


SuperDave
Free Member
-
Joined
-
Last visited
Everything posted by SuperDave
-
 What was your recipe for 112/91 and also super with tolulene and/or xylene? Is the low-lead still available where you are? I was told today that you can no longer get leaded fuel at the race track.
 -
Professional racing is about winning, for sure. But I would hope that club racing also is about good sportsmanship, sharing a love for the sport, for the cars, and having fun. There is still plenty of room for egos and money in club racing. But if it's not fun, those of us who are doing it for fun will look for other places to play. Aren't there still some of drivers who make every attempt to go as fast as they can, but are STILL blocking traffic? Or who just use poor judgement and put others at risk?
-
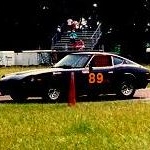
I'm not sure if "roof-edge trim piece" is the right term. You know, that piece of metal that runs along the roof-door window opening. It's the piece the arrows are pointing to in the image below: I want to remove this piece from my under-construction ITS car (I wish this was my car pictured, but, no, it's another member's car). I consider this piece dangerous. It's my understanding that the only fatality in the history of IT racing involved an exterior trim piece like this that came off during a roll-over and impaled the driver. It looks like it's attached with a few welds, probably at each end with a few in between. I figure I'll need to grind it off at these welds, but I'm not absolutely where to start. Any suggestions? Please don't suggest that I simply not roll over the car!
-
I got a xylene product and it worked very well. Only took moderate elbow grease and now all the remaining bits of tar are gone and the bare metal looks nice an clean. Well...at least the parts that aren't all rusted look nice and clean.
-
Absolutely. I think the Z's history is part of how I have come to arrive at my attitude and why some others have the attitudes they have about their cars. The Z was (the first generation at least) a relatively inexpensive car. A middle-class teenager drove the first Z I saw in my hometown. Over the years you saw many Z's in the hands of African-Americans (I'm not making a judgment about that--just stating an observation--maybe I'm wrong). And it remains one of the most reasonable classic cars to own. So we Z owners tend to be regular folks. We just don't have that much room to get too snobby. If we had more money and REALLY wanted to show it off, we might own something else (although I am hard-pressed to name that car--maybe a Ferrari, a 911--ho hum, I've never really wanted a Vette) and we'd pay Luigi to work on it for us instead of crawling in the dirt in the carport getting (not only greasy but) dirty as we tinkered with our Z. I probably sound like a Communist to some when I say this: It doesn't always have to be about winning. It's not exactly related, but it makes me think about what Paul Newman said a few years ago about the traffic at the 24 Hours of Daytona: "Some people are curteous and some are not."
-
I'm constantly amazed by the smug attitudes I see on some of the other racing forums online. There is this attitude that if you aren't willing to spend yourself silly, you don't belong. The discussion was about scales for corner-weighting and someone posted the comment that if you don't have $300 to spend on Riggs scales, you're in the wrong sport. Really friendly, huh? I replied that you can get weighed for free as many times as you like at most SCCA events and get 4-wheel weights. People ripped me like I was an idiot. Hey, I was just suggesting how you can do something for free instead of paying hundreds, or even $50 to rent a set of scales for the day. I am in the minority, obviously. So many guys in this sport are throwing around silly amounts of money and may or may not be running up front. To me, an equally exciting challenge is to see how much I can get out of a car by learning to do things myself and spending as little money as possible. At the end of the day, I want to be able to have beer money and a smile on my face. I think there are plenty of people racing who are not having fun. And if they have beer money, it's because they've max'd their credit card.
-
I drilled a hole in the 260Z's bumper cylinders and drained the stuff. It's been a few years...I don't remember whether it was gas or oil. Then I just pressed them in and they stayed put.
-
I've done this. It was a few years ago. I'm not near the car now, so I can't go outside and look, but it seems like I remember that something was in a different location and I solved it by reversing the brackets. Anyway it wound up fitting on the 260 (early) using 240 bumper and brackets.
-
Interesting that they would sell you a rear anti-sway bar for a 240, since it doesn't have any mounts. You would have to get them fabricated. But you have a 260, which DOES have an existing rear anti-sway bar. I'm pretty sure any of the sway bars you listed with bolt up on the 260. The difference would be the thickness. Victoria British lists Suspension Techniques 88-800 sway bar set as 1 inch front and 3/4 rear for the 240 Z. 88-801 for the 260-280Z has a 1 1/8 inch front and 7/8 inch rear.
-
I used heat to remove the final bits of tar that the dry ice didn't get. I pointed a 500W light down at the section I wanted to remove, then did other tasks and came back in about five minutes. The tar was pliable and peeled up easily. But it didn't remove it as cleanly as the dry ice did. There were numerous little bits left behind. I used a wire wheel on them and it just spread them out and didn't remove them. My guess is it will take some paint thinner or something to clean up the remaining bits. Any suggestions?
-
One of the ugliest jobs I've done while stripping down an old 240Z has been removing the tar-like insulation that covers much of the interior floorboards and transmission tunnel. I have done it by using aircraft paint stripper, but this was a big mess. It softened up the tar, but made it flow into low spots. Once I had most of it removed with a paint scraper, I had to use a wire wheel and more paint stripper to get the last of it off. Some have suggested using heat, but I'd think this would also be a mess. There must be a better way. Actually, I found that with no chemicals at all, some of the insulation will come off quite easily. Just get the corner of a paint scraper under it and it flakes right up and breaks off. That's the good news. The bad news is that, unfortunately, these pieces come off easily because of what's underneath--rust! The insulation that covers clean metal doesn't want to budge. A few years ago, a fellow racer had said that dry ice was the best way to clean off this insulation. I saw it mentioned a couple of other places on the internet, but I couldn't find any articles about it. Armed with just a few instructions of how to do it, I decided to give it a try. I would try to use dry ice to remove the insulation tar in the rear hatch/ trunk area of the old 240Z. Getting the dry ice was easier than I thought. My local Kroger stocks it for 99-cents a pound. They broke open a ten pound bag to sell me 5 pounds. I brought it home and tried to break it up into as small chunks as I could. Then I simply spread it on top of the insulation tar. All the areas I treated were level. I don't know what is the best way to apply the dry ice to vertical areas like a transmission tunnel. I got a really good feeling about this process when, before I was finished spreading the dry ice, I could hear cracking sounds where the dry ice had been sitting for a few minutes. Due to the cold, the tar must have been shrinking faster than the metal and finally becoming separated from it! Once I had spread out the dry ice as best I could and broken it into as small chunks as seemed reasonable, I went inside to watch the finish of the Daytona 500 and to eat supper. I came out about two hours later. All the dry ice had melted (had become CO2 gas and sunk invisibly to the floor and out of the garage). I started attacking with my paint scraper. Now, with minimal effort, chucks of the insulation as big as 3-by-9-inchs broke right off. In just a couple of minutes I had removed almost all of the insulation tar. The bad news is that I found some really nasty rusty areas that I wasn't aware of. But they will be fairly easily repaired. I'm glad I know about them. I did not try one technique that I had read about elsewhere--to use a hammer to strike the insulation. It is supposed to just shatter like glass. I was afraid this would leave dents in the underlying metal. And, if I remember it correctly, you're supposed to strike it when it's still cold (and mine wasn't really dry-ice-cold when I tried to remove it). I didn't get every bit of the insulation. I think there were some spots where I didn't spread the dry ice thoroughly enough, so I guess the insulation didn't get cold enough. So it looks like I'll go back in a few days and repeat the process on those spots. This was an incredibly effective and simple process and I will highly recommend it to anyone who wants to remove this material from any type of vehicle. It didn't involve any nasty chemicals, and didn't leave anything to clean up. Obviously there are precautions to take--I used leather gloves to handle the ice. It gives off CO2 gas, so make sure you have some fresh air to breathe. Other precautions will usually be listed on the package of your dry ice. This post has been promoted to an article
-
I did a quick check and the only docs that mention disposing the solution assure that it's not a disposal problem--in small quantities. But, yes, it is really nasty looking! I hadn't included a good picture of that. Just image a bucket-o-rusty soup and that's what it looks like. From http://www.stovebolt.com/techtips/rust/electrolytic_derusting.htm: How can I dispose of the solution? The bath will last until it gets so disgusting that you decide it is time for a fresh one. There is nothing especially nasty about it-it's mildly basic-so disposal is not a concern, except you may not want all the crud in your drains. From http://www.needlebar.com/restoration/electro/ DISPOSAL The sodium carbonate solution can be used several times. There are no pollution issues so it can be disposed of any way you wish.
-
I've done half of the oil pan from my parts car. I had thought it was junk, but now maybe it's good enough to keep as a spare. The left side is the part that stuck up out of the solution and thus hasn't been treated yet. Absolutely you can use a metal bucket...uh...but eventually your metal bucket would get eaten away. No...I don't know anything about how to do that. Do you? What benefits would it give? How hard is it? The thing I like about the electrolytic rust removal is that it is so easy, cheap, and (usually) environmentally friendly. I don't think this is the ultimate solution for concealed areas because the part has to "see" the electrode to get its rust removed. Notice on the oil pan above that the bottom of the sump didn't get as clean as the sections that were closer to the electrode. I guess this is because it didn't get as many electrons shot at it as other parts of the pan either because the sump didn't "see" the electrode as well or becuase it was further away from the electrode. 26th-Z...I'd love to see more pictures of your dipping. I had thought it was just one acid dip that ate away paint, grease, rust, everything, but it's different from reading your info. You know, for $1,000-plus you could put a down payment on a pool and do it in your back yard!
-
From the thread Bambikiller240 mentions... Yes, I believe the alkaline dip is similar to electrolytic rust removal. But that's the last of several steps. That reminds me that I didn't mention that you're supposed to have the rusty part free of grease and oil. So that's what the degreaser and paint stripper will do for 26th-Z's 26th-Z. I envy him. He's doing it right!
-
I don't dispute the 80% figure. I have read that the leaders use the stock (aluminum with steel insert) drums but they warn that the drums must be perfectly trued to get them to "do their share" (whatever that means). They say you can't to it without an adjustable proportioning valve. One message on ImprovedTouring.com had an interesting comment: "if the drums aren't turning blue you don't have enough rear bias" I've read a recommendation for Carbotech Kaelite Metallic shoes. I've only run shorter Solo I's, so I've never really heated them up enough to boil the fluid. But I've seen cars come in from a 30-minute road race where it was raining. The whole car was wet but the front wheels were completely dry--the hot brakes had heated them so.
-
How could I fiddle with old, rusty Z's for 15 years and not know about Electrolytic Rust Removal? Someone else mentioned it here, I Googled it and studied these articles: Electrolytic Rust Removal http://www3.telus.net/public/aschoepp/electrolyticrust.html http://www.buchanan1.net/rust.shtml Electrolysis Rust Removal http://www.htpaa.org.au/article-electro.php The process was cheap, didn't require any nasty chemicals, didn't produce any nasty chemicals, and seemed to produce good results, and since I have no shortage of old rusty Z parts lying around, I decided to give it a try. I went to the grocery store and bought a box of washing powder, which is simply sodium carbonate. Some of the sites say you can use baking soda (sodium bicarbonate) but I didn't find any articles where anyone had tried it. Basically, all the sodium carbonate does is make the water conduct electricity better. Then I bought a sheet of 22 gauge steel from the hardware store (it must NOT be galvanized/zinc coated). Some people use rebar. Don't spend a lot of money on your electrode--it will eventually get eaten away in this process. Also you don't want to use stainless steel because it can create hazardous insoluble hydroxides or oxides. I filled a 5-gallon bucket with water and pulled out the battery charger. Then I selected a nicely rusted brake rotor. I put roughtly 5 tablespoons of washing powder in the bucket and stirred it up. I bent the steel sheet to fit the curve of the bucket and inserted it so that a few inches stuck out above the water. I put the rotor in the bucket so that it was a couple of inches away from the steel sheet. The rotor just barely fit in the bucket, so I was sure it wasn't going to move. Later I clamped the steel sheet to the side of the bucket. I moved all of this outside to the garage stoop. You want to do this in a well ventilated area because this process is going to release pure oxygen and hydrogen. Don't smoke around this! I left the battery charger just inside the garage door and stretched the leads outside so I could hook the battery clamps up to the rotor and the steel sheet. I checked the article once more before I switched on the charger...GOOD THING! Did you catch what is wrong in the picture above? I reversed the wires! You want to put the NEGATIVE terminal on the rusty piece and the POSITIVE terminal on the steel sheet or electrode. If I had left it this way for very long, my positive battery charger clamp would have gotten eaten away. You want your rusty piece to be submerged in the water and it's ok if your (negative) charger clamp is partially submerged. You don't want your positive charger clamp on your electrode (steel sheet) to be under the water. I put the charger on 6V and plugged her in. Immediately it showed a 2 amp draw. In just a minute bubbles started rising off of the rotor and the steel sheet. The bubbles coming off the rotor are hydrogen and the bubbles coming off the electrode are oxygen. I left it outside overnight. When I checked it in the morning the water had turned rust-colored and had rust-colored foam on top. I unplugged the charger and unclamped the leads. I looked at the steel sheet. It was covered with thick black stuff--oxide. I pulled out the brake drum, hosed it off and scrubbed it with a plastic brush. Then I dried it off with a paint dryer. Sure enough, the rust was almost completely gone! Almost, but not completely. So I pulled out my drill/wire disc and worked on it. It didn't take much effort at all to make it shine. Now, it looked a lot better! It still looks a little darker than you'd expect brand new steel to look. I think part of that is from oxidation in the process. The amazing thing is that it seems like every flaw in the rotor now stands out like a sore thumb. My now-rust-free rotor is now extremely rust-prone so I applied some Sherwin Williams Ultra Clean and later I might shoot some WD40 on it. My rotor is rust-free on only one side. This process only removes rust for the parts of the rotor that could "see" the steel sheet. This is because the electrons take a direct path from the electrode to surface of the rusty piece. I'll have to turn the rotor over and treat the other side. Overall, I'm pretty pleased with this process and I'll use it on as many parts as I can. I want to do some more research before applying this to stressed parts like suspension pieces. I've read that this process can cause hydrogen embrittlement--some of the hydrogen goes into the metal. It's possible that the hydrogen can be released by baking the piece afterwards for a few hours in a 200-degree oven, but don't take my word for that. And I'm assuming you don't want to even think about doing this for internal engine parts. Next, I have an incredibly rusty oil pan I'm going to treat. Also, I'm going to figure out how to set up the old plastic kiddie pool to de-rust larger parts. And if I can just figure out who will let me drive my stripped chassis into their swimming pool and how much washing soda it would take to treat my entire car...
-
I'd like to experiment with this. Do the procedures for changing shock oil vary much from brand to brand? I assume when you change the weight of the oil, you're changing the way it behaves on compression AND rebound? Unlike double (or triple or whatever) adjustable shocks where you could adjust them separately?
-
Welcome! Here's my two cents worth: Go ahead. Get the car. Tinker with it. Clean it up. Get it running better. "Enjoy the ride!" But restoration? Nah. Hot rod? Nah. Don't sink a lot of money into this car. Save your pennies. Learn. Read. Then, if you're still bit with the Z bug, get another one. If you need your next car to be a daily driver, consider one of the first-generation 300ZX's. If you already have a daily driver, then settle for nothing other than a 240.
-
Sorry, my fault. I'll try to calm down. Your suggestions are appreciated.
-
Guess I ain't most guys. I'm sure you're exactly right that the champions in the sprints have purpose-built sprint cars and the champions in the enduros have purpose-built enduro cars. But you know what...here's a shocking revelation...it isn't always about being the champion! I've been around the track enough to know that, given the amount of money I'm spending, I have no chance of winning any races. One of the Atlanta Region board members, who works at my place, told me there was a guy last year who spent $10,000 on one race weekend. My initial aim is a Solo I hillclimb event--I do have a shot at winning there. But I want to be able to do other things without having to rebuild the car. My goal is to field a car that is reasonably safe, doesn't oil down the track (or at least doesn't make the corner workers say "here HE comes again"), is reliable enough to finish, and isn't embarassingly slow. I am not an engineer and I am not a Nissan specialist. I am doing virtually all of the work myself. I may be a back-marker. But I'll be a back marker with enough money left in my pocket to buy you a beer after the race! And if I roll my precious Z up into a little ball, I'll be able to walk away with a smile on my face and a zero-balance on my credit card!
-
I don't know anyone who runs enduros exclusively. If you run an enduro only occassionally, what are you suggesting...take out your 12 gallon cell and put in your 22 gallon cell for the enduro? I'd think that if there's a CHANCE you will run an enduro, you install the 22 gallon cell in the first place. Then for your sprints you just fill it with 8-12 gallons of gas. That's why I'm looking at a 22 gallon fuel cell.
-
I've really enjoyed this thread. This is certainly one of the friendliest forums I've seen. I think much of this unpretentiousness has to do with the history of the Z: it didn't cost too much in the early years, in later years was known as a poor person's Porsche, and, even as the early stuff starts to get rare, it's still one of the most inexpensive classic sports cars to own and maintain. So Z owners tend to not be too snobby, at least from my experience. I'm Dave, 47 years old, married for going on ten years, father of two girls, 3 and 6, living in Decatur, Georgia (close-in suburb of Atlanta). For the last 4 years I've worked as a software engineer at Turner Broadcasting Sales, Inc. building software for Time Warner's international sales and strategic planning operations--a great place to work. I saw my first Z in 1970 when I was a freshman in high school. I can still see it cruising down my street with its 6-foot-4 teenage owner leaned back and looking way cool. A few years later a girl in town had a 260 in a beautiful turquoise color. A college roommate had a 280Z and a post-college roommate had a new 280ZX turbo. My big brother was a huge race fan, crewed for a top fuel dragster team (Jack MacKay's "New Dimension" driven by Clayton Harris), and later covered motorsports. So I tagged along with him and saw several of Paul Newman's Z's at Road Atlanta. I didn't buy my first Z until 1991, when a friend suggested that I buy an old Z and fix it up. Not knowing that I was doing, I bought a 260Z for $850 that had been repo'd. After I'd bought the car, I got the SCCA bug and, really without knowing much about what I was doing, prepared the car to ITS specs. Those old flat top carbs were so vapor-lock prone, I had to cool them down with ice to get it to start up so I could finish my SCCA race school--but we made it. The highlight for that car was running in the 1994 Chimney Rock Hillclimb--what a cool event! In spite of being dog-slow, I actually tied for the Southeast Solo I ITS champtionship in 1994. In 1998, my wife pregnant with our first child, I bought a badly rusted 1970 240Z out of a cornfield in Tennessee for $150 just for the carbs. I bolted them on the 260 and--WOW--the difference was amazing--just like everyone had been telling me--9 seconds a lap faster at Charlotte! I parked the 260 when I threw a rod out the side of the block coming out of turn 7 at Road Atlanta. With the new child on the way, I knew that was it for racing for a while. In 2000 I bought a 72 240 that was being parted out for $250 with the plan to parepare this car for racing. I kept my eye on EBay buying various parts and storing them in the attic. I delayed the project while I built a 2-car detached garage and for the last year have had the 240 inside the new garage slowly tearing her down, fixing rust (I learned about electrolytic rust removal on this site--this trick has changed my life!), and cleaning her up. Since the new year 2005 I've been working on her earnestly with the hope of getting her ready for a new SCCA Hillclimb event in October in Scottsboro Alabama. It will be hard to make it, but I work on her every night after the kids go to bed (way more fun that watching TV!). So you restorers of pristine Z's will turn your noses up at all of my Z's, but I don't care. My approach is to not spend much money, do as much of the work myself as I can, have fun, and learn something. Vehicle History: 1970 Toyota Corona (my friends laughed at me--nobody had ever seen a Toyota then) 1972 Ford Maverick Grabber (V8, light and fairly fast) 1976 Toyota Corolla (hemi engine) 1977 Toyota Corolla (totalled in head-on 25mph collission with a newspaper carrier who ran a stop sign) 1972 Fiat Spider 124 (what was I thinking?) 1986 Plymouth Horizon (new, cheap, a reliable dream compared to the Fiat) 1986 GMC Van 1974 Datsun 260Z (parked since 1998) 1986 Mazda 626 1994 Ford Ranger XLT Supercab (best vehicle I've ever owned!) 1970 Datsun 240Z (parts car) 1972 Datsun 240Z (roller--future race car)
-
Hey folks! We at HounDawg Racing are making huge progress building our next race car. Someday in the next four years, we hope to actually see some of you on the track! While I finish up the roll cage and work on paint and body, I'm planning my fuel cell installation and I have some questions about design for the frame. I see many examples where you folks have built nice frames that protect the underside of the cell--and there's no doubt that the more protection you have the better. But I don't see anywhere in the GCR or ITCS that mandates any kind of frame for the fuel cell other than the steel casing. You have to keep the bottom of the cell six inches off the pavememt--I assume your frame can hang down lower than that. So unless I'm missing something, as far as the rules go, I have the option of building a big strong frame nestled around the bottom, buying a kit like the RCI-7412A kit (looks like 1 inch by 1/8 inch steel strips that wrap 4 sides in two places), or (not that I'd want to do it) just letting the bare steel case hang down unprotected. Apart from the rules, what are the design considerations for a safe fuel cell frame? First, I'd guess you want to cradle it firmly in place. Second, you'd want to protect it in case both your rear wheels fall off so the pavement doesn't dig into the cell. Third, the frame can provide some impact/crush protection. Finally, have any of you running enduros with really big cells had any problems with ground clearance? Some of the 22 gallon cells I see can be pretty tall/deep. I saw an (old circle track) RCI cell, and if I installed it in my 240Z with the top flange sitting on top of my rear deck, it would hang down below the rockers. So if my rockers were 5-inches above the pavement, my cell would have to be raised 1 1/2-to-2 inches to meet the 6-inch minimum. That doesn't seem insurmountable--I guess you just build the frame and cover accordingly, but it seems like there'd be a better way. Dave
-
The block is at the machine shop now for hot-tanking. They know Datsun L's pretty well, so I'll see what they say when I pick it up.
-
I got sloppy while disassembling an L24 block. I didn't keep track of which main bearing cap went where. Oops! It's easy enough to figure out which one is the front, rear, and middle. The rest I'm not sure about. One has a 6 stamped on it, another a 5, and two more don't have anything stamped where the 6 and 5 are stamped. Any suggestions on how to proceed and get this straighted out?
