BD240Z
Member
-
Joined
-
Last visited
Everything posted by BD240Z
-
Fabian, That's a good start. I don't have a specific answer for your problem but you can sit down with an Ohm meter and the wiring schematic and work your way through the electrical system. I had a similiar problem where my headlights wouldn't work and I tried the connection cleaning also but I didn't make any progress until I got commited to fixing the problem using the right tools. Yes your switch might be bad but you'll know for sure once you start tracking down the electrical current. Good luck with your car. Bruce
-
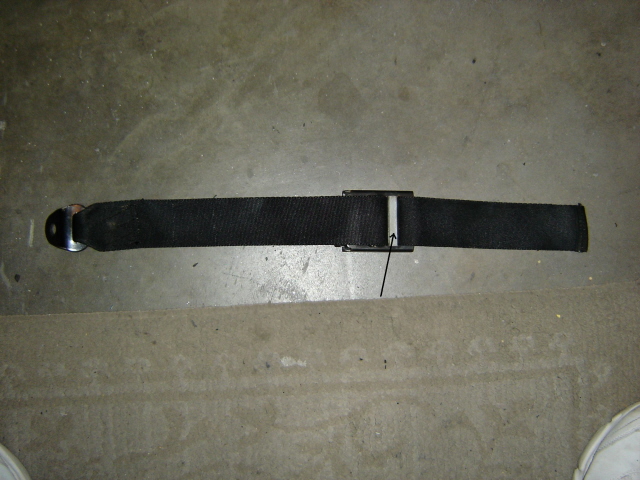
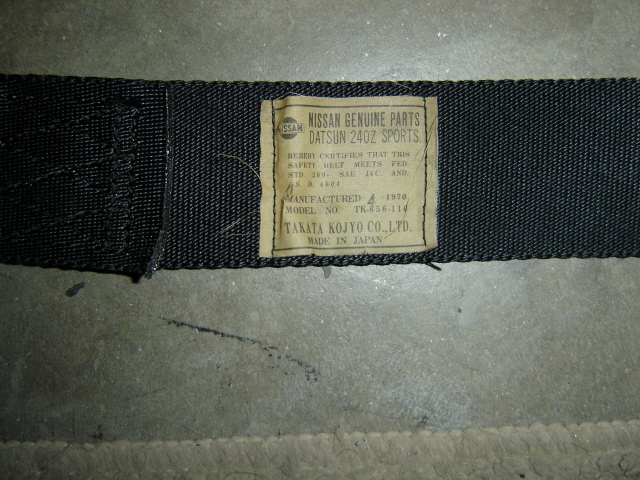
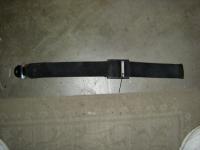
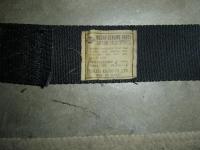
The seat-belts, (webbing, buckles, chrome ends) on my car are still in servicable condition so I'm going to use them as is. I'm not sure how I feel about a non retractable belt but time will tell. In the picture below, the webbing will NOT move or adjust through the area identified by the arrow. Is it supposed to? The matching seat-belt for the other seat won't adjust either but the buckle mechanism is located on the belt at a different position, (further down the belt). Sure hope this makes some sense! The other picture has the DOM stamped on the patch which I thought was pretty cool. If anyone with experience with these belts could shed some light, I'd appreciate it. Bruce
-
Brian, The seats look great, they fit in well with the rest of the car. I like what you've done with the appearance. The ground effects, mirrors, nice wheels/tires and how you've blacked out some of the trim. Looks nice and agressive! Bruce
-
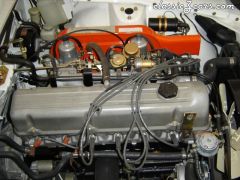
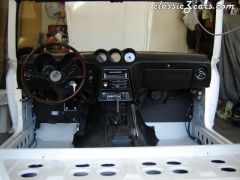
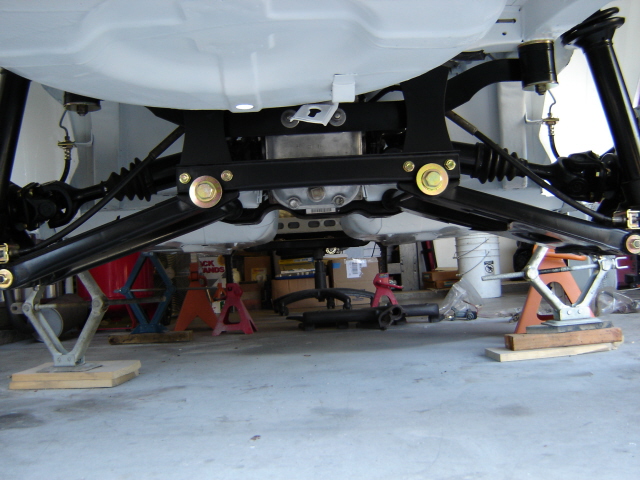
 I had to do the brakes on my daughter's car so the Z had to sit outside for a few hours. I'm getting real close to being on the road. The glass is out for window-tinting and the locks are being re-keyed. I also have a little more interior work to do, just some small stuff and then it's off to Spanky's for a tuneup and alignment. The last decision I have to make is whether to get larger wheels, (15" or 16") or have the existing wheels sand-blasted & powdercoated.
 -
My 5/70 240Z also has the metal cast emblems. I thought they were used on all series one cars that had the vents in the hatch. Either way, I'm glad my car came with the metal version and they're still in good shape. As far as I know, the replacements are made from plastic. Bruce
-
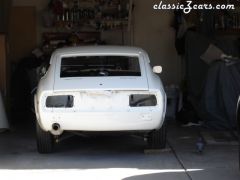
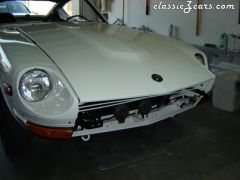
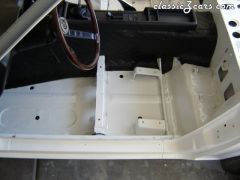
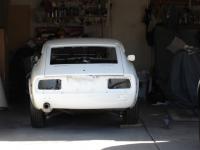
 I can't believe I'm finally getting the car put back together again. I had to prime and block the body twice because I missed my time window in getting the car painted. I hope to be registered and on the road in a month or so!!
 -
 For painting the car in my garage, it turned out pretty good and exceeded my expectations. I'd give it an 8.5 out of 10, that's an unbiased opinion of course. The paint is a single stage urethane enamel.
 -
-
-
-
-
-
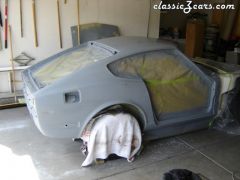 Primed the body then blocked it out with 600 grit paper.
 -
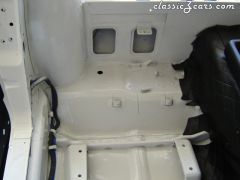
 Drivers side floor-pan. After I installed the Q-Pad tar mats I painted them to make it look cleaner.
 -
-
-
-
Congratulations on the new acquisition and welcome to the forum! Post some pictures of your car when you get the chance. Since the body is in great shape, I'm guessing your restoration will involve the engine, suspension, brakes and interior. Good luck with your efforts. Bruce
-
Here's a mounted picture of the rare/elusive right hand mirror manufactured for two weeks only in November 1969. I was lucky enough to get this one from the Pull-a-Part here in Phoenix on 1/2 price days last week. I paid $1.99, plus tax of course. Since I had/have my car torn apart I wanted to try something here. I like the idea of two mirrors, it makes the appearance look more complete, it also gives me a small view of the right side of the car. I realize this deviates from originality so it's definately not for everyone. This isn't perfect either but I got it close enough to satisfy me prior to drilling the mounting holes in the right door. The height/top of the mirror stalk on the right side is 1/4" lower than on the left. I could get it closer but I'd have to cut further into the mirror base and I think I've gone as far as I can. I took a normal left hand mirror and cut the base in the opposing direction/angle. I made a template from ABS plastic of the angle and used that to gage my progress. I made a rough cut with a dremel and then used a fine metal file to get the final result. It took about two hours to complete the job. I also put a small angle in the mounting stud to assure the mirror would mount correctly. Someone that has access to a cmm and a cnc mill could get this darn near perfect. Heres a few pictures of the mirrors on the car. Bruce
-
Paul, Ty to find an outfit that has a barrel plater, this is how I got mine done. A barrel plater is just that, a barrell. The parts get put into the barrell, the barrell rotates in the various baths and the parts get plated. If the supplier has a large enough barrell, you can also get a variety of brackets, linkages, springs, etc. done at the same time/one price because with barrell plating it's typically one lot charge. The only pain was cataloging all of the nuts, bolts, washers so I'd know where they went on the car once I got them back. My one-time cost for plating was $88 Because of environmental regulations, CAD plating is being replaced with zinc plating for most industries, (ASTM B-633). It's getting harder to get a new permit for CAD plating not that it's easy to get one for zinc. There are a number of engineering drawings that still call for CAD, these are mostly military or government drawings. My point is that you'll have an easier time, (and probably less expensive) finding a supplier that does zinc plating. Zinc plated hardware will give you sufficient corrosian protection. Ace hardware has a variety of metric fasteners but they use clear zinc, not the yellow. As pointed out, I also recommend you clean your hardware thoroughly prior to sending it off for plating. Bruce

-
Nate, If you're unable to get a good enough color match from spray cans on the shelf, a paint supply house can mix up your color, (by the paint code) and put it into spray cans for you. The supplier I use has a two spray can minimum and the price is around $10 per can. You might have a small difference in color from what's on the car now but it should be darn close I agree with Will, keep the por products on the inside and any filler, primer and paint on the outside. Good luck with your efforts. Bruce
-
Nice going Juan, she's looking good! Keep us updated with the assembly progress and new photos. Bruce
-
Randy, To my knowledge, the SEM Trim Black comes only in a spray can. I don't know what product(s) help prevent cracking, hopefully someone else here does know and will pipe in. Since yours hasn't cracked, I'd be concerned with coating it with the wrong type of product. There's a company thats makes car care products called Forever Black. www.foreverblack.com I use their Bumper Trim and Tire Gel on all my cars. They don't attract dirt or have silicone. It comes in bottles and can be applied with a rag. You might want to call them and get their feedback. Good luck with your car. Bruce
-
I would think the color would match the dash and the vinyl trim that runs up the interior windshield frame. As for the gloss, I don't like the dash shiny because it creates glare. I painted my dash and filler panel with satin black. Bruce
-
I agree with Adam. Depending on what your car is worth/how much you value your car, I like the idea of having multiple levels of protection. Cutoff switch(s), club, alarm system, trunk monkeys, etc. I hadn't seen the flashfog product before but I like it. Lojack GPS is great for getting it back, they also have the early warning system that lets you know if your car is being moved and that is key to finding it before it gets parted out or totalled. Bruce