


BD240Z
Free Member
-
Joined
-
Last visited
Everything posted by BD240Z
-
I agree with Adam. Depending on what your car is worth/how much you value your car, I like the idea of having multiple levels of protection. Cutoff switch(s), club, alarm system, trunk monkeys, etc. I hadn't seen the flashfog product before but I like it. Lojack GPS is great for getting it back, they also have the early warning system that lets you know if your car is being moved and that is key to finding it before it gets parted out or totalled. Bruce
-
Simon, The dash looks the same as when I made the repairs back in November. I'd take some pictures but the car is masked for painting, (again!). Our winter weather lows range from the mid 30's to the low 40's at night but the car is stored in my garage so it never got exposed to the cold. The real test is coming up because the "mean" season is right around the corner. I'll post what happens to the dash sometime this fall. It's an economical repair in both time and money, you might want to just go for it! Bruce
-
I googled POR15, then called them and asked them where I could buy their product in my area. Turns out there's several places close to my home. You can also buy directly from POR15, you just have to wait for it to arrive. MSA also carries their stuff. I suggest you also get the Ti Coat primer and the Metal Ready and then follow the directions for good results. Bruce
-
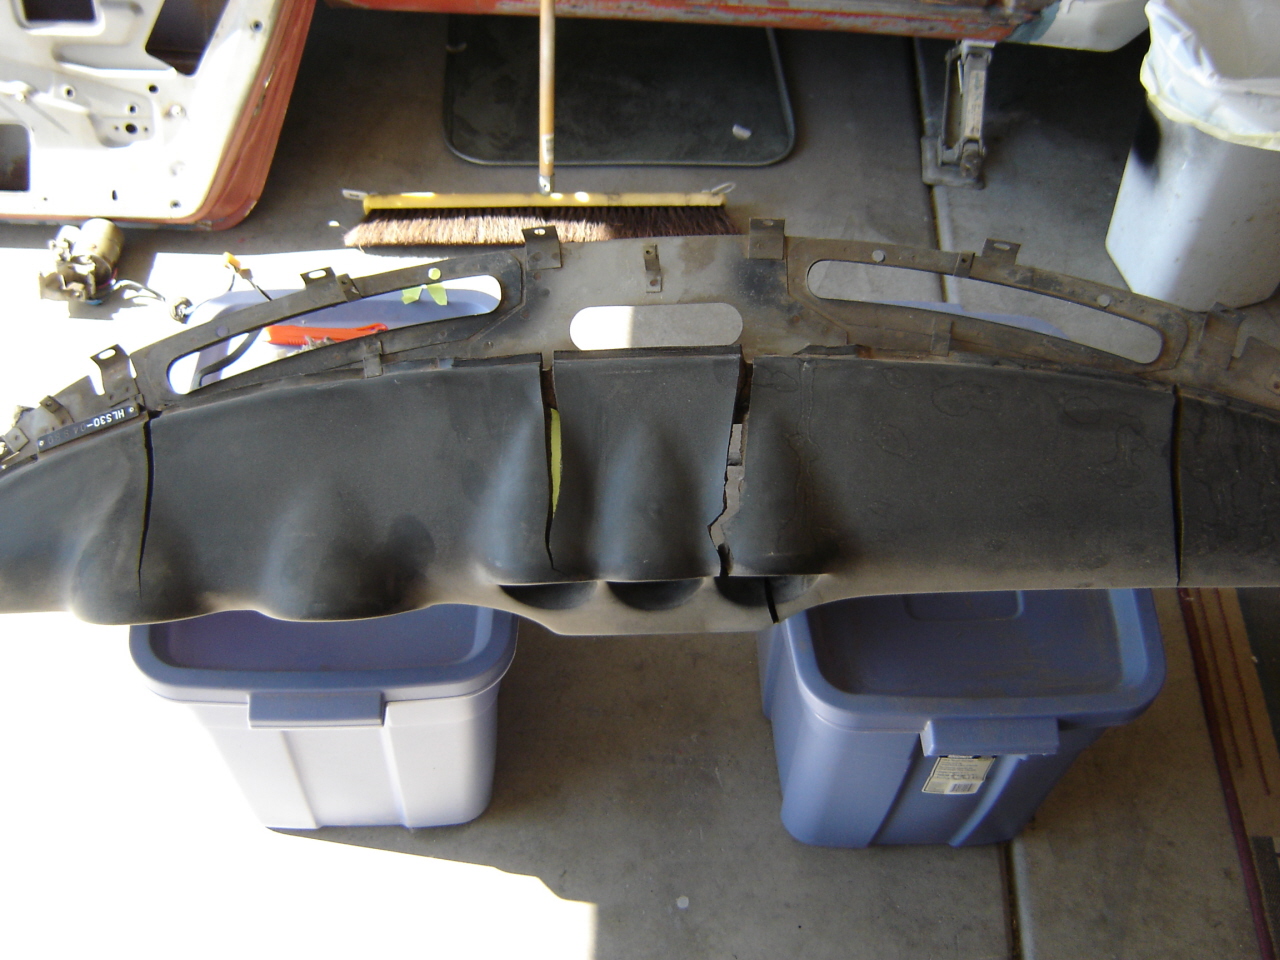
Don, I bought a full dash cap from VB/BD for the 280 and it fit really well. The dash had minor hair-line cracks. I bought another cap from VB/BD for the 240 and it didn't fit at all. It was so far off that I thought it would never fit correctly no matter how much I trimmed it so I decided to repair my dash. The 240's dash had MAJOR cracks, (picture). Since we're buying these caps to cover cracked dashes, it's likely the dash has moved (dimensionally). It's possible that some caps will never fit as well as we'd like it to. VB, MSA, Too Intense and others may be getting their caps from the same dash cap manufacturer. It's also possible you got the wrong year dash cap. Bruce

-
On my 1970 240Z, I have the same spare-tire cover and it's held in place with three small strips of velcro. On the 1978 I had, it was hinged and had two locking handles. Bruce
-
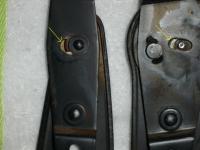
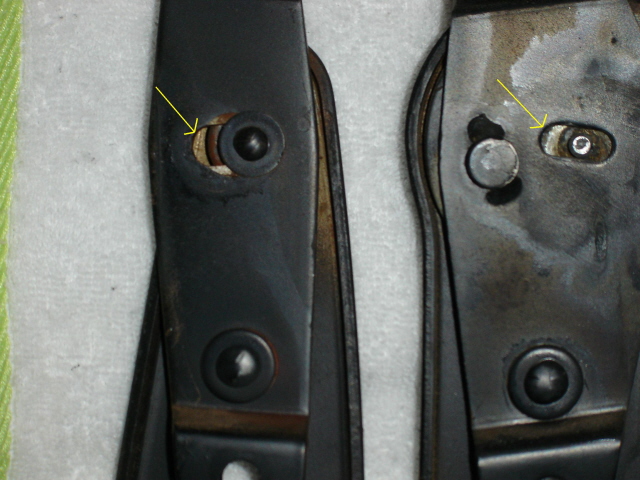
Jeff, I'm reworking my seats at this time also. I got my replacement foam and seat-covers from CDM and I'm impressed with the quality and workmanship. I wasn't sure how I was going to secure the new webbing but after seeing how others have used the rivets and flat washers, that's the ticket! I'm 6'4" and concerned about fitting in the car comfortably after I replace the foam and webbing. I'll remove the spacers from the bottom of the seat frame but I'm also thinking about making a revision to the hinges. The amount of recline is limited by the size of the oval in the hinge, (see picture), I'm thinking about opening up the oval about a .100". My concern is that the seat-back will hit on the luggage riser just behind the seat. I'm going to do the trial and error thing on the passenger seat to see if it works. Bruce
-
Congratulations Jim!! I know it took alot of time and effort to get where you're at. I look forward to reading the tech articles and seeing the final assembled pictures. Bruce
-
Juan, The link isn't working. Make the edit when you can, I'd like to see your new paint job. Bruce
-
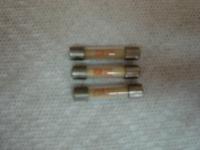
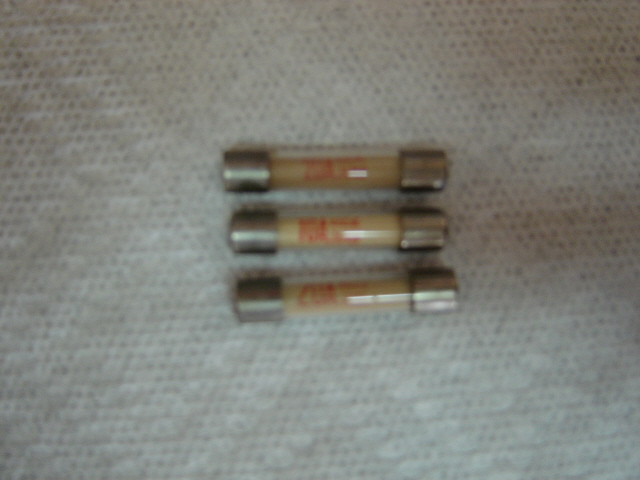
I know this is a pretty mundane question but can anyone tell me when this type of fuse was last manufactured? Are they still being manufactured? These are the types of fuses in my fuse box. Sorry about the crappy picture but these fuses have a small strip of paper on the inside and it says Niles, Japan and lists the fuse amperage When I bought the car in my avatar, I had to get a bonded title. A part of that process involved a title search here in Arizona and the last time it was registered was in 1973. As some of you know, I bought the car on Ebay from an estate sale, the car was sitting on the ground, with no wheels in a small town north of Phoenix. With the exception of the radio, from what I can tell the car is pretty complete and what I believe to be original. I’ve been trying to get an idea of how much my car was driven and these fuses might be a clue. An update on the car: I got it primered and blocked out but missed my time window to get the paint on because of work. I’m trying to plan on a free week where I can get it primered and painted before the weather gets too hot. Any feedback on these fuses is appreciated, thanks folks. Bruce
-
Here in Phoenix, even in the cooler seasons I'm a 3,000 mile guy for all my vehicles. I've always figured it was really cheap insurance. It's also easier to keep track of because of the even, round number. And though I recycle all my used oil at Autozone, here's something I haven't considered. My wifes BMW X5 gets the engine oil changed once a year. The Dealer uses whats called a Super Synthetic that's good for 12 months, I don't like it but she wants to follow the Manufacturer's requirements. The transmission has a "lifetime" fliud and they won't change it even though I've asked. I guess I'm having a hard time merging old habits with new technology. Bruce
-
I turned 48 last January. I'm starting to get a little snow on the roof and I'm using an extra notch or two on my belt but it's ok because I still feel great. I can still put in a ten hour day working on the Z, I just feel it a little more than I use to. Bruce
-
When I had my gages out, I used Brasso on the lenses and now they look crystal clear, like new! It took several treatments because the lenses were pretty worn. I've used Brasso on all my exterior lenses and they look pretty darn good also. Basically I've used it on anything plastic and it's always worked. There are a number of products that will clean up plastic but I've always had success with the Brasso so I've never changed to anything else. Bruce
-
Joe, I removed my tank last year for boiling & resealing also. While the tank was out I replaced all of the rubber vent/emissions hoses, I believe there are three of them. I got the replacements from Motorsport and/or Victoria British. I thought replacing the hoses was pretty straight-forward and wasn't too difficult. I connected the hoses to the tank first and then lifted the tank into place while an assistant pulled the hoses through the openings in the body. Deleting or bypassing the vent lines can impact your emissions. Consider maintaining the complete system as designed to help keep the air cleaner. Good luck! Bruce
-
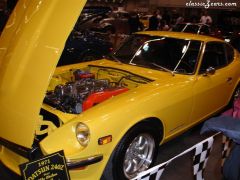 This car looks spectacular, what an excellent example of a Z car, congratulations!!!
 -
A new BMW, M5. Of all the cars out there, it's my absolute favorite!
-
March comes in like a LION!! Glad to hear the Z is tucked away, safe from the elements. I hope you're safe as well. I was born and raised in that type of weather and I remember what its like. Today I took the day off from work to block sand and guide coat the primer on the various panels of my car. AND I did it in shorts Hang in there Jared, spring is right around the corner. Bruce
David, Welcome to the club, you're in the right place for your car. I had a 260Z about 25 years ago, it's the one that got me started on these cars. Post some pictures of your Z when you get the chance, we'd love to see it. Bruce
My first Z was a silver 1974 260Z back in 1979, I was 20 years old. I was in the Marine Corps and was stationed at 29 Palms, California. I made just enough money to keep the car insured and full of gas with a little left over for fun. I kept the car for two years and traded her in for a 1977 Monte Carlo. I didn't know what I had back then but I sure loved the car. I'm on my 6th Z now and haven't lost any of my desire for these cars!!! Bruce
David, From the picture you've posted, the top of the strut connects to the inside of the hatch with two bolts. The lower section connects to a bracket on the left side of the hatch opening with a single bolt and nut. In your picture, it appears the lower bracket is already attached to the strut. It's supposed to be welded to the inner hatch on the cars body. Hope this helps, I can post some pictures tomorrow unless someone beats me to it. Bruce
There's been some good feedback but no one has answered the request to take a look at it. Is there anyone in the area that can check things out? It would be nice to see a member of this Board get such a low numbered car. Good luck Mike! Bruce
Well, here'e a possible solution: Local parts shop said they'd sell me a new one for $100 with a lifetime warranty as long as I kept the reciept. You think that's a decent deal? Joey, That's about what I paid to replace the heater core in my old 280 and also the current 240Z. I can't think of a job I dislike more on these cars. On both cars, I replaced the heater core, the heater valve and all the hoses because I didn't want to fool with it ever again! If your leak is coming from inside the metal housing I would also suspect the core, just make sure it's not the valve or any of the hoses/connections. Good luck with your efforts. Bruce
Donald, I've painted two cars in my life, both in my garage and both turned out pretty nice. Here's my feedback. If you feel the existing paint is sticking well to the body, that paint can be wet sanded with the proper grit and then primered/painted over top of. I don't think your primers need to be the same color provided you spray a uniform/thickness of paint. However, different colors of primer may trick your eyes into thinking you have thin areas and you'll paint more in those areas. I recommend that since you've gone through all the work and expense of prepping your car for paint that you primer the whole car with the same primer and primer color. I'd be more concerned that ALL of your painting supplies would work together as a team. I believe that the sealer, primer, base and clear coats should all be from the same manufacturer. I've been told not to mix materials from different manufacturers. Sanding grits should be called out on the Tech Sheet from the appropriate manufacturer. Use those to determine how to prep the surface as well as your mixing ratios and cure times. I got a lot of advice from the paint supply house where I bought my materials Others here are much more experienced with painting cars, hopefully they'll post their thoughts. Good luck with your efforts, lets see some pictures of your car when finished. Bruce
Shane, After I removed the factory tar mats, I sandblasted the inner floors. After some weld repairs, I applied POR 15, covered that with Ti-Coat primer then painted with acrylic enamel. I then applied Evercoats' Q-Pads, and re-painted the floors with acrylic enamel. The Q-Pads come in 12 or 16 inch squares and resemble the factory look. Since I have a 240Z and the carpets can be lifted, I wanted the floor to look as correct as possible. Since I haven't driven the car yet, I can't comment on how well the Q-Pads insulate. I couldn't tell which Z model you have but I used Quiet Car sound-proofing on a 280Z where the carpets were held down and you wouldn't ever see the floors. The QC is brushed on and dries to an uneven surface, it worked great and the cost was reasonable. If you do a search, you'll find a number of posts dealing with this subject. Good luck with your efforts. Bruce
Terrific pictures Victor, thanks for sharing. All the cars were great but I especially liked the pickup, I can't remember the last time i saw one of those on the road. Bruce
Important Information
By using this site, you agree to our Privacy Policy and Guidelines. We have placed cookies on your device to help make this website better. You can adjust your cookie settings, otherwise we'll assume you're okay to continue.