BD240Z
Free Member
-
Joined
-
Last visited
Everything posted by BD240Z
-
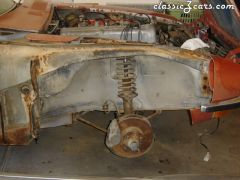 Fender removed to inspect for rust.
 -
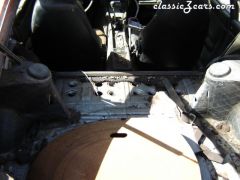 This is after I removed 10 pounds of mouse crap and one dead animal of unknown type!
 -
-
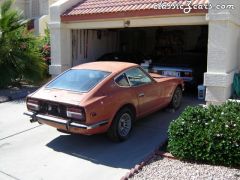
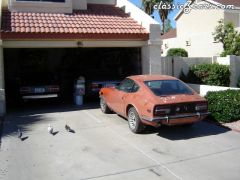
 My daily driver in the background gets parked outside while I work on the Z.
 -
-
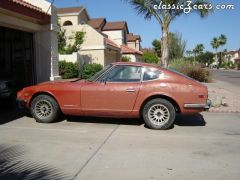
 Waiting in line to take the place of the 280Z
 -
Chris, You gotta hang in there, when you're done you'll have a nice, collectable car to drive. You'll get lots of compliments from people AND anything worth having is worth waiting for. I'm sort of in the same boat; I'm busy at work, the holidays eat up alot of time and there hasn't been enough free-time to work on the Z. My goal was to be done by the end of the year but with December already half filled with appointments, it's probably not gonna happen. I go back on a regular basis and look at all the pictures I took to remind myself how far I've come. I also look at pictures of the 280Z I sold and realize that my car will be terrific once I git-er-done. Hope this helps my man, good luck! Bruce
-
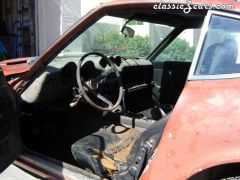
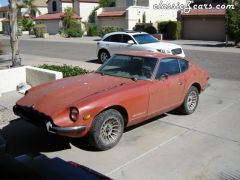
 Initial condition, when I first got her home.
 -
I'll be there as well, I'm about 15 minutes or so from the site. Some of the resto work I've seen in the past on some of these cars just knocks me off my feet, the finished products are phenominal. On the other hand, there have been a number of cars that weren't detailed at all. Makes you wonder what the owners were thinking. Bruce
-
Randy, It sounds like you'll have one sweet car once the engine's sorted out. I recently had my engine rebuilt. I had the head and block done separately because I wanted to put it back together. This saved some money and it let me do at least some of the work myself. I've done a bit of mechanical work in the past and felt comfortable following the instructions in the book, (How to Rebuild Datsun L Series engines). This is what I'd do if I had just bought this car and (this is just me); If you don't know the quality of the work done on the block, I'd take all the parts down to a rebuild shop and have them check things over. Have them insure the bores are straight, (no taper), tolerances are correct and all the other parts have been assembled correctly. Then I'd have them install the head with a new timing kit. I can't comment on what it would cost or whether this is something you could do yourself. If you're comfortable with the quality of the machining, you might have a friend or relative that could help you with putting things back together. Good luck with your car. Bruce
-
Congratulations on getting bit by the Z Bug. I'm on my sixth and if it weren't for this website, I'd be light years behind where I am now with regards to my 240Z restoration. On your two cars, if you're REALLY up for a challenge, consider restoring the 1970. I'm assuming the rust is repairable and it has a numbers matching engine. The VIN is pretty low and it would keep another 1970 from going to the crusher. If not, consider putting it up for sale after you've taken the parts you need, someone else might bring her back to life. Either way, good luck with your cars!! Bruce
-
I bought the same bushings for my 280 & 240Z from MSA and installed them without any problems. I don't remember the metal sleeve being longer than the rubber part though, I believe they should be flush like the bushings you removed. The fronts are a different length than the rears but I can't remember which one is longer. Sounds like you might have a quality assurance issue from the manufacturer or received the wrong bushings. Bruce
-
Ditto!! Congratulations on getting a spectacular sports car, enjoy it. Bruce
-
Steve, They're yellow zinc plated. Mine were pretty rusted also but they came out looking like new. When I stripped my car I took most of my hardware/brackets/etc. to a local Plater. They had a decent size barrel and I had it all done for their minimum lot charge, $88.00 Bruce
-
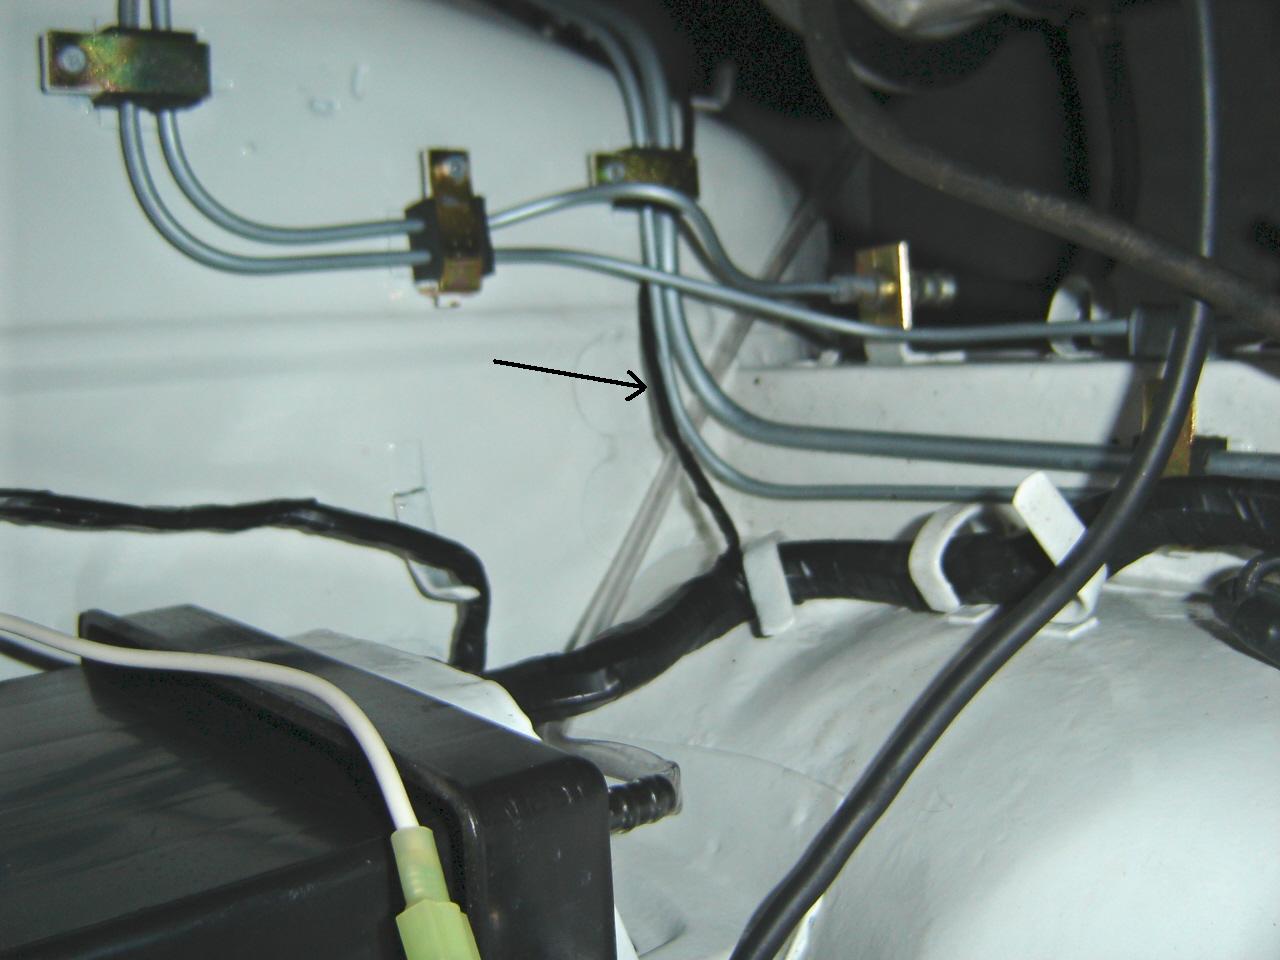
Derek, Hope this helps. Here's a picture showing where the harness for the backup light originates on my car (5/70), this is right under my battery. I tried to take a picture of the transmission but it came out to dark to see anything. I believe I have only one electrical connection on my transmission. If needed, I can take a clear picture from underneath the car sometime tomorrow. Bruce

-
I might have misunderstood what you were talking about. If you're referring to the tar-mats on the floors, many here have used dry ice to get those up. I used a putty knife and a hammer, then cleaned up the metal with lacquer thinner. If I were to do it again, I'd try the dry ice. What I was talking about in my first post was removing the adhesive used to secure the firewall insulator and the vinyl trim pieces. Bruce
-
When I stripped my car down to the metal shell, the area that gave me the most trouble was the inner firewall. I used acetone, lacquer thinner, scotch brite and a wire brush to remove it. It wasn't a fun job but it went pretty fast. Because I was going to paint the insides, I didn't care what effect the cleaning had on the paint. Bruce
-
We're probably talking about the same thing, just different terminology. On this website, they define it as "Viewing Angle" measured in degrees which is possibly your "Radiation Pattern". http://www.superbrightleds.com/specs/ba9s.htm Bruce
-
I can vouch for the QuietCar. I've used it on an older Porsche and my old 280Z and really liked the results. You apply it with a brush which means you can get it into the nooks, crannies and hard to reach areas for full coverage. After it dries, I top-coated it with some Rustoleum oil based paint. I wouldn't apply it to an area that will be seen like under the carpets in the cabin. When it dries, it has an uneven, rough surface. I think it can be sprayed but I never looked into it. My 240Z's getting the full treatment with QuietCar and Evercoats Q-Pads. Bruce
-
What about the low VIN 240Z in Colorado, I think it's in Denver. I can't find the post but if I remember, LoneTree Steve has looked at the car and reported on it's condition. Yes it needs work but it was selling for $1,200 last time I looked. Bruce
-
Looks interesting and maybe worth looking into. The problem I've run into with the LED's is the angle of the illumination. I didn't see an angle listed in the specs for these LED's. I've tried green LED's that were clustered with four bulbs and were rated at 15 degrees. These bulbs give off quite a bit of light but bouncing the light around the insides of the gage is presenting a problem. I've since ordered and received the same LED's in white but this time I also ordered whats called a wide angle LED that's rated at 100 degrees. I haven't experimented with them yet, possibly tomorrow. I have extra gages and I've painted the insides of one of them gloss white. On another gage I painted the insides white but I also removed the green plastic light diffuser. When using green LED's or clear incandescent bulbs without the green diffuser, the gage seems to light up much better. I'm expecting the the white LED's without the green diffuser will be the best scenario, lighting up the gage the best. My goal is to clearly see my gages at night, I'll gladly sacrifice the green-glow these gages were designed with. All of these bulbs have a bayonet base and plug directly into the factory socket. Bruce
-
Jerry, I don't know where any NOS assemblies can be found, I guess it might be hit or miss depending on where you call. Maybe someone here knows who has some stock left. If you have one, you're halfway there. The assemblies on my car were pretty rusted so I tried the local Z salvage yard, unfortunately their inventory looked just as bad as the ones I had. I decided to have mine zinc plated and they turned out alright. I'd post some pictures but it won't let me upload anything right now. The Plater I used had a large barrel for plating so I took a bunch of parts down when I had these done. It helped keep the per piece price down. From here I'm going to clear-coat them for added protection. I had to get a little creative with the wiring and the headlight adjustment screws but I think I've got it figured out. Again, Ace Hardware to the rescue. You might sell the NOS you have and salvage an old set. Good luck with your search and efforts. Bruce
-
Christian, Ask your Teacher whether he/she has any contacts with a local machine shop. Depending on the nature of the crack, they might be able to weld/machine the crack and do a valve job at the same time. You might even get a break in price. I agree with Tom, I'd be light years behind where I'm at now on my car if it weren't for this website. Good luck with your car. Bruce
-
Mark, I don't know all the specifics on the 280Z's fuel system. Your pump is pretty old so I don't know if you can count on it being reliable after all these years. If you have a fuel pressure gage, measure the pressure before the pressure regulator and then after to determine whether the regulator is functioning. Based on everything you've already done, my first thoughts were the pickup tube in the gas tank has been blocked somehow. Maybe open the tank drain plug into a clean container and see if any solids come out. Good luck with your car. Bruce
-
Thanks for all the feedback everyone. Yep, this repair has to pass the test of time here in the desert proving grounds. By this time next year I'll have an initial idea on how well this will holdup. Since I plan on keeping THIS Z for the rest of my life, I'll post if/when the fateful day occurs, I realize it's probably only a matter of time. My plan "B" is a Dashcap. Bruce