Jeff G 78
-
Posts
3,007 -
Joined
-
Last visited
-
Days Won
23
Content Type
Profiles
Knowledge Base
Zcar Wiki
Forums
Gallery
Events
Downloads
Store
Blogs
Collections
Classifieds
Everything posted by Jeff G 78
-
There are a ton of things that could affect your mileage. Fuel injector spray pattern, air/fuel adjustment, rolling friction (bearings, trans, axle, brakes, etc), wheel alignment, engine wear, gearing... The list goes on and on. My car would probably do much better if I properly adjusted the air/fuel mixture. Right now I have a potentiometer in the water temp circuit to trick the system. I need to adjust the AFM, but it's running well, so I don't want to screw it up.
-
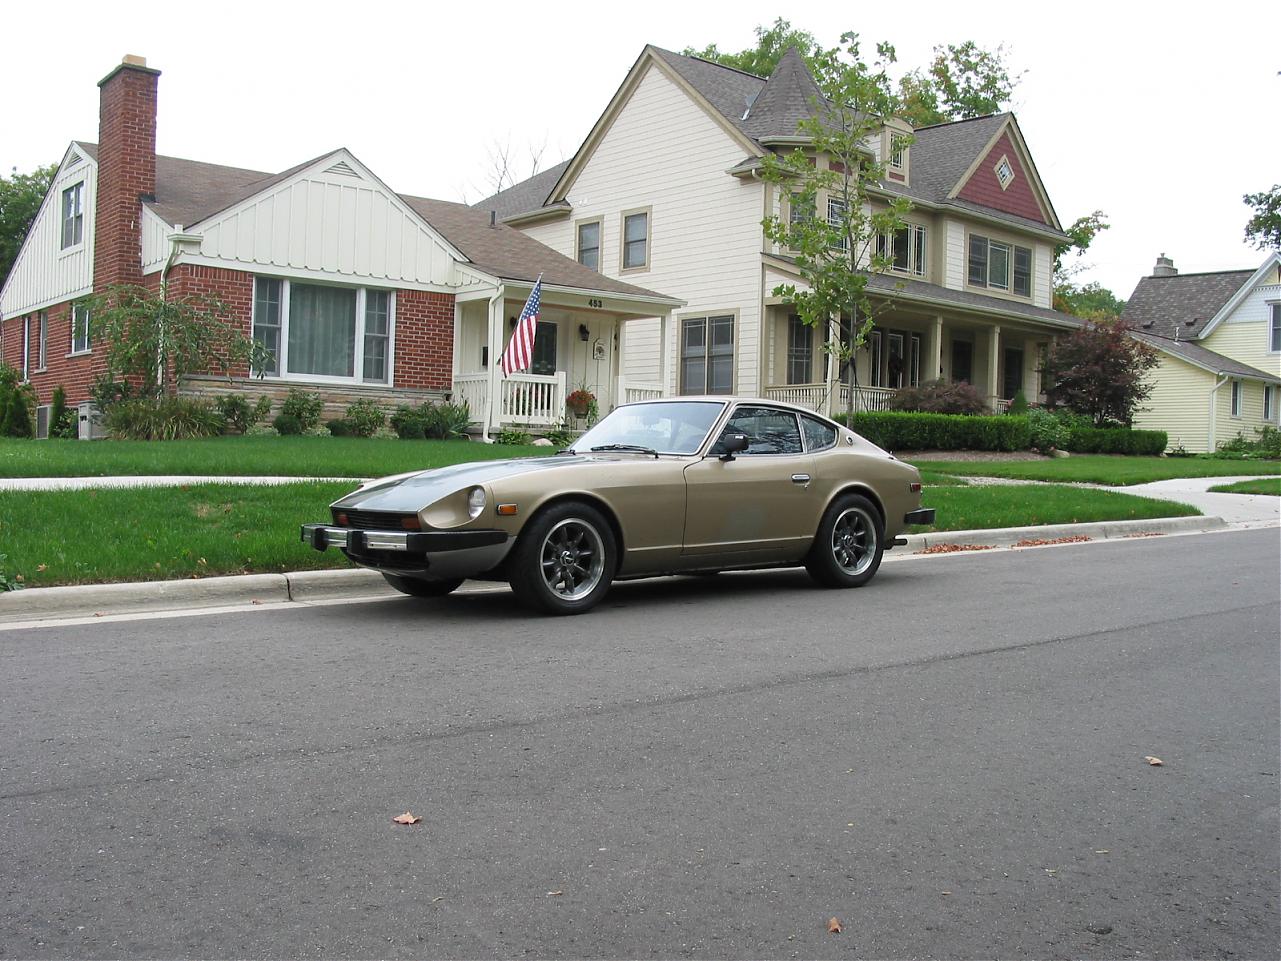
I just took a ~400 mile trip in my Z and filled it up this morning. I got 25mpg even. 275 miles of that was highway and 50 was cummuting to and from work in rushhour stop and go. While on the trip I checked my odometer and it was amazingly accurate with my 225/50R16 tires. After 50 miles of watching mile markers, it was within a 1/10 of a mile total! My speedo is another story. It reads over 10% high.
-

ease or difficulty of suspension bushings upgrade?
Jeff G 78 replied to Poindexter's topic in Suspension & Steering
Depending on what you plan to use your Z for, here are a few things to know about rubber vs. poly bushings 1) Rubber is MUCH quieter. Poly will squeek and make your car generally louder over impacts 2) Rubber is softer and will give your car a much better ride over impacts 3) Poly will give your Z a tighter feel and sharpen all of its responses 4) Poly is cheaper than OEM rubber bushings and easier to install 5) If you live in an area with smooth roads, poly might be okay for a DD, but if the roads are bad, you might tire of the sounds and feel of the poly 6) Poly will make the car feel much older than rubber 7) If you plan to track or auto-x, poly will help the handling Once you decide rubber vs. poly, then you can start gathering parts. Here are the bushings and a few notes: 1) Front LCAs - Not too hard to do yourself, but if you do rubber you will need to press the new part in 2) Front T/C rods - Fairly easy to do yourself, but nuts can be tricky to start with poly 3) Steering rack - Easy to do yourself 4) Steering coupler - Easy to do yourself 5) Transmission mount - Simple to do yourself 6) Differential mount - Not too bad, but tough to reach fasteners above diff 7) Differential strap - Haven't done this, but it should be easy with diff lowered a bit 8) Mustache Bar - Requires burning the old bushings out, but otherwise not bad 9) Rear inner control arm - Easy swap 10) Rear outer control arm - The granddaddy of all pains in the arse. This is the Right of Passage job that will make you feel like a REAL Z master should you choose to undertake it. It's not that it requires any special skills, it's just a royal pain in the arse and you will swear that the parts are permanently welded together. The good news is that you can pull it apart and take the whole assembly to a shop to have them remove the pins if you can't get them out. This one is a crap shoot. Some pins come out without too much trouble and some require nothing short of an exorcism to remove. There is a tool that might help, but it didn't exist when I did mine, so I'm not sure if it would have worked on my car. Mine fell into the really bad category. I had to cut the pins off with a sawzall and press the center section out with a HUGE press at work. It was really ugly. Do a search on spindle pins for the methods and puller tool! Order new spindle pins and nuts before you start this procedure. The old ones are rarely salvagable. 11) Bump stops - Easy to replace when doing struts but requires spring compressor Good luck! -
I have attached several Z headliners with a 3M contact cement with great results. I don't know if it's the same # as what Beandip listed, but it comes in a large diameter spray can. I'll have to look at the can tonight to see if it's the same stuff. This discussion timing is good, because I have to install my headliner tonight as well. Hopefully my very old can of spray is still good.
-
1977 280z going in the upper teens on Ebay
Jeff G 78 replied to 76Datsun280z's topic in Open Discussions
Wow, that is the cleanest 280 I've seen in the last 20 years. I'm glad to see it bring good money. Even at huge money for a 280Z, it will still cost somebody less than if they bought a new Civic or Sentra and has way more class and style. -
What Size Wheels/Tire Combo on This Silver 240Z w/ Sunroof
Jeff G 78 replied to dkd021's topic in Wheels & Brakes
Not sure, but they look like 15". My Z is lowered 1" and has 225/50 on 16" Panasports and they look a bit larger than those. I could be wrong though.
-
BCDD is the cause of your idle troubles. Search for BCDD and you will find all the info you need. The brake issue could be many things. Old hoses, master cylinder going bad, air in the lines, etc.
-
It all depends what you use your car for. If you are not worried about low speed crash protection, you could switch to 240 bumpers. You will shed around 80-90 lbs from your car and make it look better. You will lose all parking lot protection and your car will not be as safe overall. It will take some fab work and you will need to find good 240 bumpers, but it will look great. You can sell your bumpers if they are in nice shape. The rubber '76 ends are not cheap, so you will have to spend money either way. Check out 280z-hab's car. His website shows the before and after and what you would have to do. http://www.cardomain.com/ride/2066609
-
Yep. It looks like an old leather belt.
-
Hee, I had better know what it is as I am an automotive engineer . I was going to use 'NVH damper', but I wasn't sure he would know what I was talking about. I figured 'weight' was more obvious. It's been a while since I had a 240, so I couldn't remember if all S30's have NVH dampers or not.
-
I just did mine on my '78 Friday night. Jack up the front and back of the car to give yourself plenty of working height. Support the rear of the car at the body just before the wheel opening (make sure the car body is not rotten!). Support the diff with a floor jack. Remove the NVH weight if equipped and then remove the nut and washers from the center of the diff mount. Unbolt and remove the crossmember. At this point, you only have the two vertical mount bolts to remove. They have a washer and nut above the diff that you have to hold. The way the mount is designed, you can't get to the bolts with a socket to remove them. Since the mount was bad anyway, I tore the two halves of the mount apart for easy access to the bolts, then removed them with an impact on the bolts and wrench on the nuts. That's it. Installing the new mount is a bit tougher since you have to use an open end wrench to hold the bolts while you tighten the nuts with a ratchet on top of the diff. I didn't try it, but an air ratchet might make this easier. There is very little room to work. I let the diff down as far as it would go (hits the rear sway bar in a 280Z) to give more clearance at the top. Once the mount is tight, jack the diff up and install the crossmember, center nut, and NVH weight. The job took me a few hours total including several trips to the house for eye cleanings. Even with safety glasses, I got grit in the eyes. The clunk is gone and the car accelerates smoother with the new mount.
-
I agree with eracer1999. Do your cam and head have the same oiling style? Is the cam internally oiled? If you bought the cam for a 260, it should have been externally oiled via a spray bar. The '81 ZX head would need an internally oiled cam. From the picture, it almost looks like oil starvation.
-
I am finally getting around to installing a stereo in my '78 280Z and have a small problem. The car still had the original stereo plug and none of the wiring had been touched, so at least I am not dealing with PO nonsense. The problem I have is that I cannot find a switched power lead. The original stereo plug has six pins. They are +12V always on, Ground, Illumination, Dimmer, and LH speaker + and -. There are also two RH speaker wires that are not part of the harness. I have checked every wire and I used the FSM wiring diagram to trace them all back, but nothing comes on with the key in "ACC". I can't believe that the original radio didn't have a switched power wire rather than a full time power since there would have been no clock, presets, etc. to save. What am I missing? I have checked the +12V lead numerous times and it is always on. For those who have installed a sound system in your 280Z, where did you get the always on and switched power?
-
Not really. Like Jim said, the odometer is likely correct (assuming the tire OD is stock). If he were to swap speedo gears, then his speedo will read closer to where it should, but his odometer will read off by 14%. :stupid: I did the same test as Jim with a GPS and my speedo was way off, but the odo was pretty close. The problem lies with the speedo itself, not the gearing.
-
Do people notice you in your classic Z on the road?
Jeff G 78 replied to deadflo's topic in Open Discussions
I got a beep and thumbs up this morning on my way to work from a guy in a nice ~'82 RX-7. Here in Detroit, his car is just as rare as mine! My car has a long way to go, but I still get a lot of "I used to have one of those" comments. As far as the 350Z comments go, I have to disagree. When the 350Z first came out, I was a bit disappointed. I thought it was too heavy and wasn't a real Z. After a few years, I got to drive one for a few days and really felt differently about it. It felt light and nimble and was ABSOLUTELY a true Z! My opinion changed completely and now I really love them. If I had the money, I would buy one. 350Z drivers still don't wave back, but I forgive them :cheeky: I understand that most 350Z owners didn't buy the car because of the history, but that's not a bad thing! Nissan was smart enough to make a sports car that today's buyer wants to buy. Too many companies build retro cars that sell because of memories, but fail to excite after the initial buzz wears off. The Prowler and Challenger are good examples of this. The Challenger looks really good, but is just another 300C/Charger under the retro sheetmetal. I applaud Nissan for their decision on the Z. -
I planned on getting the Z out of the corner of the garage tomorrow. I have a lot of work to do before our first club meet in three weeks, but of course the weather is supposed to be crappy here as well. rain Saturday and wet snow on Sunday. Grrrr. This winter has really sucked. I hate Michigan! Unfortunately, my job keeps me here, so I only get six months a year to drive/work on my Z.
-
I got mine about 10 years ago from Victoria British (now called Black Dragon), but I wasn't very happy with the rings they came with. I have heard that they now use different rings, but I can't confirm. The rings that came with mine were all thrown in a box together with no markings or directions as to which way they should be oriented. I had never seen notches before like the ones on these rings. I asked several engine builders and they had never seen such a pattern either. Of course VB couldn't give me any tech advise as to which order they went in or whether the notches faced up or down, so I had to take an educated guess at it. I still don't know if they are in right. Someone posted a few years back that the ones they bought from VB came in typical ring sleeves that were well marked. Hopefully this in still the case. As far as I know, they are still available in 86mm, but you might have to call them to find out for sure. I tried to look at their online catalog, but the pages are too small to read and it gives an error message when I try to zoom in on the page. Here is the link http://www.blackdragonauto.com/icatalog/z/t.asp?page=54 I think I paid $240 USD for the set of six with rings and pins back when I got mine. That was considerably cheaper than anywhere else I could find at the time.
-
It should already have flat tops if it's a F54 block unless it is a turbo motor. If it doesn't already have them, then yes, simply buy pistons for an '81 - '83 NA motor. If your E88 head has not been milled and doesn't need to be (block as well), then you should yield around 9.8:1 CR. Most heads have been or need to be milled flat, so that will bump the CR a bit, so be sure to measure the head thickness before you begin. It should be 108mm thick from the valve cover surface to the bottom surface. You will need to run premium fuel with flat tops.
-
If the body is indeed perfect, it might be worth it to someone, but I have seen plenty of finished, nice 240Z's go for less than $10,000. I know of a beautiful red '72 in Michigan with a rust-free body, perfect chrome, a very nice two year old paint job, and a 10:1 CR L28 with triple Webers that didn't sell on eBay last year for the $8200 reserve. I'm not sure if he ever sold it. To get the black car as nice as the red '72 in Michigan, it would take another $5000 - $8000. When you start adding up the chrome, wheels and tires, interior trim, carpet, etc. not to mention the engine and trans, the car really isn't much of a bargain. I'm SURE he has more than $7500 in it, but we all know that these cars are anything but investments.
-
I have wondered this myself as I will be in the same boat someday. You might call Courtesy Nissan and see what they get for the OE seal. I have found that factory parts are generally cheaper through Courtesy than either MSA or Black Dragon. Sometimes quite a bit cheaper. I did buy the aftermarket full seal kit for a 240Z that I had, but I sold the car before restoring it. The new owner finished the car and installed all the new rubber. I think I remember him saying that the glass installer struggled a bit with the windshield seal, but it looked okay once installed. I can't say if it kept the water out or not while washing the car. I never saw the car with the stainless trim in place either. I would think that could be another area of concern if the shape of the seal isn't perfect.
-
I posted the solution complete with CAD drawing on here a year ago. Check it out. I did modify the bracket slightly from the CAD drawing. Rather than having a cantelevered hole, I welded a piece of steel tube for the J bolt to go through. I had to cut just a bit off the J bolt as well. I painted the bracket with wrinkle finish paint and added the loop side of velcro to the back of the angle brackets where it touches the battery. It was simple to make and didn't cost much. All the materials came from Home Depot. For the angle brackets, I started with square tubing and sliced it into angles. Angle iron cannot be used as it is only square on the outside of the angle. The inside has a taper and a radius at the corner. Let me know if you have questions.
-
From your description and the pics, I am wondering why you are sitting at your computer posting when you should be at your bank withdrawing $2300. That car appears to be worth well over $2300. I'd say it's worth just about what Carl said ~$5500.
-
So, how much does Dave charge for a mild setup like that? Why didn't you start with a L28 engine rather than turning your L24 into an L28? You should be very happy with the results!
-
My Maxima alternator tested at 105 amps when I bought it.
-
Where is the car located? Just because you don't know anybody in the area doesn't mean that you are SOL. There is always a chance that a member here lives in the area. I'd put out a request for a vehicle inspection and see if you get lucky. I did one inspection where a member was just about to buy a Z sight unseen based on photos and the sellers description. I inspected the car and found lots of problems that didn't show up in photos and let the buyer know what I found. It saved him lots of money and headaches as the car was NOT what he thought it was. I have also bought cars sight unseen and have always found things that were not in the condition promissed. Good luck and assume the car will be worse than described.