Jeff G 78
Free Member
-
Joined
-
Last visited
Everything posted by Jeff G 78
-
 A great penetrating oil alternative is to make your own. Mix a 50-50 solution of ATF and acetone. It must be shaken before use as it will separate, but it does work very well. The downside is that you lose the aerosol can, so getting it into tight spaces is harder. You can put it into a chemical-safe spray bottle and set the nozzle to jet, but that isn't as good as a staw on an aerosol can.
 -
I'm not sure if the ZX has the flats as I have never owned or worked on a S130. The ZX nuts have been used on S30 stub axles for a few decades, so they must work just fine.
-
The ZX nut is a prevailing torque nut which means it is slightly out of round at the small end. It's a very common design that the entire auto industry uses for critical fasteners.
-
You are dying of 8 other things, but you are safe from Covid-19 at least.
-
I just watched a press conference and Trump is trying to do whatever he can to keep small businesses afloat. With any luck, they can get something through congress quickly and get money in your hands right away. Good luck.
-
I've seen several videos of damaged threads from not removing the peened section of the nut. BTW, the ZX nut part number is 43262-W1200
-
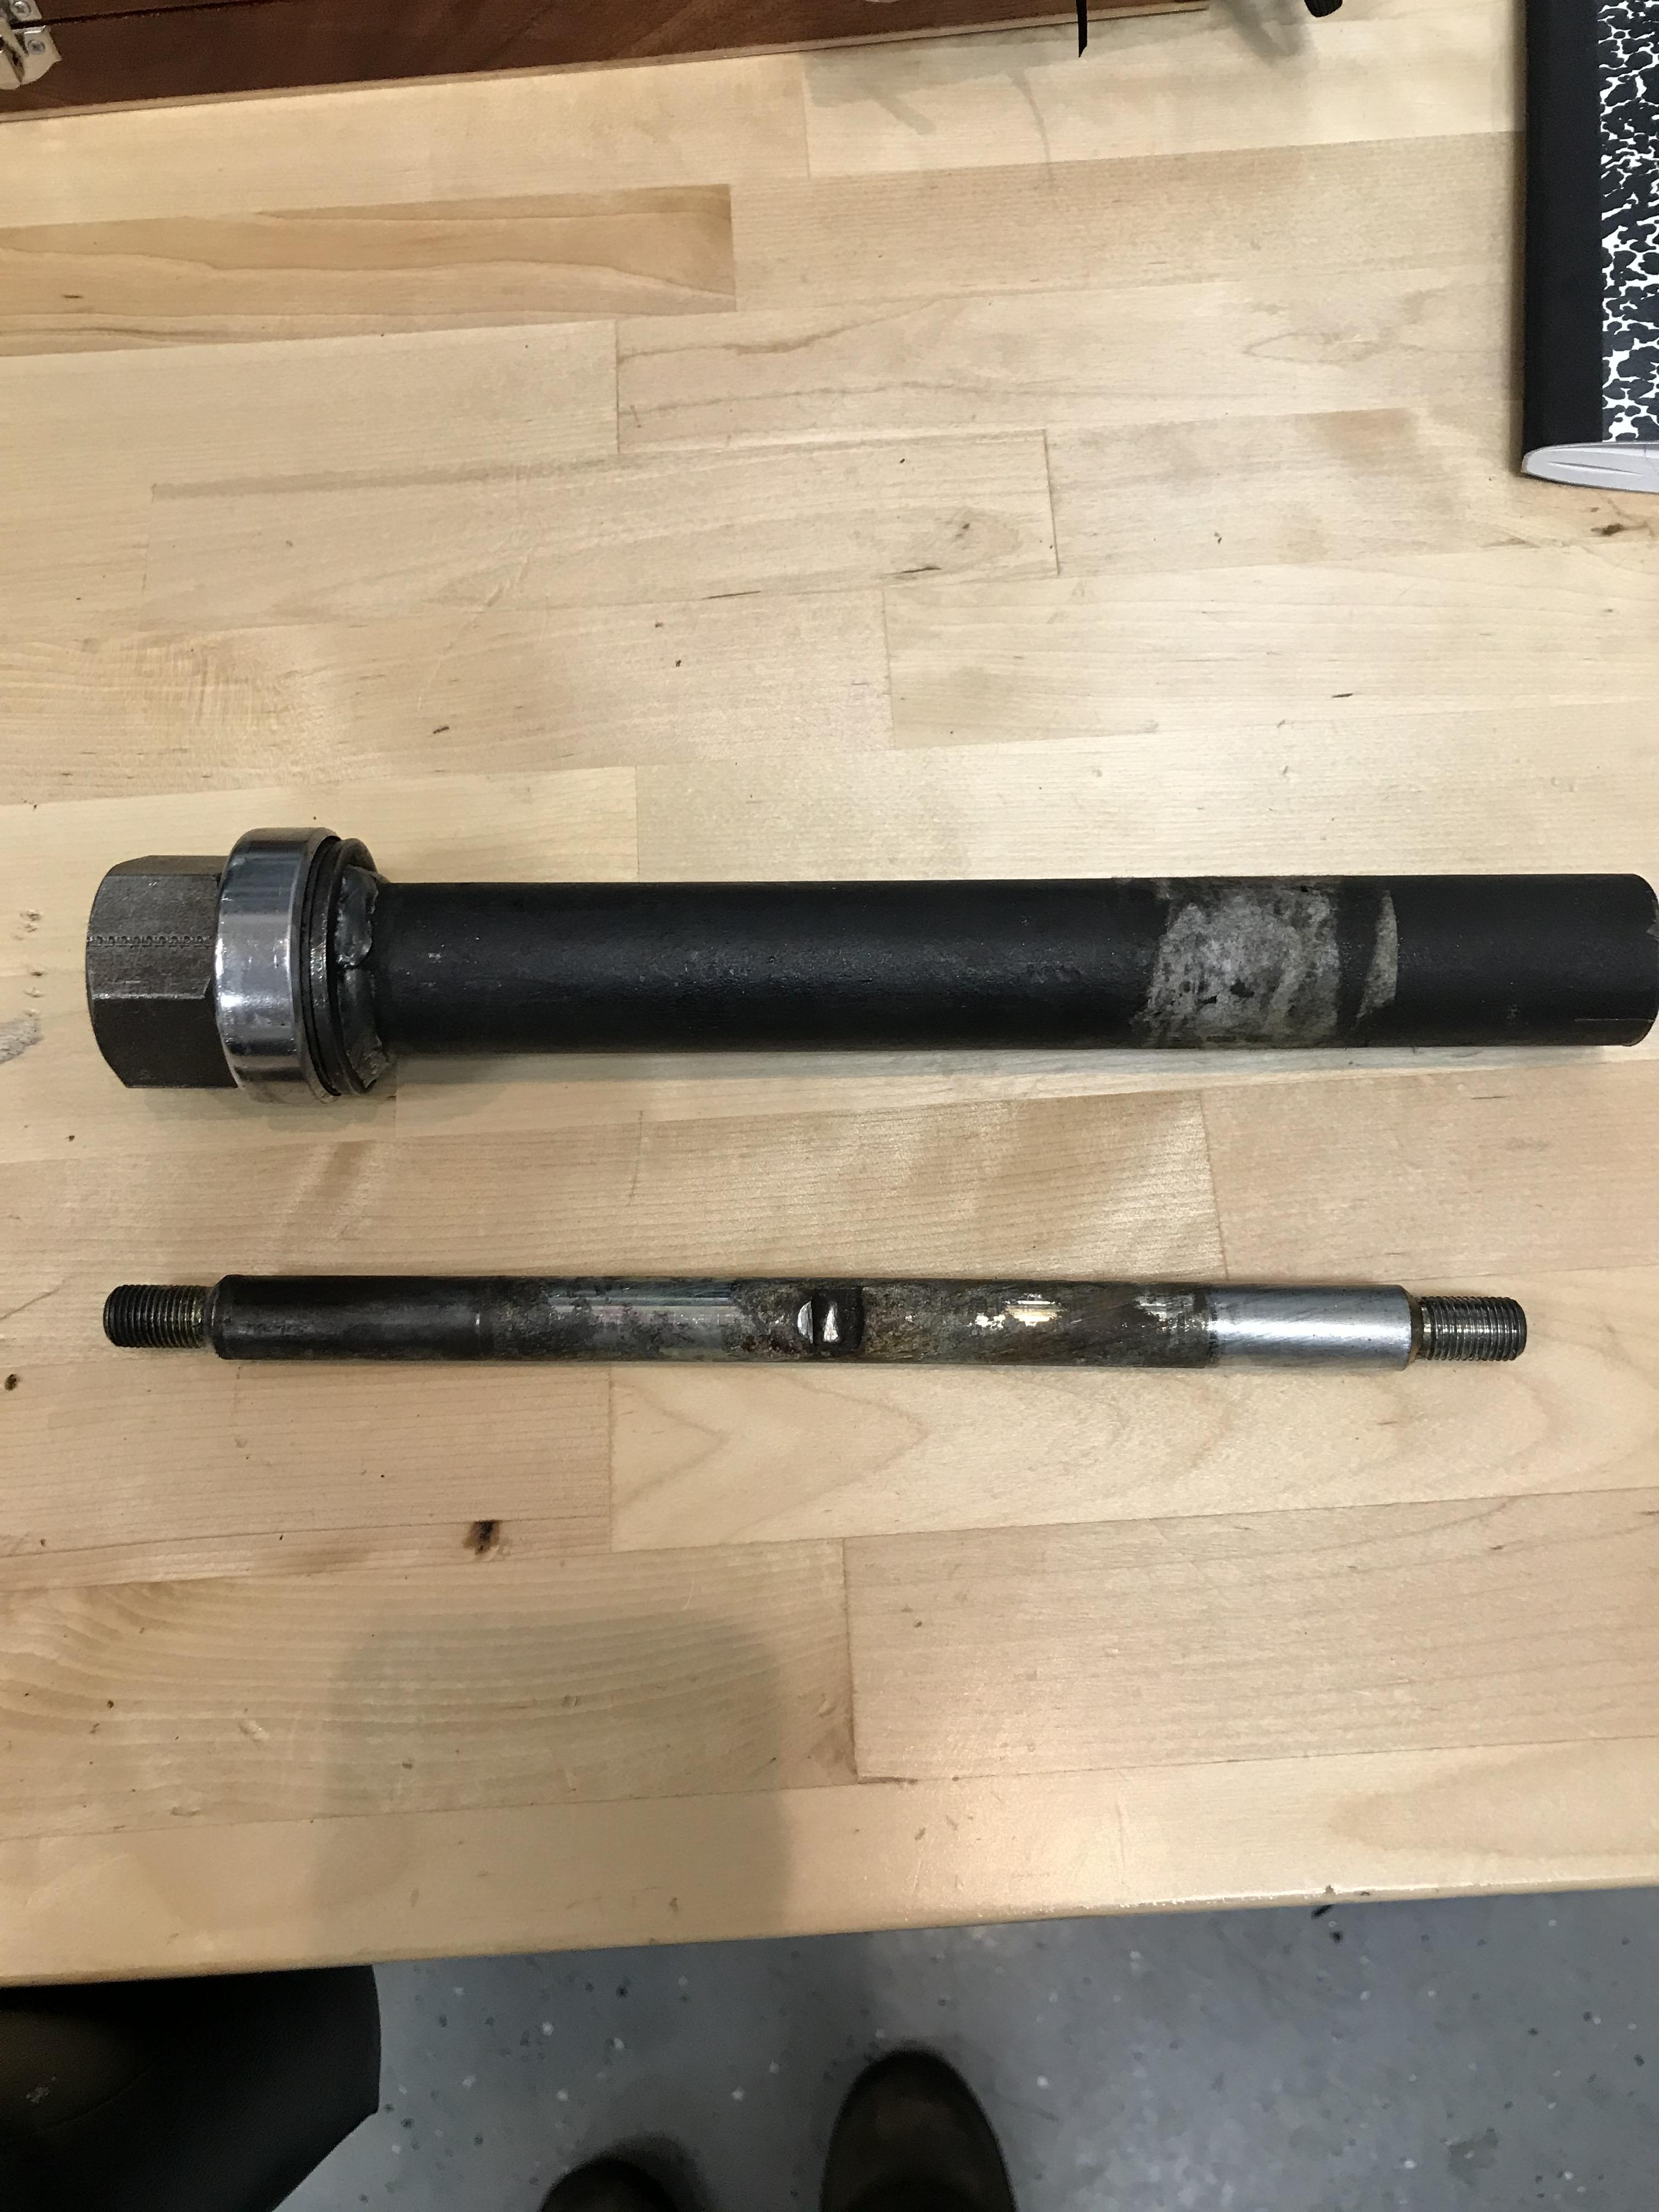
I am in the middle of this same project, so I can offer some advice. I used a Dremel with a reinforced fiber cut off wheel to remove the peened sections of the nut. Be VERY careful when you do this. I made a cut across the nut right at the start of the peened area. I only went deep enough to get through most of the nut, but not all. I then used the Dremel to thin out the areas of the nut right at the corners of the "D" on the axle to weaken the nut. After that, I drove a flat screwdriver into the slot I cut across the nut so I could pry the peened section out. With the nut thinned at the corners of the "D", the cut section broke away and I was able to grab it and break it off with needle nose pliers. Don't expect this to be easy or pretty. Repeat the process for the other side of the nut. Once the nut has two chunks missing, you can safely use an impact to remove the nut. Mine came off perfect with no damage to the threads. Be sure to not cut into the stub axle with the Dremel. I then used a 5 lb. slide hammer to remove the stub axle. It took about 20 good strong blows and then slid out with a few more. Once apart, the nut spun right back onto the axle, verifying the threads were good. When you reassemble, buy the ZX nuts that don't get peened. I found them online at Courtesy Nissan for about $15 shipped for the pair. As for the spindle pin, make sure the wedge bolt is out first and then try the puller. Mine came out in just a few minutes, but the pin had almost no corrosion. A slightly bent pin, corroded pin, or one that has damage from the wedge bolt will simply not come out no matter what you try and you will need to Sawzall the pin on either side of the knuckle and take it to a machine shop to be pressed out. I had one Z that maxed out a 40 ton air over hydraulic press. Good luck! A slide hammer should work on a very stuck strut cartridge. I've had a few give me grief over the years. One was rusted in and required a lot of brute force to remove. I mounted it upside down in a vice and put a big washer under the nut and then put a very large open end wrench under the washer and hammered on the wrench. It tool a long time, but did come apart. A slide hammer would do the same, but would apply more even pressure. Soaking the area between the cartridge and housing with a good penetrating oil will help immensly.
-
I thought that was racist?
-
1986 300ZX
-
If I had a lathe, I'd likely do the same. I was a member of a local membership workshop, but like every other similar one around the country, they couldn't survive. That was my access to a lathe, mill, powdercoating oven, shear and break. ?
-
I cut the peened parts off with a Dremel. Once the stub axle was out, the nut spun right on, so I know I didn't damage the threads on the stub axle and I know I got enough of the nut cut off with the Dremel. The only thing that went wrong was that my Dremel died halfway through cutting. It gave me a good excuse to add to my Milwaukee cordless tool collection. I won't have to fight the Dremel cord ever again.
-
That makes sense, though based on what every Z owner with spindle pin experience knows, the chances of a pin falling out are less than winning Mega Millions AND the Power Ball in the same week. I guess I'll use the wedge bolts... and buy lottery tickets. ?
-
Thanks. My back acts up from time to time. I just have to be careful and not over use it. Ahh, okay. Yes, I did see threads about the bearings being too tight. I read "adding onto threads" and was trying to figure out how I add onto an axle thread. I plan to ignore the nut torque at first and just worry about end play and breakaway torque. I bought the ZX nuts, so I'll use the old nuts which now have the peened areas cut off to seat everything and then swap them for the ZX nuts once I'm happy with the install. Thanks for the heads-up. Of all the Z's I have owned over the past 38 years, I have never had to do rear bearings. If this wasn't a race car and I didn't already have to take it apart for the brake swap, I probably wouldn't replace these either. They had just a tiny bit of play, but not that bad. I was surprised by how little grease was in there. Both the inner and outer bearing stayed in the hub and the axle came out with no grease on it. I haven't removed the bearings or seal yet, but I didn't really see any significant anout of grease anywhere.
-
I'm torn on the wedge bolt. My RH one was pretty beat up, so I either need to buy new ones, or leave them out. If I leave them out, I will likely silicone over the hub holes before I ever put it back together to keep moisture out. If I put them back in, I'll antiseize them well. Does yours have a threaded rod, or a bolt like their web site shows? I don't think a threaded rod would be a good idea. The threads are never going to be as tight a fit as the pin's smooth shaft and it could cause play in the joint. Any movement will equal slight toe changes under either cornering or accel/decel. I looked at the T3 site and their bolt has a smooth shank for one rod end and the hub, but the other rod end sits on the threads. I think they should have sourced a bolt with a longer shank, but at least the hub and one of the two rod ends are supported. You can actually see in the photo how the threaded end is slightly smaller OD than the shank. Apex Engineered arms have a similar design as T3. Again, I would have used a bolt with a longer shank. Nissan would never engineer a joint like that nor would any other auto manufacturer.
-
Sorry, I am not following. Can you explain what you mean? As for progress, I am on hold for a few days. I threw my back out, so I'm taking it easy trying to calm it down. I hope to get back under the Z in a few days so I can pull the LH side apart.
-
I run cut (2 coils cut off) springs on my late 260 race car along with Nissan Sentra jounce bumpers cut such that they are just in contact at curb height. The cut springs and added jounce bumpers raise the spring rate from 120 lbs./in to 200 lbs./in. They are still pretty soft, but I run large stabilizer bars. The car handles great.
-
As much as I'd like to go with Apex or T3 arms, I will stick with stock arms for now. Someday, I might switch though. The pins should come out super easy the next time around. The engine work, brake upgrade, wheel upgrade and complete vehicle rewiring project is all the wallet and clock can handle this winter.
-
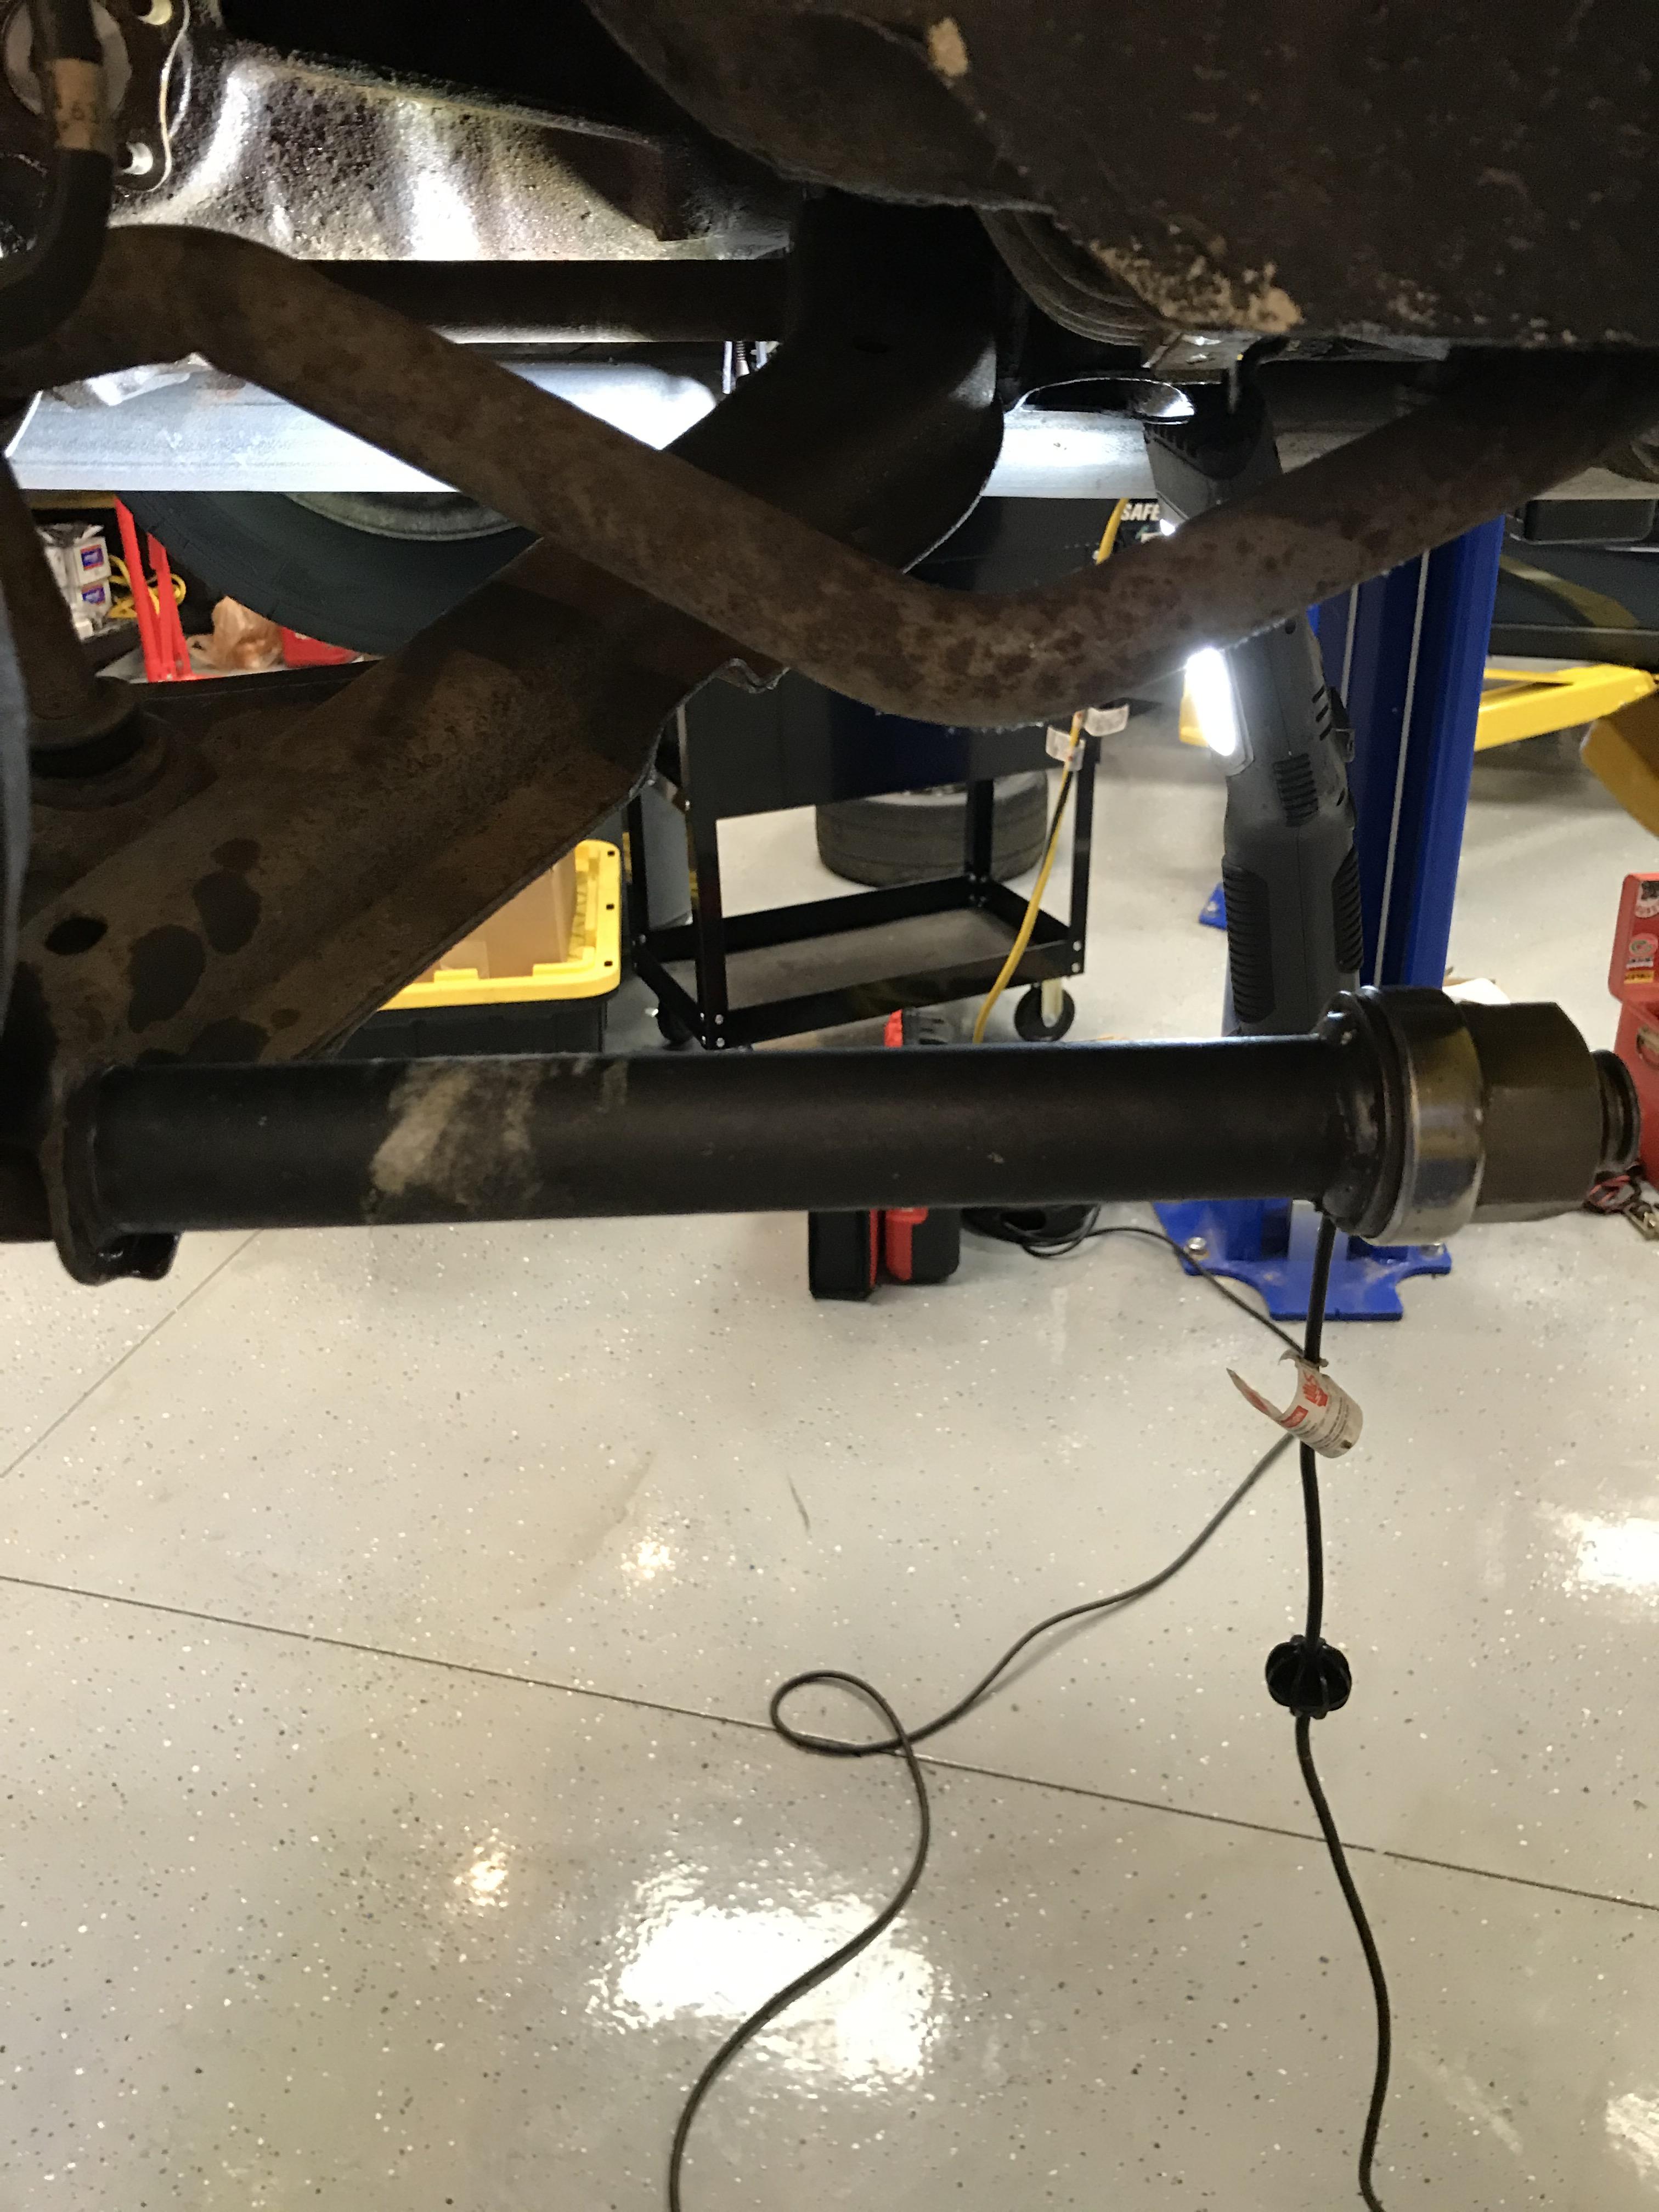
I'm making progress on my 2020 race prep. After getting the engine back in and everything hooked up, I started pulling the rear end apart for the rear disc brake swap. I got the RH side apart with little drama. Stub axle and spindle pin are out. Next up is pulling the LH side and then pressing new wheel bearings into the hubs. New outer control arm bushings and some paintwork after that and it's ready to go back together. Spindle pin puller - one, 46 year old Z - zero
-
I am currently upgrading my race car to Mustang S197 rotors and calipers. They aren't as light as Wilwood, but the piston is a 43mm and the rotor is 300mm vented. Most 15" wheels will just clear the caliper. Silvermine sells the adapter brackets. Have you checked your axles bearings for wear? Did you replace them once already? If not, now is a good time to bite the bullet and pull the stub axles. I just did one side of mine last might and the job wasn't bad. Cutting the peened areas of the axle nut was the hardest part. I removed the drum and halfshaft, cut the nut, pulled the stub axle and pulled the spindle pin. The job took about 3 hours and much of that was fighting the adjusted on the drum so I could slide it off.
-
I finally got to try my spindle pin puller last night. I made it years ago using high quality 1" acme threaded rod and a front strut bearing. Granted, the car isn't super rusty, but it worked great. I had the RH pin out in less than 2 minutes once I got the wedge bolt out. I'm doing a rear disc conversion on my race car, so I pulled the stub axle and spindle pin. I will replace the wheel bearings and outer control arm bushings while it's apart. I was pretty happy with the job. The hardest part was cutting the peened sections off the axle nut without touching the stub axle threads. Tonight, I will pull the LH side apart and then start pressing bearings. The real test for the puller will be on the spare corner modules I have in storage. Those came off a really rotted car and they are likely going to need to be cut and pressed out.


-
Beautiful day to get a family pic.
-
I'm not that fancy. ? I have a 1/4" thick x 2" wide x ~12" long plate steel with a hole in the center. I have always just used that to pull the thrust cap. I screw the bolt into the main cap and put a block of wood under one end of the plate as a fulcrum and then just lift the other end of the plate. The caps have always come right up for me.
-
Throw heat at them and try again. I can't imagine they used thread lock as high as the temps get in an engine, but it's worth a shot. I will ask a friend who is a Z engine master. He will know. EDIT, I got an answer back. He said to use an impact screwdriver to remove them.
-
-
I personally don't like Hawk pads. They eat rotors. Raybestos ST-43 are well-liked for track use. I prefer Porterfield R4 (or R4-E in my case). The Porterfields have higher friction than the Raybestos ST-43, but both are good. I really like my SS hoses. Mine are Earl's and I might have gotten them from MSA years ago.