er34gtt2000jp
Free Member
-
Joined
-
Last visited
Everything posted by er34gtt2000jp
-
 OK, so never trust that the "rebuilt" master vac you get from Advance Auto has all the correct parts. Especially when they don't look like the ones you took off the car ;-) Spent the last few days chasing a brake problem, system bled fine and worked good for the first few miles, then would lock up until the car was no longer able to move. Pulled the entire system apart, cleaned and reinstalled everything, including disassembling the master cylinder. After a day of brake work, put it all back together the fricken problem still persisted! Then spent 5 min searching our forum and found that I either had a bad MC or the pedal free paly and/or booster pushrod clearance was off. I had set the pushrod clearance to 4mm when I installed the booster and new MC but in looking at the drawings in the 70' - 71' service manuals it looks like the plunger was much shorter than mine. And the 4mm was from the booster surface not the spacer. Off came the booster and I notice that the adjuster on the pushrod is like almost and inch long and that the original was rather short. Few moments digging through parts boxes netted the old pushrod and after a quick swap and eyeball adjustment I was back in business. Today's test drive was a success! Still needs to be adjusted some more as I have quite a low and light pedal but no more dragging brakes nor locking up! As a reward for the awesome drive she gave me this evening she got her first bath in a decade, and man was she dirty! After bath: Now I just have to wet sand that paint to get it to shine again a bit ;-) I'm going to call my getting close thread officially gotten there now I think! Its been fun and thanks to all that gave advice and kind words. Not bad progress if I do say so myself considering she looked like this not much longer than two months ago:

-
-
Indeed it was! Over all spent about 8 hours with my boy this weekend working on the Z. Fun times! Even when the Z left my boy and I stranded 2 miles form the house last night. Seems I should of rebuilt the rear brakes rather than just clean and inspect them. Got a couple miles down the road and the rear brakes locked up on me. Car wouldn't move. Had to call for a ride home to get tools to pull the rear shoes off and limp the car home without hitting the brakes. So here she sits back on jack stands awaiting time to go through the brakes again: On a side note the fenders and hood fit much better now that the car has a straight front end

-
-
Thanks!
-
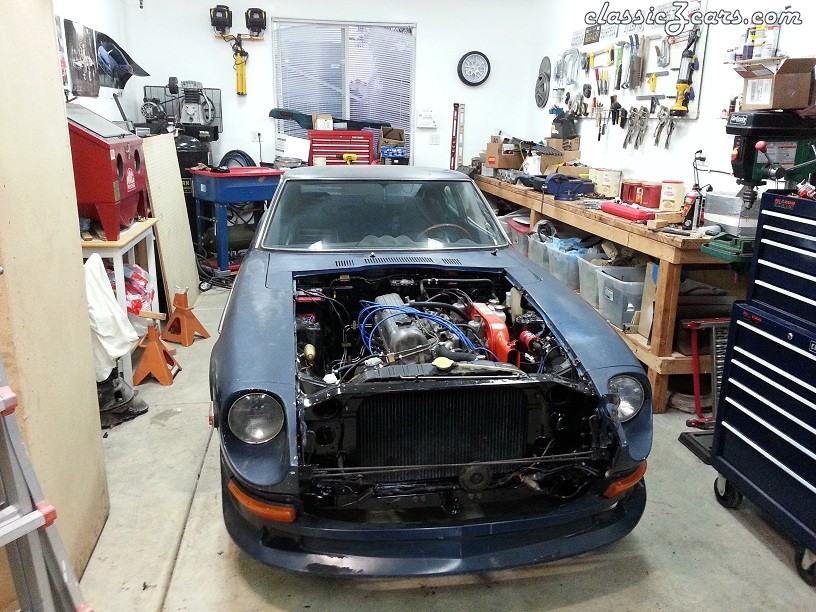
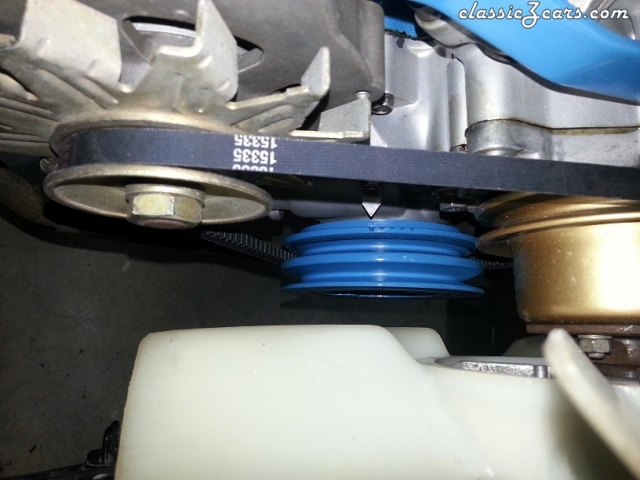
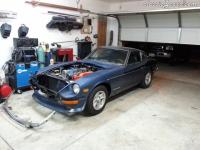
My 71' moved to day under its own power tonight for the first time in over 10 years! Spent the day getting all the little details done, pulled the trans to reset the clutch, replace the release bearing with a longer one, and check the pilot bushing. Replaced the slave cylinder as well. Changed all the gear oils and installed the drive shaft. Bled the brakes and repaired a leak from a bad flare on one of the lines I made. Sorted out my timing issue too! Dropped the oil pump and sure enough the shaft was a tooth off. Now I have timing set to 5 degrees no problem. Bet I can advance it a good bit more but we are on California crap gas so I'll have to be carful. Couple issues still, have to align the front end. Tried to adjust the right tie rod but guess I took it a bit too far and now it points off into RH space. That's what I get for adjusting it unladen I guess ;-) Also still have to put the hood and bumper on as well as the grill. Seems to have some electrical gremlins too. Maybe ill replace all the bulbs and see if that helps with my brake light and turn signal issues. Now the never ending saga of making it better begins! My favorite part! Best part of today was having my son out helping me too! That was pretty awesome, especially when we went for the first drive together Just before the first drive: Parked for the night: It's now taken its rightful place in the garage next to the daily driver instead of behind my race car. Now I can actually get it out of the garage Woo Hoo!!!

-
-
-
-
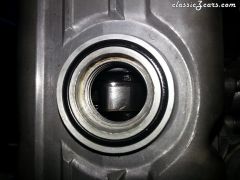
That looks strikingly like the pictures in the 1970/71 Engine Service Manual. I have never seen one like that in person before though. What year car is that engine from? Here is a pic from another post of original service manual photos:

-
It's my OCD side that lets me get a lot done, I tend to forego other things to my own detriment at times ;-)
-
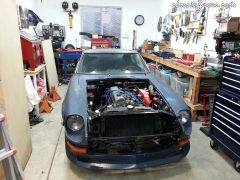
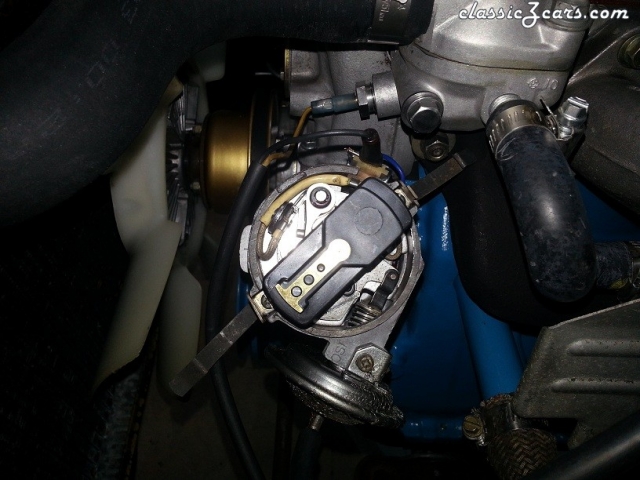
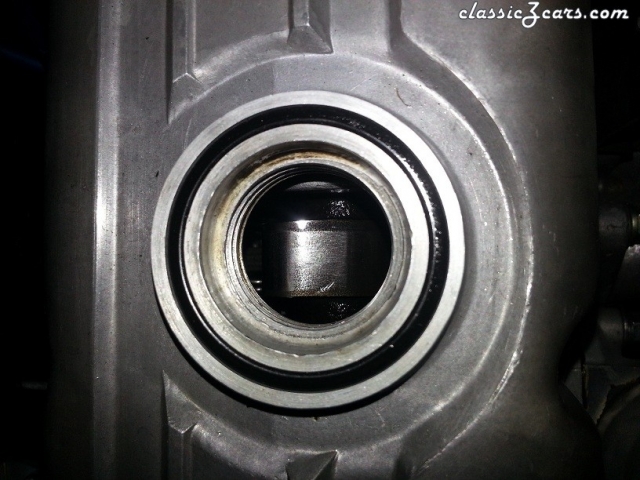
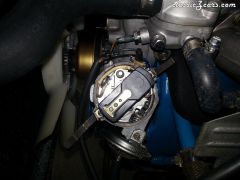
Well I used to have a cool Pertronix ignition setup, now I have a $100.00 piece of garbage.... Guess my MSD coil fried the Pertronix unit in short order, like in less than 10 min :-( Oh well, I threw a set of points in it and wow, fires right up. Well after I readjusted the float levels and set the distributor to the MAX retarded adjustment. Even with it fully retarded I cant get below 15 deg advanced. I think my oil pump drive might be off, here's a couple picks. What do you guys think? Don't have one of the distributor drive tang but it is pretty much in line with the bolt holes on the distributor mount. Pretty sure that's where is supposed to be according to everyone but my rotor doesn't face the 9 o'clock position it's more like 7:30. Tried two different distributors with the same issue. I know the motor is on TDC with #1 compression stroke, verified by finger over spark plug and cam lobes. Damper hasn't slipped either. Only thing left is the oil pump shaft, maybe ill drop the pump and rotate it a tooth. See if that helps. In the mean time, I've begun to put the sheet metal back on. Looks good with fenders, even if they are a tad oxidized ;-) I'll post an update on the timing thing in a couple days, its my anniversary tomorrow so I'll be in trouble if I'm out working on my Z!


-
-
-
-
-
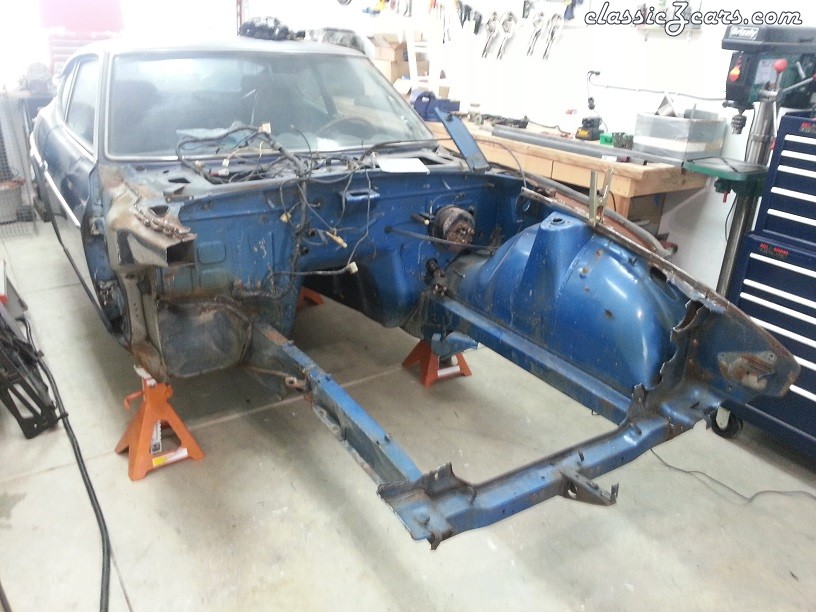
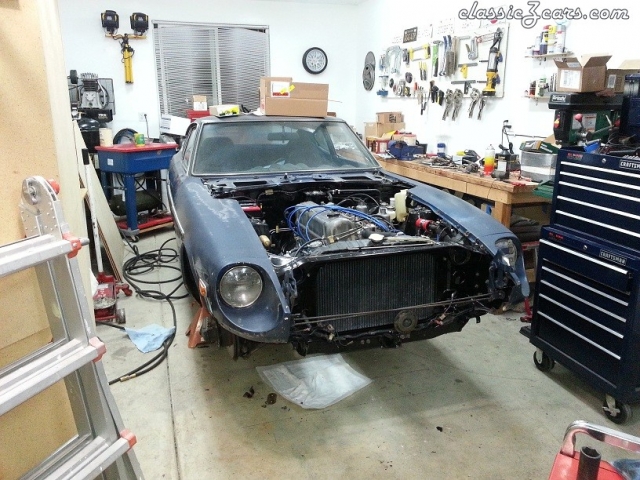
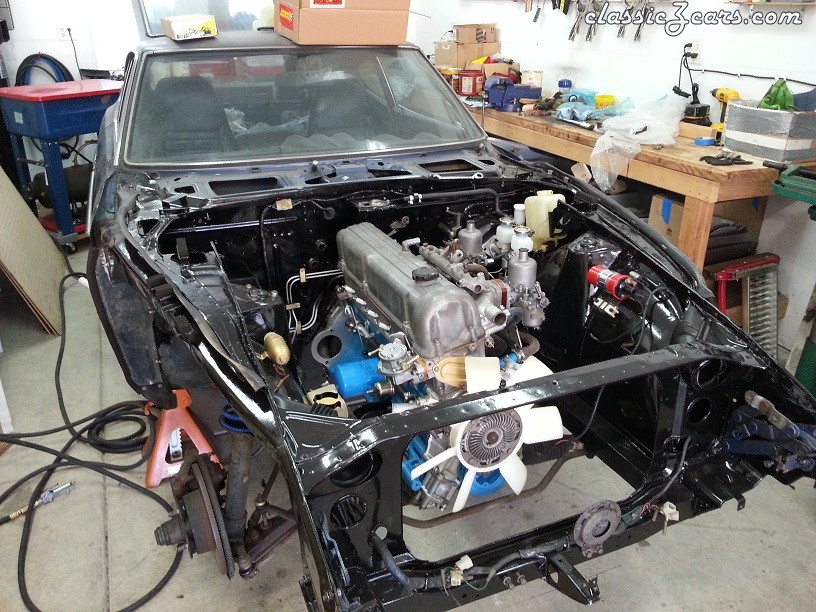
Exactly why I did it myself, the only places that would touch m 71' wanted well over $1000 to replace the front clip. And most places wither laughed at me or just flat out said "we don't work on cars that old". Im not a body man nor a professional welder. I could of found a new shell or even another 240Z all together but I liked this one so I chose to save it.
-
Or you can do it yourself with a little ingenuity a welder and a lot of patience http://www.classiczcars.com/forums/body-paint-s30/49186-rebuilding-my-71-a.html
-
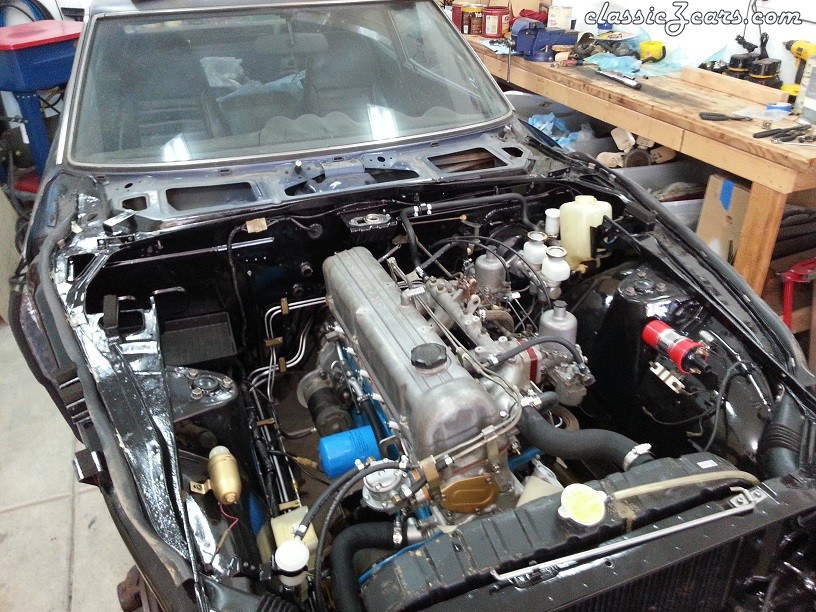
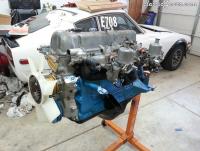
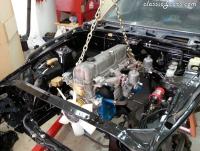
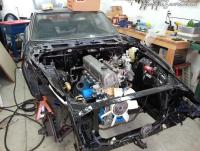
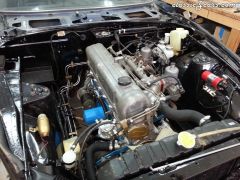
It lives! Good oil pressure, no leaks, smokes a tad but that could be just from the first start up and the fact that its running super rich. Need to adjust the carbs and figure out the Petronix wiring still. Oh and repair part of the exhaust there is rusted through and broke open during install.
-
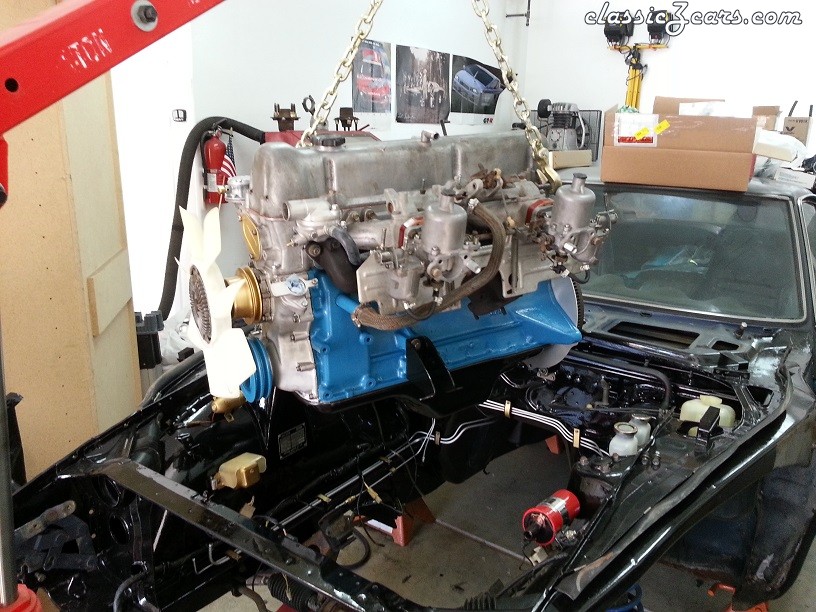
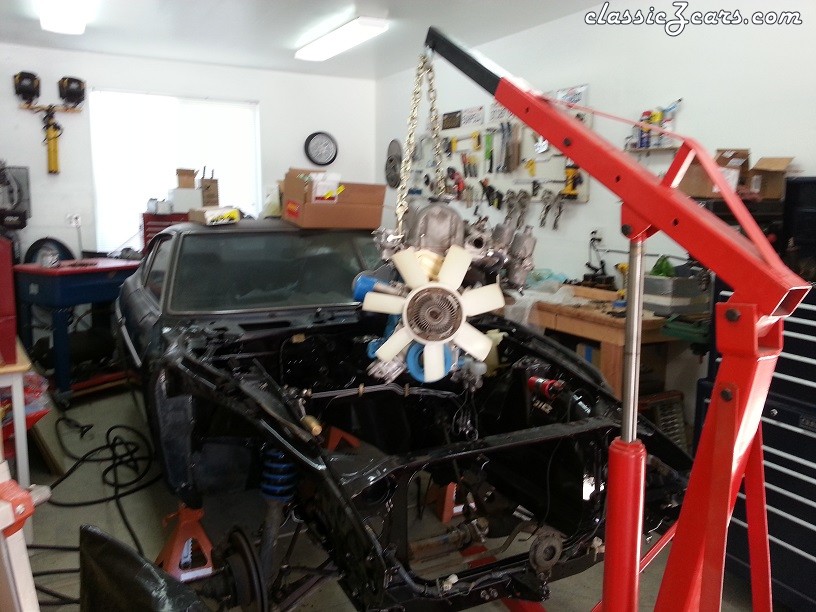
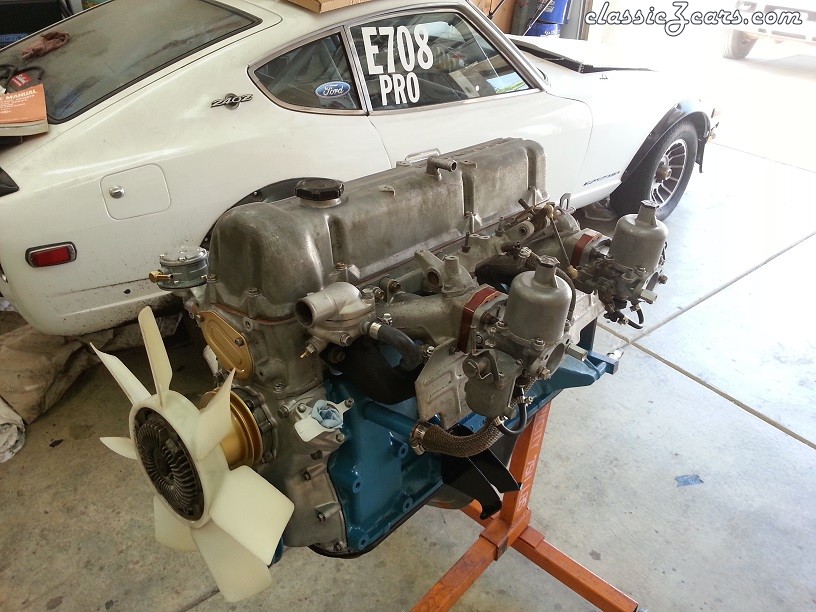
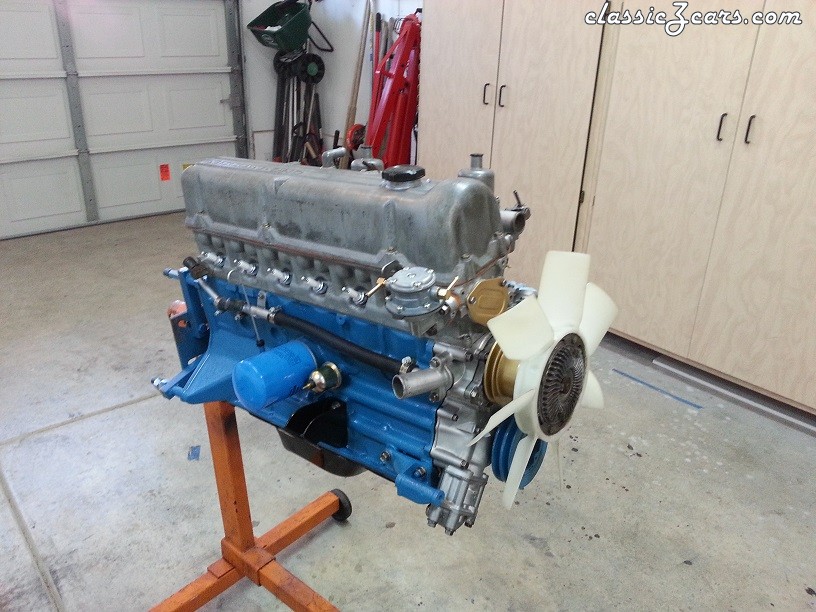
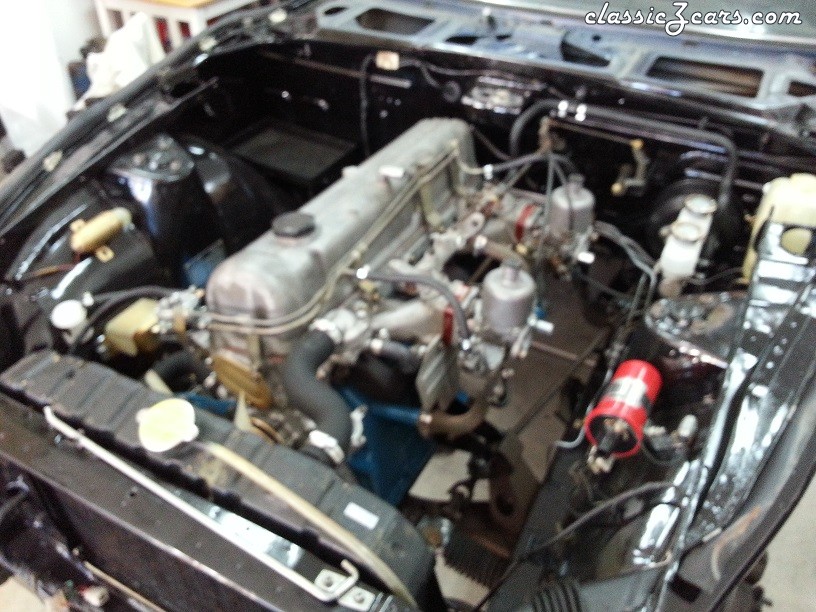
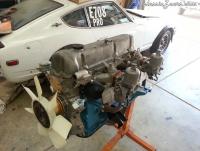
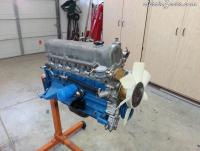
Ok so I decided to run the float as is and deal with it if it caused me grief. we'll see if I regret this decision but hey, I want to get this thing on the road dammit! Long story short, my 71' now has a freshly rebuilt L24 with a nice E31 head ( that needs valve guides at some point, but is straight and flat) along the a bitchin A series 5 speed tranny! At some point I'll want to find a 3.90 or 4.11 diff for it too but for now I'm gonna live with the stock diff. And here we are getting a shiny rebuilt engine, hopefully tomorrow I can have the first fire! And not the kind that i'll need my extinguisher for ;-)


-
-
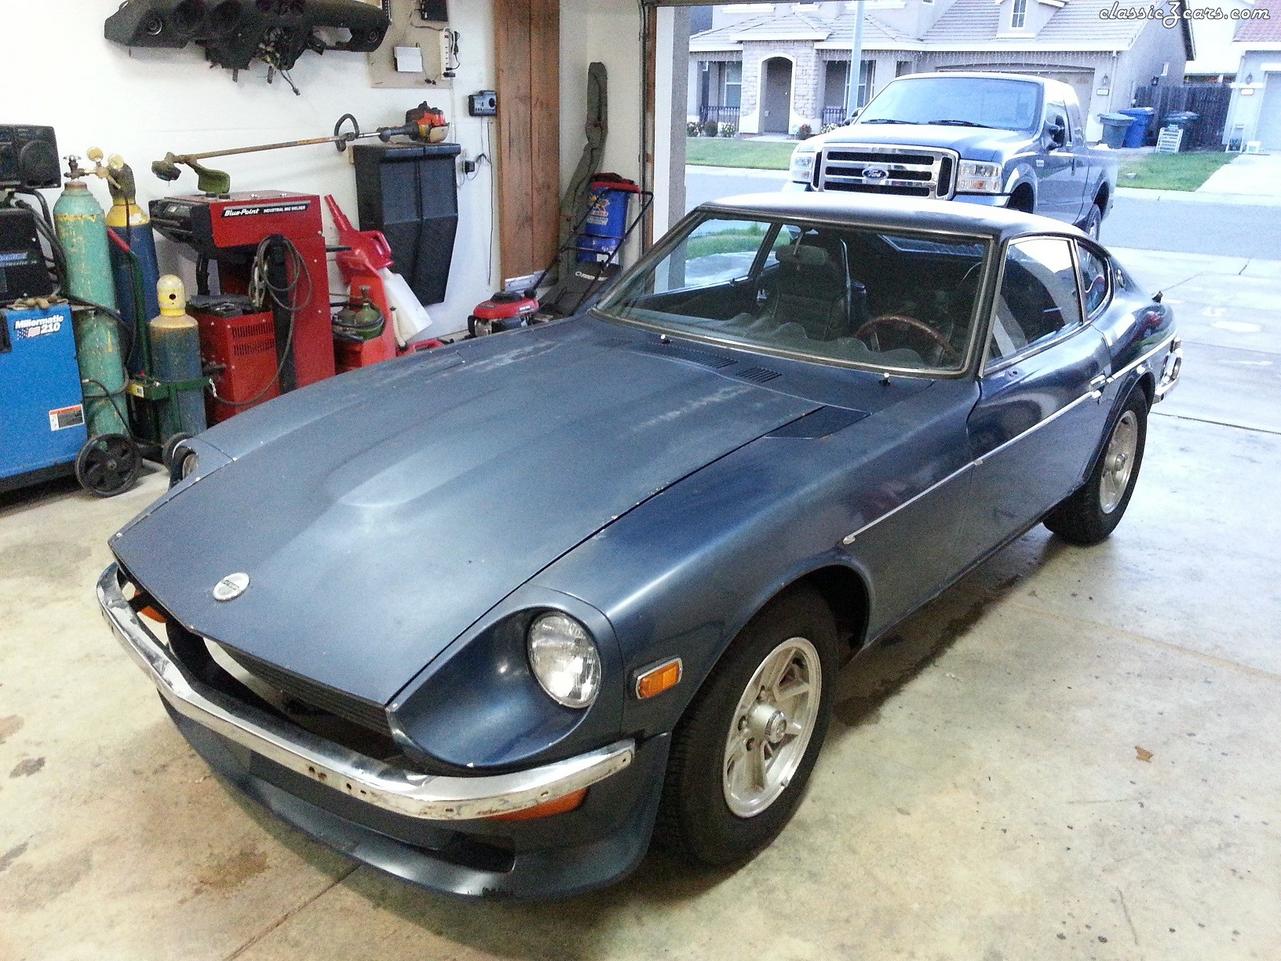
From the album: 71' @40Z
-
-
-