


Zup
Free Member
-
Joined
-
Last visited
Everything posted by Zup
-
@DatsunZGuy I restored one of mine a few years ago and the one thing I wish I had done was to clear over the long thin white decal. Unlike the other decals, which are made on a mylar type film, that one is just paper and will wrinkle and distort over time----it is not very durable. I had purchased the decals from Mike McGuiness at Banzai Motorsports. They are very nice authentic reproductions. I called Mike and asked him if it was possible for him to make this particular decal out of the same type film as the others and his reply was that "to do so would not be correct (original)" so he would not do it. I am O.K. with his response, but will clear the next one. @JLPurcell Mike is now selling reproduction air cleaner gaskets, although the only one he offers is the outer gasket. Steve Nixon also sells reproduction gaskets, but they are sold in a set of inner and outer. I have used Steve's and they work well---just needed a little trimming before cementing with Weldwood contact.
-
When you send that dash off to Just Dashes be sure to cover any kanji you wish to keep or it will be obliterated by black. Otherwise, they are the "go to" guys for this. Don't ask me how I know--
-
That is one BFW!
-
Steve Nixon reproduces the faceplate if you opt for new instead of restoring yours-- his are not cheap but are perfectly done http://www.240zrubberparts.com/
-
Happy Birthday Mr. Raspberry Jam Man! I'm wishing you many more to come, for sure Mark!
-
AAUUUHHHMMMM----(drumroll) Z-bay Feedback score: 10 "As described, a perfect part, well packaged and all with extremely fast shipping!" Yes-- I would definitely buy from this trusted seller again!! AAAA++++ All that aside, Jim @jfa.series1 sent me this photo of the "before" of the flow guide: Compare this to the finished article offered above and you might agree with me that this is Alchemy. Thanks Jim! Zup
-
So very, very true John
-
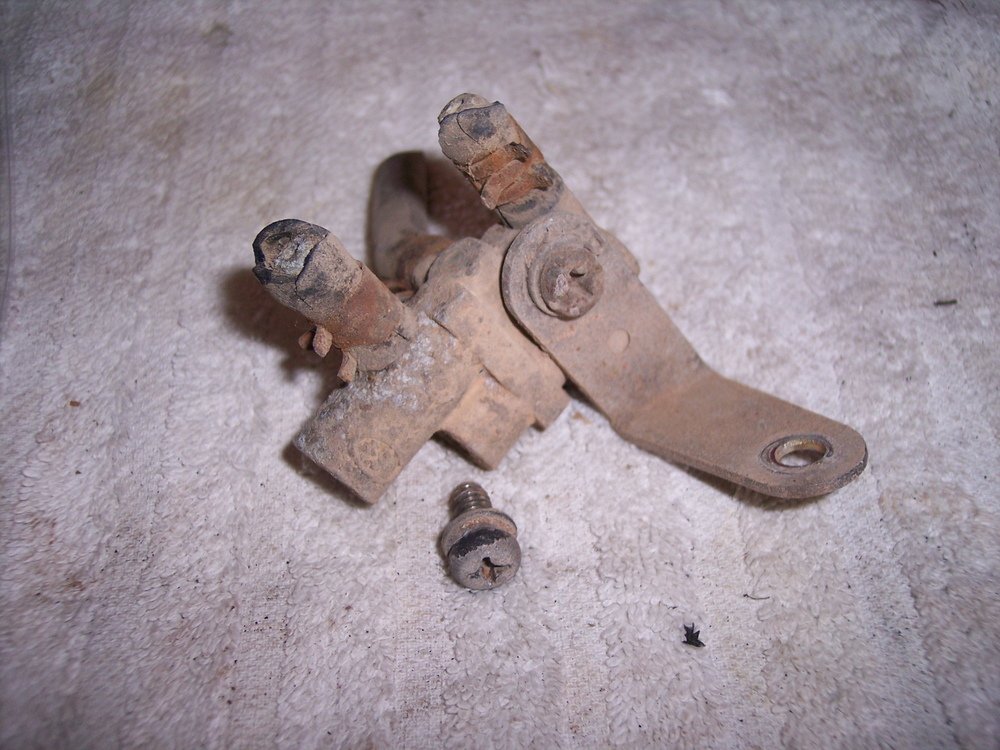
While I too have used that product for tail light lenses, I do not think it is suitable for adhering your centers to the hubcaps. It is not a cement or a glue. I would reuse the remaining post and repair the broken one with plastic rod of a suitable diameter and length to replace the missing piece. Epoxy the ends together and reinforce it with additional epoxy by coating the entire mended length. A thin coat of epoxy to the remaining (un-damaged) post would be good reinforcement for it as well. The 3M product you show in the photo is butyl rope caulking, which is great stuff for the tail lights, as it never sets up hard but retains plasticity if you ever need to get them apart in the future for cleaning the inside of soot and grim. It is very similar to the original sealant used in the tail light assemblies and will keep moisture out indefinitely. Get some 3M emblem adhesive tape if you want additional assurance that your center will not fly off. It is very good at adhering plastic to metal, and is used extensively for attaching emblems to metal painted surfaces. Good luck with your project! Saving these hubcaps is a must as @Hardway mentions-----they don't make them anymore for sure.
SOOOOOOiiiieeee! Come on down!! Your "Good news" made my day!
I agree with all that has been said above and wish you well with your sale. The car has a build date of 5/73. One of the most noticeable items in the photos to me was the carburetors. They are the earlier round top Hitachi version which, by this time in 240z evolution, should not be original equipment. I suspect that the flat top carbs were changed out, as is often the case with 73 Z cars, in favor of the "easier to maintain" earlier carbs. This could have been done at the dealership within the first few years of ownership. Regardless, it appears the conversion was done properly by those that did it. Additional photos of the underside of the car, close ups of the battery tray, rocker panels, floorpans and inner fenders would be helpful to discriminating potential buyers. (although, if given, the presentation likely will not yield any surprises) To me the documentation that goes with the car more than offsets the dip in value usually seen in 73 240Z prices versus the earlier cars and the perception that this color is the "least desirable". It is readily apparent that this car WAS loved very much by it's owner. The condition of the car is testament to his care. There are several additional minor details that would need to be corrected by a purist, but the car is a rare example of a truly "period correct" 240Z. This car certainly deserves a commitment by the new owner to match that shown by Mr. Fulkerson. I believe that this car could fetch a high #2 to low #1 condition value and will be the grist of much discussion if offered on www.bringatrailer.com Thanks for posting this topic and keep us updated as to the progress. It will be interesting to follow.
Zeddy, I know of a least 2 silver 240z cars that will be there. Yours and mine! Z ya in June!! Zup
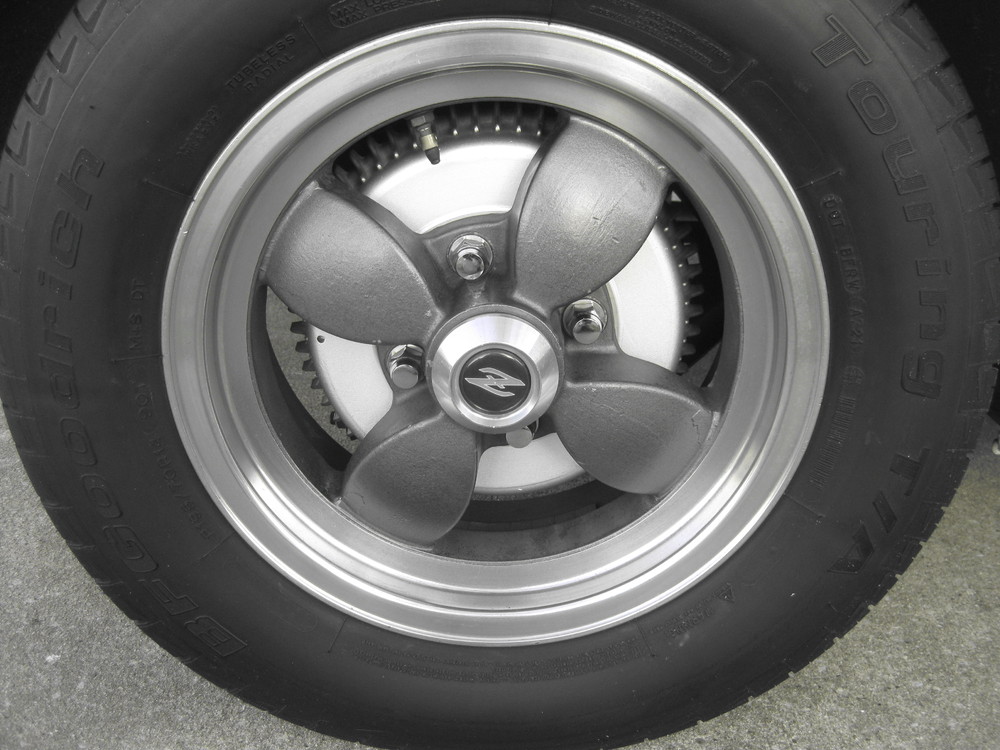
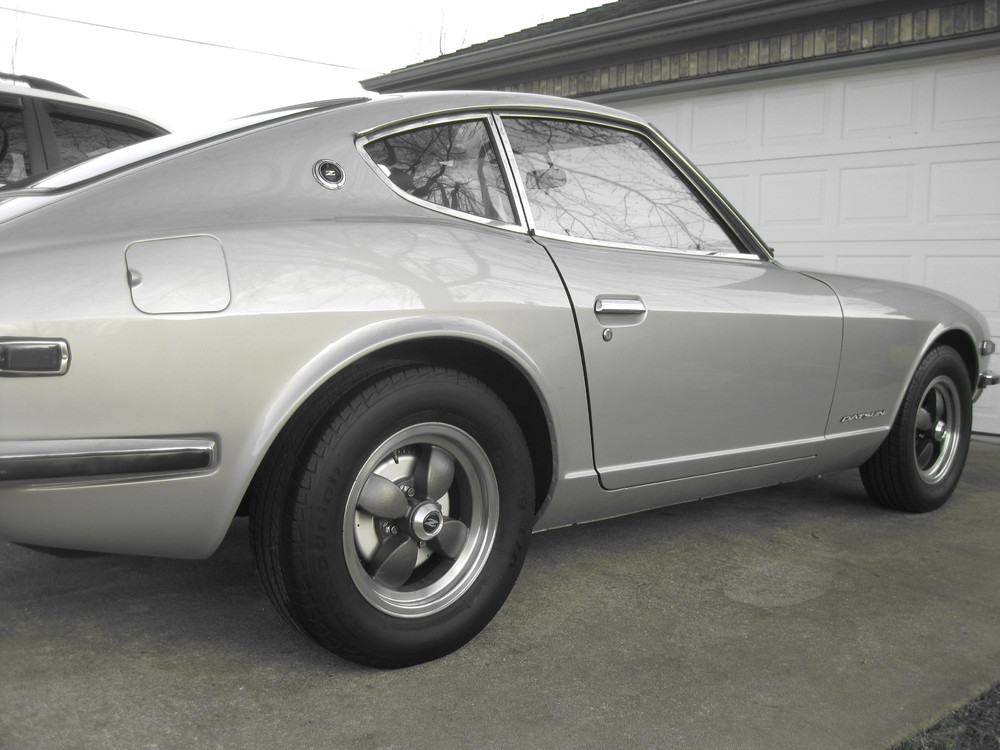
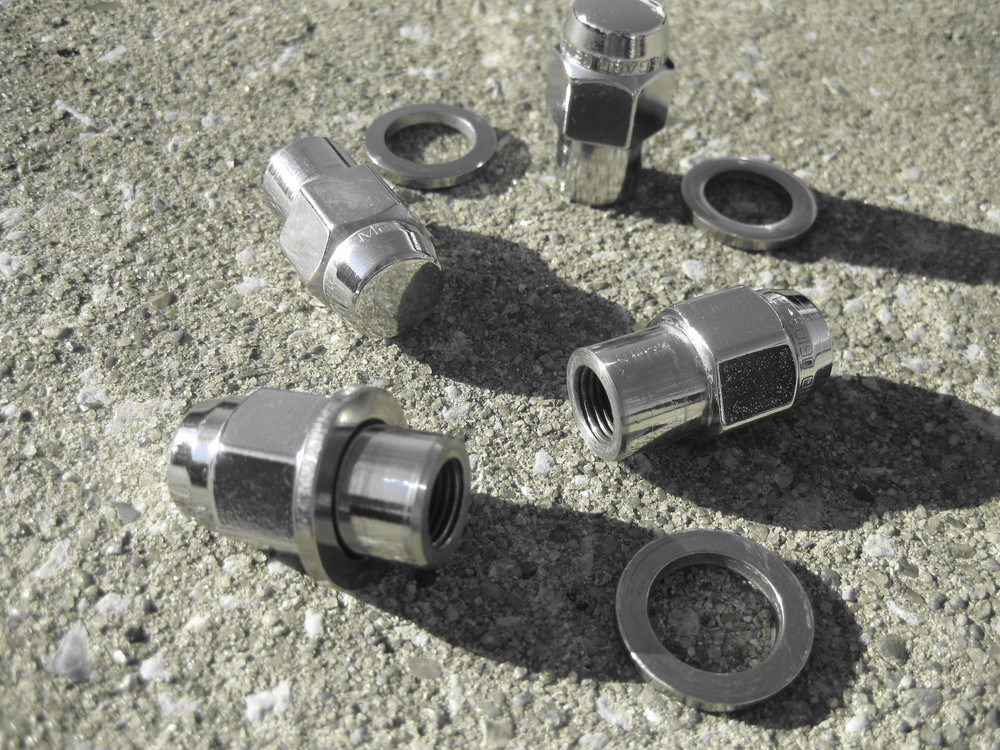
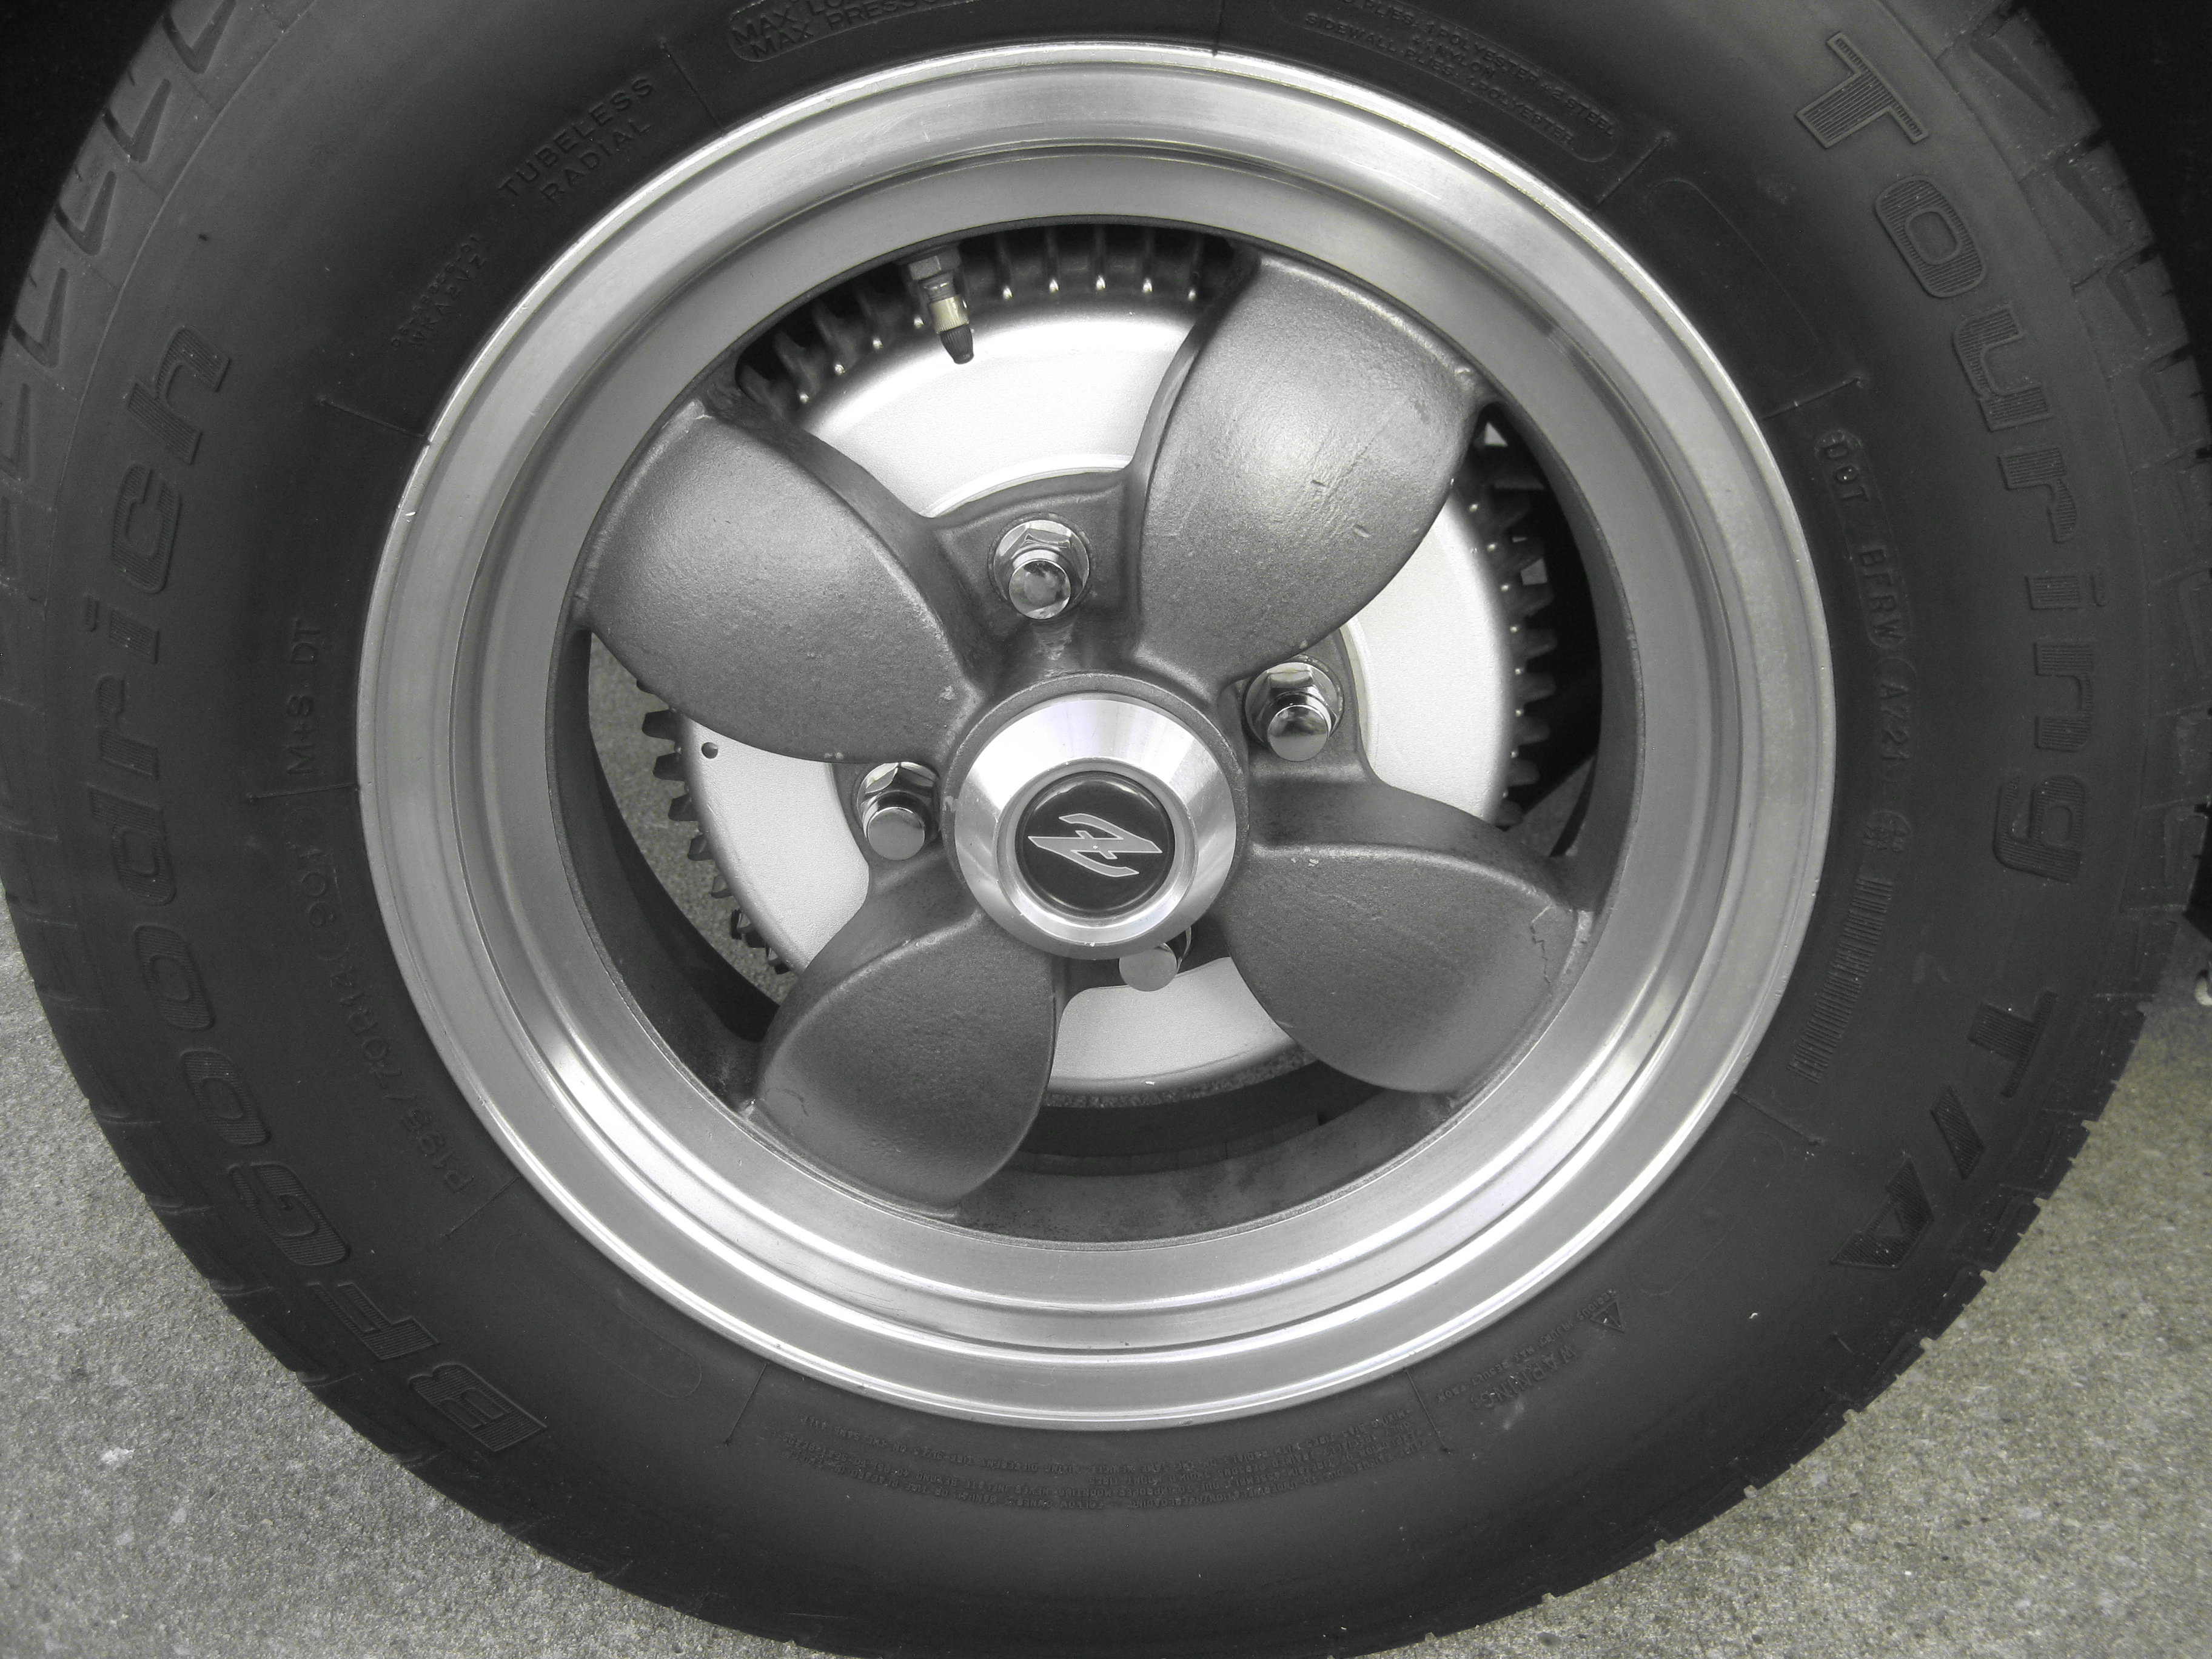
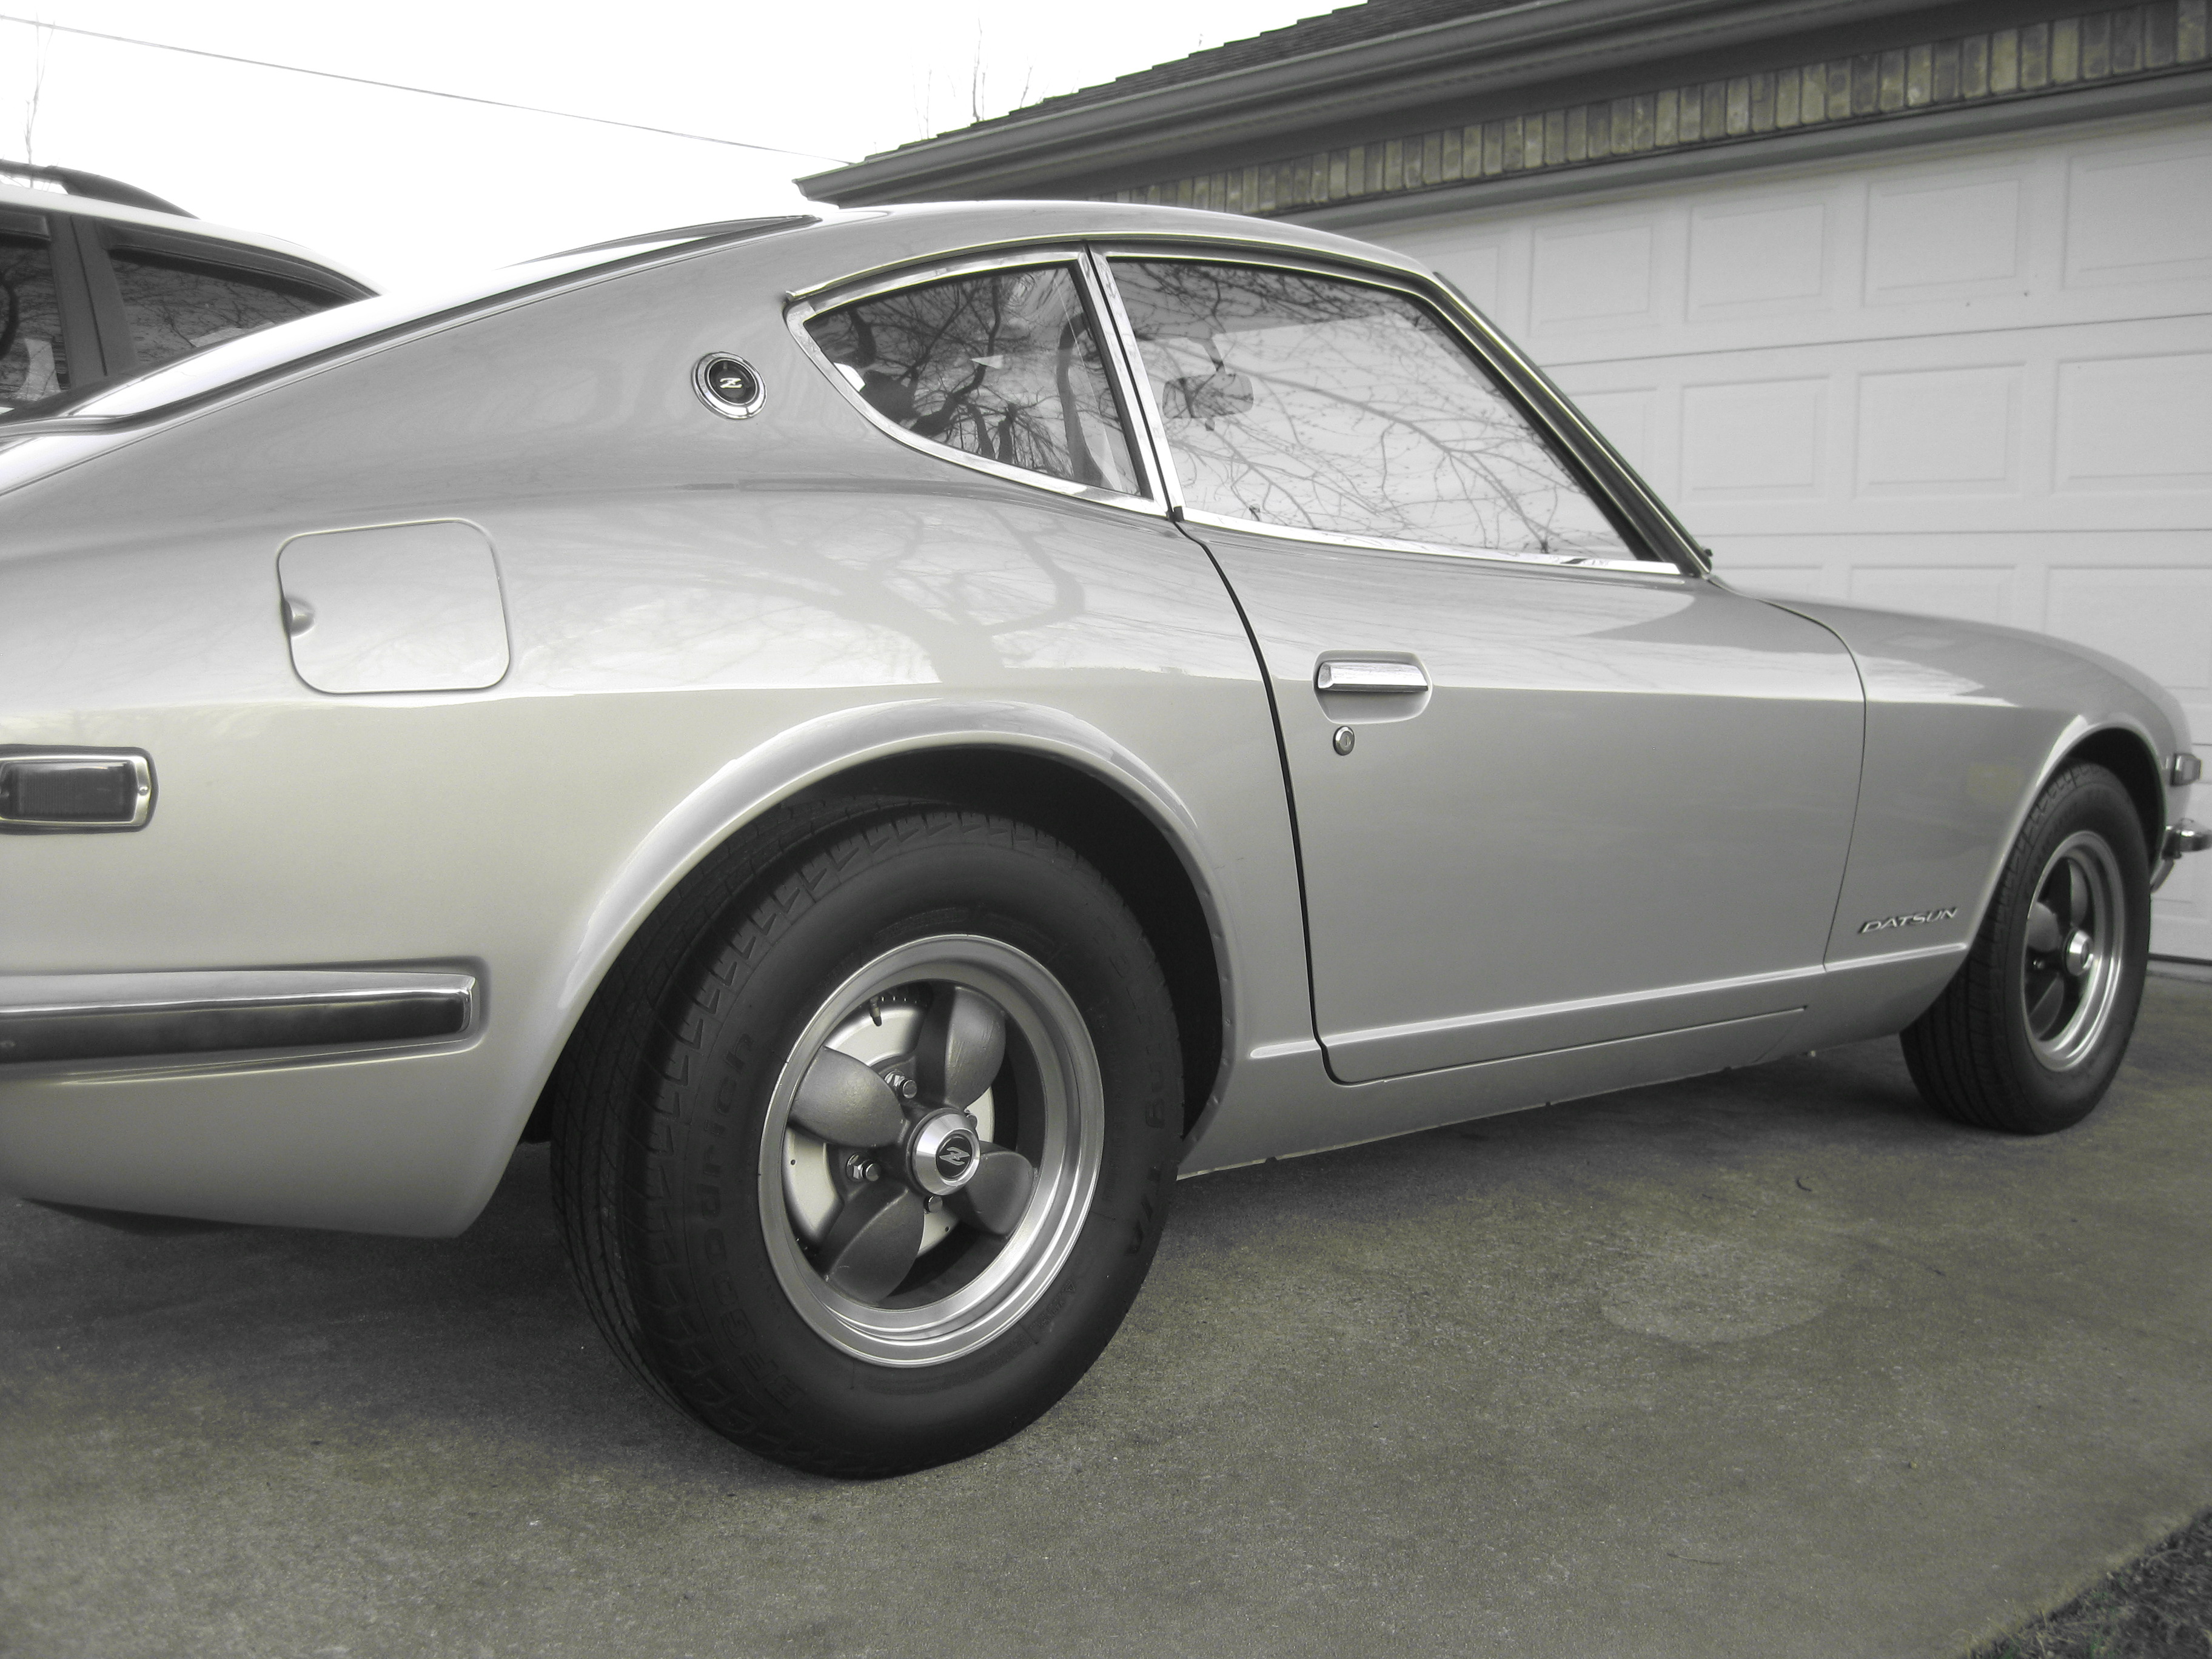
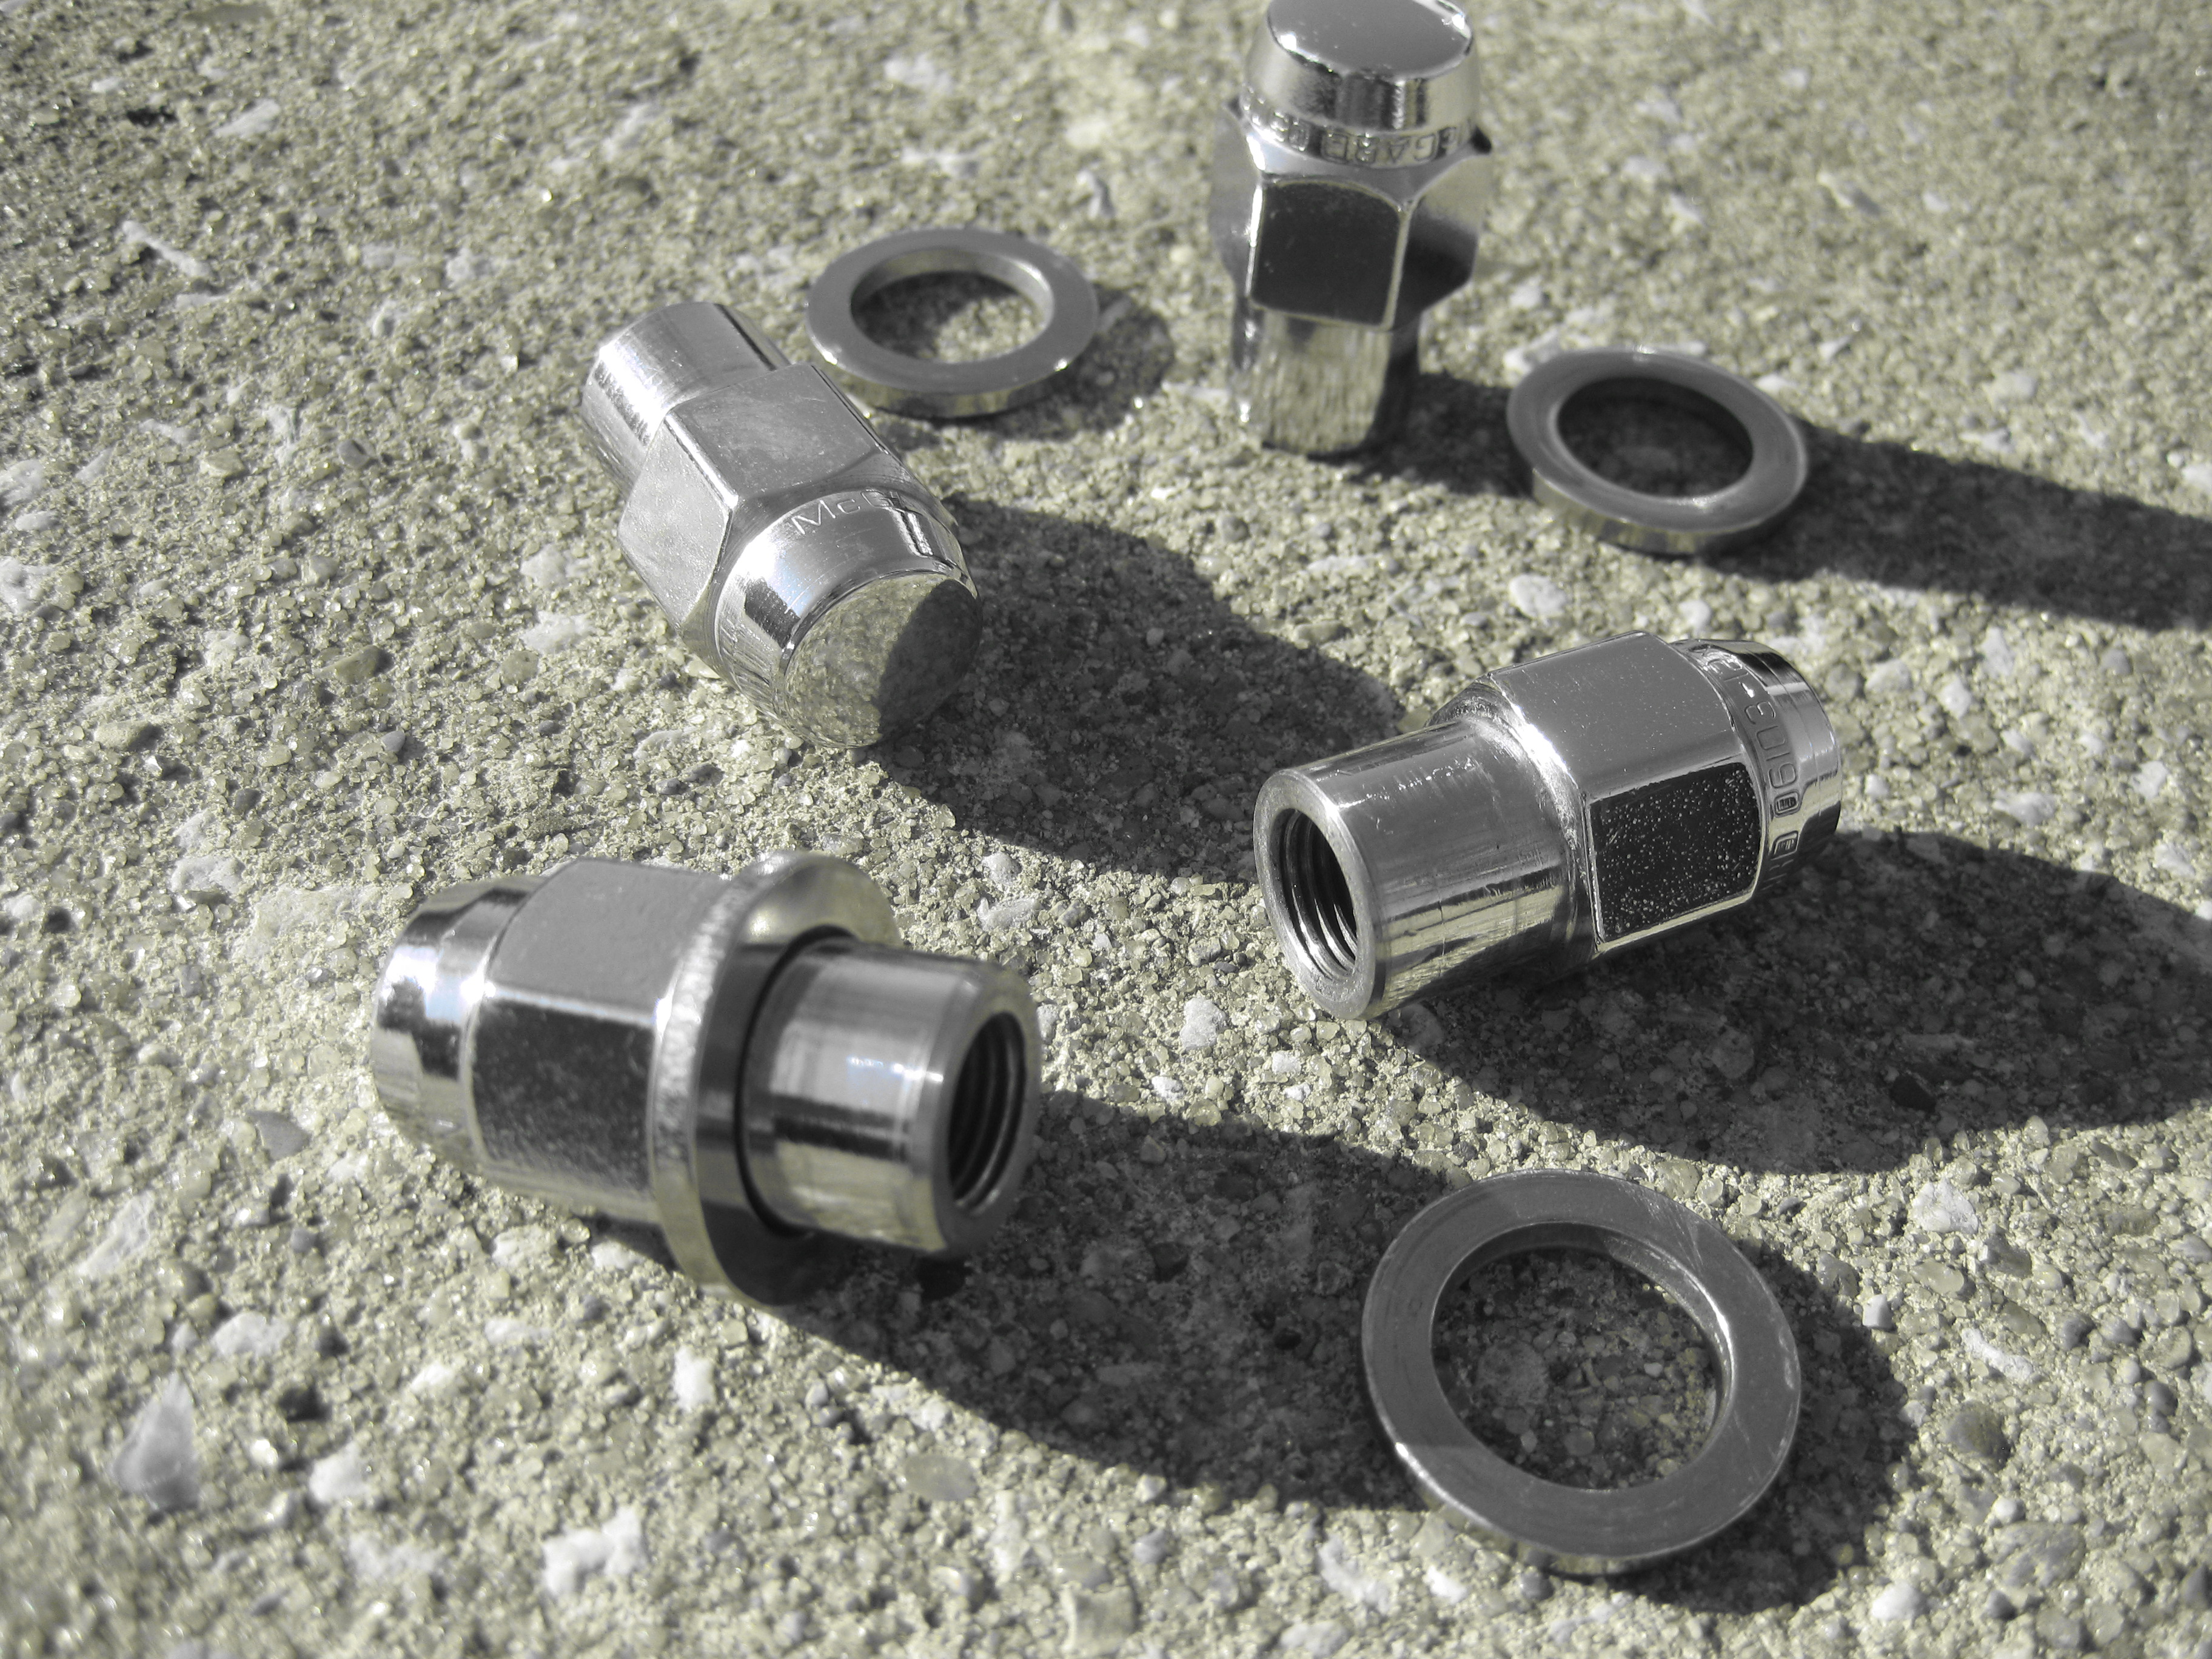
Yesterday actually---- Took advantage of the warmest temperatures for the date in over 100 years to change the rear brake drums on my 73 240Z. Let me tell you a story---- In the frenzy of activity made in preparation for ZCON 2015 in Memphis my paint shop took it upon themselves to paint my suspension. While this would normally be a good thing (and it was) there was just one small detail they overlooked in their zeal. They painted the brake drums black! NOOOooooooo----say it ain't soooo! With no time remaining to reverse this I went on to the show. The blackened brake drums had bugged me ever since but--- as is often the case with such things-- they were relegated to a "back burner" status in the scheme of life. Quite some time back,while musing through the pages of Motorsports (MSA) site, I saw a listing for new aluminum--not steel-- brake drums. Being a stickler for originality, I bookmarked in my mind that someday I should purchase a set of them as they are difficult--- if not near impossible--- to find new. I mentioned my discovery to my very good friend Jim Smirlies @S30Driver (or alternatively Jim2). He opined that "Yes", that would be a nice item to squirrel away for "future proofing". Time passes---- Jim comes to the Zup house frequently and we invited him to share Christmas Day with us for the usual camaraderie of gifting,dinner and football. Kagy (my significant other) handed me a large beautifully wrapped box with a tag which read "Holiday Cheers" that when opened read "To: Jim From: Jim2 "Merry Christmas". Needless to say I was completely blown away! It was a set of those brake drums from Jim. I was absolutely stunned! Such a thoughtful friend! Too much! Fast forward to the record breaking warmth of yesterday------------ Jim and I jacked up the rear of my 73 Z ("Zilver") and removed the offending black drums and installed the pristinely beautiful, raw aluminum silver gift set. While doing so, we gave a good cleaning to the "McGard" lugnuts that Jim2 had tasked Captain Obvious @Captain Obvious to specially modify to fit my American Racing Libre rims. I can report that after 2 years of exhaustive, daily commute, high speed road use and exposure to the harshest of Ozark climactic elements, the "McGard" lugnuts are as nice as day one, and that CO still remains as the provider "nonpareil" of lugnuts. Life is very good at the Zup garage and I am fortunate indeed. Thank you Jim2 and Captain Obvious! You guys are the best! The obligatory photos of these extraordinary acts of friendship and kindness follow: Jim D. "Zup"
 I will gladly provide the sample if it will be returned un-damaged. You could have it in hand on Monday if this proceeds well. I'm in for a set of cad plated. If it is required for the "test fit", I could send the entire NOS ductwork assembly I have as the "mule" provided as above.
Thanks to you Kats!! You Sir, are the best! You have filled in all the missing information with your perfect documentation. Thank you, thank you, thank you! Jim D. "Zup"
+1 on spring steel with clear zinc if possible---if not, phosphorous (dark brown to black) My originals did not appear to be plated at all---just spring steel but I treated them with Ospho to try to prevent them from corroding further. That turned them the color you see.
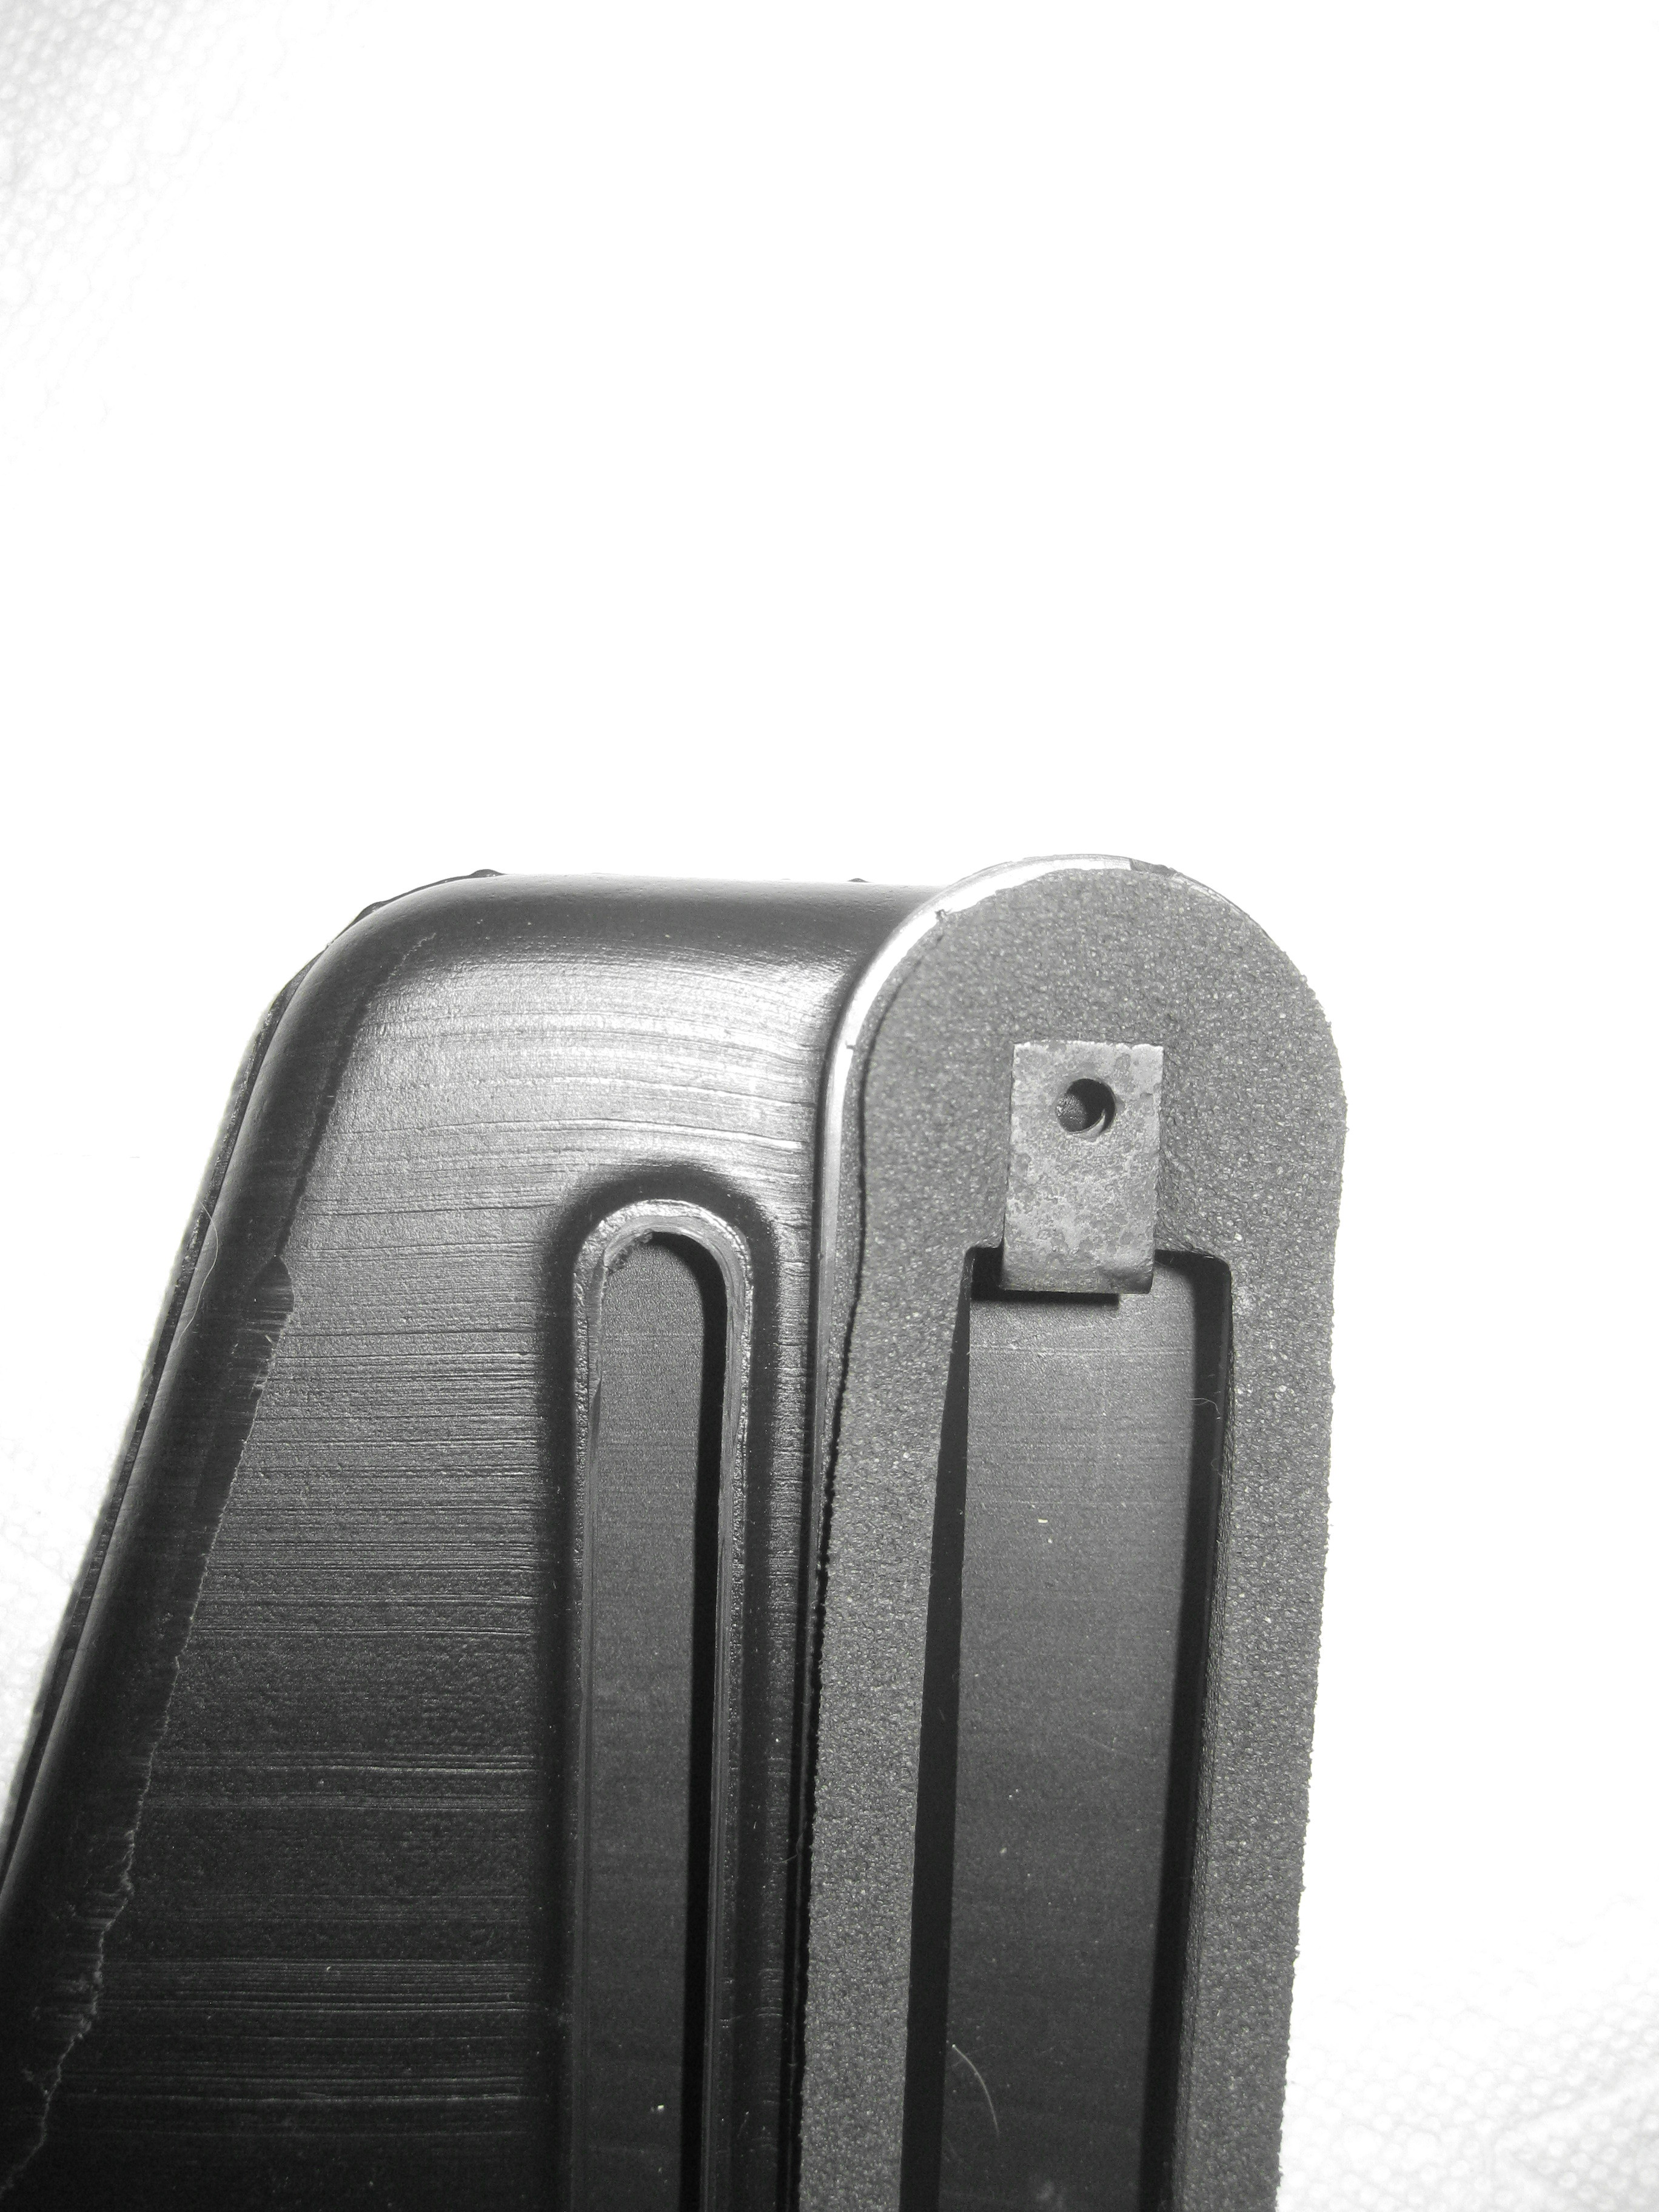
Hi Kats!! Thanks for joining in. Your thoughts are appreciated. You know these cars so well and your photos are the best! I simply must get a decent camera someday soon---the clarity and depth of your photos are most real. Was the foam attached to your ductwork when you received it in the package or did you apply it? The boxes say "Packing Duct" on them and have the part number 90827-E4100. The clips shown in your photos are identical to those I found in the bag of my NOS duct assembly but they were loose---not attached. I may have to "eat some crow" here about these clips---- I am confident that the early clips spanned the assembly parts and clipped over the top outside of the hatch opening surface to hold it all securely---as the close-up photo Jim Arnett @jfa.series1 provided of the clip on the car hatch vent opening. Now I am thinking that at some point Nissan redesigned the method of attachment such that the entire assembly is inside the hatch and the only fastening method was the pins on the finisher grill going through the holes in the hatch to engage the clip---which doesn't seem as secure to me--- but could be adequate as long as the pins are intact and not compromised. This method would not use a barrel clip on the pins as the speed nut clip has a "pin gripping" feature to it already. @katsDo you have any thoughts about the differences between these clips and the method of attachment? Jim D.
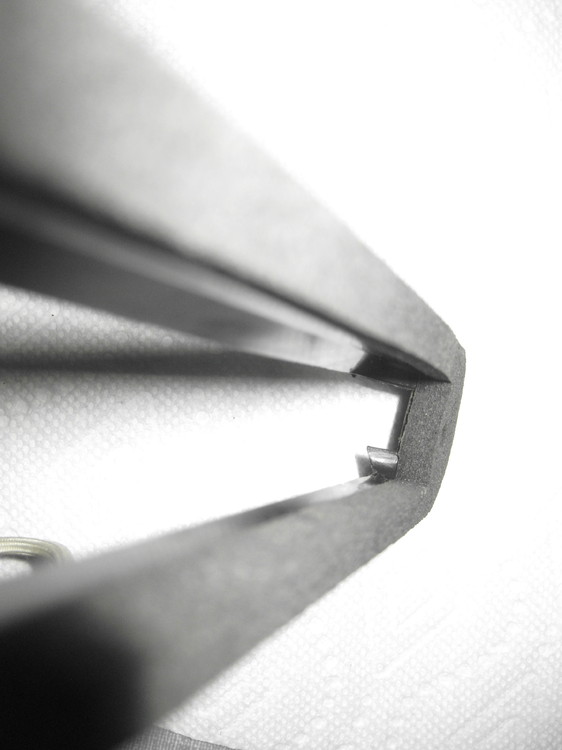
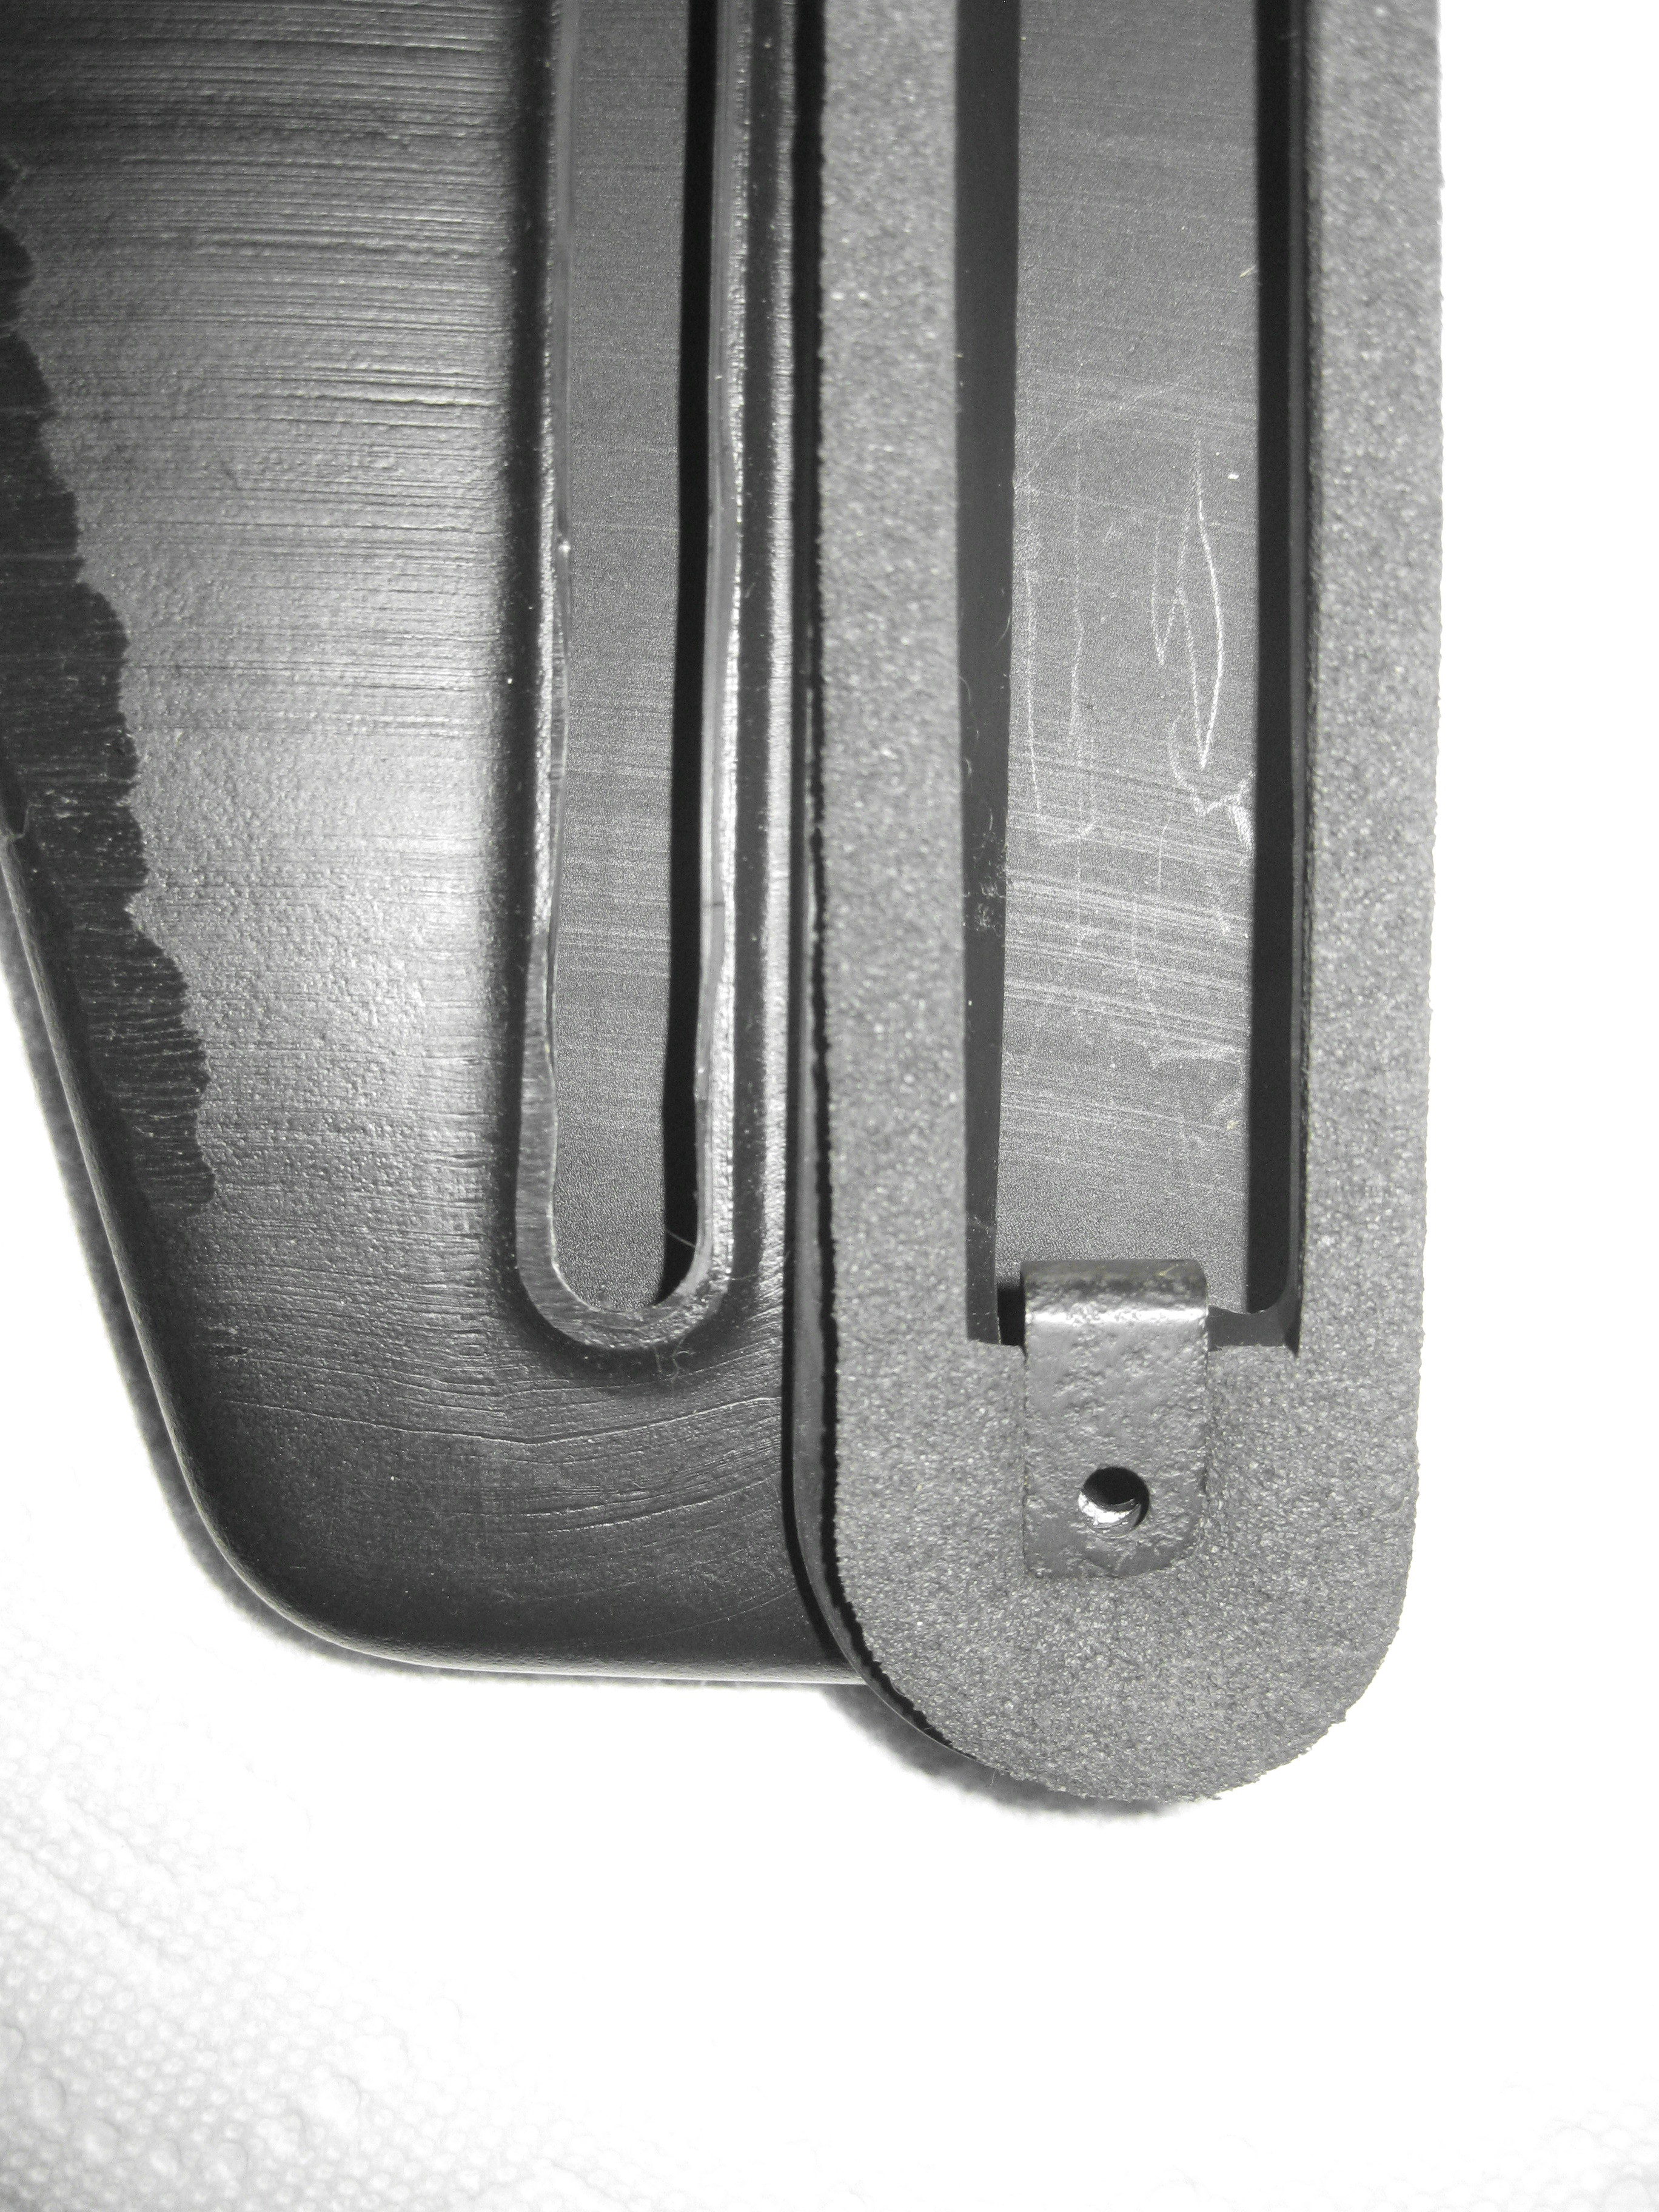
I am relatively certain that the finisher grills were made of plastic from the beginning. I have never seen or heard of an original metal version, unlike the other emblems that were made originally in metal, then later in plastic . The ductwork assembly is mounted to the hatch without the finisher grill installed. Put the barrel clip on the post and insert it into the mounted assembly by pushing downward. The assembly clip upper hole is sized to accept the diameter of the barrel clip. The lower hole is oversized to prevent bottoming out of the post.
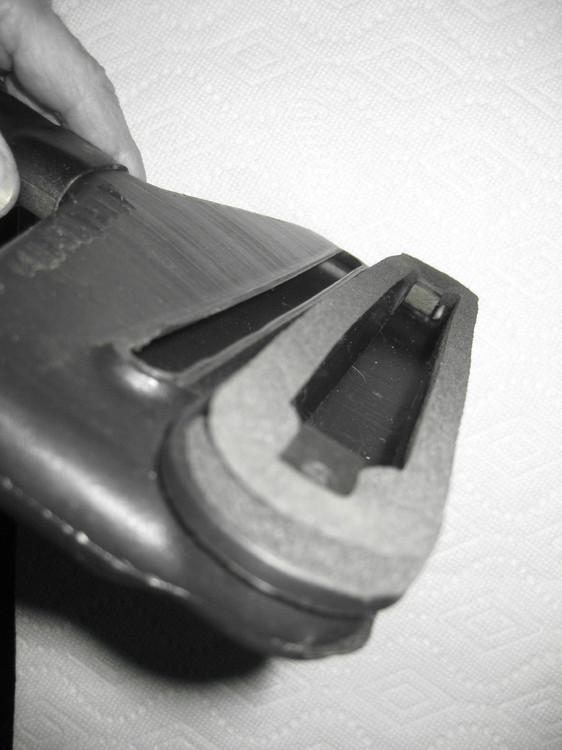
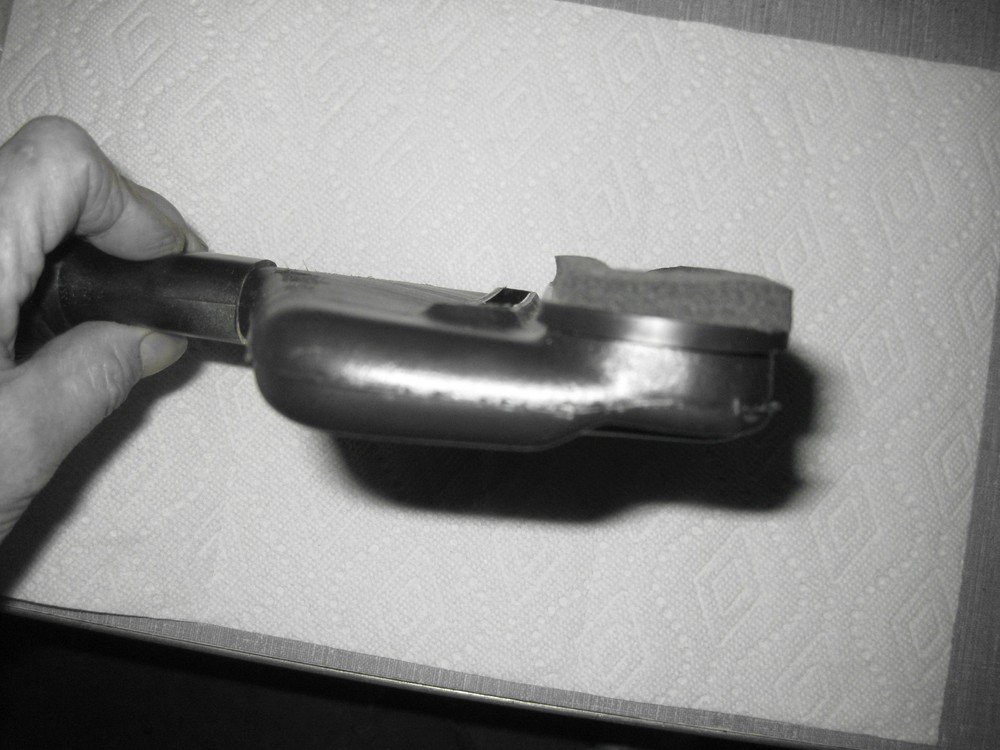
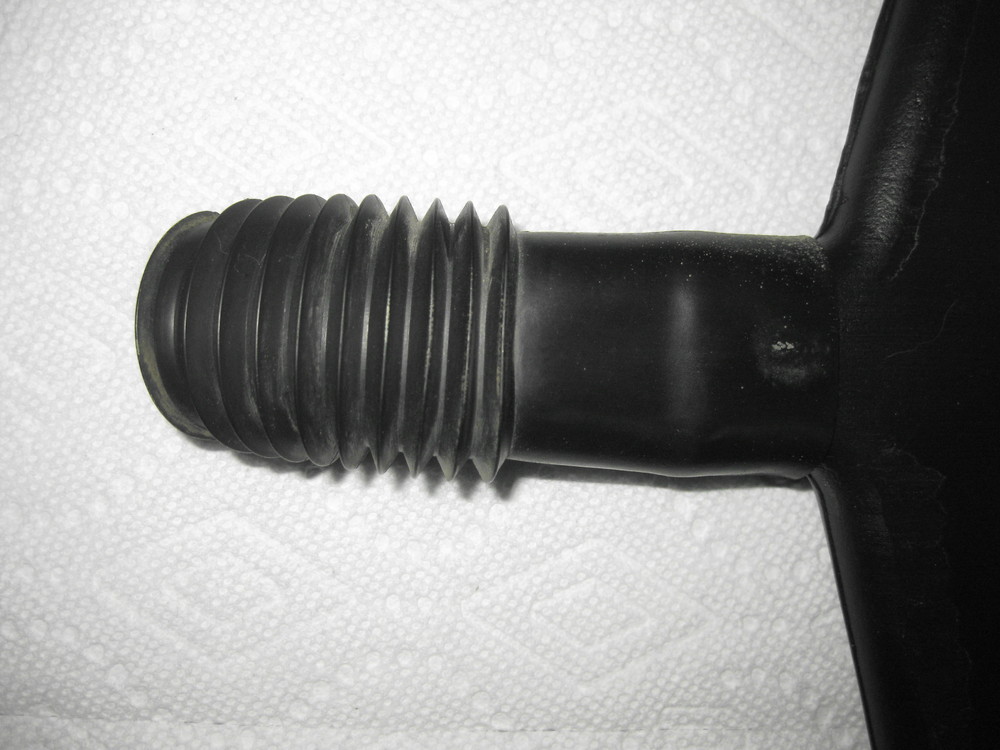
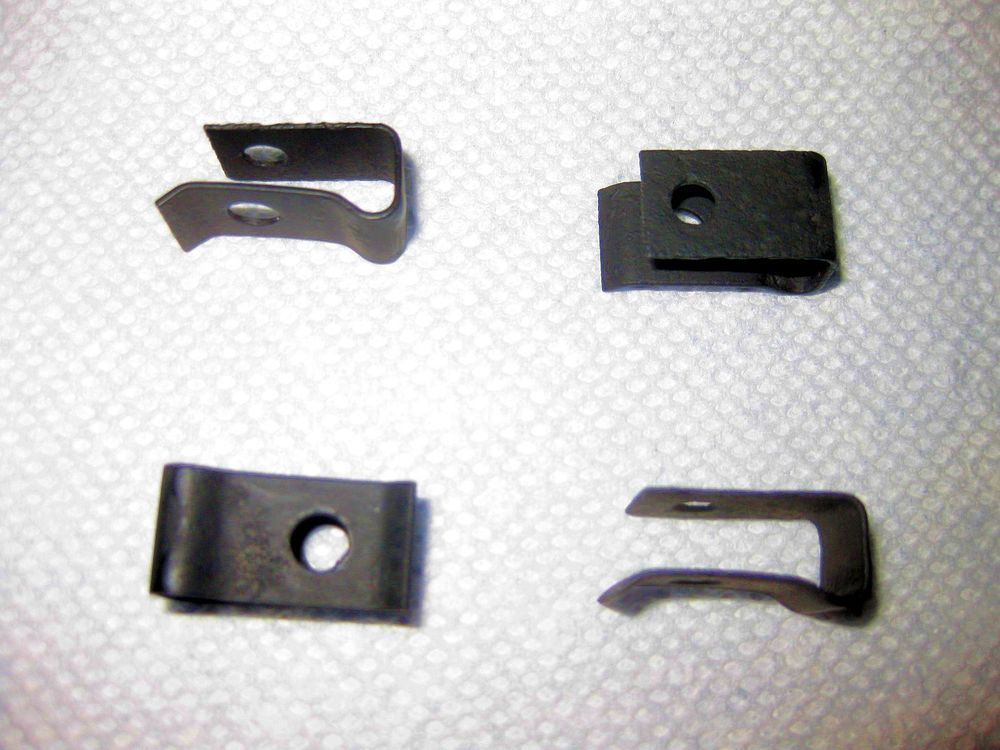
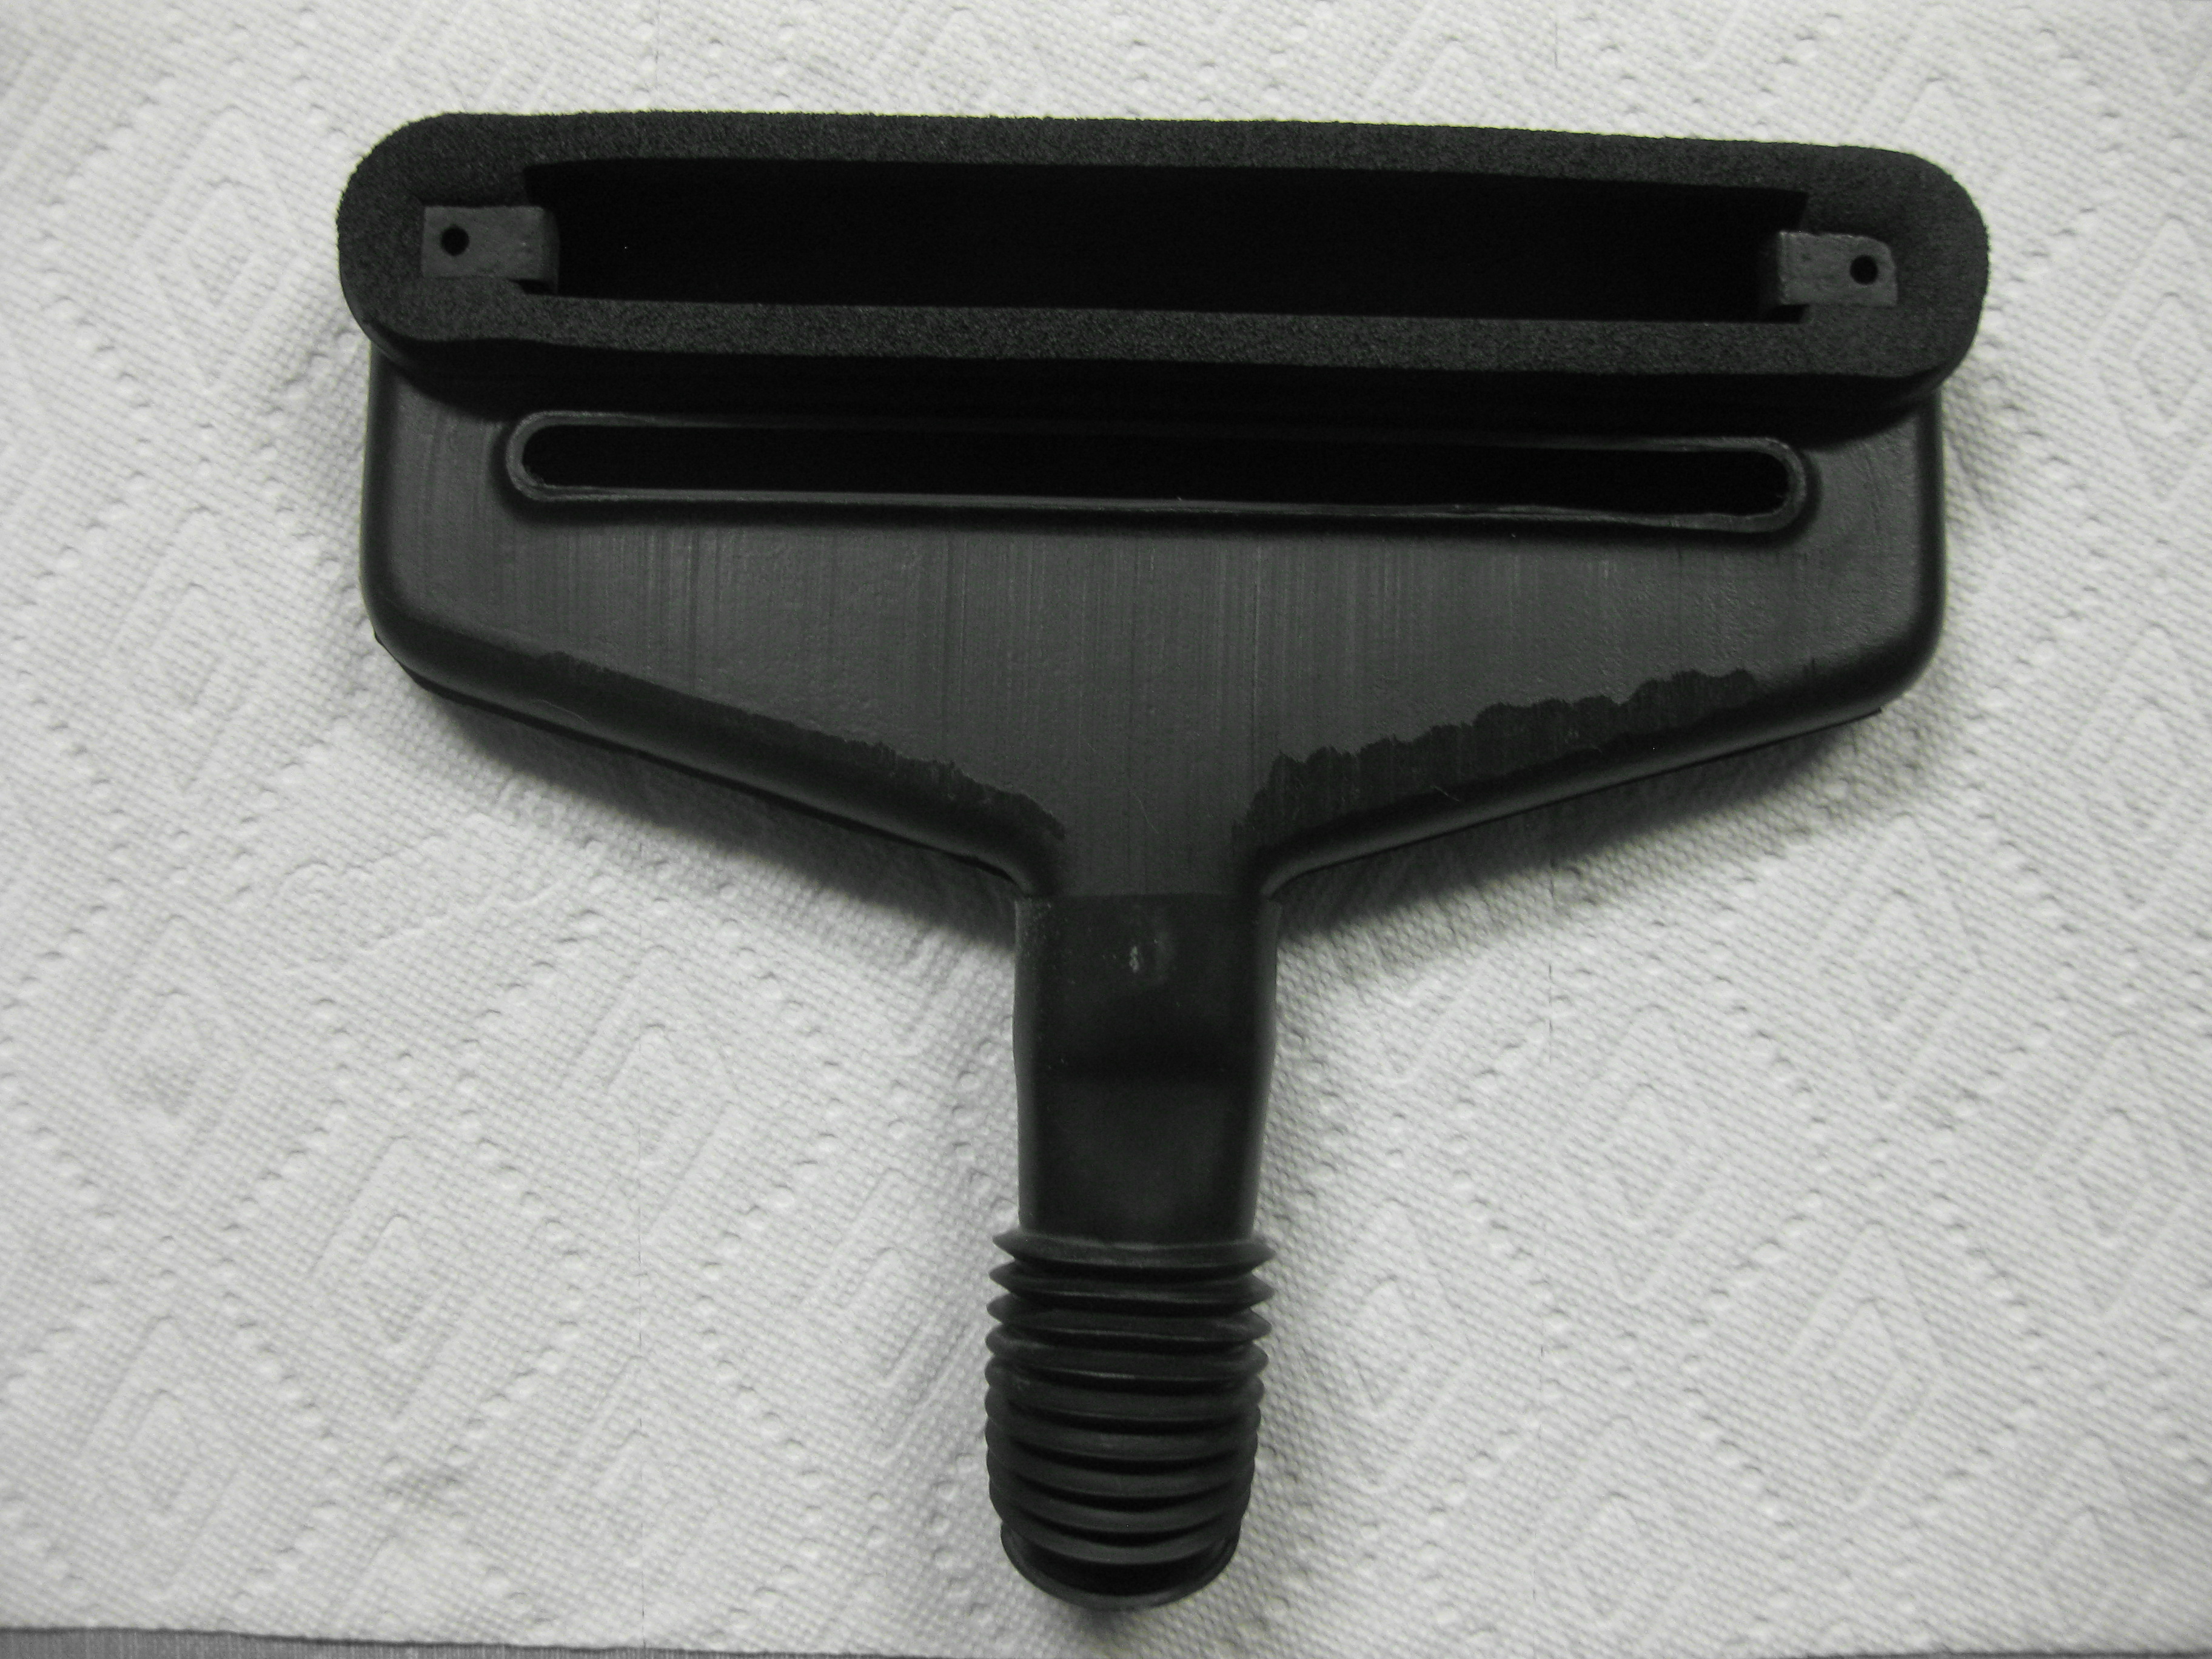
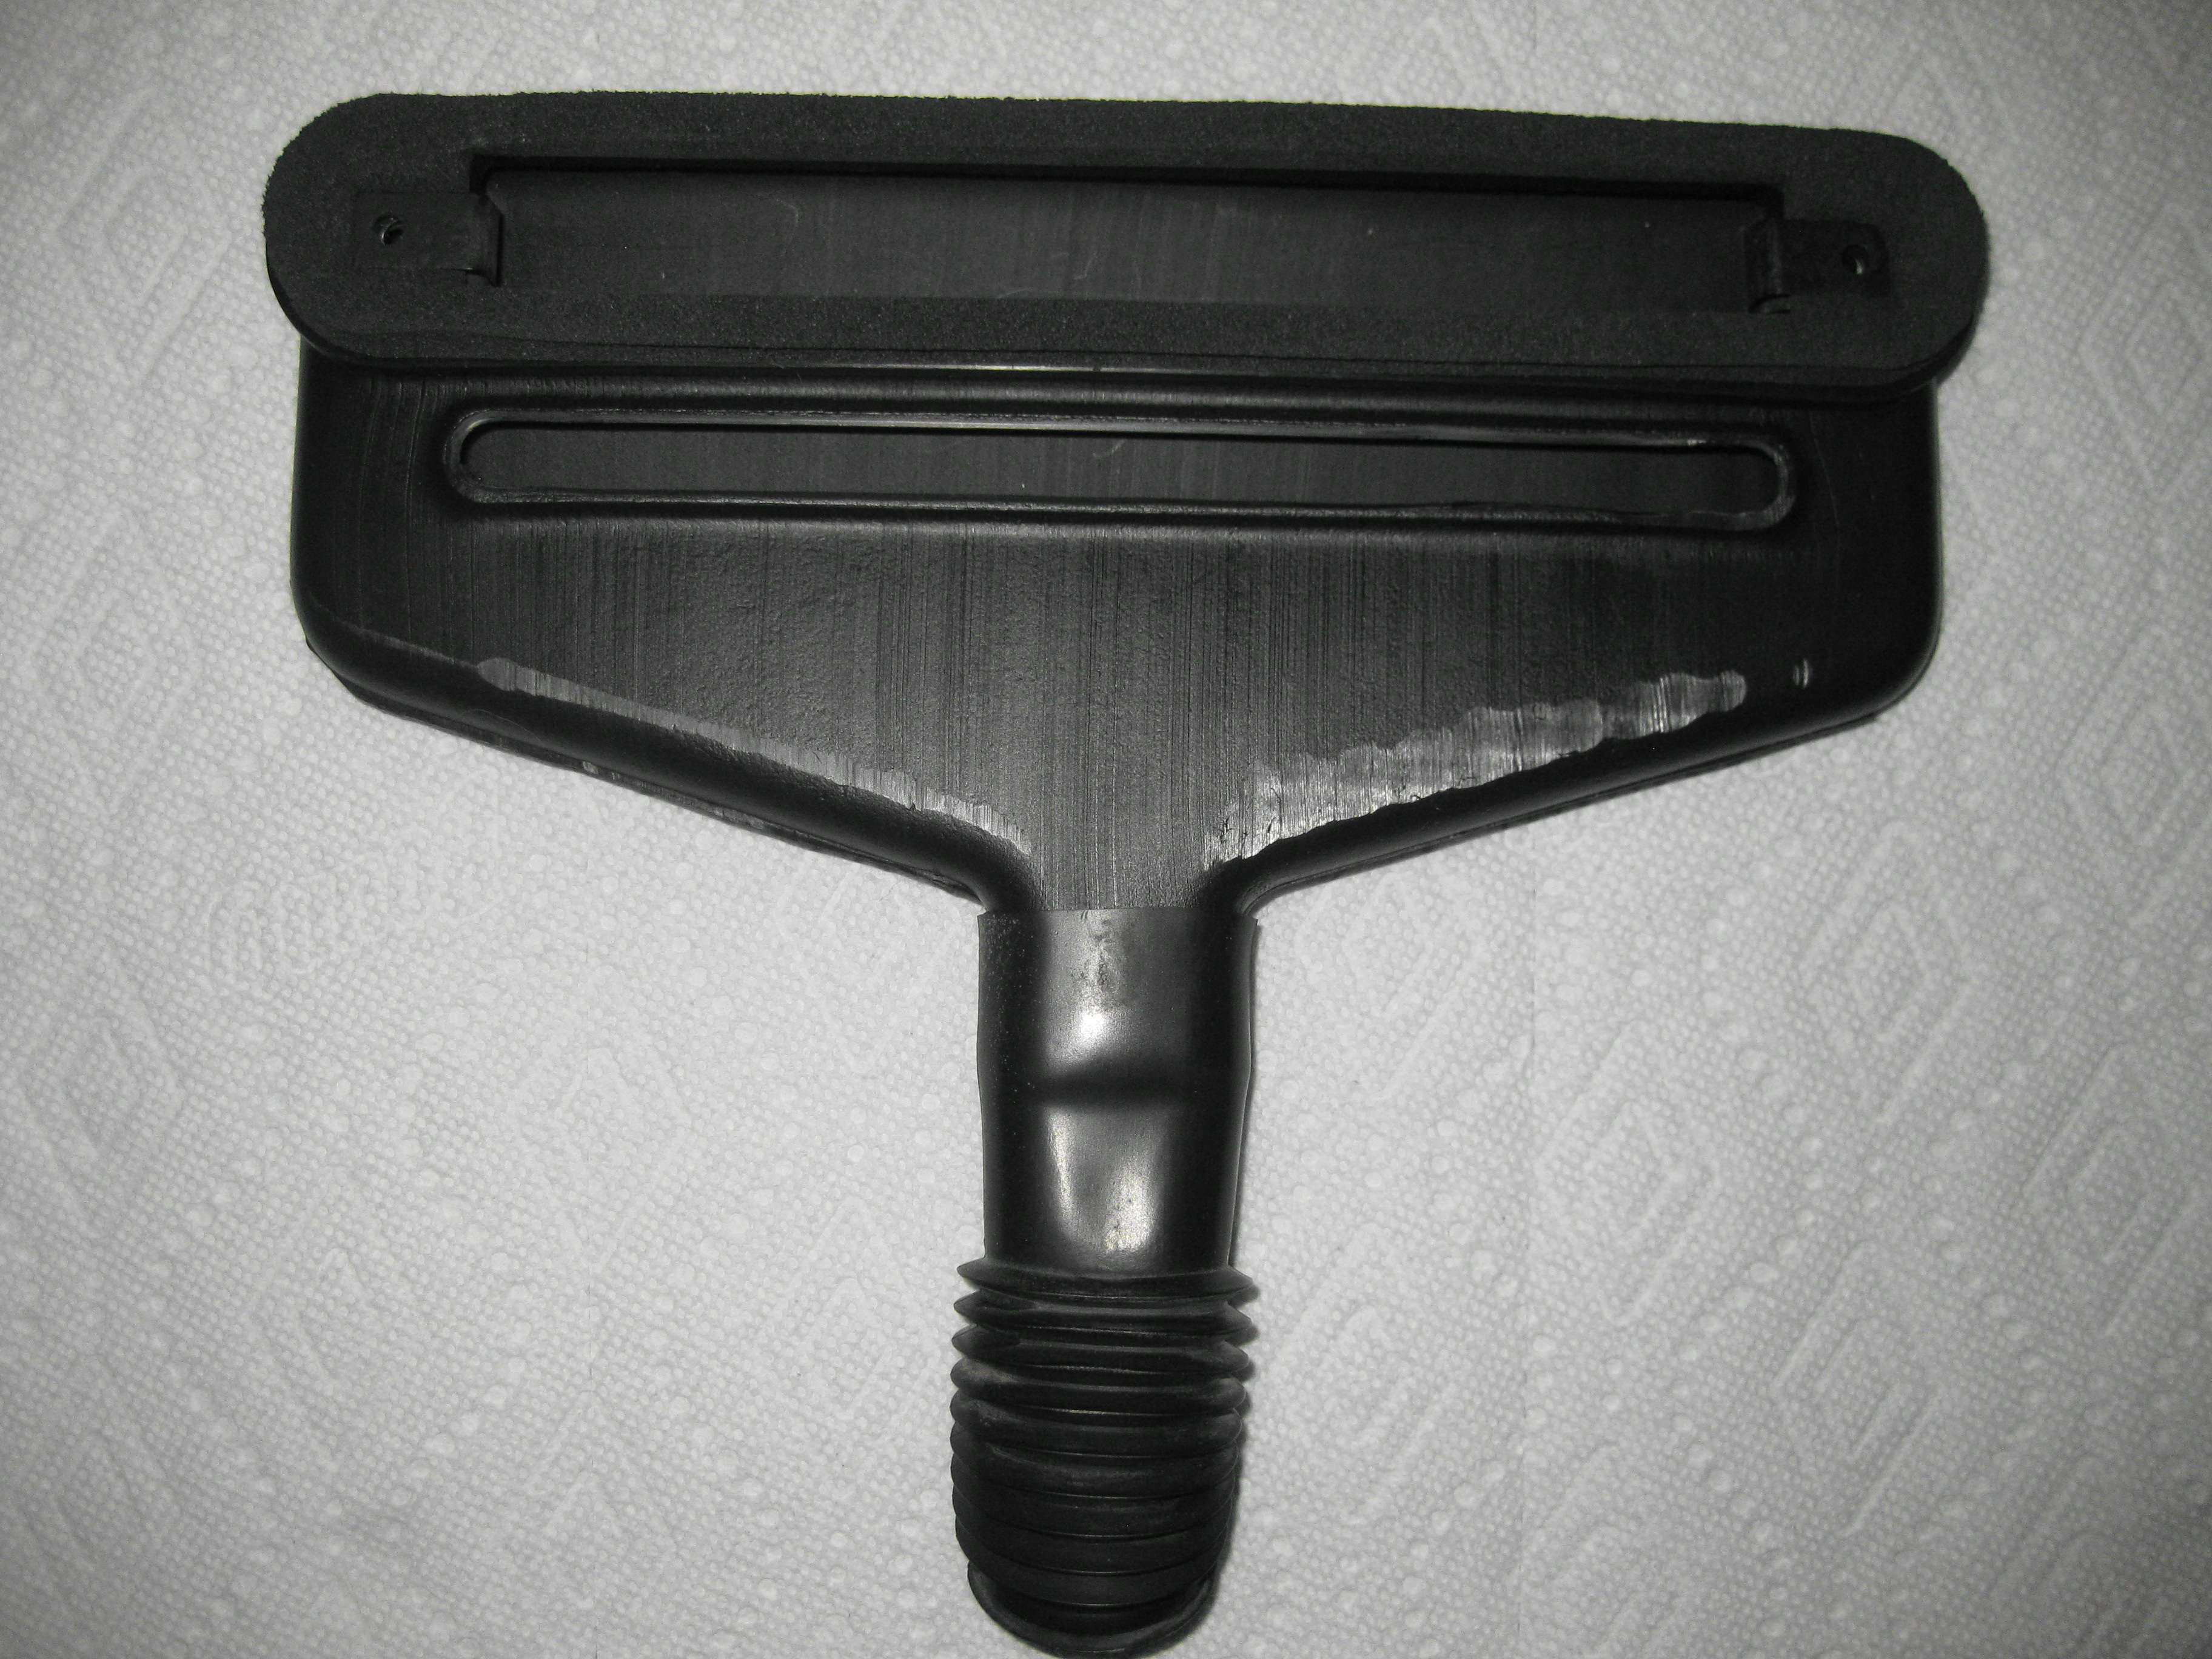
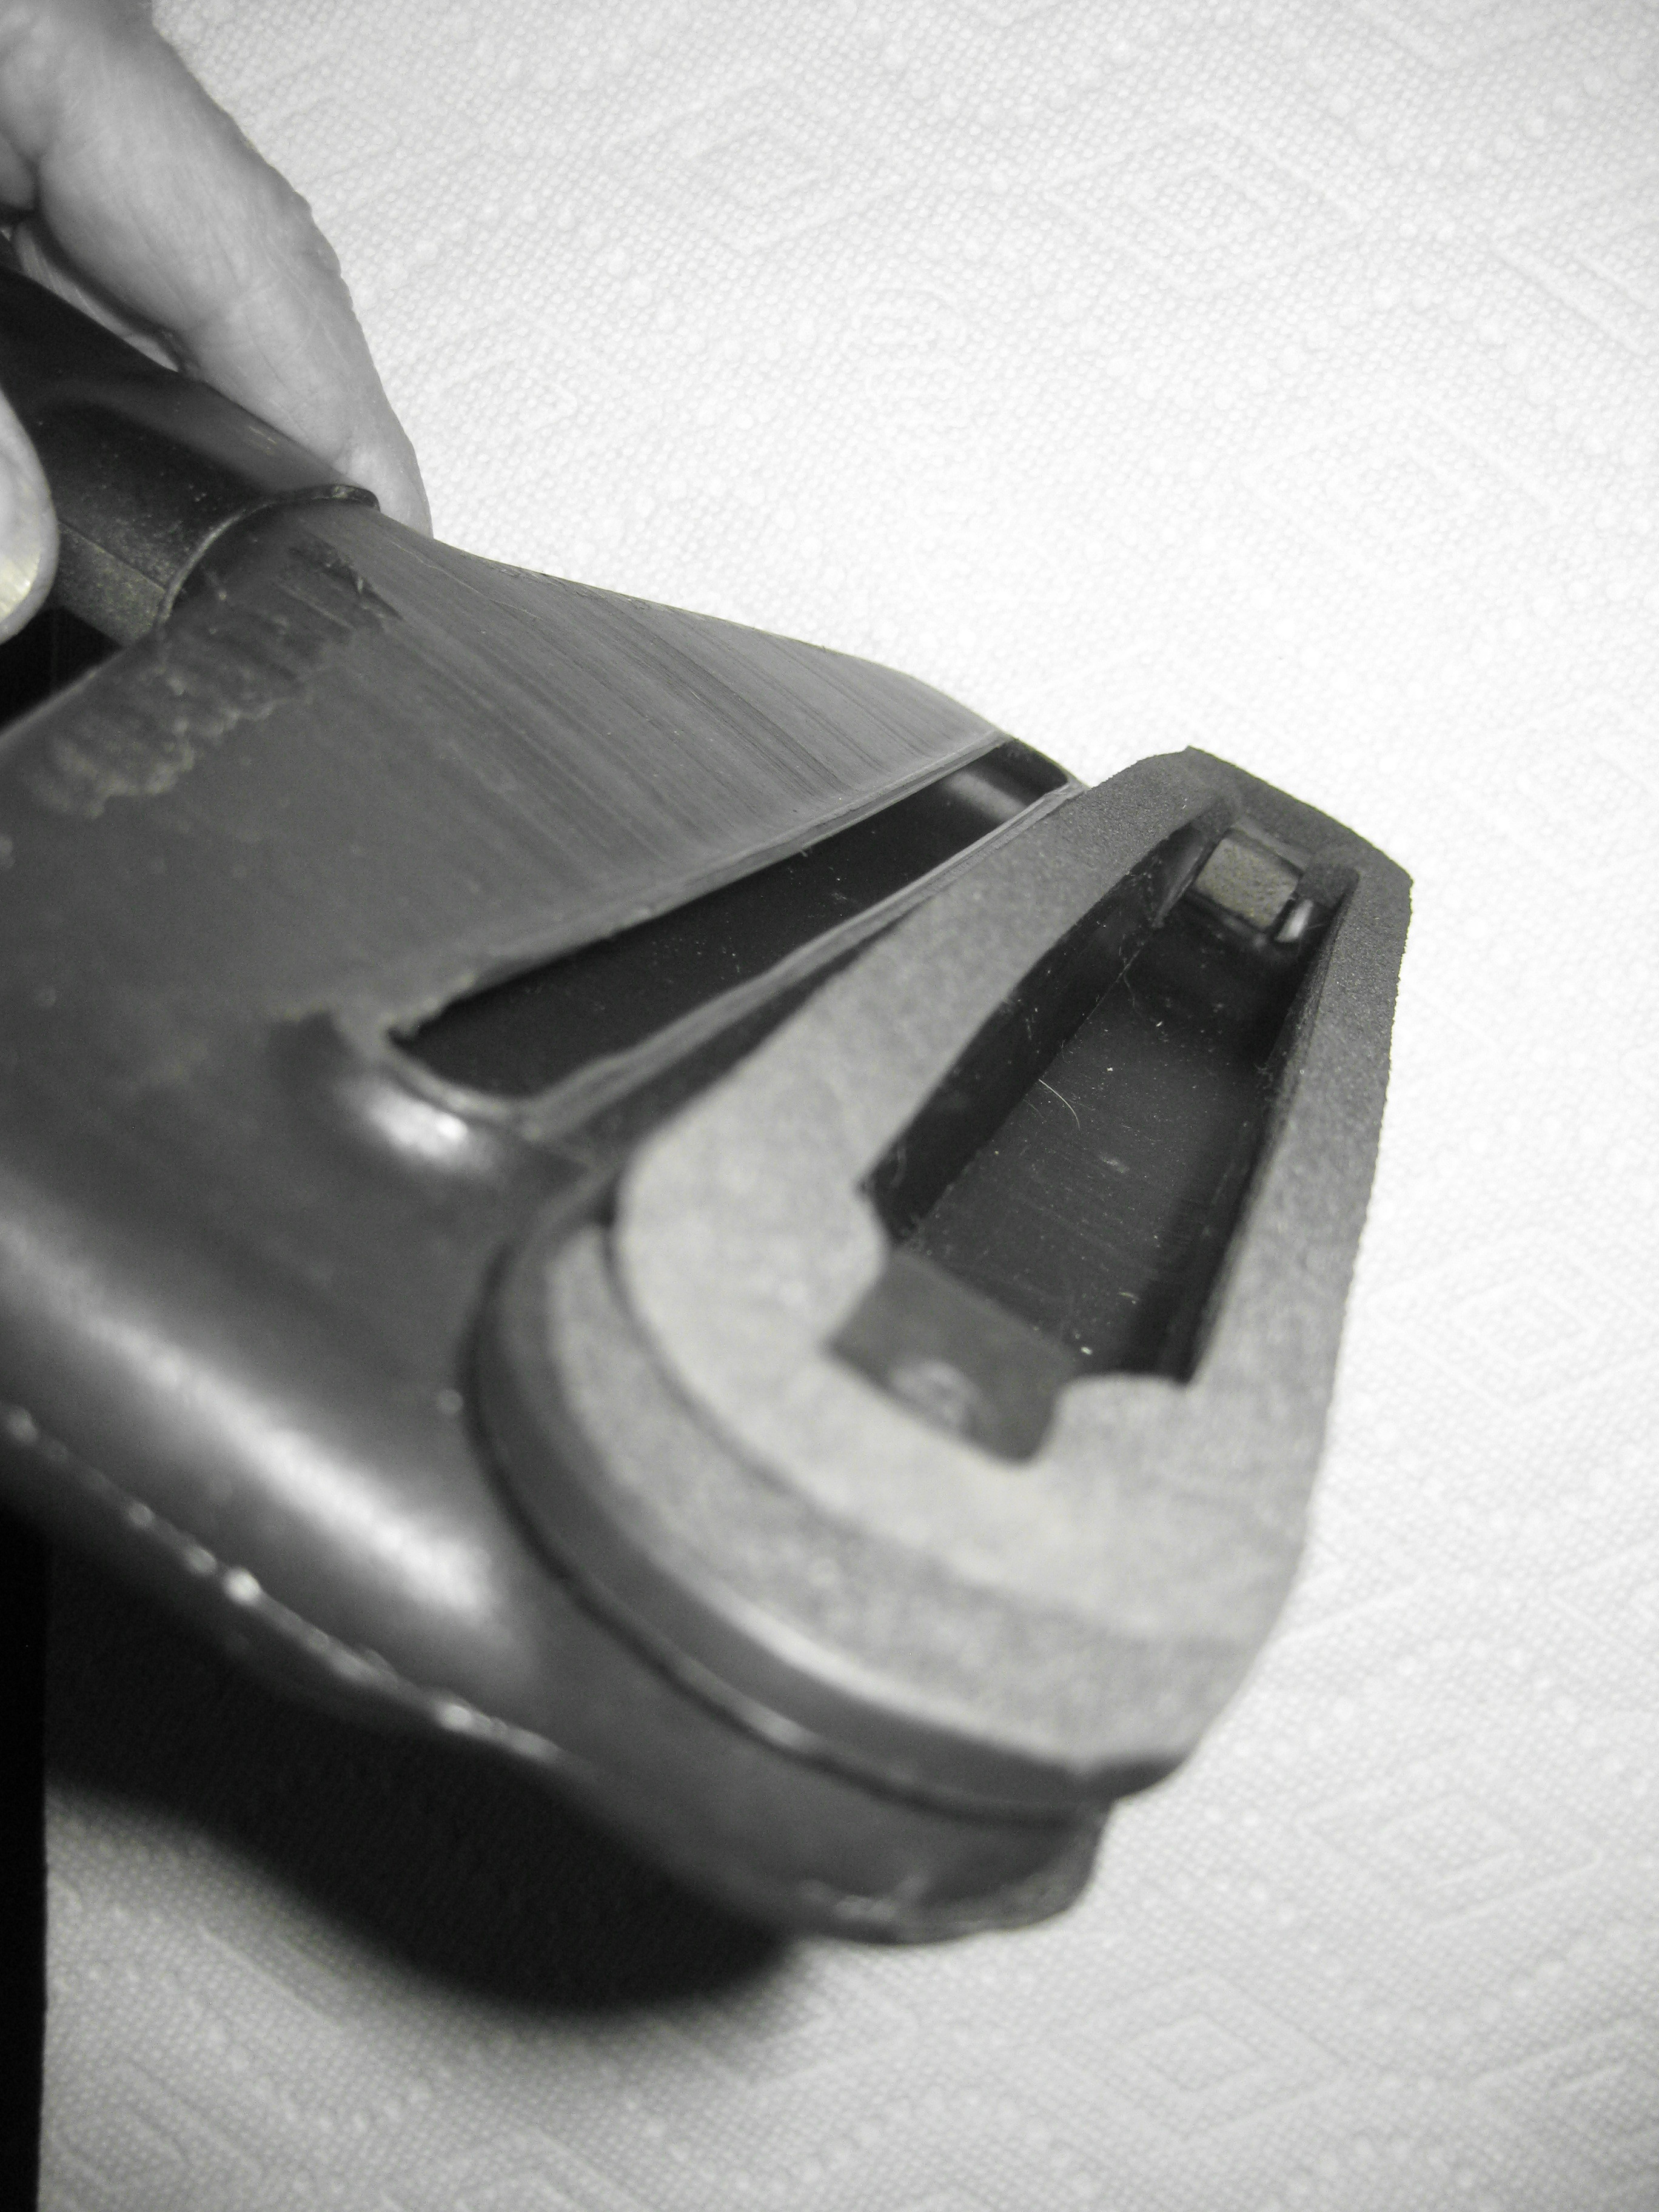
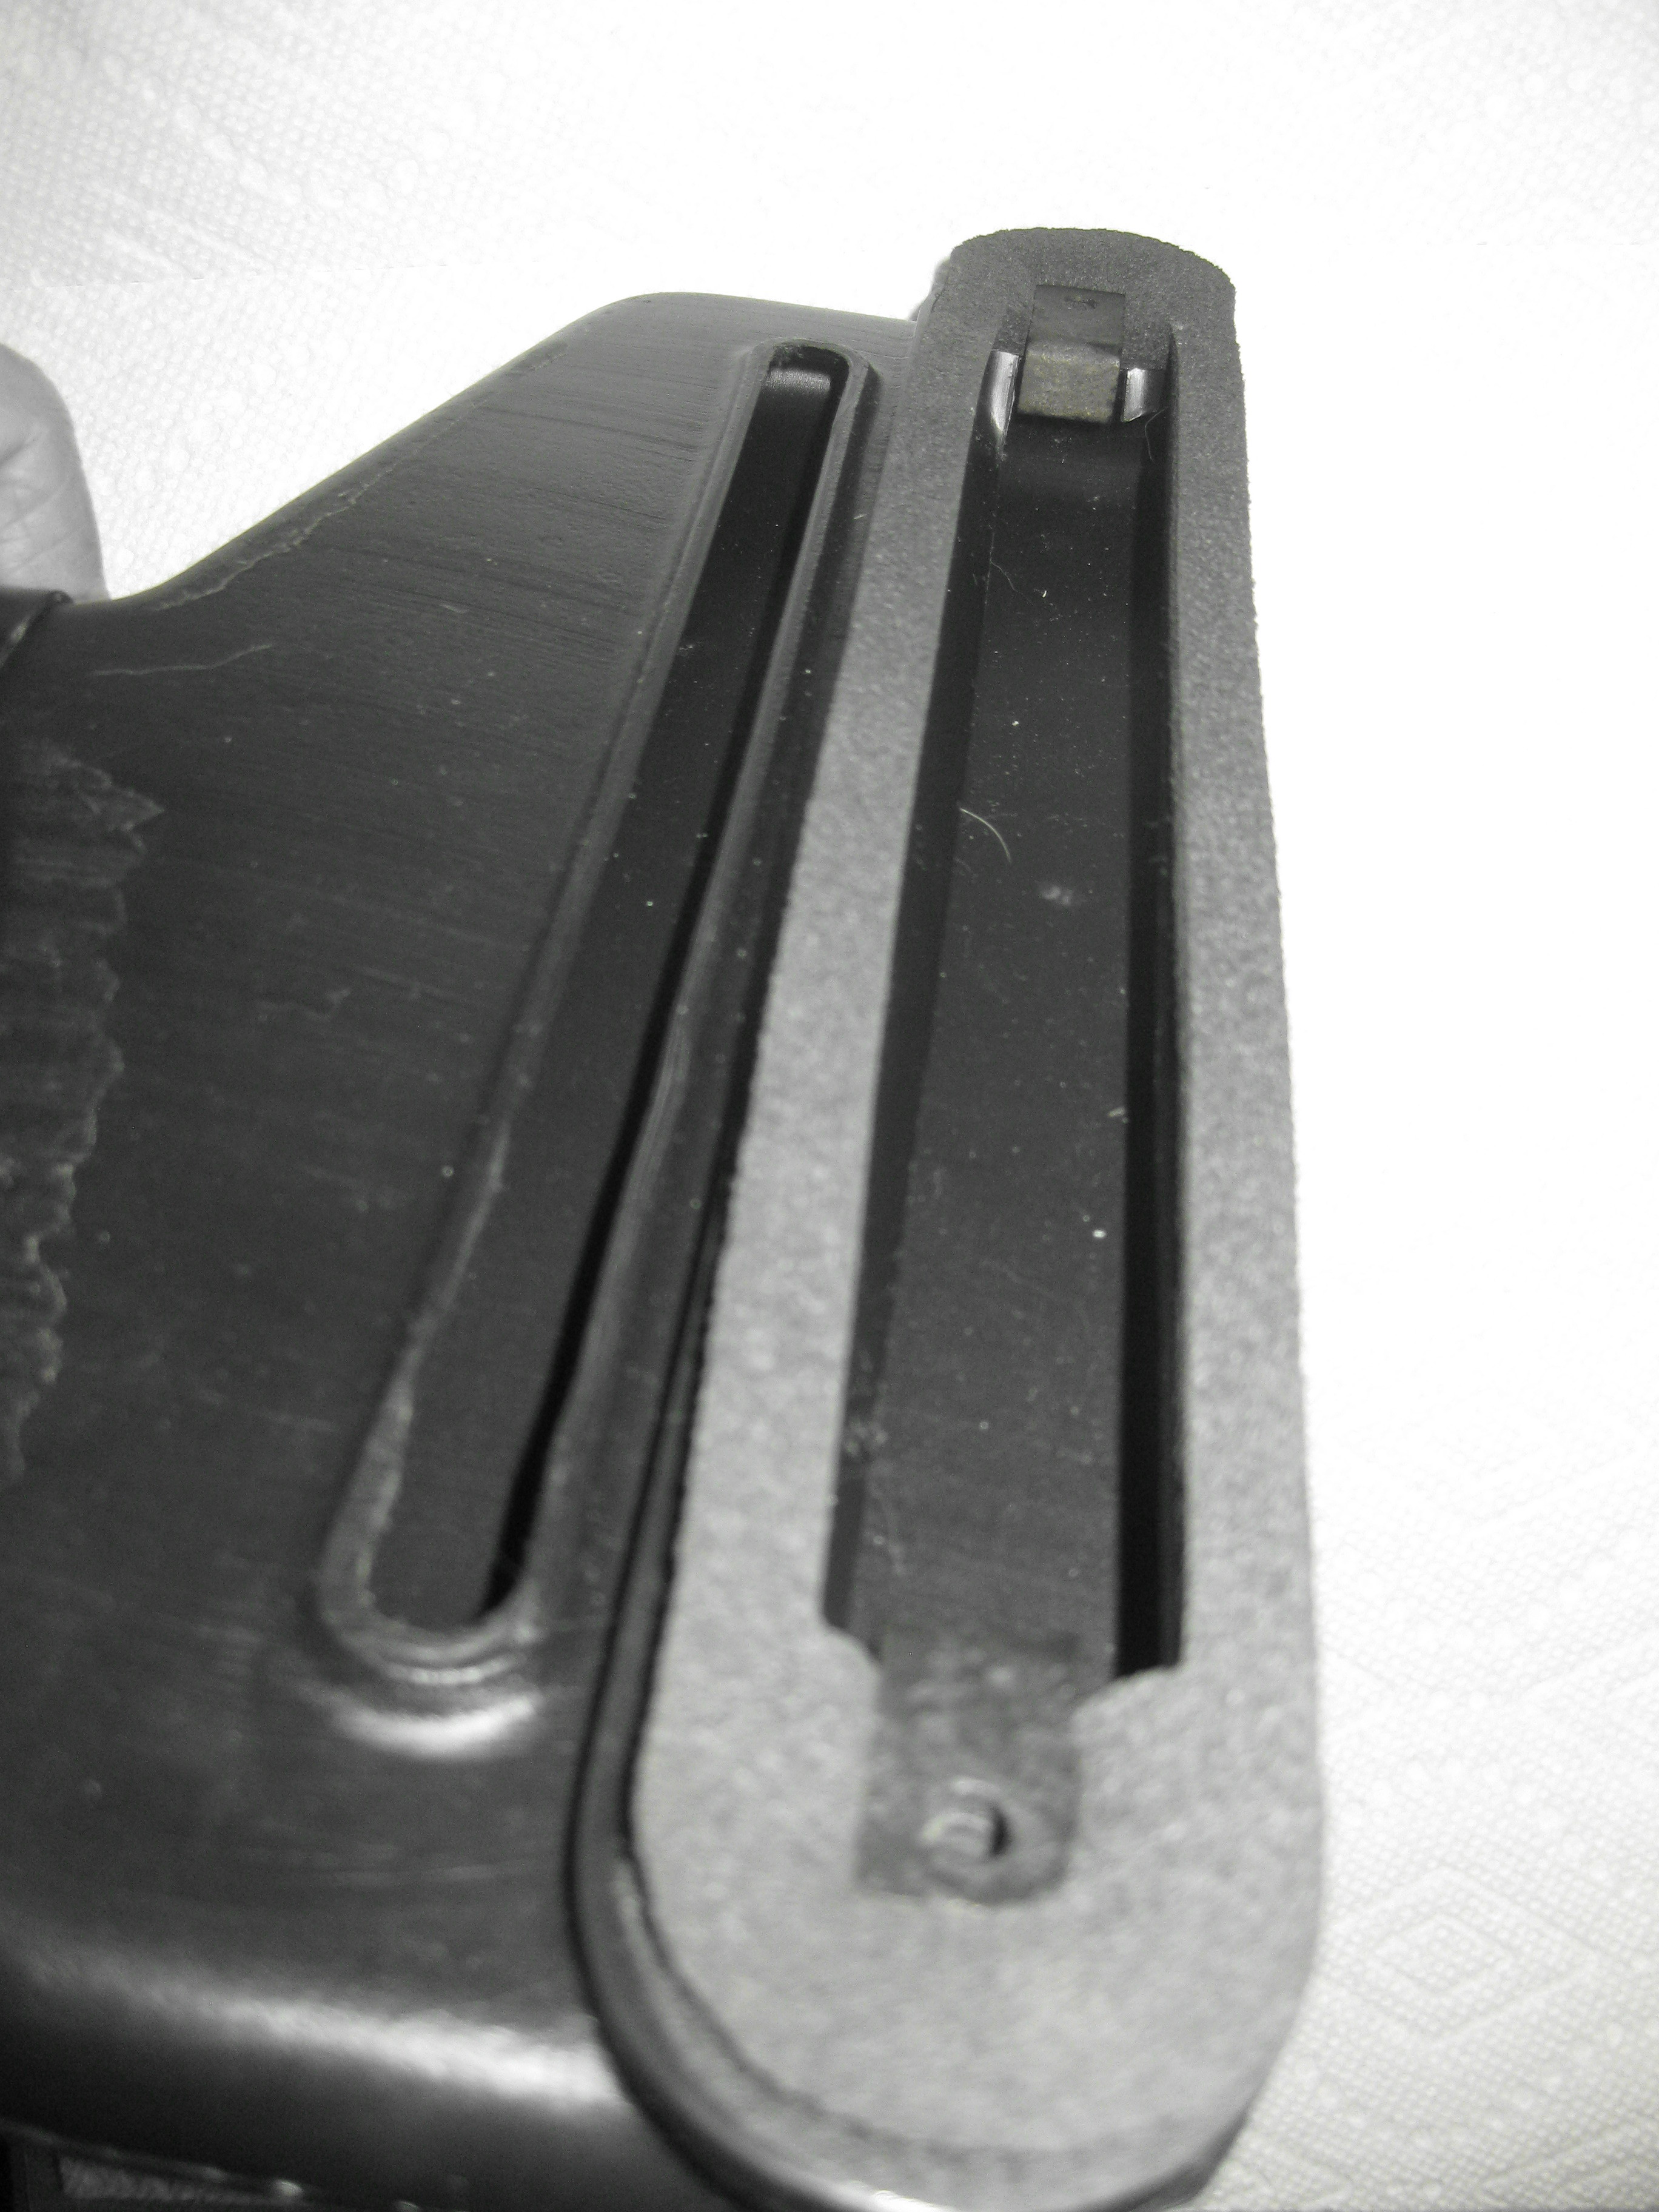
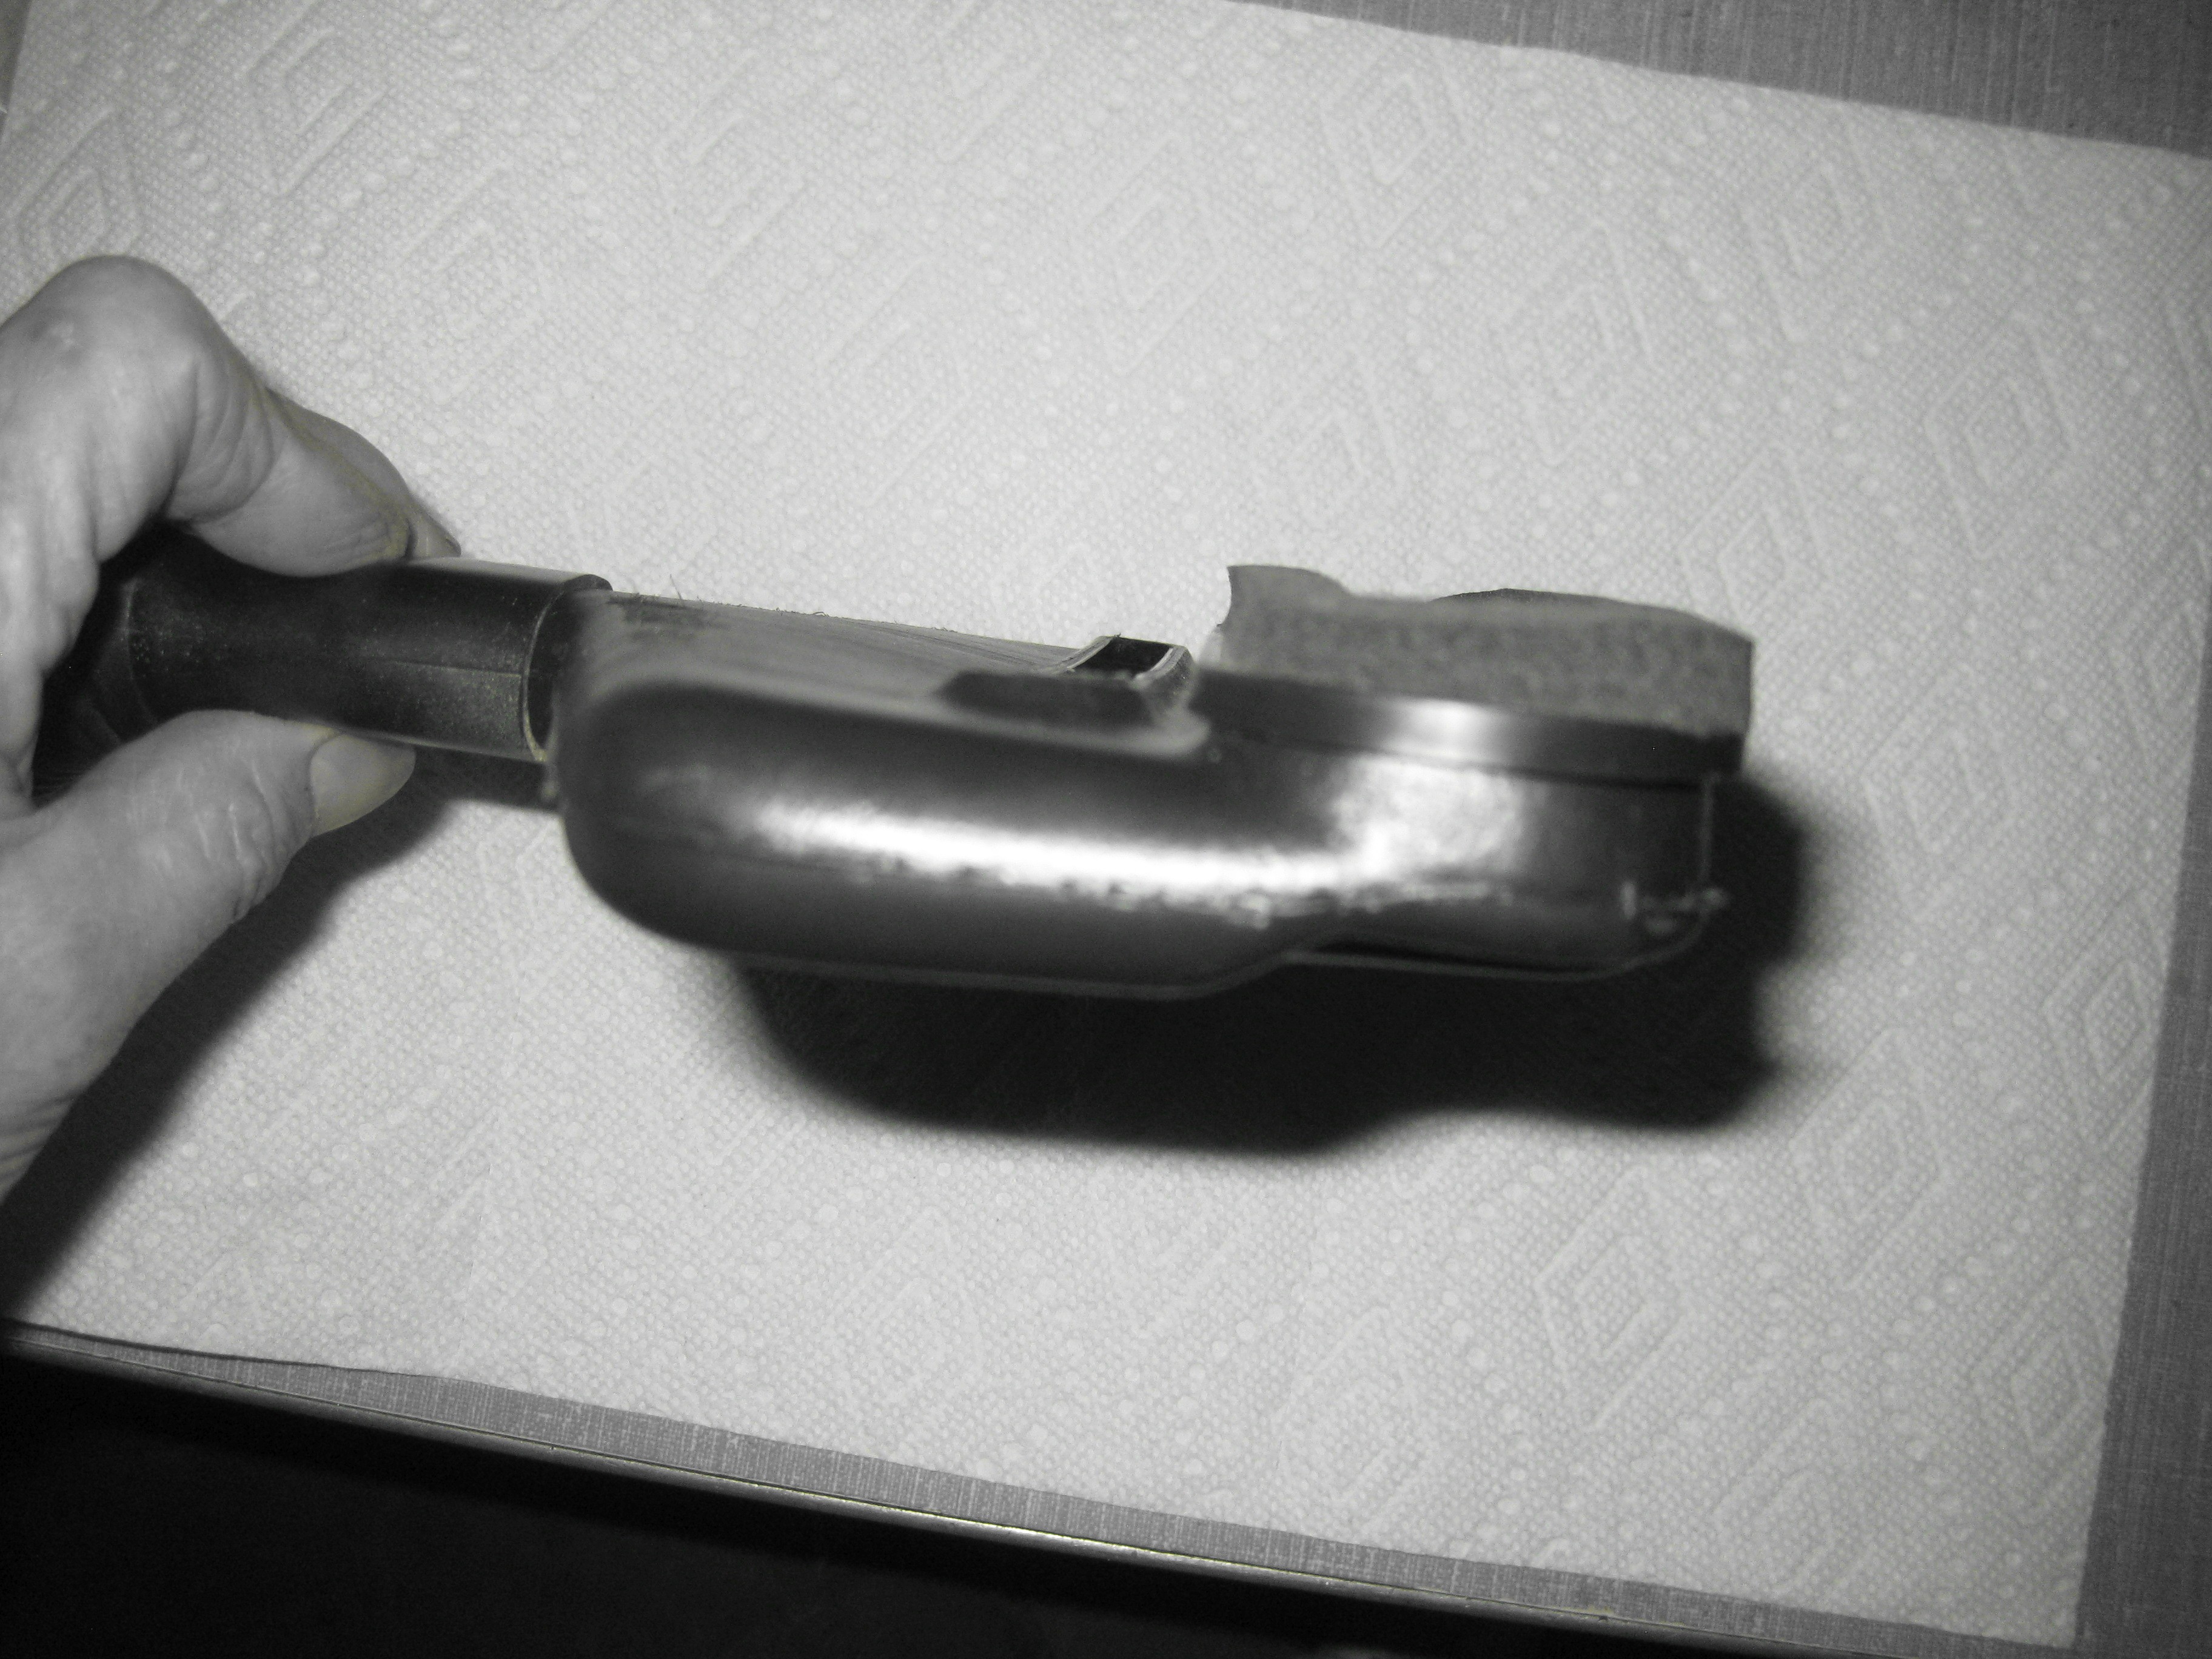
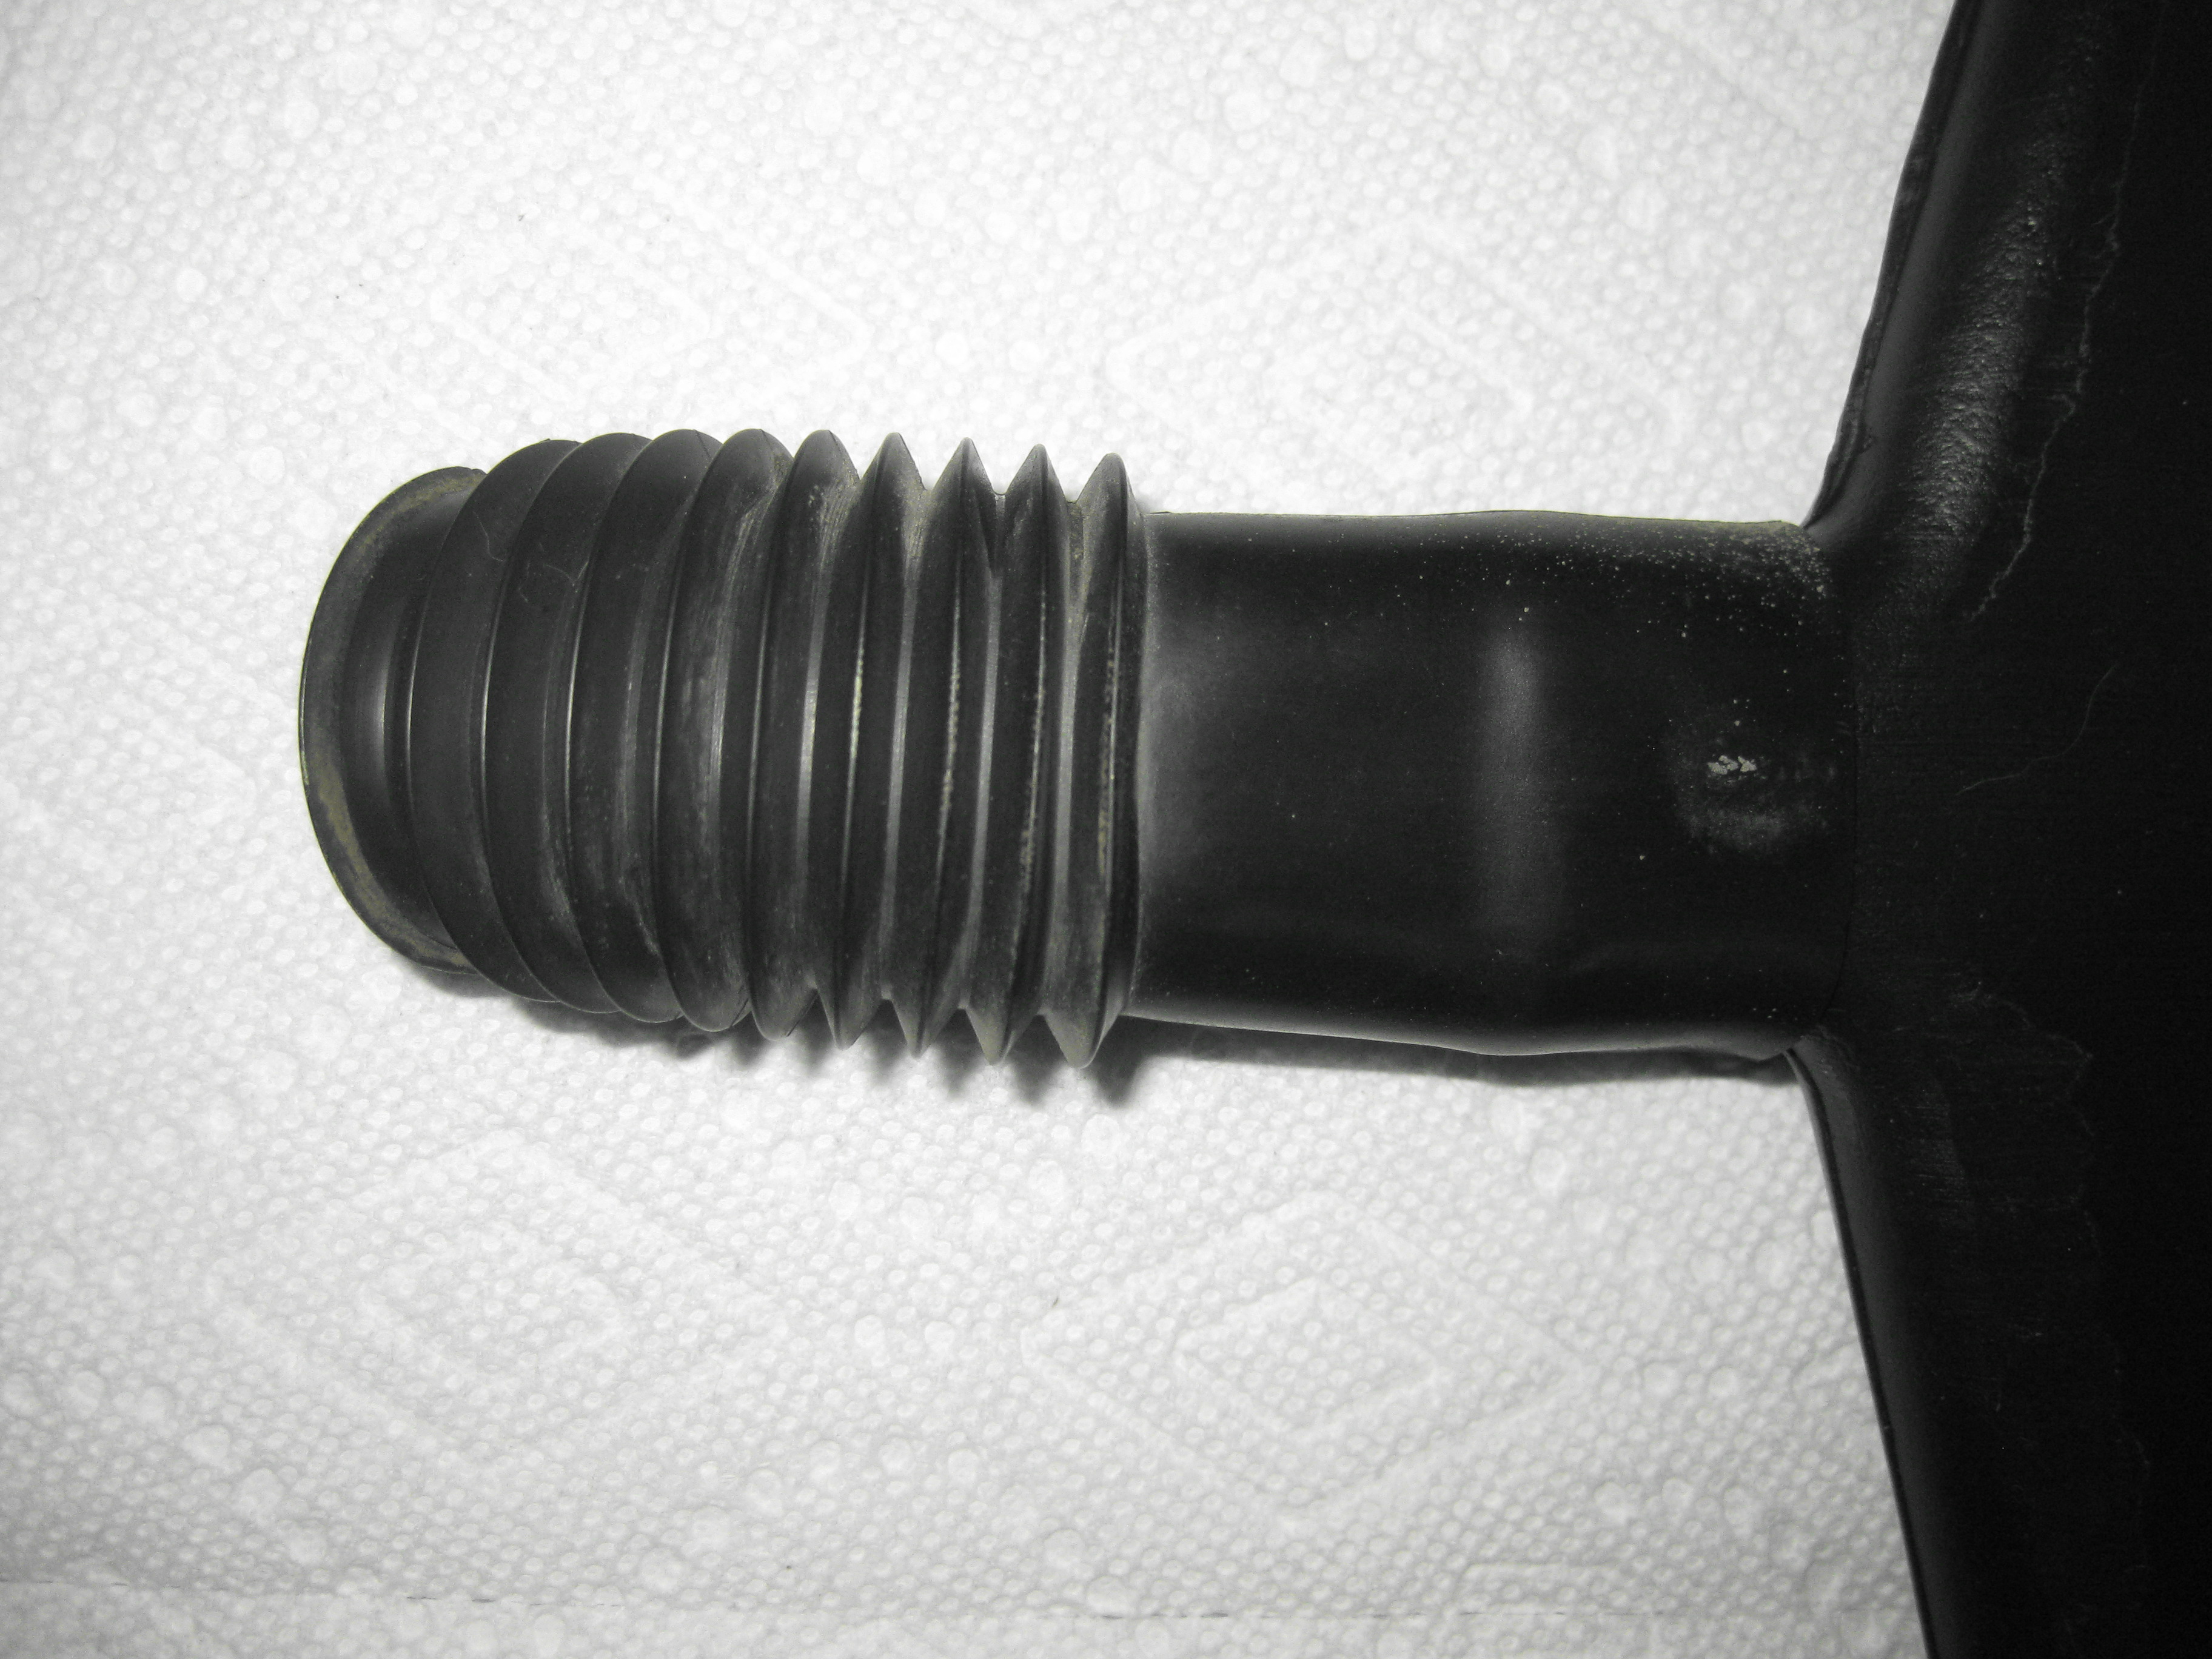
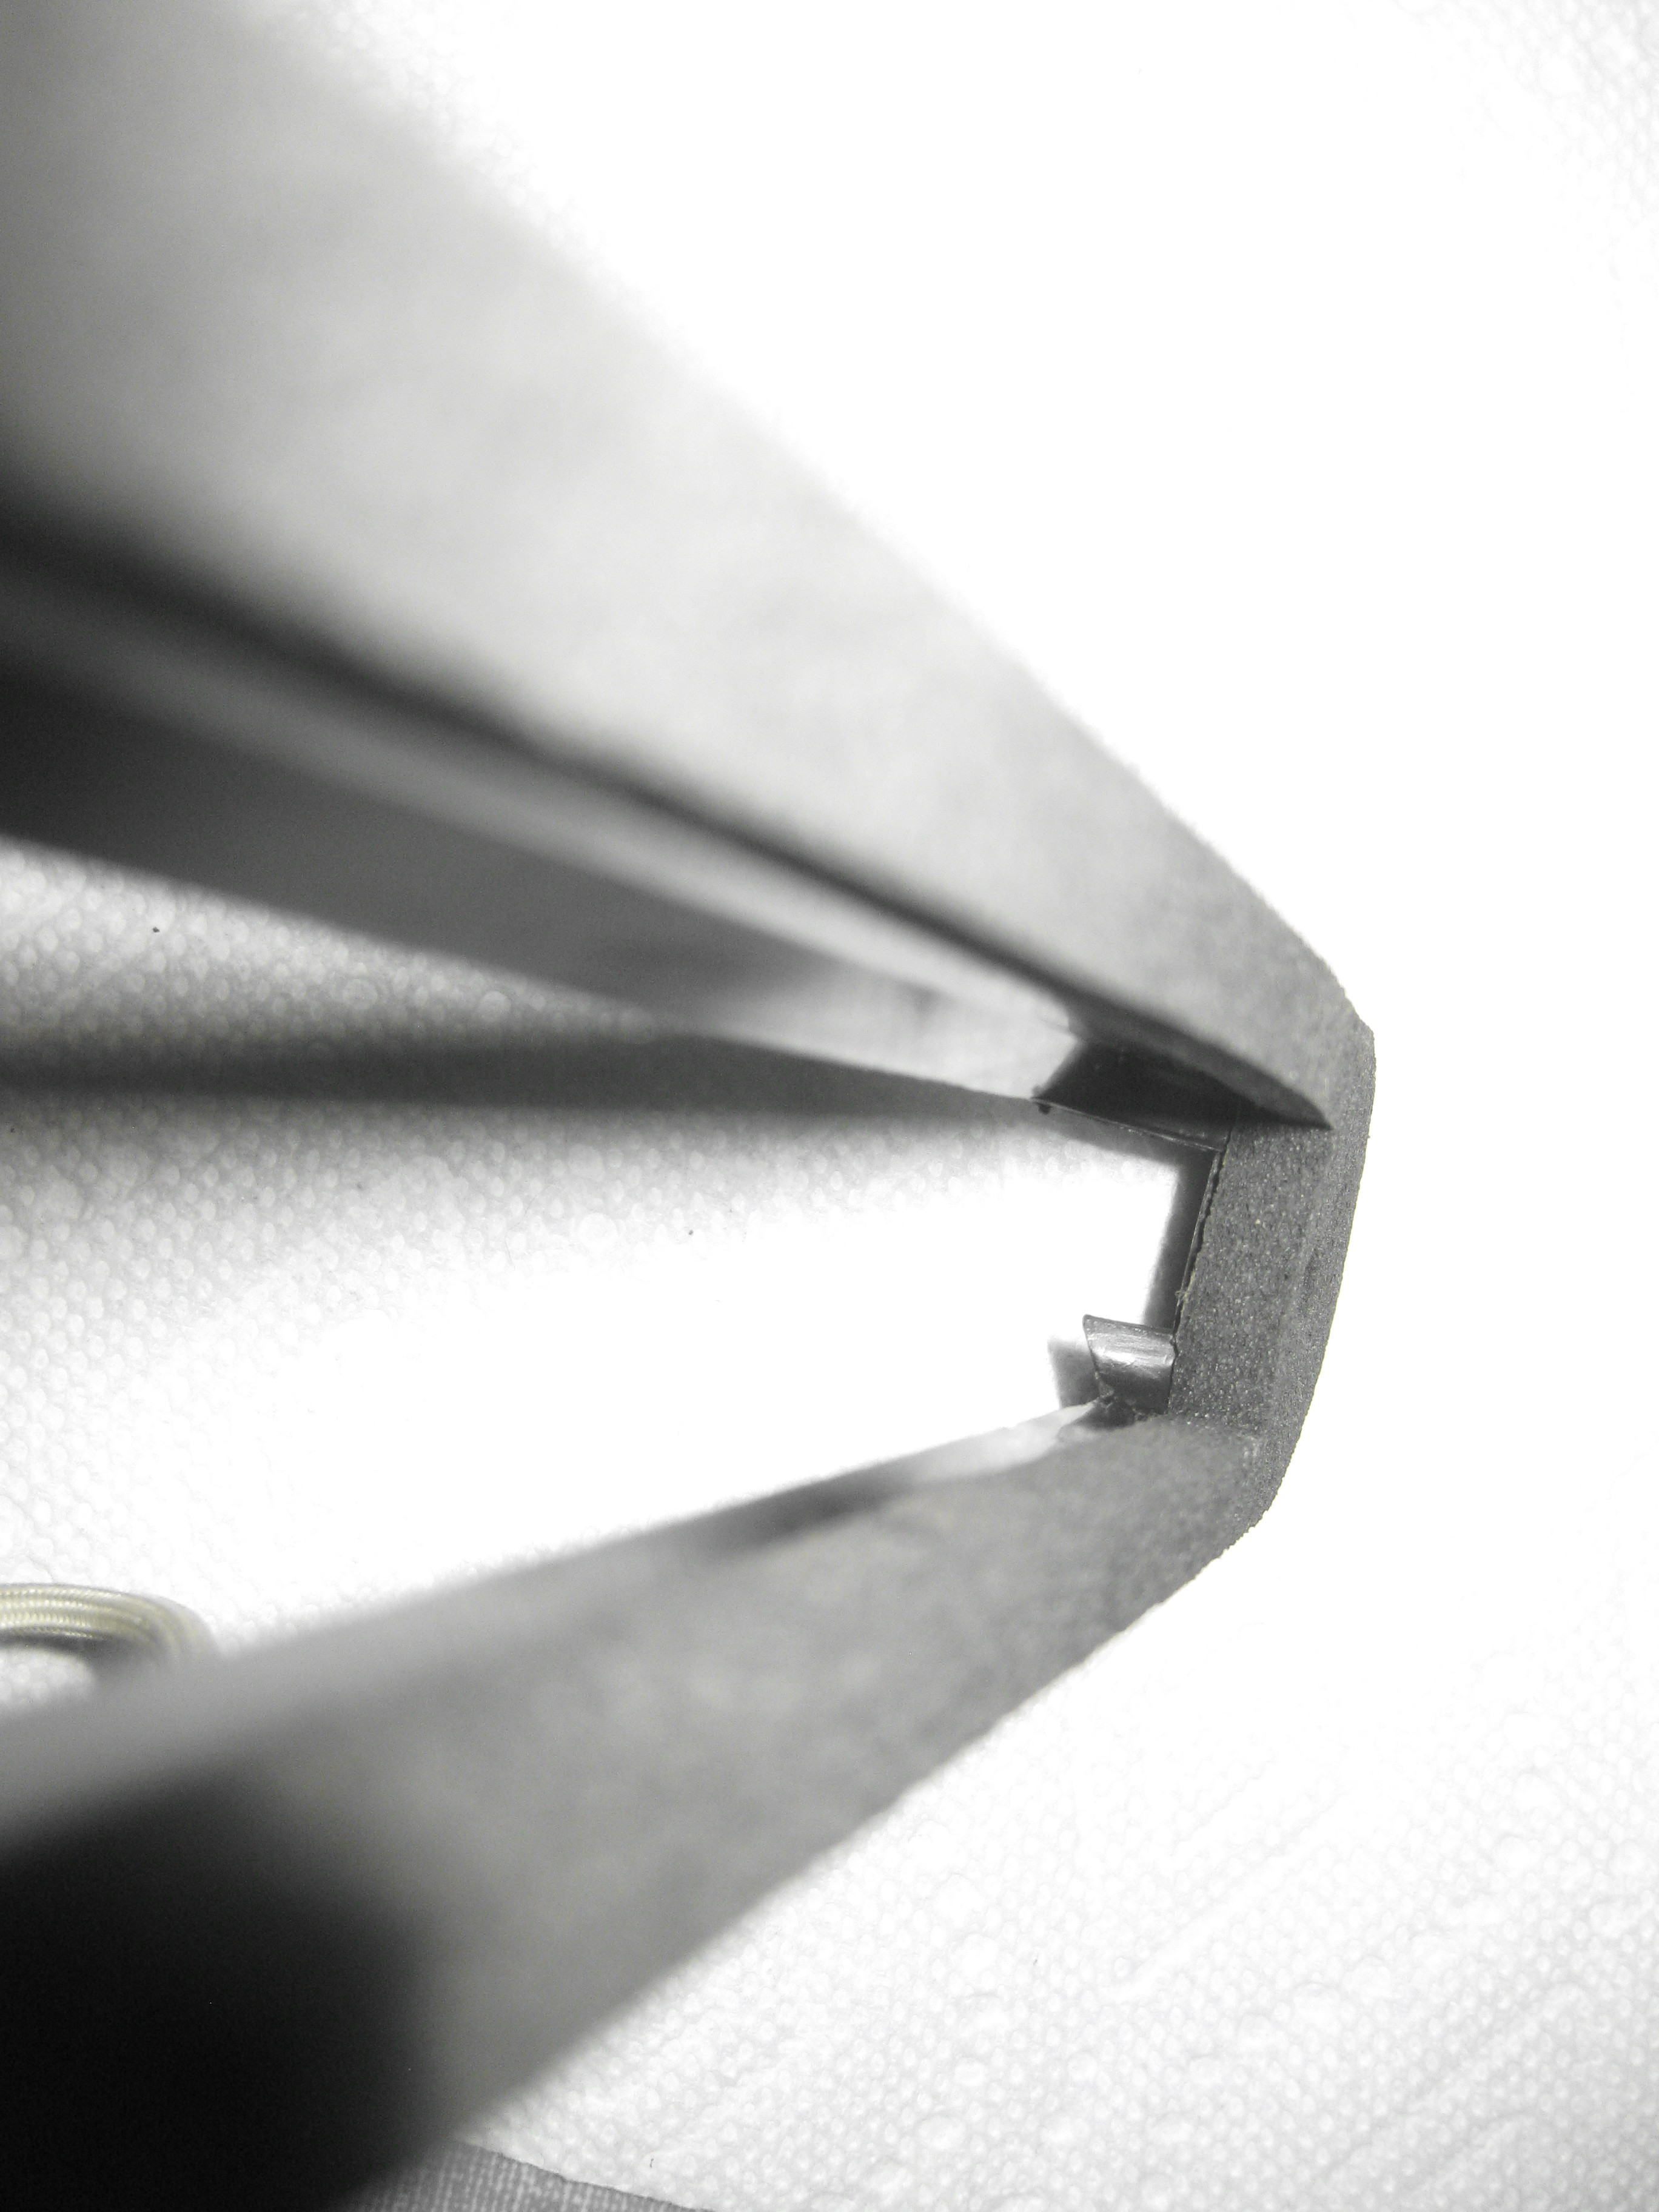
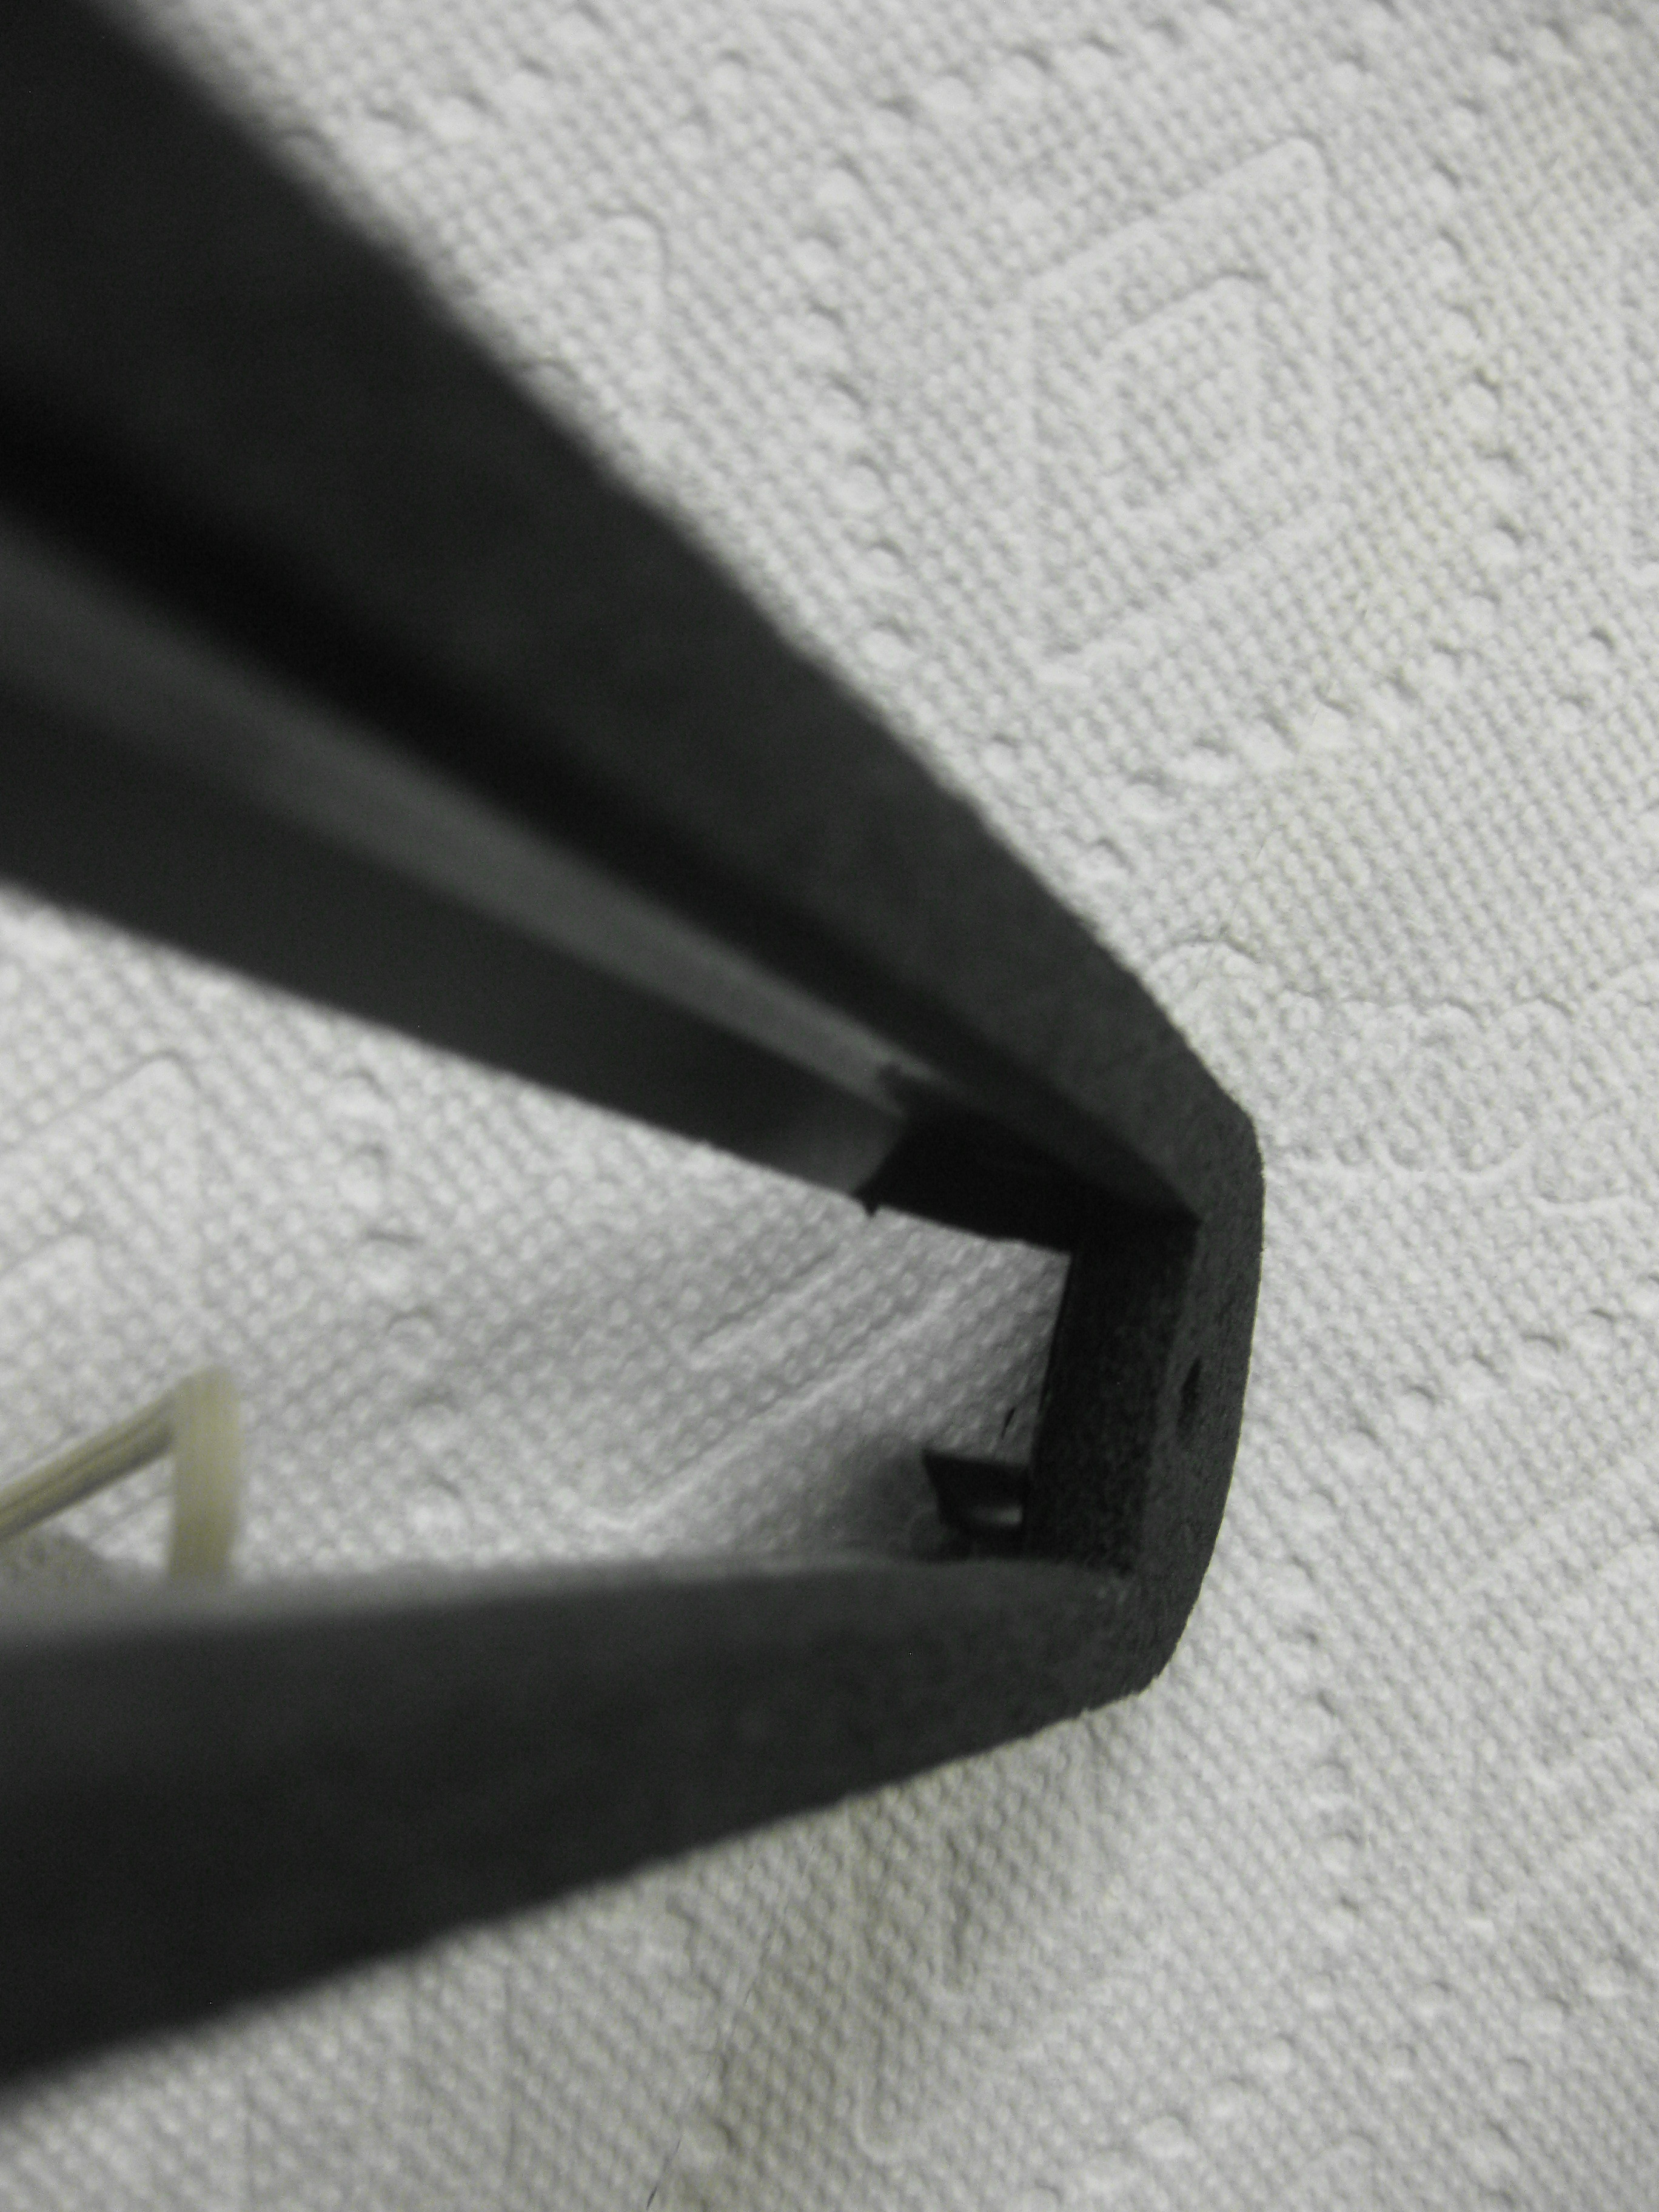
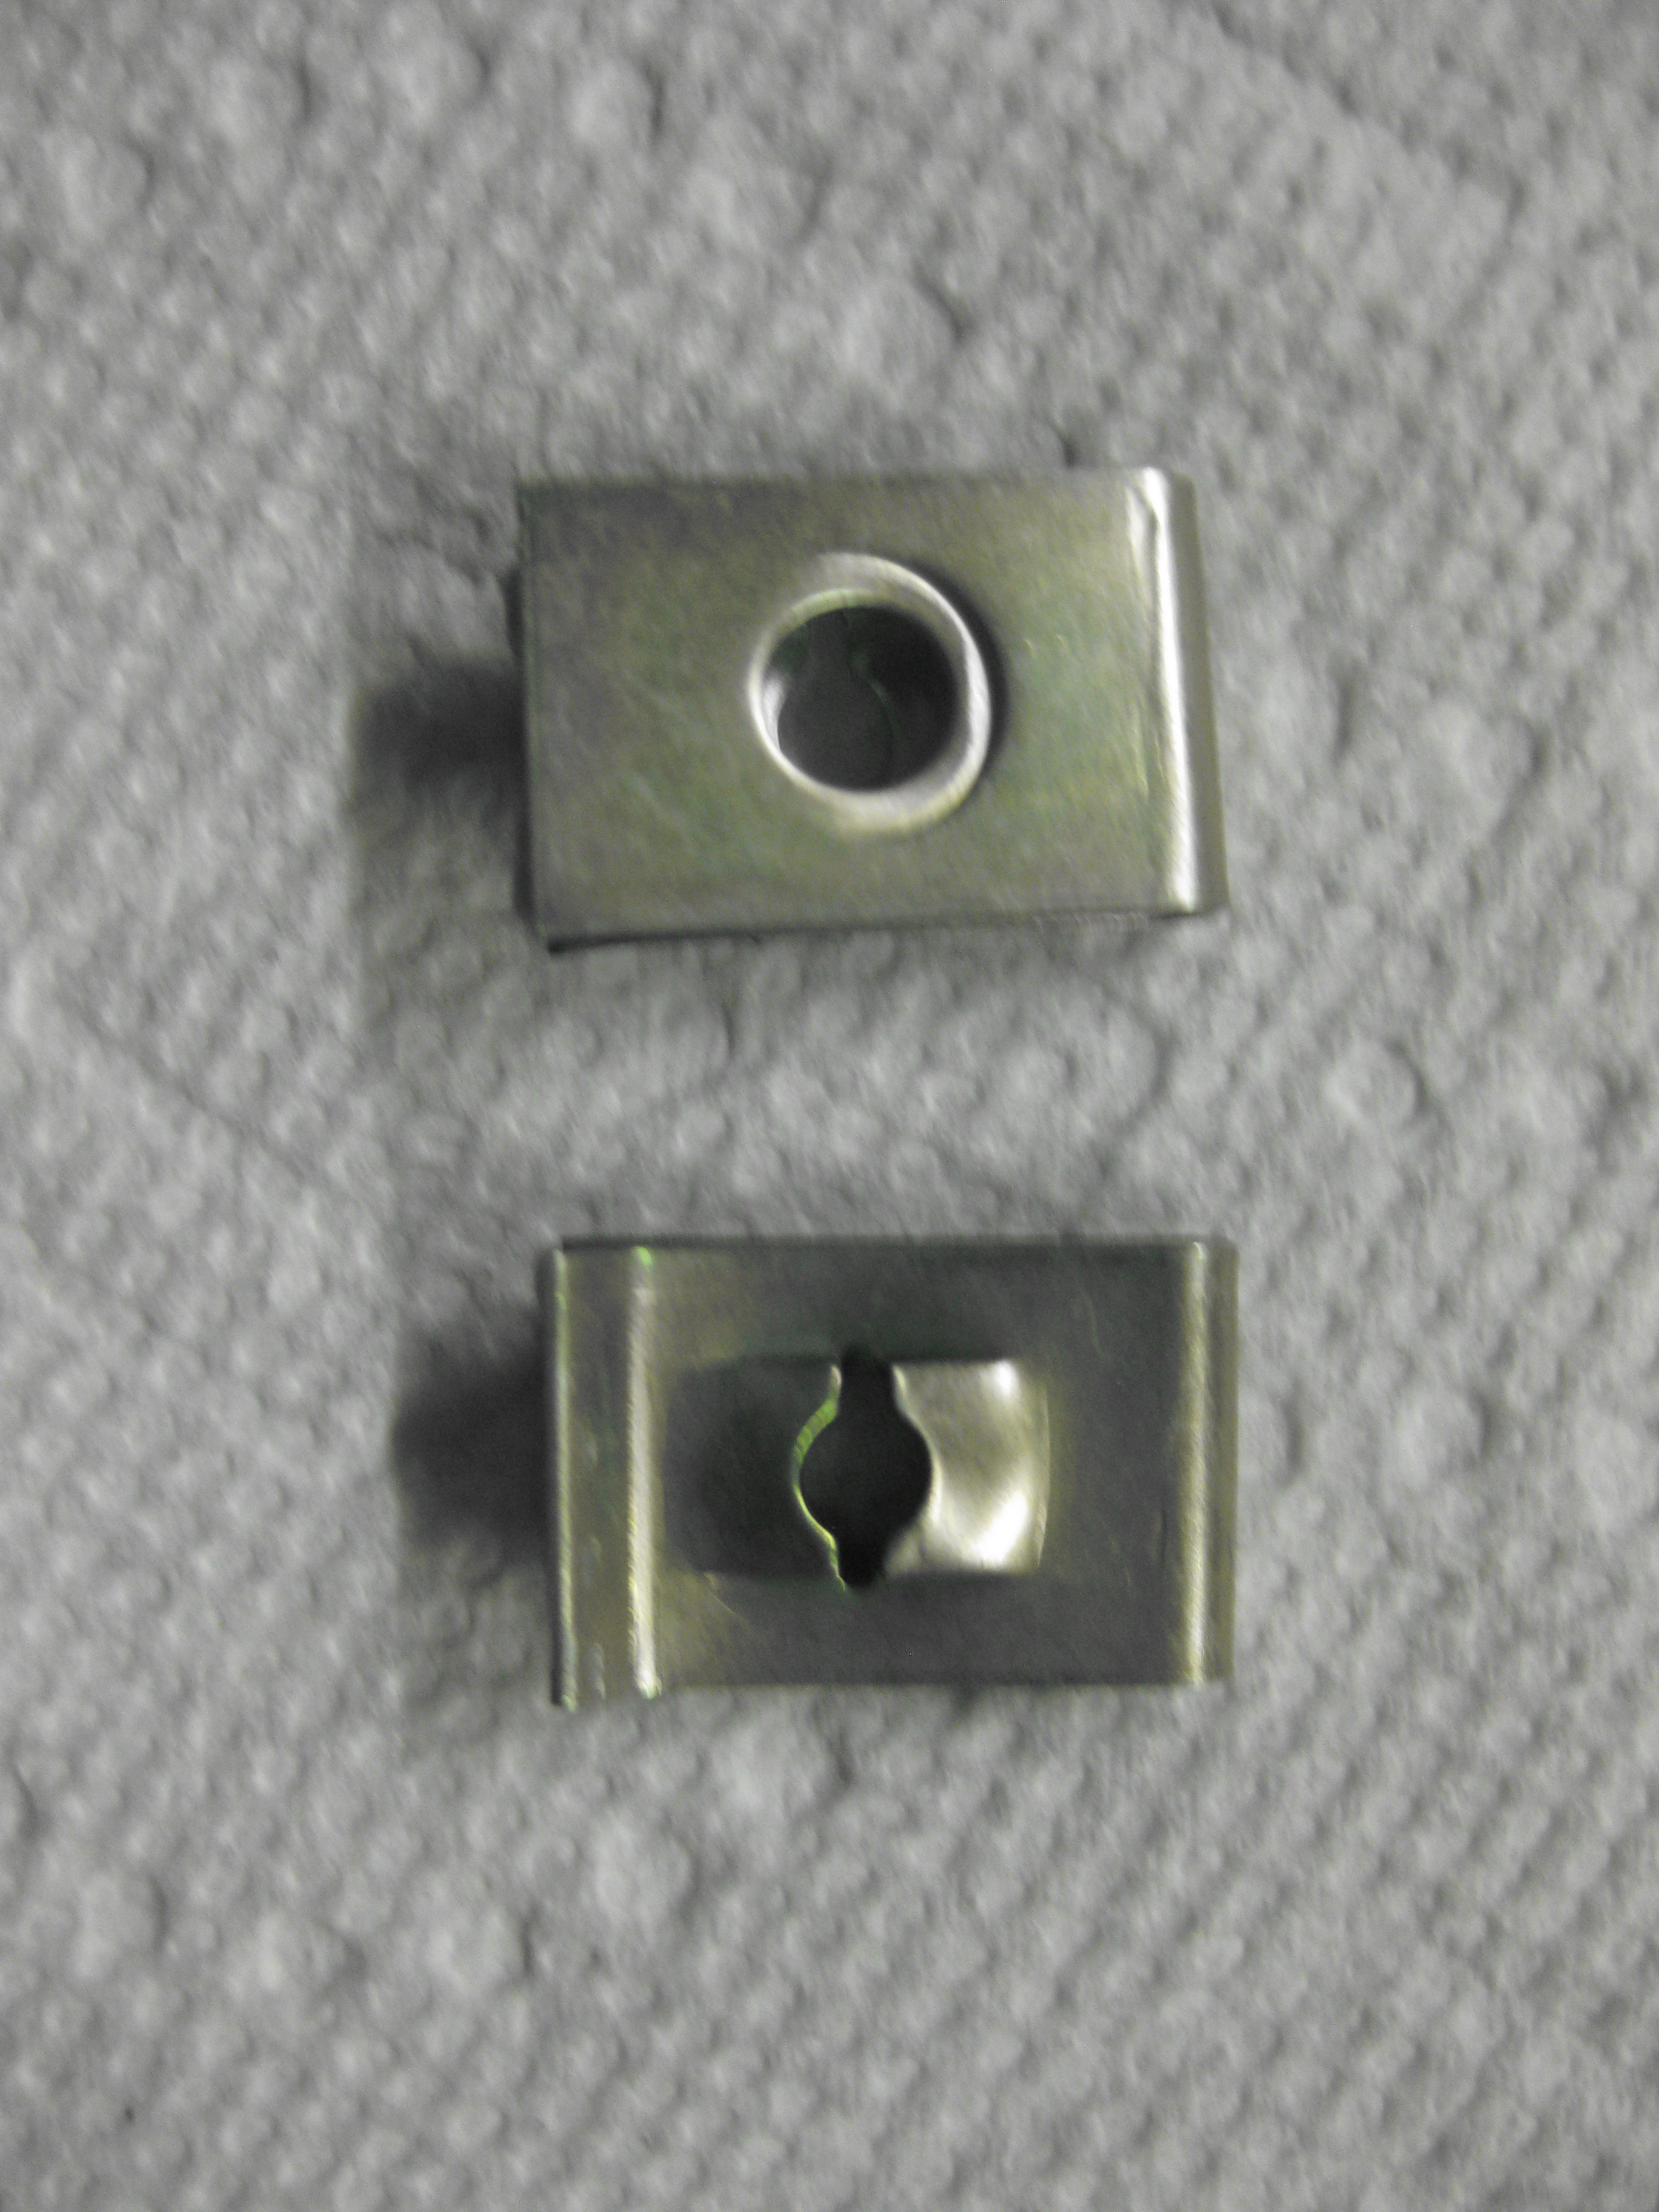
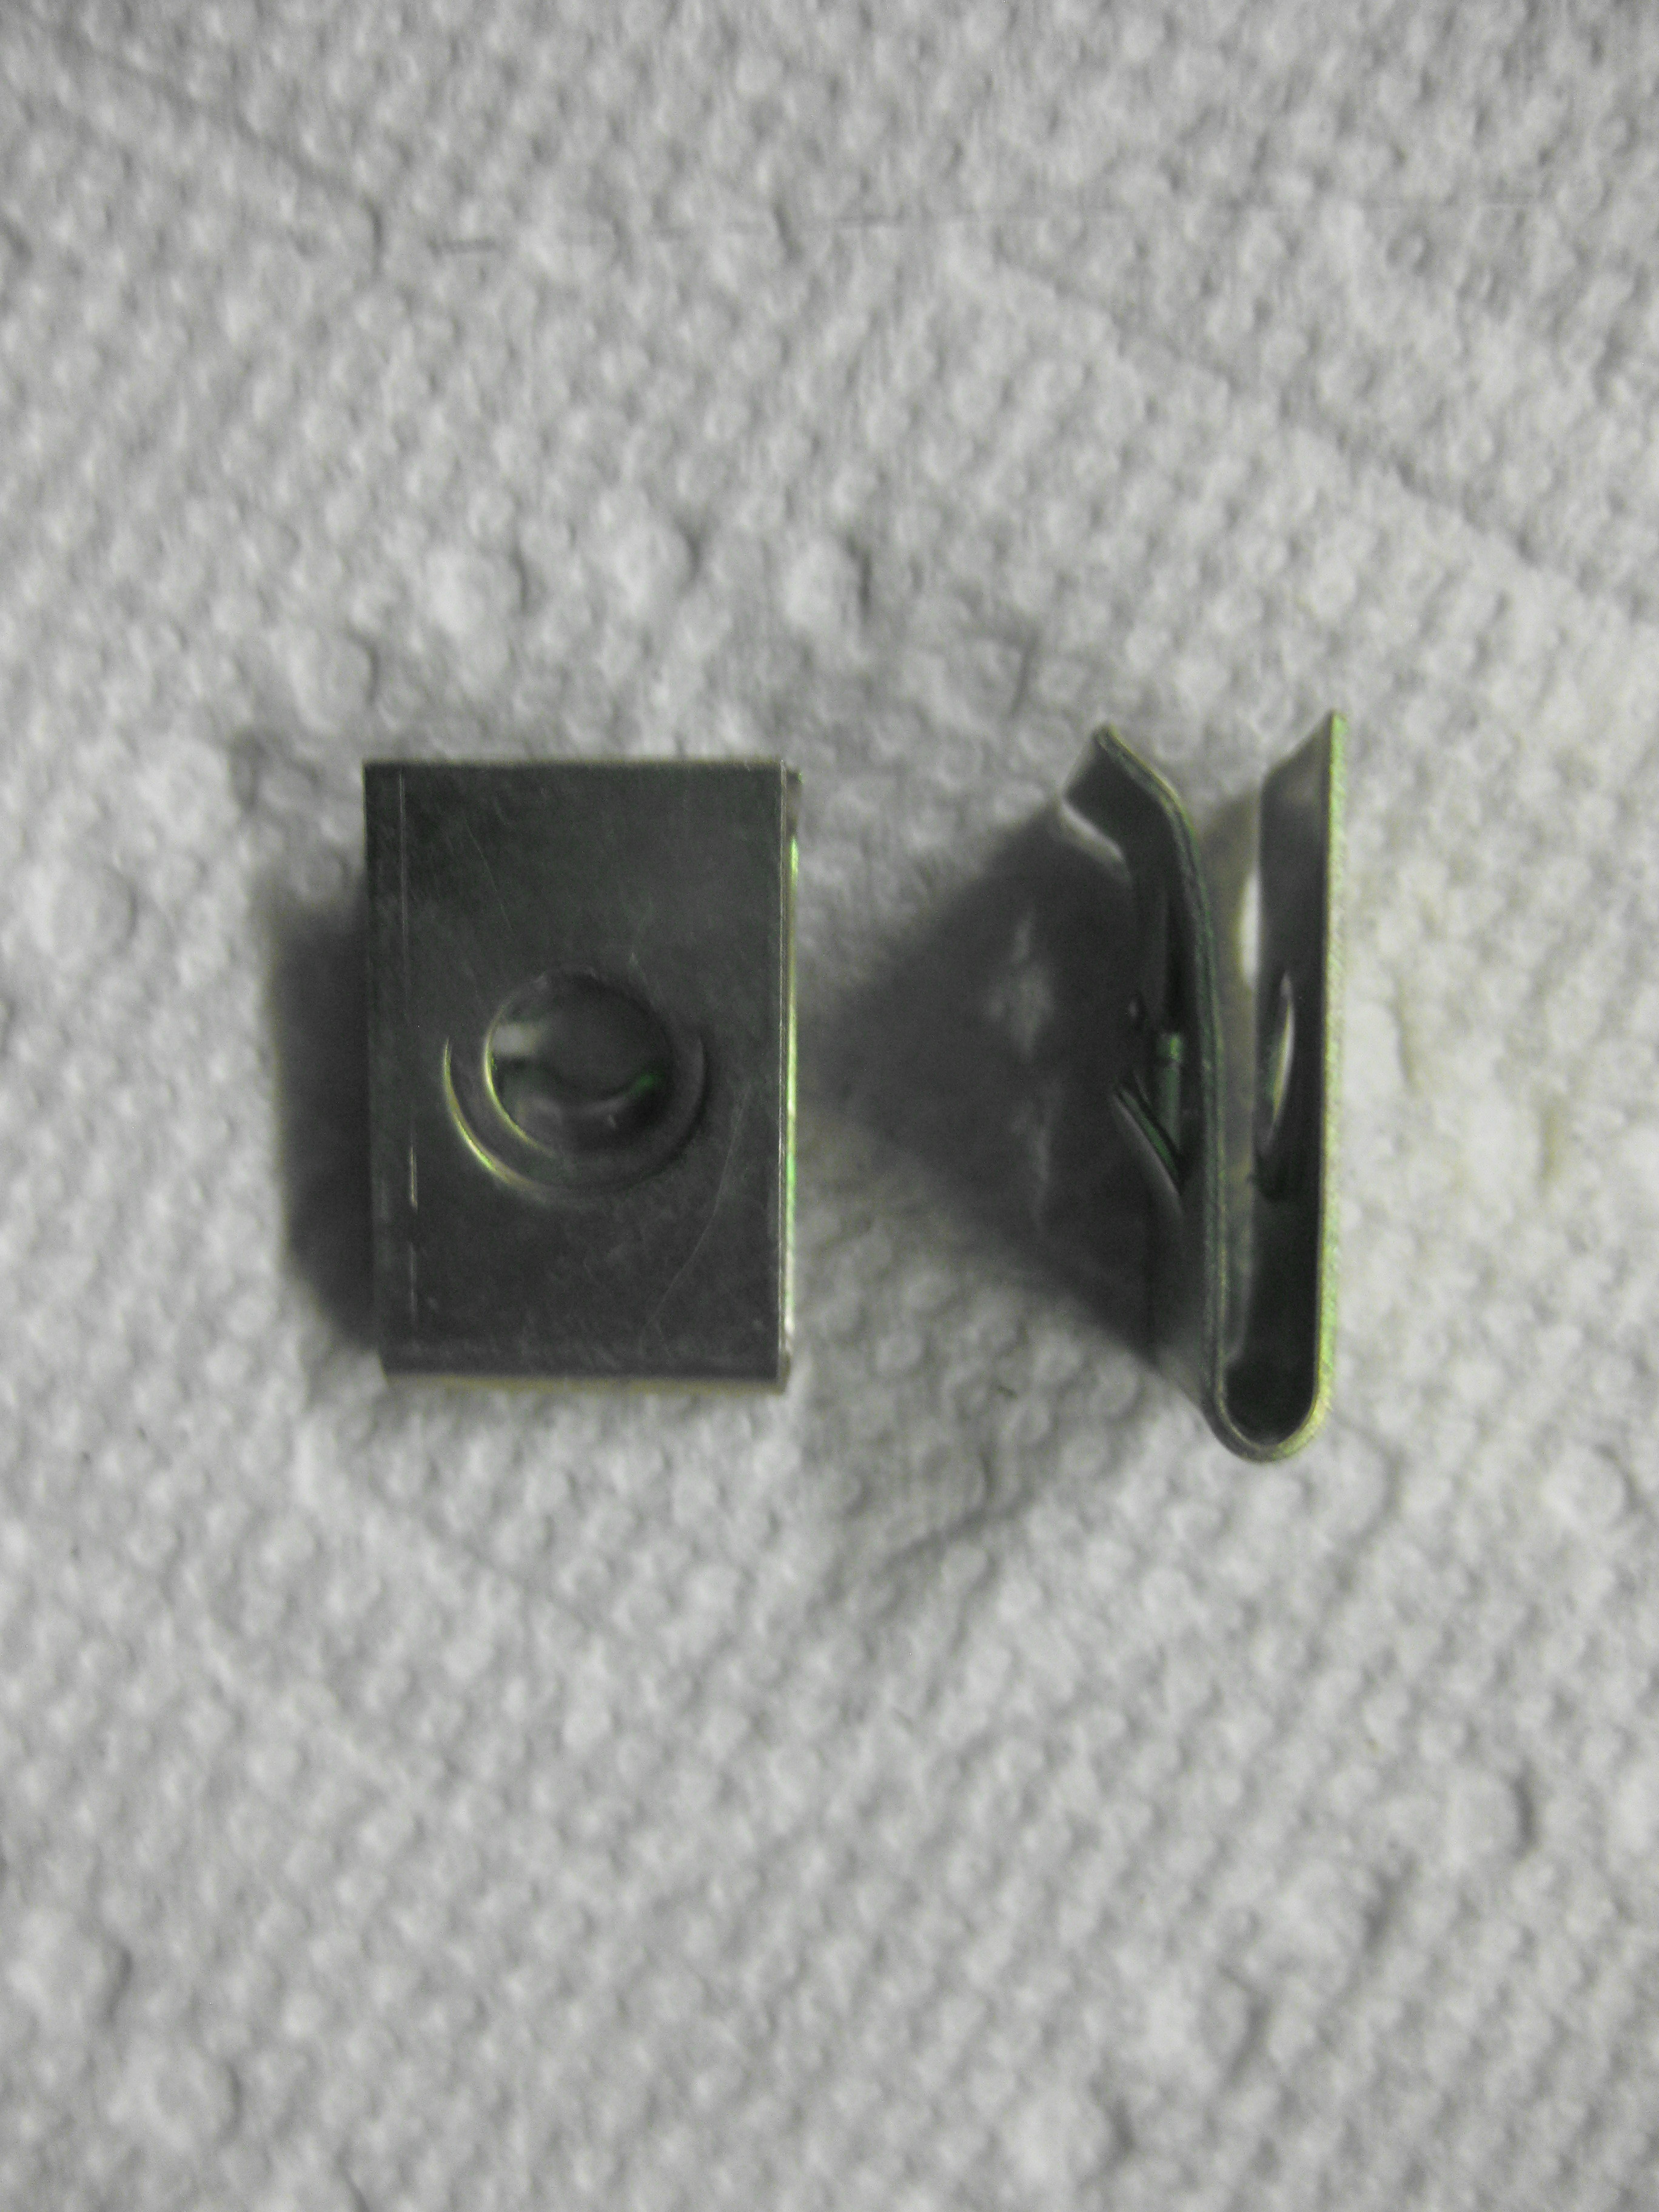
Hello Cpt'n! -- Permission to Board!--- Some observations on the NOS hatch vent duct assembly shown below--- The clips that were loose in the sealed bag are completely different from those Jim Arnett @jfa.series1 has shown and that Blue @240260280 and I have shown. They are nothing more than a cad plated speed nut and would be totally useless as a means of attaching the ductwork. The space between the leaves of the clip is far to narrow in dimension for mounting the combined thickness of the assembly and the thickness of the hatch sheet metal---believe me I tried and it will not work. I don't know what Nissan was thinking by the time this particular batch of replacement parts was produced but actually mounting them wasn't a part of it! The original clips are shown as used in the photos. They fit easily and well and I have a high degree of confidence that they will mount properly onto the hatch opening and function as intended. The diverter and plenum are identical to those I have gleaned from several sources and match Jim A. and Blue's photos. The diverter has a factory applied 8mm layer of open cell foam attached to the top using contact adhesive film (adhesive---film---adhesive---foam). While the foam is 8mm it is extremely soft in density and compresses to about 2mm upon full compression. (hence my thoughts to use 2mm closed cell foam in my replacement---I am not as concerned about the compress-ability as I am about the foam soaking and retaining water) A similar story to that of the NOS clips is the NOS factory duct tubes that I acquired from Courtesy Nissan some years back that are made of an almost rigid plastic and the accordion portion of them does not flex well. It is not made of the rubber material used originally which, even though 46+ years old, is still as soft and pliable as new and flexes easily. They attach to the bottom surface of the hatch to empty water out at the tailgate latch surface. If you are restoring your ductwork use the old tubes! On to a salvo of photos-- Hoping this helps in the future--- I think reproduction clips made correctly will offer the best chances of a satisfactory solution for anyone trying to restore this aspect of the early hatch. (now that is real news, ----) Jim D. "Zup"
I will gladly provide the sample if it will be returned un-damaged. You could have it in hand on Monday if this proceeds well. I'm in for a set of cad plated. If it is required for the "test fit", I could send the entire NOS ductwork assembly I have as the "mule" provided as above.
Thanks to you Kats!! You Sir, are the best! You have filled in all the missing information with your perfect documentation. Thank you, thank you, thank you! Jim D. "Zup"
+1 on spring steel with clear zinc if possible---if not, phosphorous (dark brown to black) My originals did not appear to be plated at all---just spring steel but I treated them with Ospho to try to prevent them from corroding further. That turned them the color you see.
Hi Kats!! Thanks for joining in. Your thoughts are appreciated. You know these cars so well and your photos are the best! I simply must get a decent camera someday soon---the clarity and depth of your photos are most real. Was the foam attached to your ductwork when you received it in the package or did you apply it? The boxes say "Packing Duct" on them and have the part number 90827-E4100. The clips shown in your photos are identical to those I found in the bag of my NOS duct assembly but they were loose---not attached. I may have to "eat some crow" here about these clips---- I am confident that the early clips spanned the assembly parts and clipped over the top outside of the hatch opening surface to hold it all securely---as the close-up photo Jim Arnett @jfa.series1 provided of the clip on the car hatch vent opening. Now I am thinking that at some point Nissan redesigned the method of attachment such that the entire assembly is inside the hatch and the only fastening method was the pins on the finisher grill going through the holes in the hatch to engage the clip---which doesn't seem as secure to me--- but could be adequate as long as the pins are intact and not compromised. This method would not use a barrel clip on the pins as the speed nut clip has a "pin gripping" feature to it already. @katsDo you have any thoughts about the differences between these clips and the method of attachment? Jim D.
I am relatively certain that the finisher grills were made of plastic from the beginning. I have never seen or heard of an original metal version, unlike the other emblems that were made originally in metal, then later in plastic . The ductwork assembly is mounted to the hatch without the finisher grill installed. Put the barrel clip on the post and insert it into the mounted assembly by pushing downward. The assembly clip upper hole is sized to accept the diameter of the barrel clip. The lower hole is oversized to prevent bottoming out of the post.
Hello Cpt'n! -- Permission to Board!--- Some observations on the NOS hatch vent duct assembly shown below--- The clips that were loose in the sealed bag are completely different from those Jim Arnett @jfa.series1 has shown and that Blue @240260280 and I have shown. They are nothing more than a cad plated speed nut and would be totally useless as a means of attaching the ductwork. The space between the leaves of the clip is far to narrow in dimension for mounting the combined thickness of the assembly and the thickness of the hatch sheet metal---believe me I tried and it will not work. I don't know what Nissan was thinking by the time this particular batch of replacement parts was produced but actually mounting them wasn't a part of it! The original clips are shown as used in the photos. They fit easily and well and I have a high degree of confidence that they will mount properly onto the hatch opening and function as intended. The diverter and plenum are identical to those I have gleaned from several sources and match Jim A. and Blue's photos. The diverter has a factory applied 8mm layer of open cell foam attached to the top using contact adhesive film (adhesive---film---adhesive---foam). While the foam is 8mm it is extremely soft in density and compresses to about 2mm upon full compression. (hence my thoughts to use 2mm closed cell foam in my replacement---I am not as concerned about the compress-ability as I am about the foam soaking and retaining water) A similar story to that of the NOS clips is the NOS factory duct tubes that I acquired from Courtesy Nissan some years back that are made of an almost rigid plastic and the accordion portion of them does not flex well. It is not made of the rubber material used originally which, even though 46+ years old, is still as soft and pliable as new and flexes easily. They attach to the bottom surface of the hatch to empty water out at the tailgate latch surface. If you are restoring your ductwork use the old tubes! On to a salvo of photos-- Hoping this helps in the future--- I think reproduction clips made correctly will offer the best chances of a satisfactory solution for anyone trying to restore this aspect of the early hatch. (now that is real news, ----) Jim D. "Zup"


 Good news Hardway-- Just want to stress that I think they should be done in spring steel if at all possible. When attaching the assembly to the hatch there is quite a bit of deformation (spread) required to open the clip wide enough to get everything clamped up at the same time it is being attached to the hatch opening metal. The spring steel accommodates this and returns to original dimension to hold everything securely. Stainless would be great for longevity, but I don't know if it can be made to match the properties of spring steel. Maybe tempering the metal and properly quenching it would do it, but I don't know for sure.
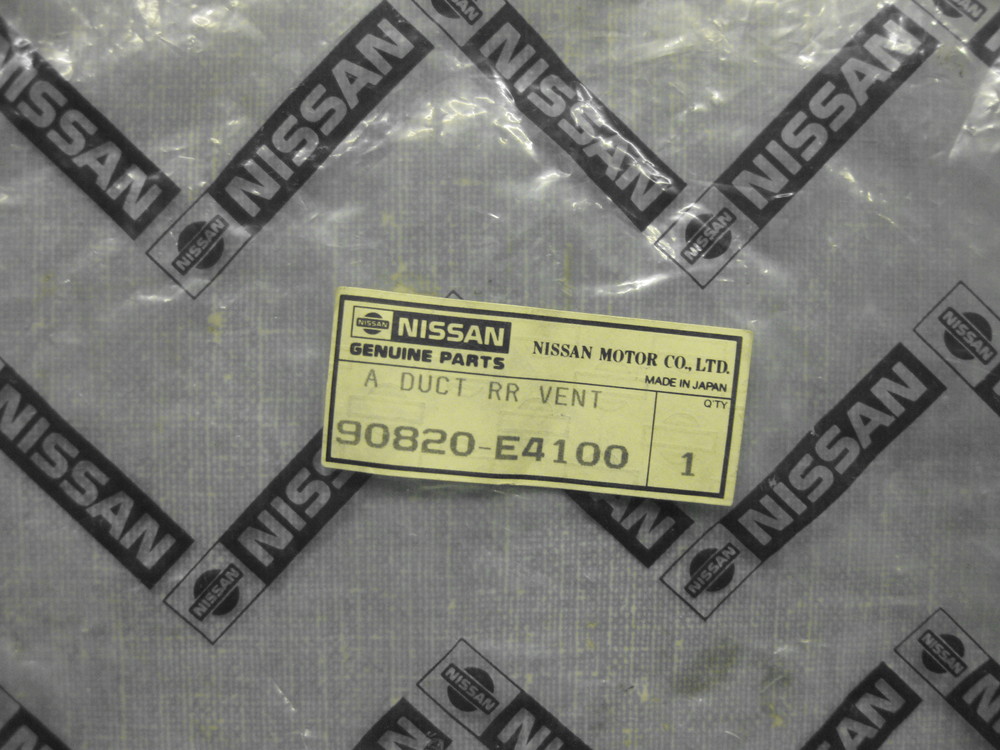
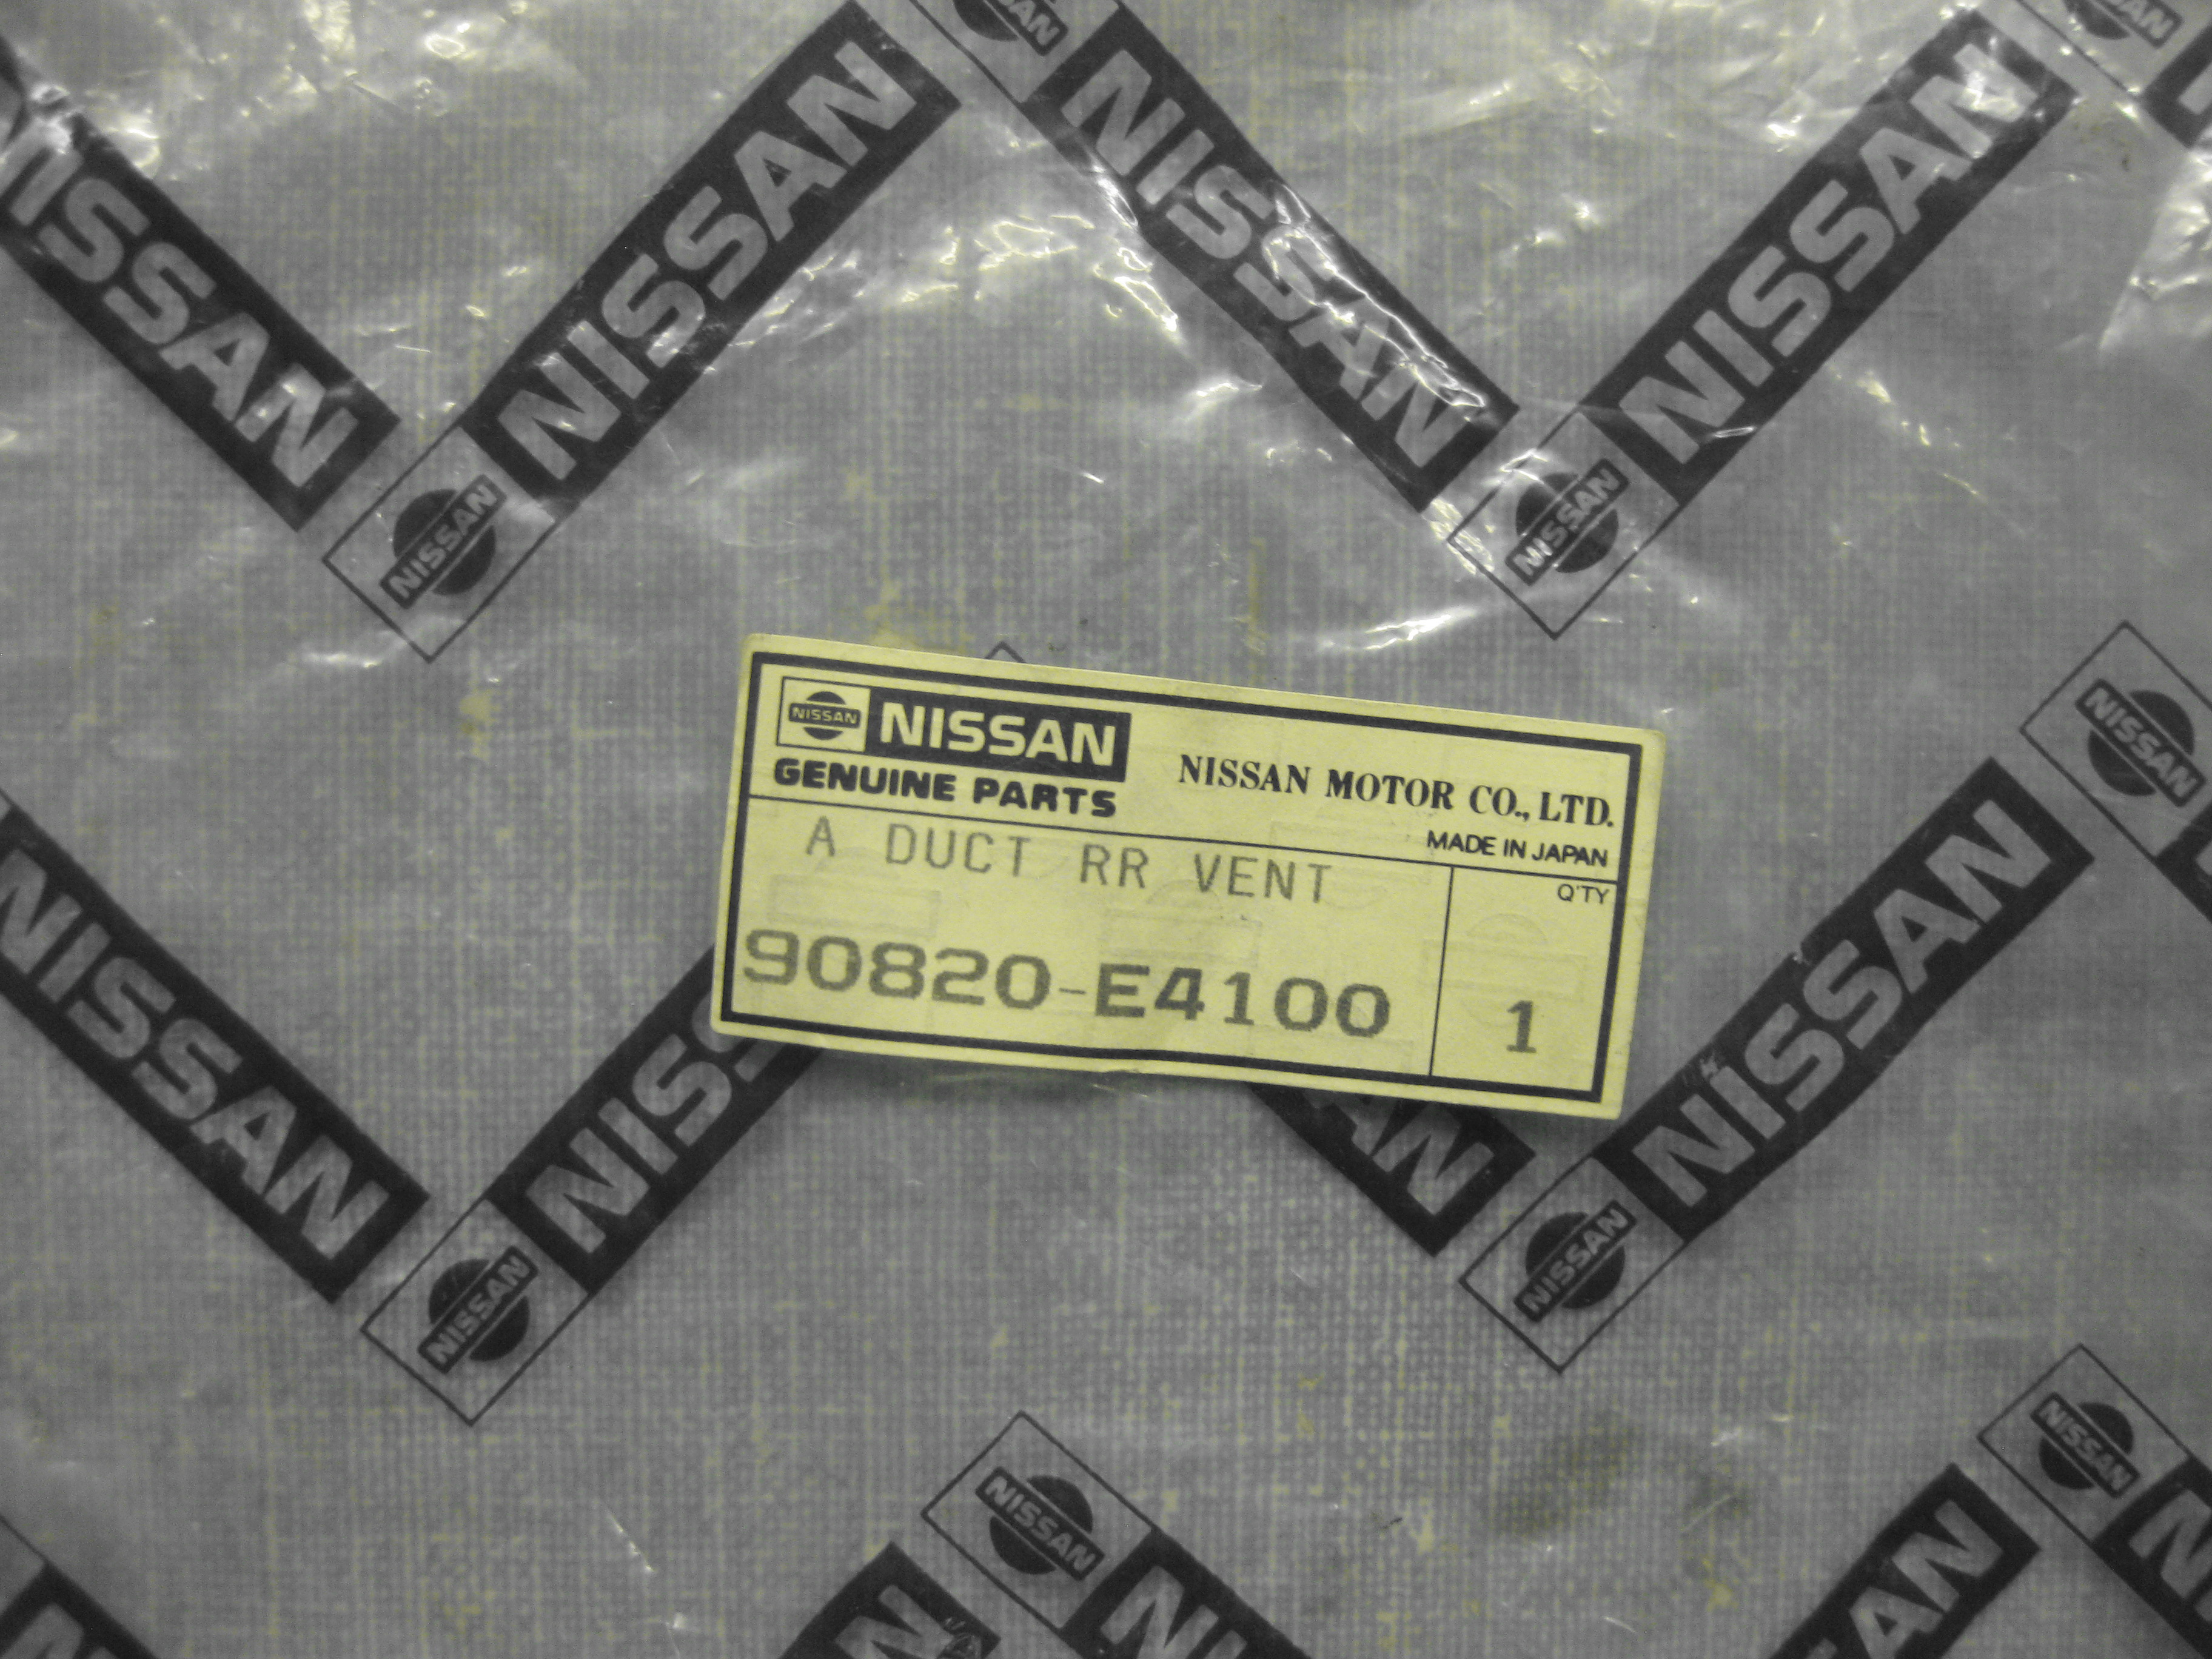
Home for lunch--- Bummer about Steve not reproducing the clips---hopefully he will re-consider. Only from my own experience with removing these assemblies from a 10/70 240z--- the hatch ductwork in it was completely intact and un-molested. Both sides were the same as far as the clip width. The photos I posted are of the original diverter and clips from that car. As usual my foggy memory fails me---so last night I went to the storage unit and found the complete NOS, still in the Nissan bag, hatch duct assembly that I had purchased some years back. Part:description from the tag: A Duct RR Vent 90820-E4100 QTY 1 I will post photos tonight. Jim D. "Zup"
I hope Steve re-pops them---- they would be identical to original and perfect. Anyone who is restoring an early car would need them, and many of us do not have the skills you have shown for fabrication. I am planning on using 2mm closed cell foam sheeting cut to the shape of the diverter and placed between it and the underside of the hatch. (use contact cement to attach it to the diverter first) You can get the foam sheeting at Walmart or any crafts store. Usually found over near school supplies or sewing. This weekend I'll post photos of the assembly before installation.
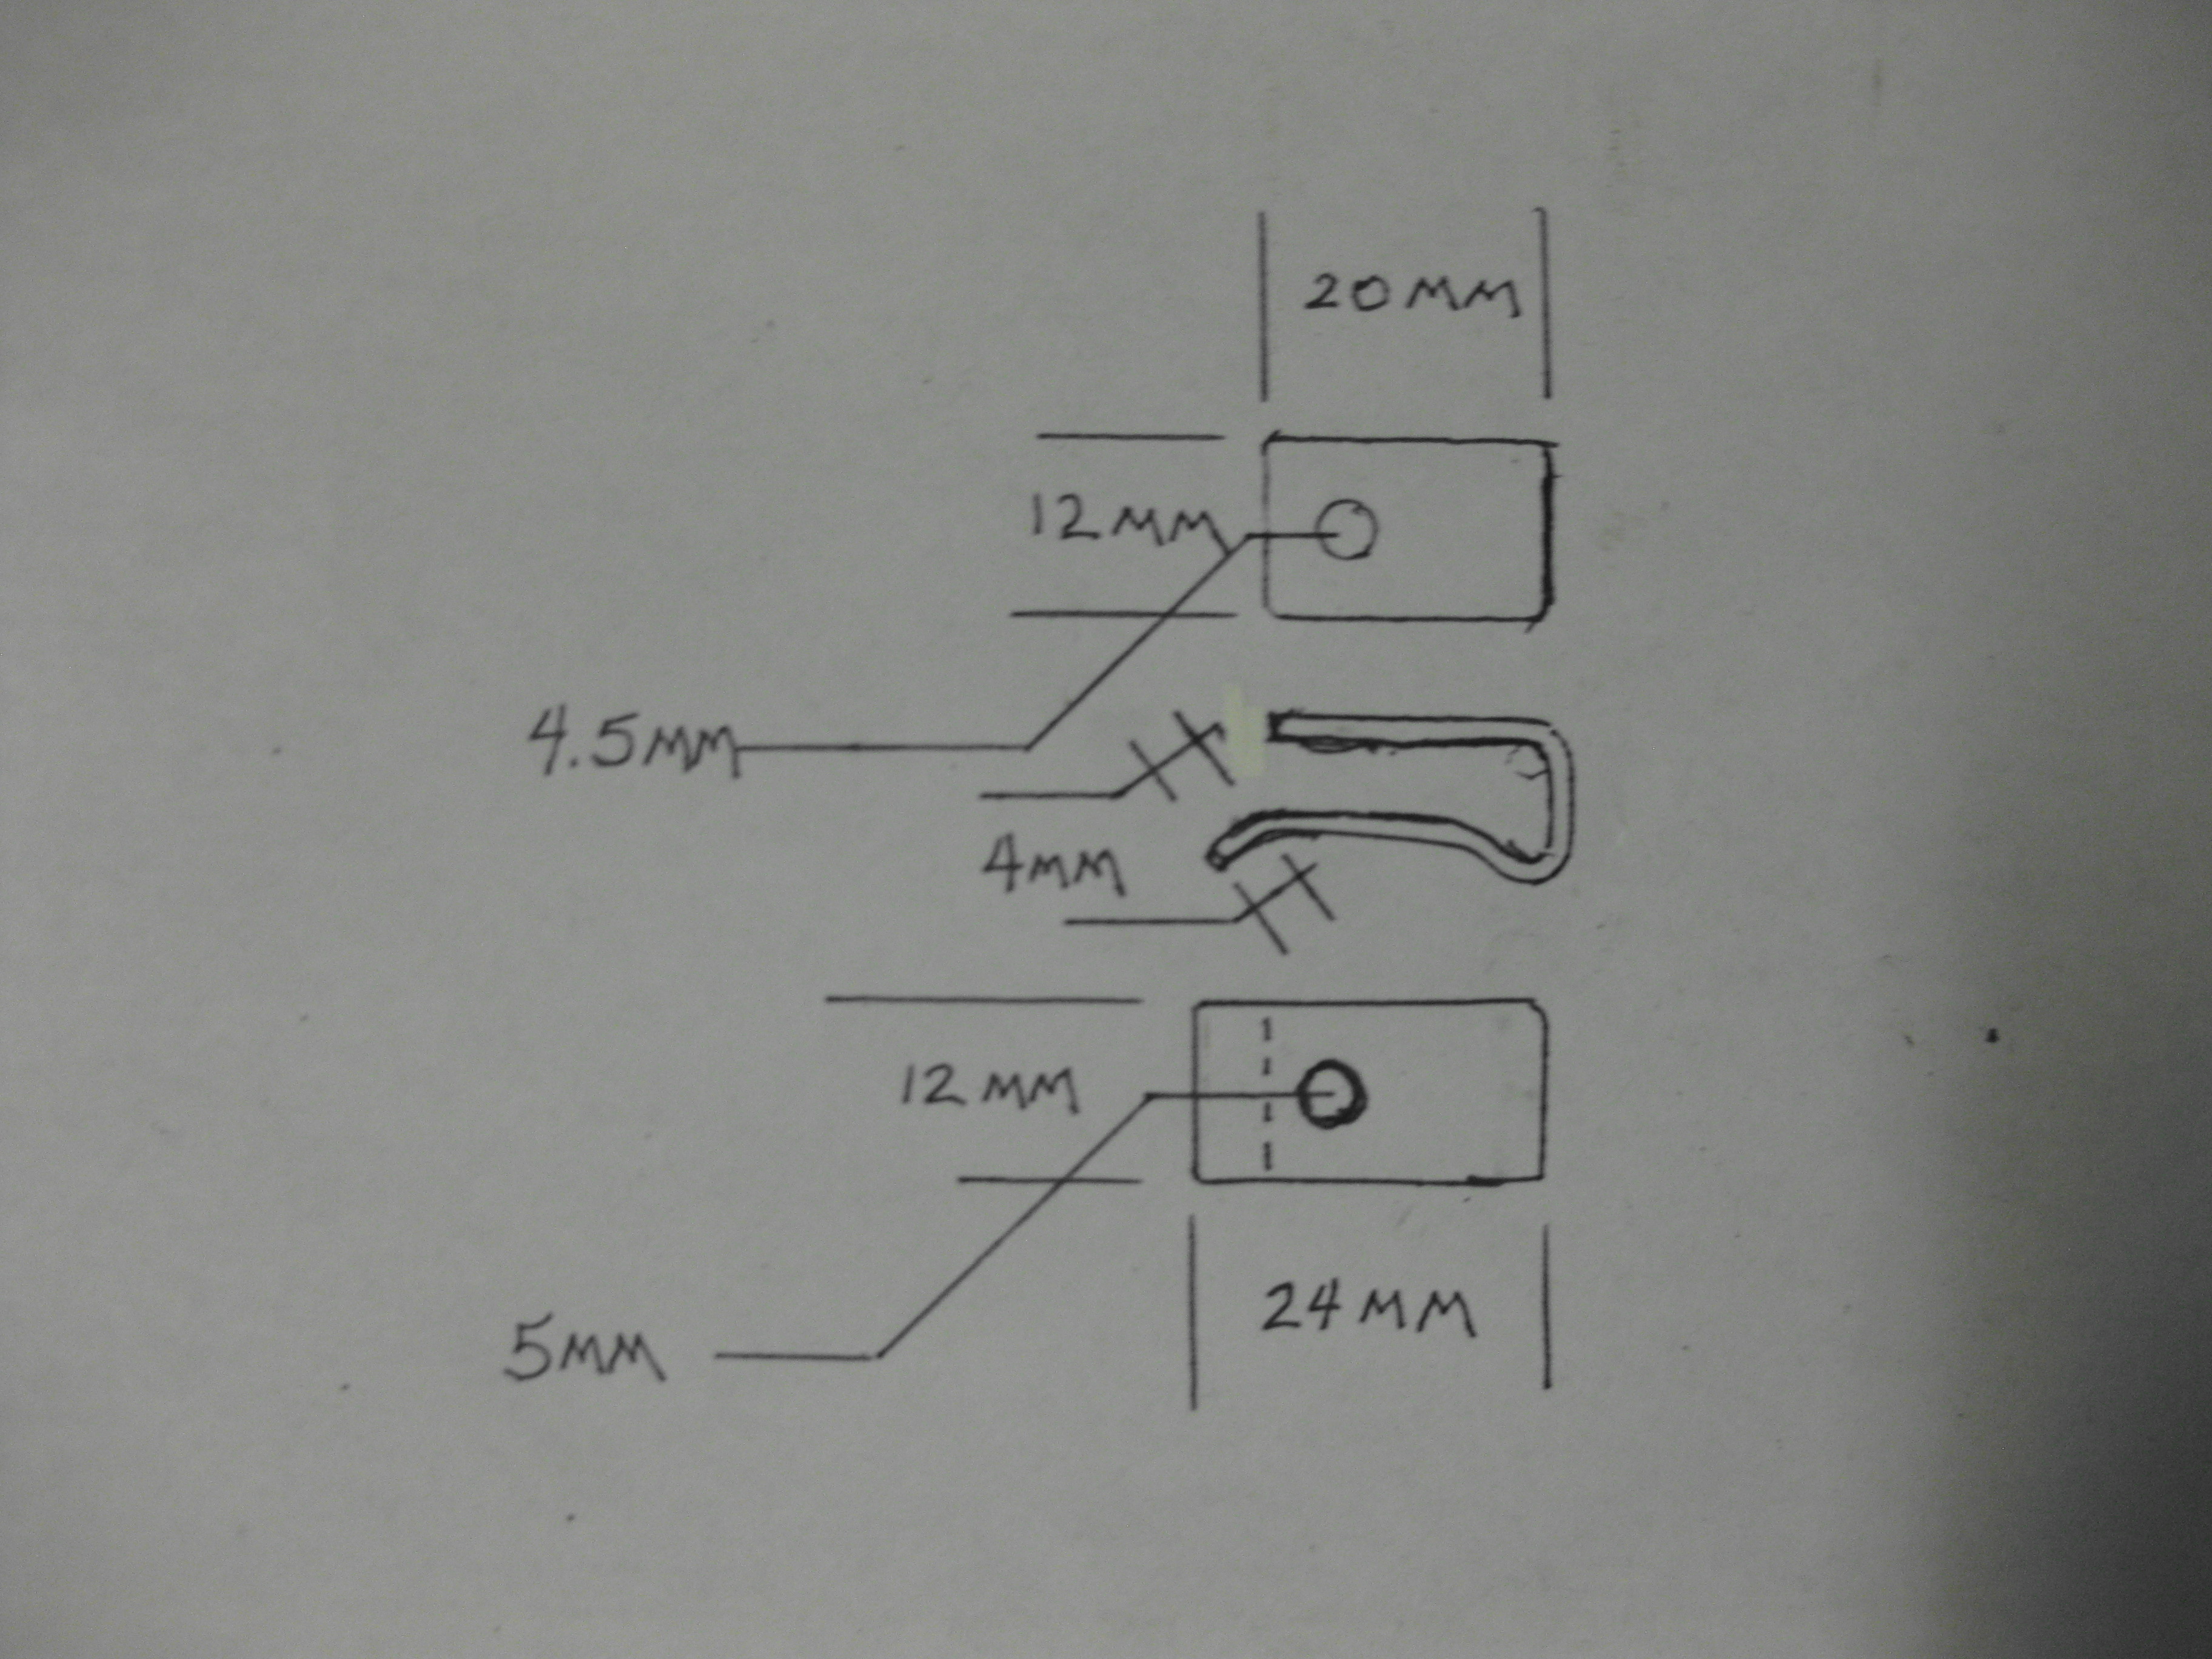
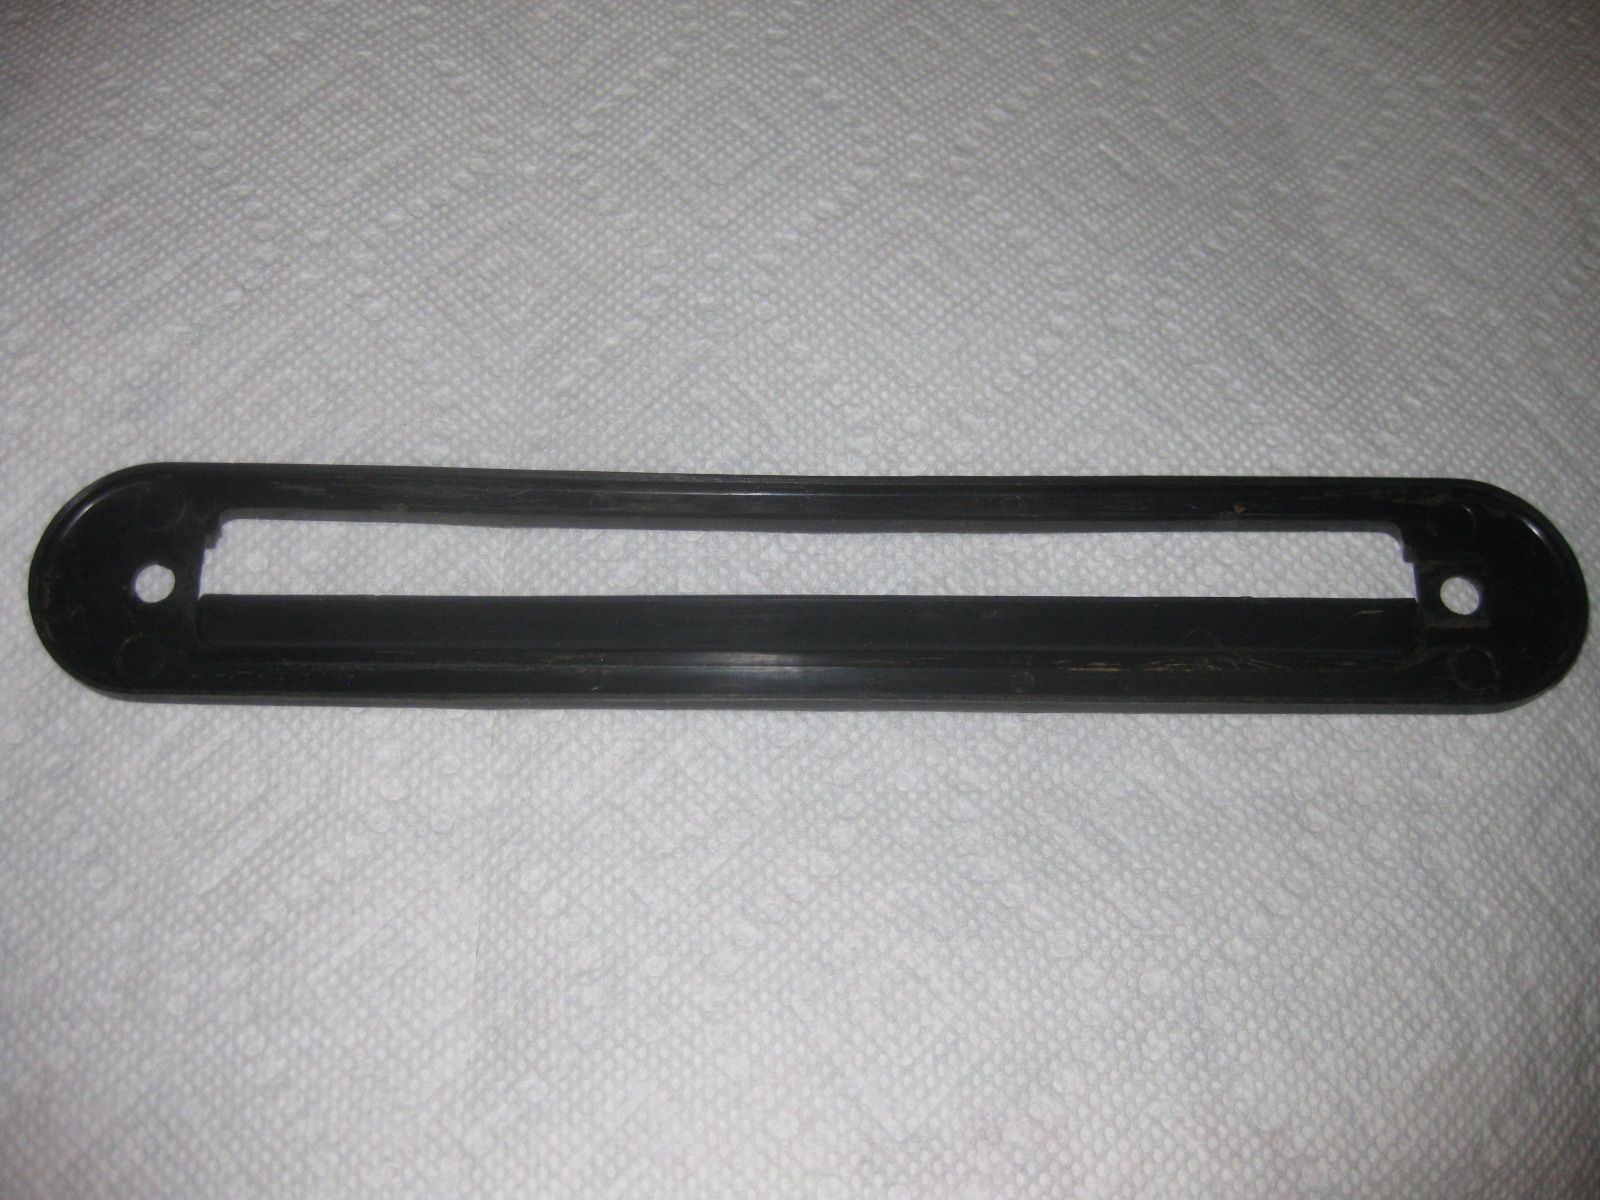
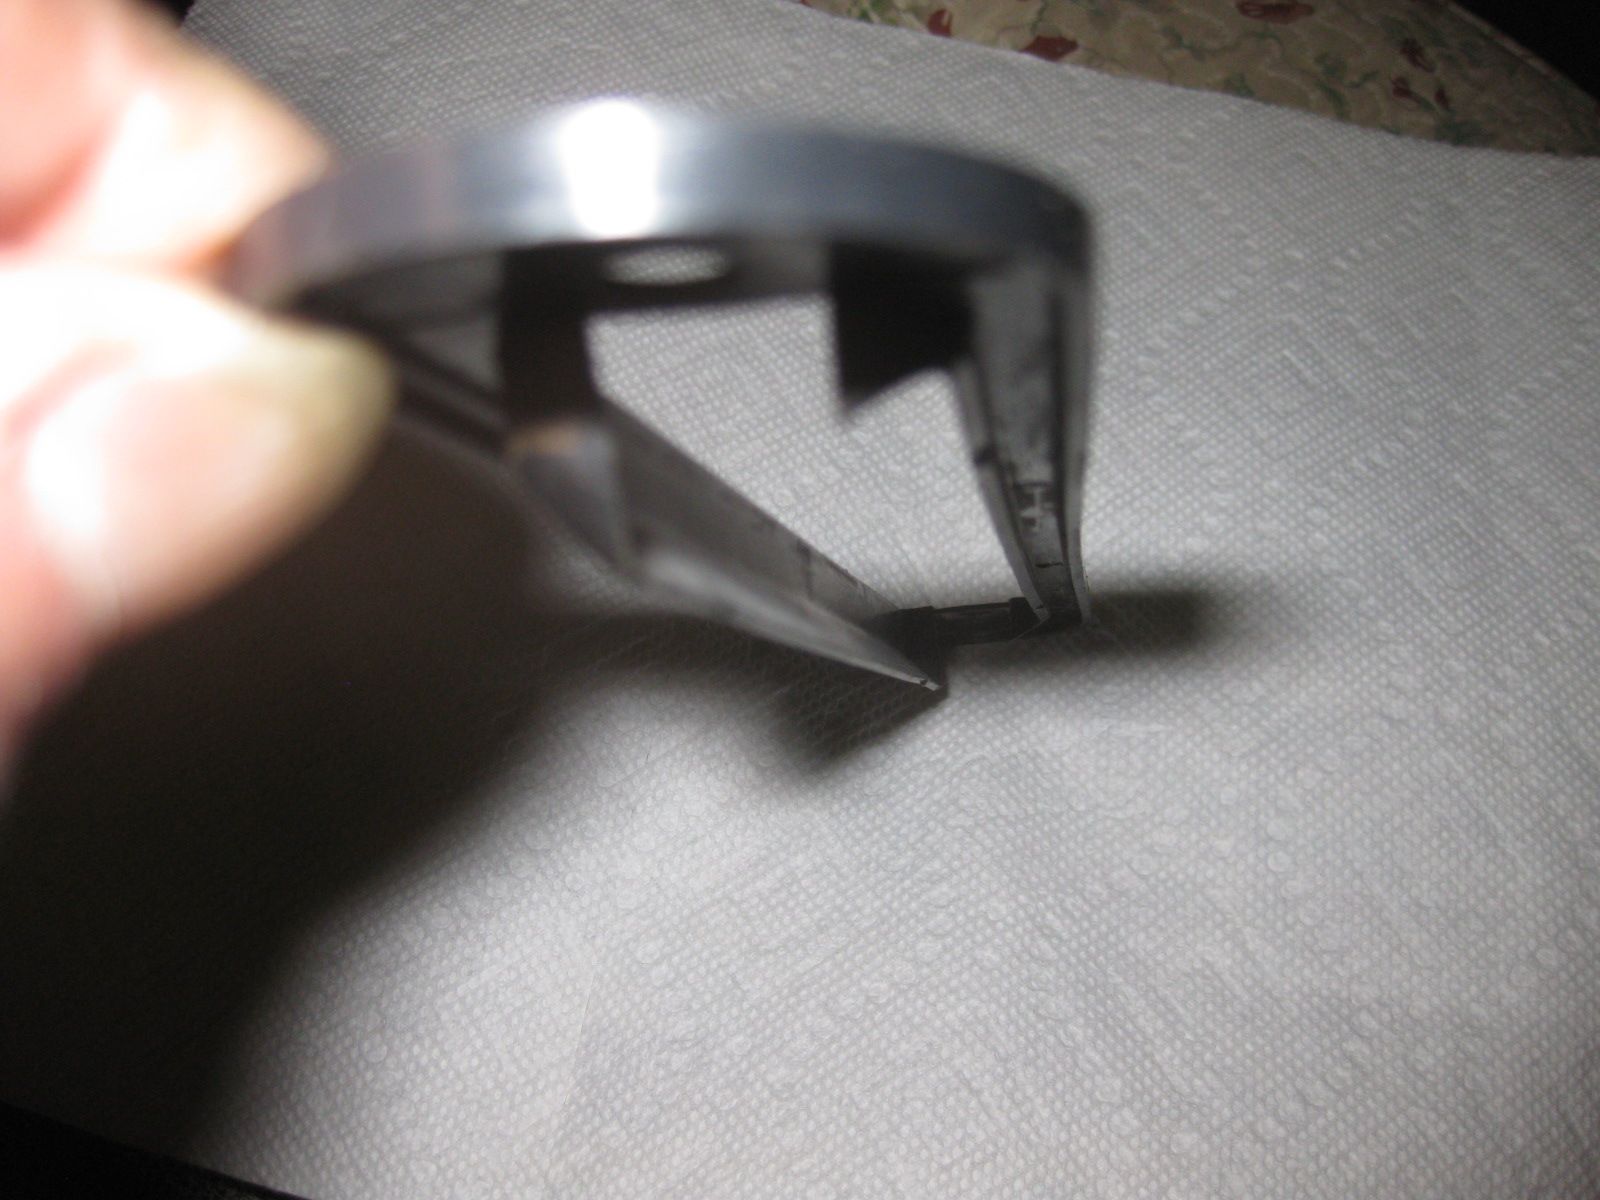
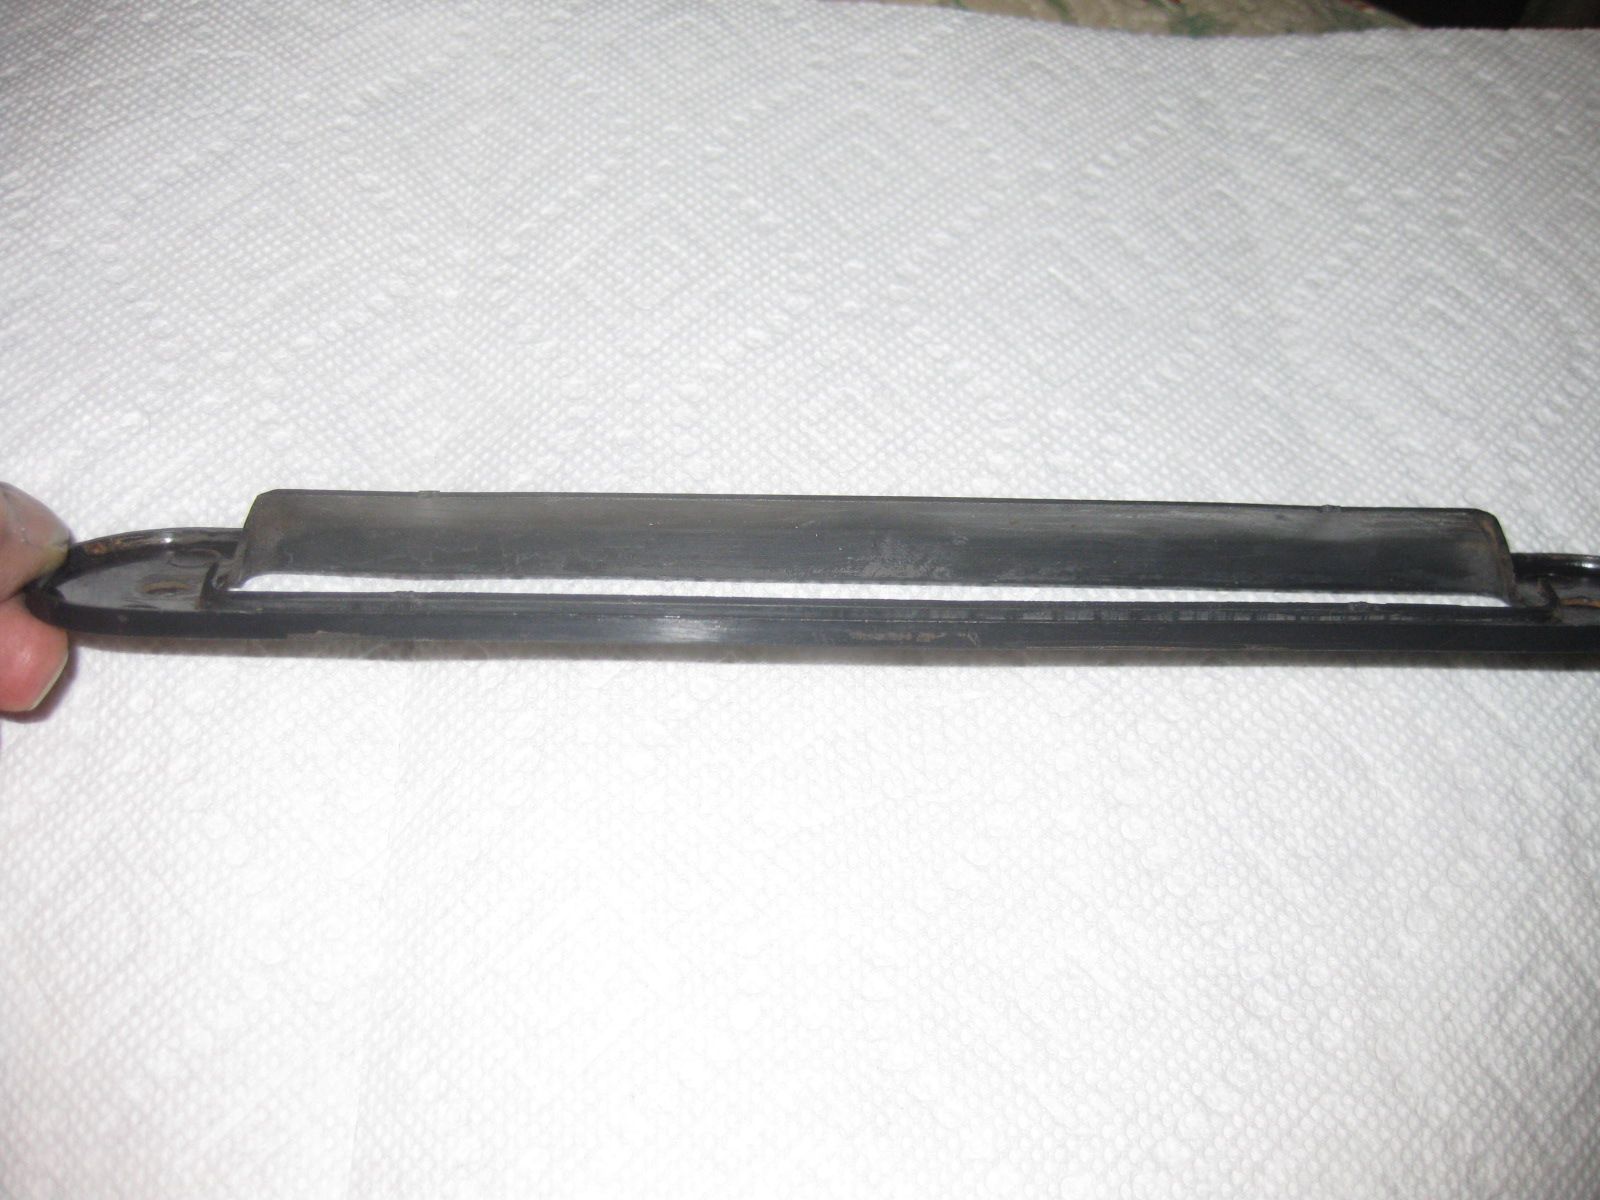
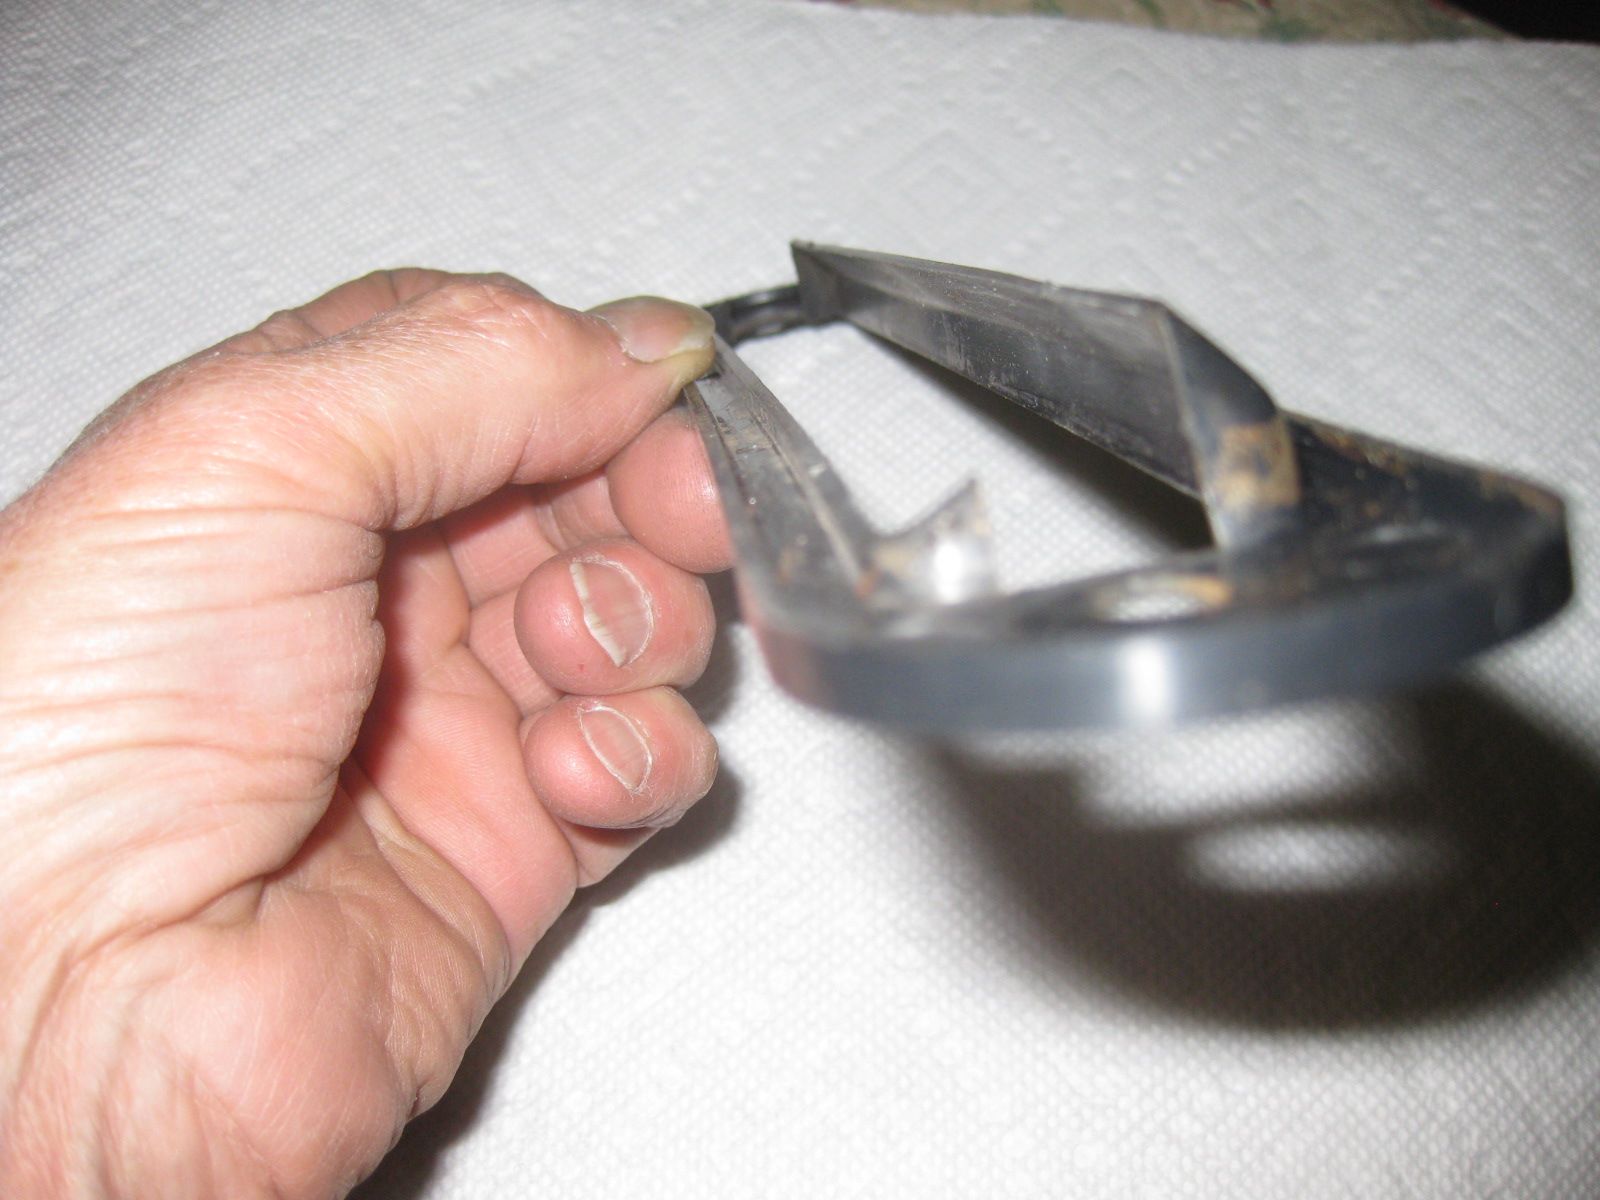
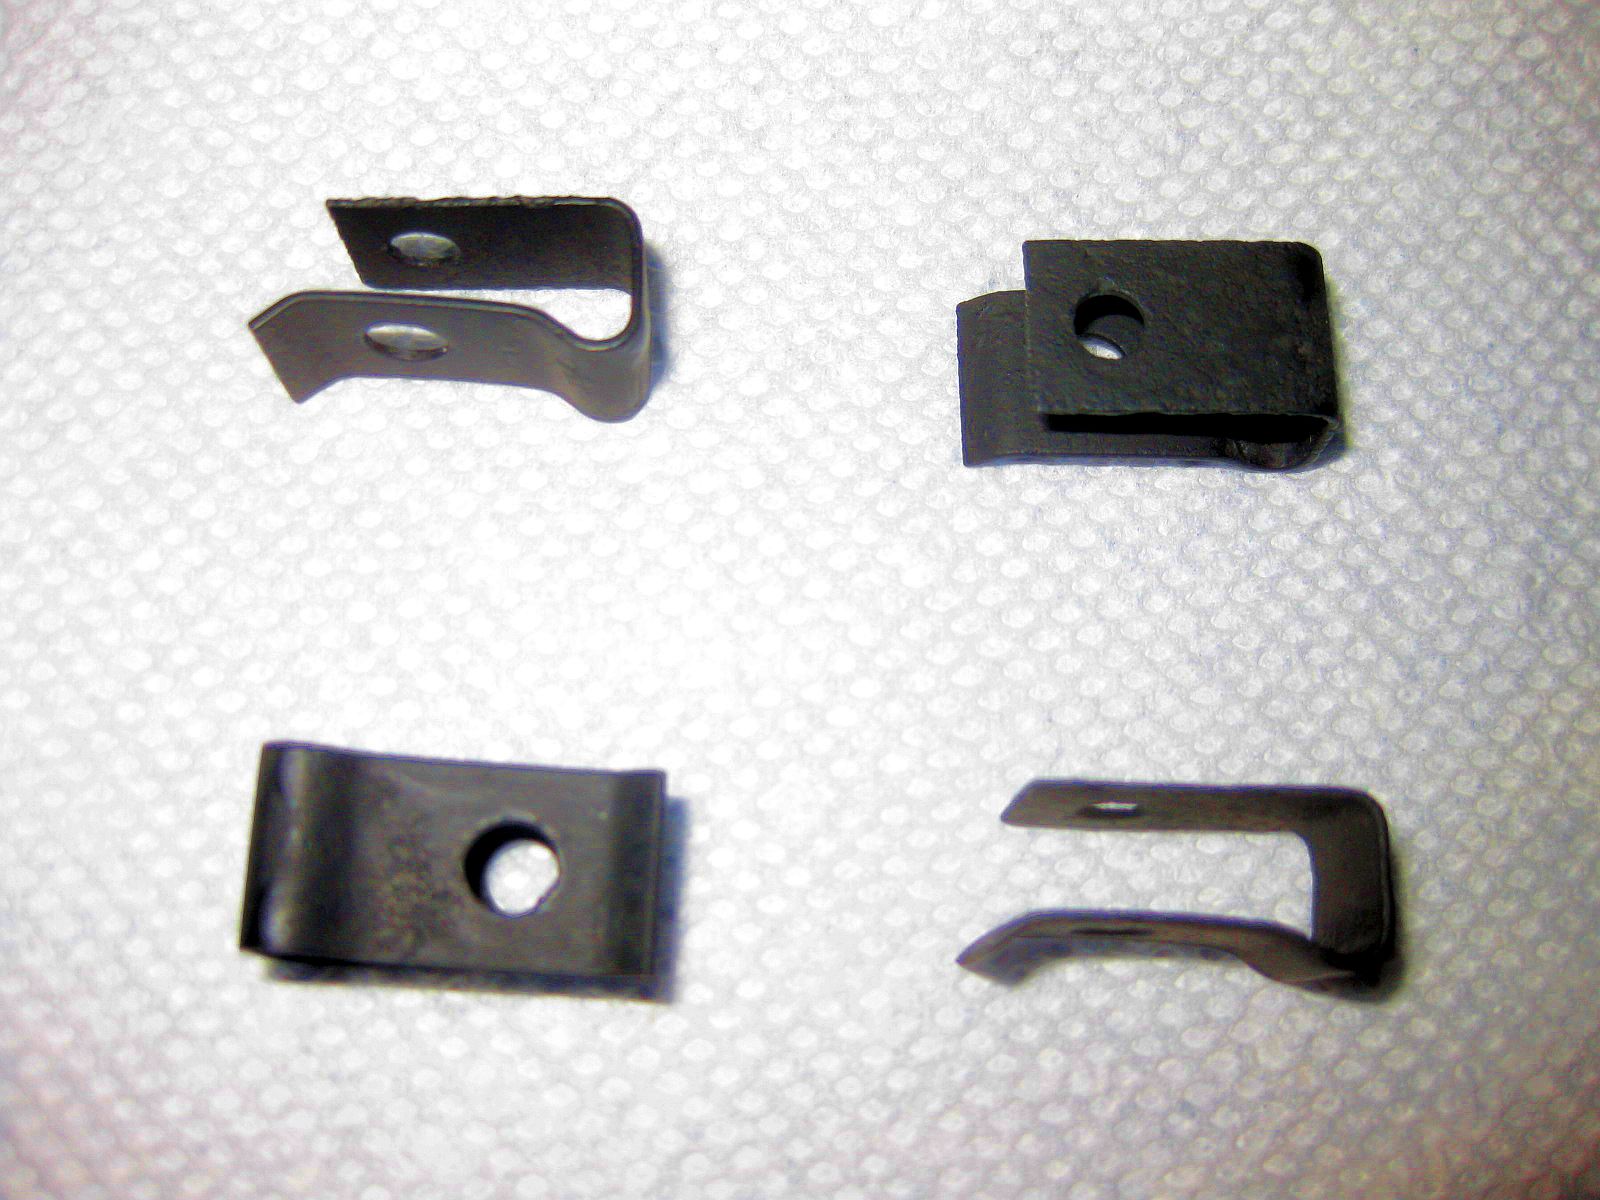
As Jim @jfa.series1 said above, the clips hold the entire assembly including the hatch trims to the hatch and position it properly. The barrel clips that are commonly used to mount the emblems are attached to the trim pins and inserted into the smaller holes of the clips after the ductwork/diverter assembly has been installed onto the hatch. Here are photos of the clips I have intended for my 7/70 and additional photos of the diverters, where you can make out the curved profile. Also, a photo of a quick tracing of the clip with associated dimensions in MM. My ductwork assemblies are in storage across town, so I won't be able to add them to this topic until the coming weekend. I'll photo the assembly and post to this thread, as it would be a good bit easier to understand than these ramblings. As I said, Steve Nixon @nix240z makes these diverters now, and he would certainly be the one to reproduce the clips (maybe in stainless) The originals were made of spring steel to ensure that they would fit tightly, even after the frustrating hassle of spreading them while mounting the assembly to the hatch. Jim D. "Zup"
Good news Hardway-- Just want to stress that I think they should be done in spring steel if at all possible. When attaching the assembly to the hatch there is quite a bit of deformation (spread) required to open the clip wide enough to get everything clamped up at the same time it is being attached to the hatch opening metal. The spring steel accommodates this and returns to original dimension to hold everything securely. Stainless would be great for longevity, but I don't know if it can be made to match the properties of spring steel. Maybe tempering the metal and properly quenching it would do it, but I don't know for sure.
Home for lunch--- Bummer about Steve not reproducing the clips---hopefully he will re-consider. Only from my own experience with removing these assemblies from a 10/70 240z--- the hatch ductwork in it was completely intact and un-molested. Both sides were the same as far as the clip width. The photos I posted are of the original diverter and clips from that car. As usual my foggy memory fails me---so last night I went to the storage unit and found the complete NOS, still in the Nissan bag, hatch duct assembly that I had purchased some years back. Part:description from the tag: A Duct RR Vent 90820-E4100 QTY 1 I will post photos tonight. Jim D. "Zup"
I hope Steve re-pops them---- they would be identical to original and perfect. Anyone who is restoring an early car would need them, and many of us do not have the skills you have shown for fabrication. I am planning on using 2mm closed cell foam sheeting cut to the shape of the diverter and placed between it and the underside of the hatch. (use contact cement to attach it to the diverter first) You can get the foam sheeting at Walmart or any crafts store. Usually found over near school supplies or sewing. This weekend I'll post photos of the assembly before installation.
As Jim @jfa.series1 said above, the clips hold the entire assembly including the hatch trims to the hatch and position it properly. The barrel clips that are commonly used to mount the emblems are attached to the trim pins and inserted into the smaller holes of the clips after the ductwork/diverter assembly has been installed onto the hatch. Here are photos of the clips I have intended for my 7/70 and additional photos of the diverters, where you can make out the curved profile. Also, a photo of a quick tracing of the clip with associated dimensions in MM. My ductwork assemblies are in storage across town, so I won't be able to add them to this topic until the coming weekend. I'll photo the assembly and post to this thread, as it would be a good bit easier to understand than these ramblings. As I said, Steve Nixon @nix240z makes these diverters now, and he would certainly be the one to reproduce the clips (maybe in stainless) The originals were made of spring steel to ensure that they would fit tightly, even after the frustrating hassle of spreading them while mounting the assembly to the hatch. Jim D. "Zup"


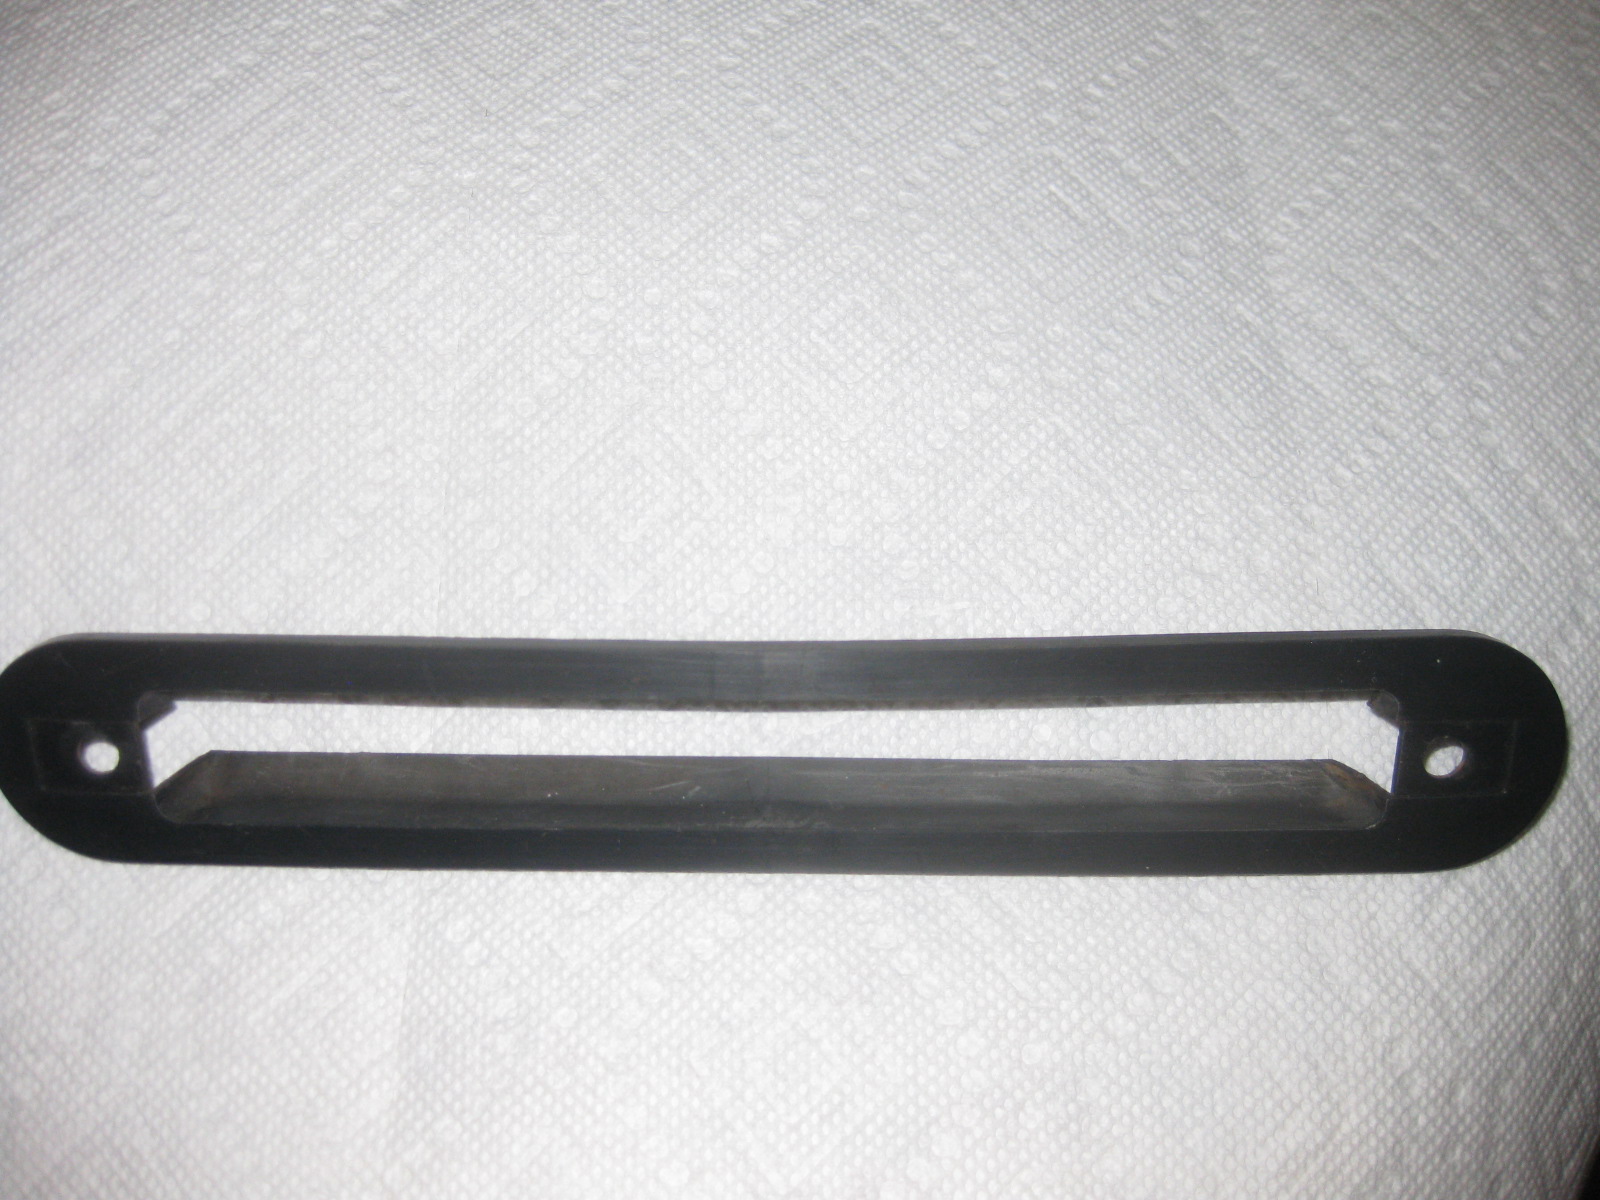
 Home for lunch so no time at the moment, but I will post up tonight with measurements and additional photos. Steve Nixon has reproduced the hatch vent rain deflectors that I sent him and offers them for sale on his website. I think you should really replace yours, as they appear to be as deteriorated as most I have seen. The curvature of the deflector to channel and divert water flow is quite important at these hatch openings. Jim D. "Zup"
Excellent work Dan! Great that you kept working toward the solution and posted to the old thread to wrap it up with additional information, which will be valued by anyone in the future with a similar issue. You need to fix this immediately though!!
Home for lunch so no time at the moment, but I will post up tonight with measurements and additional photos. Steve Nixon has reproduced the hatch vent rain deflectors that I sent him and offers them for sale on his website. I think you should really replace yours, as they appear to be as deteriorated as most I have seen. The curvature of the deflector to channel and divert water flow is quite important at these hatch openings. Jim D. "Zup"
Excellent work Dan! Great that you kept working toward the solution and posted to the old thread to wrap it up with additional information, which will be valued by anyone in the future with a similar issue. You need to fix this immediately though!!


Important Information
By using this site, you agree to our Privacy Policy and Guidelines. We have placed cookies on your device to help make this website better. You can adjust your cookie settings, otherwise we'll assume you're okay to continue.