


EScanlon
-
Posts
5,117 -
Joined
-
Last visited
-
Days Won
2
Content Type
Profiles
Knowledge Base
Zcar Wiki
Forums
Gallery
Events
Downloads
Store
Blogs
Collections
Classifieds
Everything posted by EScanlon
-
Let's not disdain this service. Many, MANY parts are RAPIDLY and irretrievably becoming scarcer than unobtanium. That Troy is taking the time to have these reproduced, is an indication of what he is willing to do to support, bluntly, our hobby. Does he expect to make a buck? I would. Do I find that unfair? Not at all as long as I can get a part that will work. In a few years a PROPERLY maintained vehicle, will for a fact, HAVE TO HAVE non OEM parts in order to keep it running simply because the OEM parts are 20+ years old. Just plain old casual driving will eventually require fan belts, brake shoes / pads, tires, and everything else that gets worn out simply by being used. You can try to "restore" some of these parts only to find yourself needlessly spending tons of time and money, when an equal substitute is available. Personally, I bought my Z to drive and enjoy. If the difference in buying a cloth radiator hose and a plain old aftermarket replacement is more than overnight and a FEW bucks, I choose being able to drive the car. Unless, of course, you "drive" a trailer queen. If that is your game, then by all means you should be using OEM parts only. No derision is intended, just that even Concours permits certain replacements without penalty. Which ones or in what manner I am not aware of, other than I have been informed that there are permissions. I think this is good advice regardless of where or whom you buy from. Having never had that experience in the dealings I've had with Troy, nor found him to try to imply that the parts WERE Datsun parts, I'll take exception to Carl's observation without malice toward Carl. Simply put, we all have different manners and forms of dealing with people, and sometimes we find someone that interacts with us in a less than pleasant manner. That I've always had good transactions with Troy, versun anyone who may have had a bad one are not necessarily indications that you will have the same experience as either one. Having said that, let me say that we should ALL heartily promote ANYONE that endeavours to produce, have produced, or can obtain the information on those items that will help us keep these babies of ours on the road. I intend to drive my car for a LONG LONG time, and to do so, I need everyone else who enjoys these cars to also be helping keep these people in business. Although there will be some who will say this is a plug for a specific vendor, it isn't. It is a plug for ALL our vendors. 2¢ Enrique
-
Also don't forget that the light has acorn nuts inserted into the nut holders. If you get a longer screw, you'll just bust the back out of the nut and get corrosion on the screw. You CAN remove and replace those nuts, but be careful as the plastic needs to be bent slightly. You might also consider replacing the screws with bolts. The lower edge of the light, closest to the rear deck, is a literall bitch to get unscrewed without busting your knuckles and / or stripping the head. I found that a 1/4 ratchet with a swivel made things a LOT easier. Enrique
-
OOPS! It's been a while since I worked on that part, and you guys are right. I added a second speaker on the RIGHT hand side and that helped me to get confused. On the LEFT side, the same applies to the side light. The antenna mast bolt knob assembly needs to be centered. Also check that the gasket underneath the round part is in fact making good seal all around the mast. The pillar emblem as well could be leaking. One last thing to check would be the hatch hinge pockets on the car. Those connect to the pillars also. I stand corrected, thanks for the pointer. Enrique
-
You might be able to swap skins, but to me, the amount of work entailed in that would make it not only prohibitve but also ...bluntly...stupid. By the time you remove the "new" skin, you'll either have used the grind the edge off and hope to re-weld onto the new frame, or you'll have spent a lot of time popping off the welds and bending the lip. In either case, you will have some bodywork to do. If, what is wrong with your doors now is that you have some rust, you'll be money and time ahead by just repairing the rust than trying to do a skin change. As Carl said, go buy the correct year. If all you need is the skin, check with either MSA or V/B. 2¢ Enrique
-
If I recall right, the speaker is in the right rear of the car. As such, you might check not only the pillar emblem, but also the gas filler neck cup where it attaches to the fender. It wouldn't surprise me to discover that the caulking they put around the edges has cracked and is allowing water in. Another place to check is the right rear side light. If the gasket isn't centered properly over the opening, or if it isn't tightened down properly, that could leak also. 2¢ Enrique
-
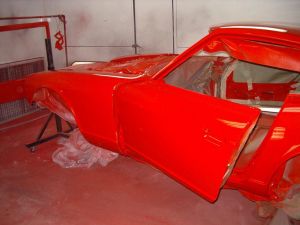 EXCELLENT COLOR! What color is it? Enrique
 -
Guus: I believe your mud flaps are on the wrong side. I can only see the left hand one, but the curve on the flap should match the curve on the fender. 2¢ Enrique
-
My take on the items, is that they are rain shields for lights where the main body of the light is inset into the panel. The top part of which might have water drip on it. Door speaker mounting kits a lot of times come with a rain shield. Could it be that these are the rain shields for the courtesy lights in the hatch of a later year Z, such as the 280ZX? 2¢ Enrique
-
The red lines denote where the meter would be put to. The blue line denotes how in a CONTINUITY check, you would get continuity between the two points the meter is hooked up to. I was trying to understand how you would have a voltage at that point if it still had a "wire" between the two leads. I'm just going to have to go out and check this out with my meter. Enrique
-
I guess I'm dumb. I'll need further explanation. In the pic I'm attaching, you're saying that there will exist a voltage across the two points of the "wire" denoted with RED. But won't you be reading the circuit across the blue line? Enrique WIRING.bmp
-
The majority of members here are into the OEM configuration of the vehicle. As a result, your availability of information will be somewhat limited. www.hybridz.org (I think) Is one place where they have a ton of information on these swaps. Hope this helps. Enrique
-
A bit spendy, but then again the pictures that he has posted seem to warrant it. The triple webers can be a lot of fun, as long as you are knowledgeable on how to tune and balance them. My car had a pair of webers and my mechanic suggested I return to the two SU's. I did and haven't been happier. As far as a ported engine, from my very limited knowledge it means that the ports (not sure if exhaust or intake or both) have been ground smooth and polished so that there is little to no resistance to the air stream flowing through them. By the way, his ad says he has a carburator per cylinder, he doesn't , it's one carburator per pair of cylinders. 2¢ Enrique
-
Daniel; I may be wrong, but it seems that your logic has missed a step. Unless I have it all completely wrong. The hatch glass' that I've seen, have a grid made up of 2 sets of resistance wires that are joined at the bottom edge of the glass and two spade terminals at the top of the glass. The resistance wires (let's say 12 total) need to ALL be cut on fully half of the grid, and all on one side, in order for there to be a lack of a circuit through the glass, and therefore a measurable voltage present. I am deriving this from what I found when I did a continuity check to try to find a broken resistance element. Since only a couple of the wires did not work, I was only looking to repair those two elements. Unfortunately, no matter where I tested for continuity, since the circuit was NOT completely broken, I always got a tone and could not determine where the break was. You're probably more of an electrician than I am, so I would sincerely appreciate knowing how to use this voltage method to determine the break in the elements. Enrique
-
That's the setup in my car. I have a 71 AT with the E-1280 module, and my tach works. I did not do the change myself so I cannot tell you what it will do without that second set of points. From what I've heard, the second point set was only used in certain high heat situations, or overdrive. I can tell you that the car runs very smoothly with plenty of acceleration. 2¢ Enrique
-
Sorry I didn't see this posting earlier. Here's my 2¢: If the OTHER door is operating properly, then open that panel up to take a look at how everything connects. Since you've already figured out what you need, here's another tip. Again if the other door is operating properly, then just swap handles. Again, as Wayne mentioned, the raw original parts were interchangeable. They become sided once you put the little rod thingy on. Just remove that rod thingy thing, and swap handles and remount. The rod thingy IS sided as I recall. Hope this helps. Enrique
-
This indicates that you do have a problem. It sounds as though the front sash is loose, or allowing the glass guide to slip out of it. The glass guide for the front sash is on the front part of the glass holder. It is a nylon bar that runs inside the front sash. It MUST be slid into the sash from the end, and not just inserted into it. The spring being broken is usually more noticeable when it is tons easier to roll the window down than to roll it back up. If you have to pull on the window to roll it back up, that's a real good indication that the spring has broken, or that you have a very seriously misaligned system. You might also check the condition of the groove in the angled part of the window frame. Check to make sure that there isn't material there that is forcing the window to stop. Sometimes, I've seen this fuzzy gasket get bent in such a way that the window is forced out of it's channel onto the edge of the frame. Check that out and repost. Enrique
-
If your intent is to buy a project for your hobby of restoring vehicles, AND you don't mind the amount of time, money, effort, money, hazzles, money, and did I mention money? Then by all means, buy a fixer upper. You will have the satisfaction of knowing you corrected an IPO's mistakes, and can then take pride in any admiration the car and the work done on the car receives. If your intent is to get a car you can drive around immediately, and have people stare at it for it's good looks, and you have the money, then just buy it outright. You'll have the satisfaction of driving a classic sports car, that has been putatively restored. How truthfully it has been restored will usually show up in the price. (Although we can make the argument of the cleverness of the ad or the glibness of the sales person. Then again, if she's wearing a miniskirt and has legs.....) The point is to stay away from what you do NOT enjoy and stick with what you DO. 2¢ Enrique P.S. NOBODY, and I mean NO ONE should buy an old car as an investment. The vehicles that truly do pay back the money invested in them to achieve their sales price are few and far between. P.P.S. If you buy a "restored" vehicle now, you can drive it for a few years, and then do your own restoration, but at least now you'll have the complete car (hopefully).
-
Good Advice. As a suggestion for those who are intent on recreating the painted effect as best as possible. If you'll note all of the edges of the paint on the majority of the painted areas (with exception to those areas that do not have a lip), go to the top edge of the lip surrounding the area of paint. However, the paint level itself is lower, and the effect is such that the edges of the paint have a very nice contoured edge. This is caused by the meniscus of the paint to the edges. In order to replicate this meniscus, it is necessary to THIN the paint. By thinning it you will allow the paint to flow out to all the edges and corners of the painted area, and fill it in seamlessly. As the thinning agent evaporates out of the paint, the paint dries from the center out. This allows the edges to get a nice smooth painted surface that flows easily into the center of the area. The trick is to allow the skin that forms on the top of the paint to stretch up to a degree. This is done by NOT force drying the paint. You want that upper skin to form slowly and evenly around the edges. This is tricky as too much thinner will show up on the finished product, and too little thinner will not allow you to flow the paint to all the edges. I wish I could give you a guideline as to the ratio of thinner to paint, but this is something you will have to experiment with. Personally, I used R/C paints since the airbrush thinners are more readily available, and in my experience, these evaporate quickly enough that there is little chance of contamination, and they do a good job of keeping the paint from separating. Hope this helps Enrique
-
Excellent post Carl. The pictures do show the differences, another example of a picture is worth a thousand words. As a note, the one on the green background (and for those whose monitor has different color ink, the one on the right) is the EARLY version with the left one (blue) being the later one. If you'll compare the two, you'll note that the lower left edge of the D has nice crisp angles, whereas the older one has them somewhat rounded. Also the begginning top left and the ending bottom right are sharp on the older, and rounded on the newer. AFAIK the 240 badge on the hatch is the same for all 240's, even those that were late in the production cycle that would have received the later "Datsun" emblem. The circle I referred to was the circle on the C pillar badges that went on in the location of the Series II vents. No vehicles had the circle behind the 240Z on the hatch. For those who are looking for brand new NOS emblems, contact Troy at Too Intense Restoration. He has them and although not cheap, he DOES have them. I bought several of the harder to find emblems from him, after trying unsuccessfully to restore some older ones. Sadly the chrome on the plastic has a tendency to bubble and pit making it next to impossible to restore. For that reason, consider what you are capable of restoring, the amount of time it will take to do that and how much your time is worth. It might be that brand new emblems from Troy may be in fact....cheap! That's why I chose to go that way. Enrique
-
The Hood gets the round "hamburger" logo, it just says "DATSUN". The Front Fenders just above the body line going back from the wheel well gets the slanted "DATSUN ". AFAIK the slant is the same for both and NOT sided (i.e. not a left slant and a right slant but both right slant). Off topic note: It would be interesting to find out if in fact there existed a LEFT slant "DATSUN" fender emblem. The pillars get the "Z" logo vent ornaments. The Hatch gets a Script "Datsun", but take note: the ends of all the letters, and the crossbar on the "t" have distinct corners and are NOT rounded. The rounded Datsun Logo was for later years. This is mounted at a slant on the RH corner of the flat portion of the hatch. The Hatch also gets a 240Z emblem, located just below the script "Datsun". The 240Z is done in the same style as the original (69, 70, Early 71) pillar emblems, except for the circle behind the original. The only other note to add is that an early 71 would have also had the hatch vents, and would therefore have had different pillar emblems. HTH Enrique
-
From behind the grill, loosen the bolts to the LH hinge and without opening the hood, push down on the LF edge of the hood. This should allow you to "tweak" the hinge position so that the fender and the top of the hood align. If you reach the bottom of the allowable travel and the hood is still high, now you will need to adjust the height of the fender to the fender brace. Before you start that however, with equal tire pressure on a level surface, measure up from the ground at key points on the fender that you can match on the other side. Check to make sure that the bottom edge of your rocker panel is equally high on both sides. If there's a difference, take that into consideration. That difference is the amount of slope your car is compensating for, or is naturally offset by wear and tear causing it to "lean". Now measure from the ground up to specific points on the fenders. Make sure you measure from the front as well to properly "X" and "Y" where on the car you are measuring. Check the top and bottom of the rear edge, and the top and bottom of the front at the nose and just in front of the wheel well. These measurements will need to be adjusted by your "lean" factor that you determined earlier on the rocker panel. Now compare measurements and determine if the fender is in fact off it's actual line. If you are measuring on flat ground, a good visual inspection with a reference yardstick is sometimes all you need to do instead of the tedious process above. However, you need to have a keen eye for reading the yardstick on a level plane. Hope this helps. Enrique
-
Chris: Two items to check. First, is the spring on the pin strong enough to push the hood up enough? Rarely, but it can happen, is that that spring has lost it's tension and can no longer "pop" the hood up. Also look to see that the seat of the pin isn't catching on the pin as it rides up and down. Sometimes a bit of disassembly and cleaning will do wonders to this part. The other item, is to make sure that the pin is correctly centered into the latching mechanism. If that isn't centered, the shaft will tend to rub on one side of the hole, reducing the strength of the spring and causing it to bind. An easy way to center it, is to loosen the two bolts holding the pin to the hood and slowly close it. Once the pin enters the opening for the latch, press down lightly, but DO NOT engage it. As you push down, the pin will be shifted by the latch to it's proper center position as long as the hood nor latch have been shifted such that a proper centering cannot be effected. Once you can tell that it is about to latch, release the hood gently and lift it to get the pin out of the latch. Now tighten down the two bolts. Let me know how it works. Enrique
-
I thought that I had posted my window adjustment articles to this site, and apparently I had not. Check out these two new threads in the Articles section. http://www.classiczcars.com/forums/showthread.php?p=105028#post105028 and http://www.classiczcars.com/forums/showthread.php?p=105031#post105031 Hope these help. Enrique Scanlon
-
This is a real basic primer on how to bump out dents and shrink metal. Ok, if you're handy enough with an oxy-acetylene torch, then you'll be ok with this next procedure. If you're concerned with the "panel beaters", and I take that to mean the specialty hammers, dollys and other body specific tools, you can still do quite a bit with your regular tools. You can use your regular ball peen hammer or regular claw hammer as long as you're careful of the claw. See if you can address the metal from behind. Typically this will involve removing the lights, wiring and other trim pieces that will be in the way. Once done with that, take a good look at the metal. Remember, metal will stretch when dented, when you are pounding on the dent from the back side (inside of the car) you will also have to do a fair amount of pounding from the outside to restore the metal to the level required. If the metal has been stretched a bit, you have an acetylene torch, and you can do a fair amount of shrinking with the large heating tip, we called it a rose bloom but it's basically the one with many holes at the tip, used to heat large pieces of metal. The trick is to heat the stretched area till it's somewhat glowing, not orange but kind of reddish, then with a rag thoroughly soaked in water, you quench the metal. This causes the metal to shrink rapidly and will strengthen it in the process by hardening the metal. You have to be careful of the amount of steam that will be generated, so wear gloves. Don't over do this, cause you can over harden the metal and then it can become brittle. Remember, you're just trying to reverse the stretching caused by the impact. Without a shrinking hammer, this is the next best method. By the way a shrinking hammer should only be 10-20 dollars, it has what looks like a meat tenderizer face to it, you use it like a regular hammer, but you have a metal dolly behind it. By the way, if you have spare pieces of solid metal lying around, look at them, you may have the basics for a metal dolly, i.e. a piece of metal to both anvil against and also to act as a counter hammer to your striking hammer. The basic technique to pounding out the dents with a hammer is to use your dolly on the low side back side. That is, from the side that you are working on, find the deepest part of the dent, then from the other side (the side opposite you) put your dolly there and press outward or towards you. Then find the ripple in the metal out from that dent. This is the "rebound" dent. When metal gets hit, part of it sinks in, and the surrounding metal will bulge out. With your hammer now work around the dent, hitting the rebound part of the dent. If you work it properly, you'll slowly but surely see the rebound dent going down, and the deep dent coming out. You CAN use the dolly to smack against with the sheet metal between, but this is usually reserved for smaller dents where you can work faster that way. Just be careful with your fingers and don't get too crazy, you can thin out the metal that you're working on, and you'll end up with a washboard wobble, then you'll HAVE to shrink that metal. Once you've brought the majority of the dent out or all of it if you've been lucky enough all of it, then use your plastic body filler to finish the panel. If you should have a dent that is too deep to try to hammer out, you can use a slide hammer, or if you don't have one, get some sheet metal screws, drill a smallhole in the deepest part of the dent, and using pliers or some form of gripping the screw use it to pull the metal out, while again taping down on the rebound dent. I hope this helps, but I do caution you, I've summarized techniques that I'm sure others will say are too complex to be tried by the amateur as well as simplified some to basics that some may argue are too simplistic. Check your library, there should be some basic books on body working to help you. and an addendum: I'll add this to that, if you have access to an Eastwood catalog, they have an excellent tool that will help you do a quick job of shrinking metal. This is a hammer that has a rotating cam head with a spiral cut on it. As you hit, the cam rotates while grabbing the metal. I personally prefer the plain old shrinking hammer. This is one that looks like a meat tenderizer. This hammer in combination with a dolly is usually all you need to shrink most stretched out sheet metal. The prior post explains the basics, and it is tricky to explain WHERE on the panel to select where to shrink. The best I can do to explain that is as follows: Metal shrinking is present when you have a washboard effect on a panel. Washboarding is when you press on the panel, and you can feel and hear it go bonk and press in, when you release the panel it bonks again and pops out. The other obvious is when you have a panel and you can see the obvious BULGE of the metal above where you need it to be. To know where to shrink, try to find the one spot that is REALLY sensitive to push / pop. This is the sweet spot for THAT stretched out area. First use your shrinking hammer, and see what you can do to tighten up the metal with that. Put your dolly behind the metal, use your shrinking hammer, and smack the metal using the dolly to absorb the impact and accept the rebound. VERY IMPORTANT DO NOT LET THE DOLLY REBOUND ONTO THE METAL. This will tighten up that specific spot. Next, find the next sweet / soft spot. Usually as you tighten one area, you'll have another area become the sweet spot. Keep addressing the individual spots with the hammer / dolly combination. You will finally get to a point where no amount of beating will reduce the metal any more. At this point you switch to the acetylene torch. Heat the metal, again not red hot, just starting to glow, and wearing some thick gloves, and with a rag that's pretty well soaked and dripping with cool water, put your dolly behind the metal to support your pushing, push the wet rag onto the surface. The metal will cool very rapidly and shrink. Move to another spot and repeat. You'll do this pretty much all over the panel, and usually it's between the spots you treated earlier. Pretty soon the panel will feel tight and no washboarding will be felt or present. Check your panel for straightness and level to the surrounding metal. Use your dolly and regular hammer now to remove any last dents, etc, and you should be ready for your skin coat of bondo or lead. If you don't want to use lead or bondo, then you just need to continue to straighten and shrink the metal until the panel is to the shape desired. Most body men will just avoid this, since it is incredibly time intensive and expensive. It is best to get it so that you end up with the THINNEST possible coat of filler. But that's another posting. This post has been promoted to an article
-
There is the Window Pressure Roller which is a little barrel shapped roller located on the uppermost part of the door, mounted onto the "outside" part of the door, and below the Chrome / Rubber Wiper strip. This is what keeps the window from flopping around towards you and away from you as you are sitting in the car. The other rollers that are of concern here are the THREE attached to the regulator scissor assembly itself. Each of these is critical in that they are the means of transferring the rotational cranking force you apply via the window crank to vertical movement. If these rollers are broken, tight, or otherwise NOT functioning properly, since they are at the end of long arms, the problem gets magnified by the length of the arm just as if it were a lever. Each of these three rollers rolls in its own independent raceway. Two of them act directly on the window pane itself, the third fits in the guide channel that bolts to the inner part of the door. Each of these MUST roll somewhat freely. This sounds vague, but what I mean is that they don't spin like a wheel on a Hot Wheels car, but more like a wheel that needs constant thrust to keep it going, but the key thing, NOT HARD. If they aren't moving easily, then you must free them up with some sort of lubricant. The rollers are nylon, and can easily become grooved or damaged. If that's the case, the only way to fix this is to get a new window regulator scissor assembly as the pin that holds the rollers to the scissor levers is peened into the lever arm. If the three rollers check out ok, then look at the raceways themselves. They must be uniform in roller channel width, that is the width that the roller "sees" as it rolls back and forth. Think of the race way as a true "C" channel with the roller trapped within the "C" by the flanges on the top and bottom lips of the "C". As you look in to the channel from the end, you should see a smooth and straight "C". Check for copious amounts of OLD grease. Old grease eventually gets to be the consistency of TAR, and makes it VERY difficult to move items through it. If again, all this check, then check the FRONT sash. This is what the nylon guide mounted to the front of the window pane bracket rides in. It mounts to the lower front corner of the door. It has a GENTLE curve to it, but the channel itself should not have ANY NOTICEABLE bends in it. If it does, it must be replaced, this is more than likely the problem as I've stated in prior posts. Lastly, check the spring on the regulator assembly itself. If this is broken, disconnected or sprung it will make the window very hard to actuate. This spring is what helps you counter-balance the weight of the window pane, so that you can crank it UP. Without it, you are trying to lever the pane up with a small 6" lever mounted through a geared mechanism, the mechanical disadvantage is such that you are literally pushing a rock up a big hill with a small stick.