


EScanlon
-
Posts
5,117 -
Joined
-
Last visited
-
Days Won
2
Content Type
Profiles
Knowledge Base
Zcar Wiki
Forums
Gallery
Events
Downloads
Store
Blogs
Collections
Classifieds
Everything posted by EScanlon
-
That's because you're in Australia, mate. There they don't call it a TAIL, they call it a BUM. (or is that in England?) Ok, we need Alan in on this one.
-
The front head lights will fit from a 260 to a 240 (also the early 280's) as far as I know. However, the SIDE headlights are year specific.
-
If your car is a 72 or later and it is equipped with the seat belt warning system you'll also want to disconnect the seat pressure switch which is connected via a pig tail at the rear of the switch. 2¢
-
Daniel: Sorry, tried to pull your leg and it came off in my hand. There is no such thing as a FRONT tail light. Unless of course, Alan knows of one that was offered in the Japanese home market that I am completely oblivious to. (Just kidding!) Sorry for the confusion. Enrique Scanlon
-
The fuel filler hose is still available from Nissan and other sources. Expect to pay about $90 US for it. The cloth braided rubber hoses connecting the fuel tank evaporator and the fuel tank and filler hose can be obtained as NOS from various sources, although some of the hoses are NLA. You might find it cheaper to find replacement hoses at your local car parts store. But be sure to specify FUEL hoses as other hoses will dissolve. HTH Enrique
-
Definitely if it IS a rear tail light assembly for a 240Z. But not at all if it is a front tail light assembly.
-
POR 15 once cured does not continue to exhude cyanides into the air. Curing takes approximately 3-6 hours depending on temperature and humidity. The product recommends that you use it in a well ventilated environment and recommends the use of an organic vapor breather if you're spraying it. Personally, I recommend using the breather even if you're brushing it on. While it makes an excellent rust-proofing material for areas where the finish is not critical, I wouldn't recommend it for exterior applications where a finer finish is desired. By that I mean the visible exterior of the car. Areas underneath the car, fender wells, underboidy, frame rails, this is a perfect use for this paint. Yes it may "fog" over time, but it is the underside of the car where you want strong chip resistant paint. I wouldn't just "pour" the POR on and hope for the best. You'll get better results if you degrease and prep the metal according to directions before you brush it on. If you do use it on exterior metal, you MUST scuff it to accept a coating of any other paint / primer. Sandblasting is a method of "sanding" using high pressure air blowing a stream of abrasive and air on to the surface being "sanded". The most basic of sandblasters is a bucket, a syphon hose attached to a blower and a source of compressed air. You stick the syphon hose into a bucket filled with abrasive and allow the venturi effect in the blower / syphon connection to pull the abrasive up out of the bucket and into the air stream. This system is generally priced under $50 (not including the compressor and air lines.) Another method is the Gravity Drop method, where the bucket is now placed above the air line and gravity feeds the abrasive into the air stream and out the delivery hose. Systems range from $50 to $120 depending on size and features.. The final method is Pressure tank. Same basic concept as the gravity drop, but now the abrasive is inside a pressurized container when mixed into the air stream. This method is the most powerful of all, as no pressure is lost in injecting the abrasive into the air stream. Systems can range from $70 to several thousand dollars. All of the sandblasting methods require a large CFM capacity compressor in order to be effective. All of these methods will need some sort of containment area or area where it doesn't matter that abrasive is going all over the place. Hope this helps.
-
Why didn't you look away once you realized her finger was escavating?
-
Bonnie: You CAN get the seat higher, but as it's already been pointed out, you're limited to the length of the bolts that hold the seat down to the frame. You might have better luck putting some sort of spacer between the rails and the seat bottom itself. Especially if you need 1-1/2". Have you considered getting a hard foam cushion? 2¢
-
Nigel: Although it looks as though that body filler is thick, it probably isn't over 3/16" thick. The reason it looks thick is that you've ground it off at an angle. When they brazed that reinforcing plate they tapped in the edges to try to hide the braze. This is hard to do in the first place, and not unusual to tap the edges down. The hard part to do is to blend the repair into the panel all the way up. More than likely they long boarded the sanding and that ended up taking the filler way up high and low. In essence they ended up "chasing" the dent. Can't explain this briefly, but it is a common body working problem. The problem lies in NOT sanding down far enough and then adding more body filler to try to smooth out the new "high" you perceive is there. Add to it that the roof / fender body seam is there and it is even easier to get into chasing the finish. 2¢
-
But in looking it over, I see that 2mZ is correct. He recommends the 280 tach. I DO have an operating 240 tach in mine. The connection was very straight forward, and I'm not using the resistor. I know I got this information on the web. I'll do some research and get back to you on this. As far as the arguments regarding reliability etc on the 240 tach, I'll post the following. My car is an automatic. The tach is a nice thing to have, but definitely not a requirement, as I don't have control over when the car shifts. It's nice to know that at idle I'm reving high, or that at 80mph I'm running close to 4k rpm (or thereabouts, like I said, I don't look at it much.), but in all honesty, I got it to work only because I hate inoperative instrumentation on the car. If I were into racing the car, or something like that, then maybe I'd want an oscilloscope, but the 240 tach is accurate enough for me. 2¢
-
The 72 and later seat belts have the retractor mounted in a cup right behind the seat, just below the flat vertical panel that is the front of the storage boxes. The earlier seat belts were just bolted to the inside of the rocker panel. You could no doubt make it work, but I think it would be easier yet just to find the 72 + model. And just a note regarding the legality of fixing your own seat belt mechanism. If you CAN fix it, you DON'T have to tell the inspector about it. Sometimes what the cop DOESN'T know CAN'T hurt you. 2¢
-
Dizzy: Don't know where I picked that term up, must have been one of you Aussie guys who are always butchering up the Queen's English. :tapemouth But you have to admit, it's quicker to type Dizzy than Distributor, and it just sounds......cool! By the way, first time I read your answer: At first I thought you were saying it was a bad word like poop or something like that.....: Western Washington U.: I believe that's up by Tacoma / Seattle area. I'm in the lower border of the state, just North of Portland, Oregon. Weather up here is fairly mild considering how far north we are. Snow is usually a disaster when it falls, since no one seems to know how to drive in it. Coming from Michigan, it was an extremely amusing novelty to watch the TV channels go into 24 hour coverage of any snow storm, and the ensuing driving conditions.....for 3 inches of snow. Compare that with Michigan where anything less than 6" is no reason to be late to work. Here, they'll shut down schools, businesses, about the only thing they don't do is call out the National Guard and the Red Cross, but I wouldn't put it past them. Rain, you may have heard is a common item. Yes, it does rain. A LOT! But then again, you don't have to shovel rain. (We don't tan, we rust!) It can make for some dreary months in winter, and be a general PITA during spring and fall, but the general climate more than makes up for it. There's a commercial where it shows a commencement ceremony going on....in the rain. One student is carrying an umbrella and the announcer just STOPS when he notices her. She realizes this, gets embarrassed and then folds it and the announcer then announces her name. It gets to the point where you don't mind it, although you wish it were less. ScaryFast: You don't want to cut that wire, all you need to do is undo the hold down plastic pieces and release one of the loops. Cutting the wire and rejoining it will only add resistance to a wire that is part of your ignition circuit. Not much, but why add any? And that only holds true for the Early Tach's as the later tach's had a 3 wire connection and not 4. FWIW
-
Part of the problem with finding good mechanics is that they are as scarce as Hen's Teeth and as expensive as Leprechaun's gold. Ask around other Z owners. Someone will point you in the right direction. But be aware that even though their hourly fee may be more than the hillbillies down the street, in the long run the Good mechanic's bill will be LESS! How, you ask? Simple, while the trained monkeys down the road are busy replacing part after part for several hours before something starts going right and they can proclaim "Fixed!", the Mechanic goes in, checks and verifies his "diagnosis" and repairs or replaces if need be the bad part. By the time the other guys have 6 hours of labor into your car, he has 2 but he's fixed it while the other guys still have to clean up. That's why he charges 3 times what the other guys do. But the biggest problem is that the average motorist, looks at his fees and presumes that the other guys, whose fees are lower must be "just as good". They then take their business over to the bad guys leaving the good mechanic without work. So support the good mechanics. Yes it may "seem" more expensive at first. Until you are STILL running without problems and the guy next to you at the show, who insists on using the Minimum Wage Parts Replacer Of The Week at the local grease hole has had to overhaul his engine a couple of times. Also, which would you rather do, spend a couple of weekends trying to figure something out that the mechanic can fix in a day? Granted, you pay the mechanic, but isn't your time worth something? The mechanic I patronize tells me that he's had customers come in, get an estimate, then not come back for a few weeks. Then they come back and the job is worse to do, and sometimes takes him twice the amount of time and effort. It turns out the customer will have taken his car to a "cheaper" mechanic and gotten the job all fouled up. Now the customer is back to get the job done right. But then the car is fixed properly and that customer never goes elsewhere. So that customer ended up paying 3 times to get the work done. Once -poorly, and the next two were to get it undone and then to get it done right. I have no complaInts.
-
Either the turn signal flasher is bad or the fuse at the fuse box may LOOK good, but do a continuity test on it. Can you hear the flasher "ticking" when you use the stalk? When you say no turn signals, I presume you mean neither front NOR back. That brings the problem to the dash area. The only other thing would be a bad hazard switch, or connection to the combination switch. 2¢
-
NOT true, that's the same setup I have and I'm using the original Tach. The key is in wiring the dizzy and tach into the car. I do know that the link posted by 2ManyZ's to geocities garage is a good one. Check that one out. Enrique Scanlon
-
Since she was the NAVIGATOR, she basically was telling the driver what to do......in the U.S. we refer to them as Back Seat Drivers. But since there is no back seat in a 240, I guess Navigator will work. Besides, she does what most Wife's do......order the driver around. J/K.......:
-
You can change the Distributor to a later NON point distributor. That way you get the advantage of losing the points AND the resistor. There's a site on geocities that has tons of information, I'll have to find the post for you. You can even use your old tach with it if you wire it in properly. That's what I have on my car and it purrs. 2¢
-
That's the resistor everyone refers to. Did you change your distributor / points to Electronic? If so, ditch the resistor, it's actually working against you. Disconnect the wires going to both sides of the resistor and do a continuity check through the resistor. Also check to ground. While you should check OK through the resistor, you shouldn't get a tone to ground. HTH
-
EXCELLENT CARL!
-
There is a Black / White wire going to the POSITIVE side of the Coil from the Tachometer, BUT there is also a Green/White wire that comes from the Tach that hooks up to the Resistor. On the other side of the resistor there is ANOTHER Black/White Wire. If you inadvertently swap these two Black White wires around, you not only will not RUN after starting, your Tach also will not work. Been there, done that. 2¢
-
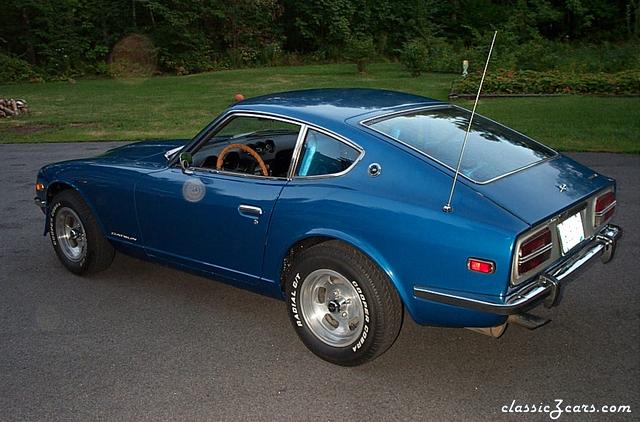
I like what the picture shows. What about the interior? Although $7500 may be excessive in SOME areas, in others it's average. You must consider that for what we have seen of the underside and now the exterior, it doesn't look bad at all. A bit of blue smoke, personally, BEFORE I would invest a dime in tearing down, rebuilding, etc etc etc ad nauseaum, I would do the very VERY BASIC items. That is: Change the oil and filter, preferably after having run some sort of "flush" solution through it. I forget the name for it, right off the bat, but it may just be that you have sticky varnish everywhere that needs to be cleaned. I just recently took my Acura in for a complete service, and one of the things they did was a hot reverse oil flush or something like that. A noisy lifter that I had, miraculously got quiet. Use a good quality engine oil. I don't know what everyone else will advise, but I've used Duralube additive and been impressed with the results so far. Check that indeed your reverse light switch is inoperative and not simply disconnected. Also check the fuse, not just visually, but take it out and do a continuity test on it.. Believe me, I've seen it happen time and time again, the fuse may look good, but fail the continuity test. Have you checked the bulbs? Check the other fuses and bulbs while you're there. Lastly, Bambikiller already said it, switches don't care which way the current is going in a 12V system. I agree with everyone else on the seat belt. Simple fix. Worst case, it's got a dose of the sticky grease, or there was a kink in it and it got retracted into the case and you just succeeded in pulling it out to where it got stuck. I'm sure there will be some that will say, those are real obvious things you're advising, but you'd be surprised how often it is the very minor and obvious stuff that trips people up. By the way, Andy Russell is an outstanding and honest guy, give him a holler for the manual, it will save you HOURS! The only other manual I would recommend OVER the Haynes and Chilton's is the Clymer's Manual. The early one for 70 to 74 vehicles with the BLUE cover. Oh, and feel free to post any and all quetions. I think that we all enjoy answering them, although 2ManyZ's and KMack and BambiKiller want everyone to tear down their engine so that they can overhaul it because they're the kind of people who enjoy that kind of thing. So don't be surprised if you post something like: My Rear License Plate Light went out, but only ONE bulb seems to light up after changing both. What's up? Those guys will answer: First, you need to remove the engine and do an overhaul..........:stupid: JUST KIDDING..........:
-
If memory serves me correctly, the rectangular turn signals in the grille area weren't for a 71 but rather for a later year Z. Checking a V/B catalog, I think you are thinking of the lights ont he 75 and later 260 and 280's. If you have a 71, and it hasn't been modified drastically, it will have the park/turn signal light right below the headlights and below the bumper. 2¢
-
The BRE Spook series of spoilers (and I'm mentioning it only cause some people will call that an air dam as well) mount to the front valance and turn signal fender quarters. 2¢
-
 Lookiing Gooooood!