


EScanlon
Free Member
-
Joined
-
Last visited
Everything posted by EScanlon
-
What kind of headlight conversion are you talking about? Look at my gallery for one type. Enrique Scanlon
-
CGinOK is correct regarding getting heated air out of the eyeball vents, but the fresh air vent outlet he's referring to doesn't connect to the eyeball vents. The Vent controls located underneath the eyeball vents go to the fresh air ducts way up high on the kick panels. You'll feel the air on your feet and legs, but you won't see the hose they come out of. As far as the heater core being bad, before you go tearing out the dash and the heater, check the hoses and valve which are very visible on the right hand side of the heater. Those go out more often than the heater core and are also easier to replace. 2¢
-
Check the Combination Switch, specifically the wiring leading to the headlight switch. It's very possible that one of the wires has come loose, or is making a bad connection.
-
The question is, can you guys round up a dozen or so sets in good to excellent condition? If so, we might be able to make a mint! We could also set up a pipeline sending parts down to Australia that you guys need, and returning some of those "exotic" items we want in the U.S.. 2¢
-
If looking for New, contact Andy Russell or Too Intense Restoration, both of them usually have them in stock for immediate shipment. Prices are reasonable considering the scarcity of the items. Used? Now, we're looking at most of the members here, as no doubt, the majority have either obtained new and removed their old, or have gone boneyard shopping to better what they have. Let us know, and where your brother is (city) so that we can maybe coordinate some of this stuff to him. Enrique Scanlon
-
As long as the opening through the firewall is in good condition, is flat and hasn't been oversized to where the boot wouldn't make proper contact and seat, I wouldn't add adhesive to it. That said, IF you feel that the added bit of adhesive will seal better, ensure that it never comes off, etc, go for it. Personally, whenever I have doubts as to the mechanical ability of something to grip, clamp or otherwise keep something as it needs to stay in order to function properly, I will use any means I have or can devise in order to maintain that function. In the case of this boot, it's only purpose is to make a weatherproof seal on the throttle shaft through the firewall. The shaft shouldn't be extending so far into the engine compartment that it would overextend the boot to the point where it would pull out of the hole, if it is, the most likely cause of that is that you've not slipped the rod far enough through the boot. Remember, when there is no pressure on the accelerator pedal, that boot could actually be COMPRESSED from it's normal state, such that when fully extended (when you've floored the pedal), at best it's extended to a "full" reach. Don't forget that rubber is less forgiving when overextended than when it's compressed. 2¢ By the way, you could also put a nylon cable zip tie on the end of the boot to "lock" it in place on the rod and to really grip it.
-
You can remove the link to the accelerator pedal from inside the cabin by gently pulling on the ball/joint connection. Then you can remove the linkage assembly inside the engine compartment and pull the rod to the pedal. OR If I recall properly, there is a duplicate ball/joint connection on the engine side of the firewall. Remove the cap over the ball gently and replace the boot. You're probably worrying about the ball /joint connection. You're right to be cautious. 30 year old plastic can be brittle and easy to crack. There is a pair of pliers specifically made to remove windshield wiper arms from those shafts that have them pressed on instead of screwed or bolted on. If you have access to one of those, use that. Barring that you can insert the nose end of a pair of needle nose pliers slightly spread apart, so that the jaws straddle the ball. Then with a screwdriver use the needle nose pliers to lever against, and that should get you to separate the ball/joint. Now if you're really, REALLY paranoid about the plastic in the cup cracking, you CAN use a hair dryer to heat it up and therefore soften it. DO NOT USE A HEAT GUN! Too many times people assume that if a little heat is good, MORE heat is better. Not true in all cases, and in this case you will more than likely distort and RUIN the ball cap, so that it will not GRIP the ball on the end of the rod. Remember, just ENOUGH heat to soften, not enough to distort. By the way, get some K-Y Jelly or some RUBBER SAFE lubricant, and lube the end of the boot where it will mate up to the firewall, as well as the other end where it will clamp on the throttle. This will allow you to insert the rubber boot easily, and will not dry it out like petroleum jelly or some other petroleum based grease. Hope this helps. Enrique Scanlon
-
Having served in the U.S. Air Force, I'll toss in my two cents: I fully support their right to have and voice an opinion. In fact, one of the credos we lived by in the Air Force was: I will defend to the death your right to freedom of speech, whether it agrees with mine or not. That said, there is an addendum that needs to be explained: Your right does not overrule MY right, nor any other person's right. Your right to protest is important, that you must block traffic, break windows, disrupt business and otherwise infringe OTHER people in their rightful pursuit of their business, in order to express your protest, is NOT. That is why the police are there to stop you, not from protesting, but from infringing upon other people's rights. When you see a police officer standing by your protest, don't automatically assume he's there to STOP you, he might be there to DEFEND you. Especially if you're trying to protest in an area where your protest would not be well received. Go ahead and protest. That's your right. If, however, the ONLY way you can draw attention to your cause is by disrupting traffic, creating havoc and terror amongst the populace, then there are two things you must be made aware of: 1) the majority of those who see you, do NOT agree with you; that's why they're ignoring, avoiding, and otherwise walking by; 2) If mayhem is the way to be noticed, how do you differentiate yourself from terrorists? 2¢
-
How come his little toe is so far back? Did he stub it down to the nub?
-
Do the following before you start disassembling locks, door panels etc. With the door OPEN, actuate the latch mechanism AS IF it were closing. That is, rotate the latch lever back and around it's center point. You will note that it "latches" at two points. The first point is the "safety" latch. The door is closed and latched, but cannot be locked. The second point is the full closed position and it is what you want when you are in the car. Unless the latch gets to this point you will NOT be able to lock the door either via the key NOR the inside button. Once the latch has been actuated to the full closed position, check that you can lock the door with the key AND with the inside button. If you CAN do that, then the problem is that the door has not shut far enough to reach the second position the latch requires. If you CANNOT do that, then you have a misadjustment on the rods inside the door and must open the panel up. Hope this helps.
-
Actually I think the disclaimer was to (hopefully) point out to people that it was a joke, but you never know these days........
-
You could also try Motorsports or V/B but 375 for black is, in my opinion, reasonable. The 10% surcharge to get a color, again very reasonable. Be aware that these are reproductions, and as such will have a deeper grain than the originals. Not bad, but definitely something you want to replace as a SET and not individually. 2¢
-
If you have access to a sandblaster I would recommend that method as opposed to a chemical rust converter. I have only used Naval Jelly one time and I can't recall being pleased with the results with it. The sandblaster WILL remove the rust, unfortunately it REMOVES the material. If extremely rusty, to the point of thinning out the metal to aluminum foil stage, you might blast a hole in it. If that's the case, the metal is gone and needs replacing anyway. Naval Jelly, if I recall properly, uses chemicals to "convert" FeO to something else by either removing the Oxygen or adding something to it. I can't imagine the chemical converters being able to penetrate thick rust deep enough to "kill" it. 2¢
-
A 1/4" "wiggle" at the end of a 36"+ long lever is minimal. Yes it shows SOME wear, but I would be surprised to see a 30 year old hings on a car that's been used NOT have some wear in it. The key thing to your adjustment is that the latch latches completely and not just to the safety. Try locking the door from either the inside or out. If you CAN lock it, it's ok. If you cannot, then you are just on the safety latch. Glad it worked for you. Enrique Scanlon
-
Here's an article I wrote some time back, in response to someone that was having trouble getting a door to shut. Unless the car has been in an accident and the door opening or door itself have been tweaked out of shape, most problems with the doors are due to misaligned latches, hinges, or worn components. Presuming that it is adjustment or bad parts and not bent items check the following. First perform a visual check of the door. Check to make sure that the door is aligned properly within the door opening. Check the spacing along the top part of the window frame, the spacing between the window frame and the quarter window, also the spacing between the door skin and the rear quarter panel. I also check the spacing on the front of the door, above the hinges and the front fender. All of these should be even, and consistent in width. The gap should not appear to be excessive one edge with it's opposite component, i.e. front of door to back of door; top edge by windshield cowl and lower edge, etc. If all these appear in order then you have an adjustment problem with the latch mechanism. If however, there is a problem with the alignment, before you go and loosen the hinge bolts behind the kick panels, first do the following: 1. Check if there is any vertical play to the door, that is, with the door open lift the door gently. If there is a noticeable movement up and down, then you may have a worn pin or pins that are causing the alignment problem. Check to make sure that the hinges are solidly affixed and if so, then you definitely have a worn hinge. Although it is difficult to find new hinges, you might need to replace one or both. On Chevy's it is a known problem and parts stores sell new hinge pin inserts to fix this. This is an often overlooked problem, so check this first before you dismount the door or start adjusting the latch etc. 2. If the hinges are in good condition and there is no vertical play, check your weatherstripping. I know of a case where a guy filled the cavity in his weatherstripping with silicone in order to get a "tight" seal. Unfortunately, it also increased the thickness of the gasket and made it almost impossible to close the door without a hydraulic ram. He finally replace the weatherstrip. Check to make sure that the weatherstripping is mounted properly on the lip of the door opening, also the rubber splash guard on the front part of the door just above the hinges. Check the lower weatherstrip on the under lip of the door. Any one of these could cause the door to shut hard. 3. If both the above are ok, check to see where the latch is striking the striker plate. The striker plate is on the door frame and the latch is on the door. Both must line up in order to catch. The latch on the door has countersunk screws and hence is fixed in position. The striker plate on the door is the major adjustment item. It can be positioned along the 4 axis on each of the screws. Close the door, if the door exterior is not flush with the rear quarter panel skin, then you need to move the striker plate in (towards the seat for a protruding door edge) and out (for a sunken door skin). If the door is difficult to close AND the handle is hard to operate, check the bottom of the striker plate to make sure that it isn't inclined too far inward in relation to the top of the plate. That is, the door latches, and the skin lines up, but it feels as you are forcing the door to close and forcing the handle to open, then the bottom part of the latch is stressing the latch, Loosen the screws, and WITHOUT moving the top part of the plate, adjust the lower portion of the plate outwards. Align and retry. If the door latches but springs back when slammed the bottom of the striker plate is probably out too far. This appears to be a half-way latch, and only the safety position has been achieved. If when closing the door, there is a noticeable thunk, and when opening the door the door seems to "DROP", then the striker plate is set too high. The reverse occurs when the plate is too low, although in this instance the door usually will not latch. If you find that you have to move the door within it's opening, then it gets a little more complicated. In a nutshell; you need to remove the electrical components attached to the kick panels, remove the kick panels, and preferably with a jack supporting the door, or a friend, loosen the hinge bolts located behind the kick panels and adjust the door to fit. It makes it easier to remove the striker plate mechanism in order to ensure a good fit. DO NOT remove the hinges from the door, or loosen these bolts unless there is a problem with the hinge. The hinge pins must be PARALLEL and IN LINE to work properly, and it is too easy to get these out of line and introduce serious stress to the door. Sorry for the length, but hope it covered your question and options. Enrique Scanlon
-
Rejgarding Silver POR on the backside of the bumper: Excellent idea, that's what I did. Let's face it, you need to protect the area, yolu need the rust preventative paint to stick and you want it to somewhat look correct for the part......Silver POR fits the bill exactly. Follow the instructions for applying POR and you're set. Regarding the bumper brackets. When I had mine off to rework the rear valance, I noticed that one of the legs was longer than the other, but could not discern a difference from one piece to the other. When I replaced them, I put them on the bumper FIRST, and then noticed that it was imperative that the longer leg go on the INSIDE bolts, so that the back part of the bumper mounting bracket would be flat to the body. There is a small amount of play on the bolt holes in the bracket both to the bumper and to the body. When you mount the brackets to the bumper, leave the nuts slightly loose so that you can still shift the bumper if necessary. There are a couple ways that I've seen folks mount the rear bumper. I've seen it mounted as one piece, even though that makes it trickier, and I've also seen it mounted as 3 pieces. The key to the installation is to ensure that the distance from the body to the bumper is even to corresponding matching symmetry points. What that means is that you measure the gap at the same point on each side. Hope this helps. Enrique Scanlon
-
Here's the posting I wrote regarding how to adjust the window on the 240. Hope this helps. The window roller is required to push the glass inward as it reaches the top of it's travel. The inside door panel and the fuzzy strip attached to it, push the window outwards. Between these two and the window frame and front sash the whole thing is maintained in the center of the window frame. The fuzzy gasket in the top part of your window frame should be FUZZY, no grease, no bare rubber spots. Grease here will just get all over your shirt sleeve. Bare rubber will just prevent the window from rolling up and down smoothly. The inner fuzzy strip mounted to the panel is what presses against the window to push it out, if it's missing or caked solid with dirt / grease / gunk it will just impede the sliding of the pane. The outer gasket on the chrome trim is to seal the window from rain once the window is closed, it is the roller which locates the window in the center of the frame. That you have to loosen the front sash and the rear guide channel (there is no rear sash) tells me that you don't have these adjusted right, or that your frame is bent or that it's misaligned. The adjustment for the window is straight forward. You DO have to have the glass bumper roller installed or it will be a b*tch. 1. Loosen the installation nuts for the front sash and rear guide channel. 2. Roll the window up and down and check the alignment of the rear edge of the glass with the door frame. 3. If the glass angles too far to the rear, move the rear guide channel upward. If it angles too far to the front, move it downward. As a general rule, the rear guide channel bolts will both be at the same location within their respective slotted holes to each other, i.e. front bolt won't be higher or lower than the rear bolt in relation to the bolt hole in the metal door frame. 4. When the glass is parallel with the window frame, adjust the front sash so it is parallel with the front edge of the window. You can just look down from above and ensure that the nylon guide mounted on the bottom channel of the window pane is going to go up and down the front sash smoothly. If your regulator is not allowing you to crank up the window after this, check to make sure that the spring on the regulator isn't broken. Without this spring it is literally impossible to raise the window. The sheer weight of the pane is too much for the angle / gearing in the regulator. The gear within the mechanism will just work its way out of the teeth on the arm. The spring is what helps you counter the weight of the window pane against gravity. Enrique Scanlon
-
I searched various archives and here are a couple pieces I wrote there: First, addressing a basic overview of the window mechanism: The chrome moulding that forms the outer part of the window frame is the exposed part of the channel that the window pane rides in. The lower portion of that moulding is bolted to the back edge of the door by the door latch mechanism. The window is always in this groove and this could be part of your problem. The window actuator scissor has 3 rollers, two face away from the passenger compartment and enter separate tracks on the lower part of the window glass holder, the other roller faces towards the inside (you) and is what determines the angle of the window inside the opening. This track for the roller guide mounts horizontally about midway up the door. The last component is the front sash, this is the guide in the front part of the door for the nylon guide attached to the front of the window pane. If one of the window roller guides has fallen off its track, the easiest way to get it back into position is to raise the window to about the midway position, then with the door panel off, get your fingers in there and help the roller back into it's track. You might want to examine this track and the roller bearing since the guide forms a "C" around the roller and for it to slip out indicates that the guide or the roller may be broken, chipped. Yes it is possible for the roller to just roll out of the guide, but then that means that the window was not installed properly, or that the back part of the window has fallen out of the guide allowing the roller to move past it's maximum extension point. Next, presuming you need to disassemble and re-align: Remove the regulator assembly. That's the gear and scissor mechanism that the window crank operates. This will allow you to operate the window pane within the opening without the regulator getting in the way. Once it's out of the way, slide the window glass up and down inside the frame and tracks. You should be able to determine if the window will go up and down smoothly and effortlessly (of course barring the weight of the pane and gravity). If it passes this test, then you know that the window frame and sashes are set up properly. You can now direct your attention to the regulator. If on the other hand you find that it sticks either on the way down or on the way up, address the problem. Is the window roller (the little barrel shapped roller) pressing on the window pane properly? Is it guiding the pane into the upper part of the frame or not? How about the lower front sash? Is the front nylon guide on the window pane sliding through the sash smoothly? Is it bent? Will lubrication take care of it or do you need to remove it? I recently had the same problem with a passenger side window. I finally disassembled the whole assembly and discovered that my lower sash was just slightly bent and was causing the nylon guide to bind, causing me to exert a ton of pressure on the handle to get it to go up and down. After replacing the sash, the window goes up and down like new. Check the Window Frame, is it straight? There are some gentle curves to it, that's to allow the glass, which isn't flat itself, to slide up and down inside the frame. But other than the gentle curves is the frame itself straight, i.e. no twists, no sharp bends nothing that would stop the glass from going up and down? If all these check, then last couple items: Are the roller guides on the window pane frame straight and unbent or undamaged? These little guides are what the wheels on the scissor assembly of the window regulator ride in and exert the pressure to raise and lower the pane. If there are kinks, gunk, or other obstructions they will cause you problems. Check the roller wheels, are they able to rotate freely? If they are binding or sticking, clean them out and make sure they operate without wobbling on their axles. If they have a lot of play on the axle on which they are mounted, i.e wobble on the axle, they will probably jam as you exert pressure on the wheel through that axle. Next, check the regulator gear and spline arm. Any teeth missing? Is the gear portion of the spline arm straight and making proper contact on the gear that the crank handle actuates? Is there a spring on the scissor assembly? If so, it's there to help exert pressure upwards on the glass to help neutralize the effect of the weight of the pane on the assembly, if it's broken or missing, then raising the glass is going to be extremely difficult. You shouldn't have to apply grease to the upper portion of the window frame "fuzzy channels" This part of the window comes into contact with passengers, believe me your girlfriend will kill you if you get grease on her $90 blouse. She will probably do more than $90 in damage to you and / or your car. The only place for grease on the window assemblies is on the front sash, where the nylon guide slides through, the gear / spline contact area, the swivel point for the scissor, and the two roller guides that fit in to the window pane frame guides. Other than that, no grease, oil or other lubricant other than the "fuzziness" of the gasket. If the fuzzy gaskets in the upper part of the frame have lost their "fuzzy" stuff, then they'll act just like rubber stops on glass, which is basically what they are. Replace them. There is no other way of restoring those items. That pretty much sums it up, I'm also looking for another article I wrote that describes how to do the adjustments. Hope this helps. Enrique Scanlon
-
Sounds like your Accesory relay. You might be able to get a new one from either Motorsports or Victoria British, or even a boneyard. 2¢
-
The information I received regarding the location of the Fog Lamp Switch on the 71 240 was that it would be above the Hazard Light Switch on the dash. Many cars ended up with a lighter in this hole, especially after they changed the Fuse Lid / Ashtray combination panel that went above the shifter and below the radio. I don't know where those cars would have put the Fog Lamp Switch. As far as the wiring, yes it is there, from the Fog Lamps to where the switch would go. Note, they are already powered, so the switch only needs to complete the circuit. On my car, the switch connects to a 2 wire connector, with a Red and a Red/Green wire. This connector can be found in the wiring bundle right behind the Fuxe Box. 2¢
-
Yes and No. If you leave the trans tunnel, the rocker panels, both inner and outer intact and they haven't been weakened, then you should be ok. But if they're not in good shape, then you can weaken it a bit. By the way, you can get replacement floor pans from Charlie Osborne at Zedd Findings and they're virtually identical to the original floor. If you get a good qualified welder to install them for you, you'll actually strengthen your floor. 2¢
-
I'm headed out of town tomorrow early. If no one contacts you while I'm out, I'll give message you on Wednesday next week. Enrique
-
BEFORE you go disassembling everything, and it CAN become that, why not check to make sure of the following: 1) fuses. You'll learn this soon, so here it is in a lump. The fuses are NOTORIOUS for appearing good, but in fact NOT letting current through. Pull them, and do a continuity check. If that's the problem you're done. 2) check for power to each of the lights at the front wiring harness below the radiator and in front. You'll see two large connectors, one for each headlight. Check with a multimeter to ground. You should get 12v from one of the wires to ground. If you don't get power on ANY of the wires THAT'S your problem. If yoiu do get power on both sides, then you need to check the lamps themselves. It's just real unusual for BOTH lowbeams to go out together unless the car has not been maintained. If you do have to replace the lamps, see if you can access the front of the retaining ring from the front of the car. It's tricky since the tab holes there are for alignment of the lamp and not necessarily for removal. If you can, then replace the lamps then. You might also for replacement lamps that would allow you to substitue H4 style bulbs. If you cannot get the retaining ring off from the front, then you have to do the dreaded access from inside the fender routine. Wash inside the fender with a power wand. You might want to go to a car wash for this, and spray the BACK of the headlamp assembly to clean it off as well as possible. Go home, jack up the car, remove the wheel and then look inside. You'll notice that the headlamp "acorn" is held to the fender support with 4 Phillips SCREWS. Which will in all probability strip out their heads if you don't apply pressure properly. So be careful, otherwise you'll have to vise grip them out. Once you get the screws out, BE EXTREMELY CAREFUL of the rubber gasket between the acorn cup and the fender support as these are NO LONGER AVAILABLE and you need them to space the headlamp assembly in the buckets properly. Now you can access the retaining ring and change out the lamp. Reassembly is the reverse of removal. Hope this helps. Enrique Scanlon
-
Do like I did and buy one of each! 71 240 Z which is featured in my gallery. 99.5% finished, just needs to have the Side Parking Lamp switch (thanks to Kats from Japan) installed as well as the wiring corrected in the Taillights and the addition of the bulb in the front lights, and install a relabeled Hazard Switch instead of the Dash Cigar Lighter to function as an OEM Fog Lamp Switch. (Picture on the Fog Lamp Switch thanks to Kats and Alan.) 68 Roadster 2000 which, thanks to Mike Gholson Webmaster, now resides in my garage. Currently undergoing work for the top, paint and a few other doodads. I believe you can still see pictures of the car in his gallery. (Flame Suit being donned.) Enrique
-
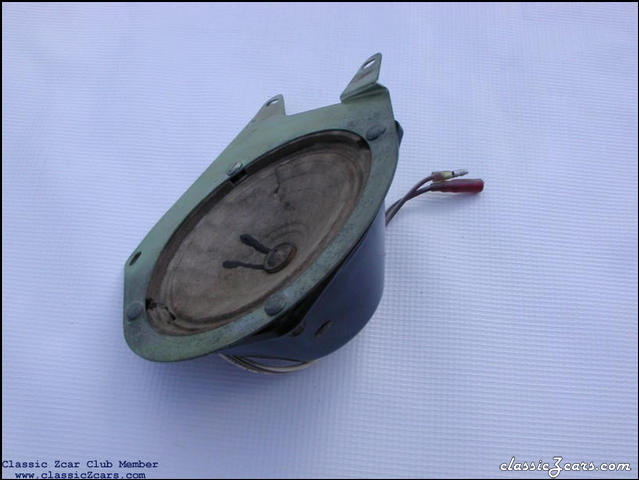 Ah, yes, the Left Side Speaker with Bracket that so many 240 owners have never seen.