


EScanlon
Free Member
-
Joined
-
Last visited
Everything posted by EScanlon
-
You've figured it out mostly. The Blue, White and White Black wires are for the power, and the speaker. The Blue is the positive, negative is through the chassis when mounted. The blue additionally should have a "fuse" which in reality is a coil to reduce interference from the engine. The White Black is the positive for the speaker These three go to a triple connector where the three female spade connectors are inside a male plastic holder; this complete connector is called a Male. The 3 connectors look like the outline for a letter U. (Like=> | _ | ; but the underline is further down) The Red Blue wire goes to a male bullet connector which then plugs into a red / blue wire for powering the light bulb which illuminates the dial. You didn't mention the antenna switch, but it connects to another 3 wire connector but this time the connectors are all on top of one another. (Like=> } | | | ; if it were laying on it's side, the curlicue denotes the indent in the top of the connector to align for polarity) The antenna should be obvious. Hope this helps.
-
Well, you learn something new every time you try to do something slightly different with the Z. I own a 71 240. The original dash had several nasty cracks that would be a pain to fix, let alone do them right. I also own a 72 parts car which had a pristine dash. Difference between the two was only in the lack of the Hazard Switch Label Indent on the 71 dash that the 72 DID have. Or so I thought. Wanting to "upgrade" my console area, I purchase a Heater Control Panel for a 73. This panel is illuminated and it has the same basic shape / look as the 70-72. However, it is slightly different. The Heater Cable Control Bracket, which is the metal part for the control arms and the light bulbs is just about 1/8 to 1/4" wider than the face plate. This becomes a CRITICAL difference when you consider how the panel and console are assembled. Most people tell you to install the center console first, THEN the radio followed by the Heater Control Panel. With the original 70-72 Heater Control Panel and Cable Control Unit, this is not a problem as the unit will slide right in. (Granted you have to guide the cables in.) With the 73, that difference in the Cable Bracket makes it IMPOSSIBLE to slide in. You must instead NOT install the console first. You first install the radio, then you insert the cables and then slide the Heater Control Panel UP into place. Once there, you can secure and very carefully install the console. Now, if you have a 70 or 71 Dash, it's possible that this will not be a problem for you. However, if you have a 72 dash, it's more than likely you WILL have this problem when installing the 73 HC Panel. The 70 / 71 dash has a very subtle lip for the HC Panel to rest against. In fact, it's covered up with the vinyl that covers the entire dash. You can feel the edge of the supporting metal, but it is at best a slight ridge. On the 72 dash, this lip is now a distinctive EDGE, and the vinyl is cut right at the edge. The lip is approximately 3/16" wide on each side. I had considered grinding it off, or even hammering it down, but decided that that may create more problems than it's worth. So, live and learn.
-
I don't know how you guys have decided Ali is a girl. Have read just about every post Ali has made and I can't find anything to indicate that Ali is of the Female Gender. I might be wrong, if so I apologize to Ali. Enrique
-
Oxidized paint can be a challenge if you're not experienced with how to deal with it. First of all, you need to determine if there is ANY good paint below the oxidized layer. The only way that I know of doing this is to take a section and polish it. Although there are rubbing compounds out there that require machine application in order to be effective, the problem is that I would definitely NOT recommend it to the novice user. You can very quickly burn through the paint down to the metal if you're not careful. Rubbing out a car by machine is something best left to the experts. Go to your local well stocked automotive parts store. Find a small tub of Rubbing Compound, and a bag of cotton or terry cloth rags. Wash the car, then apply the rubbing compound per the instructions to a small area. I would recommend you find the nastiest spot on the car. If, once you're finished with that area, you are left with a nice even color with some shine, then you're relatively safe in presuming the rest of the paint will buff out as nice. This is a very VERY labor intensive job. Although you could use a low speed orbital polisher, in my experience, these will not remove very heavy oxidation without doing the job two or three times. Your arms will be SORE for a couple weeks, but once you've done this right you shouldn't have to do it again for a few years, or as long as the paint will hold out. Unfortunately, the paint doesn't age evenly on the car. Where the hood, roof and upper portions of the car get oxidized very quickly, the sides don't. This can cause problems in that it may appear to discolor tops with regards to the bottom. Most polishing waxes out there do a small amount of removing oxidation, but when the car is oxidized to the point where it looks like the paint job is a FLAT paint job, then you need to use the rubbing compound. Even with machine compounding, there are times when the paint is too heavily oxidized to be polished out. You'll literally remove the paint and expose the primer beneath. There is also a line of waxes out there that purport to fill the porousness of the oxidized areas with color. Although these will mask the oxidation, they do very little with respect to removing it. Turtle Wax sells one called Polishing Compound. I've used it and have been quite pleased with the results, just remember that there is NO WAX in there. Once you've polished, you MUST wax, or the oxidation will return. Meguiar's also sells a good product, don't recall the name right off hand, but it is part of their Detailer series. Just remember to follow it up with the rest of the product line. Hope this helps. Enrique
-
Talk about things I'd rather forget....... By the way Brian, is it truly a rubber hose OR one of the smaller fuel supply and return lines by the sending unit. This is important as I can help you out with the repair very easily. If it's the rubber vent lines, don't skimp and do JUST the one that is leaking, get them all done. While you're at it, check your filler neck. Although this is an expensive part (~$90) it is a critical part. Enrique
-
AND THEY'RE CAMOUFLAGED!!!!
-
As you did with the other vehicle you can do temporary repairs that are good enough that they last for years. The problem with that, is that they make you overconfident on their TRUE capabilities and before you know it, you're using it for bigger and more hazardous repairs. A pinhole? Sure, JB in either of it's formulations will do the job. So will several other epoxy type repair compounds. However I wouldn't use it if it compromised the strength of the item involved. Since you are obviously looking for the least invasive method of repairing, I would first DRAIN the gas tank. Afterwards check the other strap and ensure it's snug and sound. Then I would remove the strap that's covering the hole. Once the strap is out of the way, I would very VERY carefully scuff the area surrounding the hole after having ensured that, as you stated, that it is in fact a foreign object puncture and NOT a rust through. If it's a rust through, find a new tank. In scuffing, DO NOT USE A GRINDER or anything that can throw off a spark. (This should be an oxymoron statement, but sadly as too many people know, it isn't.) Once you've scuffed the area as clean as you can, get a small piece of inner tube rubber that is at least an inch or so in diameter. (Again, this is presuming a PINHOLE.) Mix your JB, apply and then cover with the inner tube patch. This way when you replace the strap you won't be exposing the JB to direct contact with the strap which could chafe or vibrate it loose. The POR 15 folks have a tank sealing kit which will do a good job, coupled with their regular POR for the exterior and a dab of their fibreglass cloth, I wouldn't hesitate to use that for small pinholes. Their epoxy is also strong enough to handle that. One last note, when you replace your strap, make sure that it doesn't have any kinks or bends on the surfaces where it contacts the tank, as well as the rubber / canvas padding being there and in place. By the way, I'm not sure what you were referring to with your reference to the tank support. Enrique
-
Andy Russell; the Datsun Dude at z@datsundude.com has NEW ones. Phone: 480-980-6512 Or through Z Cars of Arizona; emailus@zcarsofarizona.com Phone 480-816-8668
-
No problem Victor. Unfortunately at another site there was a post where the responder suggested removing the heater cable control unit from the back of the face plate in order to remove the face plate from the dash. Since this is next to impossible for a normal human with only one elbow and one wrist on each arm, I had to reply. Upon rereading your post, it may have been my misperception of what you posted. In either case, it's a good reply to him from both of us.
-
It's much easier to remove the four cables attached to the Heater Controls from the devices they actuate and then remove the panel as an assembly. The 4 cables are connected 2 on the left side of the heater box itself, 1 on the right of the box to the water control valve and the last one, the longest goes to the fresh air flap which is behind the fan motor housing. Once you have those 4 cables removed, you can just remove the 4 screws holding it and the map light after having removed the nuts holding the radio faceplate and radio. Then it's a simple pull and disconnect the harness to the heater switch. If you have the illuminated panel then you only need to also disconnect the light wire plug. Using the 9_0° screwdriver works, but I honestly find that to be a major pain to reach in there and get the bit into the screw AND try turning it. Having had the console and dash out several times, trust me on this one, it's fastest to remove the cables at their ends than trying to disassemble the heater control plate. While you are in there, do yourself a favor and check all your instrument light bulbs. Then if you are really ambitious, disassemble them and paint the insides of the cases white, they'll shine brighter and you'll really appreciate what you've done. Good Luck, feel free to post if you have further questions. Enrique
-
Having seen Mike's car, let me tell you that, at least on my monitor, the pictures don't really justify how sharp the paint job is. I guess I could play with my monitor until, on MY monitor, the pictures come close to my mind's eye recollection of the intensity of the color. The color is closer to a very bright shade of McMaster Carr catalog yellow. If you don't have a McM/C catalog, imagine a nice BRIGHT Canary Yellow. It (in my opinion) is one of the nicest yellow paint jobs I've ever seen. Actually second only to one I personally painted with just about as bright a yellow paint. (Sorry Mike, personal pride and all.) Good Job!
-
The true 73 side markers had rubber boots attached to the rubber mounting pad. Sadly, these are NLA from most sources, (at least as of 4 months ago). If you are looking for 73 specific be aware of this as the 70-72 did NOT have the rubber boot covering the backs of the reflectors or the wiring.
-
Both with the heat gun AND the razor blade. When using the heat gun, use it at it's LOWEST setting, keep it moving and do not under any circumstance keep it on one spot for longer than a second or so. Most heat guns out there can readily produce heat in the hundreds degree farenheit and will literally BURN the paint, primer or stripe. Using the gun at it's highest setting will cause problems as the amount of time between Ready and BURN is about half a second. Your intent with the heat gun is to cause the adhesive on the vinyl stripe to soften enough to allow you to peel up an edge and then with slow and constant tension pull up on the vinyl and remove it. The razor blade needs to be used very carefully. Especially if you've used the heat gun as then the paint has been softened some by the application of heat. It does not take much for the cutting edge to BITE into the paint. Personally I would avoid using the razor blade. You can also look into a couple other products. There is a product out there sold specifically to remove the paper price stickers adhesive. It is basically a penetrating oil, but the advantage is that it soaks the label and the adhesive and ~cuts~ it. WD-40 will also do this, although if your intent is to eventually paint the car, be aware that WD-40 has silicone in it and you need to be aware of it's proclivity to producing fish eye. 2¢
-
HEY! How'd I get involved here? I'm just an innocent by stander (and beandip you stay out of this one). I suppose that due to M. B. Anderson's name showing up that I recommended him at one time. I concur, the guy is a genius with them. Around Clark County, when I was driving around with my Z looking for odds and ends, just about every car part store, or gasoline service station would recommend M.B. Anderson for the work on my car. Now let's keep him busy enough to stay in business, but not so busy that I don't have access to him. Cheers, and glad he got you running well. Enrique
-
Many NOS parts, repros and now access to a boneyard in ARIZONA. Andy Russell z@datsundude.com Z Cars of Arizona emailus@zcarsofarizona.com Phone: 480-816-8668 or 480-980-6512 I can personally vouch for him and he earns a 5 star rating in my book.
-
Dero: I agree with you, that dark grey primer does look good on it. Not that I care for primer paint jobs, but on your car it does give it a nice no nonsense look to it. Again, when you read the above posts, remember that the main piece of advice is to make sure there is something below the primer to seal the metal. Enrique
-
Gray Primer with a Clear Coat? Sorry, in my opinion that would be a waste of money. Why not get shiny grey? That's what you'll end up with. If it's the matte finish of the primer you like, the clearcoat will make it shiny. If you try to get "flat" clearcoat, then you'll be paying more money for something that the paint guys will be laughing about for weeks to come. Again if it's the matte finish you like, paint the car with primer, top coat it with a grey paint to seal the primer then top coat it with another coat of primer. You'll have the matte finish, metal protection in the paint, and proper adhesion from the original primer coat. As far as paint guys not wanting to paint on primer that's been exposed to the elements, I can vouch for that. There's hundreds of different contaminants out there that will literally screw up ANY kind of paint you put on top of it. Tree sap, bird poop, bug guts, cat foot prints, gasoline, tar, road grime, oil etc. I could go on and on and not even scratch the surface of the list. If however, you are talking a paint base below the primer, then the guy will just wet sand down to the paint and then either use sealer or primer sealer to build the base up. He'll still have to work the car down to this base, but at least you'll have protected the metal in the meantime. 2¢
-
Just remember that Primer is NOT waterproof and will allow moisture to get to your metal which CAN cause rust. Voice of experience here.
-
!!! Sell the WIFE! (j/k.......?)
-
I'll give you a better answer after you describe HOW the rust is "coming through." This is critical as there are two possibilities for the source of the rust. From the top because of : Paint : Faded / missing / sanded off Previous Paint Job leaving car in primer. OR From the underneath because of: CANCER This type of rust through is the most critical to address immediately. Suffice it to say, if it's already rusted THROUGH the metal, can you imagine how LARGE the area is in back? My personal policy regarding this type is to immediately examine both sides of the metal. Sometimes you can remove the fenders and look behind, other times you can remove interior panels and see. In either case it does involve some disassembly and may or may not be quick and easy. I started addressing a fuel leak from the gas tank a year ago after having lost the right rear wheel @ 60+ mph. (long story; and ask Zvoiture if you want ME to tell a long story). A year and 6 weeks later, I am finally getting close to getting the car back on the road. I'll be posting a bunch of pictures and will write several pieces on it. To give you a general answer to your questions: Yes, and No. Depending on the type and amount of rust you MIGHT be able to POR-15 the back of it and put everything on PAUSE or actually; really SLOWING it down. Notice this wouldn't STOP it. BUT Sadly; rust through on the panels from the back may or may not spell the end for a car. It just depends on how much you are willing to chase it. This means $, and not just $, but $$$$$$$$. Rust from the top, as long as the underneath is sound can usually have a quick shot of Sealer sprayed on, whether Rattle Can Paint or Primer SEALER. But note that regardless of how "good" it looks it IS RUST! So you need to come back to it soon and FIX IT. Enough, let me know what type of rust you have.
-
Steve: Not Neither!
-
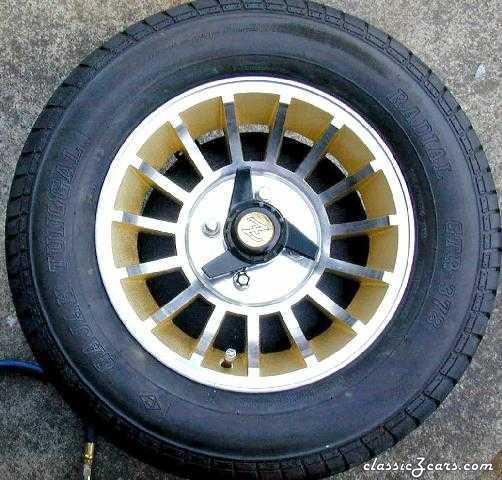 Wheels & Tires After Painting between spokes.
 -
Ahhh, that's easy then. Sell the family car and buy TWO toy cars.
-
This is one of the prior posts: http://www.240z.org/forums/showthread.php?s=&threadid=2006 I couldn't find another one I had mentioning various products. Let me state my displeasure with Armor All in this manner: Armor All is HEROIN for your Vinyl, Rubber and Plastic trim pieces. As long as you maintain a periodic schedule of ALWAYS putting it on and never exposing your car to sunlight, air or shade, you'll be fine. The problem with Armor All is that when you STOP using it, in very VERY short order, lots of problems surface. I myself used to use the stuff, and I ruined an otherwise pristine dash on a 76 Mercury Capri II, simply because I couldn't maintain the weekly fix that I had gotten the car used to. In a period of 3 months, while in the Air Force's Basic Training and Technical School, my dash went from soft and bright colored to chalky haze, cracked, pitted and HARD! I researched the stuff and asked several people about it, but the best education I got on the subject came when the company I worked for began extruding clear PVC plastic in rolls. The active ingredient in Armor All is Silicone Oil. This binds to the various PVC Polymer Molecular Chains present in Vinyl. These are also (loosely) called the elastomeric component of the vinyl, i.e. the key stuff to maintain vinyl soft and elastic. Another name for these elastomeric components is Plasticizers. i.e. the component that makes the material PLASTIC. Silicone Oil is very susceptible to UV radiation and evaporation. When it does dissipate, leaving behind Silicone which makes it next to impossible to paint the part, it also takes with it the elastomer from the vinyl. The loss of this elastomer causes the vinyl to decompose, and be even more susceptible to UV Radiation, as well as become slightly "harder". It isn't ONE application that causes the problem, it's the continued applications over time that eventually cause the problem, which becomes noticeable WHEN YOU STOP USING THE STUFF! Like I said, like Heroin, as long as you maintain the supply of the drug, and you are careful not to overdose, you can go on for years, but stop ONCE, and .......... My favorite product, Clear Guard by Turtle Wax, is unfortunately, no longer available. In fact, it's strength lay in the fact that you did NOT need to apply it once a week. And unfortunately, therein lay it's demise, it didn't sell like Armor All. In my 89 Acura Legend, the last time I applied Clear Guard was June of LAST year, when I took the car to DEQ and new plates. The dash looks clean and feels soft and smooth to this day. The only product that I've encountered so far with which I feel has the same feel, ease, and longevity of Clear Guard is the one by the POR 15 folks. It's called Boss Gloss and it really does an excellent job. The bottle DOES carry a warning, it says: "Not for use on ..."(omitted) "...surfaces where a slippery finish could be hazardous. Do not use on or near clear plastic or plexiglass surfaces, glass (may cause smearing), fabric, woven materials or paint." The omitted text deals with the specific surfaces it advises AGAINST being used on. Pedals, grips, steering wheels, beach or cycle seats, tires, brake drums are mentioned. Obviously, it does leave a smooth slippery finish and the manufacturers do not want to be sued because you lost control of your vehicle due to the slippery finish. (Like that one idiot who put armor all on his TIRES!) The front of the bottle does state: "Boss Gloss does not contain alcohols or other solvents that remove plasticizers from Vinyl and Rubber" Which is exactly the problem with Armor All. There, I'll get off my soap box, BUT just a note on the following. Baby Oil, Vaseline, and those otherwise "cheap" products will work, if all you want is shine and slippery. However, they are very prone to collecting DUST and DIRT and leaving residue on anything that touches that surface, as well as the smell. However, the main problem with these products is that they do NOT include any UV Ray protection. UV Rays are by far the biggest cause of cracked vinyl and plastic parts there is, PERIOD! This is due to the chemical formulation for plastic and vinyl, and not anything else. The C in PVC, stands for Chloride which is a permutation of Chlorine. (PVC=PolyVinylChloride) Chlorine is one of those elements which can readily bond with many substances, and sometimes all it takes for the chlorine to lose it's "bond" with whatever substance it's currently mixed with, is for it to come into contact with another substance that it likes better. The Sodium in Sodium Chloride (salt) loses to Aluminum very readily. That's why they don't use salt to de-ice planes or runways or anything near Aluminum skinned aircraft. Chlorine can also get "excited" by the UV rays which hit it. When Chlorine gets excited in this manner it very readily bonds with the Hydrogen in the air. The ensuing compound is called H-Cl, or Hydrochloric Acid. How about a nice Hydrochloric Acid wash for your dash? The key thing for protecting your dash, isn't slipperiness, or non-greasy, it's UV protection. That's why owenk is correct about dashes cracking long before Armor All. That dashes crack is due to their being made from plastic and vinyl and not because of Armor All. The problem with Armor All is that it purports to protect your dash, while making it MORE susceptible to the problem! Sorry for the length, hope this makes it clear.
-
Ok Steve, take a deep breath, sit down, put your head between your knees and count to ten. This feeling will go away in just a few minutes. Don't be ashamed to admit it, with the thousands of minutes of television and radio waves coursing through our atmosphere proclaiming the need to change your vehicle once a year whether you or it needs it or not, it is very understandable that you would eventually become susceptible to the brainwashing. You can and MUST resist the impulse to chuck it all and join the collective masses driving their SUV's and Modernized Antiques. DARE to say NO! Yes, as a member of the collective you wouldn't have to worry about much, but your individuality would suffer, and finding your car in a crowded parking lot would be but the beginning of your new problems. While your neighbors and ersatz friends may proclaim to be worry and trouble free with their new vehicles, they are in fact lonely and feel part of a hive, that's why they're recruiting you to join them, so you can be miserable together. Stand tall with your Z. Yes, it takes a bit of commitment on your part, you must be willing to forgo the convenience of instant gratification available with the newer vehicles. It isn't easy, but it IS worthwhile. Just remember this, when you pull up to a stop light, or park in a parking lot, or just generally driving around, how good do you feel when someone comes up to you and says: "WOW! Is that an Old Jaguar?"