EScanlon
Free Member
-
Joined
-
Last visited
Everything posted by EScanlon
-
Forgot to mention; my car is a 71 240Z painted 920-Gold.
-
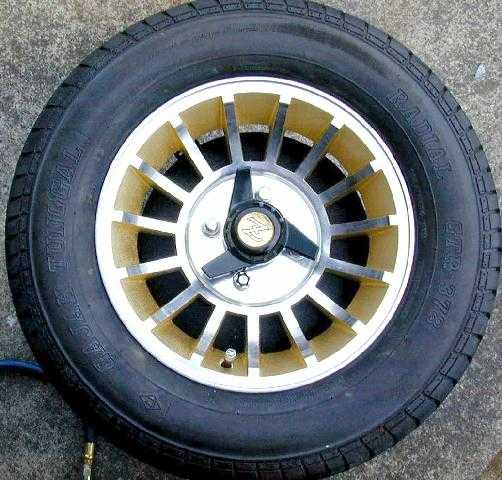
Just got the first one done. Thoughts?

-
And at least in the funnies; Clark can NEVER EVER wear contact lenses.
-
Choco said it, we may have 6" piles of odds and ends on our desk, but ask us to find that scrap piece of paper where we doodled the possible wiring diagram for a fuel shut off switch that was done on the BACK of an otherwise non-descript piece of paper, and within a few minutes of searching....we'll find it. A woman comes in and looks at this "mess" and not understanding that we have every bit and piece catalogued in our heads by it's spatial coordinates and relative proximity to other nearby pieces of otherwise non-descript stuff; will then proceed to discard it all as "trash". <<(ahh, yes here are the picture ads that stripper girl was handing out at the bar when I was returning from buying the air compressor, therefore in the pile to the left, at about the same height should be the owner's manual for the compressor, and right beneath that is where the wiring diagram is.)>> But, if you look in a woman's clothing drawers where they stash their panties, pantyhose or brassieres you will encounter something interesting: These are either: Organized: No dear, those aren't true pink, they're almost pink, and they have lace, although not lace in the front, and they have a seam in the middle of the back, although they're obviously different from that other pair because if you look you'll note that those have WIDE elastic and these don't; AND they are bikini style not hip-huggers which any idiot can tell are different from briefs. OR Disorganized: You look in the panty hose drawer, and the resulting mess will rival the most hideous squirrel's nest of fishing line you ever laid your eyes on. Even Spaghetti is easier to unravel since there you CAN pull on a single strand and the bulk of it will at least slide out from within the rest of the mess. And the problem is that when they need a pair, they're not looking for the first one they can unravel out of this hunk of solid nylon, they're looking for that UNIQUE pair with the UNIQUE shading which can only be discerned from the other pairs in there if they either put their leg in to it, or at least an arm, which of course means you have to untangle each individual pair out of the mess before you can discern it's shade at that point in time. Then when they finally do find the one pair, they ball up the ones that they had to check before they found ~the~ pair and stuff them back in to the drawer. And then pray that they don't develop a run. But women will agree that we men are disorganized, whether THEY are organized or not, this also goes for all you sicko's who insist on cataloguing the replacement screws in your spare parts bin not only by size, thread count, and material, but also by manufacture and purchase date. Trust me, as far as a woman is conscerned, your method does not make sense. But just my 2¢
-
This may sound way off topic or "what are you smoking?" but I think you need to define what you mean by break even. If you do not value your own man-hours, that reduces your investment. If you do value your time, how much are you worth? How much could your worth be reduced by the enjoyment you get from tinkering with it? Why aren't you taking it to a mechanic, if you're worth that much? How much is your enjoyment of driving the machine worth? How about when it isn't working right? Those are but a FEW of the questions that in my mind, come into play when I think about "breaking even". Personally, I've been wanting one of these since 1974 when I laid my eyes on it for the first time. Like Love at first sight, I think if someone had told me that you had to donate your male organ and accouterments, I would probably have hesitated, but I can't honestly tell you that my answer would have been immediate and without thought. (Sorry, I know, crude, but I just about messed my pants when I saw the car.) I've been a car enthusiast since I began doing plastic models in the mid 60's. At one time my plastic model car collection numbered in the hundreds, and most of them were the futuristic smooth curve variety. One distinct favorite, was a 1/8 or 1/12 scale, Jaguar XKE in bright yellow plastic. I worked on that one for close to 6 months, which when you are 11-12 is as close to forever as you want to get. If you can imagine an 11 year old being that interested in anything, then you can imagine my total "rapture" when I spotted my first 240Z in 1974. So how much is it worth? You don't have the money to buy mine. Can I possibly break even? In order to "break even" it would involve having to sell my Z, in order to sell my Z, a lot of other things in the world need to go belly up, and if those things happen, then no one is going to be interested in buying my Z, so ...... what was the question? OH YEAH! Breaking even on my Z.....YES, every single time I get in it, start it up, and pull it out of the garage and just one, yes, just ONE person looks at it, and I can read the look on their face and it says......You're such a lucky bastard! 2¢
-
If you get the Basic AAA there ARE limitations. Typically the tow can only be so many miles and it is always to the FIRST and CLOSEST repair facility that will repair what is wrong with your car. If you do not agree, and insist on taking the car else where, YOU are liable for the complete tow. You are also liable for charges exceeding a set amount, as well as distance. Additionally, the number / frequency / type of calls are closely monitored. If you exceed a given number or too frequent or keep making the same type of call (flat / gas / battery), they WILL cancel your membership. AAA Plus on the other hand, although more expensive, will give you that added security and benefit that the AAA Basic just barely covers. In my experience, the added cost of a AAA Plus membership over 5 years can be justified in ONE call, so don't skimp here.
-
A woman's definition of a pig sty: Anywhere she can't walk in in bare stockinged (nylons / pantyhose) feet. Especially if the "mess" is attributable to someone else's actions and more applicably if someone else (read: husband / children) can be made to clean it up to HER satisfaction. A man's definition of a pig sty: Where pigs live.
-
My mechanic just mentioned one to me, but he didn't have any info at the time. I'll call him and ask him to give me a jingle when the guy calls back.
-
Old Trick I've used when doing this bit. Mount everything, and do your darndest not to mix up directions. Once you're ready, get a strip of masking tape, apply it around the splined shaft for each of the wiper blades and place the tape in such a way that there is a little "flag" coming off the shaft approximately where the arm of the wiper would be, remember at this point you will be guessing. Actuate your mechanism. You will see the "flag" or tab of masking tape move as if it were a wiper. If the movement is approximately correct, relocate the tab so that it comes off the spline at the correct position that it needs to be when the mechanism is parked, as it should be with the switch "OFF". Actuate again. if everything is ok, THEN remount your arms. One other note, the "Park" position IS adjustable. There is a module on the back of the gear mechanism which has the contact switch for it. So be careful if you try to disassemble the motor / gear unit, as you will then have to locate the parked position by trial and error.
-
A few items that I am interested in, but that I have noticed have become next to impossible to obtain or extremely expensive (translated to you: profitable) European Tail Light Lenses or Light Assemblies. (Specifically 240, but I'm sure the other ones are also popular) Also the Front Turn Signal. I personally would be interested in the bulb holder for the parking light in the center (in between) the two top most bulbs in the tail light housing. I need two, would be willing to pay for that item as I can't seem to find a part number or the item itself. Replacement Chrome Strips for the 240 Tail Light. Replacement Power Antenna's both the masts and the whole unit, again the 240. Bumper Ends, Bumper Centers; 240. Door Locks, exterior. If some of these are items that are normally available, then my oversight, but I'm sure you get the idea as to what I'm referring to. Thanks Enrique Scanlon
-
There is a Green Yellow wire that connects to the Combination Switch. That GY wire is the feed from the Brake Switch. If you disconnect that wire there, and splice a wire that then runs all the way to the back to the brake lights, you will have independent function on the brakes from the turn signals. Be sure to insulate the cut wire, although no power goes to it when you use the turn signals. Let me know. Enrique
-
I'm glad I saw your post, and I'm sorry I hadn't noticed it earlier. What you are asking, and the pictures you are providing are exactly what I was working on. So, I'll share what I know and let you pick and choose. The "extra" bulb between the two top bulbs is what in Japan is used in lieu of reflectors. Here in the US we rely on the reflectors in the lenses to reflect the oncoming cars headlights and therefore make the car noticeable. In Japan they decided to require the car to light itself up. The circuit allows only ONE side to be light up at a time, or if desired, both can be. If you have an early 71 or 70 you will note that your console, to the right of the Rear Defog Switch has a hole for what people think is a fog light switch. It isn't. That's where the dual switch for the Rear Parking Lights was mounted in Japan, which is one of the bulbs you are seeing. American cars do not have the wiring to support the switch, nor the lights. In fact, you won't find mention of it in the English Language FSM nor the wiring diagram. The dual switch in the console was removed and replaced with a black square plug, so was the wiring, and the hole in the tail light was plugged with a rubber plug with the letter P on it. That's how American cars were sold. AFAIK only the Japanese cars had that feature. So, you could wire it in sequence to your parking lights, or your brake light, but you wouldn't want to splice it into the turn signal as that is the reason for having the separate color lens for the turn signal in the Japanese (aka European) tail lights. Or you could just remove the bulb and put in a rubber plug to cap the hole. Now, if you choose to do the latter, plug the hole since you don't have the wiring, I'll offer to buy those sockets from you, as I AM wiring the switches into my car and I AM looking for just those bulb holders and plugs. Now, as far as the rest of your wiring. The BLACK wire is Earth or Ground for ALL the bulbs. The Z uses that as the return part of the circuit for all the different circuits. The Green /White wire is your TAIL LIGHT circuit. (US= G/W in the CAR'S wiring harness) The Green / Yellow is your STOP LIGHT circuit The Green alone is your TURN SIGNAL circuit In the US the Turn Signal AND the Brake Signal wiring is merged up by the Hazard Switch, Combination Switch and is the same wire all the way back to the tail lights. (US= GB for Right Hand Side and GR for Left Hand side again in the CAR'S wiring harness) In order to make these lights work, you need to run an additional wire for the brakes BUT I'm still working on which one. The Green / Blue is only for the aforementioned side marker circuit. In Japan they don't have the side marker lights if I recall properly. But in the US the side marker lights are hooked into the Tail Light circuit. (there is no corresponding wiring in the CAR'S harness) The Red / Black is your REVERSE circuit Hope this helps, and I'll come back to it to help you figure out where to splice in the wire for the brake circuit. Enrique Scanlon
-
but I'm not insane! I thought I remembered Courtesy saying NLA through them. Glad you could get them Eric. Wait till you see the instruction sheet. I'm investigating a slightly different way of mounting them, and will advise once I've checked it out. I have gone to nismoparts, but sad to report have not gotten answers either, so don't know whether I needed to order them or what. Z Ya L8R
-
I have like 4 keys made for my car. None of which are "original" which yours is the original key. But then again, I'm not going for Concours. I wonder why it wouldn't fit if the one you have in the picture is the same type. I matched my key to your picture, and unless you reversed the image, which it doesn't seem likely as the N for Nissan is visible. The reversible keys were of two different types and it sounds as though you have the R and you got an L key or vice versa. From your post, if my key matches your picture one, then it would fit correct? If so, how much do you want for it? With or without shipping? How do you want paid? Let me know, private message if you'd rather.
-
The key I have is a generic replacement and it is the X7 number and it matches the grooves on the picture. According to the CD the key you are picturing is either a reversible L or R (don't know what they mean by viewed from the bow side) In either case, the key you have will fit a 71 and I believe a 72 Ignition. Have you checked with Andy, he might be able to swap you for the one you need. Otherwise, is it that it says Nissan, or DATSUN on the key? What makes it so special as opposed to the key I can get at the local locksmith? Let me know. Enrique
-
Boy are you asking for a lot. First off, not too many people are going to swap out a Series I console for a Series II. Additionally, those that would, don't normally have the additional modification of a changed tranny. That may be why you're not seeing any responses either here or at zcar.com.
-
From what you are posting and the function of the lights, it sounds as though ONLY the lenses were replaced and no wiring changes were made. The Turn Signal / Brake Light circuit share some of the same wiring, and if this wasn't modified, then that is why the turn and the brake lights are both coming on at the same time. I myself have NOT done this mod, since I don't have the Euro Tail Lenses. So I don't know where to tell you to cut / splice etc etc. But what I can tell you is that it involves running separate wiring for either the stop or the turn signals all the way from the steering column or thereabouts all the way to the lights. I will say that if you choose to NOT use the Euro Lenses, please let me know as I would be interested in buying them from you. Hope this helps. Enrique Scanlon
-
Oh well, it sounds as though I could have saved some money. But I insist that at the time I called, Late April, I was advised that they were NLA. No worries though, I do have them now and that's what matters.
-
I was trying to think of a cute way to answer using nothing but abbreviations, but phones are starting to ring off the hook. There are many of those and trying to keep up with them.....geeeez. Thanks
-
I HAD contacted Courtesy, and the guy that answered said that they were NLA, and when I called back and asked a different guy, he said that only ONE side was available. Additionally, although they advertise that there is a 10% discount for IZCC members, it turns out that the prices on their website ARE the discounted prices. I was told that by both the dweebs I spoke to. That means that ANY contact from the internet is automatically discounted. Not that I joined the IZCC for the discount, but don't tell me I have a perk when in fact it's just BS hype. Sorry but that, to me, sounds like bait and switch. They still list the parts on their web-site, but give them a call. Maybe now they got them in.
-
Glenn: Which back light bulbs are you referring to? I agree with Jeremiah, it all depends on which ones you are going for. Some are easy, and some admittedly, require not only double joints but also additional wrists elbows and heck, a tentacle to get in there, as long as it has an opposing thumb. By the way, what does IIRC mean?
-
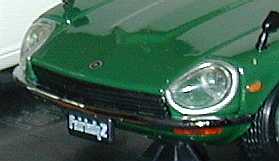
FOUND THEM! Contacted Charlie Osborne at Zedd Findings in Canada. He can order them from Japan and get them shipped to you. Here's Charlie's Info: Zedd Findings Charlie Osborne 603 Compass Court Kingston, Ontario K7M 8V9 Canada Tel: (613) 389-1397 www.datsunzparts.com www.datsunzparts.ca E-Mail: zeddfind@kos.net Now HANG ON! They are NOT cheap. With shipping they end up being about $143 US each. So, that's $287 for the pair. Also, Charlie sells them on a paid in advance basis, and no he doesn't keep them in stock. So you have to be a sincerely motivated buyer, and you might opt for the lesser headlight covers available from MSA or V/B or others. But for the difference, ahhh, the difference! I'll post a picture from the Die Cast Model I have only cause I can't scan in the picture from the original car that made me lust for a pair of these. And hopefully you can discern the classy look it gives the front end. It reminds you even more of the Jaguar XKE lineage of the car. If you have the Premiere Issue of Sport Z, on page 21 you will see a SUPERB example of a 280 fully restored WITH the headlight covers I am referring to. By the way, that issue is also the one with all the information on how to do an inexpensive fuel vent line replacement, and having talked to David (editor of Sport Z) they ARE selling out. This means if you are interested in that article, pick up the phone and order the back issue. You won't regret it, especially if you have leaky hoses.

-
1) There saved yourself a couple bucks! 2 & 3) The fact that you have ALL your spacers is something to look at. The owner's manual for the car identifies those spacers as seat spacers, and it says to apply the same number of spacers to each seat raiser (bolt). I have seen some people apply one or two to the front and one or two less to the back in order to get a lower rear edge than the front, and hence some "recline" to the seat. If you have the 71 or earlier seat, it should have a round knob on the inside pillar that adjusts the angle at which the seat back is to the seat bottom. It will allow you to tilt the back to the seat by a few degrees, but not a true recline as you may have in your late year vehicle. The 72 and up seats did in fact recline. They are distinguishable by the lever on the outside seat back support (by outside towards the door). The lever when lifted will both allow the seat to tilt forward for easier access to the tailgate area as well as allow you to tilt the seat back when you are seated in it. 4) A continuity checker is simply a battery, wires and a light or buzzer. What you are checking for is that there is a "connection" between two points. In the case of a wire, you use the wire to "complete the circuit" between a battery and a light bulb. If the light lights up, the wire is making a connection and therefore there is "continuity" in the circuit. This does not gage the quality of the connection, just that there IS one. Resistance allows you to check for the amount of current that can flow through that circuit. A perfect wire has Zero Resistance for unlimited current, but ALL wires have SOME resistance. The more resistance you have, the less current you have. So if you check a fuse for resistance, you will find that it has some, if you divide the voltage by that value you should get a figure for the current it will allow. Higher current will cause it to blow. (Someone correct me if I'm wrong, this goes back over 20 years) In reference to my original post, the reason I stated that you should do a continuity check on the fuses is simple. You can SEE the filament of the fuse, therefore it should be good, right? WRONG! The problem with those little glass tube fuses is that the connection for the filament at the end cap may in fact be a cold solder joint, and although it appears to be a good fuse, it in fact is not. This has tripped up many a Z fan. I can't tell you the number of posts I and others have seen where the person reporting the problem insists that he has checked the fuses, and we keep insisting on a continuity check. Then he finally gives in and does it the way we TELL him to do it, and VOILA! he changes the offending fuse and the problem is fixed. I know it's a PITA to remove the fuse from the holder and then figure out a way to hold it while you get the leads from your tester on each end, but until you do, you are NOT checking that fuse properly. If you try to check the fuse while it is still IN the fuse box, you may in fact be checking some other part of the circuit and not that specific fuse. Remember, electricity like water WILL find a path, the path of least resistance, but it may not be the path YOU think it should have taken. 5) When you check the HL connections for corrosion, don't forget to check the contacts, connections and even the solder points on your headlight switch at the steering column. Yes this one is a MAJOR PITA but it is also a KNOWN problem site. Good Luck, and keep us posted. OH! One other note. If you choose to change your headlights to a newer style bulb, make sure you take the time to double check your wiring. Too many guys have literally melted their wiring by changing to a higher current bulb.
-
Datsun Dude is: Andy Russell Phone: 480-217-7322 e-Mail: z@datsundude.com As far as I know he does not have an active web-site going, but he does have some excellent offerings and pricing. He also can find some hard to get items AND he'll tell you if you can get it cheaper elsewhere as a repro instead of OEM. But almost ALL his stuff is OEM. And the few pieces that are not, are of extremely EXCELLENT quality. I've not been disappointed yet. I have a price list from him, but I haven't asked him if it's ok to just post it.
-
That is the main reason Beandip got that one. He's not planning on getting the Bumper Guards as we call them (Nissan calls the guards Overriders), and therefore he needed a different mounting method than the one that mounts to the guards. When I saw this one on e-bay I told him, and he got it. It does look sharp.