EScanlon
Free Member
-
Joined
-
Last visited
Everything posted by EScanlon
-
You might want to at least acknowledge DK240Z's offer.... FWIW E
-
Good effort. You may want to denote those that are Vendors and those that are Informational sites. E
-
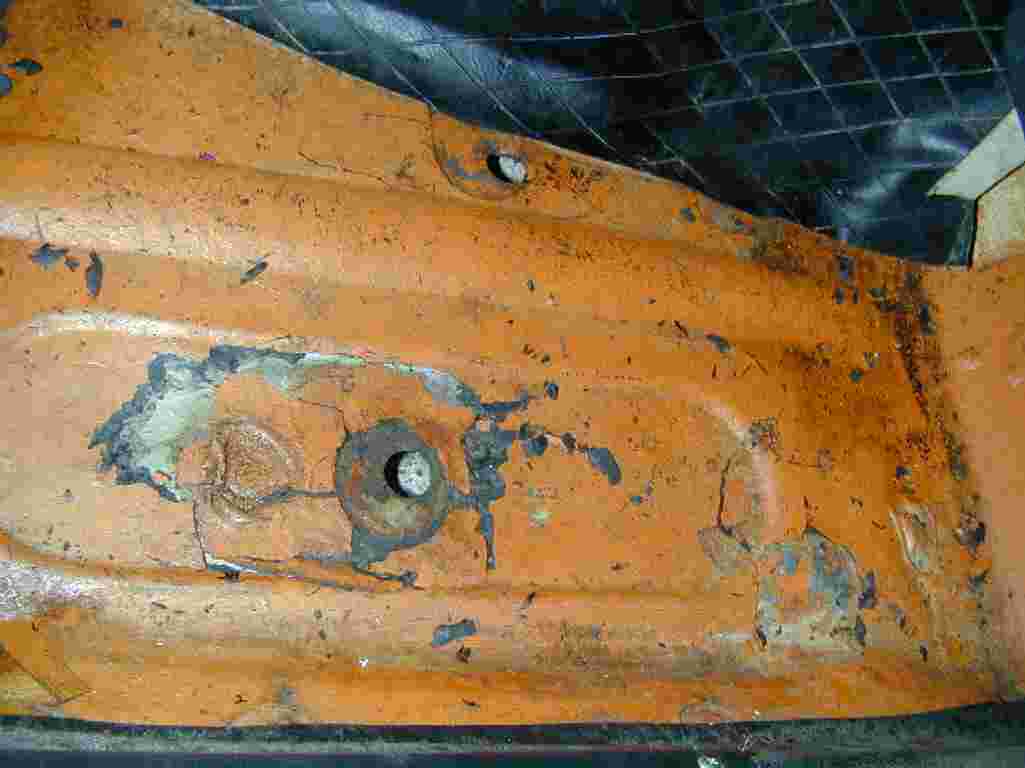
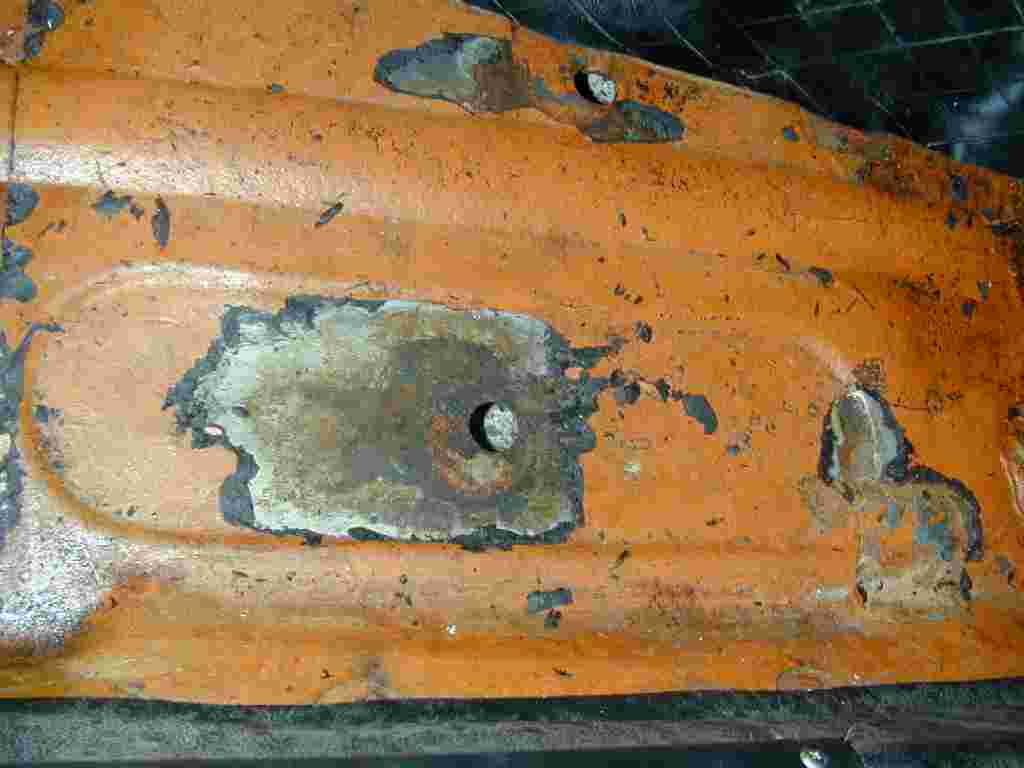
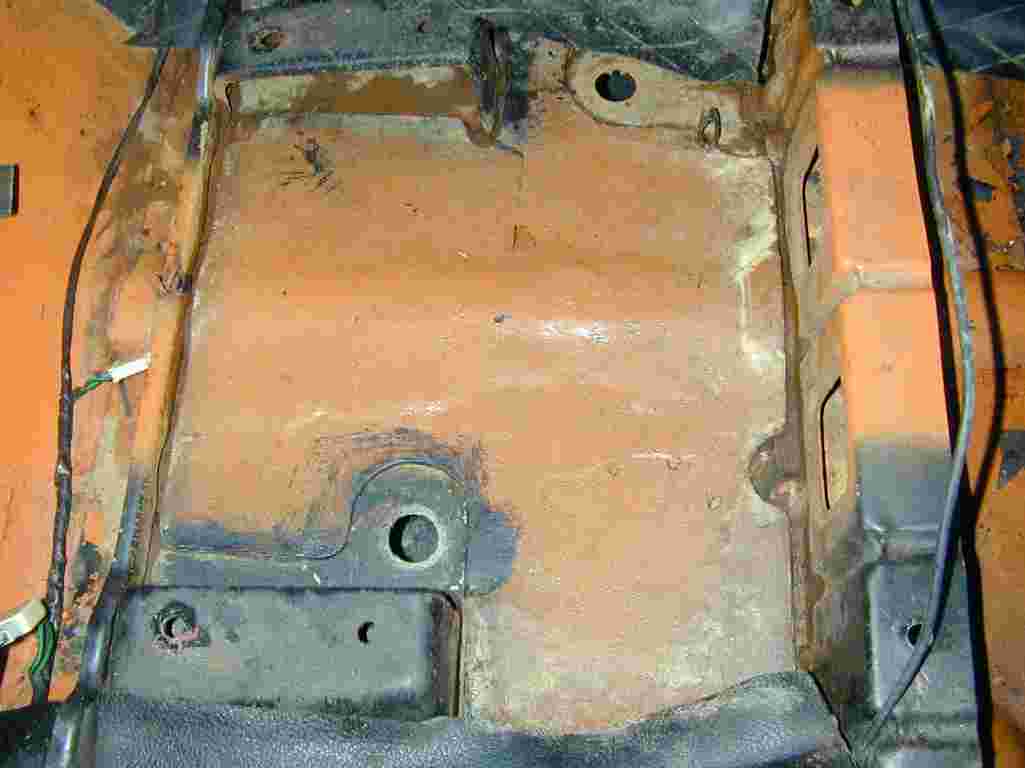
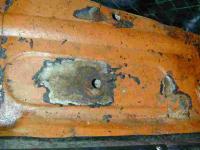
When you say "there is paint under it and no rust", I cringe. Here are two pairs of pictures. One pair shows the passenger's foot floor area, the other shows the area under the seat. While there was some indication of rust, it didn't seem to be as bad as the actual problem ended up being. You may definitively want to look at the floor's condition. If your car is a Concourse competition candidate, then you may want to consider if losing a couple of points is worth having a rusty floor. As far as the padding, go to either a Marine Supply house or specify OUTDOOR use carpet padding. Just be careful of getting the reconstituted sponge rubber padding, as it really is pieces of sponge rubber all glued togetherl, and you don't want to put a sponge in contact with your sheet metal. FWIW E


-
You might do a search on Repairing the Dash. There's an excellent article with information and How-To advice. E
-
Are you referring to the "horse hair" padding? Or is your car a brown color and you're referring to the tar mat sound deadening material applied at the factory? If the first, you can use more modern felt padding, but you may want to spray some Scotch Gard to prevent water absorption. If the latter, that IS the sound deadener material. One note however, that tar-mat was applied on many of the cars BEFORE any paint was applied. 40 years later, you may have some rust going on beneath that tar mat. FWIW E
-
I think this is the closest you'll find: http://www.thezstore.com/page/TZS/PROD/7AD1/50-1412 The 70-early 74 all had the turn signal/front park lamp mounted below the sugar scoops. The air dam you're seeking, as you've described it, would only be used on a late 74 to 78 S30, since those have the turn signals in the grille opening. The problem is that the later style is designed to function WITH the front bumper, and no pictures are given showing it without the bumper. E
-
R denotes RADIAL tires. One note, the original tire specification was 175HR14 or 175SR14 or 6.45H14.4-PR if the owner's manual and Consumer Information pamphlet I have for the 71/72 are to be believed. Edit: this is for the 240 not the 280 E
-
Your question is so broad that any attempts at answering it requires hours of work. While Wick Humble's book (How to restore your Datsun 240Z) may be of the prior model, much of the information contained therein will still apply to your car. If nothing else it will provide you with a basis for asking more specific questions that will hopefully give results. Your question, as it stands is more along the lines of "I'm going camping in Yellowstone Park, what should I take?" There will be tons of questions before any will offer any answers. HTH E
-
Use your tap/die set to find the size / pitch of the choke/throttle handle threads, then go to an R/C Hobby store. They have a lot of metric screws with the odd pitch that Nissan like to use in these out of the way threads. These screws, if memory serves, are not only a thin/fine thread, they also have a thin head with a shoulder. I vaguely remember finding a set of Allen head screws with a shoulder, but it would have required having to drill out the insert diameter (not the threaded hole) for the screw head. FWIW E
-
That's because I'm usually on here either helping others or asking on behalf of others whose vehicles don't match the specs on my cars. If the guy whom I'm helping owns a 73 240, MT and he needs a 3 wire tach (which was the latest Z I worked on), I don't need to tell everyone that it's not the 71, the 72, nor the 73 (early) that I own that I'm looking for parts for, nor hearing that neither the 67(P) or the 68 ® SxL311's used an electronic tach. I would STILL have to clarify WHICH vehicle I'm working on, and if it weren't one of mine, I'd have to clarify THAT. When I post anything about any of the vehicles I own, I try to make sure I post the information regarding the specific vehicle I'm working on. (I qualify this because sure as snot someone will do a search of all 4k plus posts I've made to try to find some that belie this claim.) That is something that a lot of people who are asking for help do NOT do. I'm sure that the people who are looking to GIVE help would like the model and year information, whether it's in the body of the post or in the signature. It just makes it easier than having to do some research on the poster's information BEFORE you can offer help to their question. As Bill Cosby's Dentist visit says...."NOW, Are you satisfied?" E
-
Year of your car? Put your information IN your signature (User Control Panel, Settings & Options, Edit Signature), that way people don't have to research what model you have. For the early vehicles you could swap the passenger handle to the driver and vice versa. The lever arms are duplicated and each side only uses one. FWIW E
-
An earlier vehicle, like the OP's 71 does NOT have a Hatch Support Strut on the passenger side, which is where the Gas Filler Neck goes. My tips: Jack car, remove right rear tire. Remove access flap at back of wheel well Loosen tank straps so you can access the Fuel Filler clamp. Remove Gas Cap and Mounting Ring, remove Rubber Splash Flap. Remove plastic interior pieces, both the Tail-Light cover and the Passenger Side. Disconnect vent hose going to Fuel Filler Tube From the outside, squeeze outer lip of tube and insert into vehicle. From below, remove the three bolts holding the lower bracket onto the filler neck. Disconnect the filler neck from the tank, and proceed to push the neck up into the interior. From the interior pull out the neck. I've summarized and undoubtedly someone will nit-pick it, but I hope you get the general idea. E
-
Dan: This specific forum is more to introduce yourself than to ask for help on your car. Allowances exist, but in your case your first two posts are virtually duplicates in two different forums and both are asking for help in locating a mechanic. Just FYI E
-
Tony D's comments on Hybrid Z are a good example of predetermining the validity of something before you read the document. His statement: is in error. The purpose of the expansion tank is for the fumes from the gas tank to have a place to condense whereby they can drip back into the main tank. With the expansion tank (aka evap tank) being higher than the filler neck, engine and generally the rest of the car (it's located about the same level as the quarter windows) it would take a great deal of expansion for the gasoline to even reach the lower level of the tank. I presume he just imagined that the overflow vent line went nowhere: The filler neck overflow tubing goes to the rear and uppermost vent (5/8") on the tank. The forward and uppermost vent connects to the diverter valve and the two right by the sender opening go to the carbs and back. There are no lines venting to the ground. But his line of: forgets that automobile manufacturers were REQUIRED to incorporate those tanks as part of the emissions systems. Beandip has this same arrangement in his car. Give him a PM and ask him if he's had any problems with overfilling. That way you'll get it directly from someone that can give you first hand knowledge as opposed to an arm chair evaluation of the system. FWIW E
-
Drop this line of discussion folks. No explanations, no preaching, nothing further. The poster has received an infraction and further commentary can only be inflammatory. Further comments will have infractions assigned. As Moderator E Scanlon
-
And an infraction at that. E
-
And it bought him his first infraction. Put your vehicle info in your signature line. E
-
and your speedo would register.... what? ... 0 miles per hour?? Go ahead and lubricate the speedo cable, it won't hurt it, but I doubt that it will eliminate the squeak... unless you move/adjust the REAL cause of the squeak. It may be PART of the total squeak, because you mention it's "constant at speed". But since it squeaks at a stop, there's something else going on there. The speedo doesn't have any moving parts at a stop. 2¢ E
-
Nuh-unh.... most folks refer to the Fuel Tank FLOAT as the (Fuel) Sending Unit (correctly or incorrectly, I'll let you battle that fight.) Meaning the mechanism that registers the amount of fuel in the gas tank via a float (kind of like your bathroom toilet's fluid tank except it's measuring not regulating). This may be a case of: "I know you understand what you think I said; but I don't think you realize that what you heard.... is not what I meant." E
-
I would take it back to the guy that "soldered" it and have him repair it properly. I think he didn't solder it at all, that might explain why it "just came off". Properly soldered would have held. Don't use an epoxy paste. While JB Weld might work for a while, I don't know for how long it would CONTINUE to work. There are other epoxies out there which have been used and claim to be fuel-proof which might be spendier but better suited for this job. POR's Epoxy is one. However, I still think the guy you paid to do the job should be the one to take first crack at repairing it. 2¢ E
-
-
If the dash had those items mounted on it previously, why not look at the BACK side of the dash and start with a small "X" cut with an X-Acto knife (not to the limits of the metal). You shouldn't have to cut through any metal. Then remember that you DO want the bezels to hide the hole, i.e. check the size and placement of the bezels/finishers before you start cutting. 2¢ E
-
I've sprayed three cars with Omni, two with Omni Clear and one with the Delstar Clear. You've all seen pictures of the two with Omni Clear, the one with the upgraded clear is currently being re-assembled. All three look great ... spectacular if I use other people's words. The two that have 3+ years on their paint have both won show awards in their respective showings. One of them has won consistently in just about every show it's been entered in. It hasn't won in every one, but that's due more to the other vehicles in it's class than anything else. The other car hasn't won more because it's owner doesn't enter it in as many shows, but he's been criticized for that... people keep telling him to enter it and he "modestly" refuses. I think that the problems reported with ANY paint are due more to inattention to preparation, environment conditions and time frames than a fault in the product being blamed. There are specific time windows given by the manufacturer for certain steps to be taken, followed by the next process, and minimum and maximums for all of those. Wait too long on a non-sanding primer, and you MUST sand before you can continue, BUT wait too long on the base coat in a bc/cc paint job and I've seen people just go ahead and shoot the clear, then bitch that the clear doesn't adhere properly and call it a cheap product. That also requires a mild sand AND a light re-coat of base to get the clear to adhere properly. You can also get good results just sanding and then clear coating, but the BEST results involve a complete chemical bond between the base and the clear. That's how these paints are formulated to work. Take short-cuts and you'll be totally on your own as far as what to expect. Same applies to not waiting the minimum amount of time. Well, enough said. I've said my 2 cents worth, but let me add that if you're trying to get your painter to shoot a different product than he's used to working with, then expect him to have a bit of a learning/adjustment curve... are you sure you want it to be on your car? FWIW E
-
It sounds as though you're hearing second hand hearsay on what the "good stuff" means. If you're having paint matched to an existing piece, then that's what will rule, and not your perception of black being more grey than true black. i.e. it either matches or it doesn't. If on the other hand you're mixing to formula, then how will you know that the "good stuff" is mixed to what the color formula is TRULY supposed to be and not DARKER because of your perception of the black being more true black than grey. A formula doesn't give you something to compare to, and paint chips are just an approximation. Omni mixed, prepped and sprayed properly with a slightly better clear (Delstar or the like) will perform very well. If you're looking for the "perfect" paint job (and someone please define that term) then you should be looking into the $300-400 per gallon range of paint and not the $100-$150 per gallon, which is what Omni sells for around here. FWIW E
-
It should be noted that the spring clip in the picture Dave Ruiz posted is bent (it's touching the screws). Both sides should be like the one side of the clip closest to the viewer. And, as a side note, put in one of the clip sides first, then pushing against that one, THEN belt it. It won't require as much force, and the possibility of inadvertently bending the sheet metal the mirror's base is mounted to or ... shudder... the ROOF... is greatly minimized. FWIW E