EScanlon
Free Member
-
Joined
-
Last visited
Everything posted by EScanlon
-
Ahhh... English terms and Yank terms. I know "wings" = "fenders", but am at a loss to for "legs". Unless you're referring to an old ZZTop song, in which case I'd suppose you're referring to the tires (tyres?). I'm not trying to be offensive, but could you elucidate on "legs", that being the term that has me at a loss. In very broad general terms, measure between key alignment points, measure and compare to the FSM (Factory Shop Manual) dimension sheet... you may have to do some basic number crunching, and clamp, support and otherwise rig up a frame to hold it all together before you do your first spot weld to hold in position. Then once you've done enough of these to hold the pieces in position, re-measure and adjust if necessary. With your experience as an armourer, you know that it only takes a gnat's width to cause problems. Hope this helps. E
-
-
A dedicated post thread for your car is fine... just not in the Help Me! section. The Help Me!! Forum should be JUST for immediate help threads. Granted you've had need of help, but your car isn't THAT much of a basket case. Sorry I can't help you with your current post as I'm not qualified. E
-
63881-N4200 Used on both the Coupe and the 2+2, as of 6/76 Per the Z Club Microfiche. Slides # 126-7 L26 & L28E Body; and 149-7 2+2 L26 & L28E Body As I wrote, they may have been added later or your fenders may have been replaced with later style fenders, but the 71's didn't have them as stock equipment. This is a good example why the Z Club CD will help decipher oddities as well as make it easy to determine what will and won't fit on your car. FWIW E
-
Have you thought of using plain old Fuel Rated hose? Or possibly going to the parts store with your old one in hand and asking them for their best match. SportZ Magazine put out an article on replacing these hoses with generic fuel rated hose. You might check their archives, or the other articles that have been offered here. FWIW E
-
Bart, Take a picture, but according to various early cars I've seen, and worked on, the inner fender liner just was not there. That's not to say that it wasn't added by someone later... whether by swapping fenders (don't recall if the 260 fenders would have worked) or by using mounting points that were already on the car in it's 240 incarnation. There ARE items that were projected for use on the initial 240's that didn't arrive till later years, and there were also items added to the later years that could be retrofitted onto the earlier ones. FWIW E
-
Yikes.... there is so much disinformation here that it is difficult to ascertain WHERE to begin. The VALUE of an item isn’t ascertained until such time as it's sale is effected. Up to then it is merely conjecture and posturing by the owner. A paint job can add to the value of a car, as well as it can reduce it’s value. Putting a 10k paint job will not necessarily raise the value of a car by 10k, but neither will it necessarily drop it by 10k. "Changing the color will almost always de-value the car if it is a classic…. changing the color will still de-value the car to the purists." Sorry, but how will you know the color was changed if it was done properly? The VIN does not yield a paint code, heck you can buy a paint code sticker in any color you choose to repaint the car. Again, if done properly, how will you know? There is no firm registry for the Z, that denotes what color it left the factory as. The only registers that exist denote the color REPORTED by the owner. If a "purist" can denote the color change, then was it done "properly"? "Even quality paintjobs in the same color can bring the value down." This one is ... baffling. How can it bring the value down if it was a quality paint job? Because it's fresh paint? I'll concede that in some cases that can be the case... when documented original paint records, chemistry, texture, etc., exist. But otherwise? Sorry, nope. Anything less than a quality paint job, wouldn't be a quality job. The value can only be brought down if the SELLER agrees to the mis-informed assumption of the presumed buyer. If a potential buyer were to tell me he was lowering his offer for my car on the basis of fresh paint... I could not care less.... as long as he met MY price to sell the car for. If his "low-ball" offer didn't equate what I WANTED/REQUIRED for the car... no sale. His reasons for his offer would not necessarily be reasons for my acceptance, but in fact, could be reasons for my denying his offer. Unlike the IRS, he cannot compell me to sell. "Especially if you don't have lots of photos showing the process." How will pictures support the value? Conversely, how will the LACK of pictures undermine the value? Pictures are but a static time slice at one point, they aren't necessarily a guarantee, nor proof of a process, nor necessarily PROOF that it was effected on the vehicle in question. I've seen pictures of someone wet-sanding a car, only to have seen that that job was done poorly. Additionally, I've seen pictures of people using a D/A only to find out they decided to chemically strip that panel later. Heck, you can't even be sure the car in the picture is the SAME car as the one you're looking at in front of you. How would you know? "New paint on a car for sale is generally a cover up. I always prefer a car with original paint as you never know how much bondo lurks under a respray." New paint on a car CAN be a cover up, it can also have been done with the good intention of UP-valuing the car. To assume that it is a cover up, denotes that the viewer is pre-disposed towards deception being the reason for the paint job. Regarding bondo, are you under the impression that cars NEVER left the factory with bondo under their "original" paint? What did you think they did with a car that suffered a light mishap? Destroy them? Nope, they repaired them and shipped them out. Secondly, Bondo is not the all-encompassing EVIL that some people make it out to be. There is a definite need for the product and process. To dismiss it outright as undesireable is at best short-sighted, but more than likely, un-informed. "never buy a car that has been primed unless you see lots of photos of the prep work!!!!" Photos can only prove what you want to believe. I can show you several pictures of cars in the process of getting primer.... and not one of them might be the car you're looking to buy nor looking at. I'm not trying to start a flame war, but too often people look upon the exceptions and consider them the rule, without additionally upholding those mis-conceptions as stated "facts". MY 2¢ E
-
Inner Fender Liner (Protector, Front Fender, Front per the CD) in a 71? Nope. Your car may have had one added later in it's life, but not from the factory. There IS a REAR Front Fender Protector, but that's on the back side and nowhere near the bumper. (It's what hides the Cowl Drain Tube, and helps cause the problem with rust on the fender.) FWIW E
-
Either Brake Cleaner, or Engine Degreaser... plenty of patience and a good stiff long bristled brush. Soak the piece, walk away for a while, come back and re-apply. It will take a couple of times, then rinse clean and to get the last bits out, use Stephen's Cleaner. FWIW E
-
http://www.cartoys.com/
-
It may be that you have NOT been lied to. Did you look at the picture in post #4? That "quarter sized hole" may just be the NORMAL and OEM Rubber Plug for the floor. There are two plainly visible in the picture. But you must be extremely careful of "a random wire hanging under my dash. ...so I decided just to cut the dam thing" as that can lead you to MORE trouble. If you don't know what it is, and aren't sure of how to fix it, don't apply spur of the moment repairs. Just a word of caution. Otherwise, your next post will be... "It was working yesterday, then I (insert next spurious "fix") and now it won't run at all. Any ideas on how to fix it?" That extra wire may be why your antenna stops working, or why the radio dash plate no longer lights up, or... get my drift? FWIW E P.S.: Johnny'O you've been here around the block at least once. Top of page... Blue tool bar... "Search"... "Tar Mat" Or start your own thread.
-
Hrudu: IIRC, you used to live in Hawaii. And you had the same car there. Am I mistaken? If so, I'll lay odds that your "rotted out pretty well", ends up being "Oh Sheet, look how far the rust is!! Check just how far the repairs need to go, then decide whether or not this is something you're going to tackle right away and HAVE the $ or if not what your plan "b" is. If you do not have the $ available, you may want to hold off ... for now. Unless you have the $ to effect a proper repair you might open her up and discover that.... you can't put her back into service for a while. That may cause all sorts of problems and $ down the road. Jimmy has experience with cars rusting due to the ocean beach's atmosphere, and with you having lived in Hawaii.... I'd check that complete rail out thoroughly. FWIW E
-
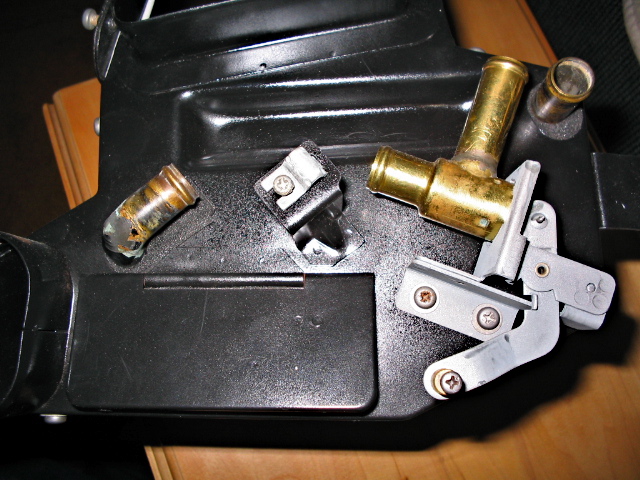
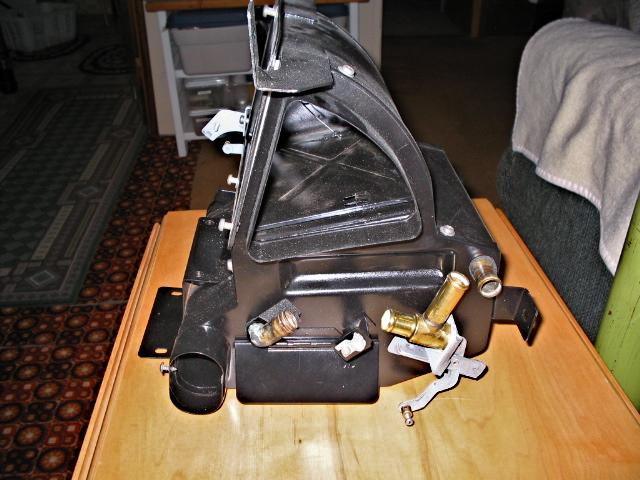
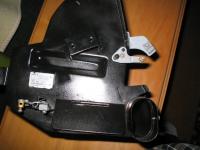
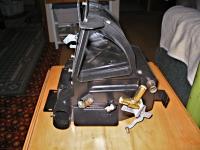
Look at this thread: http://www.classiczcars.com/forums/showthread.php?t=33258 Specifically, post # 7, that one details WHICH / WHERE the cables attach. As to HOW they attach: 3 of the 4 cables attach with a clamp and phillips screw that presses down on the sheath and allows the cable itself to then actuate their process. They are: Door to Room (left side of plenum) Water Valve (right side of plenum) Fresh Air Valve (not on the plenum, but behind the squirrel cage fan housing.) The last cable attaches with a spring clamp that also presses down on the sheath to hold it in place, but this one is removeable with your fingers. This clamping point is on the attached "arm" on the left AND front side of the plenum. This actuates the Defrost/Room flap inside the heater plenum. Two of the cables themselves (the ACTUAL cable) are clamped to their mechanism with set screws on the cable ferrule. These two cables usually DO require some form of adjustment as to the length of their travel which is why they're adjusted with set screws on the ferrules. These are: The Room doors (left side of plenum) Water Valve (right side of plenum) The last two cables usually do NOT need length adjustments and are finished with "loops" on the end of the cable itself. These just slip over the peg of the actuating arm they are controlling. Any adjustment to these two is made by WHERE you clamp the cable sheath. I've never run into a situation where you needed to adjust the length of the cable. These are: Fresh Air Valve (not on the plenum, but behind the squirrel cage fan housing.) Defrost/Room flap (inside the heater plenum) Routing of the cables is pretty straightforward. The other post(s) describe that. Hope this clears things up. Enrique Added pictures from this thread: http://www.classiczcars.com/forums/showthread.php?t=32556 Post #6 240DKW. The attachment and clamping method for the drivers side forwardmost lever (the inner room/defrost flap) is different in my description and car than on this picture. You can still readily discern where everything goes.


-
Doug; Thank you for your input, but the original poster of this thread - from October 2003 - may have already found an answer. It happens often, so don't feel bad if others tell you to check the dates of the post before responding. FWIW E
-
So what you're saying is that while the needle "moves" it doesn't register anything. Check to make sure the wiring AND the gauge are ok. AT the tank, connect the two wires going to the sending unit with a jumper. One of those wires is a spade connector with a lock tab. Be careful pulling that off. If you're not sure of how, or are worried you might hurt it, simply connect a wire between the two terminals on the sender. Your gauge should now read completely FULL. (0 resistance) If it does NOT, then there is a different problem. Could be the gauge itself, or the wiring to the gauge. Check that and post back. E
-
I neglected to mention that you might want to have him "read" your key and compare it to the data on the Key Code sticker. If they're NOT the same, there is a good possibility that your lock(s) have been changed in the past. E
-
Careful... A UK car, specifically a 78 260 is NOT necessarily the equivalent of a US 74 260. There MAY be similarities, but therein lies the difficulty. One is a 78 and the other is a 74. Add to that that one is a 280 and the other is a 260. Does a UK 78 correspond to a US 78? There you have the crux of the matter. This is why Alan T's input is so valuable. While we may assume that they should correspond, you are now comparing two vehicles in two different sales markets that have different requirements as far as engine and styling, and let's not get into the DOT requirements we have here in the US that wouldn't apply in the UK. So Matt, to answer your question, I think we need a good bit of guidance from Alan T (HS30-H) before we can determine if we're talking apples and apples. On a separate note, you don't need to post duplicate threads in different forum areas. Most users use the "Active Threads From The Forums " on the bottom of the front page to see new threads and duplicates are unnecessary and waste computer storage. Not to mention possible loss of information with one thread getting half an answer and the other half on the other copy. I'll recommend the other one get deleted. Hope this helps Enrique
-
IF, and that can be a big IF, the Key Code data is still on the inside of the glove box lid, take that to a locksmith and have him cut new keys. If not, remove the Ignition lock, it's not too hard, take it to the locksmith and have him "read" the lock. One member here, Unkle, is a locksmith. PM him if he doesn't chime in, but I'll bet he concurs or has a better suggestion. FWIW E Edit Addendum: Your locks may be so worn that they're admitting keys that should NOT technically work on the car. If that is the case you may end up having to replace the locks. Don't forget to change them to the key code on the glove box, or erase the glove box data.
-
Matt: I don't know if there are or are not any difficulties in receiving material from Canada. I preface my comments with that being said because you have an excellent source of NEW metal items from Charlie Osborne at Zedd Findings. http://www.datsunzparts.com/index.htm Presuming that there aren't any difficulties, (Don't they recognize the Queen?) then obtaining parts from Charlie may save you some money. Paying £300 is about $490 US, that's a LOT for shipping and handling, seeing as he sells his PAIR of floors for $300 US. You may want to do some more shopping. You may also find that some of the prices you are paying for those replacement parts may be for used parts, and although they ARE the "right size and shape", they are in fact, 30+ year old parts. Given that you will have to fit and adjust those used parts as much as you would have to fit and adjust NEW parts.... do you really need to question which way to go? The process your car requires is extensive. Many here in the US, due to the availability of donor cars and such would STILL not choose to tackle it. As such, you need to determine IF it is salvageable, and IF you want to do it. That being said, the next step is to not delude yourself on "repairing" marginal items. Some items simply need replacement. (Cue in Dr. McCoy: "She's DEAD, Matt!") Those are the ones that will take time and effort to locate. But, going on to the other questions: There is a product called KROIL, which as described by others is the BEST at penetrating rusted and seized nuts and bolts. There are also others that claim to have good success mixing Acetone and Automatic Transmission Fluid (not sure of the exact ratio). There are various other penetrating oil solutions that purport to free up seized bolts, with varying degrees of success. You need to note that at times, especially when the rust is as far advanced as the parts of your car you've highlighted are, that the bolt and nut have essentially BONDED beyond the scope of penetrating oil's effectiveness. At that point, simply drill and tap out the offending bolt. It is sometimes easier to start there from the beginning, but most like to snap off the bolt head before deciding that drilling and tapping is the way to go. I say this because it is easier to discern, mark and actually drill in the center of the bolt stem starting from a FLAT bolt head, than it is from the twisted remnant of the stem left sticking out of the nut. But that's just my experience, and I'll admit to giving the wrench / penetrating oil first licks before I decide to drill and tap. If I've decided to drill and tap, I typically start with a small diameter drill, and work my way up slowly through the range until I notice that I've reached the threads of the original nut. At that point, it is usually easier to remove the offending threaded remnant than to try to tap it. Once it's all removed, I run a thread chaser through to clean up the thread. The most important thing to remember, is to obtain a good set of taps and dies, so that your new threads are consistent and accurate. While a "cheap" set will work as thread chasers, they will wear out quickly and give you inaccurate results in the long run if you use them as actual TAPS and DIES. This also applies to your drill bits. Get a well stepped set of drill bits and you can slowly and surely eliminate the bad stem, without damaging the nut severely. I'm not familiar with copper grease, but I presume that it is similar to a product we have called Never-Seize. Never-Seize, or Anti-Seize Lubricant, is a good item to use.... with caution. I mention that because in the case of our Never-Seize... it is a silver colored grease that WILL, if you are NOT extremely and irrationally paranoid of it, "accidentally" get on your fingers... tools... and a myriad of other surfaces, such that you will be convinced that it will slowly but surely cover your entire car, garage, home and surrounding neighborhood; all with a thin film of silver tainted smudges. If the term "copper grease" denotes that it is a copper color instead of silver, well you may not find it as unpleasant... or it may drive you to swear off the stuff. What I'm trying to say, is that a very SMALL amount will go a long LO O O O N G way. Trust me when I say that you do NOT want your new carpet, seats, weatherstripping, all in a nice matte black.... sporting metal colored stains. The stuff will simply NOT wash or fade away. Hope this helps Enrique
-
Jan; There are numerous (maybe hundreds) of threads asking the same question(s) you are asking. NOT wanting to just cite the famous "Do a SEARCH!" becomes hard, especially when a theme/subject is asked again. In extreme brief: Inner Hatch Seal Tail-Light Seals Antenna Seals Floor Plugs Firewall Plugs/Seals Gas Tank Vent Lines AND Seals into cabin Quarter Window Seals That's just the tip of the search iceberg. You may have to adjust the words or sequence to obtain volumes of information, but believe me... it is VOLUMES. FWIW E
-
WHICH side? Completely FULL or Completely EMPTY? FULL: You have a short in the wiring, and the return lead from the sensor is grounding itself, yielding a 0 ohm reading and therefore a "full" tank. EMPTY: Probably the same thing, but your wires are inverted. Could also be just the wires being inverted and the wire expecting to be grounded is being provided power. (This second item is a long shot though.) To check if your float sensor is reading right, remove the terminals AT the sensor in the tank, and do a resistance reading. If you yield anywhere between 10 and 90 ohms (depending on how full your tank is) your sensor is fine. Now do a 12v power check between the Yellow wire and ground, it should be about 12v (don't fret if it's a dash lower). If you do NOT, then that tells you your wire is compromised to ground someplace on it's route to the tank. FWIW E
-
Emphasis mine. I agree that all this points to the numbers being engraved, but I would like to point out a couple of little points that beget questions as to whether the WHOLE number was engraved, or if part of it was stamped. And whether it was done in a single pass or multiples. I have questions as to what type of engraving bit would permit some of the edges left. Look at the DASH on (presumed HLS30) "DASH" 11730 pictured above. The left most portion of it shows a FLAT triangular wedge, while the right edge shows a ROUND edge. I can understand a round beginning point and end to the engraving process (high speed circular bit), but could anyone explain how you get a flat WITH distinct angles? That little bit of beginning also appears on the vertical bar for the number seven as well as it's "foot" or base. The base of the seven could have been done with multiple passes of the same rotary bit since the corners of the foot are rounded just like the beginning and end of the two "ones". Yet, if you look at the last two digits, 3 and 0 both have very distinct angles. The 3 at the top end and the center, and the 0 a the top. Thoughts? E
-
I've heard of using a white scotch scrubby pad. I've also heard of being careful and using CLR (Calcium, Lime, Rust remover) I also have NOT heard of resounding success with either one of those methods, although some success has been mentioned. One member here has used Adam's Swirl Remover and claims fantastic success. His windows DO look spotless, so maybe that is the ticket. FWIW E
-
If the problem is the same with your Parking Lights on (no headlamps), then you may have a cross-connected bulb. If on the other hand, it's ONLY when the Headlamps are on, then I would suspect the combination switch. HTH E
-
I would agree, except that it has happened numerous times here on this board and others. The bulb socket gets old, people shove the bulb in and out and before long it allows a sloppy fit on the bayonet base... and the bulb can be inserted incorrectly, or even an incorrect bulb. I've seen cars with really bright running lamps and barely noticeable brake lights on one side... check the bulb and it's in there 180° off. That's using the proper bulb just inserted wrong. Single filament bulbs (1156) have one contact that bridges BOTH contacts that power a dual filament bulb (1157) and you get turn signals at the dash turning on when you press the brake, front marker lights acting as brakes, and really funky operations when using the turn signals. It could be a bad flasher unit. Swap the Haz for the T/S and it's an easy check. But as Jim (a7dz) mentions, a simple "short" in the bulb base caused the same problem, his was due to water. In the original post: The problem is reminiscent of the Side Marker Upgrade connector which connects the side marker to the Turn Signal Circuit AND the Marker Light Circuit... the end intent being that the side markers blink on when the t/s is off and vice versa. That Upgrade Connector takes advantage of cross connecting the circuits. However, the indication that the RIGHT T/S is blinking "almost imperceptibly" says that it IS getting juice. That can only come from a cross-connection (short-circuit). Then Tony continues with: Emphasis mine.It often happens that when an otherwise "normally" operating item begins to malfunction, the problem can be traced to the last action taken. It isn't always definitive, but it happens often enough that that is the FIRST thing that should be checked. Since he'd replaced a bulb, the solution I offered was based on that. Mistakes do happen, and sometimes it's the simplest that causes big problems. FWIW E P.S.: On the subject of fusible links, here's a link... simplistic but nonetheless informative. I found the information on the SAE page, but you have to order the paper and it's not visible on-line. Take a look at page 11: http://www.autoshop101.com/forms/hweb1.pdf The text there reads: Emphasis mine.