EScanlon
Free Member
-
Joined
-
Last visited
Everything posted by EScanlon
-
I'll give it a shot, but your description leaves doubt as to whether you're referring to the weatherstrip piece that goes on the outermost edge and therefore around the lip of the hatch to seal the drainage space around the hatch opening or to the true inner weatherstrip which seals the cabin. The outer weatherstrip originally came in 3 pieces; the 2 sides were identical and in cross section looked like a question mark (without the period) and with 90° angles instead of curves. Those mount with the flat portion on the upper gutter floor with the "cap" (the "u" shaped part) mounting on the flange coming up from the gutter. The third part or INNER part of that weatherstrip, had a rubber tube mounted to the top of that "u" shaped cap, otherwise it was identical to the side pieces. It sometimes proves easier to remove the hatch to get it mounted properly. Mounting the side pieces is pretty much obvious and straight forward. The center piece gets really tricky in getting it to mount to the flange above and in front of the hinges. The true inner weatherstrip fits onto the inner flange and it should have been somewhat pre-formed so that mounting it "inside-out" (i.e. outer edge towards the inside of the opening) would be tricky if at all possible. But...it mounts with the fleshy part of the gasket towards the outside. As far as adhesive, if you're using 3M's Weatherstrip Adhesive (Black or Yellow are both the same except for color), I'd recommend the black if only to hide whatever might seep out. Now, apply a thin bead to the inner part of the gasket after making sure you've removed whatever mold release powder may be left inside there. Spread it evenly and just be careful not to splooge it everywhere. Then while that one is setting, apply a bead to the inside edge of the gutter...NOT the inside SIDE of the gutter but the inner part of the "u" that is the gutter, with one side being the flange of metal and the other the car body. This keeps any "oops" overflow to the gutter and not to the interior of the car (for the inner) and to the gutter instead of the larger surround around the hatch opening. By the time you've done both sides, then take the weatherstrip and gently spread it so that you can see the sides of the glue area. Position it carefully (You DID remember to trial fit and mark where the center / edge is supposed to go didn't you?) then start working your way from one end to the other. Weatherstrip adhesive is a contact cement, and as long as you don't wait too long between applying it to both surfaces and joining them, this will work fine. If on the other hand, you find that you took a little too long, simply add a thin bead between the surfaces. It doesn't achieve it's final grip until 24 hours later, so you do have some work time....but NOT hours. That is, if you apply the weatherstrip and you find that you put it on wrong, remove it right away, clean up the mess and start over. If you wait till tomorrow....it's on there for good and you'll only succeed in tearing the weatherstrip. Hope this helps. Enrique
-
Actually, even though the outline of the car is not noticeable in the left side of the fiche, you can see where it goes in relation to the fuse box...that tells you it should be on the DRIVER'S kick panel. If it's where I think it is, it's in the upper section, just above where the Hood Release Cable goes. Enrique
-
It might ALSO be that you inadvertently hit and bent the little copper/brass tab on the BACK side of the steering wheel so that it made contact. Either by pushing down on the steering wheel, or because you had been poking aorund the steering column shroud. These are all POSSIBLE items. That's why you have to check them all out. Remember ZSaint not too long ago had problems with his horn...couldn't get it to work. He's done a LOT of work on his car, it seemed really weird for his horn to NOT work. He finally traced it down to the little brass arm that touches the back of the steering wheel (in order to complete the circuit made by the horn button) was simply NOT touching the back of the wheel. It wasn't anything he DID, and nothing that he did wrong, it was simply not aligned properly. As far as to how your car decided to honk......S.F.M. (Sheer F****ing Magic) or Gremlins. E
-
Here's a link to help you: http://www.atlanticz.ca/zclub/techtips/electrical.htm They have wiring schematics on line, that unfortunately are too big to upload here. You CAN open it up, but it might be just as easy to buy one at the parts shop. That it didn't stick the second time around, again isn't unusual. It may have been a fluke, or .... FWIW Enrique
-
There IS a Horn Relay, and if it's location is like in the 240's it should be on the passenger's bus box (that funny looking thing with all the relays, and other electrical boxes). It wouldn't be unheard of for the relay to have gotten "stuck" and caused the horn to blow continuously, especially if for some reason the internal switch got "stuck". Remember it's more than likely the original relay (they don't go bad often enough to have possibly been replaced more than once). When you disconnected power, it broke the contact and allowed the electromagnet to loose the connection, that's why it didn't go off again when you reconnected power. Check the relay, it should have H - S - B on the side or on the base. It's a 3 wire relay, and is generally about 2 to 2.5 inches long, 1 inch tall and about .75 inches wide. FWIW Enrique
-
Get a small can of gas....a one gallon or 2.5 gallon is sufficient. Then run the tank dry, THEN check to see how much it takes to fill it and you only have to consider the one or 2.5 gallons you put in. Drainnig the tank is not at all a bad idea, especially since you suspect that there's crud in there. Again, run the car until you get to that point where it starts cutting out on you, and then get it home, drain and if possible filter the gas (rather than throw it away). That you're using your odometer to determine when to fill more than your gas gauge, says you know that it is inaccurate. Check those out and then see what you find. Enrique
-
Excellent! Score one for Arne and getting it on the first post. One last question to finish this up: Is your wife home and ok? E
-
I mentioned the tank being dented, because there IS an anti-slosh baffle located in the centerline of the tank, going from front to back. IF the tank got hit just right, it is highly conceivable that the outer skin of the tank has been crushed up tight against the baffle and trapping or daming several gallons worth of gas behind it's "dam". That it isn't a perfect dam would allow for some gas to seep under it and allow you to re-start and run until once again, your demand had overcome the supply. Granted, may be a bit of a far-flung possibility, but unless you have several pounds worth of .... something.....taking up 6 gallons worth of space, (5 if you presume that you weren't towed or pushed into the gas station), that's STILL a lot of space to mysteriously lose. Now, I'm going to ask another "stupid" question. Are you reporting 150 miles from fill up to .... 1 - when your gas gauge reads Empty and YOU decide to fill up again, and can only get 10.4 gallons into the tank before it fills up? That is, you decide to fill up before you get stranded. 2 - when you run completely out of gas, and even if you were to wait overnight you STILL wouldn't have enough gas to get home? That is, you ARE stranded. (That you sometimes lose power and the engine quits and can be re-started later and run for a few miles may be an indication of vapor lock and not necessarily running out of gas. The bent pick-up tube wouldn't allow you to once again pick up gas once the level of the gas is low enough for it to suck air....unless some gas is trickling back into the tank (which it does) or the gas is somehow expanding in volume.) If it is YOU deciding to re-fill, have you considered that it is entirely possible that your gauge is off by a good amount....that's not at all unusual to have as a situation. Changing the sender unit changes the readings at the gauge and vice versa. The two (gauge and sending unit) are a matched pair. Before I would presume that you have enough crud in your tank to fill up a 5 gallon gas can (unless your car was used as a drug-runner), I would investigate the other possibilities. 2¢ Enrique
-
Are you sure that it hasn't been halfway crushed? You'd be surprised at how many tanks I've seen that had been backed into curbs. FWIW E
-
And Victor wins the prize! Once I win the lottery, you can have your choice of ...... Will: Close, but not quite yet. I'm having fun deciding how I want to run the lights, whether the Single Filament for the JDM Parking configuration and the Double for what we (U.S.) would consider the "standard" use (i.e. Park/Turn) and then whether to mount inboard or outboard..... Then again, I also need to run additional wiring, which I need to investigate further on. Won't that be a ~fun~ job!?? Specially since it involves BOTH front and back AND both sides. Thankfully, it's only 2 wires total to the front, and 2 to the back, but it does involve removing the plastic in back..... what a pain! (I've GOT to ask Kats or Alan what that lamp circuit is ACTUALLY named.) Zbane: Actually the "Halo" headlights that I bought some years ago, have caused a bit of a furor here at times. So, Yes, that is "unusual", but it was done some years ago. No, they're not OEM nor even what could be considered "Period Correct", but I couldn't resist them --especially once you see them with the OEM Headlight Covers. They are a knock-off of the BMW concept, and when you get them they have a blue bulb. Unfortunately, just up and across the street, lives a Sheriff's Deputy (now retired) who promptly reminded me that in WA, Blue lights are "verbotten" in front of the windshield pillar.....unless you are an emergency vehicle registered to the state. I didn't want to argue the number of kids out there with little blue lights on their windshield washer nozzles etc. seeing as he IS my neighbor and...... Besides, with the car being 920 Gold, an Amber bulb looks better. Now, to the real prize winning notice. Yes, it's a grille badge I made from some excess ABS plastic I had. But I'm hoping to spur some interest, and also have several contacts / quote requests out there finding out IF/HOW/HOW MUCH/WHEN etc, it would take to produce them and .... If pricing/availability makes it worthwhile, it would be something that we could buy and help the club (here that is) with the expenses of bandwidth, server problems, new hardware....etc. My thought is that we could have our own "regional" chapters of the CZC. All with the same Grille Badge, as I did, but with a small scroll or whatever, down below for ..... In our case here in Portland / Vancouver, I'm thinking that since our airport's international designation is PDX, that would work. That would make our little "scroll" read CZC=PDX. In Dallas/Ft. Worth = DFW, and Chicago OHD. Maybe it's not what that association of members from that area would want. And maybe a "scroll" would not be the choice, maybe a little rectangular plate, or a .... But the key thing is to have the CZC Red White Blue logo, as an internationally recognizeable logo of THIS site and hence our individual "chapters". In my opinion, it would give those of us that would have one, a way of being recognized by other members whom we might not already know, and a way of promoting our club, both the chapter and the main one here. Thoughts anyone? Enrique
-
Ok, that's ONE for Arne. Any others? E
-
-
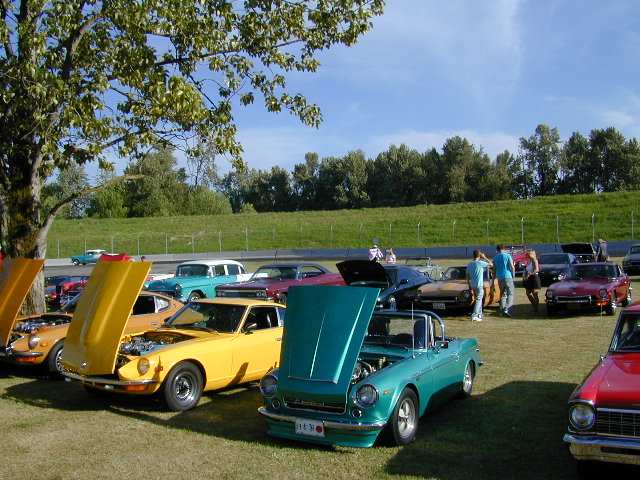
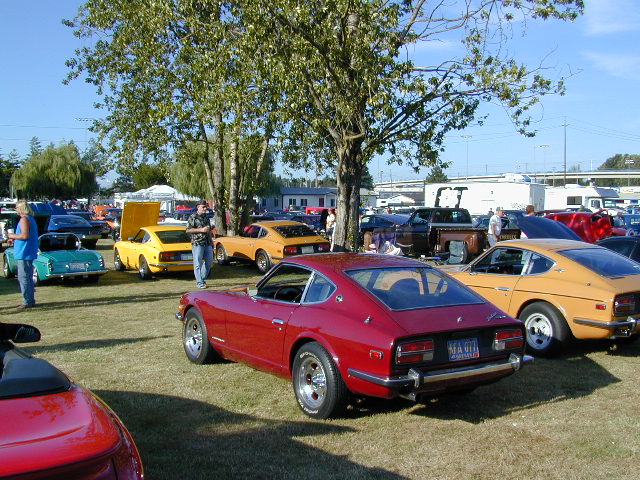
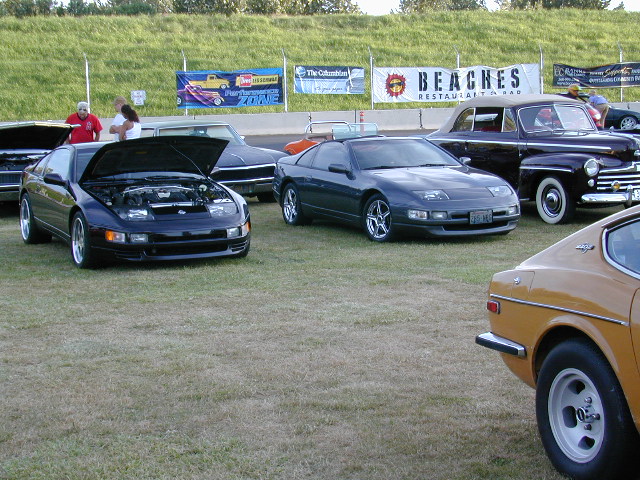
Excellent day! Not too hot, and not too cool. Excellent turn-out, although off to a slow start. See pics below. We actually increased our count! Had 2 300 ZX's join us!! Met Larry Flint who worked with the BRE team, back in the day. Helped in Paul Newman's pit when he raced here at PIR, knows all sorts of people in all facets of DATSUN racing and bunches of tips. Nice guy. Met a couple more Z owners who hope to bring their car out next week / soon. Enrique


-
While you'll get a lot of information here, check: www.zhome.com where you'll find a list that breaks down many of the MAJOR changes according to year and where possible, gets it close to VIN #. However, be aware that that list is very U.S. Market specific and that variations existed amongst different markets as well. That is, "European" Z's had different options and features that weren't readily available in the U.S.. There were many owners that would seek out those parts to personalize their vehicle also. E
-
Now you're making sense..... not "loco en la cabeza" talk.....(crazy in the head) Post the pics soon. E
-
I think you'd be surprised at what is STILL available, and how easy it would be to fix it. For the amount of money you received you would still net a "profit" even if you took care of other problems not related to the damage. Unless you are referring to frame damage, or serious alignment issues, changing everything over to a new body may prove to be more work than you're imagining. Check with TABCO for replacement panels for starters. E
-
Fix the Z. It's a beautiful car, becoming even more noticeable, and it's still FUN to drive. The BMW and the Porsche (Targa?, you mean the VW camouflaged as a Porsche?) are simply .... not worthy of much interest. You'll just be one more drop down the drain of old cars. Then again, Hip Hugger Bell Bottoms are popular at Halloween parties..... JMO E
-
Tomorrow, June 28 is event number 3 for this summer! It just seems to get bigger and BIGGER each week. 600+ cars the first event, then rained out the next, then last week probably 700 and a couple hundred motorcycles....stay tuned for details, better yet, show up and be counted. While those of us here at the CZC-PDX club love Datsuns, you should see the Salleen, the Rolls, the Lambo, the Rat Rods, a '69 Subaru 390, the XKE Jag, just to mention a very small idea of the spectrum of cars there. More classic cars than you can imagine at a WEEKLY cruise-in. A Band, prizes, and tons of good looking cars and women....for $5 a car. There's also COLD Beer, Wine and Mixed Drinks, HOT food, and DRAG RACING going on behind you. There were only 2 Roadsters and 4 Z's..... you can see we need your help in getting represented. Hope to see everyone there again, and hopefully a few more. Enrique
-
Simply drill out your VIN plate from your old dash, and having removed the old VIN plate from the new dash (if it hasn't been done already), rivet your new one in. The key is to make sure that the VIN on the dash plate matches the VIN stamped on the firewall and on the other data plates (engine / door). 2¢ E
-
Camo; Part of the problem of wiring it that way, is that the door switch / dome lamp are on the same circuit, and it's "hot" all the time. The little "Lights On" buzzer circuitry would be on continuously. Zbane: Ideally, that would be the way to rewire the switch or the Relay Harness (for those that bought one), but there's already enough items going through the ignition switch that exacerbate the wiring nightmares without adding another one. Lastly, I bought a few that were on sale, and have been trying to find where to plug them in. I'm hoping that SteveJ's post is the answer I've been looking for. As one that has .... bluntly, spaced out turning off either the Headlights OR the Parking Lights OR the Dome Lamp only to discover a thoroughly discharged battery....I can say that I'll take ANY kind of warning, whether before the door opens, or right after I stop the car (which currently my wife has been doing...with ensuing "joy" at how I get reminded) or a buzzer that kicks on as soon as I turn off the ignition. Would love to have as my Acura does, a soft chime when the door opens, but I'll take the buzzer. I'll post my confirmation of SteveJ's post with the buzzer I got. Hopefully they're one and the same, and I don't screw it up. Enrique
-
The mail list had this link for a guest book. http://www.legacy.com/ContraCostaTimes/Guestbook.asp?PersonID=18197734 It's open for posts till 6-21-2007.
-
Rest In Peace Carl. Hopefully, you found a perfect Z waiting for you. E
-
Argggh! Missed it completely! E
-
Tanny; I'd be interested in your posting where you connected it to. If you could provide a photo of the fuse box without cover and showing the connections of the little "gizmo" that would be very useful. Thanks in advance Enrique
-
OR Cannibalize the 73 switch for the parts you need to repair the 71. E