


EScanlon
Free Member
-
Joined
-
Last visited
Everything posted by EScanlon
-
OFF TOPIC RANT Now this is the main reason we have so many liability issue problems and a totally messed up insurance and legal suit program. It's always someone up the chain that "should have" done something to prevent someone down the chain from being supid. Now I'm posting this before seeing the video, but from the comments I've read and this one, I can tell that the problem was lack of proper procedure. That is, some form of accident where the initial action was to see the driver and / or the equipment involved and NOT ensuring that no one else gets involved. From the comments apparently one of the bikers leans into a corner and clobbers a corner worker who is responding to a prior spill by attending to the motorcycle. This may be totally erroneous, as I said I've not yet seen the video, but the gist of what Bill is saying is that the people AT THE SCENE should be held blameless for the catastrophe that ensued and that the owner should have foreseen this situation and taken steps to avoid it happening. (Rant begins here....) Accidents happen, people get hurt, it's not always due to malicious intent on behalf of someone, sometimes it happens to be good old fashioned...no one has thought of that way of hurting oneself before. So how do you prevent or even go about preventing the myriad ways that humans have of proving our knack at finding new ways of picking ourselves off? You can't, and that's the problem. So, sorry Bill, but blaming the owner / sponsor / next guy up the chain for not having foreseen something catastrophic is inane. E P.S.: Now, having seen the video: That one is hard to lay blame for. That's basically a hazard of racing. That there was enough time for them to wave traffic off the rider, they could have continued doing so and never attended to the motorcycle. Possibly everything would have been fine. I see it as the corner workers thinking they could move the motorcycle off the road and let the race continue. Now if that is NOT part of their job description, then they put themselves in peril. If on the other hand, the corner workers are required to move equipment, then that would be the fault of the owner / promoter, for not having enough personnel for safety.
-
The Emergency Brake gets adjusted by pulling up and releasing several times until such a time as only 7 clicks or so are enough to hold the car on a slight incline. The Hatch Lock many times will actually get a bit worn and require a gentle touch so as not to push the lock cylinder down into the holder sleeve. Insert your key and making sure you are NOT pressing down and moving the cylinder down, rotate it 90°. Generally, straight up and down is locked, (Relative to the top (front) of the hatch) and side to side is open. FWIW Enrique
-
In the military they remind you that the first thing to know about Security is that you don't discuss it with anyone. Now, with that out of the way.... The 1st step to deterring a would be thief is to make it plainly obvious that THIS vehicle is simply NOT worth the hazzle. A second is to re-inforce that deterrence. The removal of the steering wheel is to make it obvious to the thief that they will have to be driving with their Vice Grips....not necessarily something you want to be seen using...while driving. This makes it a hazzle. If they persist and enter the car, then, having the alarm respond in such a manner that it draws attention plays in your favor. The thief is going to want to LEAVE right away....JUST IN CASE.....someone sees him. The typical, and I am not a criminologist so I'll stand corrected or supported by one, Joy Rider wants to get in quick to leave quick to go have a quick "high" Unfortunately these guys are the most damaging. They don't care if they destroy the car, they're "using it up". If the car gets destroyed but they walk away it was a "good ride". The car thief is looking to make money on it. The higher the value of the car, then the more damage they'll do on it, in trying to steal it than if the car is only worth it if it's complete. Although a determined car thief will take it for the quick buck it offers. In any one of these cases it's their speed of attack and the strength of our defense that details how fast they can get away with it. An experienced thief or joyrider knows that it's easiest when it's fast. Walk up to the car, open the door, get in, insert key, start it up and leave. All without being noticed. If you offer enough "dis-incentive", than the car next to yours, he'll walk past yours. I knew a guy in a city that will not be mentioned, that used to keep a pair of those pony compressed air tanks in his rig. As he parked it for the night, he'd flatten both tires on that side, and refill them in the morning from the tanks. Thiefs look to defeat your well thought out plans, but they are limited with what they can do. A spare pair of tires to fit your particular vehicle....that one would take the expertise of a pro, and then you're screwed anyhow. So, hopefully you get why I'm making light of it..... E
-
Bill: You need to see the show on either the Discovery or the Learning Channel that highlights what Repo men do as part of their job. Believe me, they can get it EVEN with cars parked up against it. The ONLY way is for you to park 4 cars around it. (so that no side is open) As far as the second......Great....except that now you can't leave the car. One idea is to install a CO2 cartridge and plunger under the seat, as you leave the car you release the plunger needle. When the thief enters the car, he sets off the plunger and releases the CO2. If the car doors have been closed up, the thief passes out for a couple hours with a mild coma induced by the CO2, or it freezes his butt or the back of his calves. Either way, he'd have to know that it was C02 to stick around to the end. Otherwise, he's going to have been startled out of the car by the sudden discharge of the gas. If in addition to that you use a blinking LED behind one of the lenses on your console (Seat Belt; Choke) that you've changed the lettering to : TOXIC GAS Or even better, one of the "Talking Lady"'s from the SX's that announces as soon as the gas starts "WARNING: DO NOT BREATHE THE GAS, LEAVE IMMEDIATELY, CALL AHEAD BEFORE YOU SEEK MEDICAL HELP, DO NOT CONTACT OTHERS, DO NOT HESITATE, YOUR LIFE IS IN DANGER, .......... E
-
Sadly, if they want it bad enough, they'll literally come and pick it up and put it on the back of a truck and off they go. Years ago, my group of friends went out and between all of us, we lifted this guys VW Bug and carried it 150 feet onto the golf green at the country club. So, a boom truck would have no problems picking up a Z and carting it off. The key I think, is to determine the amount of "DETERRANCE" that you need to put into the car. If you're parking it on the street, remove the steering wheel and turn the tires to the stops one side or the other. Simply remove your horn button and remove the nut holding the steering wheel onto the splined shaft and take the steering wheel inside with you. When you replace the wheel, the nut need only be tight enough to not let the steering wheel slide on the splined shaft. Yes, it's a PITA but it's better than having your car stolen. A car alarm, unfortunately, has become an ignorable sound in parts of the country, so swap the horn it actuates to one of those musical air horns. As long as your alarm is NOT going off every other night, or often enough to inure your neighbors to the sound of "La Cucaracha" going off incessantly and loudly at 3:00am, you WILL get someone to look. Whereas for the "Standard" Alarm tone, they'd just roll over and cover their ears. If you have the money, buy a Car Boot. You know, those nasty things that some cities use to prevent you from moving your car once you've been "booted". Again a PITA, but maybe it would do the trick. Personally, I would opt for a car alarm that immediately released some form of nerve agent to immobilize the thief, but that would dissipate after a bit. That way the thief is disposed of, and you still have your car. I used to love the idea of J Bond's Theft Deterrent System that he used on the Lotus in "For Your Eyes Only", but then you're out the car as well, so I've thought up this idea instead. Biggest setback with this system is finding a commercial source for the nerve agent although some of the hair coloring solutions around could serve as substitutes. Anyone else with other ideas? Enrique
-
Based on: "a smaller retangular piece on the bottom and kinda funny diamond shaped on top", and that they are about 24" ...in one direction or another..... My WAG is the tool bucket liners. However, as an aside, Year or Model (at least), would help narrow it considerably, a photo would be ideal, if not at least a good description and dimensions of the item. Now if you don't mind waiting for the correct answer...... 2¢ E
-
When I posted my "Priceless!" comment.....I was actually referring to Will's comment........... :cheeky: E
-
PRICELESS!!!
-
Spoken like a new Z owner..... Just wait, she'll whip you into shape soon. And then, even with your Mercedes and BMW and .... you'll find yourself looking for "excuses" to drive the Z. You've been warned..... Actually, that might work with BMW's, and Mercedes' but that's cause of their German / Bavarian ancestry. The Z on the other hand, uses this as a way of getting sold..... Like V12Horse's signature quote, you get chosen. Enrique
-
Will said it. As long as the ladies get along, no problem, but ignore the human one for the Z and all hell breaks loose at home, ignore the Z and all hell breaks loose in the garage and on the road. The trick is to treat the Z as a special lady. Show her how beautiful she is with your occasional wash and wax. Take care of simple boo-boo's as you would a young girl's scuffed knee. Don't ignore obvious signs of illness or she'll resent and lash back. (You know, stuff like a leaky water pump, fuel pump, etc.) When you drive her and other people see you in her, make sure that your demeanor says.....Yup, she's my baby! Be proud of her and she'll take note and behave accordingly. Snuff her in the least.....well, let's just say it's not pretty. If you do the above, then she'll actually enjoy you taking a human female out and letting her strut her stuff. Females love to strut, and even more so when they can make other females envious. She'll purr and steer like you've never seen before. Just be careful that you don't push the limits while you have a human female on board. The Z will quickly size up the situation, realize that you are purposedly letting her "strut" and will proceed to petrify the human female with her antics. The end result is that the human female will either do her best imitation of Linda Blair in the Exorcist's fireman's hose vomit scene or will demand to be removed from the car immediately. Afterwards there will ALWAYS be resentment between the two and ....... As an aside, do you know the Chinese Symbol for trouble? It is "Two Women Under One Roof". Now, don't think it's an impossible task, or that the Z is like Stephen King's Christine, they aren't.....as long as you don't invoke the money detector or the b!tch module. Hope this helps Enrique
-
If you'll look on the door mechanism, you'll note that the "rotary" part, the one that gets pushed by the latch on the car, has two lobes. The first lobe points straight down when the door is open, and the second is pointing at the door. The first lobe SHOULD have a rubber "coat". Almost like if it had been a piece of tubing that got stretched over the lobe. That's the rubber that finishes the "sound" proofing on the door. The cone washers help push the door up and off the weatherstrip, but with metal to metal contact at the latch, you will always have that rattle. Don't extend the screw holes in order to "tighten" up the latch, you won't be doing yourself any favors. The trick is to see how to recover that part of the latch with rubber. Sorry if I can't give you a good suggestion, I scoured the junk yard until I found a pair that had the rubber in good condition, so I haven't come up with a fix. But I'm working on it. Anyone else? E
-
If you can find a car cover that will ACTUALLY protect from scratches and dingies, I think all of us would buy one and put it on full time...... If you really, REALLY never park the car outside, in the elements, then yes that is the better material for the car. If on the other hand, you EVER even only for one or two nights park it outside, then go with the Sunfogger at least. I do park predominantly outside so I bought the Noah. It's not cheap, coming close to $200 + S&H a couple years back. But it IS custom fitted to the car, and it has pockets for BOTH mirrors. Covercraft has the patterns for the Z. But for indoor use only, the one you've selected is fine......as a car cover. Same for all the other ones, they're just car covers. Preventing scratches when using a car cover is primarily one of keeping the car cover clean on the INSIDE, the part that actually touches the car. The other part is to not rub the car cover on the car. Preventing dings is simple, don't hit the car..... But I know, it's the kid's best friend, Ida that has the most accidents in the house and that's who you need to protect against. A car cover will protect against casual hits by very light items, for more protection you need to step up the padding. If Ida is planning on using the car as a back stop for his skate board....then you have to use at least 1/8" steel, not sure what gage that would be. If on the other hand you're looking at protecting against the inadvertent "open the other car's door" or Mama with her purse, or the "I just leaned the bike against it!" accident, then you need to add bulk and impact absorbing material. You could put sheets of styrofoam, or sponge foam on pieces of velcro attached to the cover, on the OUTSIDE, but not on the inside. (You can buy NEW foam cheaper than a paint job.) You could even go as thick as that thick sponge rubber mat underneath carpet. And although this will do a lot to protect the car, it won't bullet proof it. FWIW Enrique
-
Just a WAG on my part, but I'll bet that the little rubber bumper on the part of the latch that goes up and around is missing. E
-
You might check with others around here, but it may be that you have one of the ORIGINAL shift knobs. If it isn't shot, you might post pictures and offer it to another member. One man's poison is another man's treat. Yeah, sure......and she'll respect you in the morning, and she promises to love you forever, all as long as you are willing to display proper abeisance, adulation and worship at required intervals and durations. hahahaha Face it, the Z is like a woman, a very beautiful woman, a very beautiful TALL woman. No matter where you go, there's some other Joe who's looking at you thinking..."What the heck does he have?", while others are envying your luck. And you want to play the part that ~snicker~ YOU are in control....... Face it, only as long as you play nicely will she stick around. Same with the Z. You got to pamper her, without spoiling her. You must be polite and attentive without seeming obsequious or she'll stomp all over you. If you try to act non-chalant.....she'll blow a tire just to check if you're paying attention. Mine decided to loose a Left Rear Tire AND Wheel at 70 mph. It's amazing the kind of things they'll do just to "check on you". The bottom line is to make sure she's safe, then get her sport blood flowing again, fix the mechanicals so that you know you can trust them, then start her make-over. Another way of saying don't paint the car before you fix the rust. You know....this reminds me of a skit on a record years ago: Two Russian soldiers are walking around the compound in the middle of winter, guarding the perimeter. They are supposed to report on everything they find. As they come upon this strange dark substance in the middle of the path, the one in charge is wondering if it might be a well disguised explosive, he orders the other guy to look, pick up, smell, poke with a finger, smell again and finally taste the item. All to confirm that the dark substance that looks like sh!t is in fact sh!t. So, KDMatt, the reason we're telling you NOT to invoke the ethereal money detector is NOT because we want to see you try it, as in snipe hunting in Boy Scouts, or looking for Prop Wash when in the Navy or Air Force, or any one of a hundred initiation rites.......where the goal is to have the new guy do something goofy just to initiate him into the club. But rather because there really IS an ethereal money detector in there...... So, to summarize and paraphrase......There's a huge pile of poop on the sidewalk up ahead.....if you choose to step into it, AFTER you've been warned.......then you must have wanted to. Enjoy the stink, and don't b!tch about it. Enrique P.S.; Welcome to the club. You've been warned.
-
[quote name=KDMatt... first things I'm going to look into buying (after the Z itself) are a car cover' date=' and probably a decent security system/car alarm.... ! Fast answers back at you: You're welcome. Before you go spending money on a car cover, (even on e-bay they start at $30, and that one doesn't fit well, and the one that DOES is $200+ + S&H), spend a little time with the car. Learn how it starts, or get it started. Before you go making plans on the next edition of America's Extreme Z Make-over, remember that it takes a CHUNK of money AND time to do what you see in the galleries. I am not saying to NOT work on the car, just that you should hold off on getting all psyched up about ..... whatever, only to find that the car has decided on it's own (and they do, don't kid yourself) to need something else. You're planning on a new carpet set, and it's deciding if the heater hose needs replacing. Don't ever put your wallet on the console of the car. It has some sort of ethereal money detector that automatically causes it to need a repair or improvement. If you let her know (and they're ALL female) that you have or are willing to, spend money, she will take over. Before long you will be looking for aluminum cans at the park along with every other homeless wino hoping to find enough to be able to afford that OEM Original Day/Nite blemish free Inside Mirror===HORRORS!=== And everyone on this site is just as deranged, so we're no help there either. There's nothing we like more than the new guy who'se only going to do a few "minor" things, that ends up being the next 5 year tail-light bulb change that costs $15,000 or more. Heck most of us will tell you how to fix all those "Since I'm in here this far...." parts just for the glee of getting to type it out..... But I hope you get the picture. Drive the car first, find out where she fits you well, and find out where she doesn't. Repair SAFETY items first. then MECHANICAL, then start on functional items. I'm not going to list all the items you could do, and in what sequence to do them, I just want you to get out, enjoy the drive, and then decide what it needs. Just don't tell her you're going to spend money on her or you won't like the uncontrollable spender she becomes. FWIW, 2¢ E
-
That's good that you are covered. Now save some money, have her add it as a second car, but not list you as it's primary driver. Have her keep your designation as a household driver. I.e. you kind of make it sound as though you will be driving the family station wagon, while she's driving the sports car. In this way they don't decide to hit you with the full value of a young male with sports car policy. Believe me,, those can be STEEP. Additionally, unless you are getting a policy with a Value Agreement, i.e. where you are insuring the WORTH of the car, don't get full coverage. Get good old plain vanilla LIABILITY insurance, and store the car out of reach of prying fingers. If you can't park it away from the MidNite 5-Finger Auto Store, THEN see if you can pick up theft and vandalism. Full coverage means they'll pay for repairs done to your car. For the most part, the slightest amount of bodywork / re-paint will usually be reason for the average insurance company to try to total out the car. With liability only, you have made yourself responsible for YOUR cars repairs, but kept the OTHER guy's car insured from an accident you caused. But do be aware that even those small $500 to $3000 repairs on your car are YOURS to pay for and the insurance company isn't going to. The reasoning is simple math, you're going to be paying 40 to 50 a month more (as a minimum, if not more) to have "Full Coverage" on a 30+ year old vehicle. The insurance company will GLADLY take your money, until you have a claim. Then suddenly your car isn't worth the cost of the ink on the policy and that's all they want to pay out. Now sure you can fight them, but if you have the car for any length of time before you make a claim, you will have paid more than you will get back. (or it will be close) If you can store it in a garage (a requirement) then check into Hagerty Insurance (Classic Car Insurance). There your Mom might be able to insure the car for an agreed upon value (and check with us here at this site for info) for only a hundred or so a YEAR. As I understand it, even fender scratches are covered. Now, that's the way to go. 2¢ Enrique
-
Do so! Or at least investigate if your insurance carrier will insure you on the way home. I heard this story when I was in the service, and as with all of these "This guy I know of..." stories, you have to understand that it's based on a dash of truth, but not necessarily a totally true story.: Purportedly this guy went down to Saginaw Michigan to buy and pick up his new car. He'd discussed it with the insurance company, gotten an estimate and had presented that information to the credit union financing the purchase. All happy that he had everything taken care of, he drove down to pick up his car, and decided to stay overnight and visit with some friends. On his way back to the base, he slid on some black ice and ended up rolling the car, totalling it. Rumor had it that the insurance company refused to pay because he had gotten an ESTIMATE and not a CONDITIONAL POLICY (i.e. insurance on the condition of purchase), therefore they hadn't yet "issued" a policy. Other stories had it that he had to go fight them in court before they relented and paid for it (because they had produced paperwork which the credit union had verified about the insurance). In either case, the "moral" of the story was to NOT buy a car without insurance already on YOU as the purchaser. Since it usually only takes a phone call with a VIN, or at least a good description, it's a good "failsafe" option. 2¢ Enrique
-
Get Liability Insurance on it right away. The last thing you want is to end up owing someone for years and years because you thought you'd be "ok for the ride home". E
-
The handle on the passenger door to help in closing it. E
-
Personally, I like the blended bumper look. Done well, it looks great. Don't know if the original bumnper goes on beneath, or if you lose the bumper completely. (I've never installed one.) Don't know that I would want to lose ALL of the bumper's protection. It's not much, but it's SOMETHING.... Edit: Forgot to mention, make sure you FIT both of those pieces perfectly before you send it off to get painted. If you're doing the work is one thing, but if you're sending the part off to be painted, you're counting on the painter using flex agent (a paint softener) in order for you to be able to mount it afterwards. The main problem in not fitting it BEFORE you send it off to paint, is that you will not know WHERE and IF it flexes. Then adjusting it to the car can be a real nightmare. (I believe there's another post on the subject recently, sorry no answers for him.) E
-
Interesting how an unpainted and painted front end can look so different. Check the lines of this bumper: http://www.classiczcars.com/forums/showthread.php?t=17886&page=1&pp=15 and the one at the beginning to this thread. There is a difference, the style and location of the turn signal lights, but otherwise, they're the same air dam. 2¢ Enrique
-
Wow, Daddz! Now that's an explanation all right! I like it. With all that information we could almost add to the Vin # listing at zhome. I wonder if Carl Beck would allow that database to be expanded to. Items such as what the car has now in various categories would definitely go a long way to developing our own "Z carfax" history. Granted it would only be after members here sell their cars to others, but the thought of the benefit down the road is tantalizing. E
-
I think that it sounds as though you've found a car you could be happy with. Remember, the major part of the FUN of owning a Z is in the drive of it. You can't explain it to someone until they drive it, then they're converts. If in order to drive it you have to change the stereo to something different, well, yeah, I guess it's a shock to the purist world, but if you retain the parts in the garage for whenever you sell the car (if you do) then at least you've not destroyed the car. I think most purists would agree that the problem isn't in the items done to "optimize" (my term) the car to their individual owner, but rather in that the changes are done in such a manner as to be irreversible. In fact, that's what can make a car completely undesireable to the purist, if the changes are such that they've affected structural modifications (sun-roofs) or changed key items (engine, transmission). In my opinion, if you do the changes to the stereo, and addition of the speakers without having to modify anything (i.e. cut, drill, weld) and you keep the old one, then you've made it relatively easy to return the car to it's original (restored/refurbished) condition. With original parts (the ones that came with the car ORIGINALLY) then it is "better" than when you have to go find "replacement" or "or-equal" parts. That is items of the same style/function as what was in the car originally. With the notorious changes mid stream to the production of vehicles, whether you got the auto-scan radio of the Series I or the Cassette or 8 Track player of the later years becomes a regular crapshoot....unless you have the original receipt. So go buy the car, enjoy it's drive, and when you make changes (and you probably will) make them so that the next guy can undo them if THEY wish. Enrique
-
One of my favorite sayings: "Never Underestimate the Extent of Human Stupidity" Or "Whenever something is made to be fool-proof, they invent a new fool!" Enrique
-
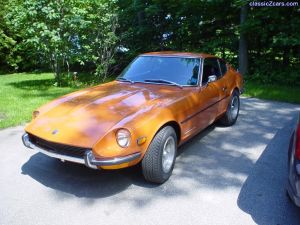 Excellent Color! Almost perfect, needs a set of the OEM Headlight Covers and ....... E