EScanlon
-
Posts
5,117 -
Joined
-
Last visited
-
Days Won
2
Content Type
Profiles
Knowledge Base
Zcar Wiki
Forums
Gallery
Events
Downloads
Store
Blogs
Collections
Classifieds
Everything posted by EScanlon
-
Excellent video link! I think the only one that has really used them properly is Alan T., and while I can't claim to now be "in the know" hopefully I won't be so "rude" as the video says. Thank you Blue-Sensei E
-

Lost key! Replacing tumblr, now can't lock the door
EScanlon replied to tamo3's topic in Open Discussions
I usually hold off to allow others to chime in, but the game(s) must have everyone distracted. The plastic piece you have in two pieces is usually on one of the rollers for the window mechanism. Nice to have, but I don't think you'll have much trouble for not having it. Best I've been able to discern is that it's to either keep the roller in the track on the window pane, or to keep the roller under a slight amount of pressure and therefore in line in the track. Others may have a better or more accurate explanation. As far as to why you're not locking now, it may be that the position of the lock and / or the tab on the back side has shifted sufficiently to NOT allow the locking mechanism to travel properly or to be just short (or long) and therefore not permit the lever to rotate. Tried your video, but it didn't play for some reason. I'll try again later and maybe I can offer more,. After getting it to play, I can't offer much. Check that you have a Left tab on that lock and that the shaft on the lock isn't too worn to properly actuate it. Hope it helps. E -
I can't recall all the details, but if memory serves you may want to post a picture of your actual hinge. The reason being that there was a change in the Lock-Tab (again if memory serves) that changed the configuration of the hinge from the earlier to the later hinges (240). E
-
everybody likes pictures, right? Newbie from TX
EScanlon replied to andres14oj's topic in Introductions and Rides
Just a thought for you, the majority of members here aren't conversant in ?? text speak? Spell things out and use proper sentences and grammar and you'll find that everyone can understand it. FWIW E -
Gorilla Glue in my experience is hard to control as to where it goes and then when it starts foaming, even more difficult to keep in place while it sets. I would recommend a product called Shoe Goo, Household Goo, or other XXX Goo. Think of it as Silicone on major steroids. Where silicone sticks and is hard to tear off, this stuff grips and you need pliers to even tear it, and even then it's hard to peel off. One might think that this would make it problematic, and it can be if you aren't familiar with working with silicone. However, if you are familiar with silicone, and remember the old spit on your finger to smooth it out technique, this stuff will please you to no end. I'd check your local hobby store and see if they still sell those styrene plastic "beams" and other straight pieces. One of them, if memory serves, is as close to a "C" channel as can be... but in miniature. Again, IIRC, it's available in various widths. Find the one that's closest to the width of the channel you're hoping to extend and then glue it in position with the Shoe Goo. Smooth the transition from one to the other and you should have a properly extended drain. FWIW E
-
How to attach new quarter window trim molding?
EScanlon replied to dltalfa's topic in Open Discussions
Your car may have originally used the earlier variation which did NOT have the metal strip the later style had. I did this to my 71 by changing the quarter window frame completely so I can't say how to modify an early to use the later style, maybe some one else has and will post. FWIW E -
I've had my soldering iron for over 30 years. It is a real "old-timer" as it was used when I got it. I did find the right style / wattage / size on-line, but was surprised at the price: http://www.all-spec.com/products/3138-150.html?gclid=CLKhqovP2rQCFQVcpQodqGYA5g I also found a vintage one with the right wattage although the style of the tip / body is somewhat different: http://www.etsy.com/listing/100844855/vintage-150-watt-drake-soldering-iron?utm_source=googleproduct&utm_medium=syndication&utm_campaign=GPS&gclid=CO62so3P2rQCFcZfpgodlzgAbA FWIW E
-
The solder technique of sealing holes works best with: a) Acid Core Solder Tinning liquid c) a nicely cleaned hole and small part of the surrounding (just past the exterior of the hole). If necessary you want to "ream" the hole to make sure there's no rust or schmutz inside it. Apply a drop of Tinning liquid to the hole, then heat up your iron and once it's hot, insert the tip into the hole and sweat the solder into it. Once the iron is warm, you can usually do these in 20 seconds or less (depending on the size of the iron and hole). I can usually seal all the holes on the side of a vehicle due to the rivet-on vinyl strips, in less than 5 minutes and most of that time is spent moving the equipment from hole to hole. Emblem holes can be done, but they require that you can literally "sheet" the solder across the hole, meaning that you carry the solder from side to side. This is where having a small area around the hole without paint and also tinned becomes critical since without it it is darn near impossible to "gap" the hole. But I agree with Ron, for hidden holes that you want to seal, JB Weld, or some epoxy would do it. Just don't use Bondo, it's porous and will soak up humidity. FWIW E
-
Do NOT under any circumstances, opportunity or manner of thought go test ride a Datsun Sports Roadster. That's it, it's all the warning I'll give, and if you know better you won't delve into it. Nuff Said. You've been publicly warned. E
-
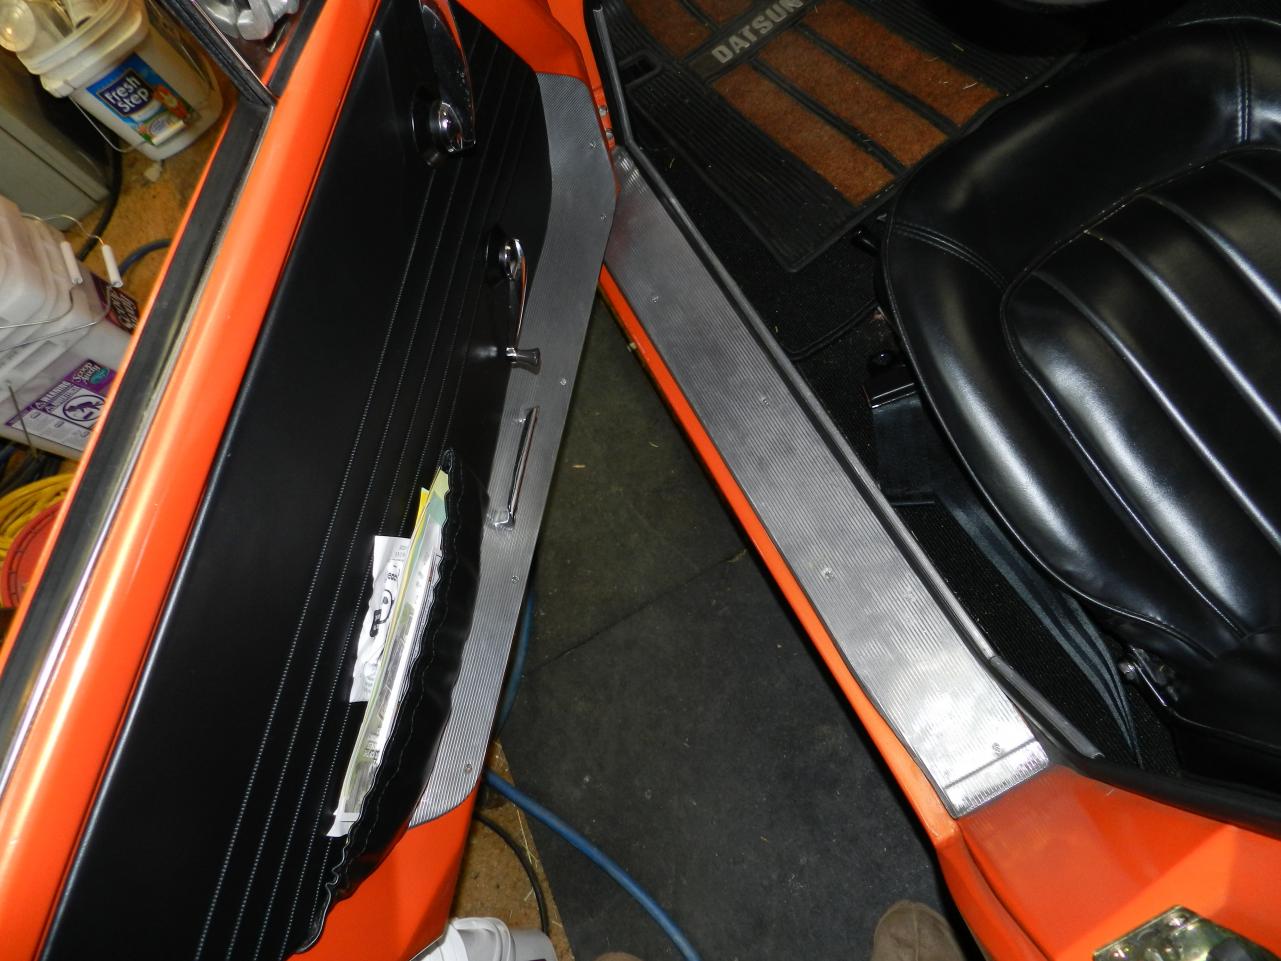
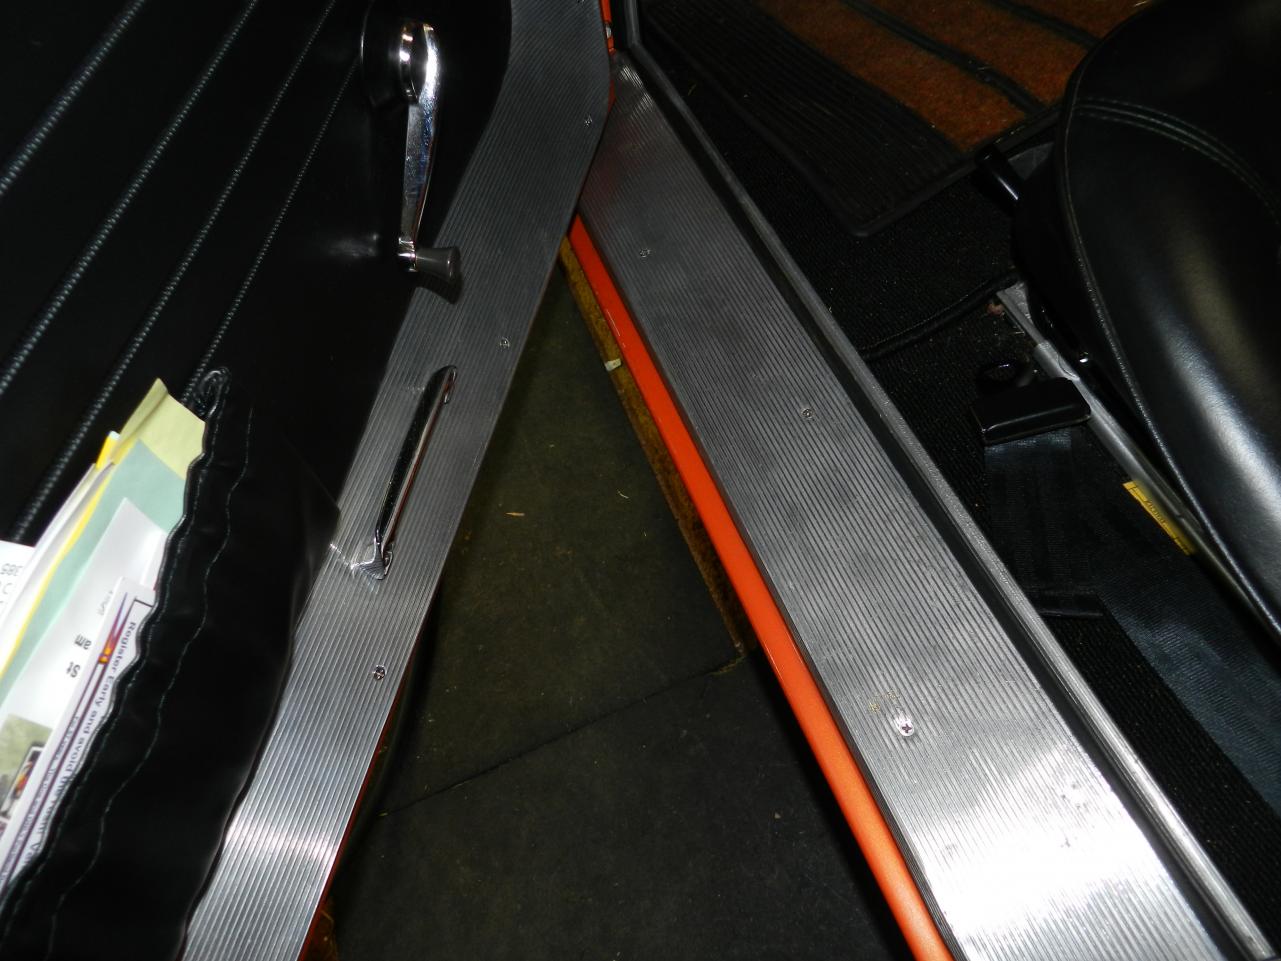
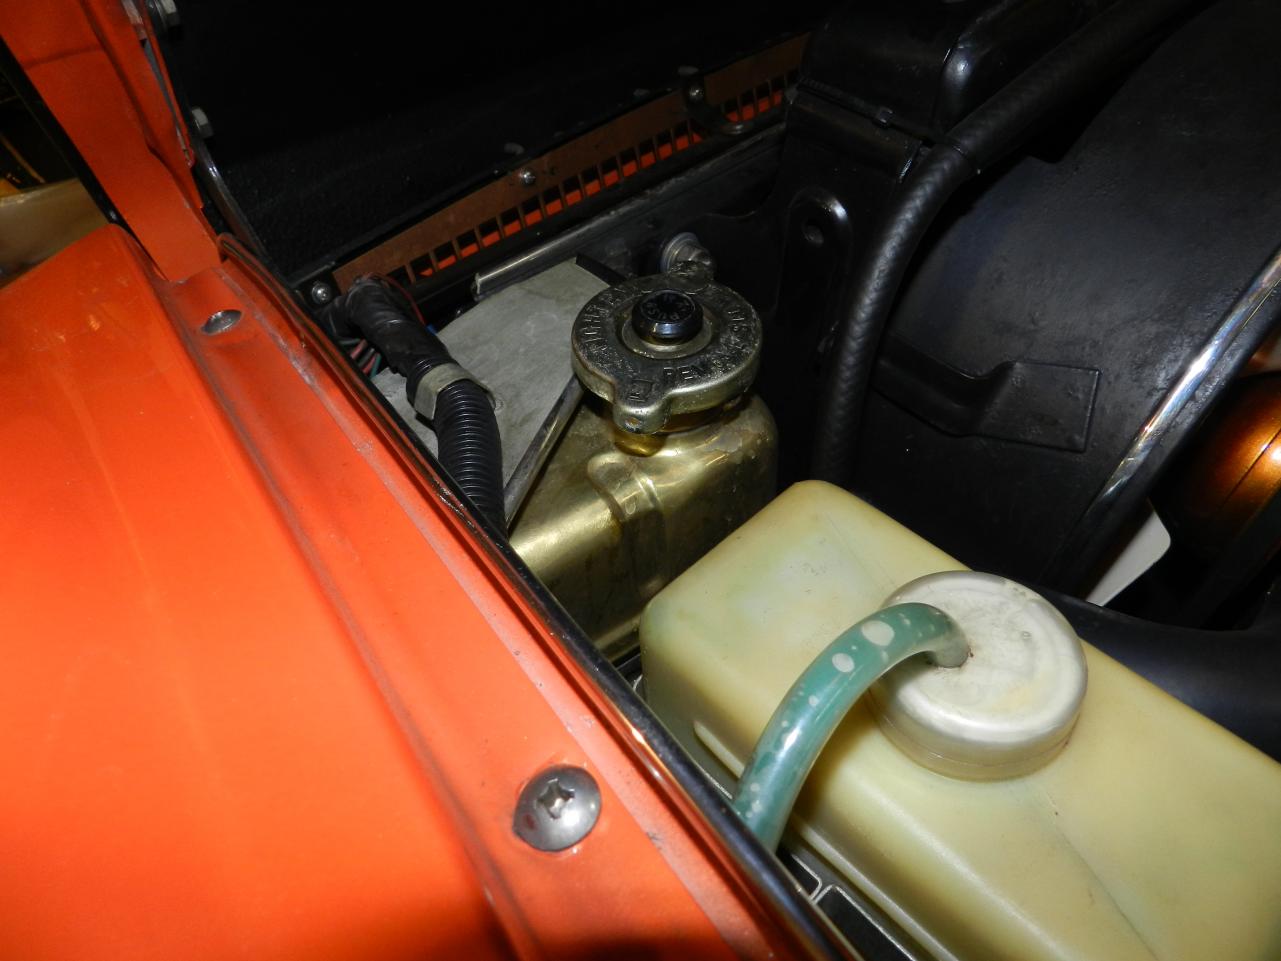
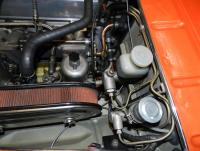
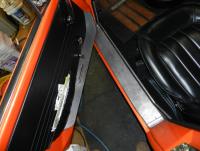
Sorry it took a while to get these pics taken, but here they are: These are the aluminum door sills and lower door panel which the Roadsters used. I was content with a bright non reflective shine, i.e. somewhat of a satin finish. As the parts were sourced from several different states, each one probably experienced different washes, sprays etc. The important thing here is that this coating was applied in 2007. Overflow bottle, the original paint was peeling and the nice brass metal was showing through. I felt it needed to show all the time. Again, Glisten PC applied 2007. Last picture shows the air filter housing (plain steel, note no corrosion) and the Heater Control Valve, the main one which Roadsters used to bypass the Heater completely. Note that this is not only above the exhaust manifold, but also subjected to the water temp inside. It is both copper and bronze. Again, coating was applied in 2007. FWIW E


-
Sorry but the premise that half the core is bad won't wash. The heater plenum is a pretty basic unit, if you're getting heat out of it at all, it's available to both sides. You're not making the mistake of expecting the heat to come out the eyeball vents are you? Heat will NEVER come out the eyeball vents, they are strictly VENTS and Fresh Air Vents at that. If you are getting heat to come out the passenger side of the bottom of the plenum when the levers are in ROOM mode, then you have something obstructing the driver's side of the door as the heater core is just above the volume of space that feeds both the passenger and driver side doors. If on the other hand you're referring to heat out of your Defrost tubes when the lever is in the Defrost mode, and you are only getting heat out of the passenger side, then you have something blocking the tubing as again, the defrost tubes (R&L) feed from the same general area of the plenum. FWIW E
-
In re-reading this older thread, I noted this post and find I disagree. The Stick-On style of body molding that the OP shows in the picture, as I recall, was available in the 70's, but it was more expensive than the aluminum / vinyl setup, or at least that's what I recall. Additionally, it took more effort to get it right, not only did it need something to hold it straight as you applied it, the ends of the molding had to be carefully cut and shaped in order to create the pointed and rounded ends. And as far as filling the holes from previous rivet jobs, the shop I worked at had a slick method of using a large size soldering iron to fill them in. I've used that method myself and knowing how to do it saves hours of body work from having welded or brazed the holes shut. E
-
Indicative of a bad re-connect within the Hazard Switch when you turned it off. That's why I mentioned actuating it, it has happened to others before. E
-
By "the indicator switch no longer works" are you referring to the Turn Signal Stalk no longer actuating (turning on) the respective R or L turn signals? If so, it might be as simple as wiggling your Hazard Switch to ensure that the T/S contacts within make contact again. Alternatively, it could be the T/S flasher that went out on you. FWIW E
-
Aluminum foil inside injector port. I feel stupid.........
EScanlon replied to bondoking's topic in Help Me !!
I blew it with the rotating the engine bit. I was thinking more of not letting it blow through the exhaust or intake valves but didn't process the thought completely. I'm glad there are others here who chimed in! E -
Aluminum foil inside injector port. I feel stupid.........
EScanlon replied to bondoking's topic in Help Me !!
At a WAG, why not remove all the spark plugs and injectors, then slowly rotate the engine by hand (wrench) and blow high pressure compressed air in through the injector hole and see if you can get the piece of foil to blow out the spark plug hole? Others will chime in, but if you're talking a small piece of aluminum foil and not a solid chunk of aluminum then more than likely it won't cause major damage if any damage at all. But like you, I'm more of a bodyman than a mechanic so I'll bow down to other's opinions. E -
The early (70-73?) Z's typically had the Heater Blower powered through an in-line fuse holder and not through the fuse box itself. FWIW E
-
Not original from the FACTORY, but it was installed by dealers in the US to combat Vapor Lock problems they encountered with some of the emission control wrappings, settings, etc.. Also known as the "Competition Hood" by others. 2¢ E
-
Don't forget RV repair shops when looking for closed cell foam. That's where I found it in a whole assortment of widths, AND thicknesses as well as several combinations thereof. E
-
In a word... YES. E
-
The black residue you're seeing is either the remains of the foam or what's left of the black "suede" or flocked finish that got applied to the inside of #31. Additionally, the chrome center vent fits inside 31 and is held by 32 + 33... The area where your blue line touches #31 is (was) a foam which not only sealed to part #30's metal face (which you ID'd above) but also pushed slightly up against the chrome center vent. This foam, due to age, typically disintegrates and needs to be replaced. I don't know if buying the replacement for #31 would provide it or not. If memory serves I have a #31 untouched (because the foam that's on there will barely accept looking at, definitely NOT touching) so I'll provide pics later. When I redid my vehicle and a couple of friends, I re-built the foam using closed cell foam strips that I cut and shaped to fit. I don't think I have pictures of the finished product, but I'll check and see. FWIW E
-
Not trying to confuse the issue but there is a phenomenon in this part of the U.S. that may not be noticeable elsewhere. Here, there are countless daily drivers that are simply ... "Old Cars" and not considered anything special by their owners. Yes, there are also the carefully cared for vehicles, the gems of which are the kinds of cars that Arne, Mike and myself have been privileged to source, but there are also numerous other vehicles that are simply: "Old Datsun, RUNS, needs some TLC to be a god daily driver, $1000 OBO". Those of us here in the PNW know to check some of these out as sometimes they really are diamonds in the rough. I have two, both victims of "While I am there..." disease and misdirected good intentions. The point I'm trying to make is that there are undoubtedly many vehicles that haven't been reported to any of the registries or even part of the "circuit" because to their owners; many of which are probably low-income or hard on their luck people who have little to no interest in owning a "classic" or even a "sports" car; they are simply... a mode of transportation. I don't think there is a large number of these, as I think it would be a strictly regional item. That is, here in the PNW, California, and possibly the South West states. The rest of the country will undoubtedly have limited isolated vehicles that fit into this category, but their numbers will also be limited. I don't think it's enough to alter the final statistics that may be deduced, but it should be considered. E
-
That "Chevy Logo" is also on the original dash, it's the location for the Hazard Switch Info Decal (ON-OFF) which on earlier vehicles did NOT have the indent. It's one of the ways to detect an early dash from a later style. Indent= later, no indent = early. E
-
In my case one of the Pertronix on one of the Roadsters didn't last more than a couple of weeks, and even then minimal engine run time, from side yard to garage and back couple of times a week. The ZX dizzy on the Z, except for one module failure several years ago (after lending it to "check" someone else's installation ... which I heartily opposed but was talked into and now will absolutely NOT lend) has been working for 12+ years without any problems, adjustments or repairs. Oil changes, tune-ups, etc. yes, but nothing to do with the dizzy save cleaning and re-gapping the same spark plugs. I generally take the Z to my mechanic for convenience's sake but he recommended the ZX change over for the other Z's I'm working on in order for me to source them. Sadly, there isn't a direct swap for the Roadsters although there is an individual who re-manufactures dizzies for them. FWIW E
-
Checking my installation further, since it was done 12+ years ago, apparently my swap included the proper base for the ZX dizzy, which in my mind didn't register. As a result, in straight SIMPLE terms, the Pertronix should be the easiest. However, my experience and others do show that there CAN be problems with it's installation and subsequent short term service life. My problems may have been due to a sensor plate that was slightly off spec, whereas others that have written their trials and tribulations mention dizzy bearings and (separately) over heating of the parts with eventual failures. Arne has an excellent test/trial/result article where he goes back to Points after trying the ZX, the Pertronix and one other (which eludes me at this point). However, he went back to the points and was completely happy with them. I searched high and low for references to the proper dizzy base and the only thing I found was post #5 in this thread: http://www.classiczcars.com/forums/showthread.php?t=43498&p=374406&viewfull=1#post374406 Maybe there are other incidences, and if you know of them it would help if you posted them here. E