EScanlon
Free Member
-
Joined
-
Last visited
Everything posted by EScanlon
-
Sorry Will, I have to disagree with you. The Fiberglass is what I would also have recommended a few years back and would have been ok....for a while. Since then, I've been introduced to POR-15 and the Power Mesh fabric that they use. Nate: In a fast nutshell, that rust you have didn't start on the OUT-side of the car, it started from the IN-side. The inside I'm referring to is the interior side of the rocker panel. The proper repair is to cut out that bad metal and replace it with new metal. You can confirm the lack of or the integrity of the rocker panel by looking at the backside of the panel through the circular openings in the INTERIOR rocker panel. The holes are for strength of the metal, but they allow you to see through to the inner side of the rocker. Using a strong flashlight, look in there and evaluate what you see. If there is a ton of rust...replacement is the best and possibly ONLY repair for this. If there is NO rust, and only in the rust-through spots do you see any rust on the interior of the panel, then you might be able to do what I'm going to suggest. How much rust you do accept is up to you. Prep the inner part of the rocker panel as directions for POR specify. Use a nozzle to get the marine clean well inside the rocker. Then the Metal Prep. I know some may shudder at the thought of using a hose and water in the inner part of the rocker panel, but there ARE drain holes specifically for this purpose. Then when you're ready to apply the POR, first use some tape on the OUTside of the holes. Duct or masking ... it doesn't matter, you're building a "dam" for the POR you'll paint from the inside. Then paint the POR using a syphon nozzle and you'll protect whatever is left of the metal and at the same time "replace" the outer sheet metal...at least the part that's missing. Then you should be able to finish the rest of the bodywork. FWIW E
-
AFAIK the 71's only had the ONE fusible link, which you've mentioned. E
-
That is a good question to ask them directly. As I said, AFAIK you can only get them by buying the whole handle. E
-
It was obviously way WAY too early for one of our biggest "pushers" on the site. Just about EVERY recommendation he made doesn't DIMINISH the addiction mania to Z's.....it INCREASES it. You'd think he gets a commission on each person hooked...... So, relief? Not really, unless you count getting so thoroughly involved that you start obsessing over the slightest detail and getting totally skewed in your perceptions. Stuff such as obsessing over the color match of an item from a PICTURE that someone posted on this site with regards to how it looks on your home monitor and the ACTUAL piece....and ARGUING about it....are clear indications that you're too far gone for even this site. This site is mostly for the type of individual who wants it fixed, wants it to run and look right...even if it's slightly modified but isn't obsessed on whether you've pronounced the quality control inspector's name from the stamp on the back of the speedometer. But we DO have some of those. So, if you were looking for ways of NOT liking the Z....well, post that and we'll send you a PM, otherwise...this site will do NOTHING in that regard. In fact, you might as well make space in the garage, your garden shed, the basement, attic and other well known storage spaces in order to store all the parts you'll be wanting and getting. Just a note, since you're young now and presumably not married...bumpers and other sheet metal parts aren't viewed by the majority of the mothers, significant others and live-in girlfriends as acceptable bedroom accessories...even if you do have a fuzzy set of handcuffs dangling from the bumper. So, don't get into the habit now and you won't be forced to move them or sell them or worse yet, come home and discover they've been.....'disposed' of (shudder...!) So welcome, and enjoy the site. E P.S. Just be careful of Will....he likes to do work on several cars at once and before you know it he's got you buying more just to keep up.....
-
If you're referring to the two chrome caps that go over the ends of the grab handle, then you may end up buying a whole new grab handle in order to get them. 2¢ E
-
Ramses, I'll check but not sure. There are typically TWO styles of this fuse puller. One is the black one provided with the car. The other is the bright yellow one found amongst the replacement fuses in the auto store. The black one is "OEM" for lack of a better word (I don't know if it is or isn't, so save the bandwidth, but it IS the one that I've seen in the majority of fuse boxes.), whereas the yellow one is Boss' tool. I'll check if I have one in the spares, but the black one was kind of thin and prone to breaking. GreenZ's suggestion may have merit once in-line fuse holders are no longer readily available, but AFAIK, in-line fuse holders are plentiful and easily found in most hardware stores that carry any amount of electrical items. Radio Shack who has progressively moved away from the build-it-yourself market of the mid-70's carries them on their shelves / parts drawers, which shows their common demand. If nothing else contact your local auto stereo installer. E
-
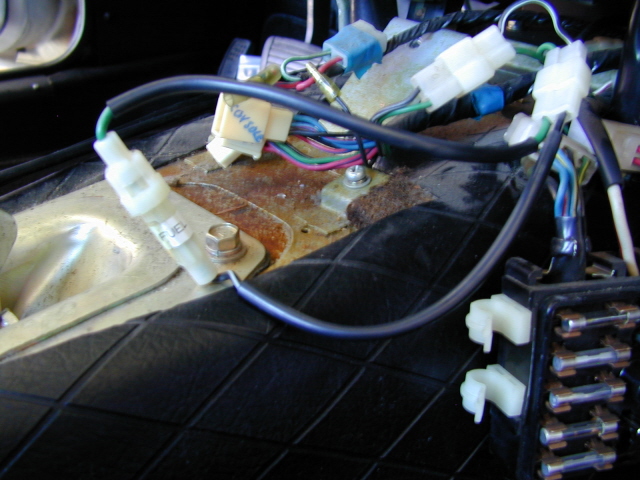
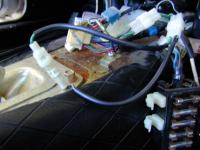
Hopefully Ramses described the in-line fuse holders well enough for you to find them. Attached is a pic of the in-line fuse holder for the Fuel Pump. If you look at the fuse box in the background, the white "hook" things are the holder for the in-line fuse holder. The fuse rating for the blower is 20A per the wiring schematic. Thanks for the kind words. HTH E
-
Did you find the fuse in the in-line holder for the power to the blower? E
-
Thanks Chris; Hopefully my text didn't come off as stepping on your post. I laughed because it's just that this ALWAYS seems to come up, and we can relate to the FIRST time WE ever sat in the car and "figured it out". I've even had people think the rivet was going bad and they needed to smash it tighter....which is what Nissan did in later years....which of course ruins the belt and now replacement IS necessary. This because they simply assumed that the shoulder and lap belts were indeed RIVETED together, and when one "fell apart" they thought they needed to replace it, when it had simply been aligned properly and it got bumped.... E
-
I had overlooked your original picture, and incorrectly thought that SleepyZ had been the one to mention it. My apologies to SleepyZ. I'm only commenting with regards to the wiring, as to why one would want/need addtional fuel pressure at any point I'll leave to the mechanical gurus. The picture linked to on the fuseable links' link (pun inadvertent), the first post's picture is of a NON-STOCK set-up. It is what some DIY mechanic decided to do to fix the car to operating condition. It may well have been that these links were "cheaper" for him or considered an "upgrade". It may be as simple as that part of the wiring harness was damaged beyond repair / use and a repair had to be made. Sometimes, it's simply a matter of getting the car RUNNING in order to get to work on Monday and whatever it takes - - TODAY - - to get it fixed is what becomes the repair - of - choice. FWIW E
-
This is one of those "quirky" things about our cars. Look at the SHANK of the rivet on the over-the-shoulder clasp and you'll see that it has the sides flattened...not from excessive wear but by design. That "thinned" out portion of the shank will, when aligned to the slots in the back portion of the lap belt's clasp, will slide THROUGH those slots and then be CAPTURED by the round hole that the slot connects to. Typically once you've "threaded" the pivot, most people just leave them attached and then hang the belt and shoulder straps off the hook on the rear quarter panel's interior. Just aft of the door opening. This hook can accept the lap belt's clasp via the square hole in it in case your belt's shoulder strap has lost the round loop of material that should be put there. Hope this answered your question..... Sorry for laughing, but once you've read my explanation, and then tried it, you'll see why it's quirky to explain. FWIW E
-
The wiring for the fuel pump in 70-73 Z's AFAIK based on wiring schematics was a Green wire that was powered off the same BW wire that connected to the Ballast Resistor and the Tach. In the 73's, specifically, with the addition of the seat belt warning system, that warning system was ALSO powered off the same BW wire. That you found continuity between the wires at the seat belt switch and the fuel pump is correct as that IS how the car is wired. The only mention of a "cut-off switch" was by SleepyZ, in reference to the seat belt / fuel pump commonality of wiring, but this is simply a guess on his part. If at the fuse box area you find the connector for the in-line fuse holder that then powers the wiring for the fuel pump, you could then install an electric fuel pump to replace / suplement the mechanical one. However, do note that excessive fuel pressure in the supply line to the carburators has proved to be problematic, as the fuel tends to seep it's way past the float bowl. So, hopefully this clears that up. However, one question does arise; The Z's had a provision for BOTH seats to trigger the Seat Belt Alarm if occupied, unless you have a very heavy cell phone that you park in the passenger seat.....How is it that you've (presumably) been driving the car WITHOUT putting on your seat belt? E
-
Fabian: The Break Down Manual would be correct in stating that the "0" indicator should be at the top dead center of the piston's travel, as that IS what it is supposed to indicate. The spark plug however, is part of the Ignition System, and it's sole function is to ignite the gasoline vapors being compressed in the cylinder. Since the combustion isn't instantaneous AND complete, it needs a bit of time for it to progress to the "fully ignited" state which is when it can exert the downward push on the piston. This is why you set the timing of the spark to occur just before TDC (Top Dead Center), so that by the time TDC is reached, the combustion is now reaching the point at which it's expansion rate is the greatest. If you set it too far in advance of TDC, you're actually going to be trying to compress the expansion. Set it too close to TDC and the expansion will occur much later in the cycle and you'll lose potential thrust. Hope that helped explain it. E
-
The SECOND switch has the proper connections in all three positions. The First switch has an extra and not correct connection with the BW wire in the Start mode. Your assesment that the wiring goes through the tachometer before it gets to the coil is correct, and you've apparently picked up on the extra BW contact. Arne's description has it correct except that it omits the tachometer. Unless something has been disconnected or removed, both the Tach and the Resistor are required to have the engine start and run. (Note on edit: you CAN remove the resistor and tach both, you just need to properly connect the removed wires to finish the proper circuits.) Power to the coil starts with the W/R wire coming into the ignition switch. In the START position, the power is connected to the BY wire to energize the starter solenoid and also to the GW wire which then connects directly to the Tachometer. At the tachometer the return path for the power then exits via the BW wire which is then connected to the positive post on the coil. In the RUN position, power from the ignition switch goes to the BW wire which connects directly to the Ballast Resistor in the engine bay THEN it goes to the Tach via a GW wire and finally to the coil via the BW wire previously mentioned. This seemingly "recombined" circuitry is a simple bypass circuit. Your assesment was right, except that you had the power flow going backwards. Note that there are TWO BW wires. One connects to the resistor and one connects to the + post of the coil. The GW connects to the resistor. That you're not Starting, but you it does RUN, tells me that the Ballast Resistor is disconnected and now you have the BW wire going to the resistor mounted directly to the coil's + post. This being the case, I'll bet that your tach isn't working either. FWIW Enrique
-
I know the "fun" of PCS'ing every few years, although I was lucky and was stationed at one AFB for my two tours. Trying to pin it down to ONE compressor model, or type, or characteristic gets tricky, as it can be most subjective. Sears' recommendation is to go for something with a SCFM Rating of at least equal or up to 150% of the highest requirement tool you will be using. This is a fair enough "rule-of-thumb" for most buyers. The biggest thing to consider is how LONG you'll be using a tool for each time you do use it. I've seen grinders that require between 3-5 cfm at 90 psi, and won't work well at lower pressures. Other tools are best operated at low rpm's , but require larger volumes of air to perform well. The D/A's I linked to require 8 and 14 CFM @ 90 PSI. Clearly very few compressors are pumping out that kind of volume. For the average home user who intends on doing his own bodywork, I would first recommend that you get the largest tank you can in order to maximize the volume of compressed air. Second would be to maximize the horsepower of the compressor in order to re-fill that tank quickly. Third to decide if it will be stationary or needs to be mobile in order to determine whether 220v or 120v can be used. Some motors can be converted from 120 to 220 and back, some are strictly one voltage. The 220 voltage will usually require an electrician to come in and connect it, although I've heard of people using electric dryer cords to plug in directly to a 220 outlet used for dryers. (This is not something to learn "on the fly".) Since you're in the military (as I was when I bought my compressor), pick one that has wheels to wheel it around, is convertable to 220, but is wired for 120. A vertical tank is preferable over a horizontal tank for amount of FLOOR area it will take up, although being taller it won't fit under many tool benches or shelves. A vertical tank will also be faster to purge of water condensing inside the tank (and believe me you will be doing this every day you use the compressor) and most importantly will evacuate most of the water. However, I wouldn't pass up a horizontal tank if it was a good deal. The tank you currently have will work....but just barely. It WILL be running on and on trying to catch up. Just take a break every few minutes or so, allow the compressor to catch up (shut off) and then work some more. Every so often (you decide on how long), take a longer break, do something else and allow the compressor and motor to cool off. The only thing I could think of to help your compressor, is for you to buy a secondary tank for additional volume. If you decide to do this, be sure to connect them with tubing that is rated for the max pressure of the compressor. This also is not an area to "play" with. So, as you can see, it's hard to say....this one. All you can really say, is "This is what I would do or did". So, FWIW Enrique
-
In the FWIW dept: If you're planning on spending $400 on a new tool box but putting off upgrading the compressor.....I would personally change that. A properly sized compressor will allow you to run the tools you ARE planning on buying, without waiting...and waiting....and having lots of water in the line....and waiting...and more water....Get the drift? The "small stand up Craftsman model. 3hp @ 90psi / 1.5hp @ 150psi w/15 gal tank" you mention is perfect....for a nail gun, screw gun, and other short bursts of air, but simply inadequate for the task of running a D/A, Grinder, Paint Gun, etc. etc. (By the way, I'm guessing you mean 3 SCFM @ 90 PSI AND 1.5 SCFM @ 150 PSI, which is how they're rated.) For the $400 instead of the tool box you could pick up a good sized compressor that would have no trouble doing the tasks you've mentioned and more. But, we can cover the sizing on compressors on another post. FWIW E
-
Are you sure those are Black/WHITE and not Black/YELLOW? If they are B/Y, then there is a good possibility it's part of the Seat Belt Warning Indicator system. Look on the lower left of the wiring schematic and you'll see the "Inhibitor Sw. Relay arse'y Type K-18 (A.L.R. Relay)", and the second item (left to right) shows 3 B/Y wires and TWO Green wires going to it, (which causes doubt). It also appears to be a grounded style relay (the ground wire on the bottom of the case). FWIW E
-
Clean off the wires so you can see the colors and post them here. It seems as though there is one Black, a Black/White and a Green, but this is simply by enlarging the screen and it could be wrong. From those colors, my WAG is the Thermo Relay for an Automatic Transmission which was used to power the secondary points in the distributor. FWIW E
-
I think that the differences between a Die Grinder (Angle or Straight) and a Dual Action (D/A) Sander are getting a bit confused here. The tool that Ed links to: http://www.harborfreight.com/cpi/ctaf/displayitem.taf?Itemnumber=93157 and this other one: http://www.harborfreight.com/cpi/ctaf/Displayitem.taf?itemnumber=92007 Are BOTH a type of grinder, and are generally called Die Grinders. Because of their size and speed they are commonly used as clean up tools as well as final shaping grinders. These are extremely handy in that you can use wire wheels, Rol-Loc grinding disks and scotch disks as well as the bristle cups. For heavier grinding on sheet metal, the disk and face on this style is changed to a rubber backing plate and 9" or larger grinding disks: http://www.harborfreight.com/cpi/ctaf/displayitem.taf?Itemnumber=93179 Although a hard disk gets used to coarse grind very heavy pieces of metal. For grinding on thick metal with more control: http://www.harborfreight.com/cpi/ctaf/displayitem.taf?Itemnumber=31309 That last one also gets used to clean up welds and cutting through thicker structural sheet metal. But if cutting sheet metal will be done often, there's this item: http://www.harborfreight.com/cpi/ctaf/displayitem.taf?Itemnumber=90114 Sometimes you need a middle of the road between a solid disk grinder and a flexible disk grinder. Additionally, sometimes you need a flex disk sander to sand material quickly. That's where this next one gets used a lot, even though it gets referred to as a sander, it is used as BOTH a grinder and a sander. Typically you use a fiberboard backing plate with a 4-6" flexible grinding / sanding disk. http://www.harborfreight.com/cpi/ctaf/Displayitem.taf?itemnumber=97187 That one has the added feature that it becomes a drill as well. Except for the last one, every one of the tools listed above are considered GRINDERS, that is they rip material quickly as opposed to sanding it off slowly and smoothly. Then this is where the SANDERS come in. Sanders are either rotary (circular), straight line or Dual Action (D/A). The first two terms are self explanatory. D/A's are a sander that both rotates AND oscillates around AS it rotates. Dual Action sanding marks look like a series of stretched and flattened coil springs, that is loop after loop all in one big looping pattern. The biggest and probably the most important feature of the D/A is that it allows rapid and intense material removal (paint, primer, bondo) but in a very spread out manner and if properly used over a larger area. This allows sanding a large panel flat or sanding a prior paint job to as thin as possible and necessary. There are two predominant styles. The one that everyone remembers looks like this: http://www.harborfreight.com/cpi/ctaf/displayitem.taf?Itemnumber=90288 But this style, "palm" style is becoming more popular: http://www.harborfreight.com/cpi/ctaf/Displayitem.taf?itemnumber=93742 BOTH are D/A's, both have their "advantages" and adherents. The first one allows the use of two hands to apply pressure easier than the palm style. The Palm style allows the subtle and quick movements that a curved panel requires if you're going to D/A a curve. NEITHER one is a "grinder", and generally when in use, you'll be looking to protect the flatness of the pad and the edges to ensure that the edges press down evenly (no chunks out of the edge). This last tool is an In-Line Air Sander: http://www.harborfreight.com/cpi/ctaf/Displayitem.taf?itemnumber=91773 This tool gets used to quickly shape bondo to the level of the panel. Generally this will sand (depending on grit) a large area much larger than a D/A can, AND it will provide for a faster smooth transition to the bondo applied onto the metal. For the job you're showing, you may end up using just about all of the tools I've mentioned. It all depends on just how MUCH damage there actually is behind that rocker panel, and how thorough a job you intend on doing. Obviously unless you're really into doing bodywork, you're going to have to pick one or two. With that limit being imposed, I would choose these two: 5" HIGH SPEED AIR SANDER WITH JACOBS® CHUCK (Item 97187) and 6'' DUAL ACTION AIR SANDER (Item 90288) But the FIRST thing to determine, is how much rust you have. That may influence everything. FWIW E
-
At a WAG, someone has hooked up the starter interlock wiring with the key-in buzzer or the Fasten Seat Belt buzzer that kicks on when you put it in gear. You don't mention the year of your car, so all we can do is take Wild A$$ed Guesses..... E
-
You'd be better off using POR-15 and their Power-Mesh material to "make" the floor metal you need. This is actually a very cheap way of doing the floor (as a stop gap vs proper sheet metal replacement). I can't say the same about the Bondo though, especially on the floor with the backside exposed to the ground AND the grit that's it's sure to get hit with! 2¢ E
-
Check out : www.zhome.com You'll have the buyer's guide you're looking for. E
-
Look at the bottom side of your console. The Choke Lever controls should be attached to the bottom of the console. Look at the housing surrounding the Choke Lever, you should see a spot about half way up the top with a couple of tapped screws that would allow a micro-switch to mount right in line with the Choke Lever. This is where the switch mounts. If the switch is NOT there, then you'll just have an empty pair of holes. If on the other hand, the wiring for the switch is routed on the underside of the center console and it's connector is way up by the fuse box, and all you did was lift up on the tail end of the console, that might explain why you did not see the wiring the first time around. Then, if as you mention the IPO just "chucked" the switch up into the fuse box area, since the switch is a NC style switch, AND it requires pressure on it's button to turn off (open) then you DO need to find it in order to disconnect the SWITCH and not just the bulb. FWIW E
-
I'd like to find out how you come to make this statement. I first got introduced to it when I needed to repair the threaded flange on a model boat engine that had completely broken off. This is the flange that (one of two) that bolt the muffler/exhaust manifold unit to the side of the Cylinder. I was looking for something that WOULD take high heat (in the case of JB Weld, it states 500°F on the package itself) and be strong enough to accept threading. I cleaned up the area, then DRILLED and TAPPED the JB and put the motor back into service. I can't tell you how many hours of use it's had since then....but it's still going strong. I don't know in actual numbers how hot it gets, but I know it's hot enough to melt and burn plastic. Granted, I wouldn't use it in lieu of proper repair methods, but as far as most applications in the engine compartment (aside from direct contact with the exhaust header etc.) I would think it would function quite well. So could you clarify where you got your information from? E
-
Again, IIRC there is a clip that goes on the lower edge of the turn signal panel, on the inside, for a bolt that comes in from above and holds the scoop to the turn signal panel. Additionally, there are a couple of sliding captive nuts on the turn signal panel that go behind the scoop to finish that edge. There is also a pair of bolt/nut combinations on the lower edge of the TS panel to bolt to the center valance. That gets held to the body with the two winged mounting tabs on it. I'll see if I can find some pictures. E