


2ManyZs
Member
-
Joined
-
Last visited
Everything posted by 2ManyZs
-
Mostly a buyer beware:disappoin If the lumps are near a body seam of the chassis, outer trim on the vinyl roof, or if there are any cracks(or a lot of heat checking) in the vinyl, you can be pretty sure it's rust. Situation could be not so bad, or not too good...but you'd have to strip the vinyl off to find out for sure.
-
Hmm, sounds like it has more problems than just the obvious ones... I got to laughing too much and couldn't wait long enough for all the pics to load... after I saw the ball on the back bumper I couldn't help rolling on the floor.... ROFL :stupid:
-
Well, 240zx gets the chocolate cigar..... that looks so silly it stands out like a wart would on JLo's derriere..
-
Well, he does do a good job of hyping a car that isn't in the greatest shape, that's for sure. I went back and looked at the pics a little better the second time, bondo cracks in the hood, rust showing through inside the hatch, wonder how much else has been painted over... The absolute funniest thing, is the trailer hitch ball in the back bumper.. and it isn't even in the center....:stupid: :stupid: :stupid: But you are still missing the one that stands out like a sore thumb....:devious:
-
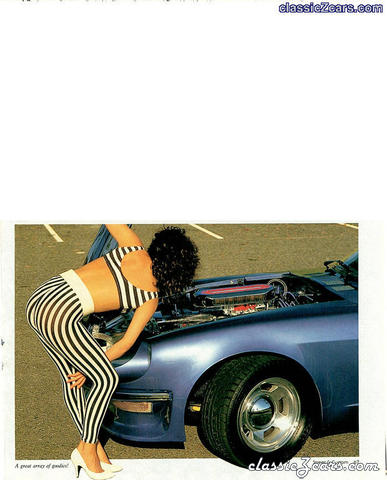
Let's see how many of you can pick up on the obvious problem with this car, not only what is wrong, but where did it come from??? http://cgi.ebay.com/ebaymotors/ws/eBayISAPI.dll?ViewItem&item=2417219841&category=6187
-
As far as I know the 70-73's are all the same, while the 74-78 are a little different. MSA used to offer rebuilt racks for about 350 and you had to turn in the old ones for a core.
-
The early A model trans has what is commonly called a "monkey motion" linkage. It is not as good as the later linkage which was part of the transmission case. You can still get the solid aluminum bushings for the early A model, but it still won't be quite as slick as the later B model. Not only are that, but there are a couple pins that could possibly need replacing as well, they are held in place by "C" clips if I remember right, similar to how the later stick is held in place. You might be able to do some work there that will get rid of a little more play.
-
PB Blaster is a pretty good penetrating oil. Be careful you don't end up snapping the J-bolt off as well as messing up the strap, they aren't too easy to find either... I soaked mine with PB for a day or two before I tried to get mine off. You will need a fair bit of play to get the strap out of the rear "T" mount, so every little bit you can loosen the nut will help, so if you get a little more slack each day, that will help. If you get real close, I guess you could always bend the J-bolt bracket back towards the tank just a bit if you need just a little bit more slack in the strap to get it loose.
-
No, "we" are saying two in the rear makes little sense. One on either end is fine if you choose the sizes correctly and don't overdo it and get bars that are too big on the front or rear as it will adversely affect the handling.
-
If they use some sort of acid to get the garbage out, yes, I'd put some type of sealer in it as the acid is going to etch the metal and take off any type of sealer that might have been there in the first place. It's going to rust much faster if it is etched with an acid than it would if they just steam cleaned it. If you are going through all the trouble to remove the tank and have it cleaned, it's probably best to seal it with one of the selaers on the market, you should never have to worry about it again and you'll have piece of mind that this is one think that won't cause problems down the road. No sense it taking the tank out a second time if it does cause problems with surface rust after you have it cleaned.....
-
I usually look at what new or reproduction parts are going for and base my prices on that to some extent. The harder the part is to find, the higher the new price is going to be, and the used parts are worth just a little more than the run-of-the-mill easily found parts. Gives me an idea what the "market" will bear.... I normally don't ask much more than 1/2 what the new price is, unless it's something that is really tough to find new.
-
I've never seen new straps advertised, so your only solution might be finding a set of used ones..... The padding can be replaced with a plain piece of rubber. Buy that at the local hardware store and cut it to fit.
-
First thing I would do is to put the front up on jackstands and while someone is turning the wheel back and forth see it there are any strange noises. Also, check your tie rod ends for any looseness, ball joints for play and look at the steering rack itself and see if it is moving in the bushings. Look to see if there are two grease fitting in the steering rack housing, one on each side in the front of the housing. If you see a plug with a slot for a screwdriver, take those out and put a grease fitting in there and place a small amount of grease in the rack. Another often overlooked item is the bearing in the top of the strut itself. It is sandwiched between the coil spring seat and the top hat that mounts to the inner fender. These can over time collect a lot of dirt, water and rust. All you would need to do is to pull the top of strut assembly apart and thoroughly clean and re-pack the bearing with grease. Also, you'll find a bushing in the steering shaft below and in front of the brake master cylinder, check to see if there is play in that after you put the wheels back on the ground. It could be a combination of a lot of small things, or just one problem that is in dire need of attention. I wouldn't drive it too much until you find the problem, as it could be something serious enough to cause an accident if it were a bad ball joint or tie rod end. If you don't find any mechanical problems, it could also be something as simple as the toe out is not set correctly, but this would show up as uneven tire wear which you didn't point out....
-
MSA has a kit but you'd be just as well off to go and get a short piece of exhaust tubing and get a cone shaped filter that fits it and do it yourself. That's basically all the kit is is a short piece of tubing with a cone shaped K&N filter. Just have to find the right size tubing to fit into the rubber elbow in front of the AFM and go from there. http://www.zcarparts.com/store/merchant.mvc?Screen=CTGY&Store_Code=TZS&Category_Code=PFFC12
-
I'm with Alan on this one. Gold looks good with red body colors, but kinda overpowers the light colors. Black look good on race cars or dark colors. Grey goes with any color.
-
I haven't done a hatch window... yet, but it seems that you should be able to do it the same as the windshield which I have done. First, put the seal on the window and then lay the window on the hatch. You might be able to do it by yourself if you turn the hatch upside down, but it might be easier with one extra set of hands. Get some line for a weed eater and wrap it around the seal about 3 or 4 times in the groove that fits into the hatch. Spray the groove and the line with some silicone lube, or perhaps some kidn of light grease to lube the line. Then with the hatch upside down lay the hatch on top of the window and using the line (might want to wrap the end around a screwdriver so something so it doesn't cut into your hand) pull it gently and steadily to pull the inner lip of the seal inside the flange on the hatch. This is where you might need an extra pair of hands as sometimes you need to push against the glass so the lip of the seal will pull inside the flange. Just keep pulling on the line until the seal has been pulled over the lip of the flange and you should be done. Pull all the line out and that's it. Sometimes if you are lucky it will pull the seal lip over the flange on the first time around the window, sometimes you might have to go one or more times around to get all of it set. Hope you can understand my directions.. I looked for an old post of mine when Kmack was putting his windshield in and couldn't find it......:stupid:
-
First thing you have to do is get the inner metal sleeve out. I use a 7/8 or 15/16 metal hole saw and put the control arm in a vise, and use the hole saw to drill the rubber from one side and then the other. The hole saw will go through the rubber fairly easy and it fits nicely around the inner sleeve and cuts the rubber almost in the center of it. Or you could use a drill bit and poke a lot of holes in it and then using a set of good vice grips, you should be able to tear out the inner sleeve. Or, you could do it the messy way and burn out the rubber.. but you'll not make any friends in the neighborhood with the smell..... Then I use an air chisel with a V shaped bit to remove the outer sleeve. With the V vertical, you can usually catch the lip of the sleeve and roll it over and then proceed to cut the sleeve. Be careful not to cut into the control arm, but if you do you can dress it later with a round file. A hammer and chisel will do the same, just take a lot longer. That's the way I've been doing it and it doesn't take long.....
-
I'd wager a guesstimate of anywhere from 1500 up to 4K. It all depends on how much will have to be replaced, as compared to repaired. Hard to tell with no pics, but, since it's a 70 with a fairly low VIN, the price is going to be a bit higher than you would expect to pay for a 72 or 73 in the same condition. It really depends on the rust and how bad it is, and how much can be repaired simply and how much has to have panels replaced.
-
-
If it's rotational play, you could also have problems with the drive gear. Best advice I can give is to pull the distributor and see if the drive gear has any play. If not, it's all in the distributor. If it does have play in it, you will need to correct that as soon as possible as the oil pump also runs off the same drive. That could be a major problem.
-
Ahh, the lash pads.... You should be able to find them at Courtesy... If you do a search you'll also find a few recent posts concerning them as well, might help you decide which thickness you need before you order. They are around 36 bucks for a complete set, and there are 18 or 20 different thicknesses......
-
Not really sure what you are referring to as rocker valve guides... Try http://www.courtesyparts.com/nismo/s30/ You should be able to find what you need there.
-
You won't need the spacers if you re-drill the mounting holes. The spacers serve to lower the outer end of the control arm to make it parallel with the ground (when using shorter springs the bottom of the strut housing is raised) which puts the roll center back where it should be. By raising the inner pivot point you are doing the same thing. By moving the pivot point out on the crossmember you are then adding negative camber by pushing the bottom of the strut out away form the pivot. Either way works, and it does the same thing... however, using the spacers and either camber plates or adjustable control arm bushings is a lot easier and the car could then be put back to its stock condition if the situation ever arises that you would want to put it back to stock.
-
You can't compare 70's carburator technology with todays electronics. Nor can anyone say for certain that an early de-smogged car in a perfect state of tune will pollute anymore than a smog equipped car in a sad state of tune without putting them on a machine and comparing the levels. You cannot even compare the 74 cars with the flat tops to the 75's with FI as they are two entirely different systems. The early FI systems are now where near as good as todays, as todays systems are reactive and update their own paramaters during driving.
-
Don't think you'll find any that are more inexpensive than stock replacements..... Here's a company that has a few choices of manufacturers although you will have to contact them for their prices.. http://www.malvernracing.com/showcase.html