TVollnogle
Free Member
-
Joined
-
Last visited
-
 Theramz, you're right about the primer color affecting the final color. When we did sample boards we used the same primer. I'll have to check with my painter, but I think it was light gray. John, I'll get the dimensions for you. My nephew has the rotisserie down in SC now but I'll either call him or measure it when I'm there in a couple weeks. My car is moving along quickly now. I just took an early out from work so am "retired" and can dedicate more time to it. Just dropped the engine back in yesterday. I started tearing down my car over 4 years ago, but didn't touch it for over 2 years due to work schedule, etc. Just got back on it last November. Terry

-
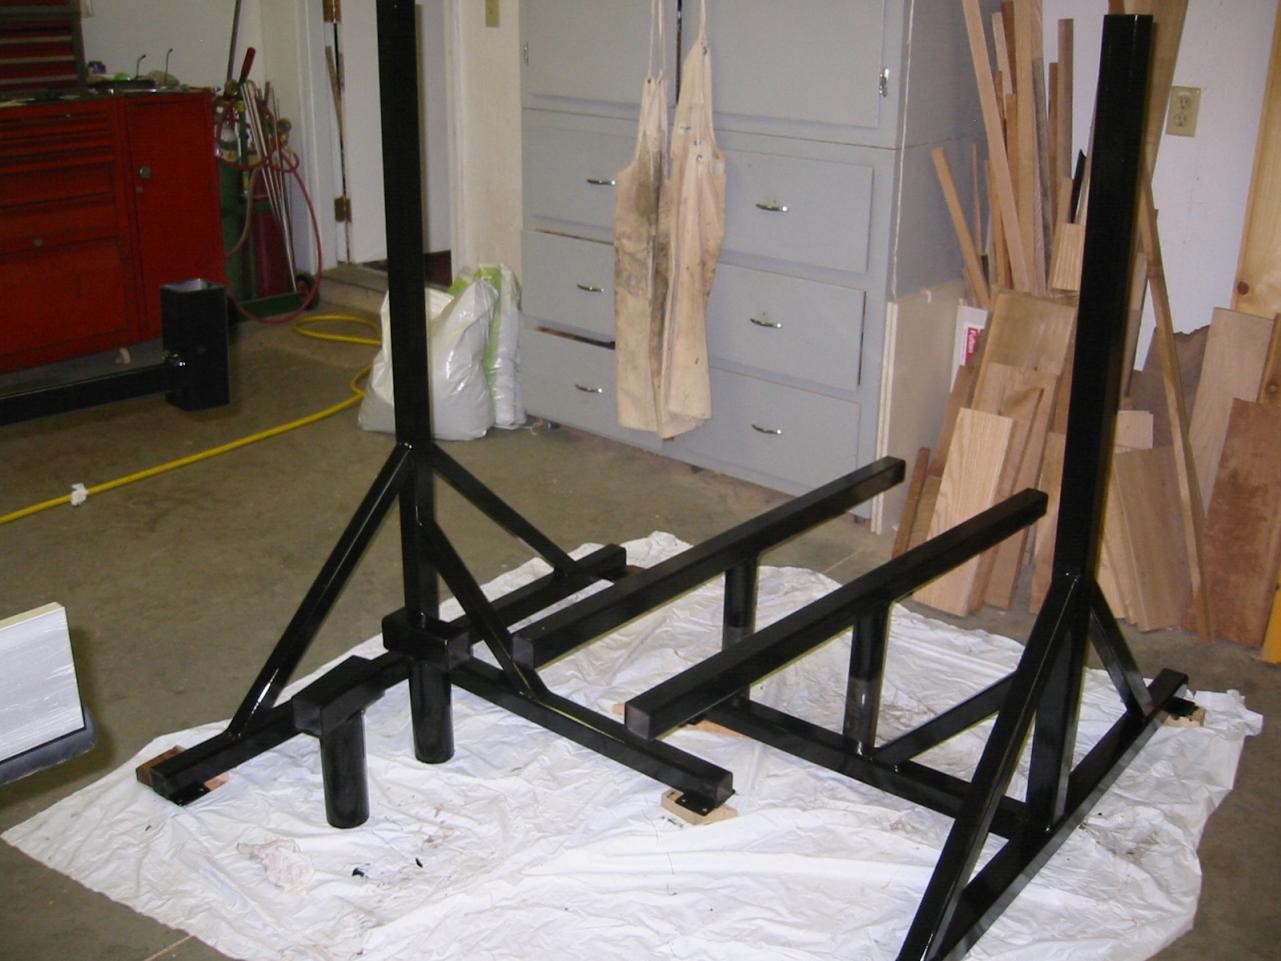
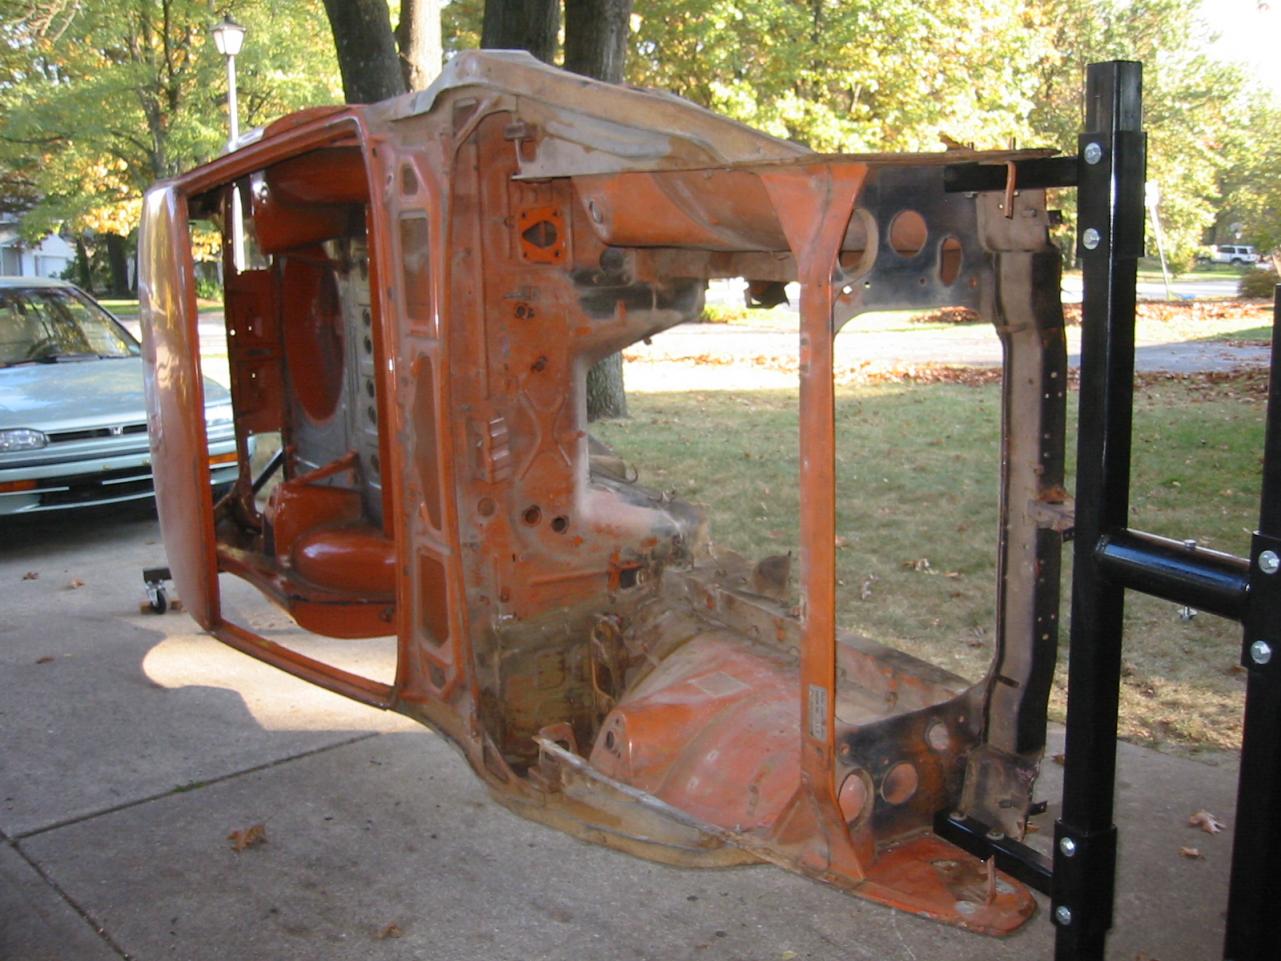
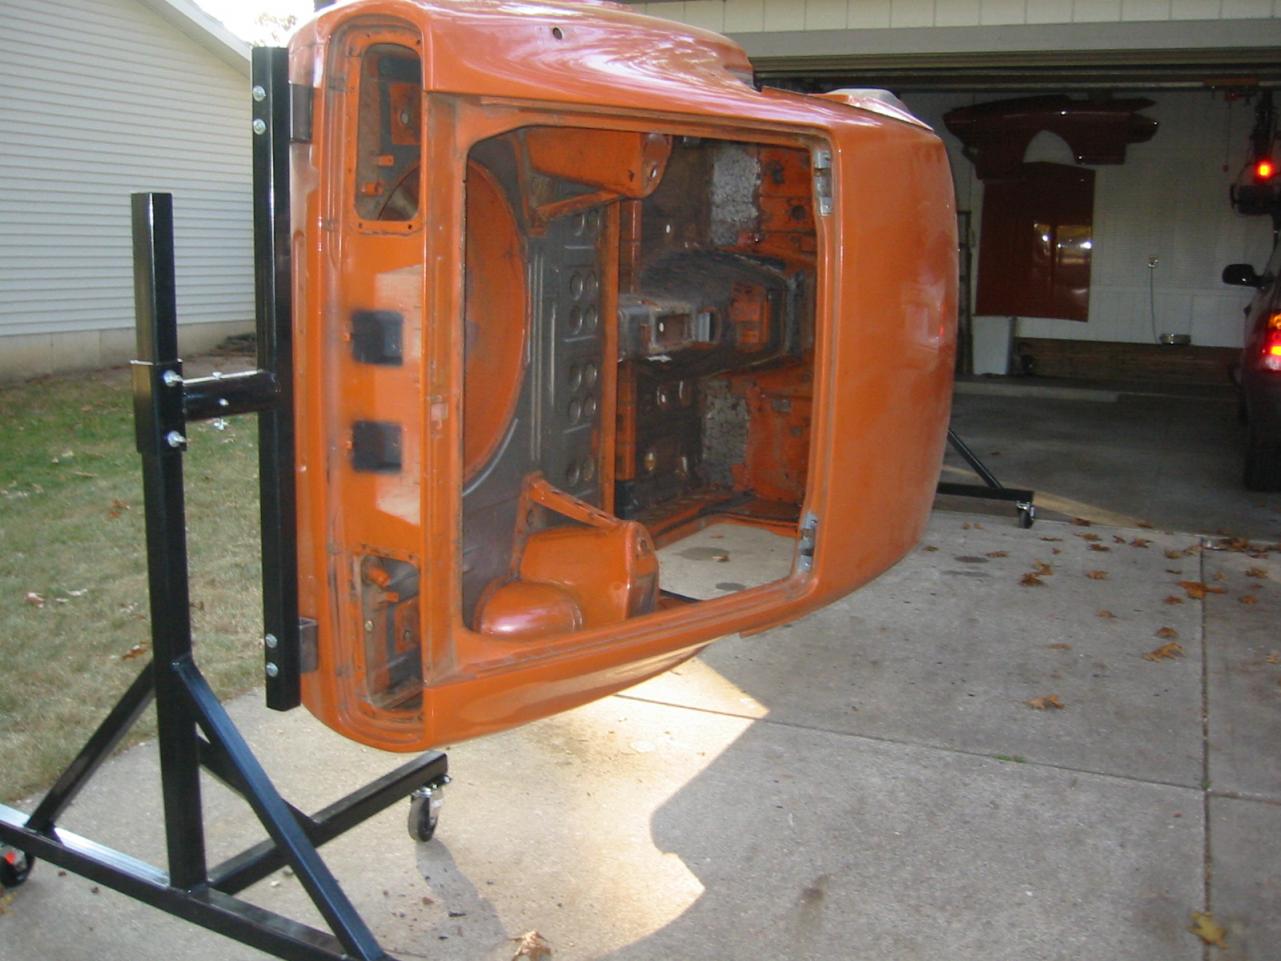
John, I built the rotisserie. It was more than sufficient for a body of this weight. I even bolted the entire undercarriage on the body before taking it off of the rotisserie a month or so ago. Wheels came from Harbor Freight. I'll attach some pics. If you're interested, I can get measurements for you. Terry


-
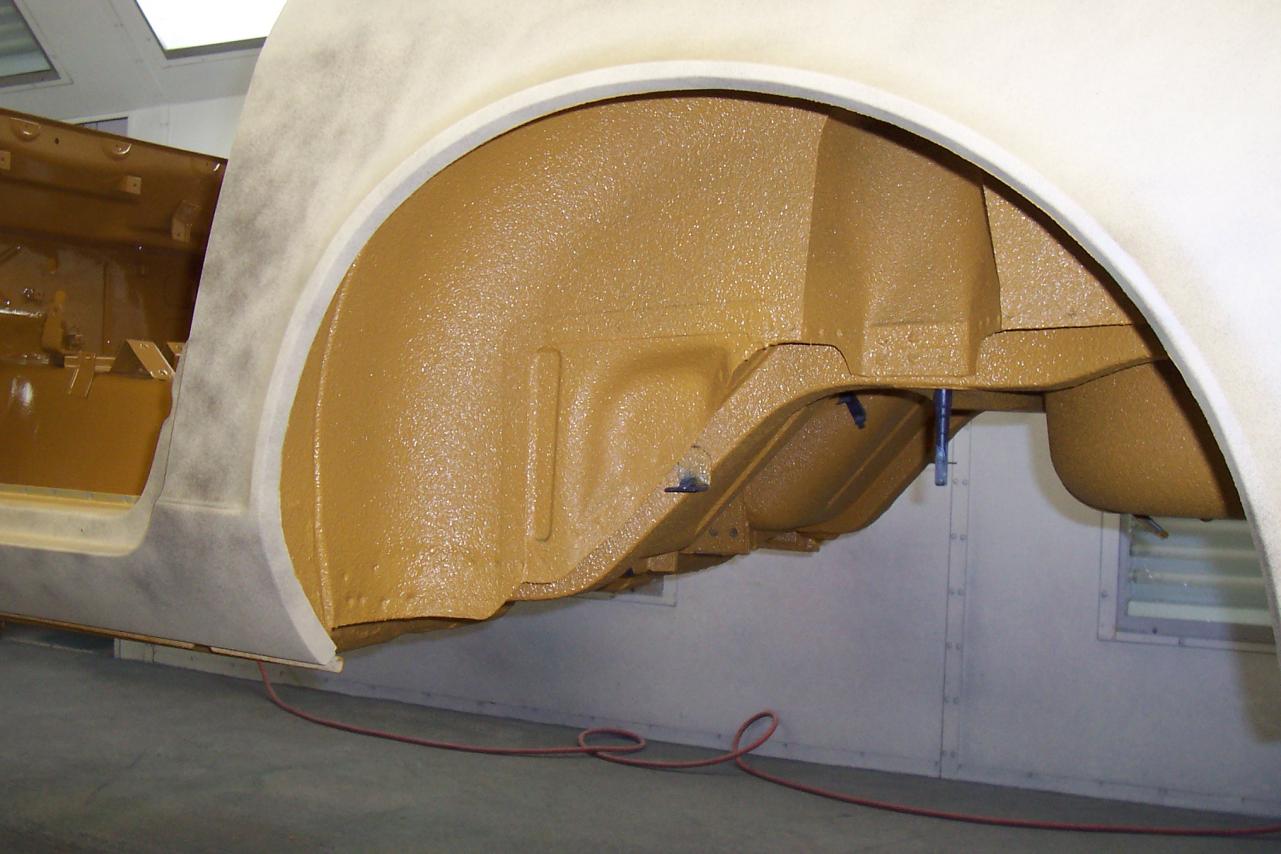
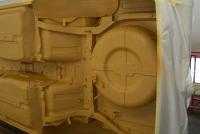
Here are some pictures of the undercoating (bedliner). Terry


-
John, I had this discussion about the undercarriage with Carl Beck within the last year when I was getting ready to paint. I'll take the liberty of quoting him since this is just informational: Hi Terry: Your observation is correct. The undercarriage was sprayed with a very light coat of paint the same color as the body. When new, the paint under the car almost looked like an overspray - somewhat flat or dull, not a shinny paint job like the the top of the car. Most of the 69 and first few months of 1970 production cars had no undercoating other than in the wheel wells... we aren't certain when the factory started also coating the floorboards, but most Series I cars built after 06/71 have had it. The factory undercoat was a very fine grain, rubberized type, sprayed on the prime coat and then painted over to match the car. Usually it extends up into the transmission tunnel - but not clear around the tranny. All this was done, before the fuel and brake lines were installed and before the suspension was put on the car. Most of the suspension components were simi-gloss to gloss black (gloss black on the fuel tank). There is an access pannel in the right rear wheel well - three or four screws hold it in place. That one panel seemed to painted with the same paint used on the body.. it was far more shinny and better finished than the wheel well itself. Carl What I ended up doing was spraying the entire undercarriage with Zero Rust. I then sprayed it with tintable bedliner material tinted to 920. The color comes out slightly milky looking which I was told it would. It is not a noticeable difference with the wheels on and sitting on the ground. Terry
-
I wouldn't assume that PPG is going to be off just because of my Dupont experience. As a7dz said, he hit it right on with one of the formulas. If it was me, I'd shoot some samples and compare them to a known correct color. You could contact Les Canaday and see if he'd compare a sample to his Nissan supplied sample if you sent it to him. John, the reason I was going to go with the single stage and then polish was to stay close to the original style of paint. I was advised by several painters that the single stage would achieve that better. I feared that the basecoat/clearcoat would look too "artificial" but that is not the case. I'm pleased with the results. I did polish the clearcoat. Also, I have a formula for the rear light trim panel paint. Dupont converted it for me from a different paint line formula I found in one of the forums here. In the end, I didn't feel it was cost-effective to mix it and just bought the spray cans from Les Canaday. Terry
-
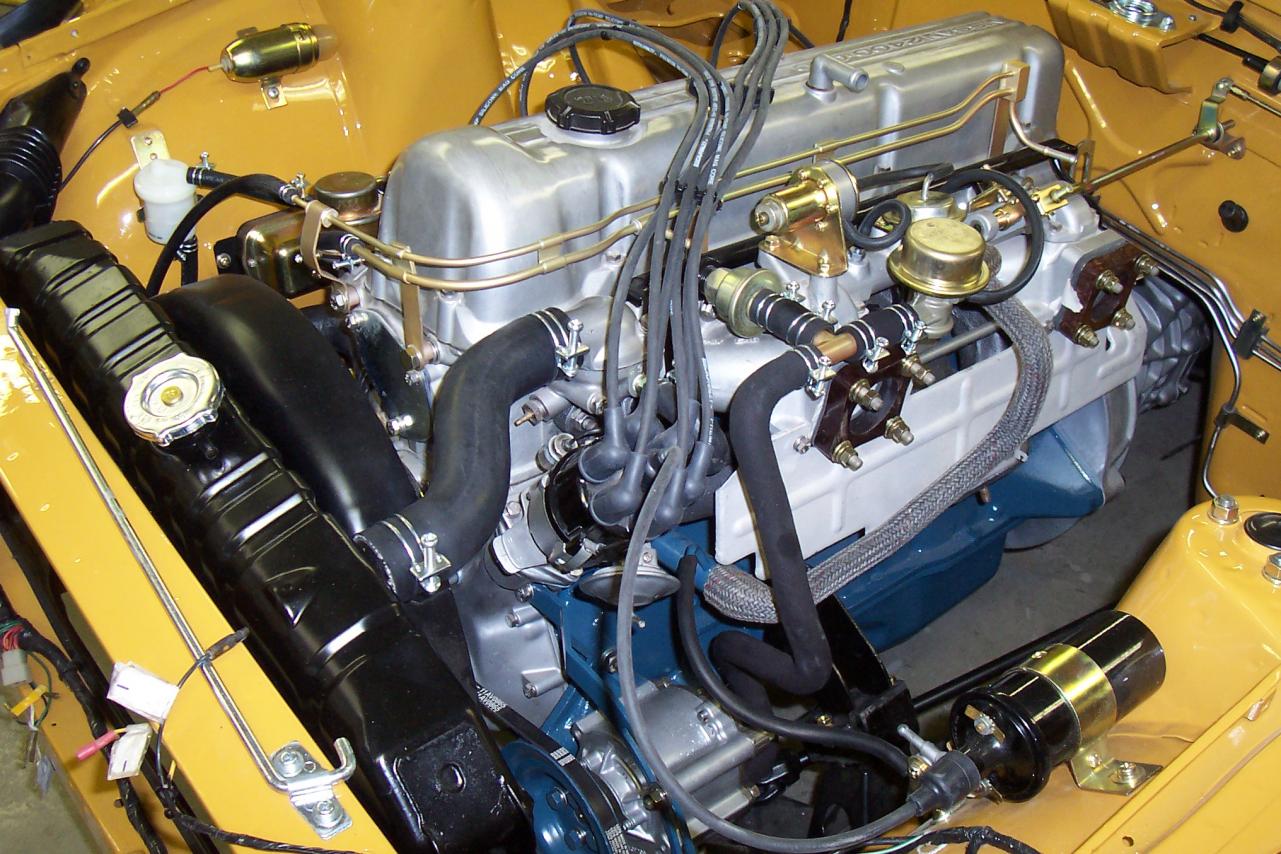
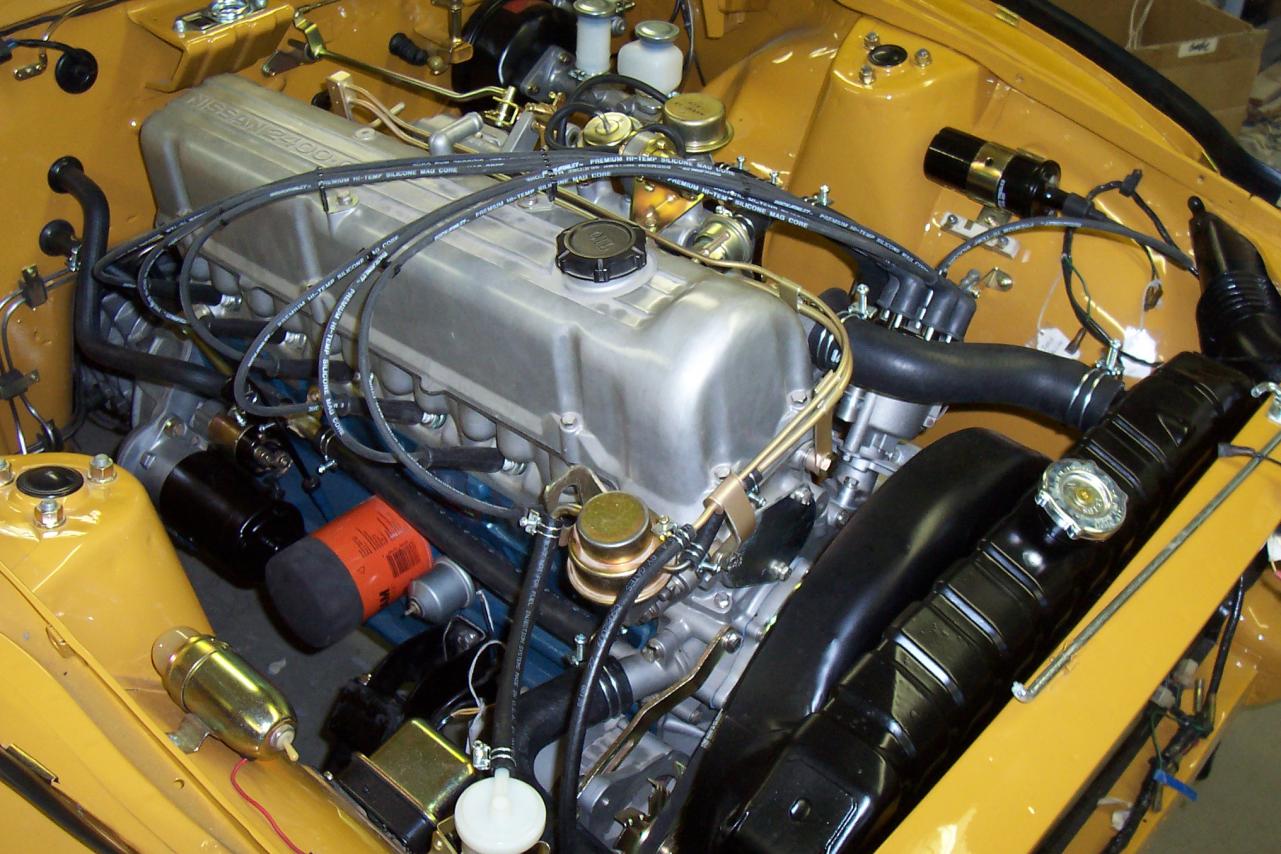
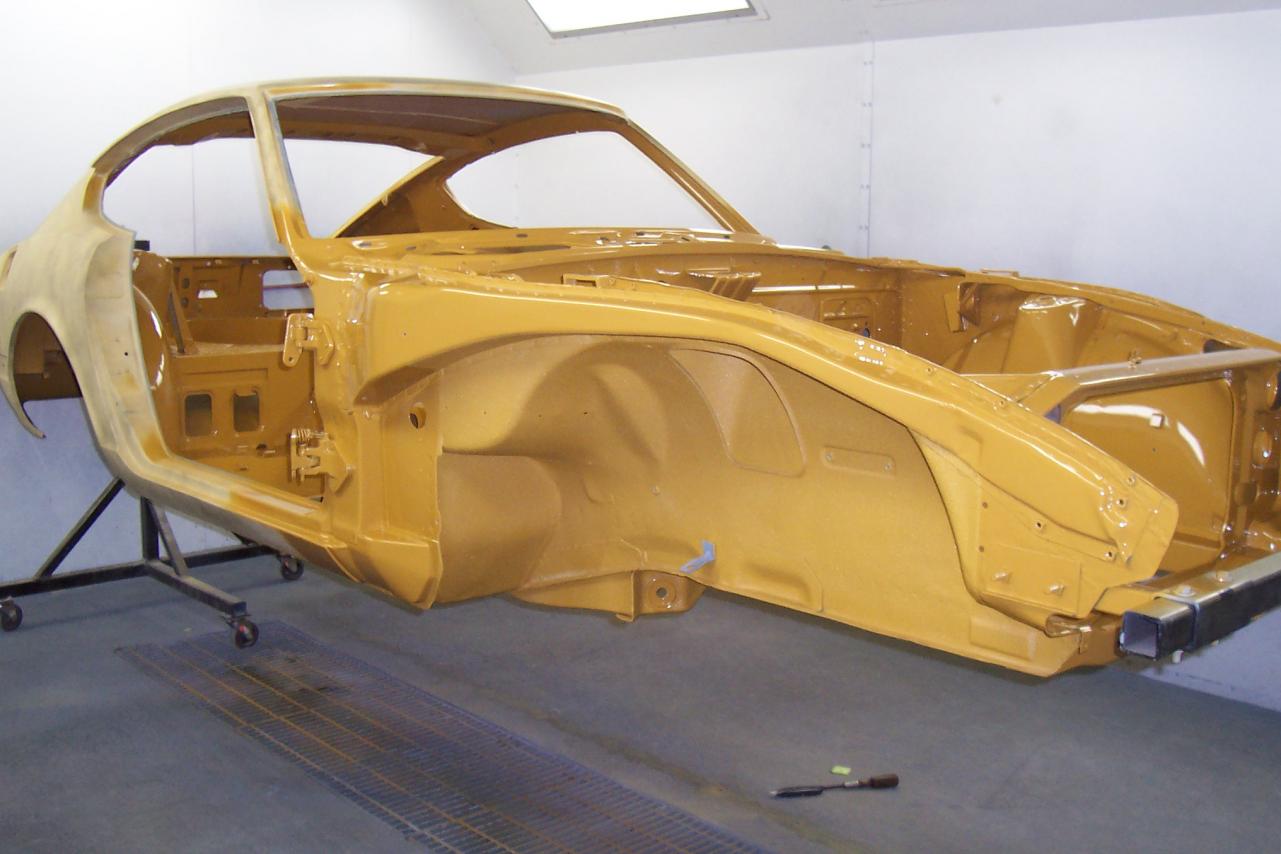
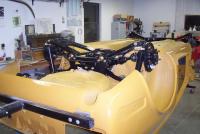
Hi All, I’ll try to give the short version of my paint color experience. I had decided to paint my formerly orange ’70 240Z with 920 Safari Gold during restoration since I had a ’71 Z back in the early ‘70’s that was 920. Since my painter uses Dupont paints, that is what I went with. I had wavered between single stage and 2 stage (basecoat/clearcoat) but in the end decided to use 2K single stage, then color sand and polish. I took the body to my painter on the rotisserie and he shot the interior and engine compartment. After seeing the color, I was of the opinion that it was darker than I remembered the 920 being. I contacted Carl Beck and Jim Frederick down in Florida and sent color samples to them for an opinion. After comparing the samples to other 920 cars (Jim has one original and one of the Z Program cars), they both thought it was too dark. I contacted Pierre at Pierre Z Car and Les Canaday at Classic Datsun since they had been involved in the Z Program cars. They said that they used Dupont paint on the Program cars and both gave me the same formula: 920 Safari Gold: DMA 383 40.0 DMA 311 100.0 DMA 346 180.0 DMA 329 1030.0 Les still had a Nissan supplied 920 Safari Gold paint color sample with the formula on the back. They were to use it as quality control for checking that the colors were coming out correctly on the Program cars. During this process, my painter was having the Dupont rep mix different samples to try to come up with the correct color. I lost track of how many we did. In the end, I sent a sample board of the 920 in Dupont ChromaSystem basecoat/clearcoat (mixed with the above formula) to Les and he compared it to his sample board from Nissan. He said it was as close as you could hope to get it. I ended up reshooting the engine compartment with Chroma One single stage, but used the ChromaSystem basecoat/clearcoat on the body since I knew from Les that it was correct. I didn’t want to risk another color variation due to changing paint systems. The reality is, now that the body is painted, the engine compartment in single stage and the body in 2 stage appear to be the same. The problem with the original single stage being dark was that my painter had used another Dupont poly line (can’t remember which one) and due to the different base for mixing, the color didn’t come out the same as the original color like the Chroma line did. Dupont called the paint a “blendable colorâ€, meaning it might not be dead on but should blend in when doing repair work. In my opinion: not so. If you have any questions, contact me. Terry
-
John, As Mike said, I experienced this several months back with the 920 Safari Gold and could write a book on what I went through. I'll post here later today on my experience and resolution. At the time, it was suggested by several that I start a thread about it but I never got it done. Terry
-
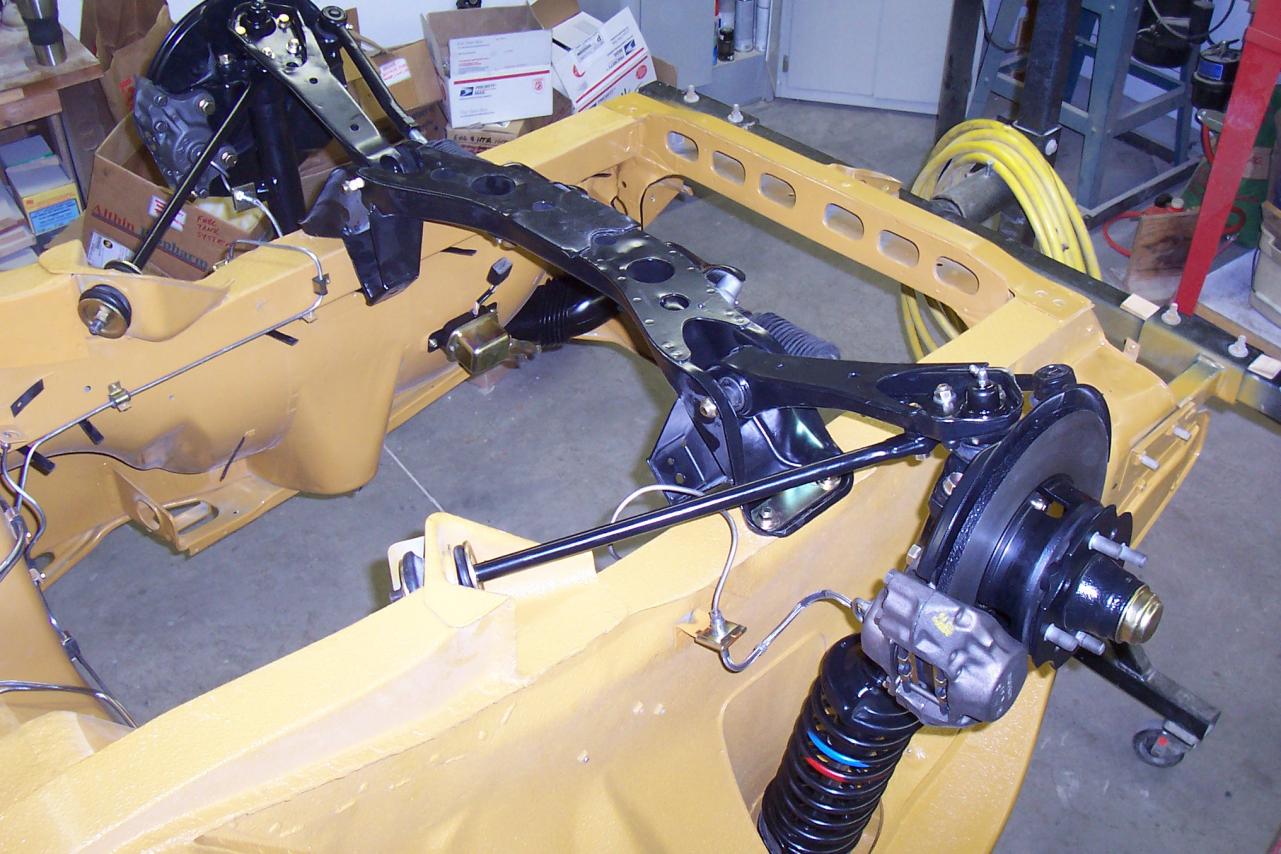
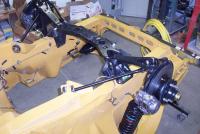
If I knew that one bracket was longer, I had forgotten since I pulled and rebuilt the engine 4 years ago. I went out and looked at mine which I have temporarily bolted on the engine which is on the engine stand, and I had them switched. Guess I would have picked up on that at some point. The microfiche confirms different engine brackets for the left and right on 240's and 260's. It also shows the same engine mount (insulator) for all, so it there was a weakness in the early ones, and thus the plate, they apparently corrected it. Mike and Rich - if you're crawling around under your cars sometime and happen to have an inspection mirror in your pocket, check to see if you have that spacer plate between the transmission mount (or "Insulator Engine Mounting Rear" as Nissan calls it) and the crossmember. It would be interesting to see if its on all of the early cars. Guy - your '70 doesn't have the spacer on it? How about your '71? Terry
-
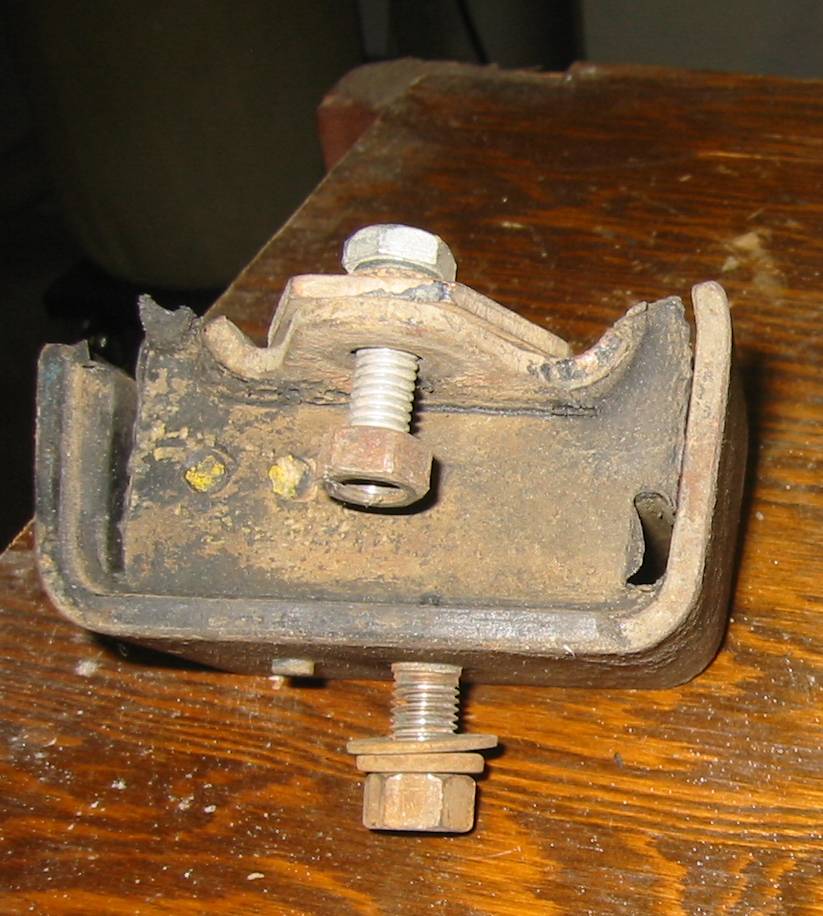
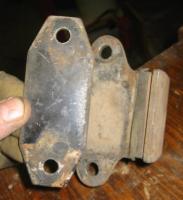
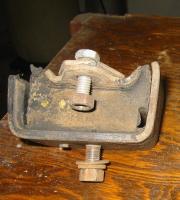
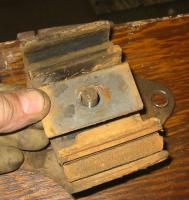
My '70 #3212, had a spacer between the right engine mount bracket and the engine mount when I disassemble it. The left side had none. There was also a rectangular spacer between the transmission mount and the cross-member. They can be seen in my attached pictures. I thought maybe the left engine mount spacer was missing, so I went into the microfiche but don't see spacers shown for either the engine mount or transmission mount. Can anyone give me some input on them? Were they from the factory and used for alignment when needed? Thanks, Terry
-
Good one Will. I sat here last night racking my brain as to what they could be and remembered that there were louvers thrown in the back of the car when I bought it. I started wondering if they could be the mounting brackets for it that had been thrown in the back and I just put them in the interior stuff box while stripping out the car. I was going to check today to see if that was the case. Thanks for the help. If anyone is interested in having those louvers, let me know. I'll never use them. Just pay shipping and they are yours. Terry
-
Well, that makes me feel some better. I don't remember taking them off but they were in the box with interior stuff related to door. I even checked the door interior of my '72 parts car but didn't see them. It's a mystery where they came from. Thanks for the input Arne and Mike. Terrry
-
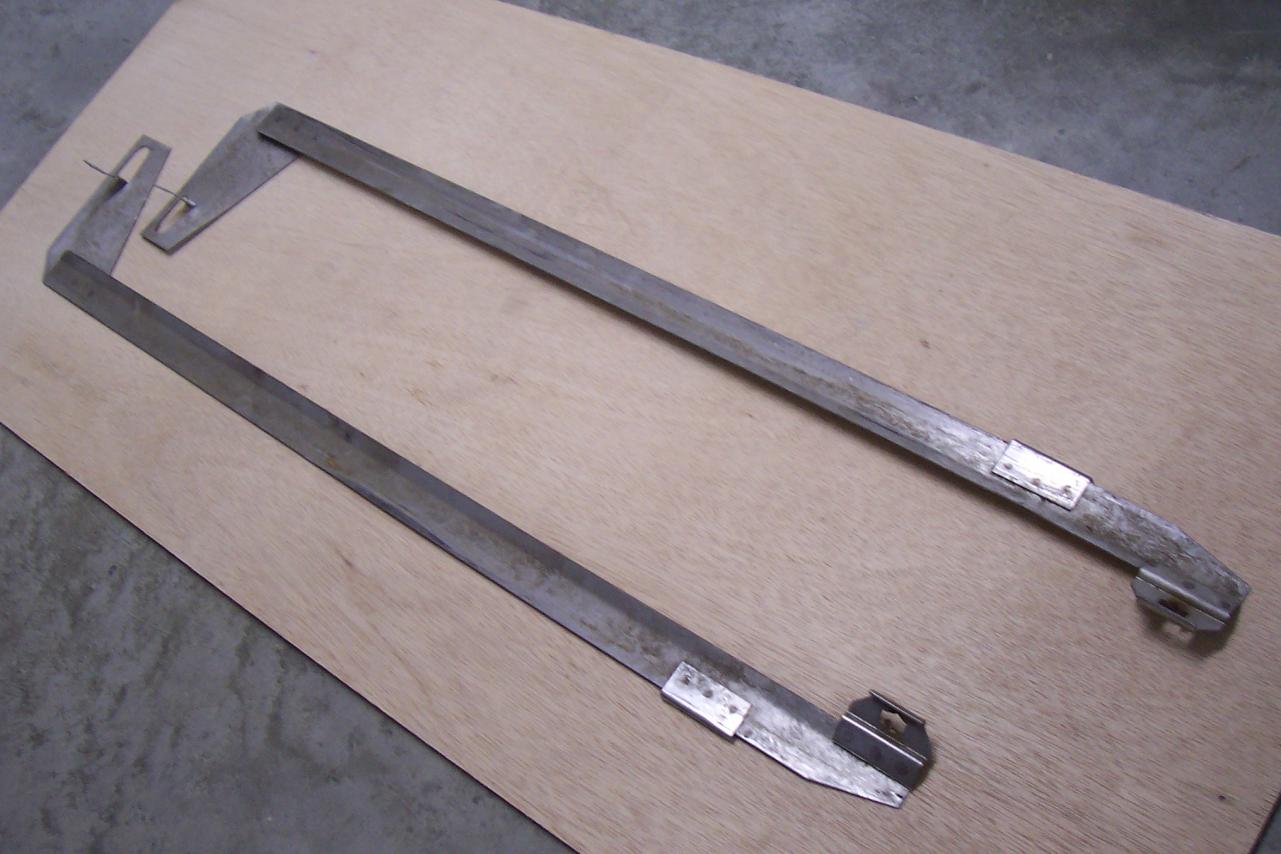
Wonder if anyone can tell me what these parts are. I suspect they might be door components but can't find them in the micro-fiche. I've scoured my disassembly pictures and am not coming up with anything. They are 30" long or so and came off of my '70, #3212. Thanks, Terry

-
What Derek said. I got a set from Harbor Freight just for chasing threads and they barely do that. The 6 X 1.00 already has the cutting threads worn off and needs replaced. I have a 30+ year old Craftsman SAE set that has served me well.
-
Z Specialties has the ones for the tail light panels. Here's a link to them: http://www.datsunstore.com/product_info.php/cPath/4_281/products_id/1170 Thanks to Mike B for posting this info recently. Terry
-
I dug my old master and slave cylinders out of storage today and checked sizes. The master that was on my '70 4/70 is 5/8" and the slave is 3/4". The slave does have the adjustable rod. I don't know that either one is original, and from the previous info, probably have a later model slave.