Arne
Free Member
-
Joined
-
Last visited
Everything posted by Arne
-
 Where in Oregon do you live, Dustin? There's lots of us Z owners here, but most of us are older than our cars.
 -
The '71s came with two different styles, depending on when they were built. Most had a plastic tank, the very latest '71s had a metal tank. The tanks are interchangeable but the plastic trim panels that cover them are not. As it happens, I have a spare plastic vapor tank, should that be the style you need. Send me a PM about it. Replacement vent hoses are still available from the dealer. Check this tech article I wrote a few months back for details: http://classiczcars.com/forums/showthread.php?t=25857
-
More details might help too, like what year and model Z you are working on?
-
My Nissan dealer gives a club discount, his prices are always less than eBay, MSA, and even (just barely) Courtesy and Nissanparts.cc. Never any shipping charges either. So give your dealer a shot. Don't be afraid to ask for Z club discounts.
-
1.) No. 2.) Maybe, if you can find a self-locking nut in this size, but it also needs to be fairly low profile, so probably not. 3.) 43262-21000 for 240/260/280Z. The 280ZX nut does not require staking down (normal self-locking) and is 43262-W1200
-
Dunno. I talked to them a few weeks back about smaller than 2.5" and they recommended I find a local muffler shop. Looks to me like the system for stock manifolds is the same as yours, with the addition of a downpipe. But it looks good, I may yet try it on the yellow car, if I find a stock manifold for it.
-
I certainly understand the desire for the increased creature comforts of the 280Z. I also understand the preference for the small 240Z bumpers. But I don't really like the idea of buying a 280Z and then trashing its bumpers to make it look like a 240Z. If the big bumpers bother you that much, either buy a 240Z or perhaps try to find a late '70s 260Z in Europe. Just my opinion, but why buy something you don't want?
-
I like the look of the new flanged system. I just wish they offered it in a smaller diameter as well. The 2.5" is a bit much for an L24, IMO. But if they made it in say, 2.0" or 2.25", with a round DynoMax 17-741 instead of the oval muffler, I'd be really interested.
-
The aftermarket wheels look to be a composite wheel - a cast aluminum center welded to a chrome-plated steel rim. That type of wheel is typically heavy, and can be prone to vibration problems. Probably 14x6 from the looks of them. I'd probably try to sell them for $100 or so, as a guess. The factory alloys are (to me) far more desirable. With caps and their special lug nuts they are worth far more than the others. Probably $250-300 as is, more if they are nicely polished. But if they are the ones the car came with, I'd keep them.
-
Not too impressed with most of his parts, and check out the shipping costs?
-
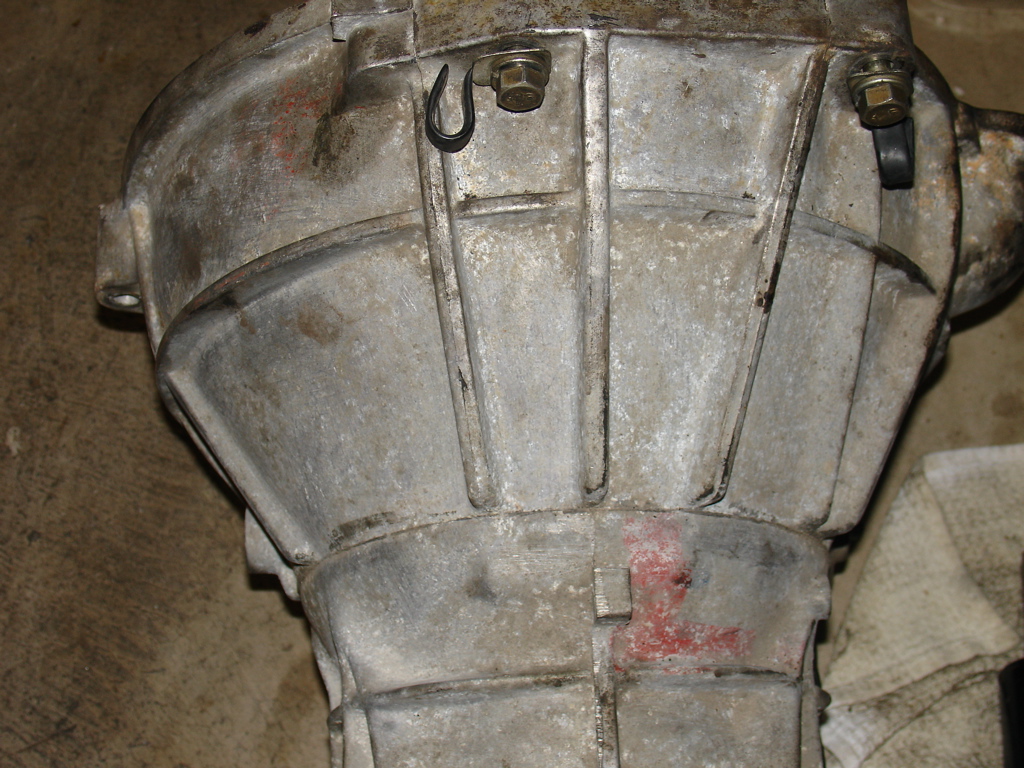
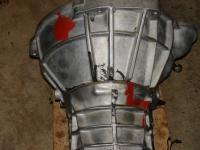
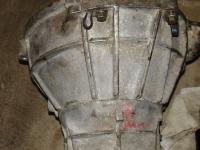
I've had the transmissions out of both my cars recently (more than once actually, really long story), and noticed something new to me. Big splotches of red paint. Both transmissions are Type A 4 speeds. The clean one is out of my low mileage red car (7/71). The grubby one has been (and soon will be again) in my yellow Series 1, but originally came from a 4/71 parts car. The big spot of red on the left top of the bellhousing was visible from under the hood. With the transmission out on the floor, I could see the similar sloppy paint splotch on the top right of the gear case. Interesting, but not notable -- until I looked closely at the other transmission. Because while the other transmission is dirty and corroded, it still has some red paint visible, in much the same spots. While the red paint is similar in color to the red car, the parts car was originally blue. So I figure that the red paint may be some sort of inspectors' mark. So should a properly "restored" '70-71 240Z have sloppy red paint applied to the transmission?
-
Front spoiler or air dam will help, too.
-
So Frank, I'm guessing your car must be a fairly low VIN, am I correct?
-
The modified lever looks like one of these:
-
Mine is currently the original black gelcoat. I'll paint it red to match the car when I get around to painting the car some day. Probably add a flex agent when I have it done.
-
Both sides are the same, so you don't need a "driver's side" specifically. You'll need one from a 280Z, the spline count on the 240Z are different. Last I checked, new ones were still available from Nissan, but they aren't cheap...
-
Profile says a '78 280Z. Do you mean the stub axle? No threads to strip on the half-shaft. If it's the stub axle you need, both sides are the same. You'll need one from a 280Z, the spline count on the 240Z are different. Last I checked, new ones were still available from Nissan, but they aren't cheap...
-
This looks like it might be a good buy for someone. No connection to the seller. http://seattle.craigslist.org/est/car/446170260.html
-
Don't rush it, Bryan. You've done a great job so far, you don't want to cut corners now.
-
I'm of the same opinion. I don't mind modifications, as long as they can be undone if later desired.
-
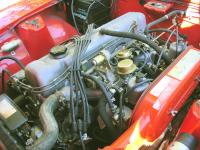
I've got no problems with detailed, polished and color-coordinated engine compartments, but bone stock is so rare that it's a "must have" for me.
-
For the five speed in a '70, you need the transmission itself, and all the clutch parts should come from the same car - pressure plate, thowout bearing and collar, clutch fork and slave cylinder. Simplest is to use all your current clutch parts with the newer five speed. You will also need to either enlarge the hole in the tunnel and use a 280Z shift lever as-is, or have a 280Z/ZX lever modified to fit your existing hole. If you stuck with the existing forward mounted R180, you could use your existing driveshaft. But if you go with an R200 you'll need a longer driveshaft from a '72 or later Z. For the R200, you'll need the diff, moustach bar, lower rear suspension cross bar, front differential crossmember, and possibly a pair of halfshafts for an R200. I think that's it. Somebody chime in if I missed anything.
-
Hard to say for certain. You might want to consider having a pair of front strut bearings on hand, just in case. Not much else that you might run into while doing struts only. If you were doing the rest of the suspension too... well, that's a different story.
-
I believe 280Zs had the boot, but 240Zs did not. Boots are OK, but not required unless you are driving in really nasty road conditions.
-
Bump stops for certain. Two boxes of Energy Suspension part number 7.6104G (graphite-impregnated black) or 7.6104R (red poly). If your brake hoses are not up to snuff, do them now also, as you'll have them all apart anyway.