Arne
Free Member
-
Joined
-
Last visited
Everything posted by Arne
-
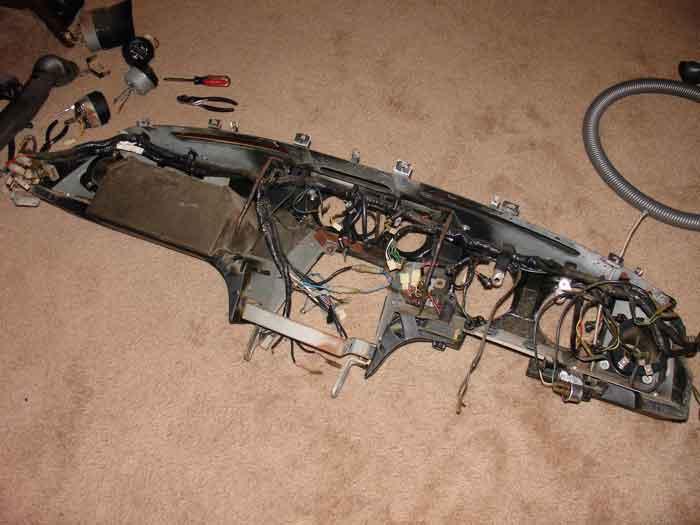
 5 Feb 2006 - Re-wiring Begins I didn't know if I'd have anything to work on this weekend or not. But Saturday morning my replacement dash harness and fusebox arrived by FedEx Ground. They deliver on Saturdays? Who knew? Anyway, that was a good thing, as I didn't have much else planned for the weekend, other than watching the game. I opened it quickly, and was immediately pleased by what I saw. The fusebox was solid and intact, and the harness looked good at first inspection. All the connectors were intact, and no wires appear to be melted. Pretty much just what I had hoped for. So I straightened it all out, and began carefully looking at each terminal and connector. Comparing to my wiring diagrams, testing the wires, cleaning, etc. And I'm well pleased, it is a really good harness. That was mostly yesterday. I had some time before the Super Bowl today that was not allocated to anything else, so I went out to look at pulling the dash out of the car. Well, it turns out that pulling the dash on an early 240Z is not all that difficult, and it is upstairs in the spare bedroom even now. I haven't pulled the bad harness all the way out of the dash quite yet, still comparing and making sure all is right. The replacement harness is from a manual transmission car, which means that are no wires to connect to the kickdown switch, but I don't care, the transmission swap will be the next thing after the wiring. I've got all the gauges out too, and will clean them all up before I put it back together. No real surprises so far...
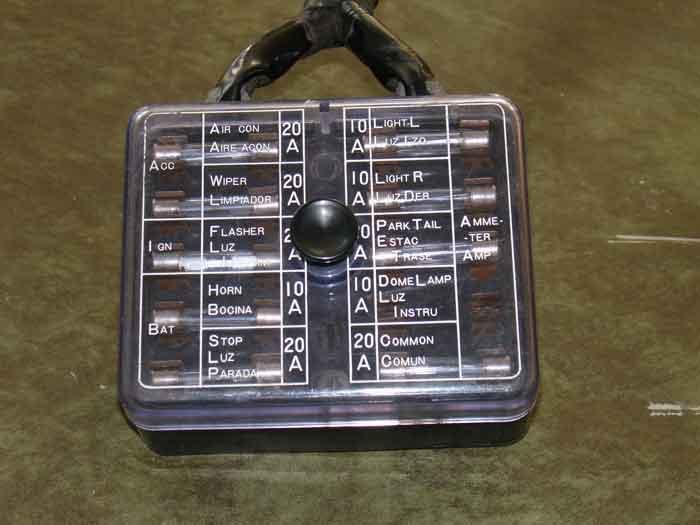

-
29 Jan 2006 - ...And Waiting... That's right, still nothing physical happening to the car. But the end of this lull is (perhaps) in sight. During this week just past things have started to come together. That first small batch of parts for the transmission swap arrived. Not all of what I need, but some of the required new parts - slave cylinder, pilot bushing, etc. A second order of new parts is still in the future, as well as a batch of used stuff. The factory service manual that I didn't expect until early February also arrived, much sooner than I had figured. So I can now easily find hints on how to do things, as well as find all the various specs and torque values (and wiring diagrams!!) I will need. I no longer have to wing it. As for the wiring, I have located a good dash harness assembly and fusebox to go with it. These parts might be here and ready next week, but surely by the following week. Hopefully this will be all I need, but if not the engine compartment and body harnesses are available. Once in hand, I can begin cleaning, testing and repairing as necessary. Then I can plan the replacement of the bad parts. And last week I mentioned the set of suspension springs I had reserved. Well, those also were shipped late this week. But when they get here, they'll just be checked over and put away for the future. The suspension will be one of the last mechanical areas to be refurbished. So the next thing to happen will almost certainly be the removal of the dash for the wiring replacement. Probably not as soon as next weekend, but maybe later next month. I will continue to round up the remaining parts for the transmission swap, as I expect to do that as soon as I get the wiring sorted. Stay tuned!
-
22 Jan 2006 - Still Waiting... Another week with not a lot to show. Still awaiting word on a wiring harness, the likely supplier for that part thinks he'll be able to confirm that he has what I need this coming week (if all goes well). I've done some additional hunting just in case, and have a couple possibilities in reserve. I've given some thought to picking up a parts car, too, should the opportunity arise. But I don't know where I'd put a second car... I've also continued to slowly gather parts for later tasks of the project. Early next week I should receive a small batch of clutch parts as I begin to prepare for the transmission swap. I've also ordered a copy of the factory service manual, but it probably won't be shipped until the first of February. Lastly, I also have a new set of front and rear springs reserved which should be ready for shipment soon. No, I won't be ready for these for a long time yet, but I felt this set was something I didn't want to miss out on. I got word last Fall about a limited run of new reproductions of the factory European Stage I springs that were a popular dealer option in the early seventies. These springs are slightly firmer to give better handling, but - unlike all the other performance springs available today - they will not significantly lower the ride height. So I reserved a set early to make certain I'd get some. Oh yeah, remember I said the new key didn't work in the glovebox lock? I compared the new and old keys closely, and decided that there was a very small difference that I could fix with a small file. So the new key now works in all the locks. That's all for this week, here's hoping that I'll have more to report next time.
-
16 Jan 2006 - Marking Time So what happened to the Z this past week? Almost nothing. Some more research, hunting a few parts down, and a key. For wiring harness, I found a supplier who is pretty sure that he has what I need. It might be a while before he can pull the parts, but since I don't really have any trains to catch here, that's OK. Most other suppliers of used Z parts have either told me that they don't have what I need, or have tried to sell me harnesses for a different year. I decided I'd rather wait for the correct parts. I've spent a bit of time getting distracted too. Seems like every time I turn around there's some part on eBay or Craigslist that I will probably need before the car is done, but certainly don't need to have right now. I need to stay focused on one task at a time. (Well, maybe two tasks can happen concurrently.) The wiring is still job 1 for now. So anyway, I really don't expect to get a lot done on the car until I get the wiring taken care of. Which will primarily consist of the replacement harnesses, a new fusebox and a lot of time. I am still a bit bothered by the engine too. In the last update, I had reported that the new coil fixed the engine miss. Turns out that's not altogether true. It is much better, but cylinders two and five are still weak. When the engine is fully warm it's not very noticeable, but it is there. If I pull one of the offending plugs when it has been running for a short time (engine cold), the plugs are wet and smell of gas. If I pull one when it's fully warm and running better, the plug is dry but still black and sooty. A plug from one of the other cylinders has a tan color to the electrode. Reading plugs can be tricky, but this does seem to indicate that something is different in #2 and #5. I just haven't figured out what, yet. Lastly, I had a little problem getting the door unlocked today, so I took the key code from the sticker inside the glovebox to a locksmith, and had them cut a new key from the code, not from the old worn key. Costs more to have done this way, but in this case my old key was so worn that I couldn't see wasting my money by having it copied. They had a hard time finding a blank, but once found they were able to cut a nice clean key. The new key works well in both doors and the hatch, but not the glovebox. The old worn key works in that lock, but not the new one. I don't know that I'll ever lock the glovebox, so I don't think I'll let that concern me for now.
-
8 Jan 2006 - Ignition Update Just a quick update this weekend, as I continue to prepare for the replacement of the wiring harnesses. Earlier today, I installed a new ignition coil and bracket. My hope was that this would finally be the item that cures the on-going engine misses I've been fighting. So during the week I picked up an inexpensive black coil and matching bracket, as specified for a '79-83 non-turbo 280ZX (since that's what my ignition is from). Installation was very simple, took more time to open the packaging and gather the tools than it did to actually install it. And this time, I was rewarded! It started quickly and runs smoothly. No miss at all! The improvement was huge. And that was it for the weekend, as the majority of my resources right now are devoted to the wiring. I'm slowly starting to search for the wiring harness sections that I need. That means that there may not be a lot happening with the car until the wiring is handled. But stay tuned anyway, I'll at least keep you updated as the hunt progresses.
-
31 Dec 2005 - Back to Work The holidays are winding down, but I've still got some time off so I had time to play with the car before the end of the year. I started on Friday by draining the oil to replace the pan gasket. If you do it just right, you can get it done with the engine still in the car. This was to fix the oil leak that I had found while was working on the carbs. I also planned to drop the oil pump and reposition the distributor drive shaft while I was under there. This would allow me to finally be able set the timing correctly and still use the lock bolt. So I pulled the drain plug, and with it came a bunch of RTV sealant and a thick paper washer! The copper sealing washer had been crushed so many times that it was paper thin itself, and so it no longer sealed. So rather than get a new copper washer for it (the one I picked up was 10 cents), whoever put the engine in my car tried to use paper and silicone sealer. That should have prepared me what what came next... I started pulling the small bolts from around the pan, and quickly noticed that all four of the ones across the front of the engine were missing! Since the holes for those go all the way into the crankcase, my unknown benefactor had squirted RTV all over the front of the pan to attempt to seal it. After getting the pan off, I then proceeded to clean all the sealant off the engine and the pan itself. While cleaning, I noticed that one of the four "missing" pan bolts was actually broken, with the broken piece still in the timing cover. Whoever broke it appeared to make a few attempts to remove it, obviously without success. While mulling over my options regarding the broken bolt, I pulled the oil pump and positioned the distributor drive correctly. As I suspected, it was one tooth off, which is quite easy to do. This task went just fine. So I went back to cleaning while thinking about the broken bolt. And while doing so I found the OTHER problem someone "fixed" with silicone sealant. It seems that there is a small puncture hole in the bottom of the aluminum timing cover. Hard to say for sure how it got there, but since the hole is located right next to the broken oil pan bolt I suspect that the damage occurred during the failed attempts to remove the broken bolt. Like the other problems, a liberal coat of silicone was the solution of choice. So. Another problem. I seem to find new ones faster than I fix the old ones. There's no reasonable way to get the broken bolt out of the timing cover while the engine is in the car, and now I find that the timing cover itself is bad as well. Time to make do for now, and worry about permanent fixes later. I replaced the oil pan with its new gasket, and three new bolts. One bolt is still missing of course, where the broken one is still plugging the hole. It should work better than before, however. For the hole in the timing cover, I cleaned the area thoroughly and then applied a patch made of Permatex Liquid Metal. Since this part of the engine is not under pressure, I think this will work at least as well as the silicone did. This will buy me some time to decide how I want to proceed. I let the Liquid Metal cure overnight. After I got oil back in it Saturday morning I set the timing and I drove it to the gas station to put a few gallons in the tank, and also to warm it thoroughly. I once again own a Uni-syn carb syncing tool (sold my last one after I sold the MG years ago), so I figured it was time to do the carbs right. So with the timing set correctly, I properly synchronized the carbs. Once that was done I spent some time fine-tuning the mixture. I think that I am now (finally) pretty much satisfied with the carbs and their mixture. It still has a miss though, especially at idle. And it runs smoother the warmer it gets. So I decided to check the compression myself. I got 170-165-165-170-165-170, which is good for this engine (and is consistent with what I was told by the seller). After putting it back together and playing around with swapping plugs, wires and such, I believe that the problem is a weak spark which may be caused by the coil. When it is missing, it smoothes out at higher revs, and it does run much better when it gets good and warm. I used my inductive timing light to test the consistency of the spark, and found that when it is missing several cylinders don't have enough spark to flash the strobe. If you pull a plug wire and observe the spark, at idle it is small and inconsistent. Rev it, and the spark is much stronger. When warm (and running better) the spark is also much more consistent, even at idle. Coils can be rather temperature sensitive when they are going bad, so I think a replacement may be in order. Final note for today, after running the engine a good while today, and even driving it around a bit, there is no fresh oil leaking at the front of the engine. So the new pan gasket and Liquid Metal seem to have cured the oil leak. So the past few weeks have revealed a couple of fairly important issues that will need to be addressed before the car will be ready to drive. One is the wiring, the other is various engine problems. Regarding the wiring, I now know all the original part numbers for the three major harness assemblies. I've considered several options, including sending various harness parts off to be professionally restored. But since my goal is not to build a show car, but just a very clean daily driver, I really feel that the restored harnesses are overkill for this car. So my plan at this time (subject to change, of course) is buy a matched set of three harness assemblies (ideally all from the same car), and then check each wire, clean every terminal, and repair and re-solder as necessary. That should give me the reliable electrical system that I need, at a much lower cost (other than eating a good chunk of my time). It also gives me the option to get harnesses from a manual transmission car, which are not required for the transmission swap (the auto harnesses will work just fine), but it does open up more possible donor cars. As for the engine, it still seems to be relatively sound, but there are several items of concern. One is obviously the timing cover. It will either need to be replaced, or at least removed so that it can be repaired properly by welding. While it is out of the car, the broken bolt will need to be removed, if possible. But since that bolt may have broken because it was cross-threaded, a replacement timing cover may be the best bet. There is also another broken bolt, this one in the cylinder head. It is one of the exhaust manifold bolts, the one closest to the firewall. Like the one in the timing cover, it would be much more difficult to extract it while the engine (or at least the head) is in the car. Considering all this, when I swap the transmissions later in the Spring (or Summer) I may pull the engine and transmission as a unit from under the hood. I had been considering pulling the transmission only from under the car, and leaving the engine in place. But pulling both may be easier in some ways, and it will give me an opportunity to evaluate and hopefully repair the engine at the same time. The cooling system is also rather haphazard, and I'd like to overhaul it while the engine is out of the car as well. That will require a new radiator, all new hoses, new water pump, new thermostat housing, and probably a new fan and fan clutch to replace the aftermarket electric fan now on the car. On the plus side, the engine does run pretty well when it's good and warm, has good oil pressure and compression, and makes no bad noises. The carbs seem to be good enough as is, although I'll probably want to replace the nozzle hoses and float bowl gaskets. If I do that, can get the ignition dealt with, and replace the timing cover, the engine should be fine. So that's it for 2005. I've had the car for three full months so far, and there have definitely been some improvements. Of course, we still have a long way to go.
-
18 Dec 2005 - Wiring Revelations Did I accomplish anything you can see or touch this past weekend? No. But I did learn some things. I spent my time learning about 240Z wiring harnesses. Like most cars of this vintage, Datsun built the wiring harnesses for the early Z cars in a number of connecting pieces. For the early 240Z there were "officially" three main pieces - engine, dash and rear sections. I say "officially" because it is more complex than that. For example, the dash section actually consists of two entirely separate harnesses, taped together into one "assembly." This two-part assembly was listed for replacement under one single part number. But each of those two sections also has its own part number, neither of which is the same as the single number of the replacement assembly. The number for the dash harness assembly is not on the harness, and the individual numbers are not listed anywhere in Nissan's parts catalog. I found this out during my initial searching for replacements for my car's melted dash harness assembly. The individual part numbers on my pieces are 24013-E4705 and 06. These appear to translate to number 24013-E4703 for the assembled pair. The bad news? This assembly is no longer available new from Nissan (no surprise there), and might even be rather rare since it was only fitted to automatic-equipped 240Z's built from 10/70 through 12/70. Three months only. Now I know why no one has tooled up to build replacement wiring harnesses for the 240Z. Apparently Nissan changed the harnesses not just every model year, but often every few months. In four years of 240Z production, there were at least six or seven major variations of wiring harnesses, for each transmission type. Call it ten different configurations, or thereabouts. Worse, the dash harness assemblies are not the only ones that are specific to transmission type. The engine harnesses are different that way too. And no one can tell me for certain if you can or can not mix manual transmission dash harnesses with automatic engine harnesses. The general consensus though, is that you can not. So it boils down to a pair of choices. I can try to find a good, intact (and possibly rare) dash harness assembly from an automatic car built between 10/70 and 12/70, or I can replace both the dash and engine assemblies with similar manual transmission harnesses from the same car. Any other option is uncertain - it may work, but it may not. So I've got my feelers out for harnesses and/or parts. Stay tuned...
-
11 Dec 2005 - Hatch Seal and Wiring I don't know about you, but for me the holidays don't leave lots of time for playing with my cars. But this weekend did see a little work on the car, even so. During the week, the outer hatch seal and oil pump gasket arrived. I didn't have time to tear into the oil pan and pump, but I did install the hatch seal. Since it appears to me that the outer seal is primarily there as a rain gutter, this should help to keep the inside of the car dry when it is outside and raining. I used the one-piece seal rather than the three-piece. I haven't confirmed which style is original to my car, but it doesn't matter to me either way. The one-piece is easier to get installed properly, so thats what I got. So yesterday I removed the hatch, pulled off the remains of the old seal (which was a one-piece, by the way), cleaned the channel and glued the new seal down. It fit great, and seals nicely against the hatch when closed. Today I spent some time trying to debug the wiring mess, and the findings aren't good. When the original fusebox melted for one of the previous owners, it took out one or more wires in one of the harnesses as well. Said wire(s) got hot enough to destroy the insulation on several other wires in the bundle as well. Several of the wires appear to be shorted together. This is where my problem with a constant battery draw comes from, I'm sure. The farther I unwrap, the worse it gets. So I'm beginning to track down data on the various harness pieces, as I fully expect I'll have to replace some. Specifically the one(s) that connect to the fusebox leads with six-terminal connectors. There are several things I need to determine. For example - there are two separate medium sized wire bundles leading to the fusebox. As far back under the dash as I can see, they remain separate. Are these really separate harnesses? Or do they merge into one somewhere back in there? I also need to determine how specific the different 240Z harnesses are. My car is an early '71, and since I'm not worried about absolute originality, will harnesses from a late '71 or a '72 be close enough that they can be made to work reasonably? For example, could I use a '72 harness if I use the later short pigtail fusebox? And that's where I left it today, with lots of questions, and few answers. The project has gone extremely well up till now, with noticeable improvements without much in the way of money spent. I've got a feeling that's about to start changing...
-
3 Dec 2005 - Not Much News Not much Z news this week. Got and installed a new air filter element, but that's not really notable. (Oh well, I noted it here anyway.) Also finished replacing and installing a few more of the various vacuum and vent hoses on the carbs and air cleaner assembly. That's about it for actual work on the car. Started it again today, first time for a cold start since I got the carbs adjusted. Started from cold fairly easily, and runs very nicely when fully warm, but the in between is less than stellar. If I leave it choked, it runs rich and starts loading up and fouling the plugs. If I shut off the choke it wants to die. Now I know why Datsun designed these cars with hand throttles - if only mine was so equipped! I also prepared for future tasks. I have an oil pan gasket now, and ordered a oil pump gasket today to go with it. Once the pump gasket arrives, I can proceed with replacing the leaking pan gasket and correcting the distributor drive shaft timing. Might get to that later this month, but might not. Also ordered a rear outer hatch seal to keep rainwater out of the back end of the car. That will definitely get installed later this month.
-
28 Nov 2005 - More Alternator and Carbs This past Thursday was a holiday here in the USA, so amid all the family, feasting and travel there was only limited time for playing with my car. But I did find time to install the alternator jumpers (with diode) and do some quick and dirty carb adjustments. I had picked up the diode and built the jumper wires (one with diode, one without) earlier in the week, but didn't want to connect them until the weekend when I would have some daylight so that I could see the colors of the wires. So on Thursday morning I installed the jumpers. I would have to start the car to test them, but decided I couldn't do it right then as I had disconnected the choke cables in preparation for shortening them. I didn't have time to shorten them right then, and didn't want to mess with reconnecting them for such a short test. It would have to wait until later. But on Sunday afternoon, I did have some time, and so I started by shortening the choke cables. After finishing that, I checked the float levels. The rear carb was about where it should be, but the front carb's level was 2-3 mm too low. After readjusting that, I turned both mixture adjusters all the way in, and then backed both out by 2.5 full turns as a starting point. I also remembered that since the injection has been removed, the ignition module I am still using (for now) retards the ignition by about 8 degrees if the injection isn't connected, so I advanced that by eye before attempting to start it. Starting it was still a bit of a struggle, as my "baseline" setting of 2.5 turns was apparently too rich. It took a bit of fiddling to get it close enough that it would run without me babying the throttle, but once it would idle on its own, it didn't take too long to get it running decently. So now the carbs are set fairly close. When warm, it starts almost instantly, idles fairly well at about 800 RPM, no longer misses at all, and has good throttle response. I'm certain that they could be fine tuned a bit, but they are plenty close enough for now, considering that there is lots of other work to be done before it will be ready to drive. As for the alternator and its diode, the results are all good. The ammeter shows a good charge, and the engine now shuts off with the key as it should. And the tachometer works as well, and seems to be reasonably accurate. No remaining issues there, time to move on to other things.
-
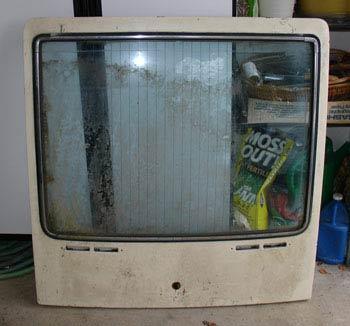
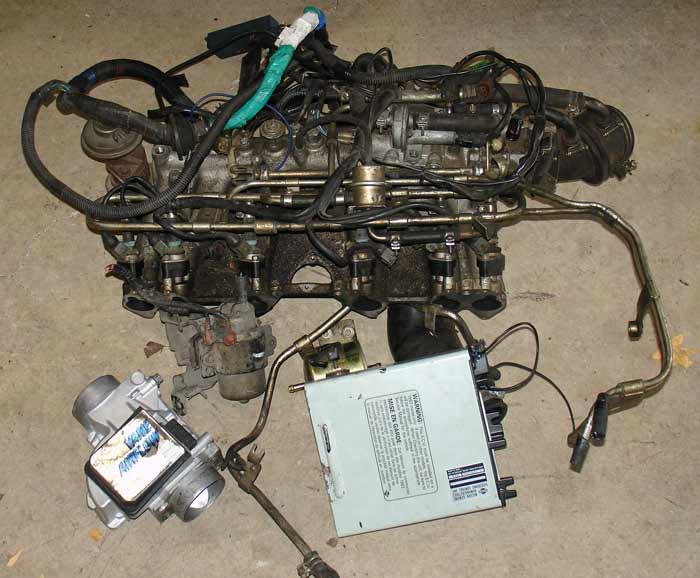
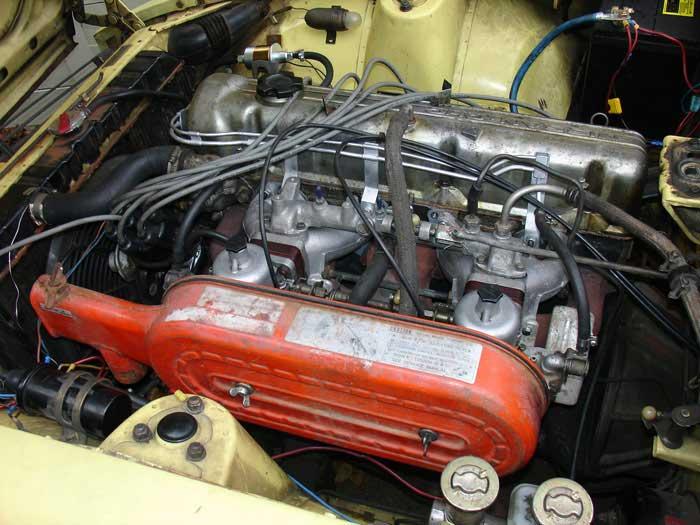
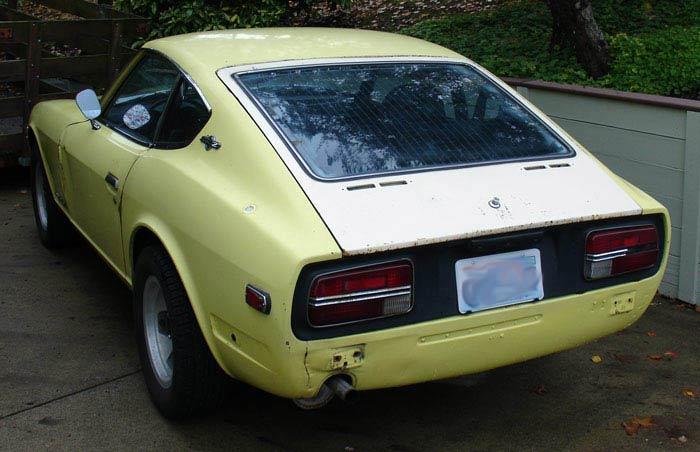
15 Nov 2005 - Carbs and Hatch The news started early this past week. On Tuesday a box full of parts from Danny's Datsuns arrived. I had ordered a few parts for the upcoming carb installation from him - an air cleaner, heat shield, return springs and choke cable assembly. At first glance, it all looked good. But after closer inspection, the only parts that were acceptable were the return springs. The choke cable assembly was wrong, it was for a '72, not the earlier '70-71 that I needed. The heat shield had one mounting tab broken off, and a second one (there are four) was cracked. And the air cleaner looked OK from the outside, but inside the air horns and crankcase vent tube had all been cut off with a hacksaw. I called Danny to explain, and he was great to work with. He was certain that he could find an acceptable air cleaner and heat shield for me. Not as certain about the early choke cables, but he'd give it a shot. And since his shop is only 60 miles from me, I asked if I could drive down rather than ship the stuff to him. He agreed to that quickly, saying that by doing so, I can look over the parts and approve them there on-site. "Plus," he said, "you never know what else you might see while you're here that you just have to have." So we made an appointment for late Friday afternoon. Deanna and I drove down and easily found the shop. Dead Z's everywhere you looked. Kind of exciting (lots of parts) but sad (dead Z's) at the same time. Met Danny and he began to look for suitable replacements. As promised, the air cleaner was easy - he had a shelf full of them. He found a proper choke cable assembly in fairly short order, although the cables themselves were in bad shape. But he gave it to me and told me that between it and the one he sent originally, I should be able to make an early one that was good. The heat shield was tougher, none of the singles on the shelf were intact. So he proceeded to strip one off a recently acquired L24 on the floor of the shop. While he worked getting the heat shield off, Deanna and I wandered around just looking at all the stuff. And just as he predicted, we found something we "had to have." We found dozens of rear hatches leaning against a wall. Looking through them, we quickly found that three were the early hatches with vents that our car should have. The hatch was one of those parts we knew we'd have to find, but would be reluctant to buy sight unseen. So we picked one out and loaded it in the back seat for our trip home. Saturday morning found me moving the Z into the garage for the carb install. I was pretty sure that I had most everything I needed. Shouldn't be more than a "one or two trip" project (meaning trips in the middle of the job to get unforeseen parts). BEFORE Started by pulling the FI fuel pump and restoring the fuel lines near the tank to factory configuration. I had decided that while mounting the new pump up front isn't ideal, would be far cleaner, easier to work with, and much easier to wire. Then I capped off the coolant fittings to the injection manifold, as I won't be using that on the carbs. Stripped out all the wiring and the brain, then finally pulled the whole mess out of the car. THE MESS Started installing new stuff after lunch. Installation went fairly smoothly, only a couple of small bugs. After getting it all physically in place, the last three tasks were: mounting and plumbing the fuel pump; wiring the pump; and rewiring the ignition. Those tasks went well also. It turned out to be a "two trip" job, I finished late Saturday afternoon. AFTER It started rather easily, and runs surprisingly well, considering that the carbs are unchanged from however they were when I unpacked them from the shipping box. It is running rich, but it runs. A short drive showed that yes, it can run smoothly and not miss, so the results are encouraging. There is still much tuning to be done, but the main pieces are in place. Good news and bad news - the tach now works, but it is not accurate, reading quite low. Also, the engine continues to run after turning off the key, so there is still a wiring issue to be dealt with. These two problems are probably related, as the tach is much closer to correct when the engine is running with the ignition turned off. I will also need to shorten the choke cables at some point as well. Lastly, today I swapped the new-old hatch onto the car. It actually fits much better than the one that it had before. I suspect the other one had bent hinge mounts. Plus the color (cream now, originally orange) is much closer to yellow than the blue was. I think the glass will need to be replaced, but this hatch is actually in much better shape than the last one, and is "correct" as well.
-
5 Nov 2005 - Brakes and Ignition Took a break from car stuff last weekend, but started gathering more parts during the past week preparing for this weekend. First order of business today was to revisit the front brakes for the last time. I installed a pair of remanufactured calipers, and bled the brakes yet again. This time it's right. Good pedal, feels like a sports car's brakes should feel, and it stops straight. So the brakes are almost finished, all they lack is a parking brake cable. I will probably do that when I swap the transmission, as I think I have to remove the cable to drop the gearbox anyway. Next was the valve adjustment. I picked up a new valve cover gasket during the week, and figured out that I did not need to get a new narrow feeler gauge to do the adjustment after all. I realized that I didn't have to measure the clearance at the lash pad, I could measure it under the cam lobe itself where my normal feeler gauge fit just fine. (Too used to adjusting valves on pushrod engines, I guess.) Most of the valves were a bit loose, and the valves are now quiet. Spent the rest of the afternoon looking into the ignition. My initial plan was to remove the 280ZX electronic ignition and revert back to the original 240Z points type distributor. This was because I had read that the 240Z tachometer was not compatible with the later ignition, and I would rather replace the ignition than try to adapt a later tach into my dash. In addition, the current ignition looks to be just as "thrown-together" as the injection is. For example, the distributor timing was held in place with a pair of vice-grips because the hold-down bolt wouldn't fit if the timing was adjusted properly. So I figured if I was going to have to start over, I'd rather go back to factory. But recently I've heard from several people running this same ignition on their 240Z's with no problems - the 240Z tach even works. More research showed me that if you bypass the ballast resistor and make a few simple connections it should all work. So I thought I'd spend some time looking into this option. So I traced the wiring and made a few tests. I was able to get it running using the factory wiring, but couldn't get the tach going yet. I now believe that the reason the tach won't work is an additional wire on the negative terminal of the coil that goes into the injection harness. The injection won't run without that connection, but when it is connected I believe it is grounding out the tach signal. So I can't verify the tach function until the injection is gone. Another thing waiting for the carb installation. I then pulled the distributor to look at the timing adjustment. I wanted to get rid of the vice-grips. I found two things - one was that the adjusting plate on the bottom of the distributor could itself be adjusted as well. When adjusted as far as it would go, I could get a hold-down bolt in and not have to use the vice-grips. After reinstalling the distributor, I was able to barely get the timing close enough for the time being. The reason I couldn't get it any better is that I discovered while the distributor was out that the distributor drive from the oil pump appears to be one tooth off. Since it's close now, I probably won't correct this until sometime later. I expect to pull the engine to replace seals and gaskets (probably next Spring), and that would be a perfect time to address this. So I am now fairly comfortable with the thought that I can retain the later electronic ignition. I am pretty sure I can get the tach to work, and once I get the drive from the oil pump corrected everything else should be fine as well. This option should be cheaper, as instead of needing a distributor, distributor support, coil, ballast resistor and distributor cap, all I'll need is a different (E12-80) ignition module that doesn't require input from the injection computer. More parts are on their way, so the carb install is getting closer. Last week I ordered an air cleaner, heat shield, return springs and choke cable assembly. Those parts should arrive late next week. I also found a good buy on the shift lever for the transmission. The transmission swap is much farther out, probably not until Spring as well, but if I see parts I need at a good price I'll try to gather them ahead of time.
-
22 Oct 2005 - More General Assessment Put a new bulb in the dome light yesterday evening, and it mostly worked. Definitely works fine when turned on manually, and most of the time when the driver's door was opened. Not at all with the passenger door. So this morning I removed the door switches and cleaned the contacts. All works properly now. During this process I found that the "key-in-switch" buzzer had been disconnected. For kicks I reconnected it. The buzzer not only works, it's one of the most annoying buzzers I have EVER heard. I quickly disconnected it again. Laid more plans on the upcoming return to carbs - where and how to run the plumbing, what to connect, what to disconnect, what to remove, etc. Not ready to start that project until I get more of the parts. Pulled the cam cover, as it sounds as though one or more valves are misadjusted. Found that I don't have a feeler gauge set that will work on the narrow lash pads of the Datsun. So now a new tool is needed. Lastly, did more sorting of the wiring in the heater panel area. Also looked over the heater controls them selves. It's missing some of those little clamps that retain the control cables, and at least a couple of the cables them selves. Putting that all back together will be a small project all by itself.
-
16 Oct 2005 - Carb Assessment Started going through the carbs and associated parts today, to learn more about what I already have, still need, and still need to do. I found that on closer inspection, the manifolds are a bit later vintage than the carbs. They appear to be from a '72 as they have the water passages in the manifolds and into the insulator blocks. But the carbs have no corresponding water passages in them. This shouldn't be a problem as long as I don't hook up the water lines to the manifold, the earlier carbs will still fit just fine on these manifolds. Spent some time cleaning and straightening the fuel rail, it's not perfect but it'll do. Then started pulling parts off the manifolds for cleaning. The manifolds and balance tube cleaned up nicely with a wire brush, so then I turned my attention to the carbs themselves. After looking them over carefully I decided that I will want to rebuild them before long, but that they'll probably be OK until I acutally start driving the car. Forgot to look for a bulb for the dome light. Maybe some time during the coming week.
-
15 Oct 2005 - Parts, Title and Misc. I spent some time preparing for later parts of the project, but not a lot of results that show today. Got some more parts during the past week, though. Today's first car related task was to get the title transferred into my name. Unlike some places back East, out West we have titles for all cars, no matter how old they are. So I needed to take the Washington title down to Oregon DMV and make the change. Since I was transferring an out of state title, I had to take the car itself to DMV so that they could physically compare the VIN on the title with that on the car. I had known I'd have to take it there for this, which is why I'd been working on making it driveable (more or less) these past couple weeks. So I gathered the papers, connected the battery, and fired it up. Of course, the only local DMV office that's open on Saturdays is on the opposite end of town. The car actually drove fairly well, all things considered. The suspension needs a bit of work, but does the job for now. The engine ran acceptably, sometimes quite good in fact. I think that the bad injector on number 6 was deciding to work intermittantly, because at times the car didn't miss and ran strong and smoothly. Good to know, it confirms that the engine itself is probably OK inside. Surprisingly, DMV was not swamped! Got the paperwork handled in short order, and drove it back home. Part way home I ran into a mild shower, enough to require me to turn on the wipers. I did so, while crossing my fingers that they would work better than they did when I tested them in the garage. They worked, albeit rather slowly at first. Worked better the longer they ran, so I suspect the linkage needs to be disassembled, cleaned and lubricated. Another day's project, though. After I got it back home, I spent the rest of the afternoon assessing future parts requirements for the carb install. I was able to start doing this because the carbs and manifolds - that we forgot to pick up with the car - arrived earlier in the week. What I got is a functional looking pair of SUs that appear to have originally come on a late '70 or early '71 240Z. (Four screw pots without float drains, for those who care about details.) The carbs came on a pair of E88 manifolds, with all linkage parts and an original fuel rail. I still need to find a heat shield, two return springs, choke cable/lever assembly and an air cleaner. I will also need a different (lower pressure) fuel pump, and a whole pile of little odds and ends. Since the injection isn't working well, and has some electrical problems as well, I really want to get the carbs back on the car soon. The other parts I got during the week was a one of a kind deal. While surfing eBay last Sunday, I found an auction for a virtually new clutch pressure plate and disk. The seller only lived 20 miles away (no shipping), and the current bid was at $1.00 with less than 30 minutes to go. I ended up winning the auction for $5.50! Even better, the seller is a Z enthusiast who has lots of contacts and promises to be a valuable resource as I get further into the project. Lastly (and the only actual work on the car itself today), I removed the interior light to see what I had. It didn't work, but I didn't know whether it was just a bad bulb or something more serious. It was both, actually. The bulb was obviously shot, but it was also apparent that the connection at the hot end of the bulb was bad. The wiring tested fine. I took the lamp assembly apart, thoroughly cleaned it and repaired the bad connection, but don't have a replacement bulb to finish the job. Maybe tomorrow.
-
8 Oct 2005 - Brakes and Cleaning Again Not a lot to do today, gathered some stuff during the week and went to it. The first order of business was to tear into the front brakes, as I picked up a pair of new front brake hoses earlier in the week. Started on the left side, replaced the hose, checked and cleaned the pads and hardware. No problems, it bled out fine, and I went to the other side. Didn't go so well on the right side, which shouldn't have surprised me. After all, since the car was pulling to the left, the right front must not have been working well. Got the hose on without problems, but as I got to cleaning the caliper I found the inside piston was totally seized. Made some non-destructive attempts to free it, but no luck there. Re-assembled the brake and bled it out, then watched the caliper while my wife applied the brakes. The inside piston never budged at all. So now I've pretty much worked through the entire brake system. The needed hoses are on the car, and it still needs a pair of rebuilt calipers, and a hand brake cable. Those two items will pretty much complete the brake system. The other new item for the car is not as much fun, as it doesn't help the car work or look any better. (Well, it hides the bad paint and rust.) But for a while, the car is going to have to spend a fair amount of time sitting outside. I don't like it, but that's the way it's going to have to be. So we decided it needed a car cover. What I bought was a fitted all-weather Technalon cover from Motorsport Auto. After cleaning the car I put the cover on, and it fits just fine. It was obviously designed specifically for this car. It looks like it will do the job just fine. Other odds and ends - since the car cover doesn't come with an antenna hole, I decided to see if I could get the antenna to retract. After jumping the wiring, I could hear the motor try to move the mast, but it didn't budge. So I pulled the antenna out of the car and opened it up. What I found was that the spool case was totally filled with rust. No way that antenna is ever moving again. I left it out of the car so the car cover would fit. I found a really tattered pair of old Fiamm air horns poorly mounted behind the grill. Out they came. Tried to hook up one of the factory horns (which were still in place), but the horn relay doesn't click, so no horn yet.
-
2 Oct 2005 - Misc. Electrical Had some non-car tasks to do today, but still managed to squeak out some time to explore the car a bit more, mostly electrically. Looked at the turn signals first. The left side was blinking very slowly, and the right side not at all. First I swapped the flasher unit with a spare I found in the car. That fixed the slow blinking, but of course had nothing to do with the right side. That I traced to the column switch. I found that if I pushed the lever slightly past the detent the right side would flash normally. So I removed both of the column switches for cleaning and such. The right hand switch (wipers and lights) worked fine, and cleaned up quite nicely. The turn signal switch was rather sloppy feeling, a bit rusty on the stalk, and didn't work well for right turns. I disassembled it, cleaned and adjusted the contacts, sanded and painted the stalk, and replaced the tension pin that the stalk pivots on. The results? I now have a very good looking turn signal switch that still has a sloppy feeling stalk, and doesn't turn on the right blinkers until you push the lever past the detent. In other words, all I accomplished was to make it look better. I will have to replace it at some point. Oh, well. Can't win them all. Other than that, spent more time tracing and debugging the wiring. Much of the wiring that is bad will be removed with the injection, so I'm not going to go too far on this until after that is handled.
-
1 Oct 2005 - More Brakes, runs better Didn't really do much to the car during the week, but did do some thinking and planning. For example, I remembered that the Z rear brakes were self-adjusting, but that the adjuster mechanism is activated by the parking brake. And my parking brake cable is disconnected because the cable is frozen. So the self-adjusters haven't been self-adjusting. Which could be another reason the brake pedal was still a bit lower than I thought it should be. So today's first task was to adjust the rear brakes. I found that the aftermarket steel drums lacked the access holes in the face that the original aluminum drums had, so I had to pull the drums, turn the adjusters, replace the drums to test, and repeat as needed. The left side was a bit out of adjustment, and the right side was WAY out. I think the adjuster was bottomed out. On the plus side, both adjusters were in good shape and turned freely. Now the pedal feels better (although still a touch low), and I'll replace the parking brake cable soon to keep them that way. So of course, now I want to go drive it to test the brakes. But the car still makes that horrible howling noise, and had no power to boot. Got to do something about that. So I start it up, get out of the car and get ready to make it howl and see if I can hear where the noise is coming from. So as I rev it the first time, I have my head cocked to try to listen better for direction. And my eye is on the air flow meter in the front left of the engine compartment. And as I rev it, the rubber bellows between the AFM and the throttle body half collapses, like a vacuum cleaner hose with your hand over the end. As part of the injection installation, the car has a home-made cold air intake on it. There is a rubber duct that runs from the AFM through the radiator support, where a large 3" diameter exhaust pipe elbow is connected. The elbow comes through the radiator support and bends 90 degrees towards the center of the car in front of the radiator. A large paper filter element is press fit onto the pipe. So I reach down and remove the elbow and filter from the rubber duct. Suddenly the idle speed increases. I rev it. No noise, and the engine revs eagerly, even with number 6 not firing. I look at the filter element on the elbow, and find that it had been pushed so far onto the pipe that the rubber cap on the closed end was plugging the pipe. The engine couldn't breathe at all! The howling noise was the sound of the air forcing its way past the rubber seal, which was also being sucked even tighter by the engine vacuum! Took it for a test drive. Totally different now. Even with one dead cylinder, the car revs and pulls responsively. It's much happier now. The automatic shifts well, and makes no bad noises. I did find that the car pulls hard to the left when braking though, so back to the garage to check the front brakes over. When I pull into the garage and shut it down, Deanna asks me if I have any idea how much gas it has in the tank. My answer is no, the gauge isn't working. Hmm, another thing on the list for today. Front brakes look much like the rears, good pads, recent rotors. But the hoses are shot. That will have to be a priority. While the wheels were off, I determined that the wheel in the spare well is not the same as the two front wheels. Different brand and type of construction. So I have 5 dish mags, made by three different manufacturers. Somewhere down the road a matching set of four will be needed, but that's a very low priority right now. Time to look at the gauges. The speedometer works fine, including the odometer, trip odo and warning lights. Tachometer... not so much. Apparently early 240Z tachs don't work with later Nissan electronic ignition like mine. I can either replace with a 280Z tach, or ditch the ZX ignition. A quick look makes me think the vacuum advance on the ZX distributor isn't working - if true then I'll probably go back to an early distributor that likes my tach. No use spending money on a tach for a distributor that is sick as well. Next - oil pressure gauge works, and shows good pressure. Temperature gauge does not. Looks to me as if the ZX motor doesn't have a sender that is compatible with the 240Z gauge, so the wire was never connected to anything. The current temperature sender is connected to the injection brain, so this will need to wait until after the injection is gone. While looking at the cooling, I figured out that the radiator is not original, it's much larger. No idea what kind of car it came from. It is enough thicker that they had to convert to an electric fan, no clearance for the factory unit. Seems to work OK, the fan does come on when needed. Ammeter - OK, although it sure is showing a high rate of charge, close to 40 amps. I probably ought to connect my trickle charger to see if I can top up the battery. Fuel gauge looks dead. So I remove it and check the wiring, which checks out fine. Take a good, close look at the gauge itself and I can see that the glass has come loose and the needle is pinched in the empty position. I take the gauge apart, reposition everything, reassemble and re-install it, and it works fine. (I have almost half a tank.) Clock is dead. No surprise there, old Z clocks are always dead by this time. Somewhere down the road I'll get it converted to a quartz movement. Spent the rest of the afternoon tracing and cleaning up wiring. Lots left to do there. I will definitely need a new fusebox before I return the car to the road, the original is melted badly.
-
25 Sep 2005 - Brakes, Battery & Cleaning First order of business on the first day - get a battery. The picture of me in the garage that first evening home was me testing the battery it came with. No surprise - it was the wrong size, totally dead, 8 years old and wouldn't accept a charge. So the next morning I went to a local parts house and bought a new battery for it. This made moving the car much easier, no more jump starting. But before I decided to trust it totally, I checked the system for a draw on the new battery. As I suspected, the wiring is hosed up and will discharge the battery in short order. So for now, I will remove the ground cable from the battery whenever I'm not working on it. Later I will track down the draw. Second order of business was to see if I could improve the brakes. At first I thought the master cylinder was bad, but after trying it a bit more I decided it felt more like air in the lines. I recalled that the previous owner said he had installed a rear wheel bearing a short while back. I know that changing the wheel bearing requires disconnecting the brake line, so I thought that was the first place to look. Found that the rear brakes were fairly recent and mostly good shape. Aftermarket steel drums, and new brake hoses, but the handbrake cable was froze solid and disconnected. When bleeding the right rear brake (the side with the new bearing), I found a sizable air bubble. This improved the brakes quite a bit. Not perfect, but useable. Took it for a spin, but was disappointed. It seemed to stop OK, but I really couldn't tell for sure because the car was still running much more poorly than I remembered from the first visit, and so I couldn't really give the brakes much of a workout. It was still hard to start, very sluggish revs, no power, and that loud howl when I did get it to rev. Plus it was still missing badly. Time to check a few basics. By pulling the plug wires one by one, I soon determined that the only cylinder missing was number 6. (Found that the previous owner had installed new NGK plugs and new wires very recently.) Going farther, I found that the problem was fuel, not spark. The fuel problem is not wiring, but does in fact appear to be a clogged or otherwise bad injector. Since I plan to remove the injection and re-install carbs (once the previous owner sends them to me), I tabled this and started looking for the howling noise. So I'd rev it to make it howl and listen. Then repeat. And repeat again. And again. The howl was so bad, my wife (who was outside working in the yard) came up and told me to let that go, out of sympathy for the neighbors. I knew she was right, so I reluctantly left this problem for the time being. Looked at the four speed box to see what I had. It turns out to be a type 'A' four speed that is correct for a 240Z of this vintage, and all gears feel smooth. No telling for sure how good it is until I put it in the car. Grabbed the shop-vac and started cleaning the car. Pulled the seats, inspected the floors and inside the rockers for rust (about what I had expected), and gave it a quick (very superficial) cleaning and sorting inside. Found the original Service and Warranty manual in the glovebox! The car was originally delivered on January 7, 1971 in Butte Falls, Montana. I may try to contact the original owner just for fun. Surprise! There is a spare tire, and it is also mounted on a slotted dish mag. Looks to be the same narrow 5.5 inch wide wheel as the ones on the front of the car. Says it is a Western Wheel. The rears are a different manufacturer and offset, so I may need to find a fourth narrow one to make a matching set. No jack or tools, though, even though the little plastic tool covers behind the seats are intact! Put the seats back in, and the rest of the interior back together, and gave it up for the weekend. Spent the rest of the evening looking at catalogs and searching eBay...
-
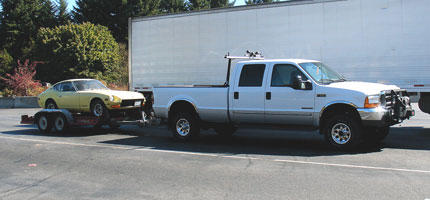
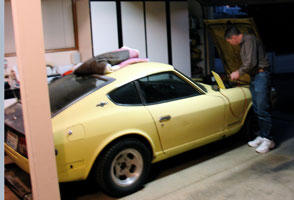
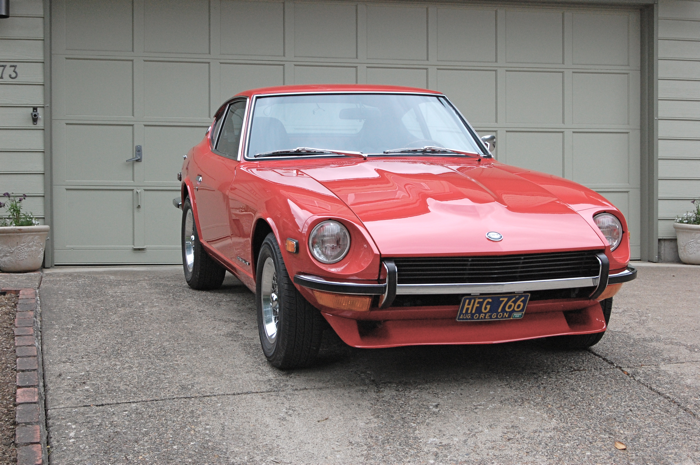
24 Sep 2005 - Bringing it home I had verbally committed to buying the yellow '71 in early September. Now I had to arrange to go get it. The car wasn't drivable, so I needed to trailer it. Problem being, not only do I not have a car trailer, I don't own a vehicle suitable for towing one either. Since I didn't want to have to rent a truck as well as a trailer, I arranged to borrow my brother-in-law's Ford F350. A bit of overkill, perhaps, but easily available. The truck was being used for the next couple weekends, but we arranged to borrow it for the day on Sept. 24. I called one of the local U-Haul locations and reserved a car trailer for pickup at 7:00 PM the night before the trip. Got the truck, went to pick up the trailer. Note to self - Some U-Haul locations are less competent than others. First they couldn't find any reservation. Seems the person I talked to early in the week was busy, and so didn't bother to actually reserve anything. No name, no notes, nothing. It turned out not to be a big issue, as they still had a couple of trailers available. Got it hooked up, checked the lights (most of which worked), signed the papers and came home. Then I decided to look the trailer over before dragging it 500 miles round trip. Three of the four tires were 15 PSI low, the fourth was mostly flat. A couple of the wheel bearings had more play than I would have liked, but not so much that I was worried about them. So I drug the trailer down to a nearby station to air up all the tires. Since we had to get the trailer back to U-Haul by 7:00 PM, we were on the road before dawn, and had an uneventful trip up. The trailer behaved it self just fine. Met the seller, loaded the spare transmission in the bed of the truck, and found the included rear bumper. The bumper was pretty rusty, probably only a few salvagable parts on it. But the rear overriders are straight and could be re-chromed, and those can be hard to come by. Did the paperwork, and proceeded to start the car to drive it onto the trailer. The battery was dead. No real surprise, we had to jump it when I looked at it weeks before, and it had only been moved once since then. It cranked over just fine on the jumper battery, but didn't start as easily as I had remembered. Once we got it running, it still felt sluggish, and would make a horrible howling noise when revved. Didn't do that last time. I didn't worry too much about it, I just wanted to get it loaded, and get on the road. Which we did. So far so good. Trailer is still behaving, the big Ford hardly notices the extra load. Stopped at a rest area a little over an hour into the return trip. Ate lunch there and got back on the road. About halfway home Deanna suddenly says, "We forgot the carbs!" True story. Forgot to load the carbs and manifold assembly the seller had said would go with the car. Too late to go back, so I was going to have to see if he would pack them up and ship them to me. Grrr. Stopped for diesel for the Ford. Gulp! Diesel is expensive this weekend (just after hurricanes Katrina and Rita), and the Ford uses a lot of it. Oh, well. Got back home around 5:30. Made decent time, considering. Had to jumpstart the car again to get it off the trailer. Started easier this time, but still doesn't want to rev, and when it does it makes that horrible loud howl. No matter, the trailer must be returned by 7:00. Got the car off the trailer and backed into the garage. Got the trailer returned with 45 minutes to spare. Yay! It's done! Took the Ford back to its home, found the transmission and bumper still in the bed. Had to load those in the trunk of our main car, and came home to have dinner. While waiting for Deanna to prepare dinner, I (of course) had to go into the garage to look it over. Deanna pops the door open and snaps the picture below, laughing about, "It hasn't been 10 minutes and you're already working on it."
-
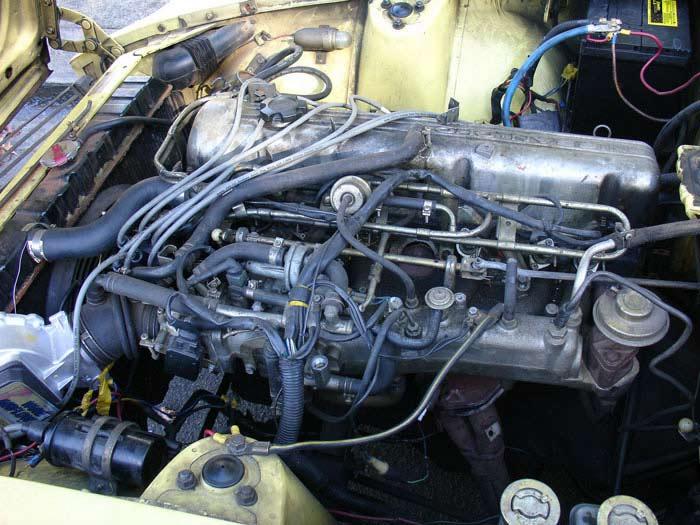
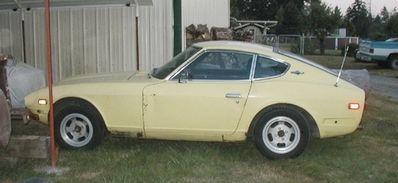
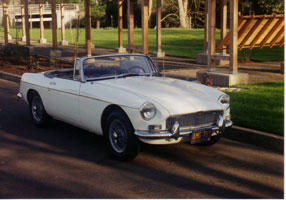
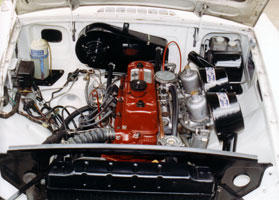
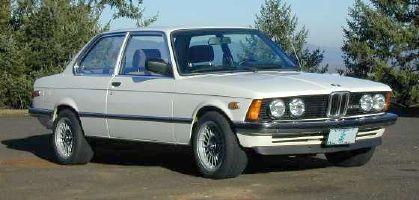
Project Intro - originally published August 2005 Motor vehicles in one form or another have been a source of recreation for me for most of my life. I have been tinkering, disassembling, rebuilding and modifying cars, motorcycles and ATVs since I was in my teens. Back in the late '80s, I decided it would be better to have a car that was dedicated to being worked on, rather than me keep disassembling and modifying the main family transportation. Just seemed to make more sense. So my first true project car was a '67 MGB - and boy was it a project. It needed most everything. It was a successful project though, I kept it for 6 years, and drove it daily for most of that time. By the time I finished it, I had pretty much touched virtually every part of the car, except the insides of the differential. But once it was done, I found myself getting bored with it. Driving and maintaining the MG was nowhere near as much fun as restoring it. I really missed hunting down those obsolete parts, figuring out what it really would have looked like when it was new, and trying my best to get close to that. So I sold it and moved on to other projects. My other long-term project was an '81 BMW 323i. That car needed less work up front but was still fun to research and work on, and fun to drive as well. Since I sold the 323i about 3 years ago, I haven't had any project cars. And as time progressed, I got more and more bored and fidgety. My wife and I finally decided that to maintain sanity (both mine, and especially hers), I needed to have something to tear apart, and hopefully put back together as well. Most of my prior projects were picked out more-or-less on the spur of the moment or by accident. This time I decided to give some thought to what might make a good project, and pick the car that way. So I tried to itemize some things that make a car a fun project in my eyes. The car must be attractive... no, not necessarily, though it helps. But it can't be ugly, and its design should be clean and free of gimmicks. It should be fun to drive (in its restored form), and yet reasonably practical to use as daily transportation. It should have enough of a following that some parts are available, and should have a community of people striving to do the same thing I am. (Help and moral support, you know.) It should not be too common, a bit of rarity or eccentricity is good. It could have been common when it was new, though, as long as attrition has reduced the numbers so that you don't see one every day. It shouldn't be too similar to something I've already done. The initial cost must be affordable, because I know I'm going to end up spending a pile on it before I'm done. Before long I had weeded it to a short list that consisted of '70-73 Camaros, Fiat 124 Spiders, Porsche 914s and early Datsun Z-cars. (Porsche 911s and Jaguar E-Types never made the short list because they violate #6. Dang!) I discarded the 914 because my wife felt (then) they violate #1. The Fiats have two strikes against them - parts are scarcer than I would prefer (#3), and the finished product is similar in concept (though not detail) to the MG (#5). That left the Camaros and the Datsuns. Both are viable, but in the end I decided that since I really enjoy driving a nice handling car more than one with quick acceleration I would be more likely to enjoy driving a Z every day than I would a Camaro. (Number 2 wins.) Over the years I've fielded questions and comments about how I'm approach projects, and so I thought I'd clarify my restoration method. It is a bit different than what many people do. Typically, a restorer-to-be buys their project car, brings it home, and immediately proceeds to strip it to the bare shell. Everything is removed so that the body and paint can be done. Then when the body is done, parts are cleaned, refurbished or replaced before they get put back on the car. Eventually, the entire car is done, and everyone is happy. This is the conventional "ground-up" method of restoration. But over the years, I have seen numerous failures from this process. Let's say a person decides that they want to restore a car. They pick it out, disassemble it completely, pay someone a pile of money to do the body and paint, and then they find out they don't have the skills/tools to fix and reassemble the car. Oops! Or once they get ready to put it back together again, they can't remember how it goes together - after all, they only saw it complete for a week or two before they tore it apart. Or worst, they actually do get it completed, only to find out that the finished product isn't what they hoped/expected it would be. So I tend to do it differently. I buy the car, and then go through most of the electrical and mechanical systems first. Once the car is mechanically sound and drives well, then I can start to think about tearing it apart for the body and paint work. This way by the time I need to reassemble the car after paint, it's easy because I know the car well as I've already had many of the systems apart more than once. I also know pretty much how the car is going to drive when it's done - because after repairing/replacing a lot of the parts ahead of time, it already drives pretty much the way it will when it's finished. Downsides? Well, I do spend more time assembling and disassembling the car in small chunks, rather than doing it just once. But since I enjoy working on my cars, that's not much of a problem. And I suppose it does cost me a bit more, as some things like gaskets, seals, fliuds, etc. will need to be replaced more than once. But that's about it. In the end, doing it this way works for me. By early June 2005 I had narrowed in on a Z as my prime candidate for restoration. I had bought a reference book, was hanging out at various Z web sites, and generally just soaking up what I could before actively searching out a car. I knew I wanted a 240, but figured I'd look at early 260s as well, should the opportunity arise. I also firmed up what it was that I wanted the car to be in the end. When I restored the MG, originality was my goal. That car ended up 98% stock. That is not the goal for this one, plenty of other people are restoring Z's to that standard. My goal this time is a car that looks visually period correct, but that may have any number of non-original parts or improvements. So in mid-June I started checking the local paper, and the Auto Trader too. And it so happened that the first car I found in my price range was a 260, and not only local, but it was less than 10 blocks from home. The car in question was an early '74 260Z, root beer brown with an automatic and the ubiquitous slotted dish mags. It was in so-so shape - fairly straight, and minimal rust. (Side note - here in Oregon we don't use road salt, so rust is less prevalent than in other parts of the country. Still, I discovered that there are two kinds of affordable early Z cars: those that have visible rust, and those that don't... yet.) The interior was a bit rough, and a rather unappealing orange-brown color. Being an early 260, it had chrome bumpers similar in size to the 240's. The universally despised "flat-top" emission-tuned carburetors had been replaced by dual down-draft Webers. The asking price was $1300. I didn't want an automatic, but a little research showed me that converting to a manual transmission wouldn't be too hard or too expensive. (Another side note - it appears to me, and has been seconded by others all around the country, that these days unrestored Z's with automatics are typically in much better shape than the manual transmission cars. I guess they haven't had as hard a life.) It probably wasn't a bad car, but somehow I couldn't get excited about it. The seller had apparently been trying to sell it in various ways for some time, with little to no interest. I looked at it a couple of times, and then decided to put it on the back burner for a while and see what else might turn up. (It apparently finally sold in late August.) Corresponded with several sellers via e-mail and phone over the next few weeks, but found nothing worth pursuing. Then in early August I came across a posting on Craigslist for a '71 240Z about 250 miles away in Washington. This one was yellow, another automatic, and had a 280ZX 2.8 liter with injection installed. They wanted $1500 for it. I started corresponding via e-mail, and it sounded promising. It was reputed to be mostly straight, mostly complete, and decent shape. It took a couple weeks to get pictures, one of which is below: The pictures showed a car that probably had potential, if it wasn't too rusty. (I had learned by now to take all rust assessments from sellers with a grain of salt.) It would be a long day's drive to go look at it, so I made plans to go there on a Sunday a couple of weeks from then when I had to get up really early anyway. (Taking our son to the airport to go back to college.) While waiting for the day to go visit the yellow car, I saw another local 240Z on eBay. Turns out this car was in walking distance of my office. So I went to look. This one was a '73 240 with a four speed, and carbs off an earlier 240. It had originally been yellow, but was now an odd dark blue. Bits of yellow stuck out here and there, and the interior was not too good. It had been hit in the rear at some time, and the repair was of pretty poor quality. It had the normal rust in the lower front fenders, too. The seller told me he'd sell it to me locally for $3000. I decided to pass. (The auction never met his reserve, last I saw he still had it.) So in late August we drove 260+ miles to look at the injected yellow car. Inspection in person showed a car that had been fairly accurately described by the seller. Quite straight, other than the driver's door. Amazingly, the nose was not all dented up. The car was an early model that originally came with a hatch with the small vents, but it had a later non-vented hatch on it. No bumpers on the car, but there was a rear bumper to be included. The interior was intact and much better than average. The dash had only one very small crack. The brakes were not so good, with a very low and soft pedal. The engine was out of an '83 280ZX, complete with the injection. It would run, although it was only firing on five cylinders. The sellers had done a compression test, which came out good, so they figured it had a clogged or bad injector. A set of original SU carbs and manifolds were to be included as well. My only hesitation was - of course - rust. This car wasn't too bad on that score, but after looking it over I decided that the passenger floorpan, lower part of both front fenders, rear doglegs and both rockers would need to be replaced. We told the sellers we'd be in touch later and drove back home. Early that following week, I decided to re-contact one of the sellers I had talked to earlier, but had not gone to look at the car. It was also an early '71, red with a four speed instead, and was only a bit more than 100 miles away. It was half the cost at $800, but the seller's description made it sound a bit rough. We talked on the phone a bit, and I arranged to meet him to look at it on Saturday. Before leaving on that Saturday morning, I checked my e-mail only to find that there was another car in the same general area that the owner needed to dump fast. He said it was a '71, red with a four speed, straight and unrusted. (Yeah, right!) The front brakes were disassembled, but he would sell it for $500 provided the buyer could have it out of his garage by the following Sunday. If the car was decent, I could swing that, and was going to be within 20 miles of him anyway, so I called and made an appointment to look at it on my way to see the other car. Looked at the $500 car first. It had a poor quality repaint, in a slightly different red than the original. Red paint covered everything, the suspension, trim, you name it. I found rust in the passenger floor, passenger rocker panel and the hatch latch tray. Lots of bondo in the right rear quarter. It also had a cheap aftermarket glass moonroof that looked like a leak waiting to happen. Turns out the car was not a '71, but was a '73 instead. The seller didn't have a title, either. I passed. (Someone else did take a chance on the title, and hauled it off the following day.) Next stop was the $800 '71. Remember when I said it had sounded rough? I was right. Body was beat, the interior - what was left of it - was worse. Plenty of rust. Definitely a parts car in my opinion, not a car to restore. The yellow car was really starting to look good in comparison. I was planning to call the seller and talk a bit more about it, when another one showed up in the local paper. It was listed as a '73 four speed with spare parts for $600. I went to see it that same evening. What a mess! Extremely thrashed, and the spare parts weren't much less beat. Rust in the normal places, some quite bad. (You could see daylight under the battery tray.) Another pass. So I called the seller with the yellow car again, to ask a couple of questions that had occurred to me after looking at all these other cars. Talked for a few minutes, and mentioned that I would end up swapping a manual transmission into the car at some point. He said that he had a four speed box, and he'd throw it in as well. That pretty much sealed the deal for me, and I verbally committed to buying it. Now I had to figure out how to pick it up and get it home...
-
This thread will be historical, being mostly a repost of content that was originally posted on a personal website that no longer exists. So don't expect anything new. I just thought it might be mildly entertaining for some to review. I tried doing this as a blog, but don't like how that works. Please bear in mind that since it's audience originally was not necessarily people already familiar with 240Zs, some of the descriptions and such will be worded as though the reader is not already as informed as most of those on Classic Z Cars is, and not as detailed as it might have been if I had posted it here while it was happening. I also probably won't respond much to questions or comments along the way. Maybe some, now and then, but my goal is simply to save this info somewhere useful. And I can't think of a better place to save Z info than here.
-
Ahh. No, I don't think I've met him. I'm pretty much a street driver these days.
-
I suspect Don was prior to my Z time. I only started in 2005.
-
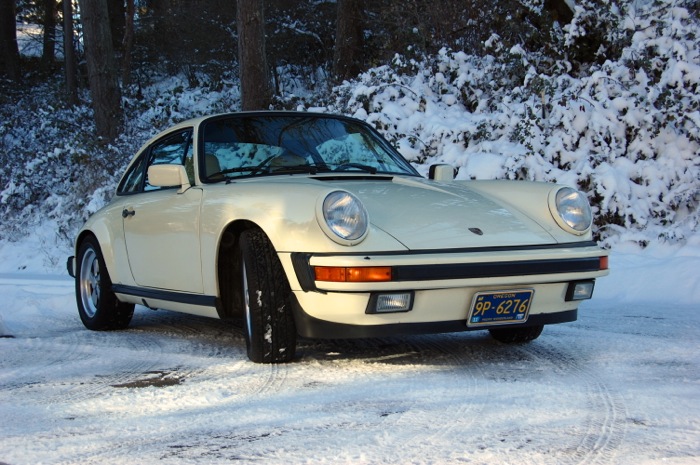
Yup, I still pop by now and then, especially when @Mike pings me! I read this whole thread, and being the car guy that I am, I could probably drive all of the cars mentioned here. As noted, I sold my '71 240Z to make the move into a Porsche, but I stayed with the air-cooled variety - an '84 911 Carrera 3.2 in my case. Being active in the PCA now, I've driven several newer Porsches, and agree that IMS bearings not withstanding, the 996 cars are a great bargain now, if a modern sports car will satisfy your need. For me, they do not. Like an early Z, my Porsche is more direct and involving than a modern car. Incredibly capable, but still a vintage driving experience. That said, I bought mine 5 years ago, before the recent price craziness hit. The current prices for air cooled 911's make the recently rising Z prices look really nice. And they can be expensive to maintain, unless like me you do it all your self. Sadly, classic 911's have left the affordable station, and it looks like 240Zs may be starting a similar trajectory.