CanTechZ
Free Member
-
Joined
-
Last visited
Everything posted by CanTechZ
-
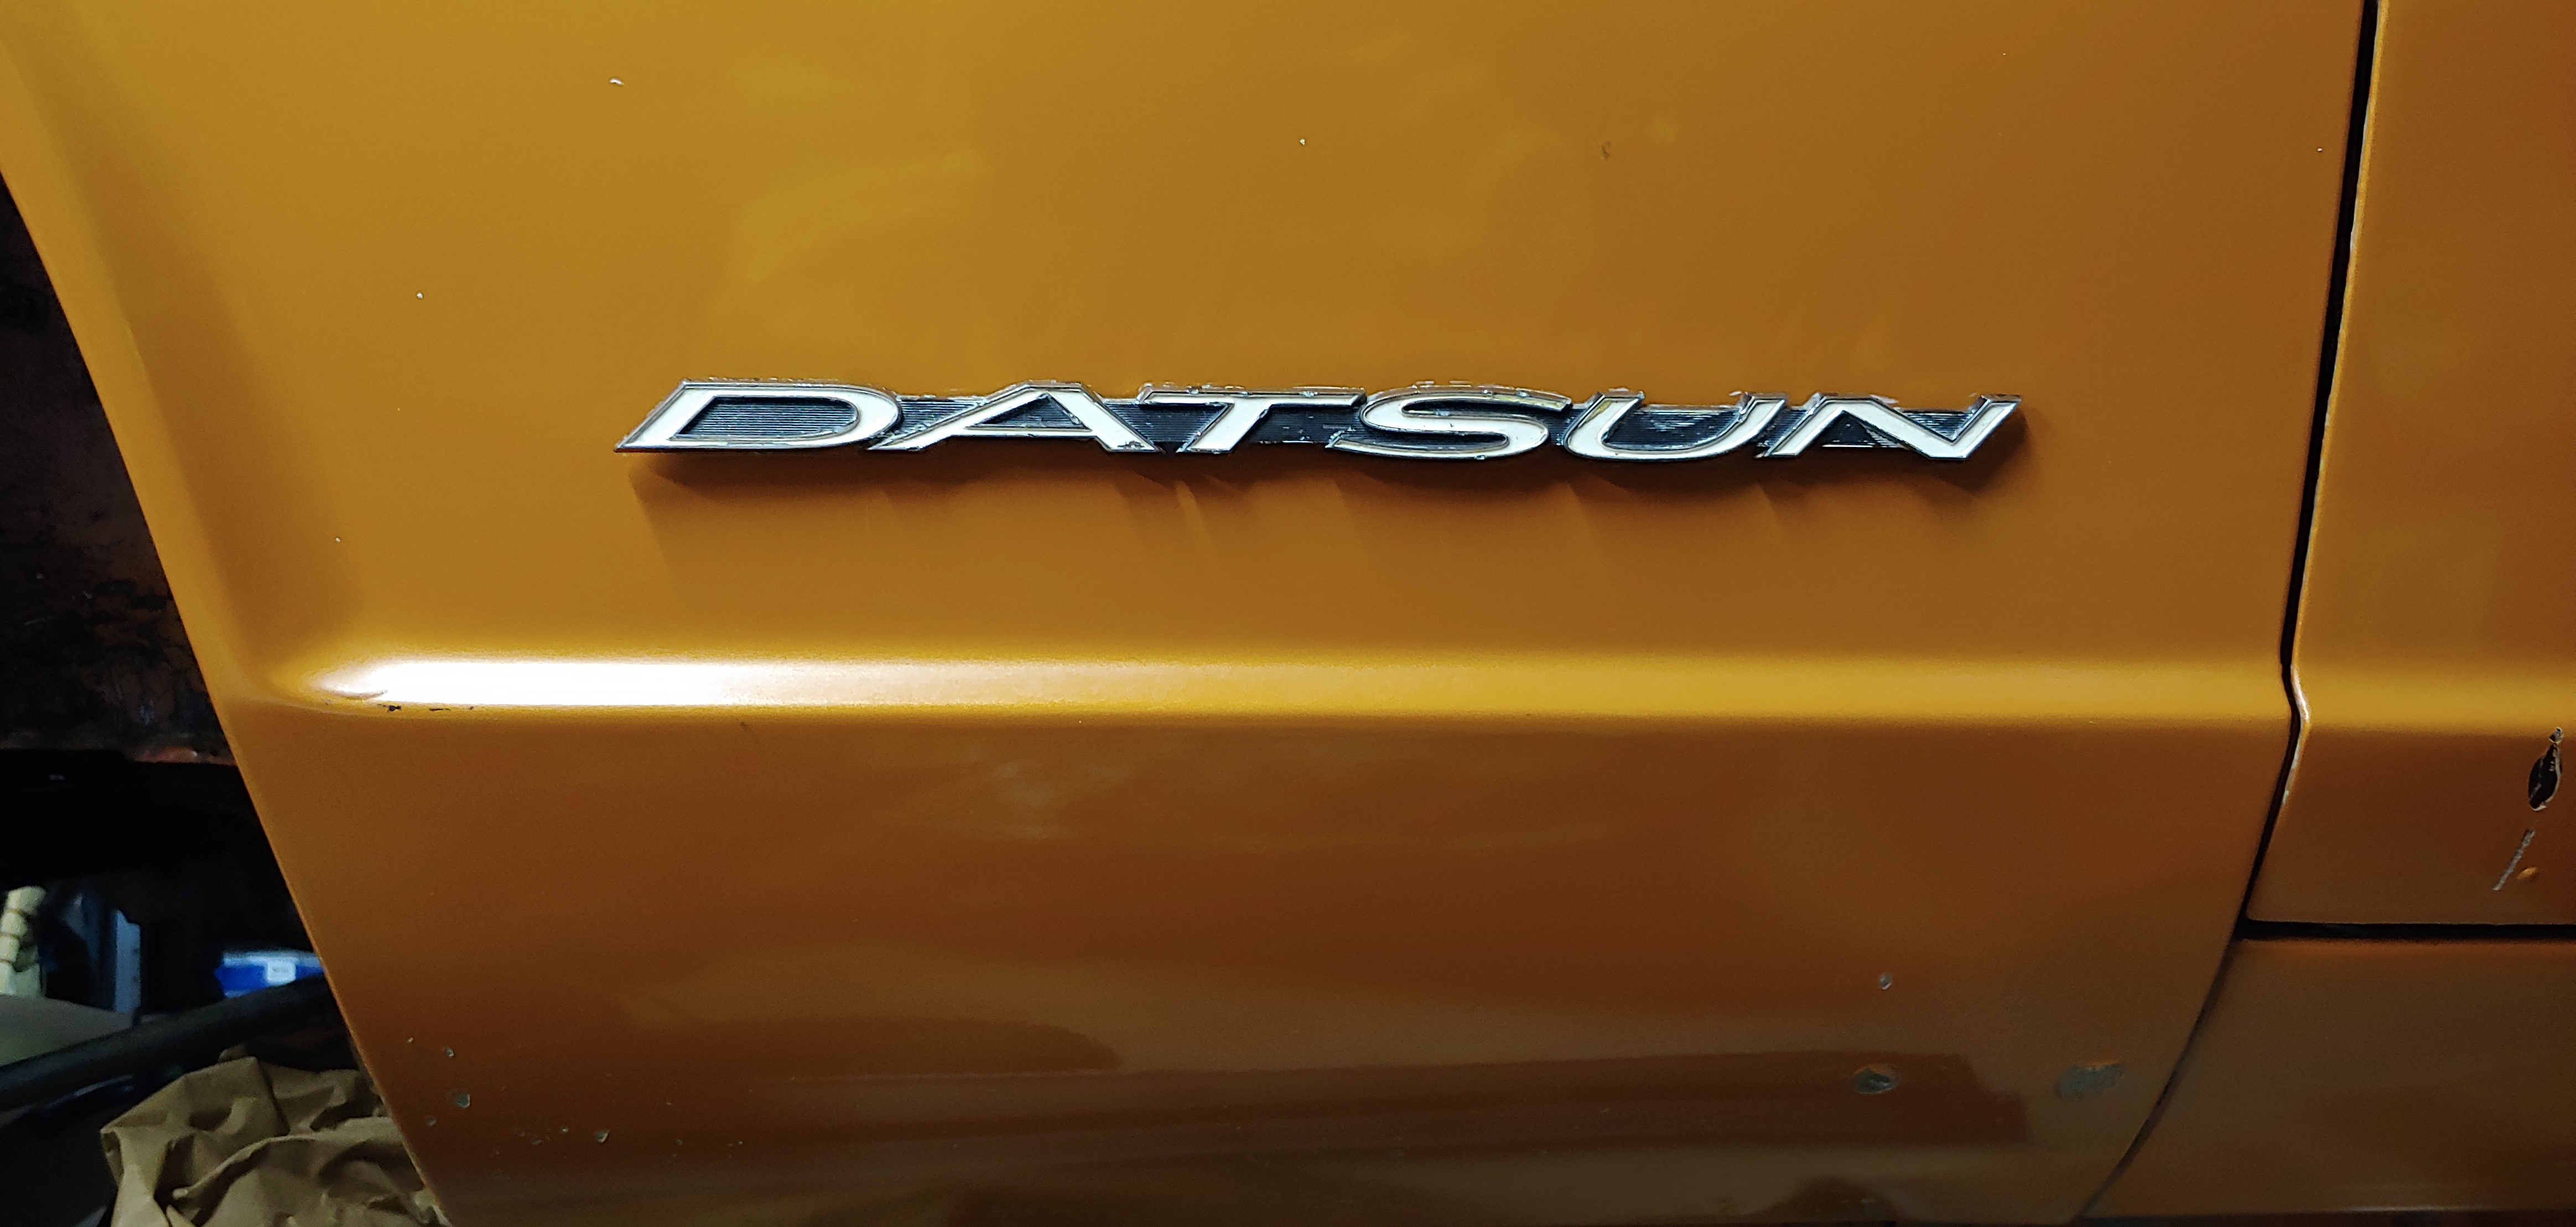
 Here is a snippet from the picture @SpeedRoo posted in another thread of his RH OEM fender, it has same four hole pattern. My fenders are also OEM replacements that I purchased in the early eighties from my local Datsun dealer for my first restoration.
-
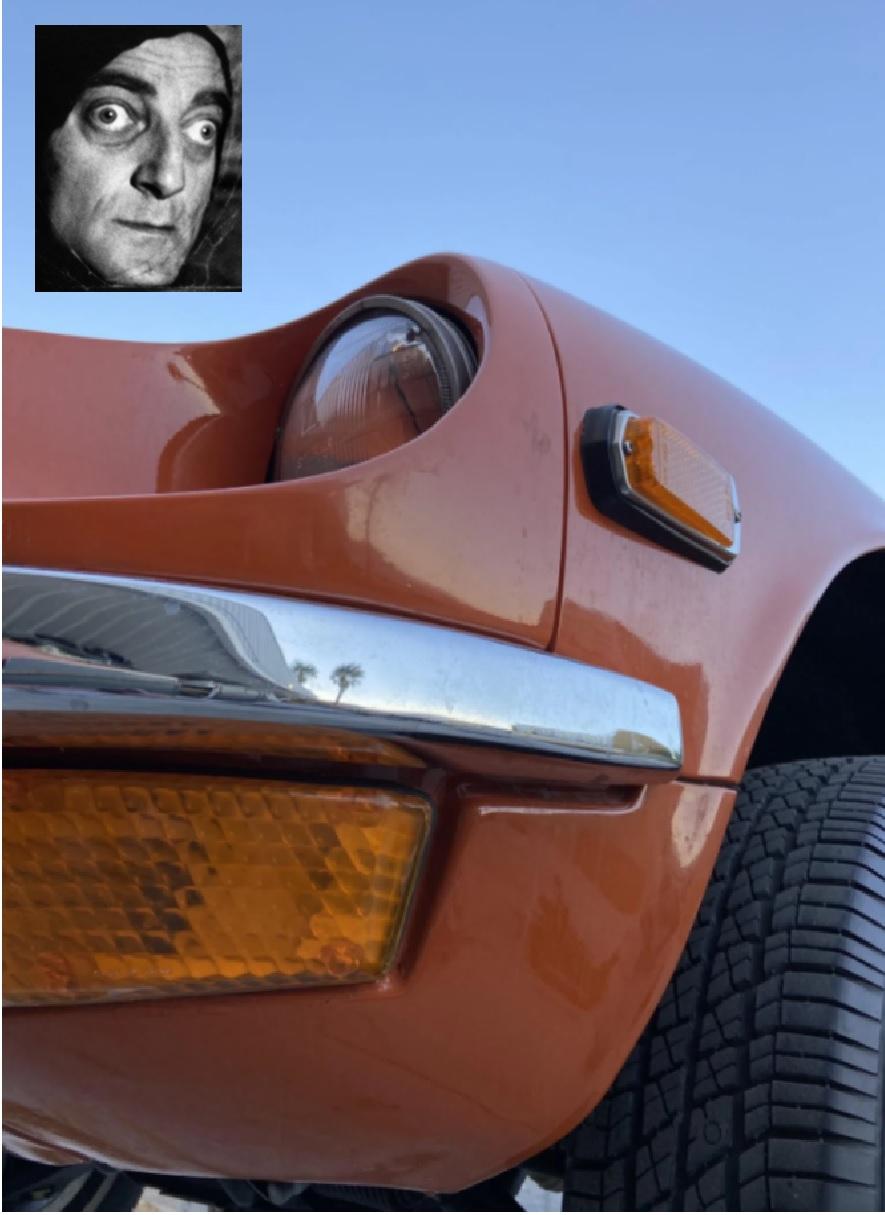
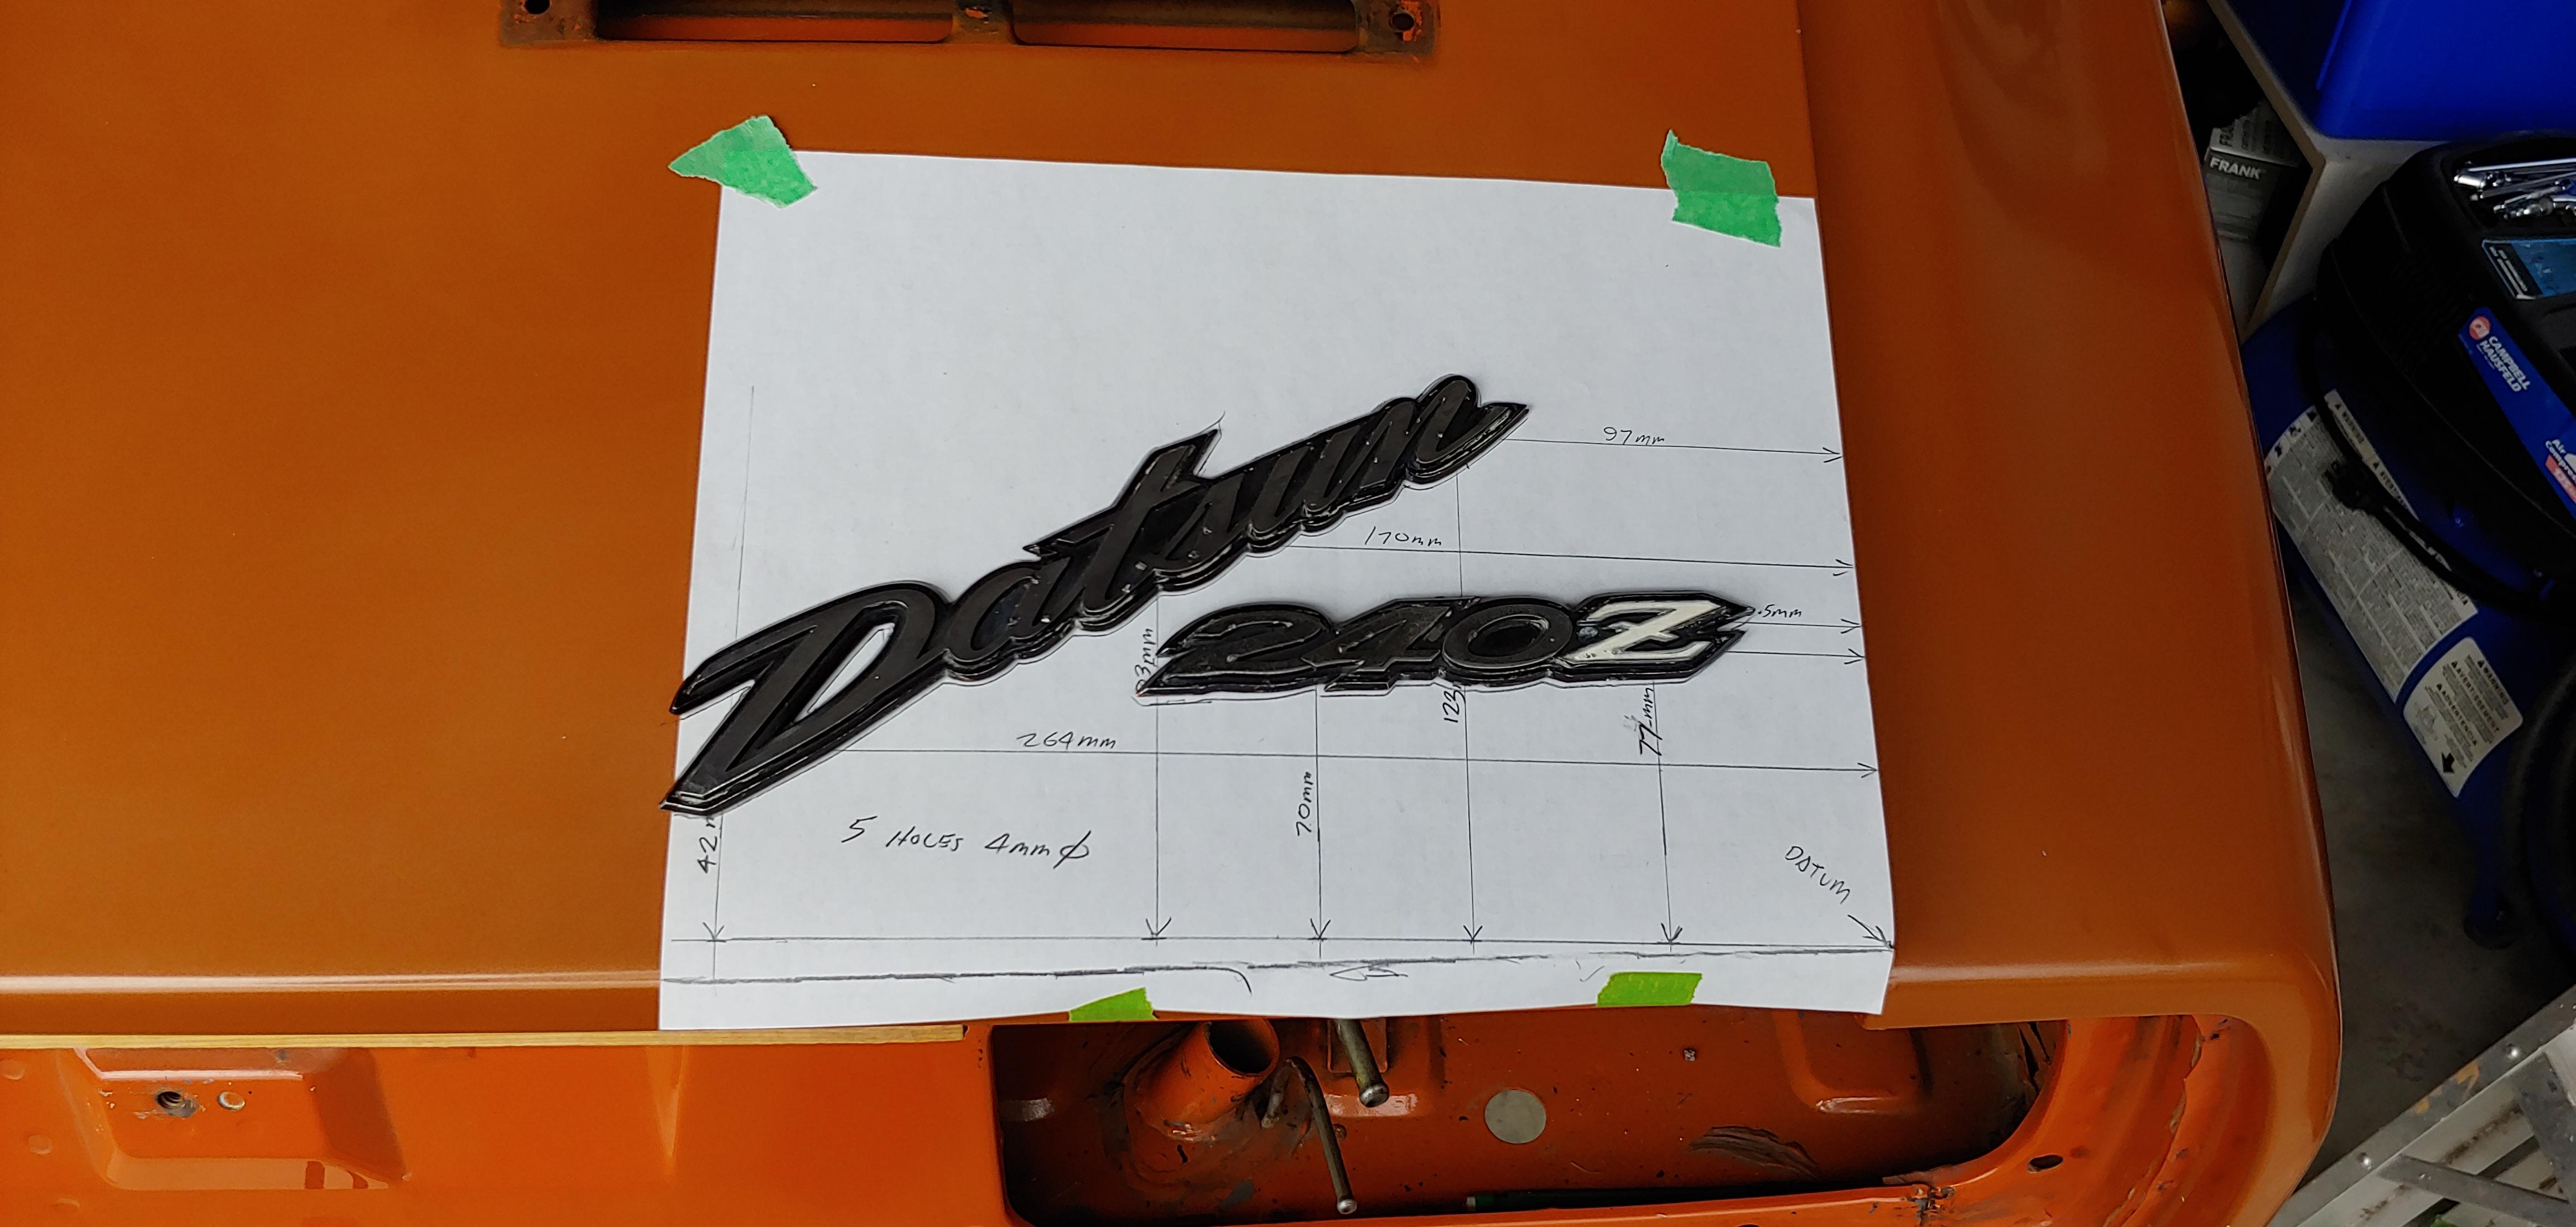
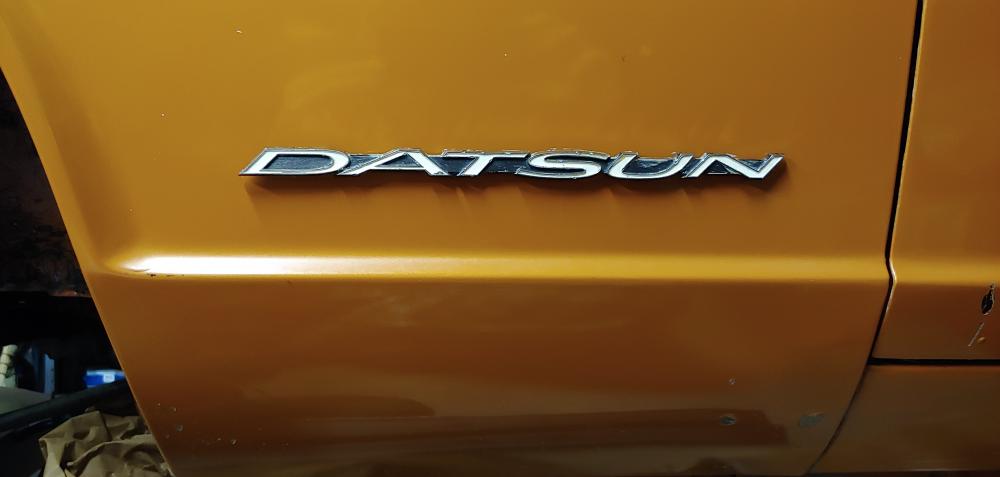
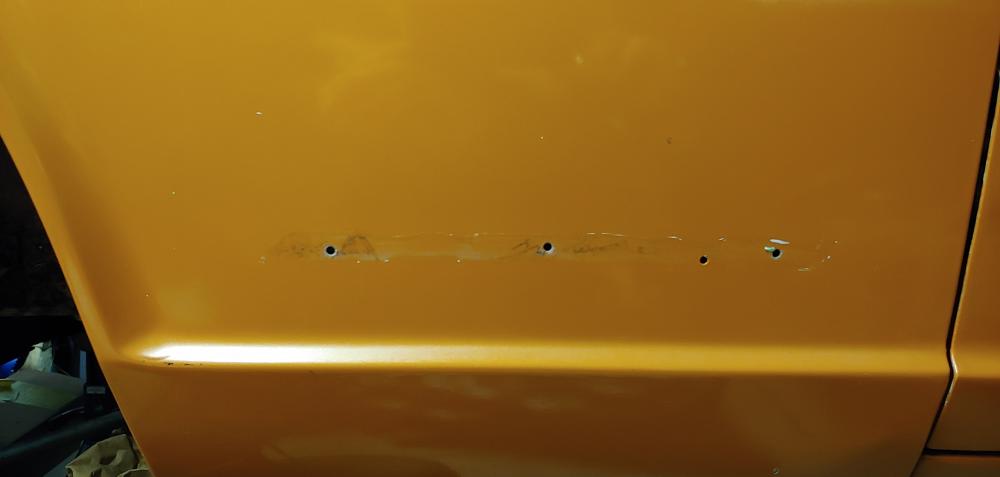
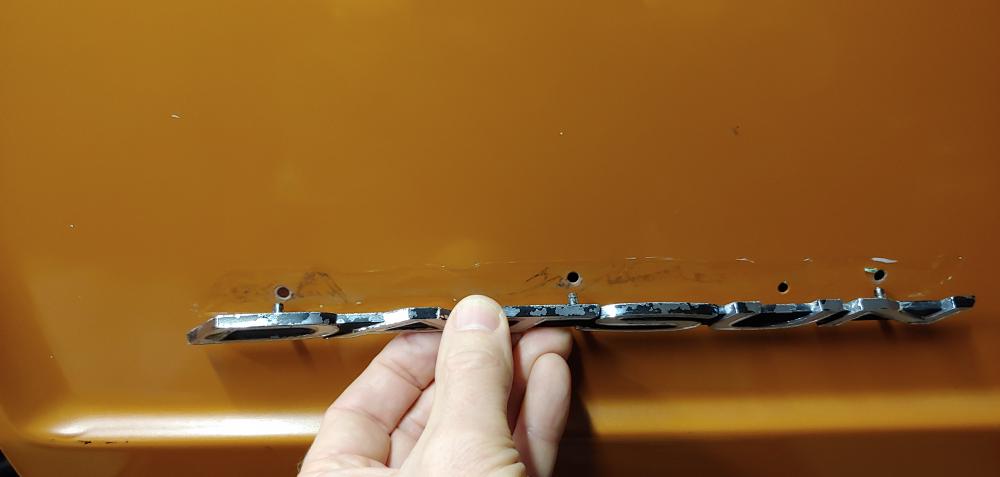
Just heading off to work but here are a few pictures. I can take some measurements tomorrow morning. Strangely there are four holes but only three pins on the emblems. Same but opposite on the right hand side. And of course the three pins are not in a perfectly straight line. The pin behind the "D" is slightly lower.
-
That is correct.
-
It was Igor, but this was one on the best scenes. Abnormal >>>> Abby normal. As you already knew.
-
The googly eyed '71 on BAT just sold for $36,750. https://bringatrailer.com/listing/1971-datsun-240z-165/
-
I have not used that product, but I will say if you are trying to get close original, I would say test spray something first to see the amount of "metallic". The original is a matte finish that had virtually no metallic except a very minimal amount at certain angles. Five years later I am still very happy with the choice I made, as in the link above that @siteunseenposted. HTH, Mike
-
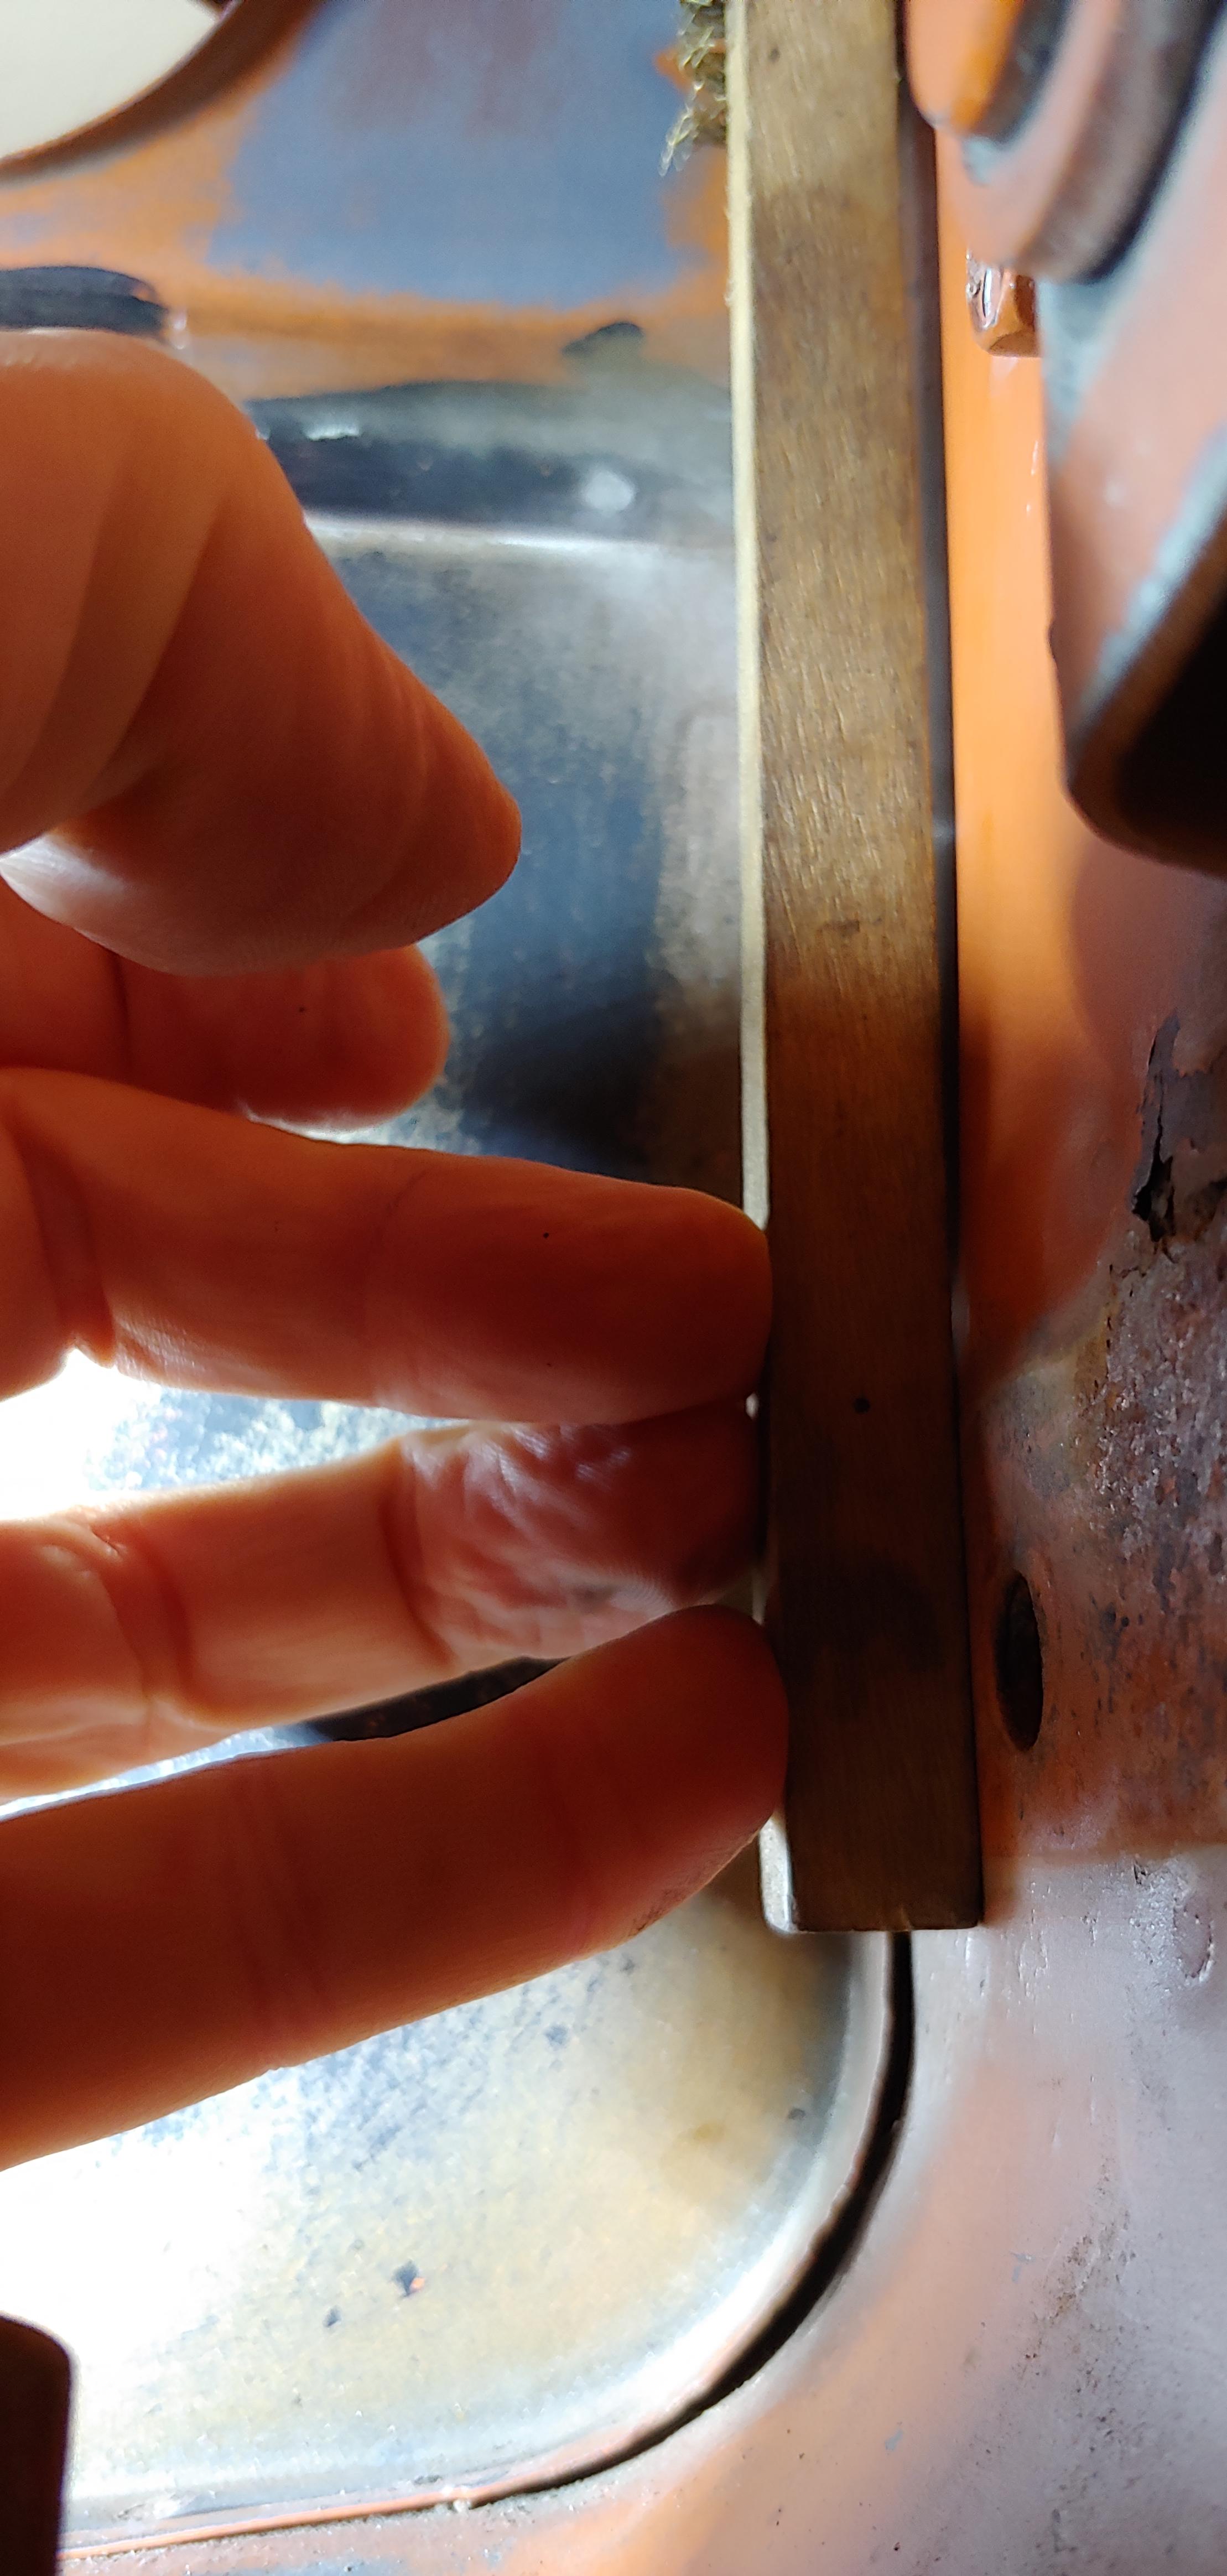
Hey Ryan, after seeing the pictures from Dan, I had a closer look at my car and found It doesn't have the offset on the RH side. The offset on the LH side must have been due to some minor old damage? It was strange how straight and even the offset is, although it does appear to be opposite to the top edge of the stiffening doubler plate on the far side. So much for my "bloody legend" status, LOL.
-
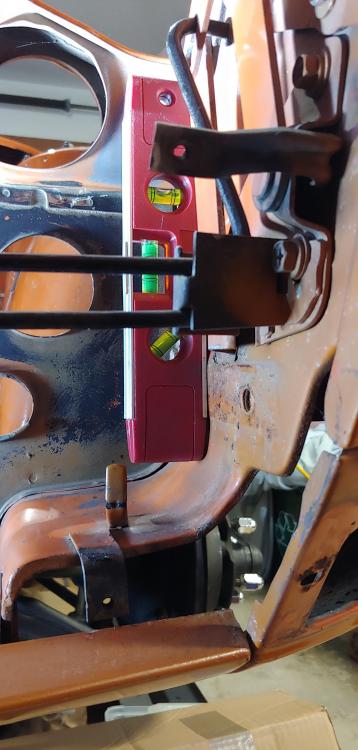
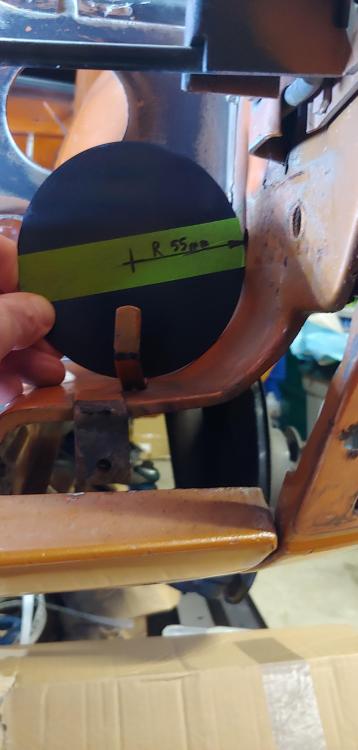
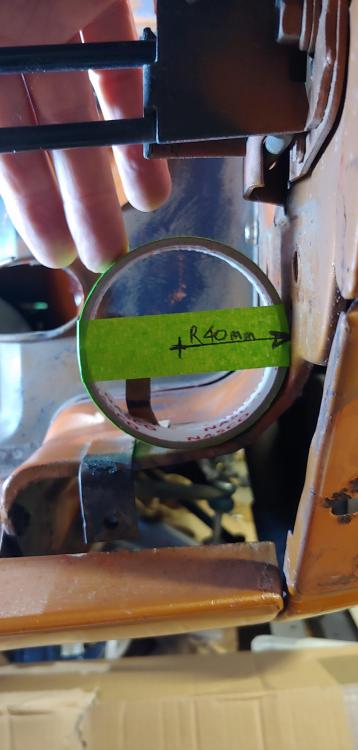
Here are a few measurements from my '70. The area where the bumper mounting bracket mates, is vertical. Please note that the vertical steel section above the surface where the bracket mates, is parallel with an offset of about 2-3mm. The radius you wanted varies, I measured about 55mm in line with the back bracket hole and reduces to a radius of about 40mm at the leading edge. Hope this helps Mike

-
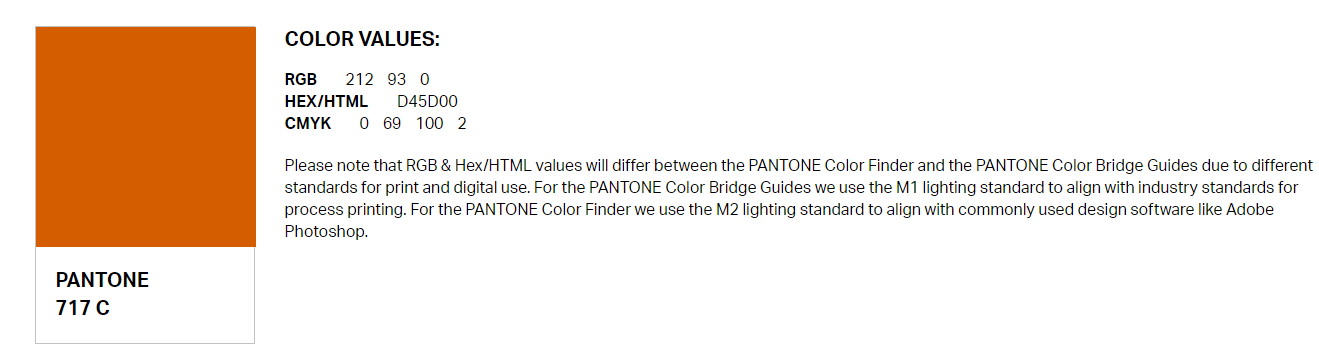
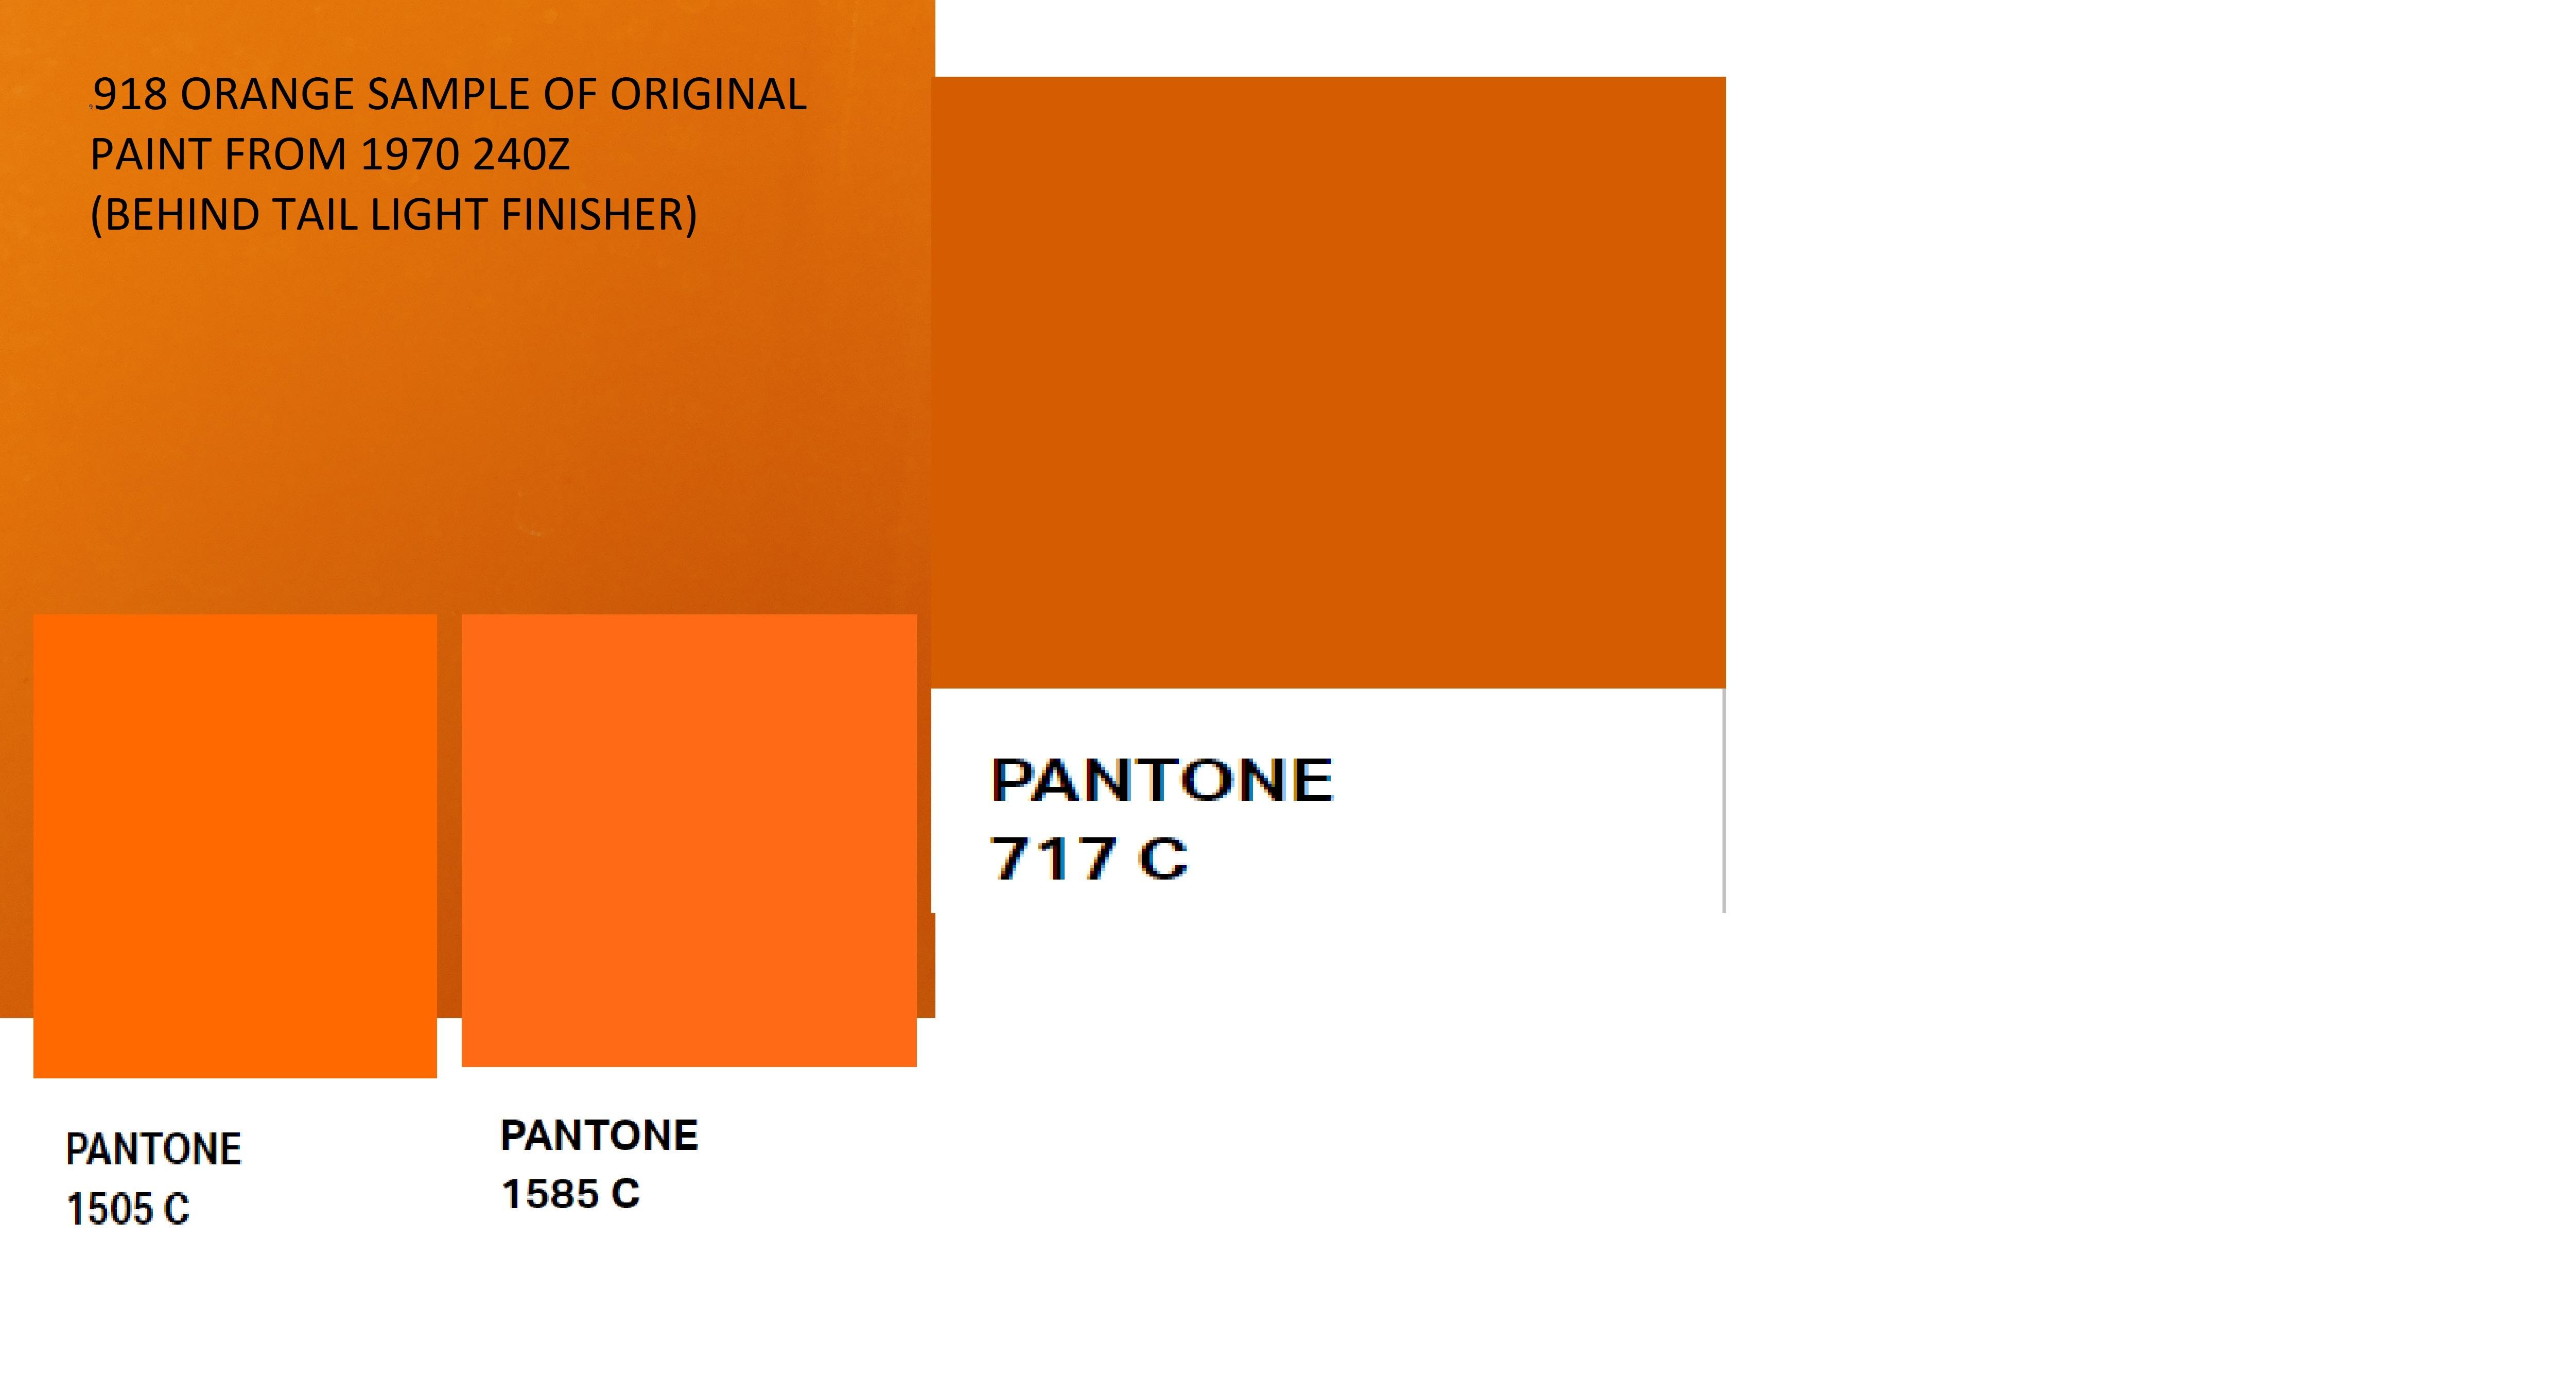
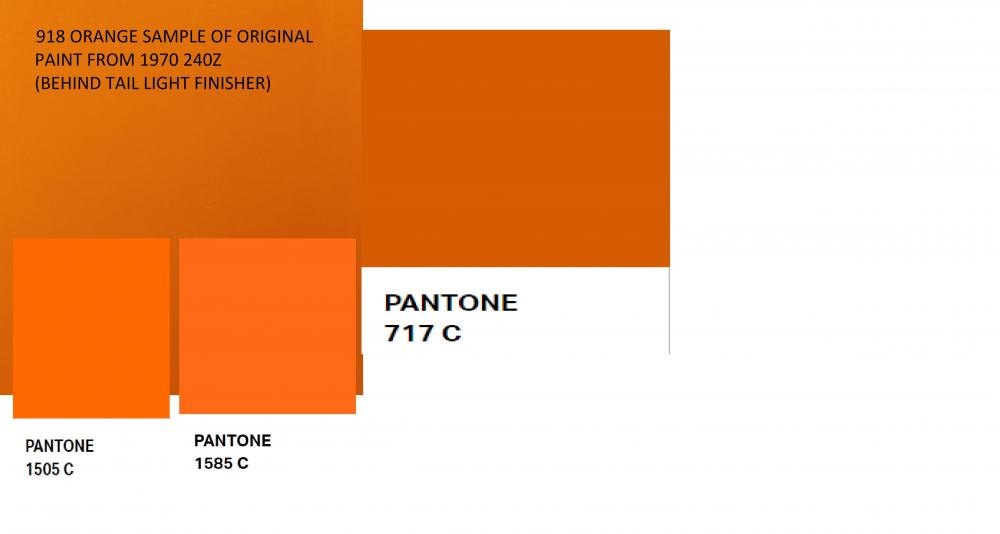
Here is a pantone color I found that's very close to 918 orange. https://www.pantone.com/color-finder/717-C Here is a comparison to my car. my paint on the left and pantone on the right, also with a couple of other pantone colors below. Here is the picture that I cropped for my color. As it is original paint behind the tail light finisher there is no fade. I took the picture with no flash in natural light, overcast sky, not direct sun. I found the pantone color 717 C, after a few tries here: https://www.pantone.com/color-finder

-
Very good step by step instructions in Tom Monroe's Book that I mentioned above
-
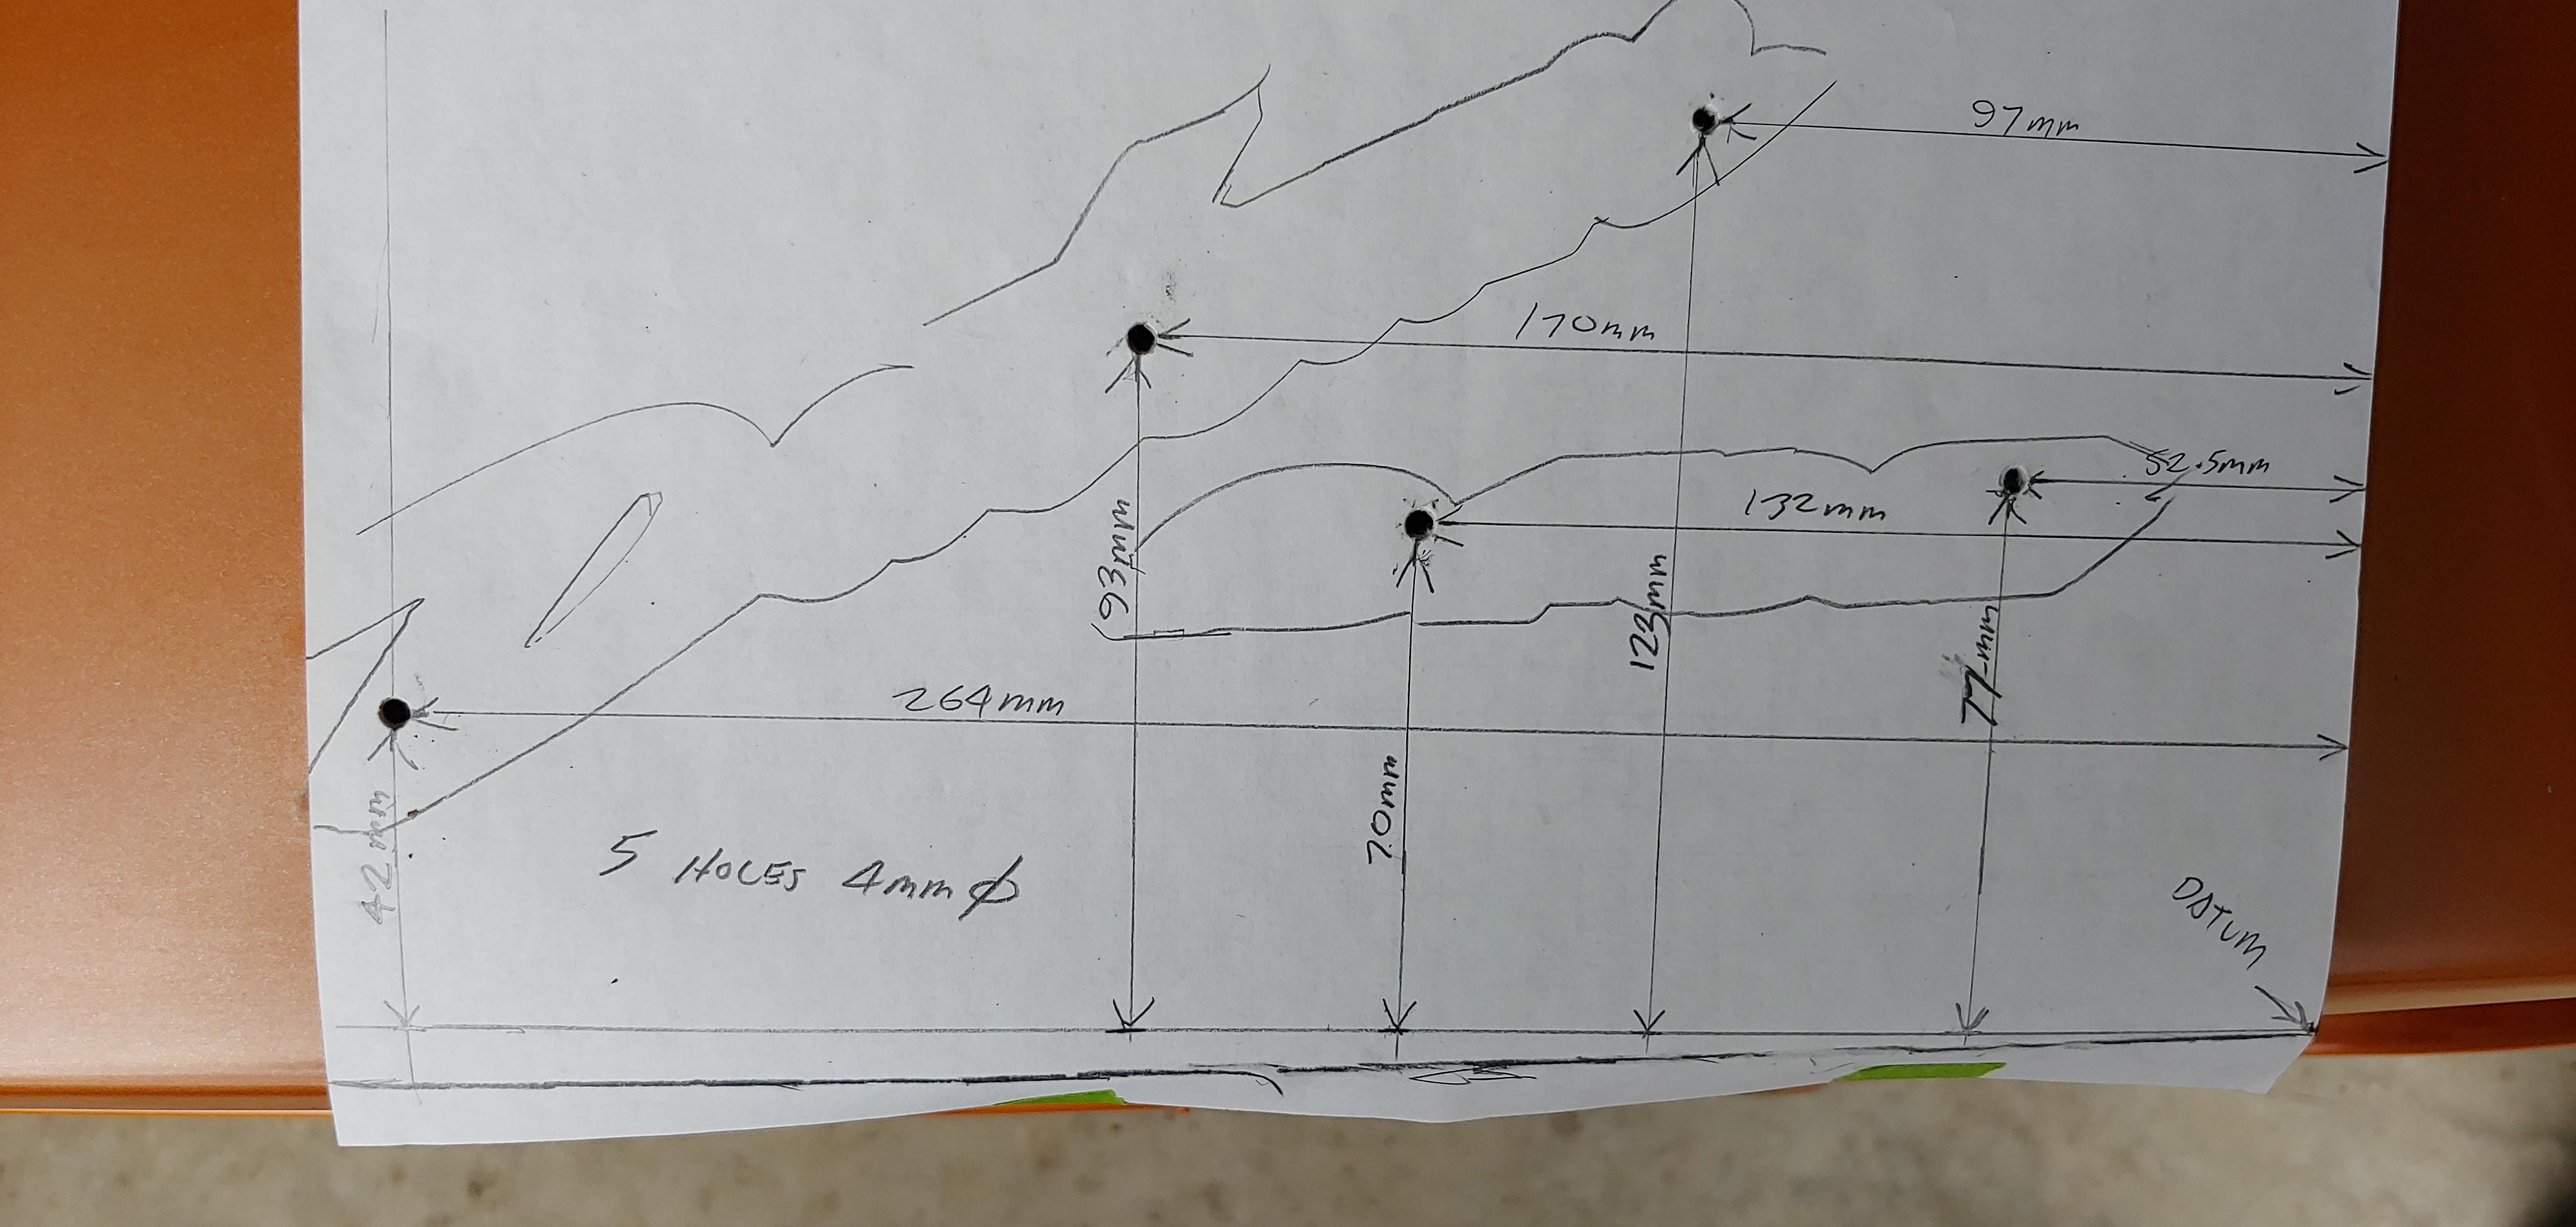
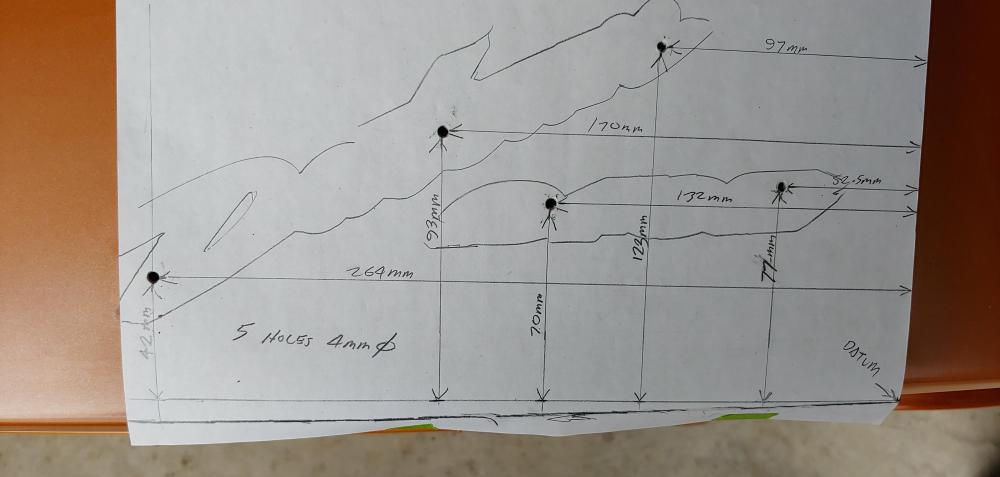
Here is a scan of my sketch, if you print on 8.5" x 11" paper and select "actual size" it will print to scale. 1970 240Z HATCH EMBLEM HOLES.pdf
-
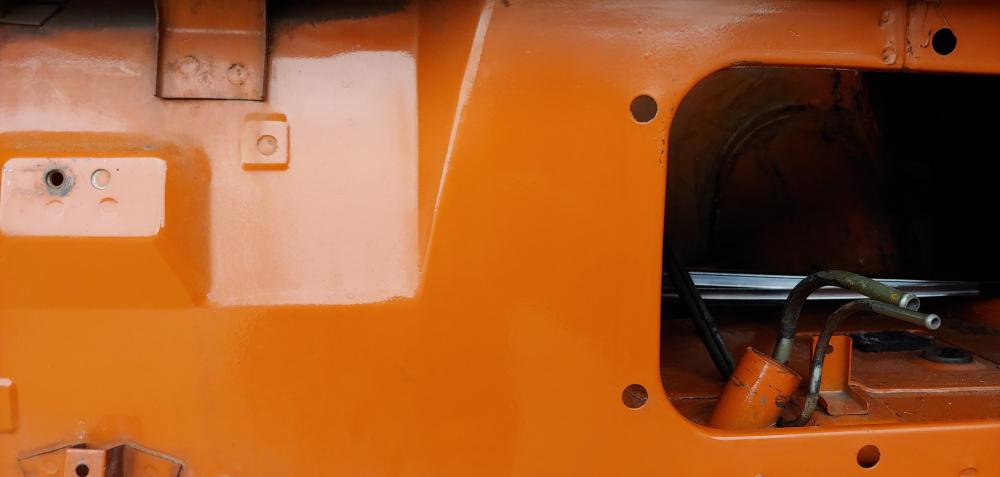
Sorry, definitely not mine. I'm still in dis-assembly mode. Here is a picture photo shopped with @Wally's picture for comparison. It's the fuel inlet hose protector from the rear right wheel well after the under coating was removed.

-
I'm pretty sure they are the same for series 1 and 2, here are measurements from my 1970. The datum for measurement is the lower right corner of hatch. The bottom edge of the hatch is curved so instead of the that edge I drew a line at right angle to the right edge for the vertical dimensions. I hope that makes sense.

-
Congrats Jim. Very fitting dealership name "Trophy Datsun".
-
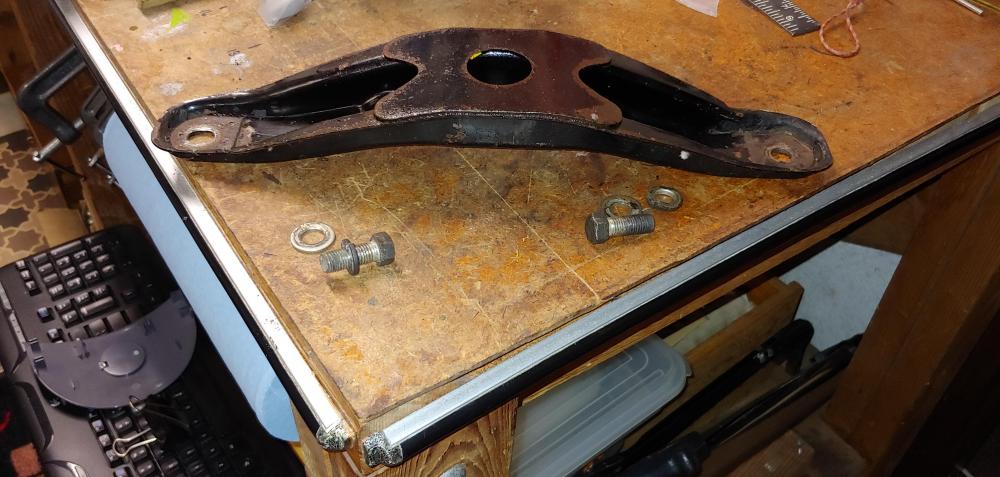
Original fasteners are definitely M8 with a 12mm hex size. To get a 12mm wrench on, I had too do quite a bit of cleaning first, but it did go on. A 15/32" wrench would not work, as it is slightly under 12mm, 15/32 = 11.9mm. If I remember correctly, I also had to use a wrench with a thin cross to get in there on the diff side.
-
Leaked photos in gray and pearl white, I like both. Here's the gray. https://japanesenostalgiccar.com/production-z35-nissan-400z-photos-leaked/ https://www.400zclub.com/forum/threads/production-400z-spotted-in-gray-and-silver-–-pics-videos.143/
-
My series 1 as well.
-
You're very welcome, if you make out here definitely message me and we can sample some local hazy IPA's as well. Cheers, Mike
-
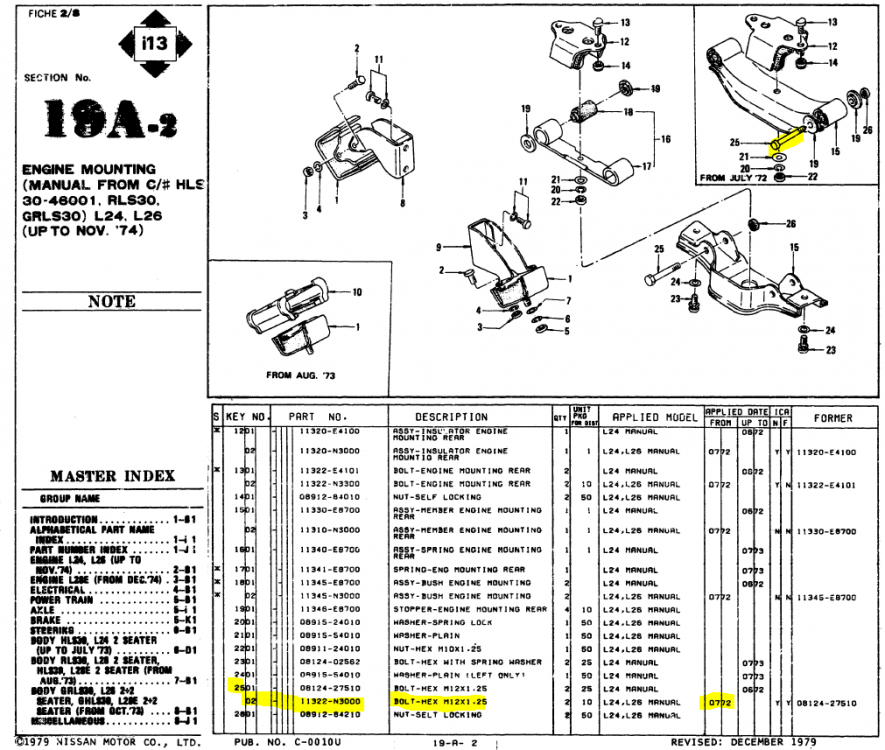
Here is a page from the parts book, I thought I might be able to decode the part number but as of 7/72 the part number is not an NES type, it does show that it will be M12x1.25. Funny the bolt up to 6/72 has an NES part number (08124-27510) that decodes as Hex Head Bolt, Medium Carbon, M12 x 75mm long, zinc plated.
-
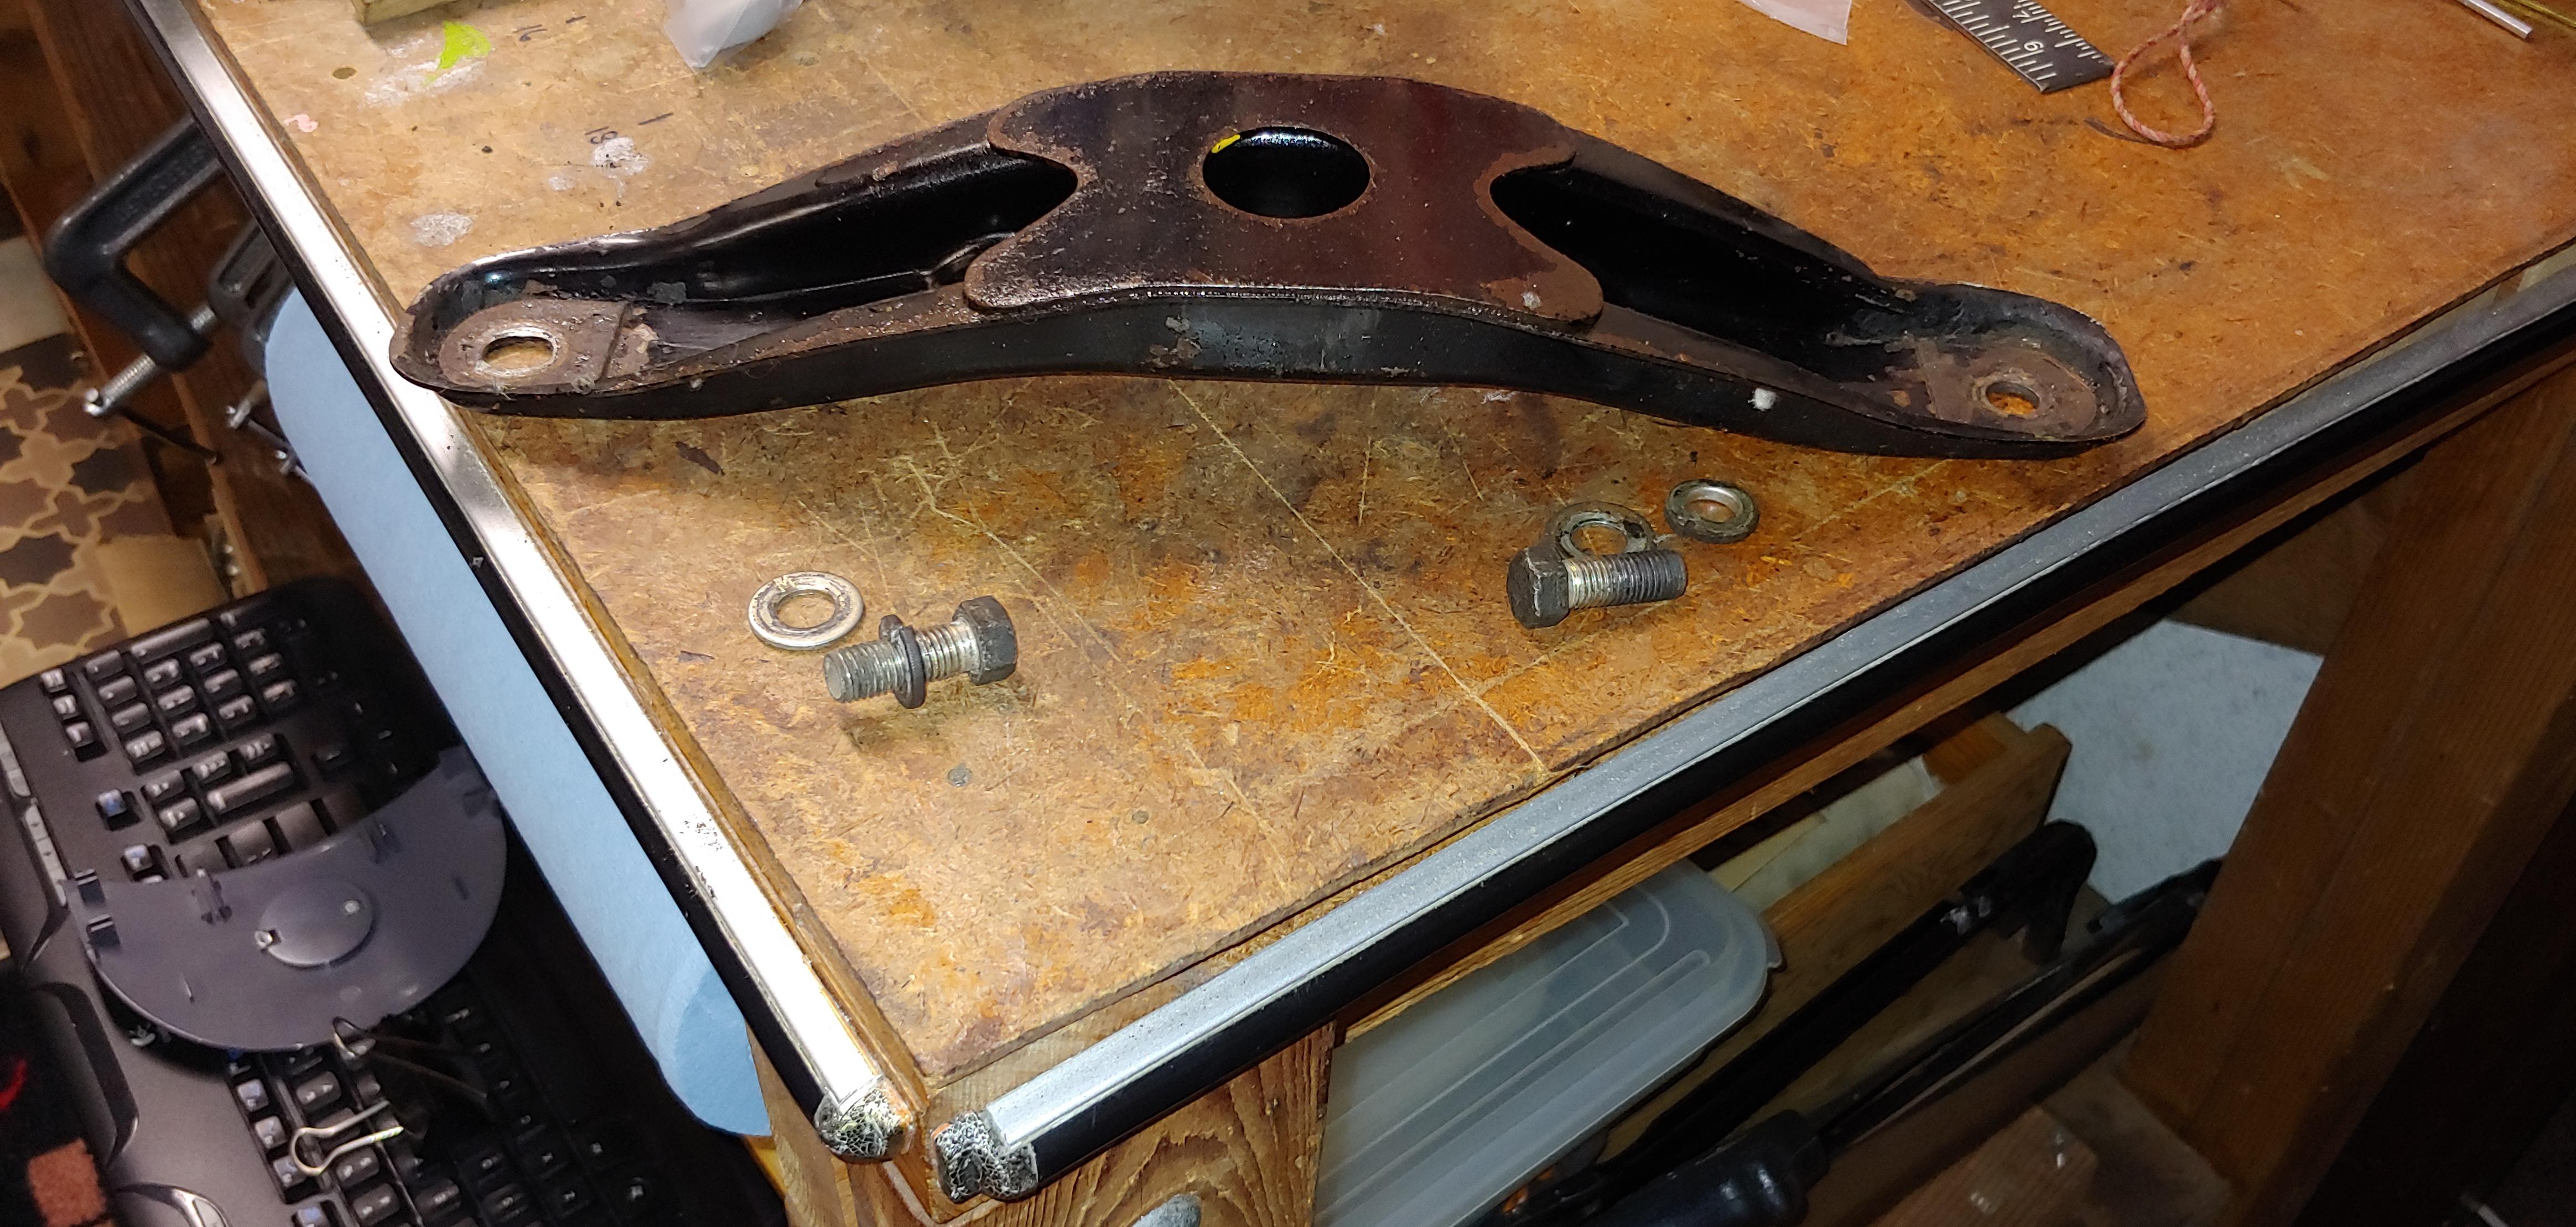
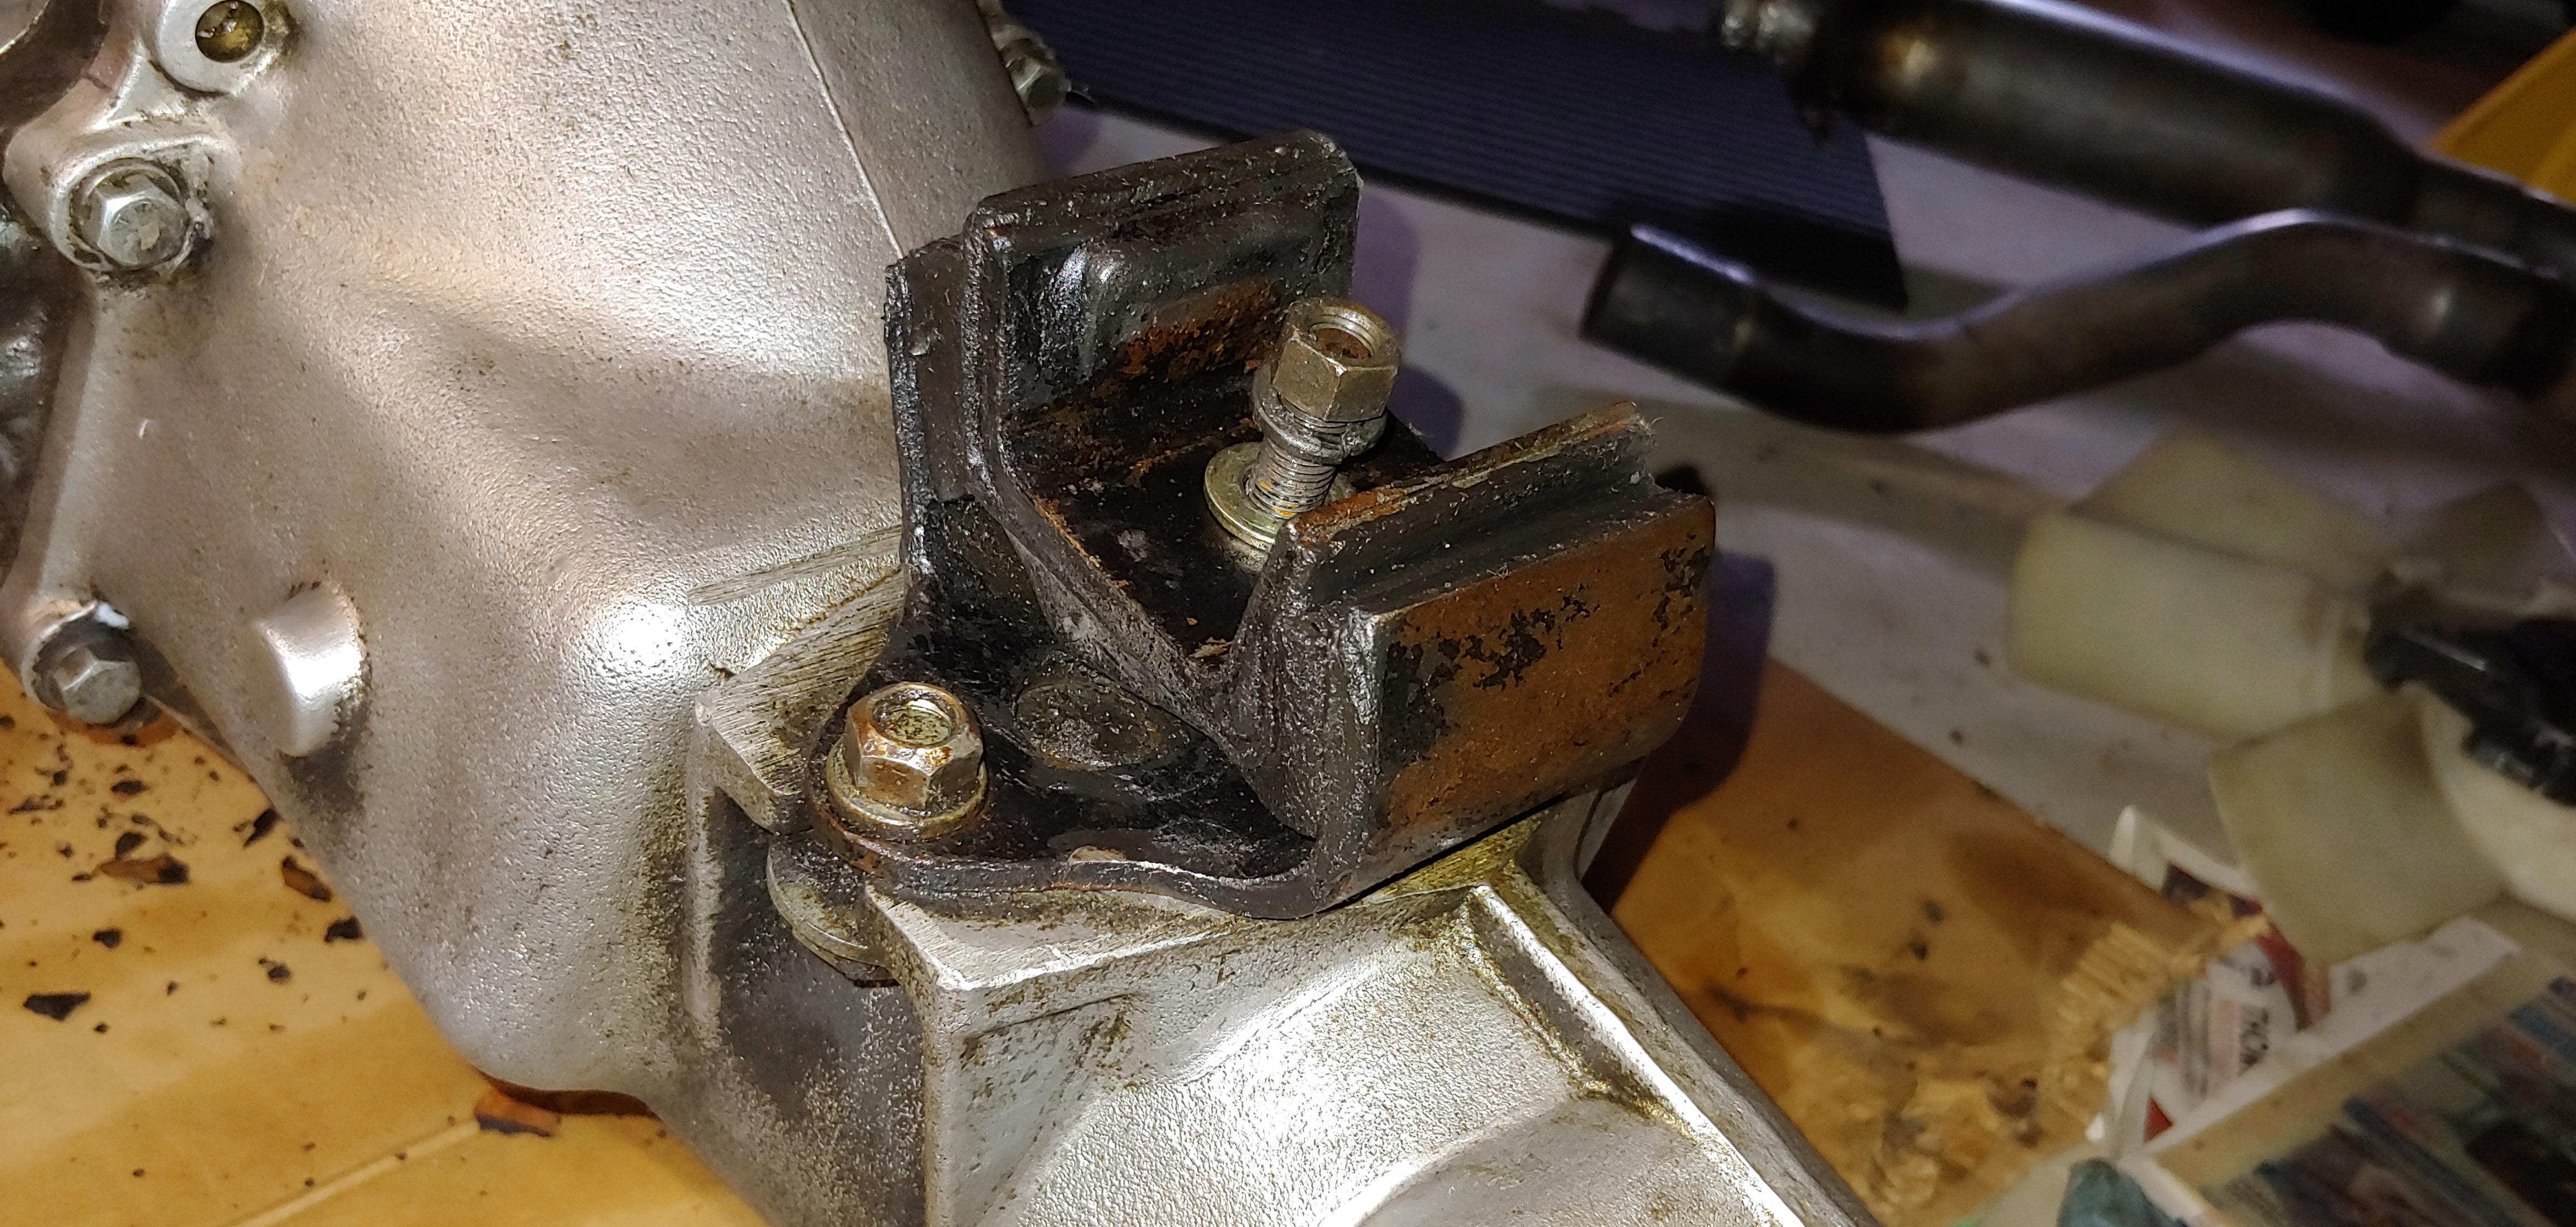
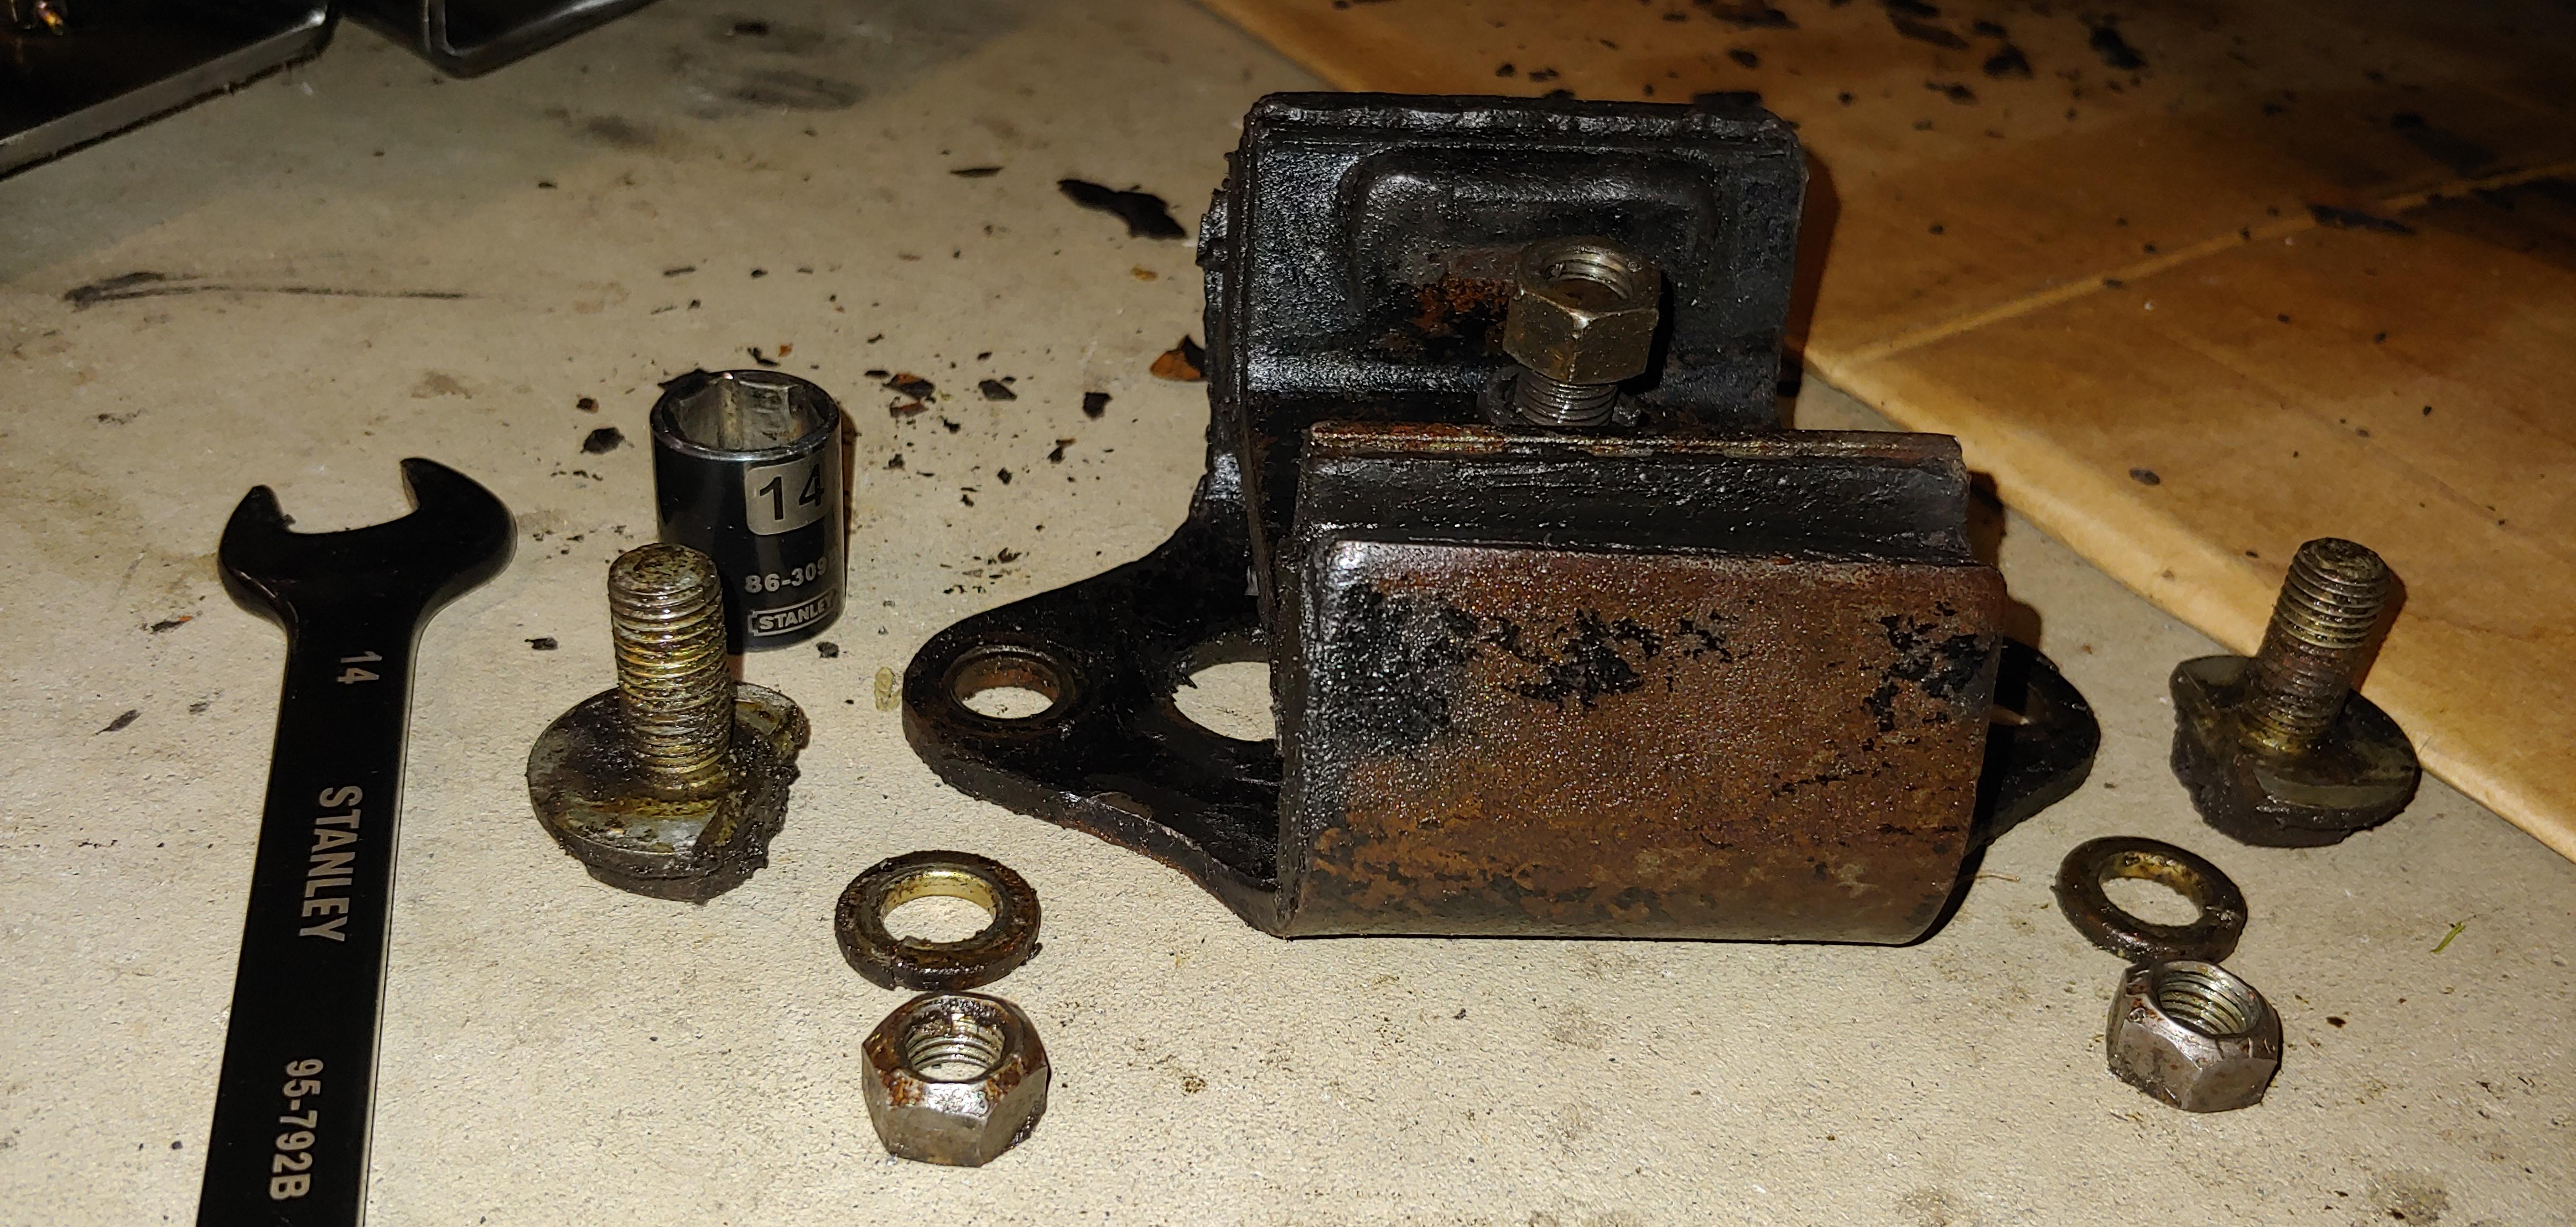
On the transmission mount cross member my 7/70 has M10x1.25 x 25mm long JIS type cap screw with 14mm hex size. Plus lock and flat washers. The actual transmission mount on mine has two M10x1.25 x 25 flanged head cap screw. The head has a larger head, 19mm hex and 28mm OD flange, the flange and head is clipped. Plus lock washer and M10x1.25 Nut, JIS type (14mm hex). These bolts seem a little short, see picture before I removed them.


-
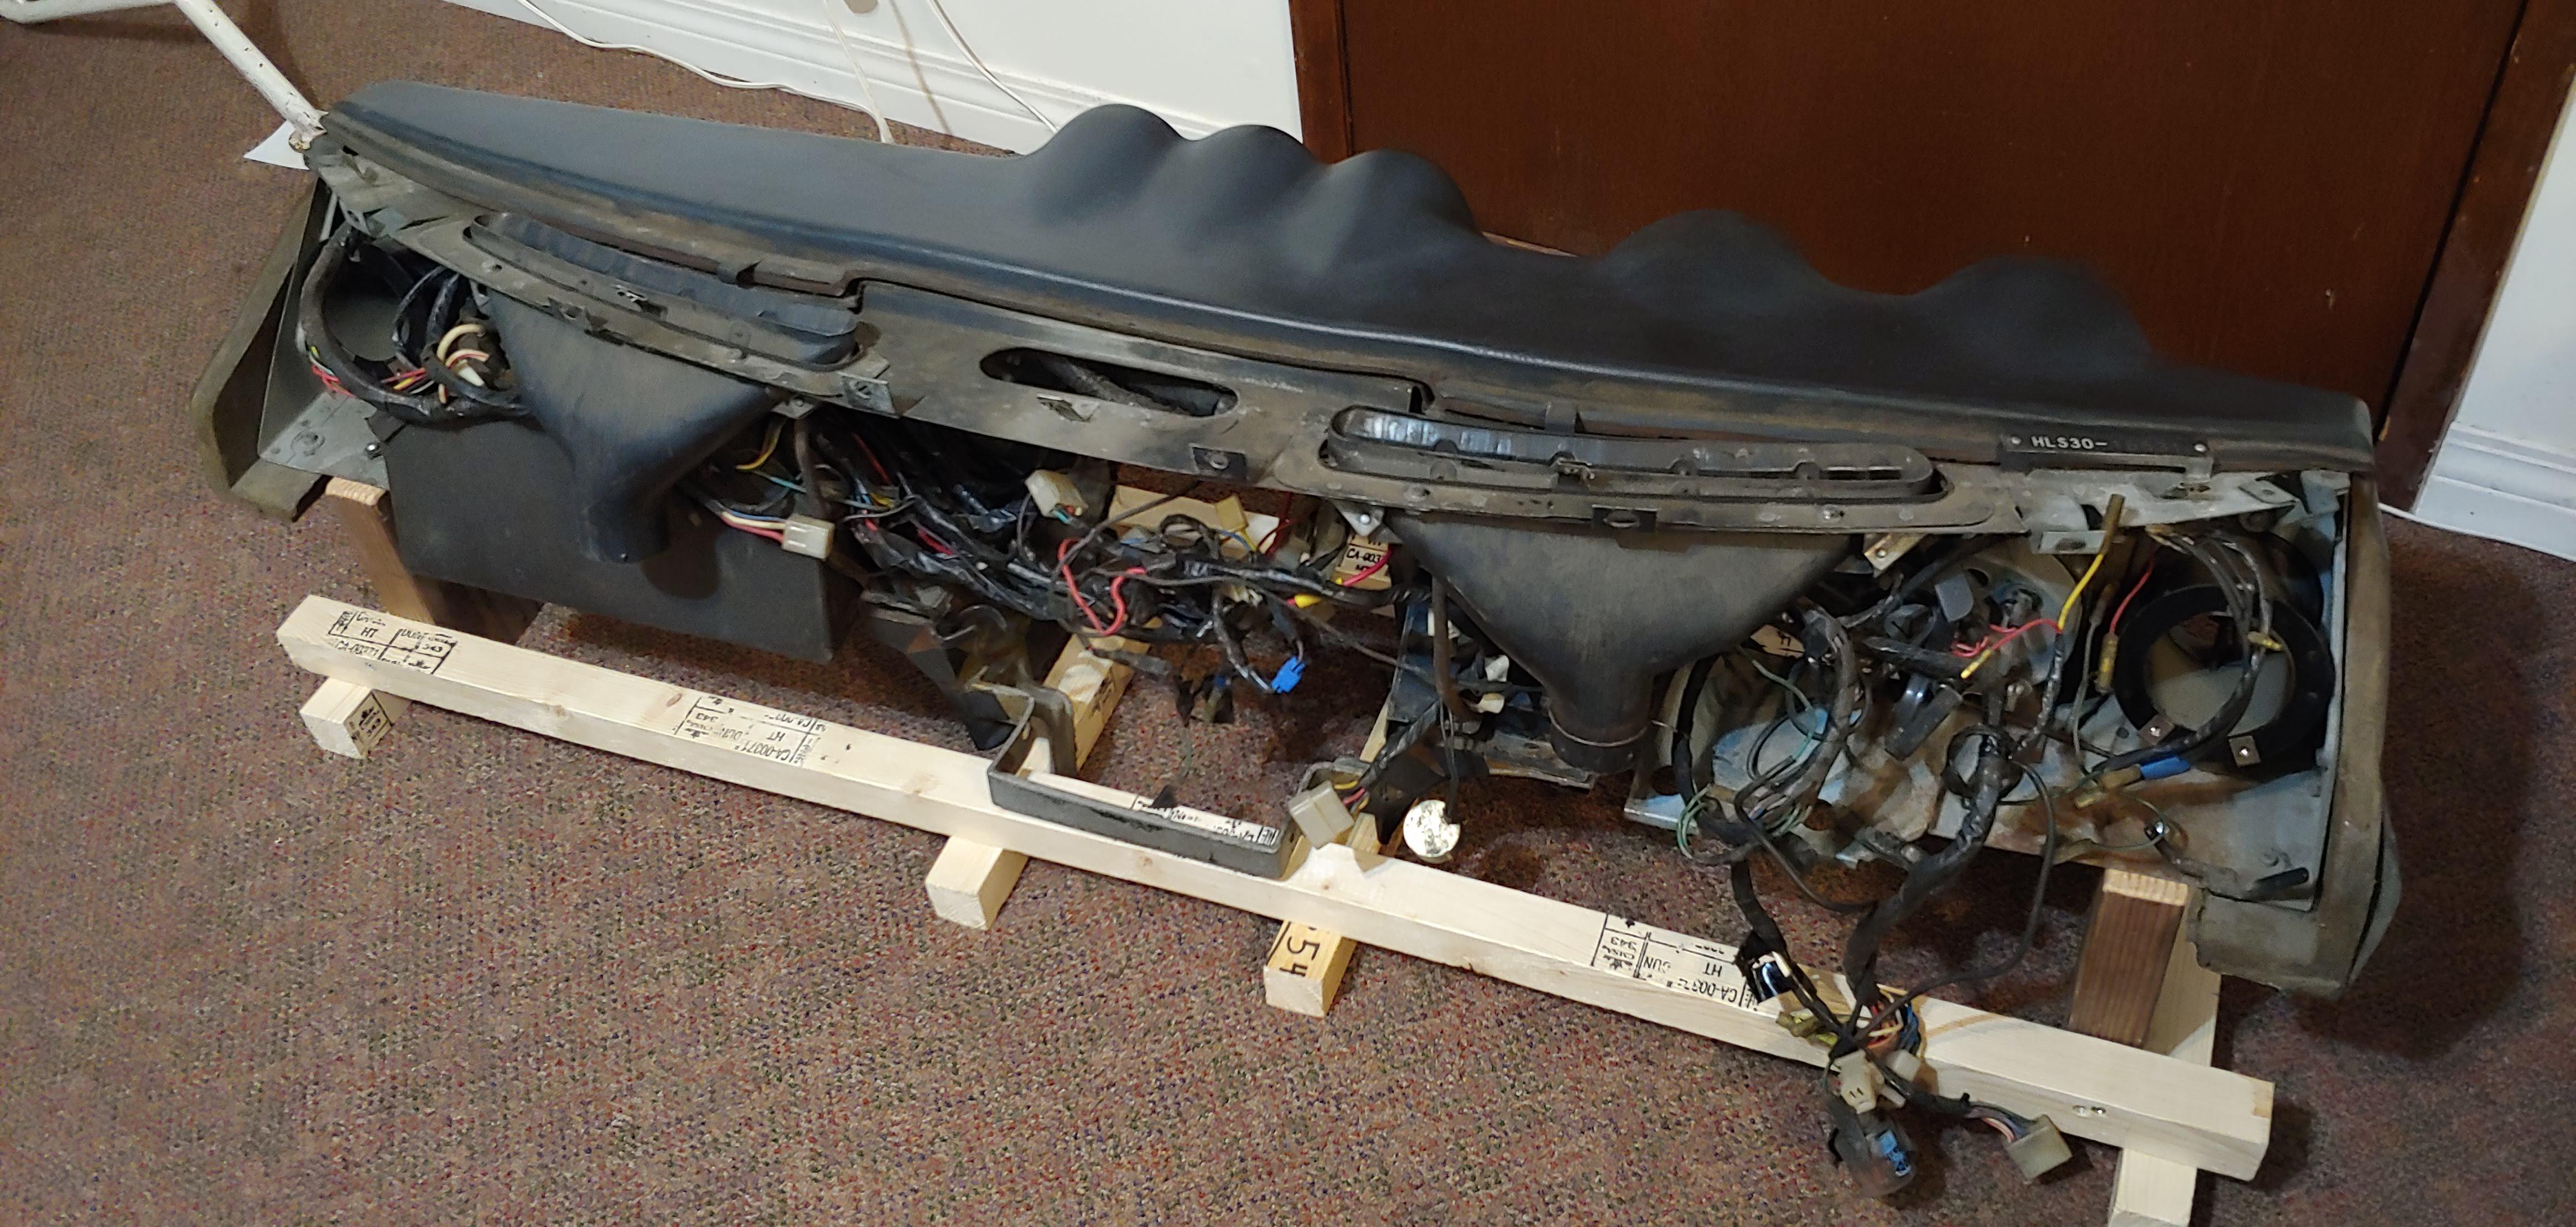
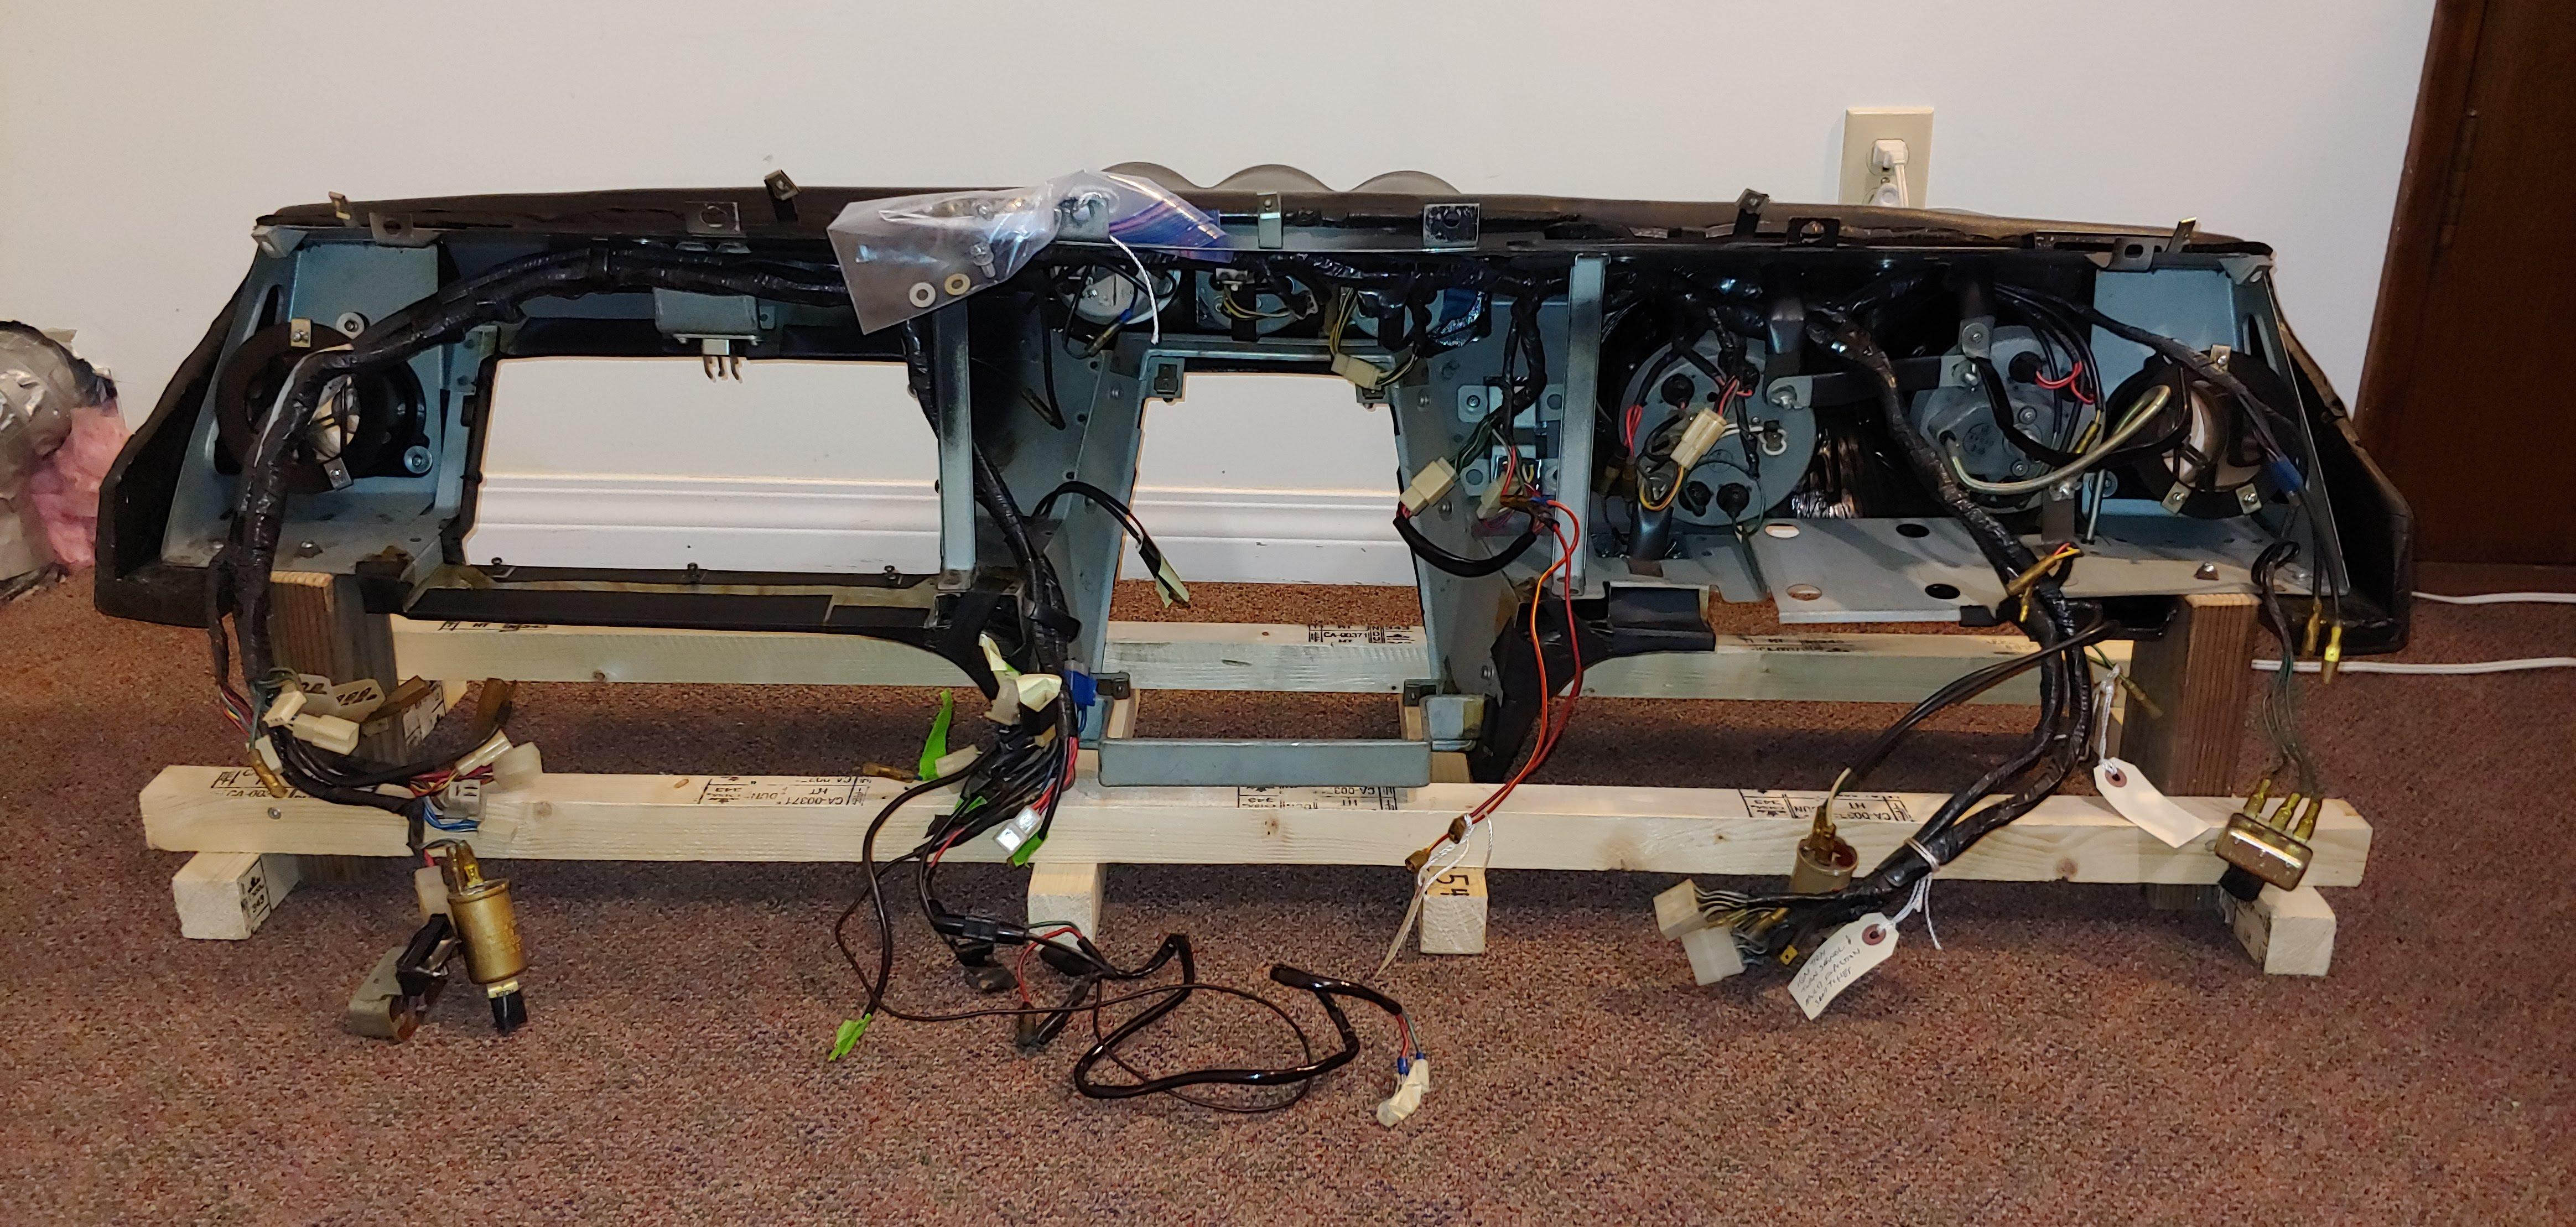
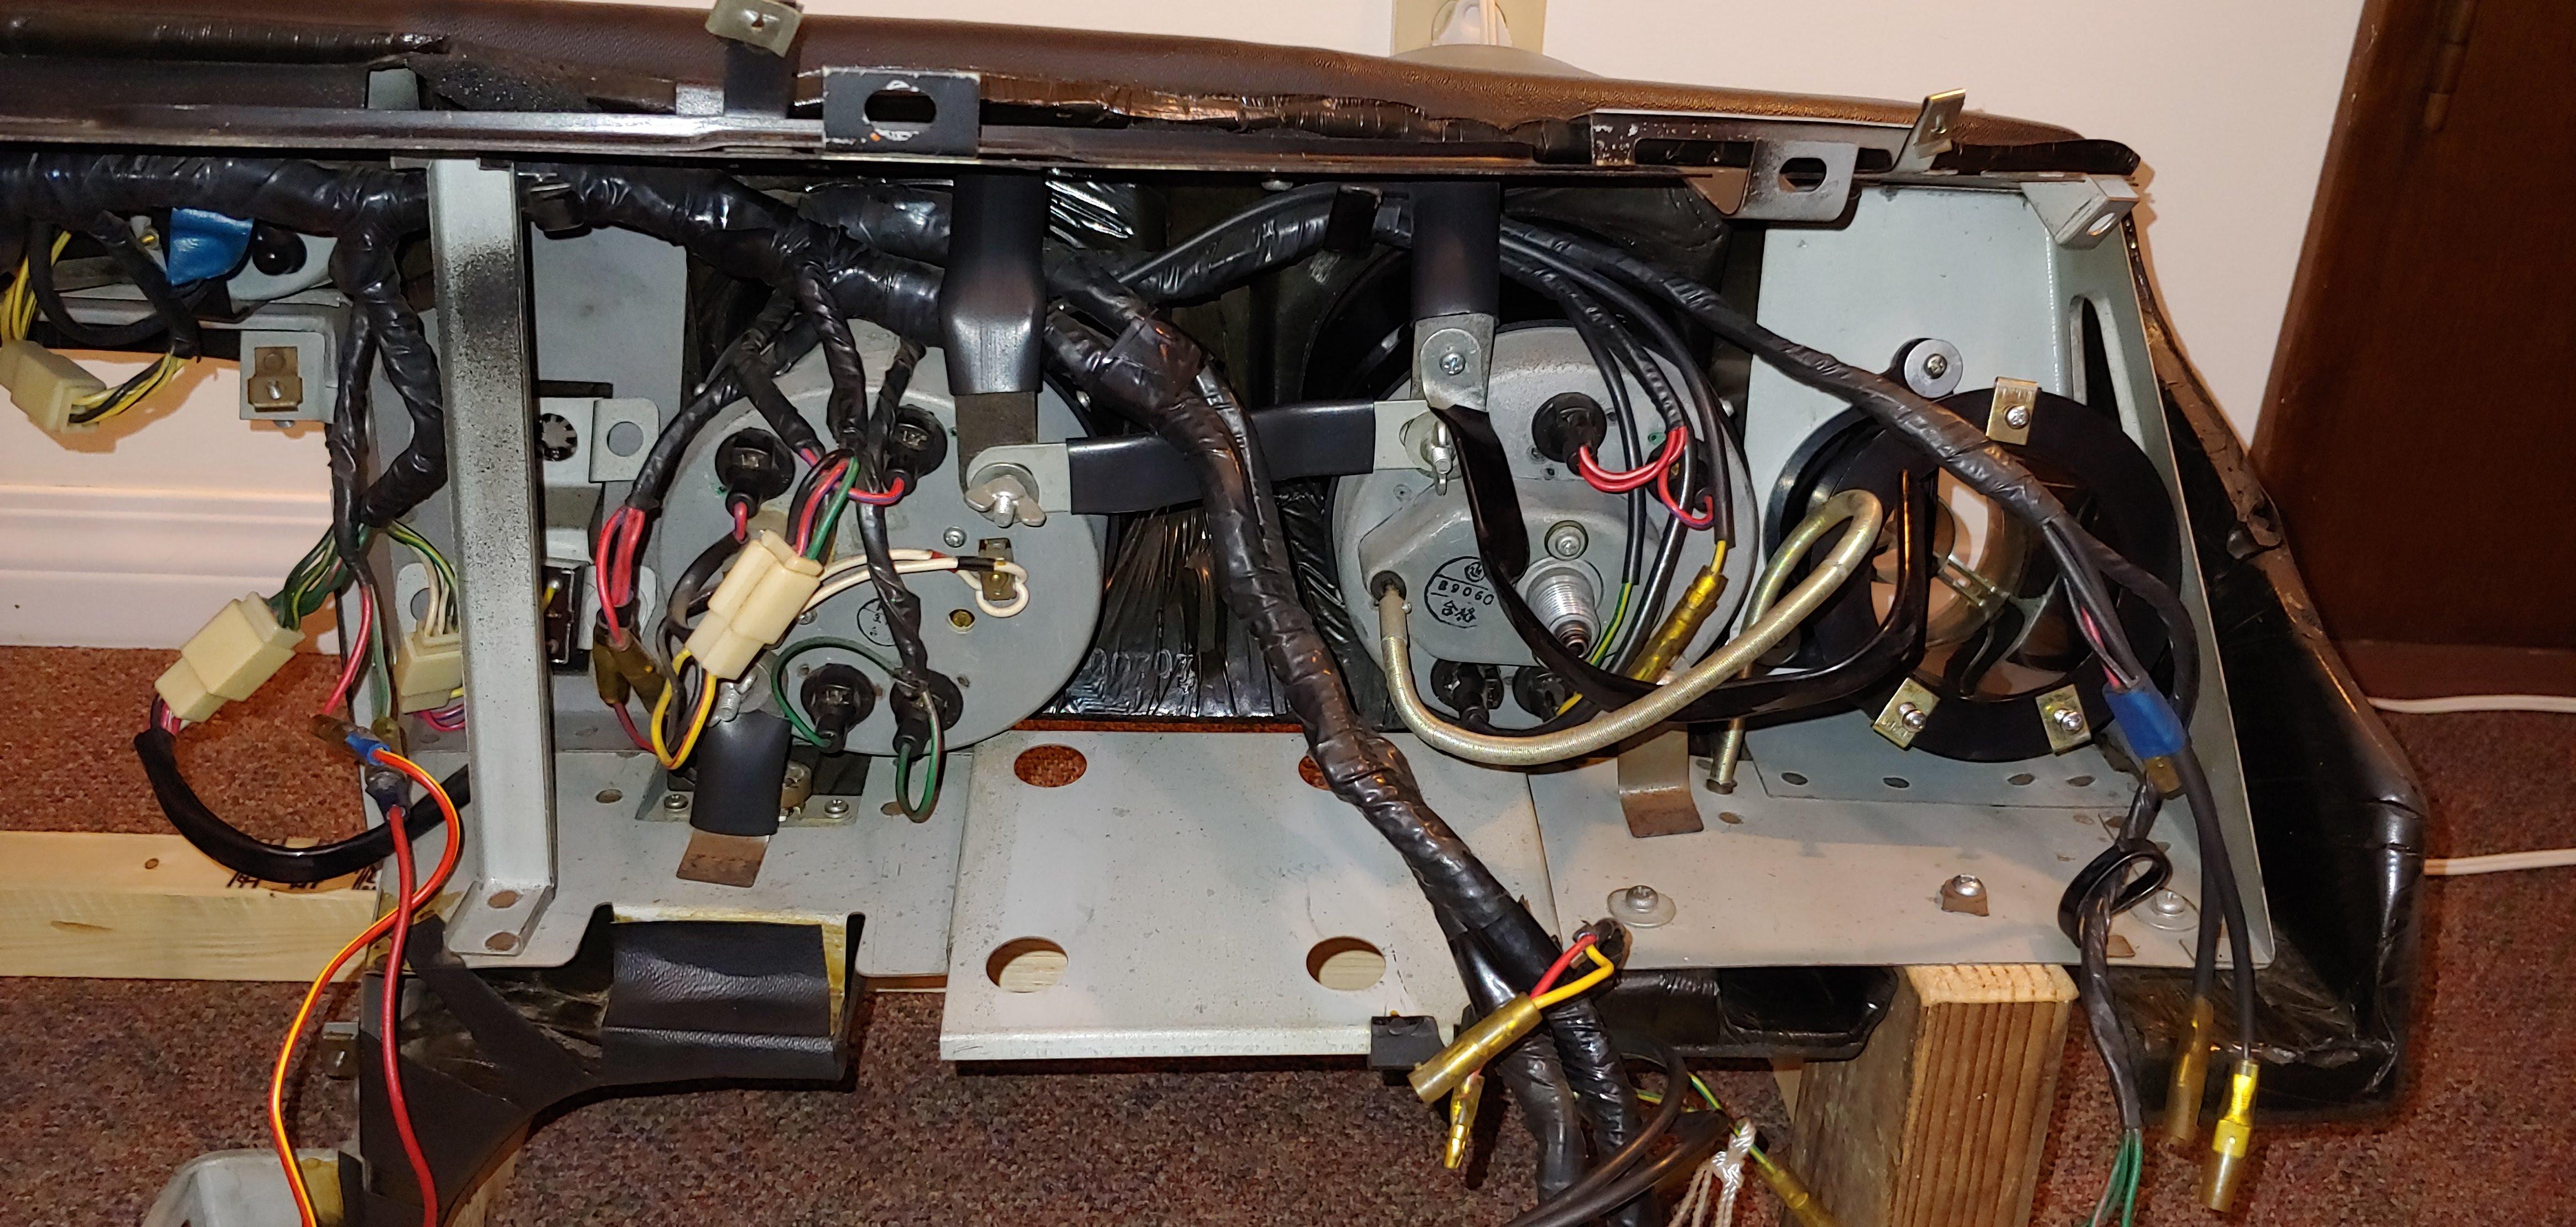
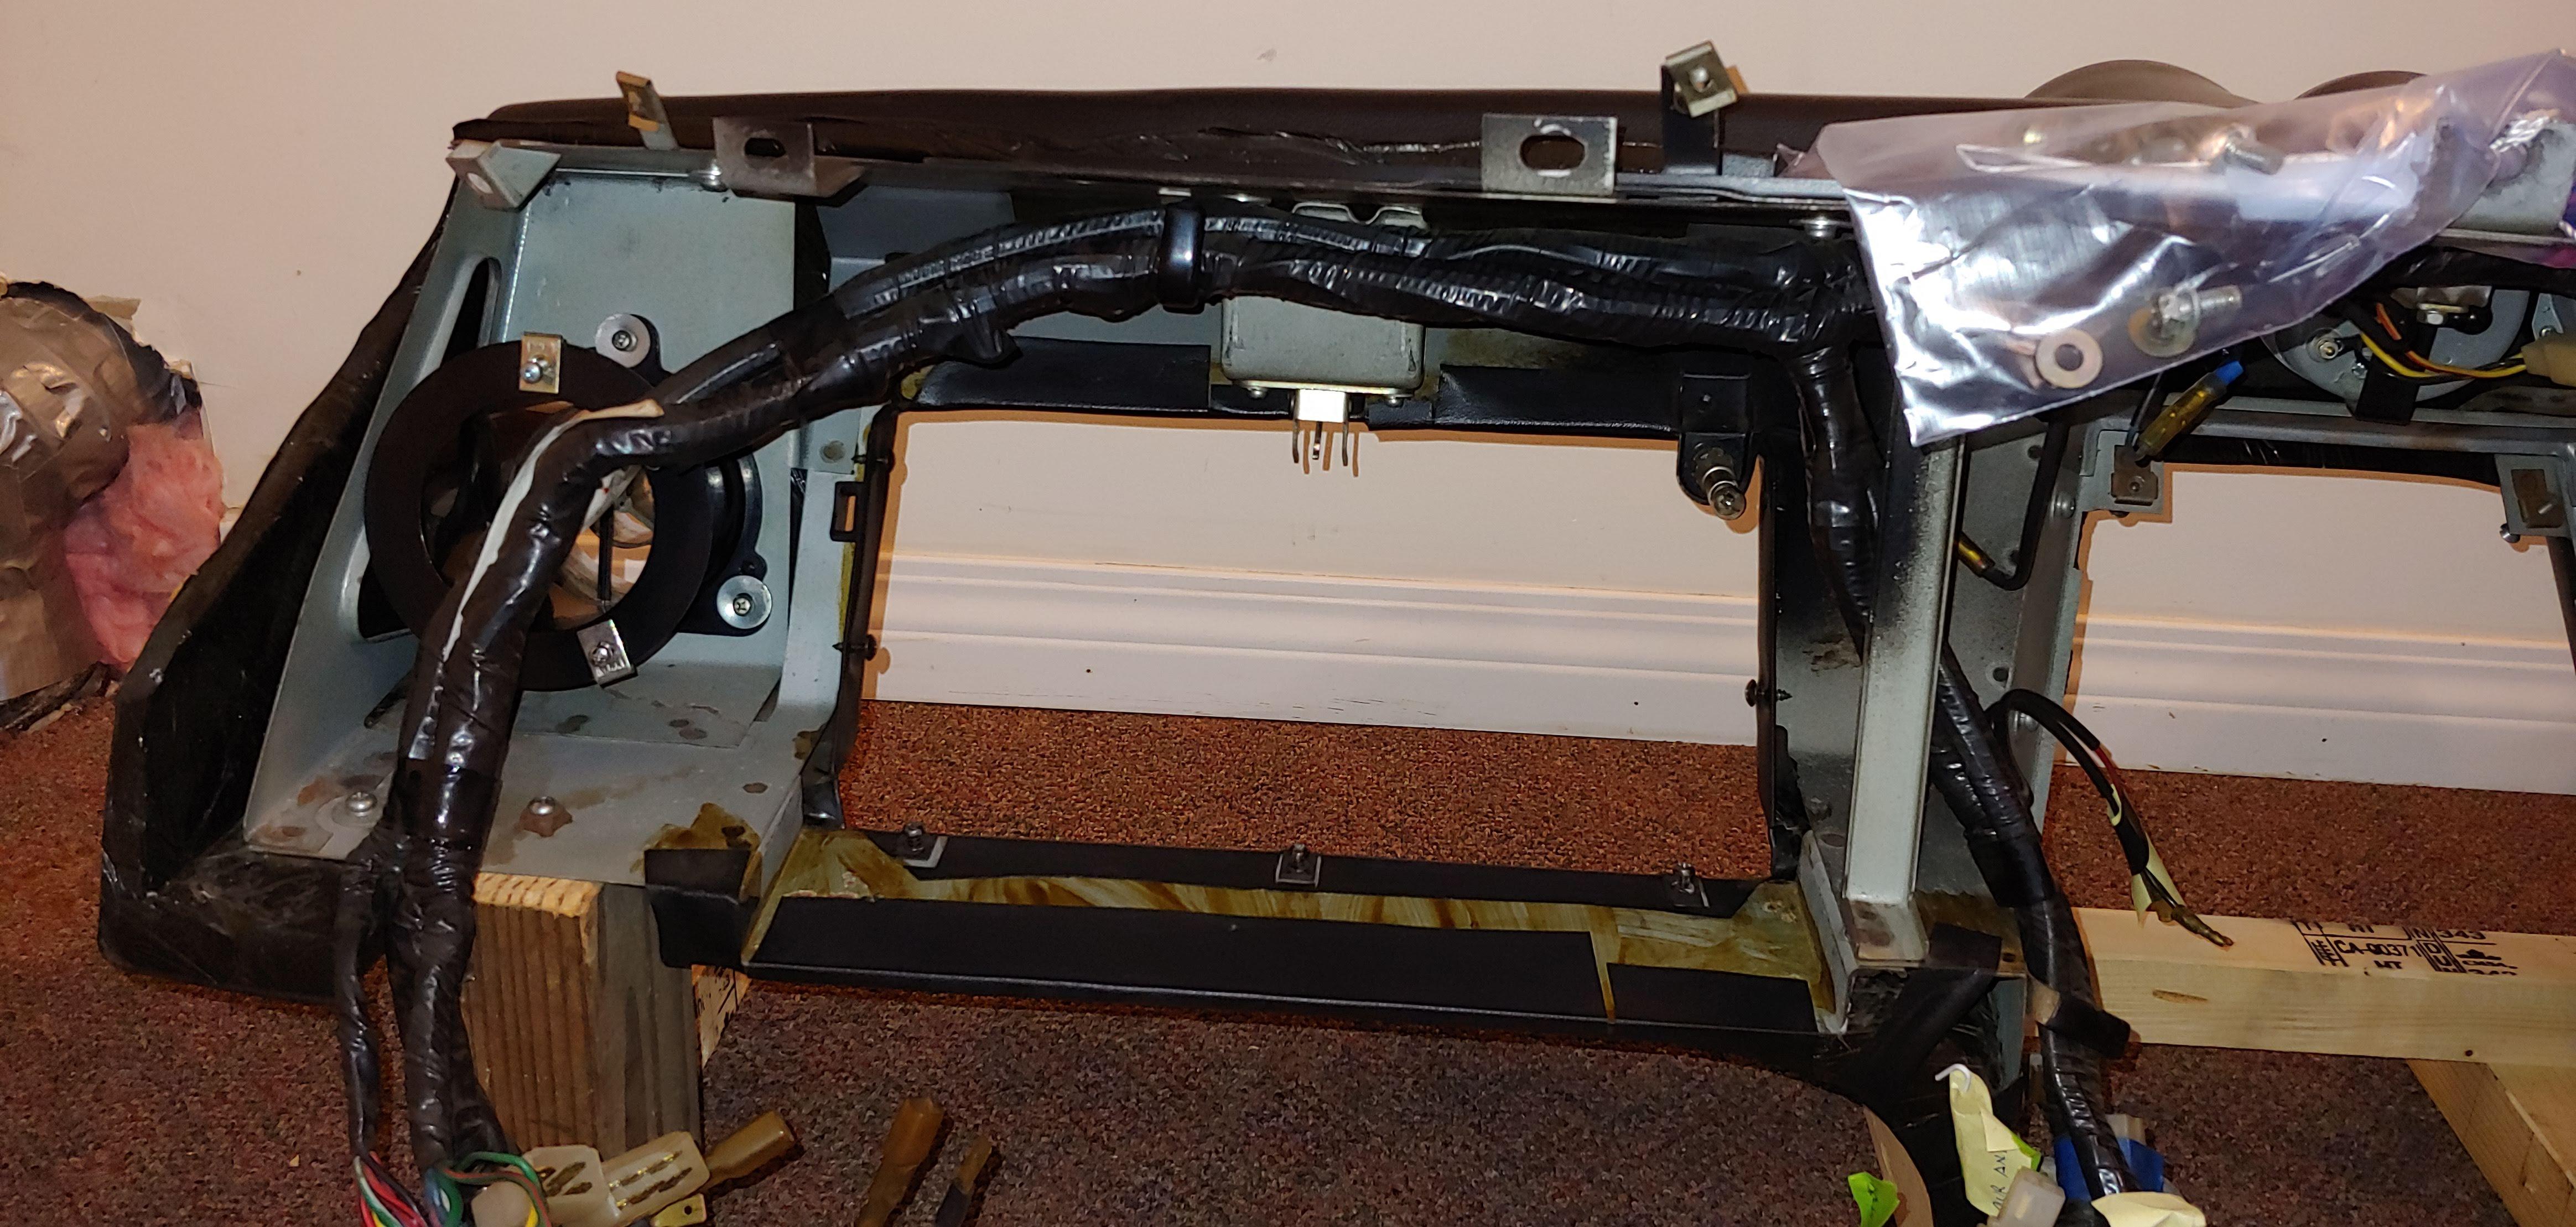
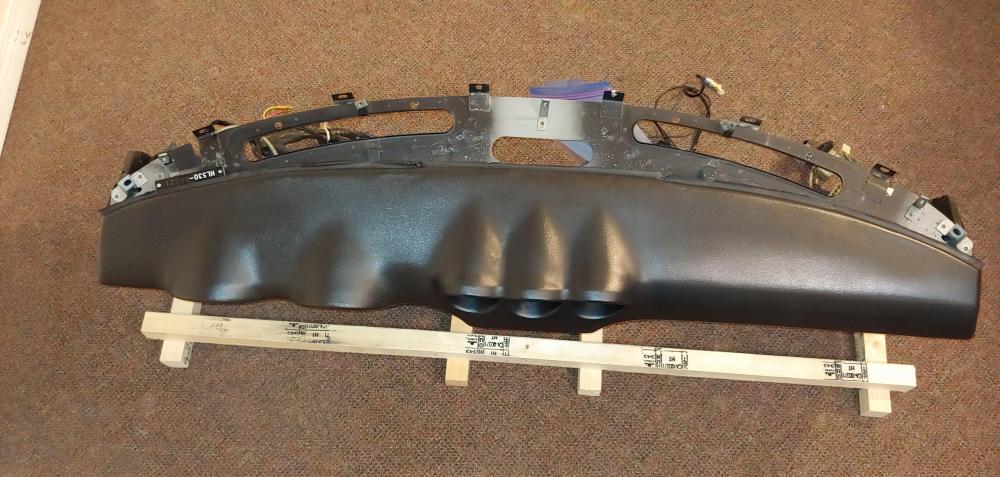
Dash from my 12/70 parts car (#16531) has the round center braces. Looks like most of the evolution happened in the first year.

-
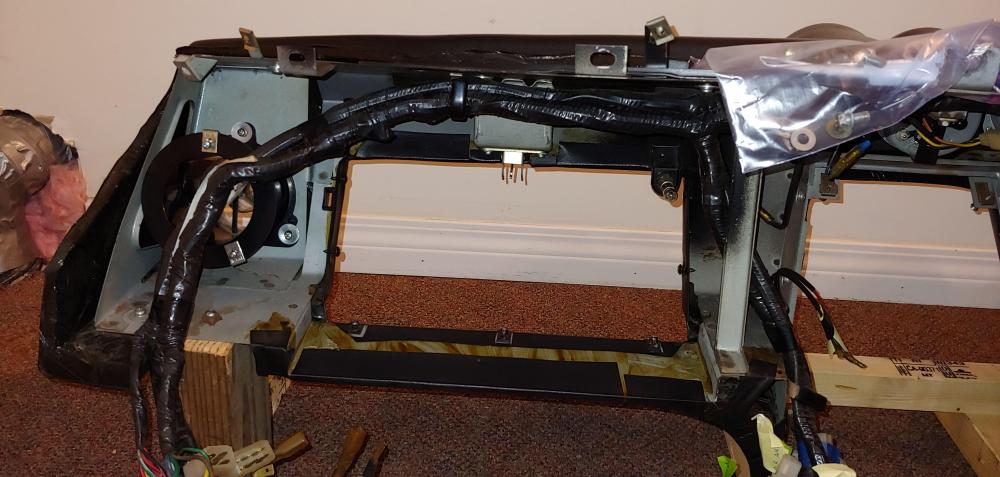
The Dash from my 7/70 (#6521) has some of the early and later features. Reinforced ends and stamped steel center braces.


-
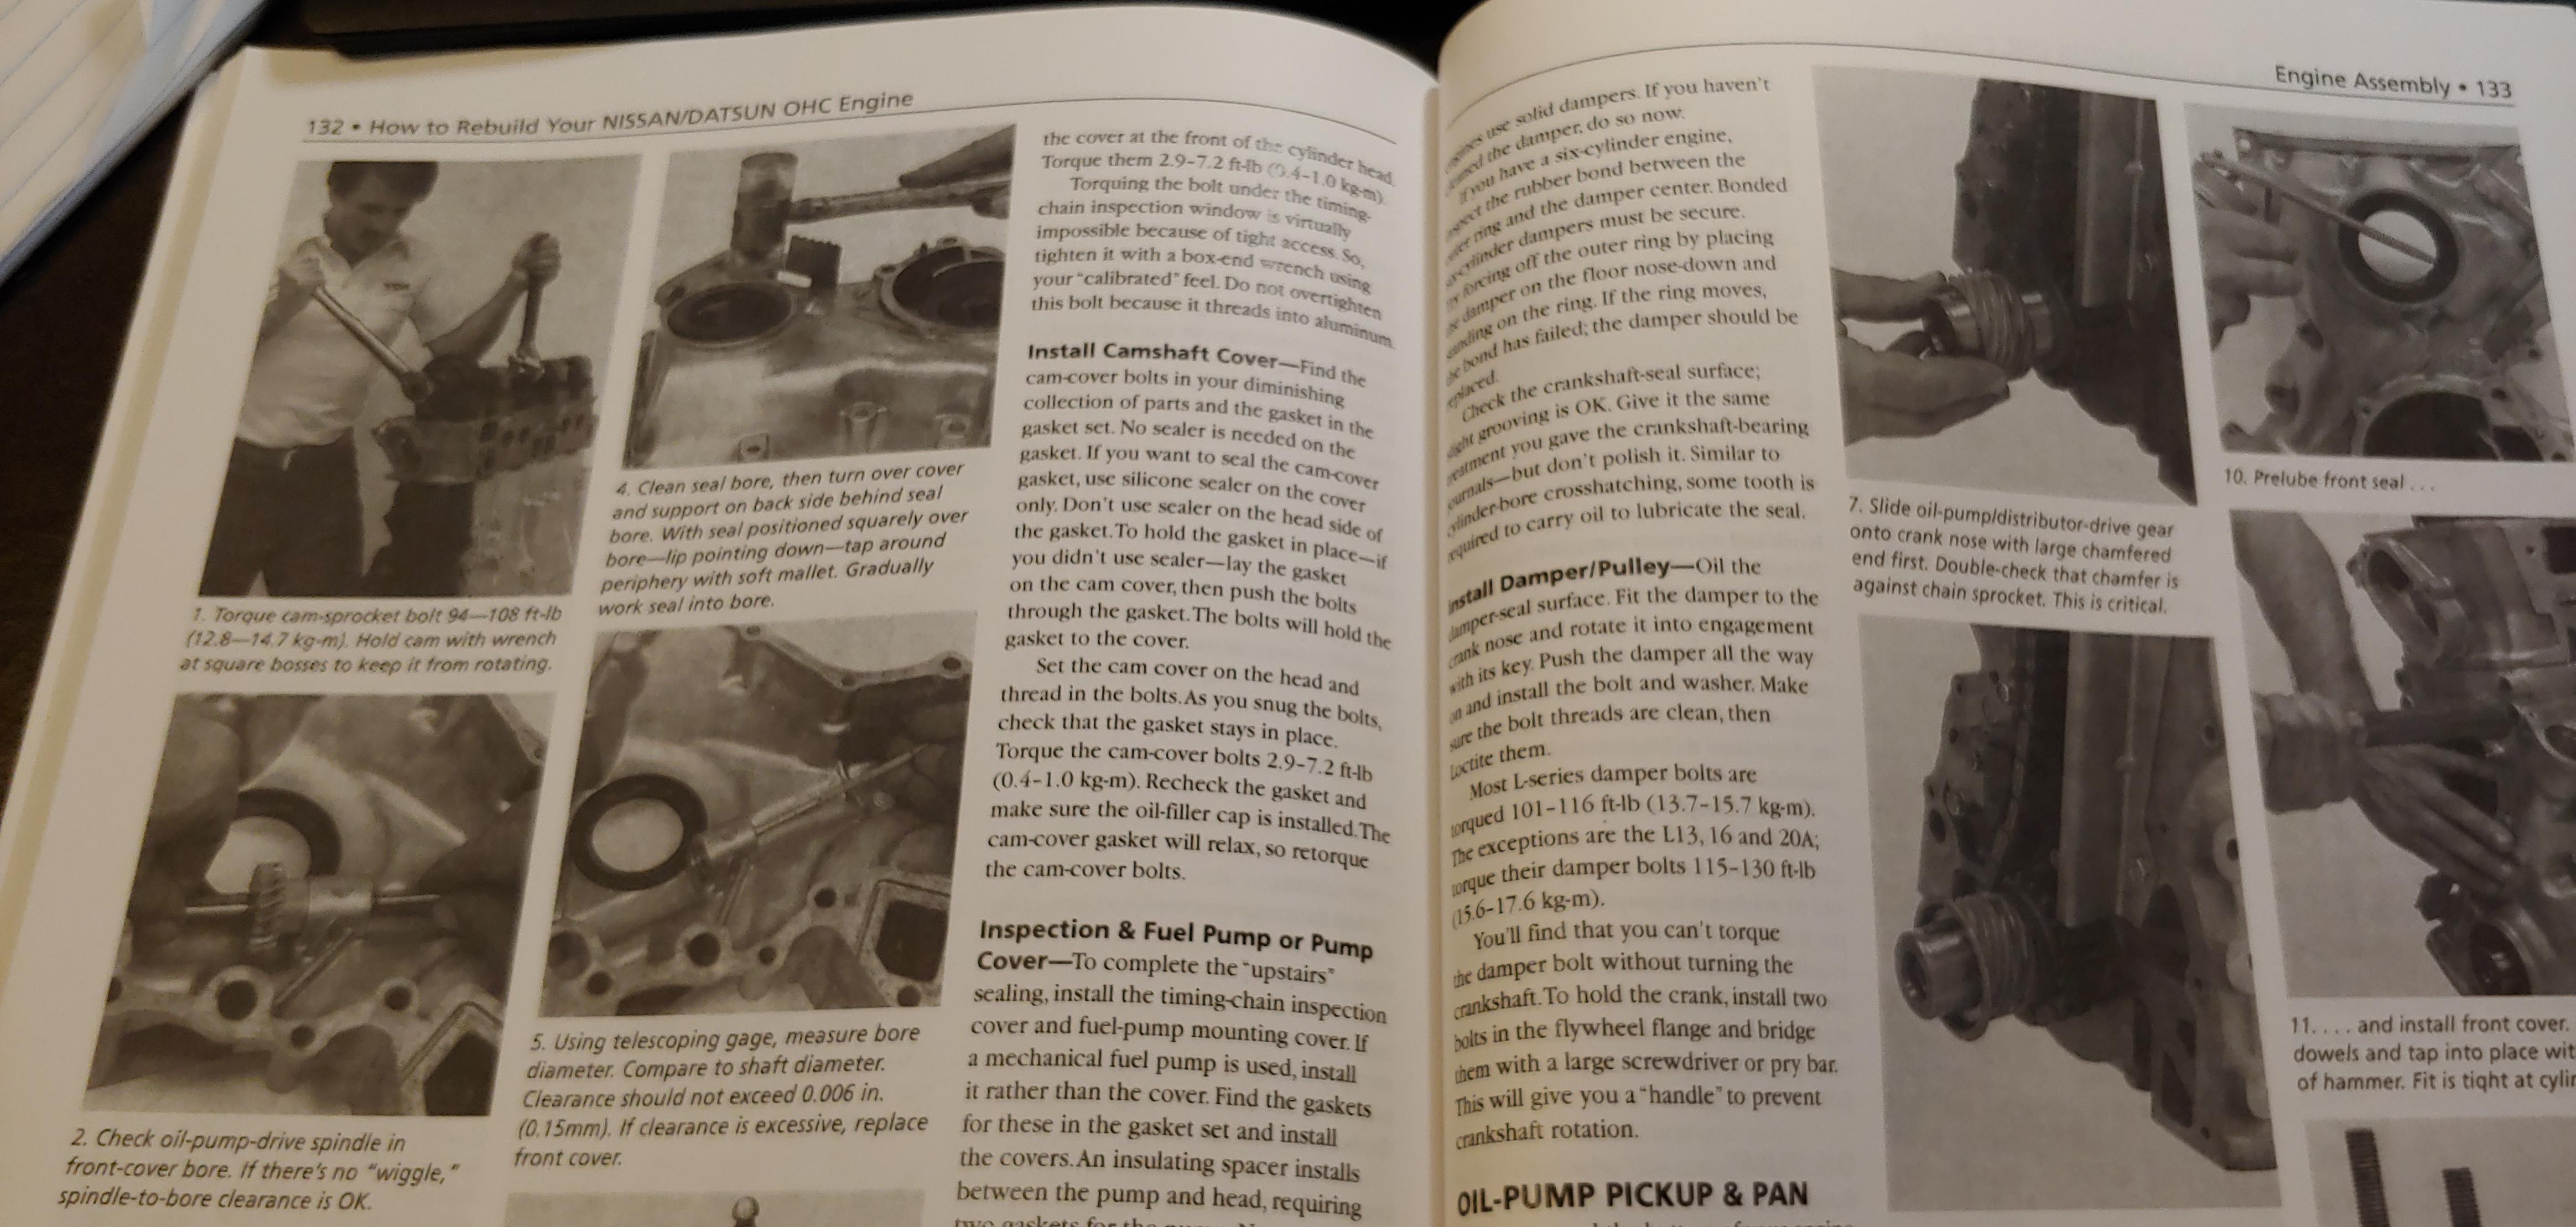
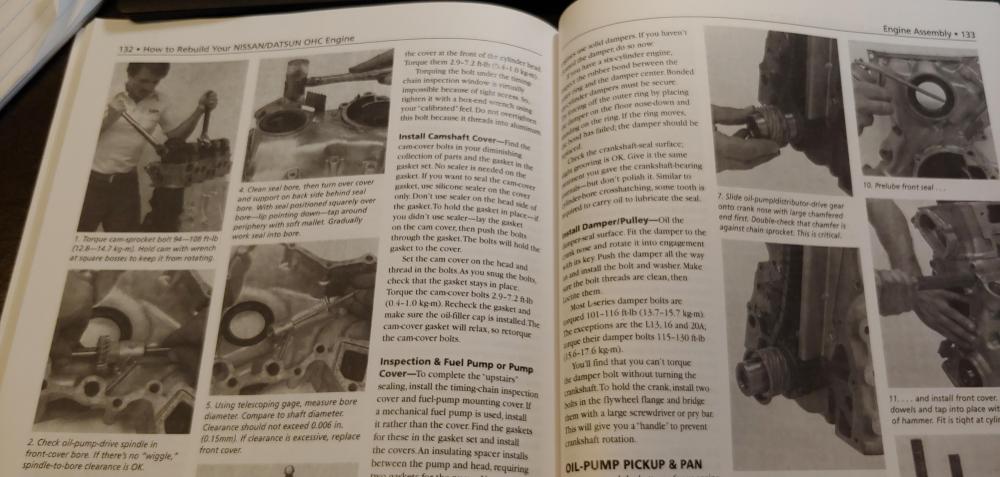
@Wally You should consider getting a copy of Tom Monroe's book, How To Rebuild Your Nissan & Datsun OHC Engine, if you don't already have it. Lot's of detailed assembly instructions and pictures. https://www.amazon.com/Rebuild-Nissan-Datsun-Engine-Publisher/dp/B004X9A0OA
-
If your old seal was rubber on the outside it still would have a metal case under the rubber. For aluminum housings it is standard practice to use rubber covered seals due to the fact that aluminum has a higher thermal expansion rate than steel. The rubber covering comes into play to help ensure that a press fit is not lost and also prevents fretting corrosion between the seal OD and aluminum housing seal bore.
-
That makes sense, looks like the image in the '78 FSM is might be wrong. Is it 1978 that the change to the sloping floor in the rear deck was made? Maybe the "reversed" type bracket is to accommodate that. Just guessing, I have no experience with 280Z's.