CanTechZ
Member
-
Joined
-
Last visited
Everything posted by CanTechZ
-
 The basic rule for metric tap drill size is very simple. Tap drill equals thread size minus pitch, for M6x1.0 tap drill is 5.0mm (.1968"), closed imperial drill is #9, .1960". Here is a printable Starrett toolbox card with inch/metric tap drills and decimal equivalents that I have found very handy and a link on the Starrett website. https://www.starrett.com/docs/educational/decimal-equivalent-card---bulletin-1317.pdf Starrett-decimal-equivalent-card-imp-metric tap drill-bulletin-1317.pdf
 -
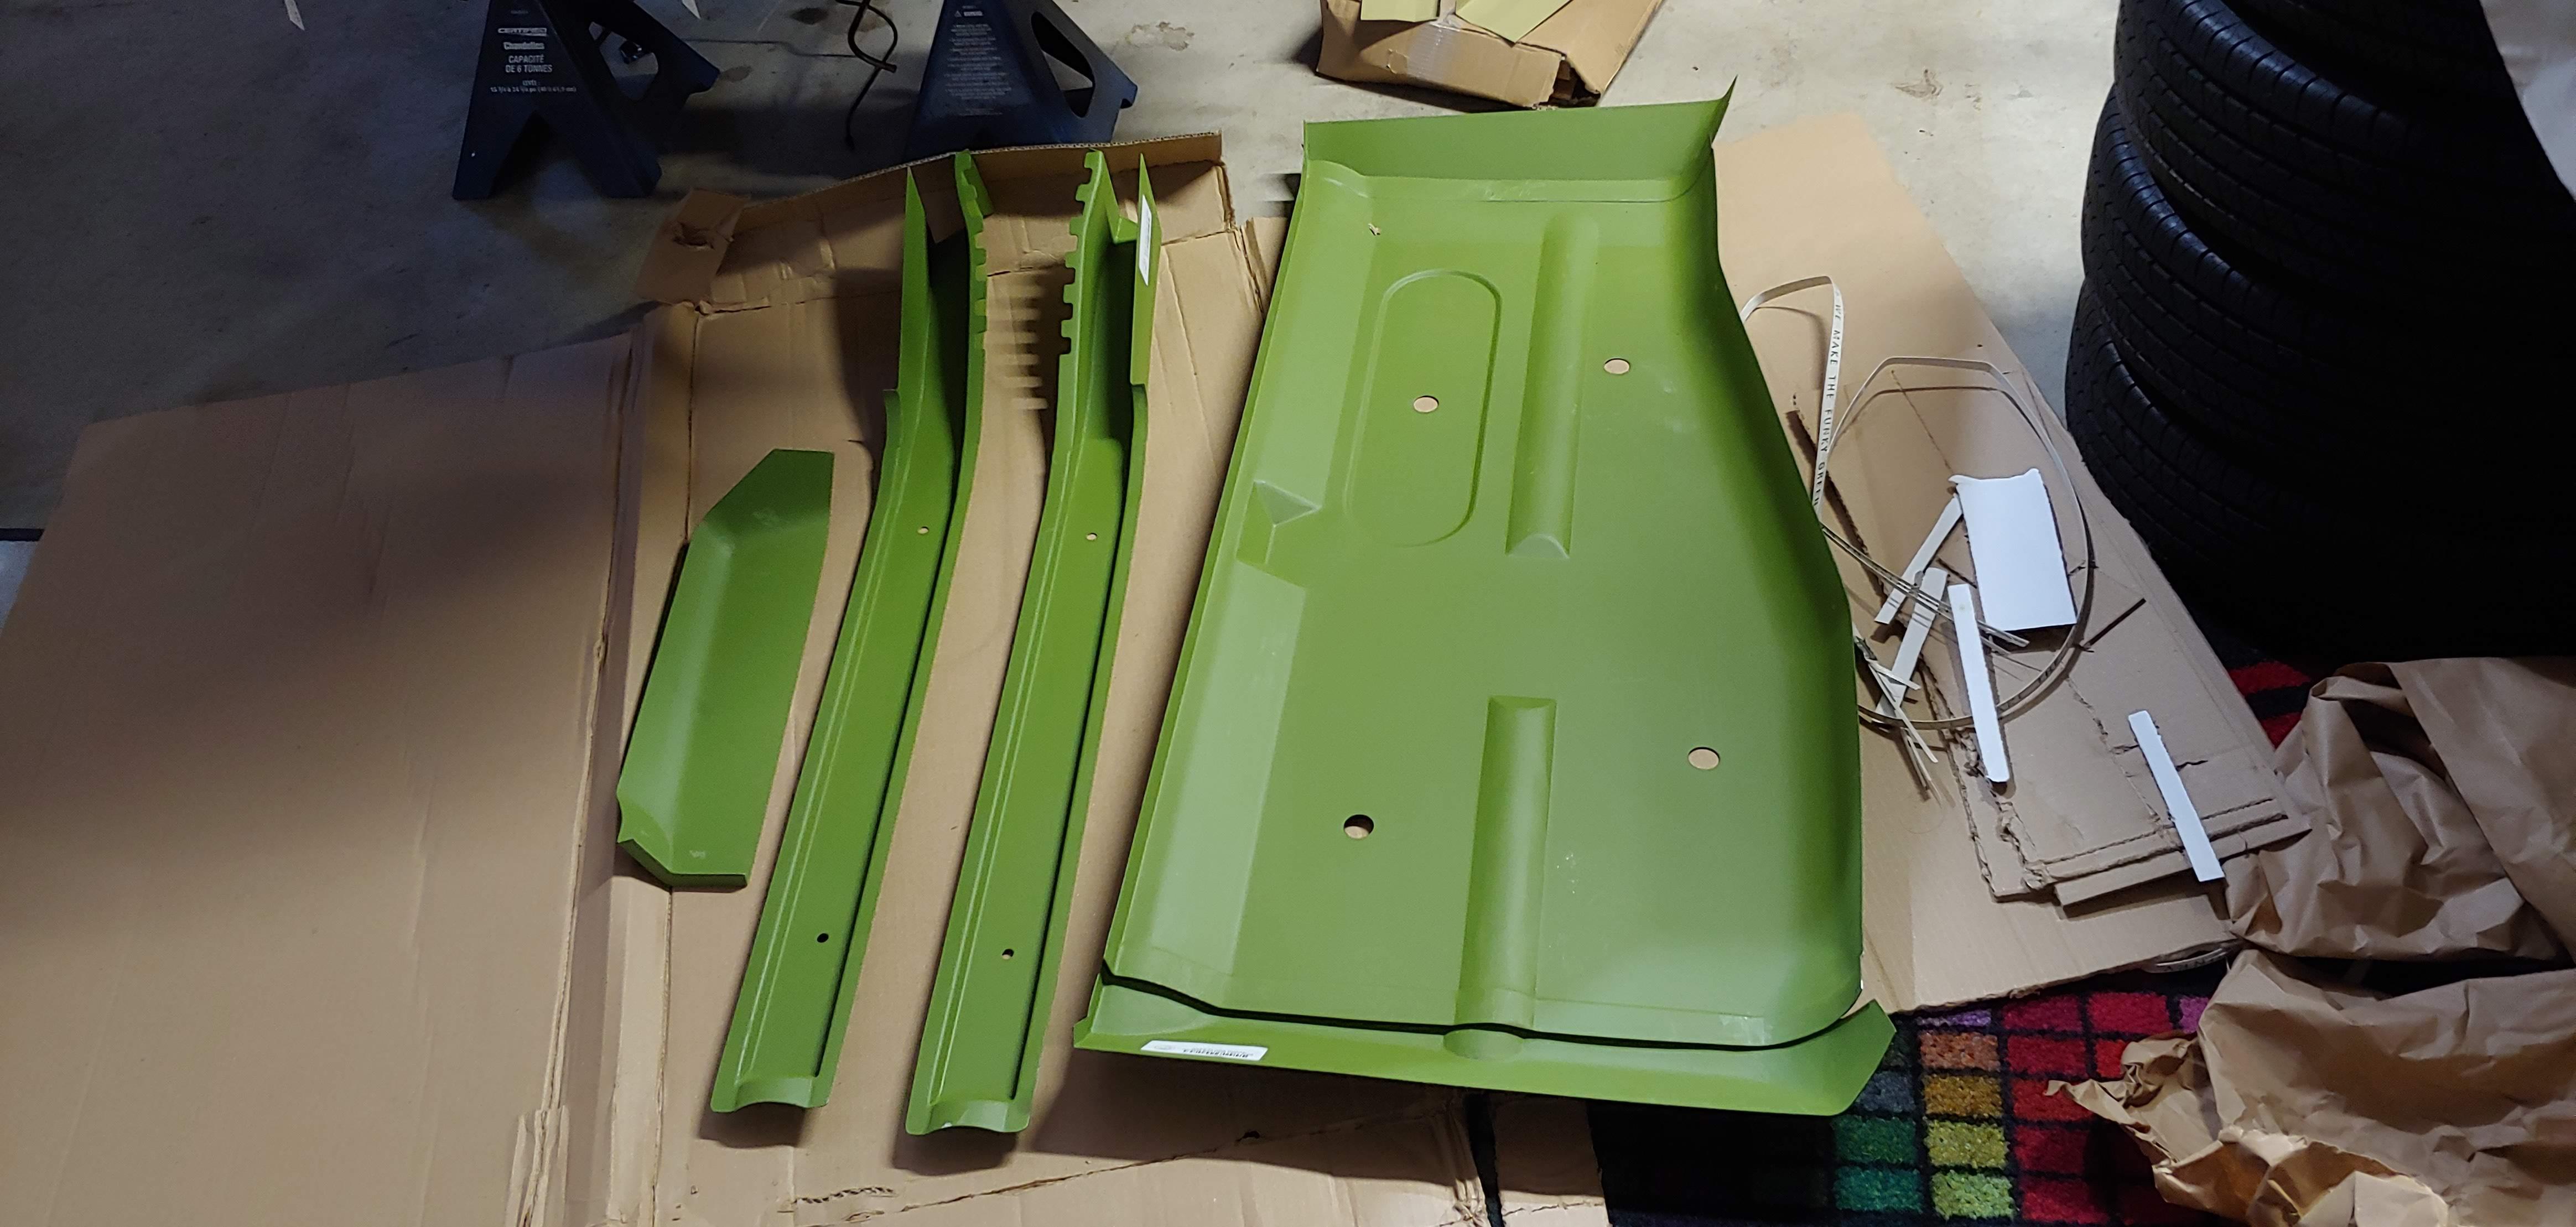
I just received my floor pan parts and full rear frame rails from KF Vintage JDM and they look great. I would definitely recommend them. They arrived well packaged in three business days from Bogata Columbia to my address in BC, Canada.

-
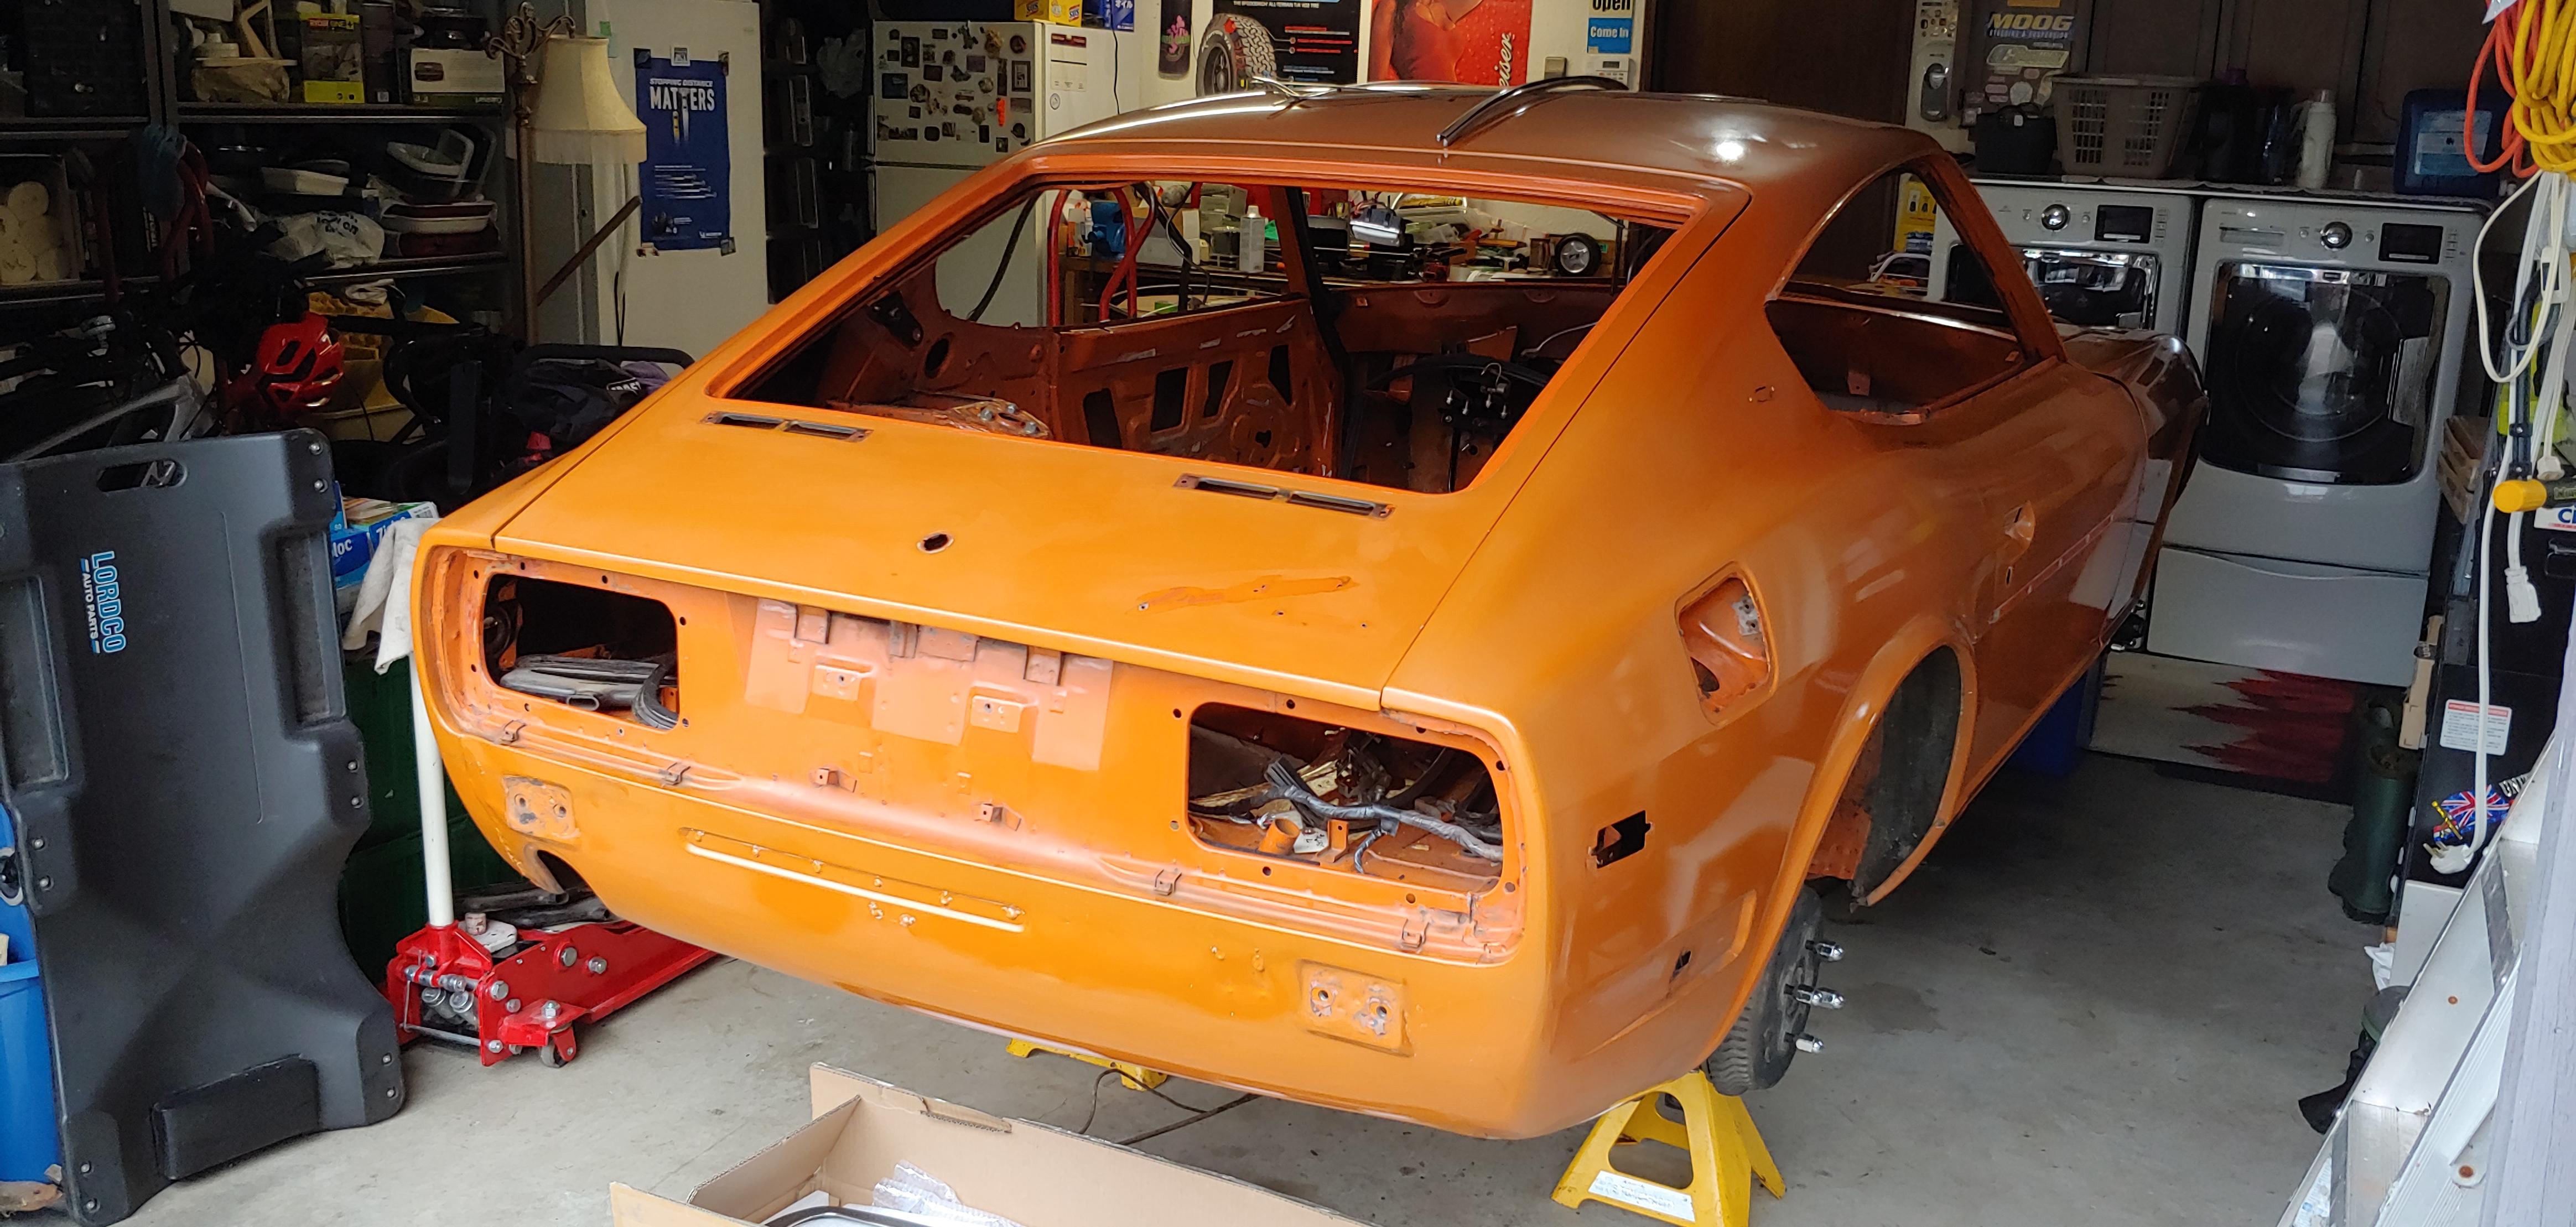
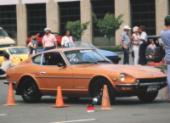
I would definitely go back to body color, 918 orange also happens to be my favorite. 😃
-
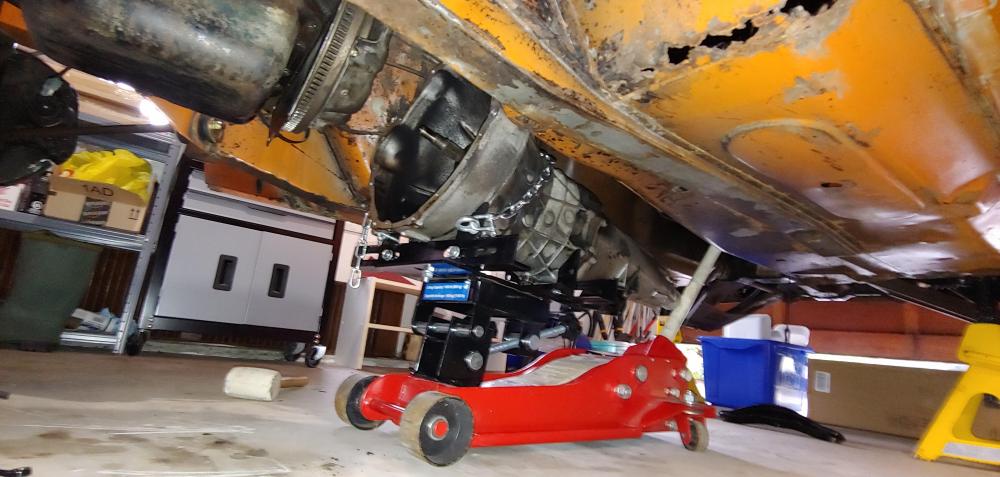
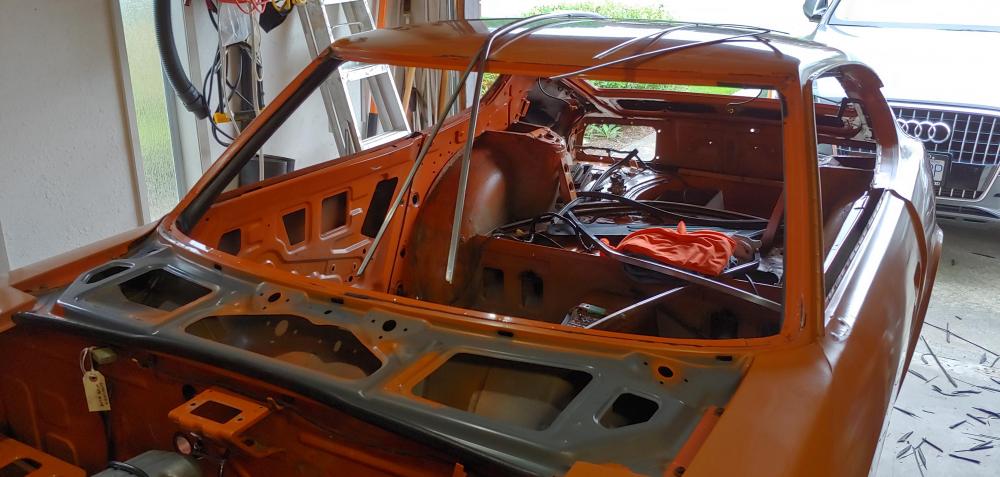
It's been a while since I've made a progress report so I thought today is a good day to do that. Firstly I had a good meeting recently with my body man Jody. I will be sending the bare shell to his shop in mid November. We looked the car over to see what repair parts I should order, and decided on the following: 1. Zedd Findings - LH and RH front frame rails 2. Auto Panel Solutions (UK) - LH and RH outer repair panels above T/C box 3. KF Vintage JDM - LH floor panel and full frame rail, toe board, rear floor repair section - RH full frame rail, toe board If other parts are required we will address as we go. Since last report I have removed the starter and transmission and finished stripping the doors of window frames and latch/lock hardware. Removed the quarter windows, windshield, hatch glass and all seals. I also stripped all ventilation system parts from the hatch. I will be pulling the engine soon.

-
-
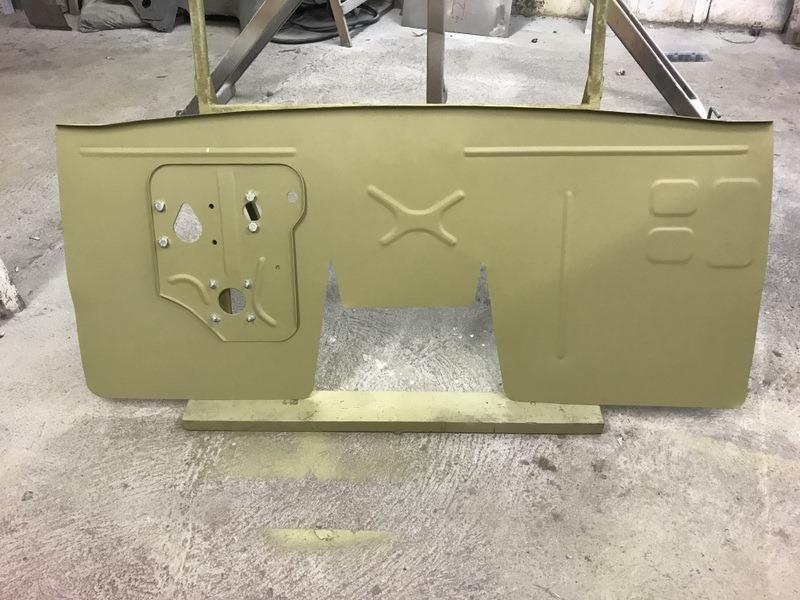
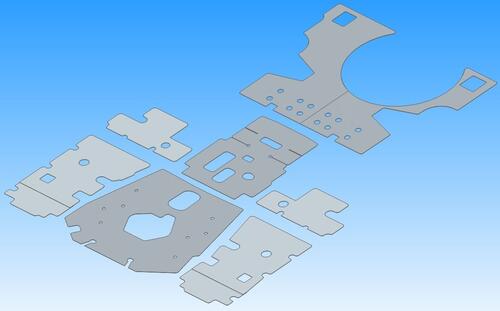 Templates for the tar mats (floor insulators) for the front floor and under seat areas of a 1970 240Z in PDF and DWG formats. The dimensions were taken from my July '70 car. I measured these as accurately as I could and printed verification templates on a wide format printer to check fit. Transmission tunnel and rear deck templates have now been added, this now a complete set.Free
- 9 comments
- 1 review
-
-

-

- 5
-
-
-
Very useful info, thanks for posting.
-
Anyone else ordered from Auto Panel Solutions? I would be interested to hear about others experiences and/or thoughts. @wrecked2001, how was the fitment of the parts you purchased?
-
-
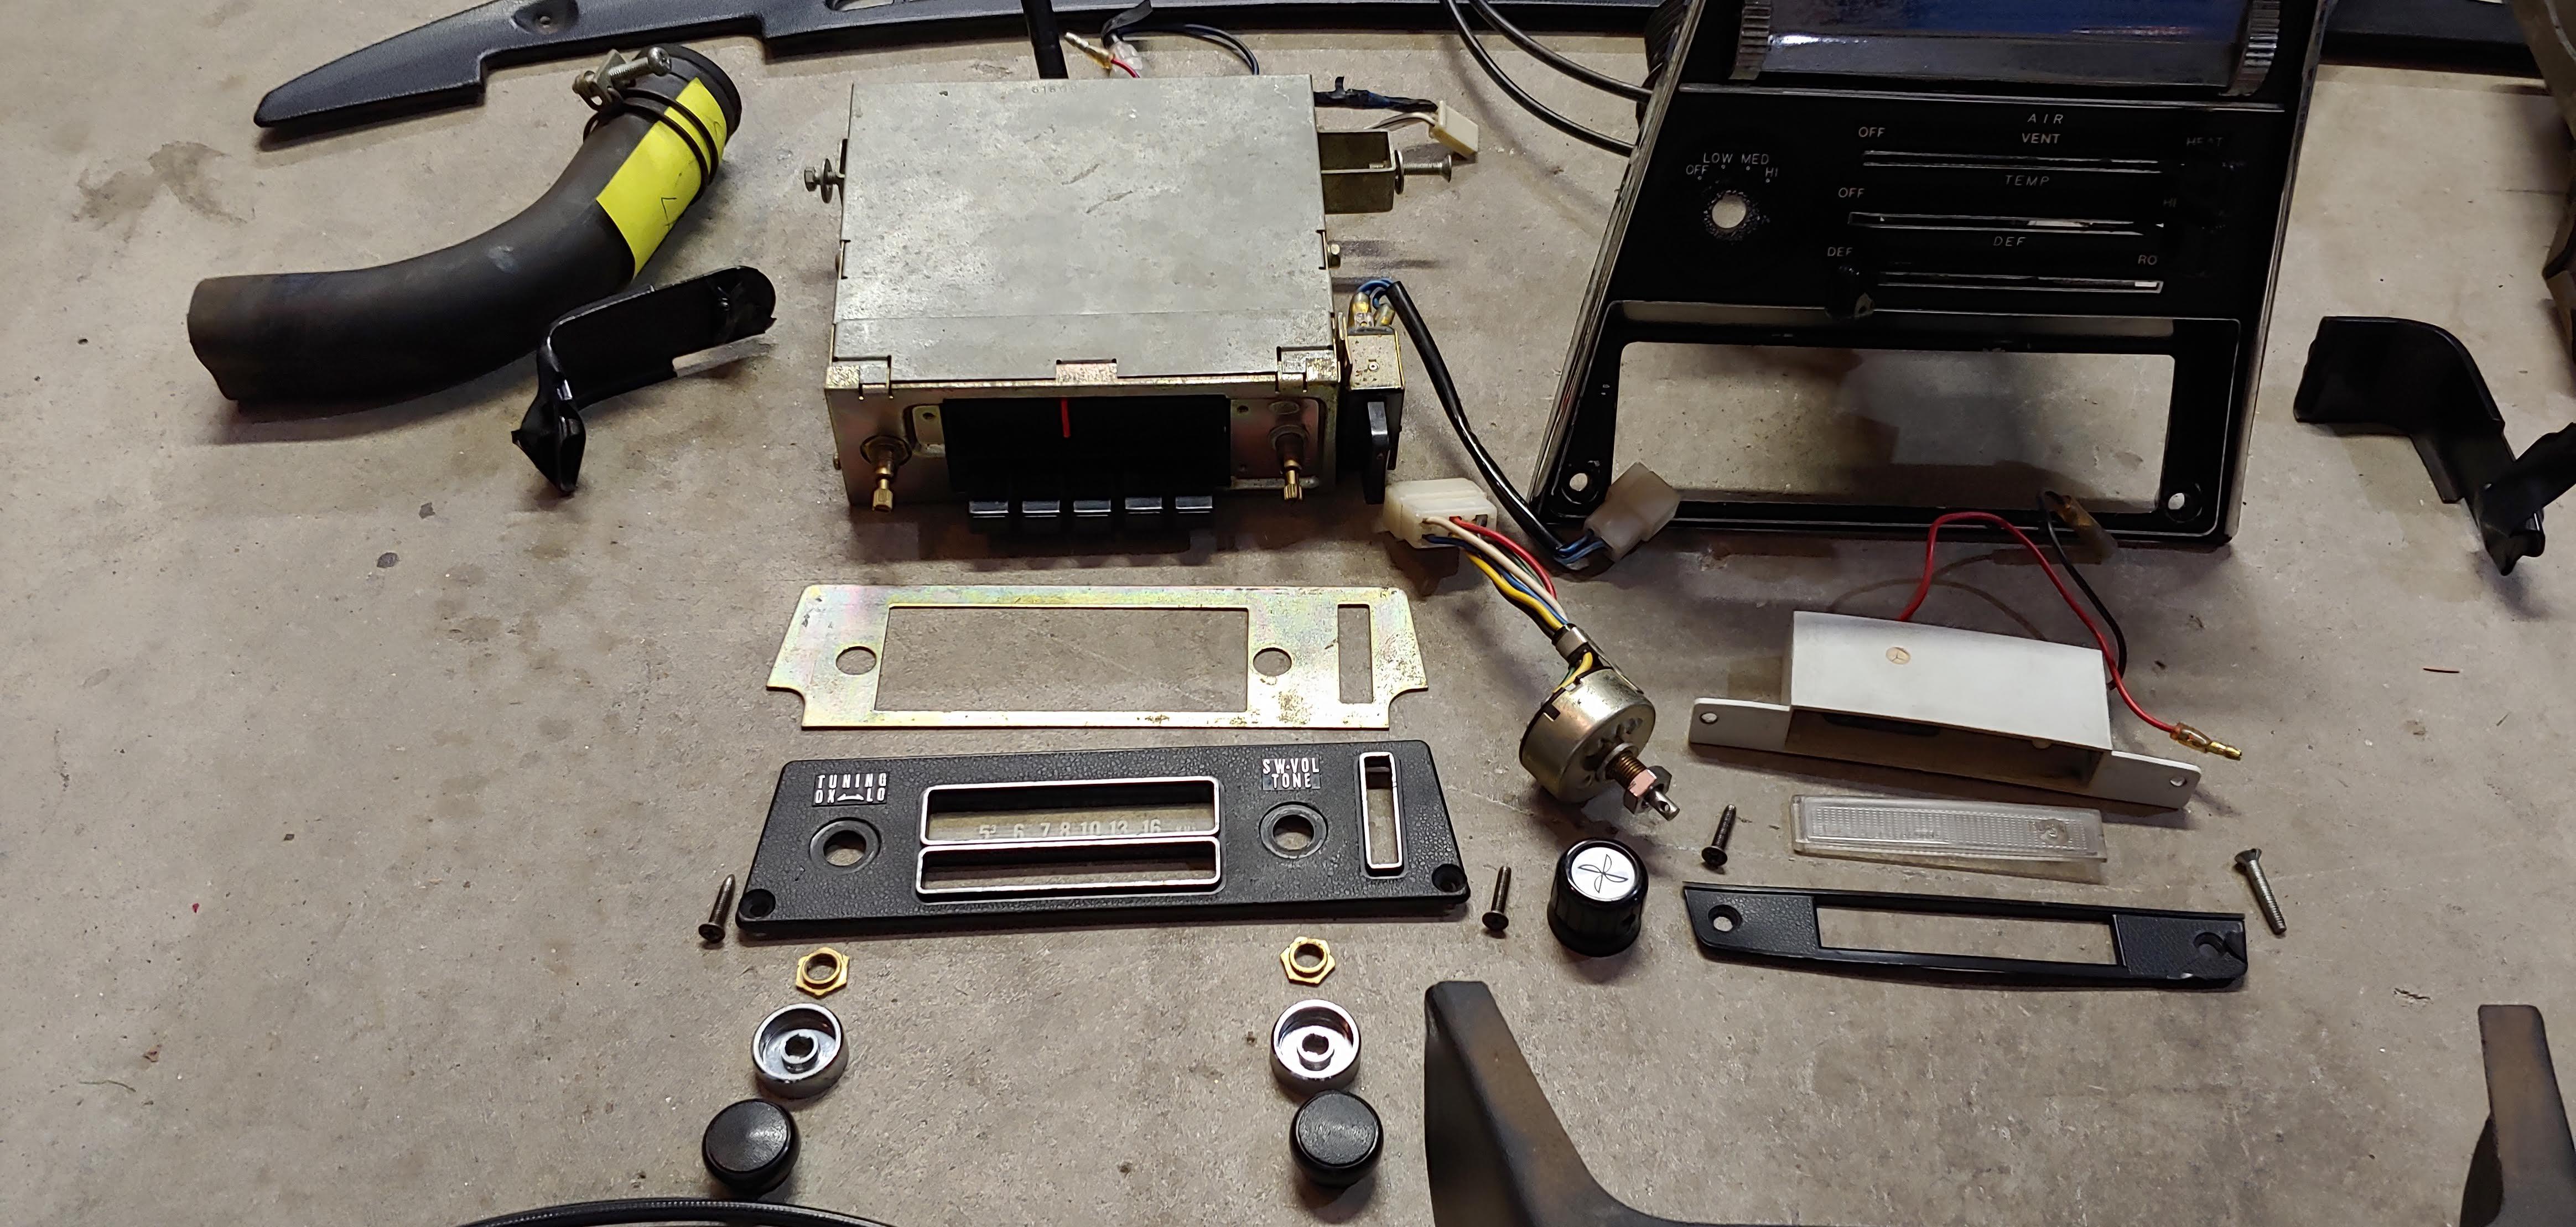
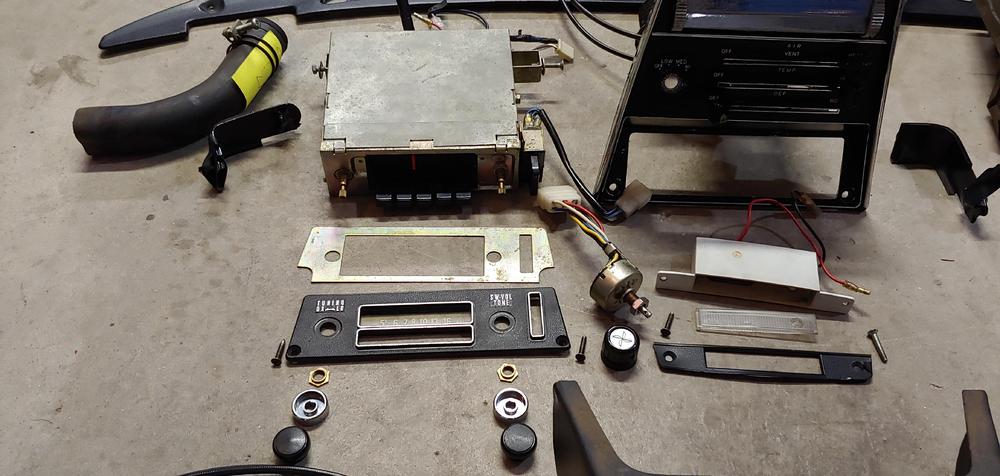
The correct nuts have centering bosses to align the face plate with the radio. Do the WE nuts have that feature? At least they do on the early AM only radio, I'm not sure if they are the same for the later AM/FM radios.
-
Looks like I was wrong, no X-ray vision required. You just have to know what you are looking for. ?
-
Not sure how this helps (unless you have X-ray eyes ?) but here you go. Seriously, maybe try contacting @Zs-ondabrain
-
-
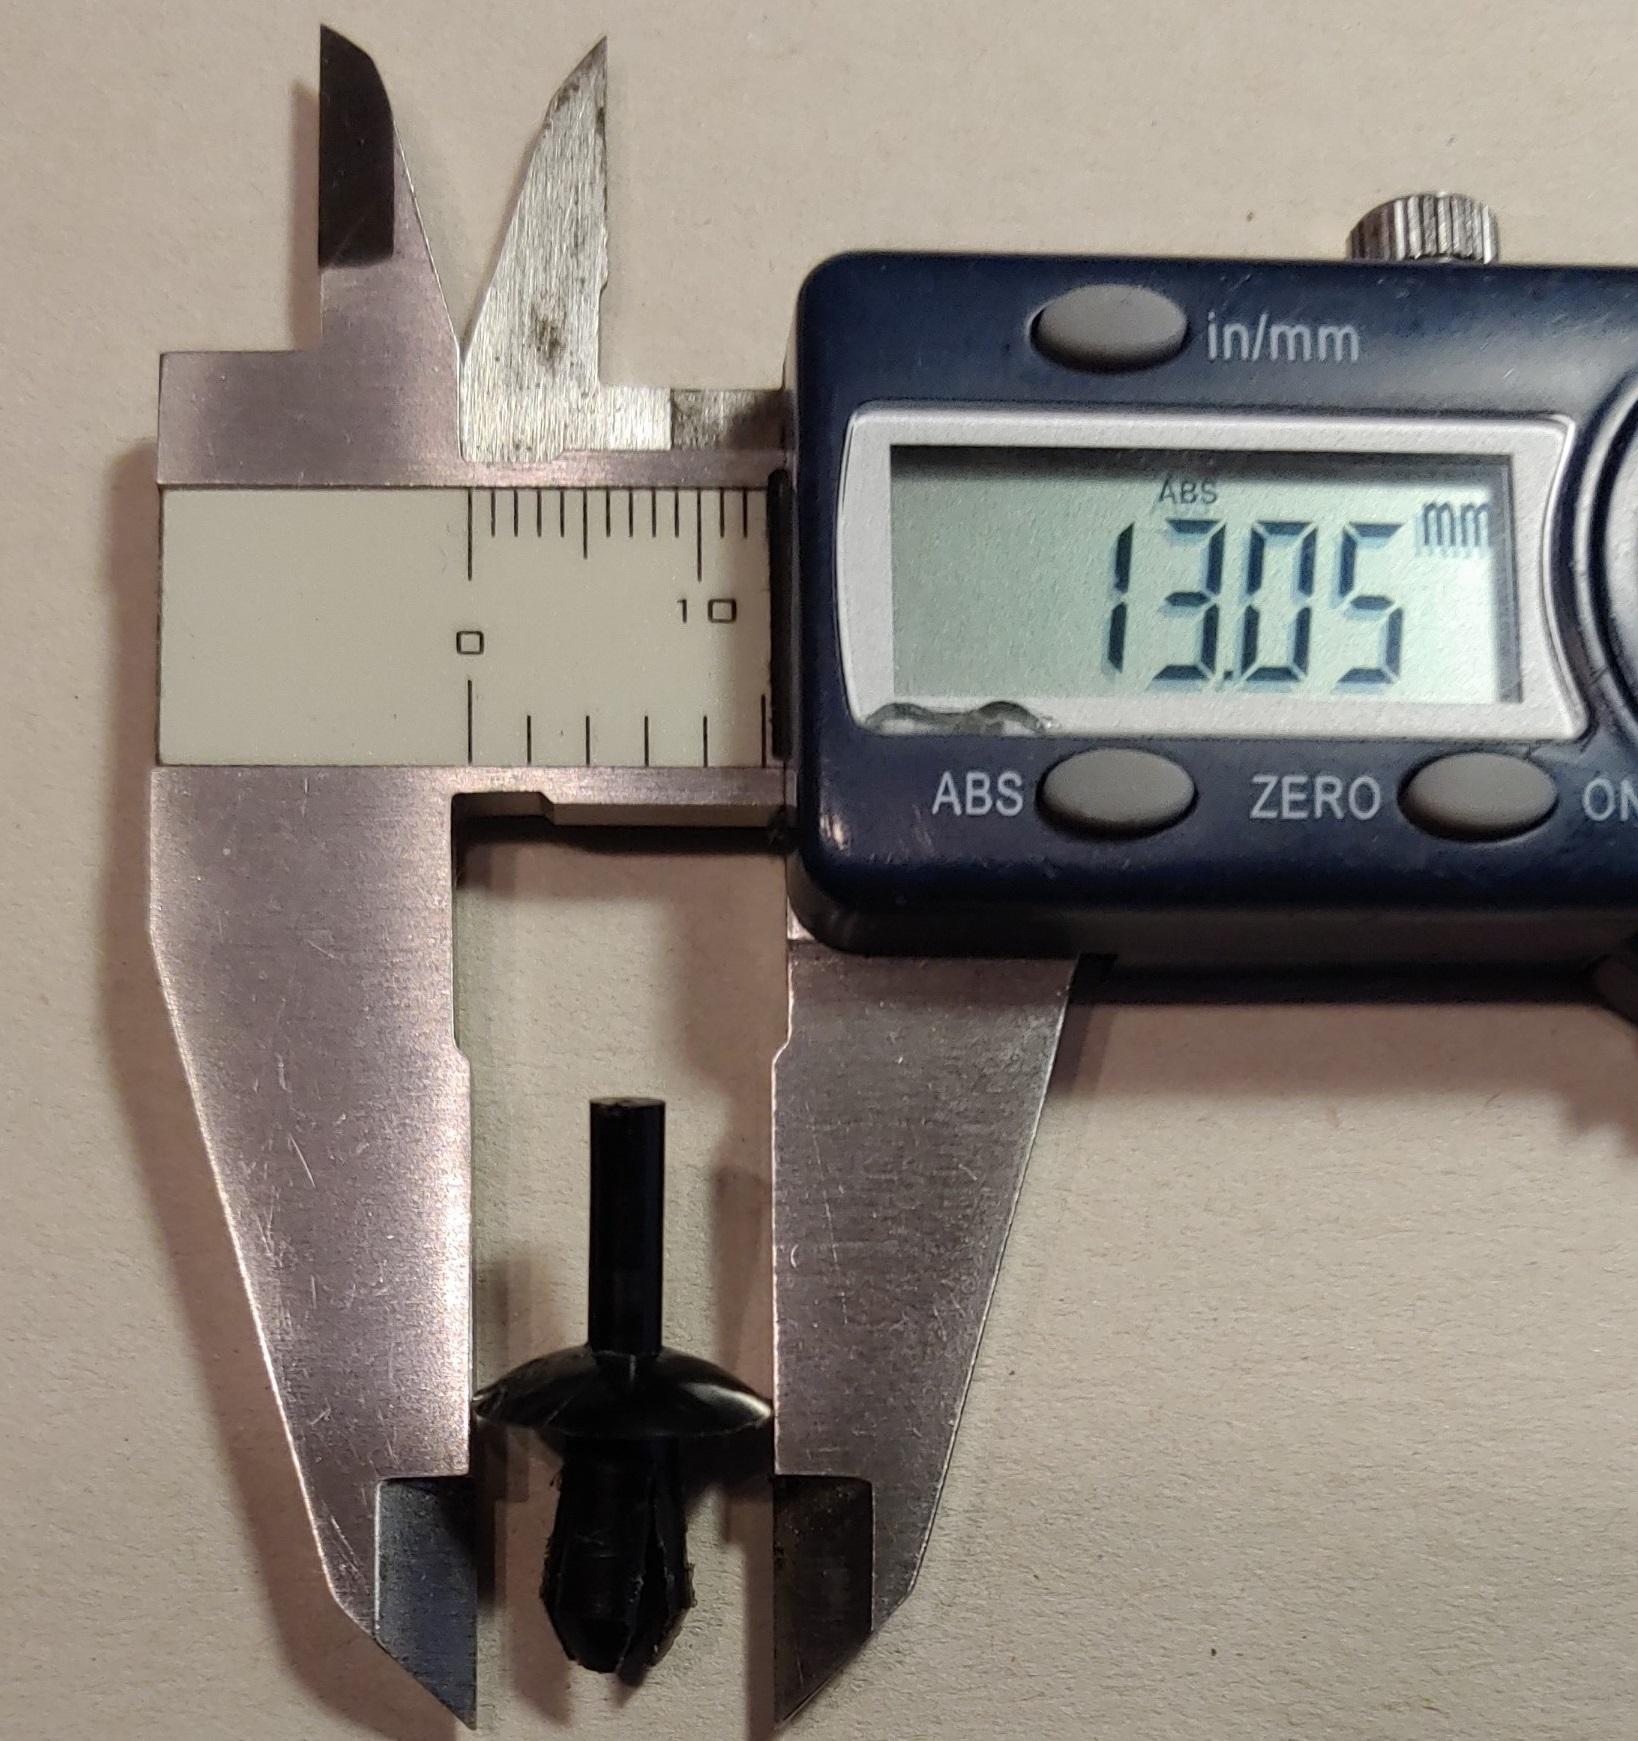
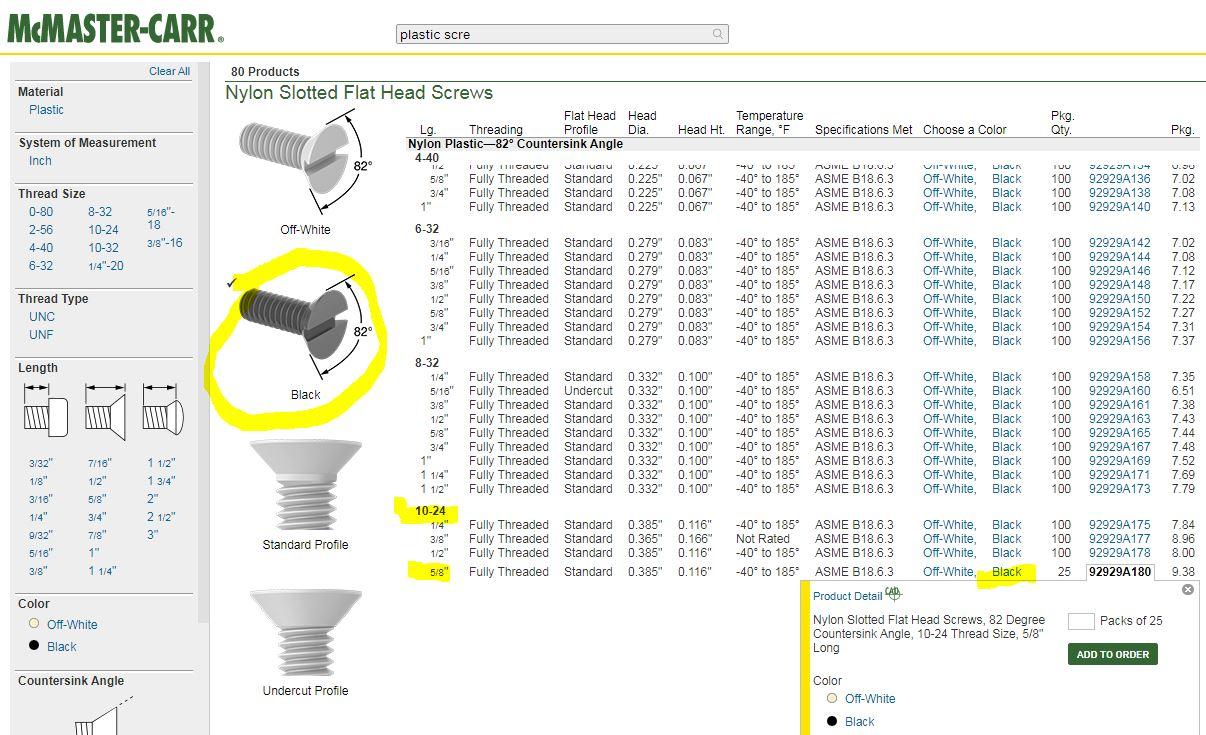
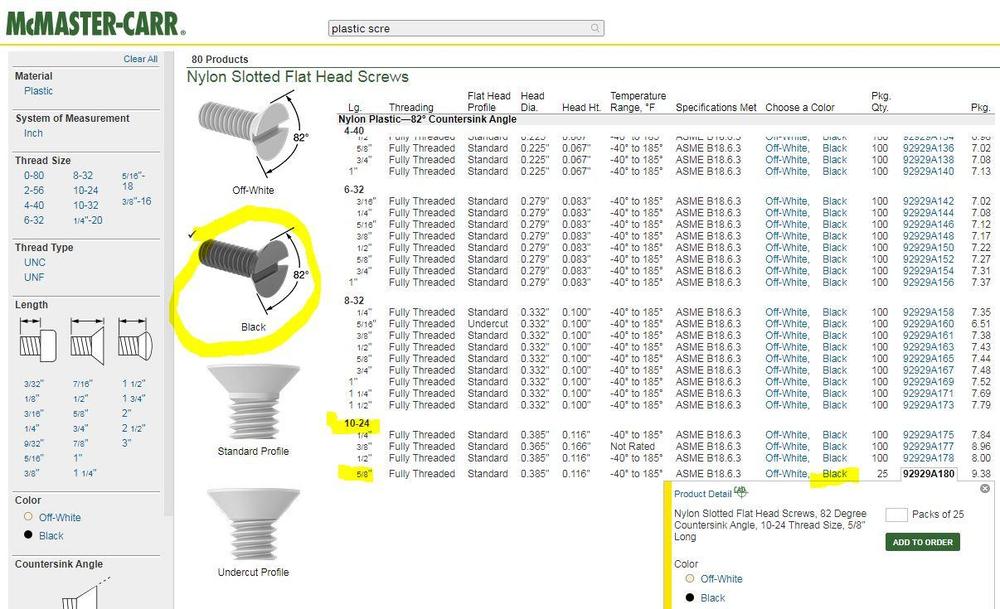
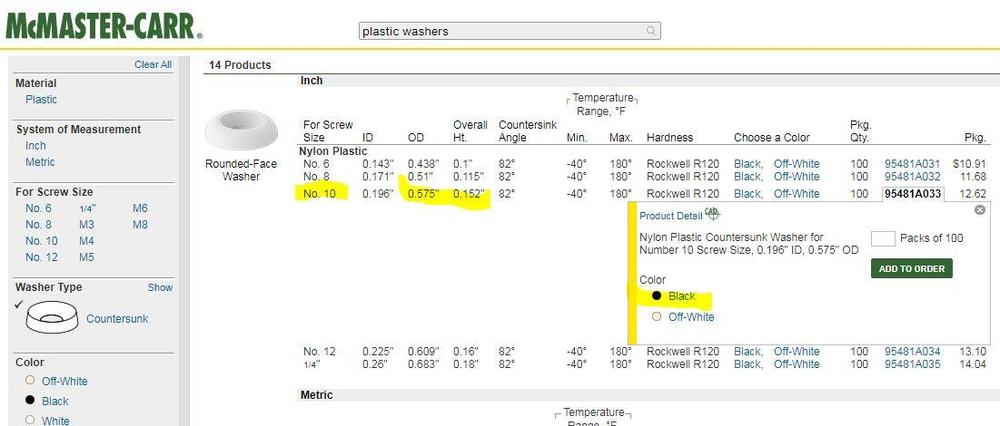
Here's another idea, black nylon flat head screws with round face countersunk washers, size 10-24. Metric 5mm is also available but the washer ht and OD is to big. Less risk of marring the plastic panels compared to steel. https://www.mcmaster.com/plastic-screws/flat-head-screws/nylon-slotted-flat-head-screws-10/ https://www.mcmaster.com/plastic-washers/washer-type~countersunk/.
-
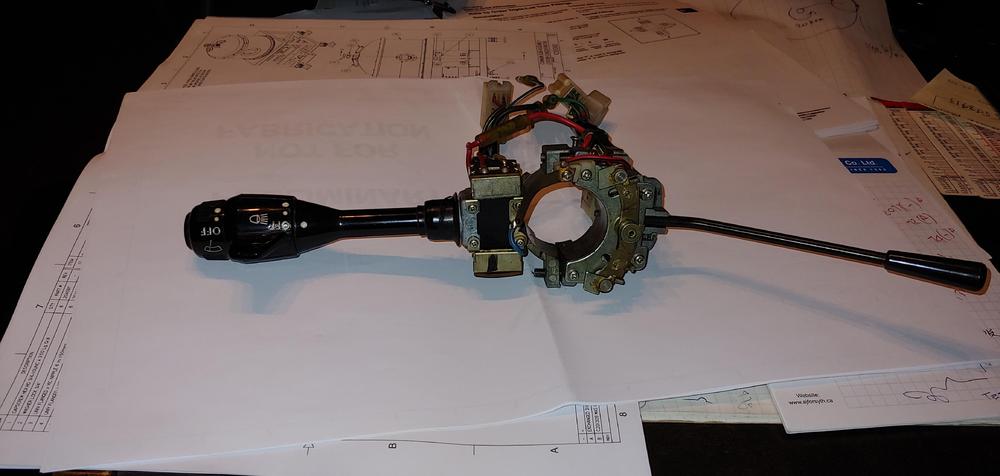
I created 3D cad files of the interpart louvre lock assembly a while back and uploaded to the club downloads section. If it helps you can find it here:
-
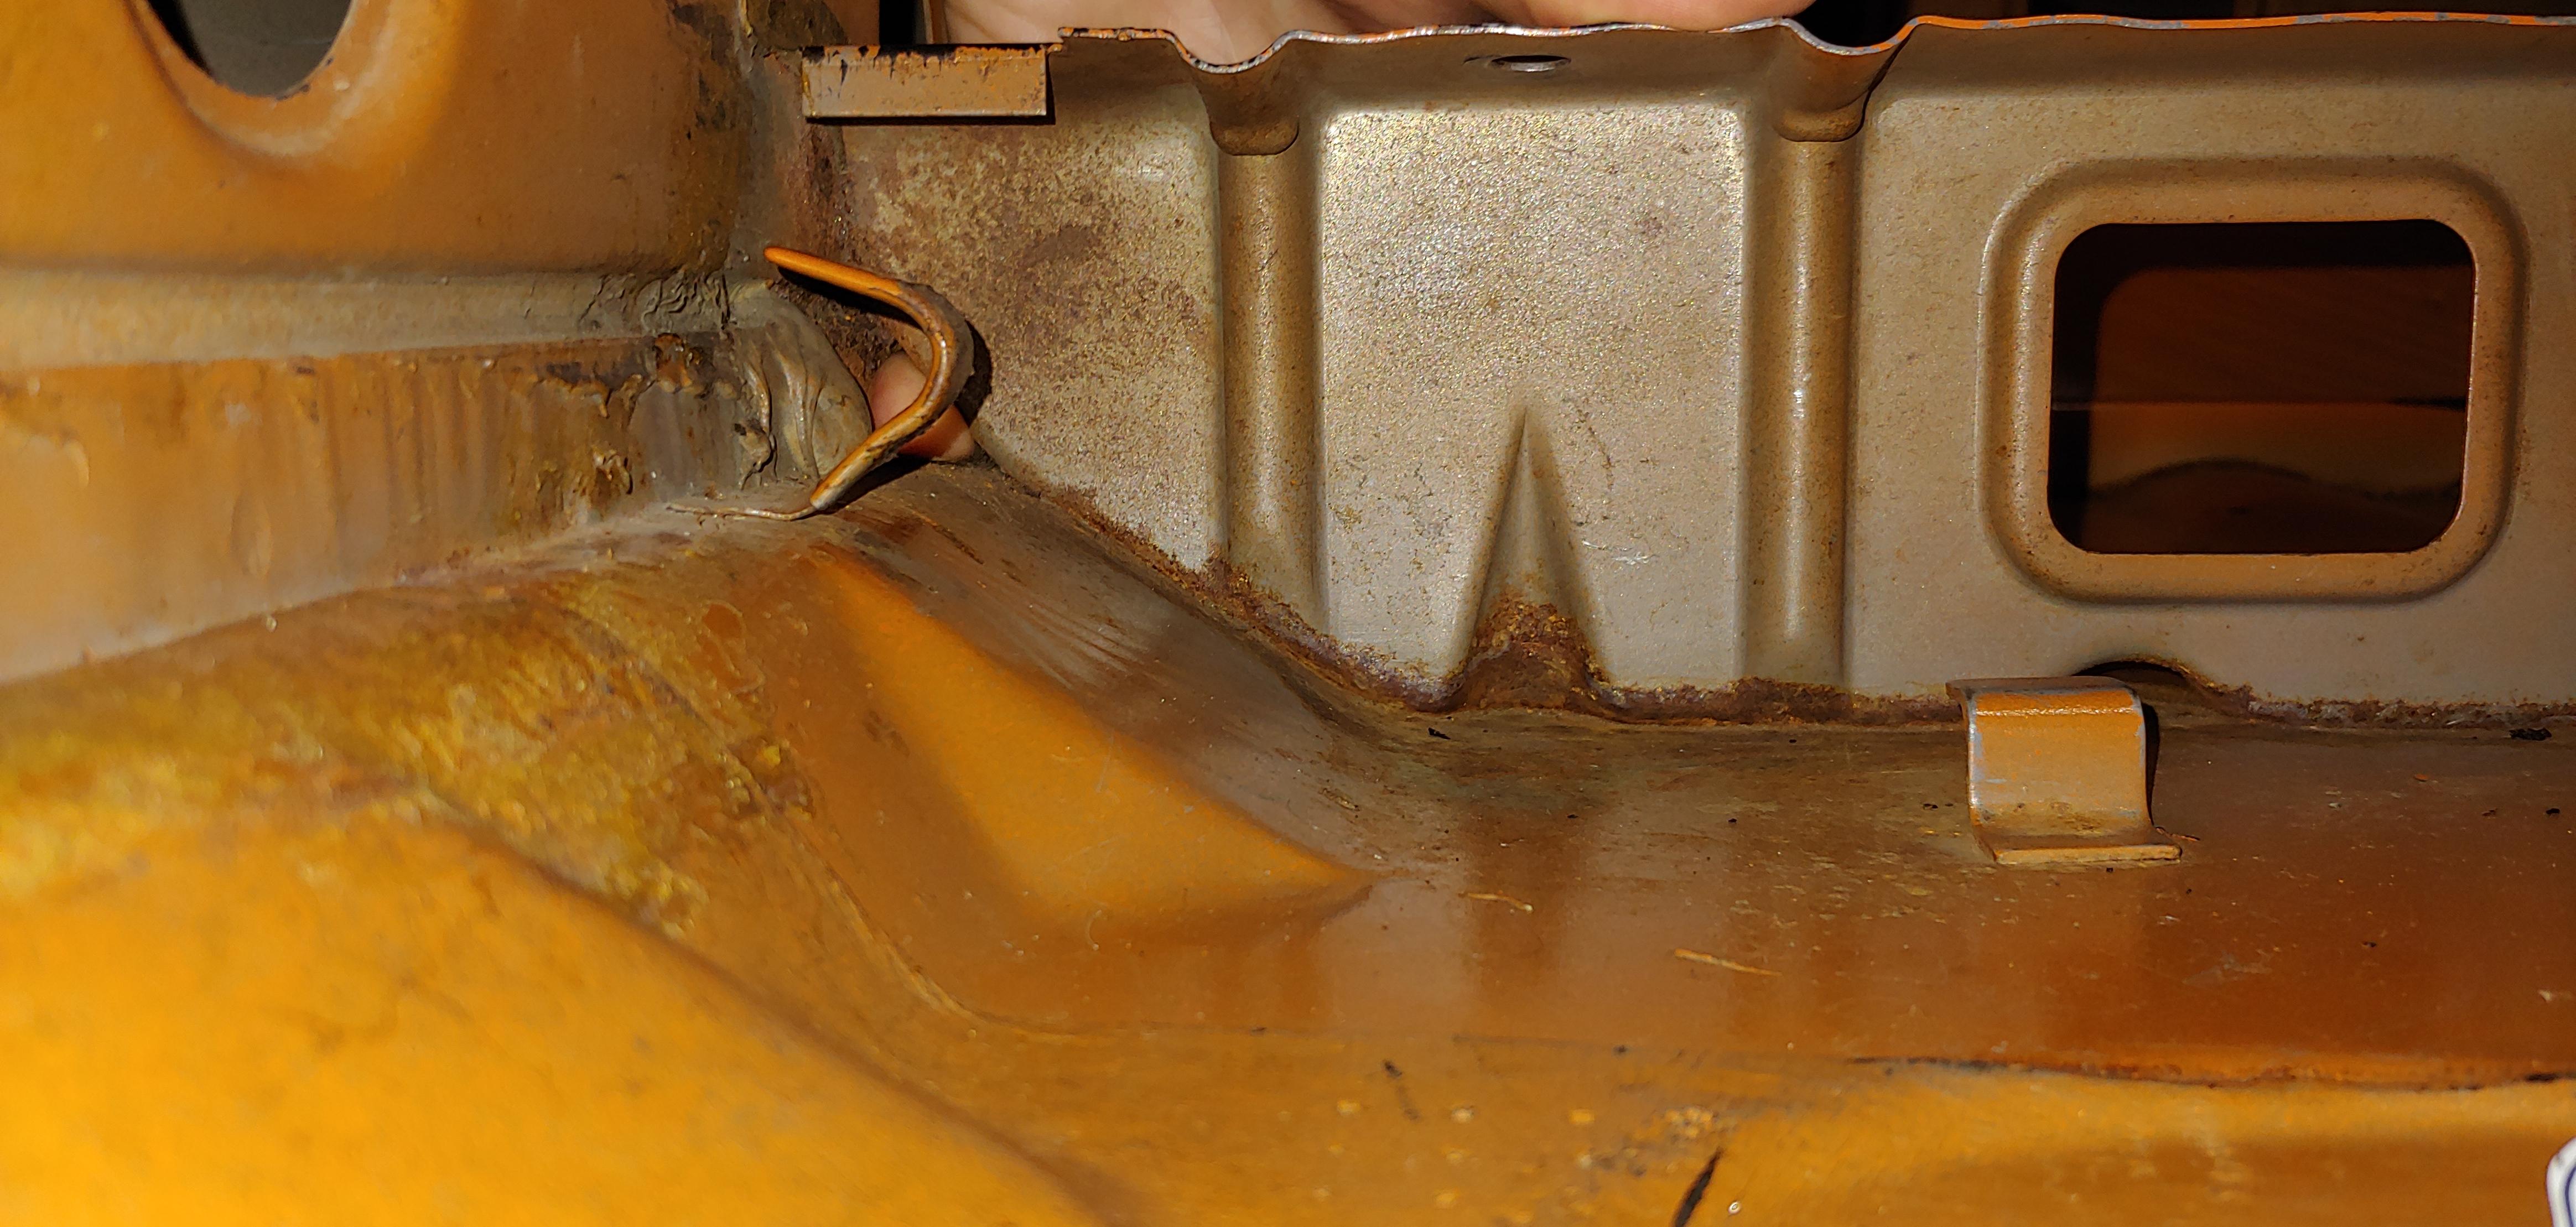
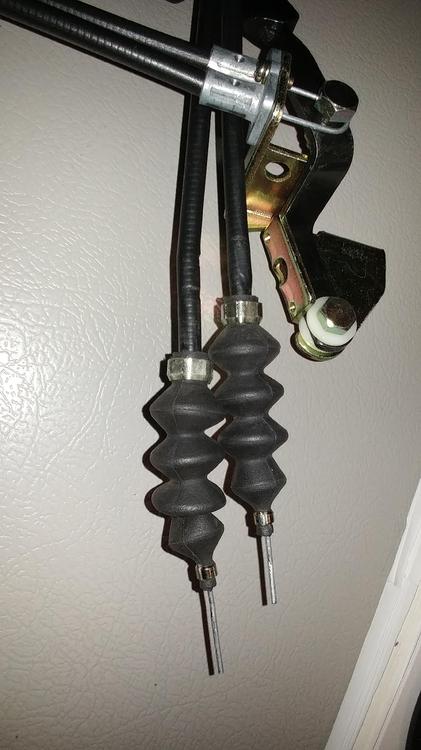
Is it possible that the collar does go over the rubber boot and then crimped is to make a seal on the rod? Similar to boots on later 240Z choke cables.
-
I didn't notice that you have a 280Z, here is a link to the 280Z accelerator parts breakdown. https://www.carpartsmanual.com/datsun/Z-1969-1978/engine-280z/accelerator
-
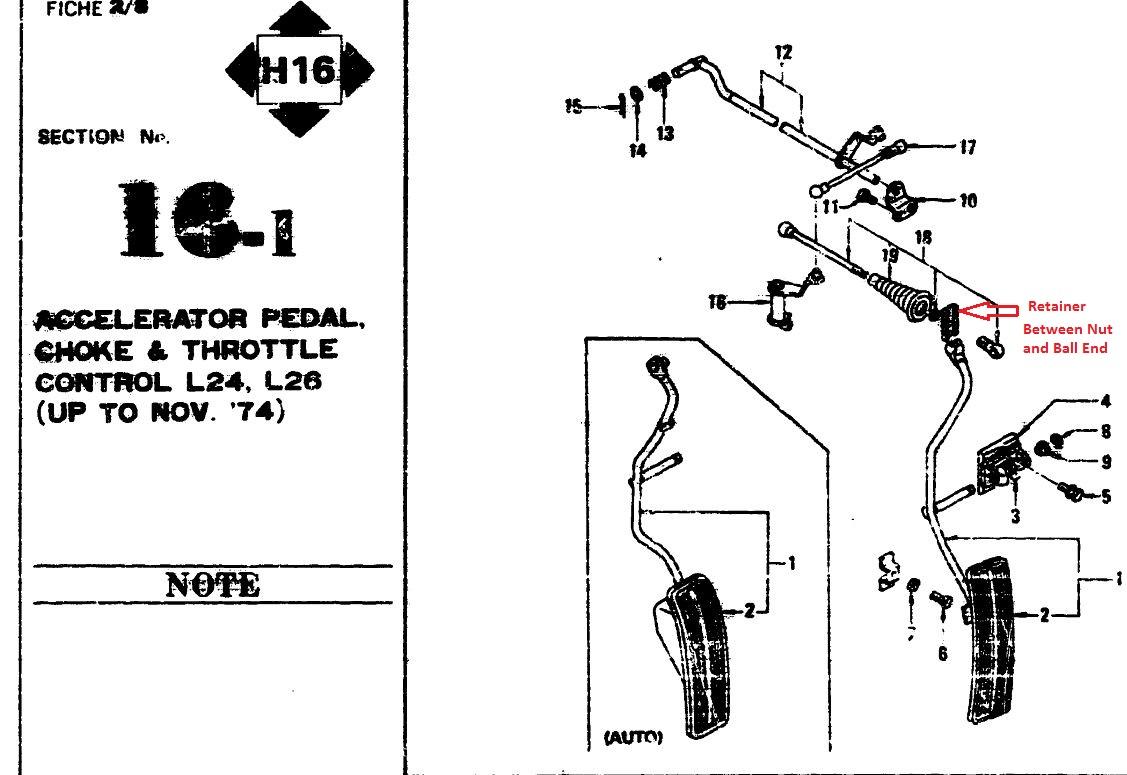
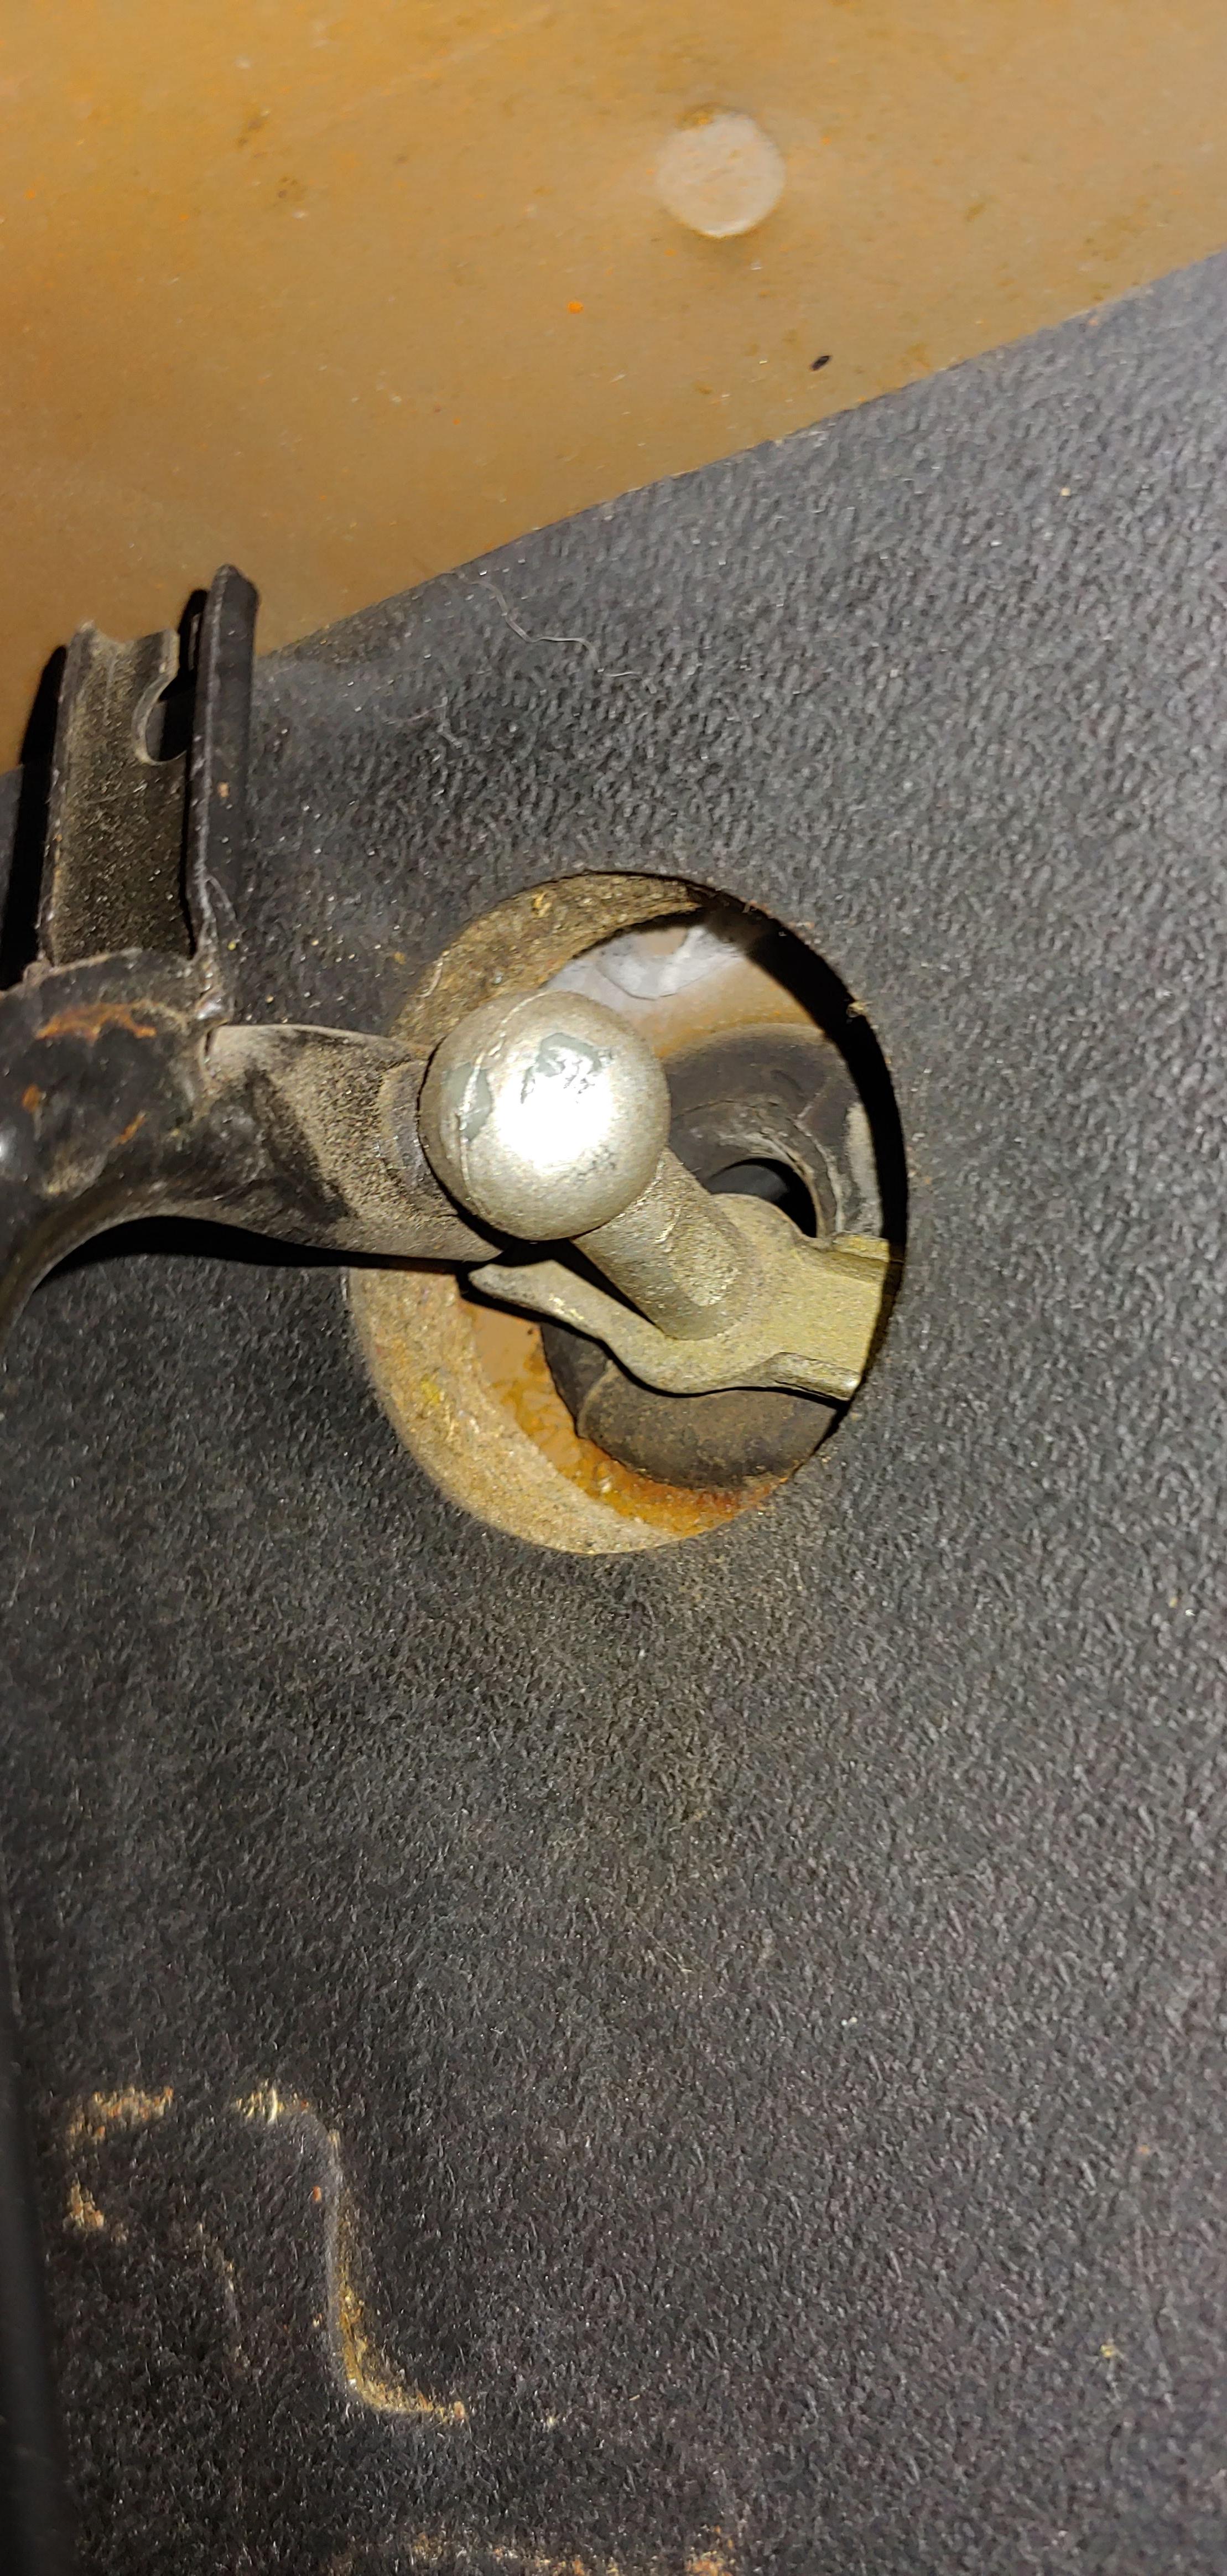
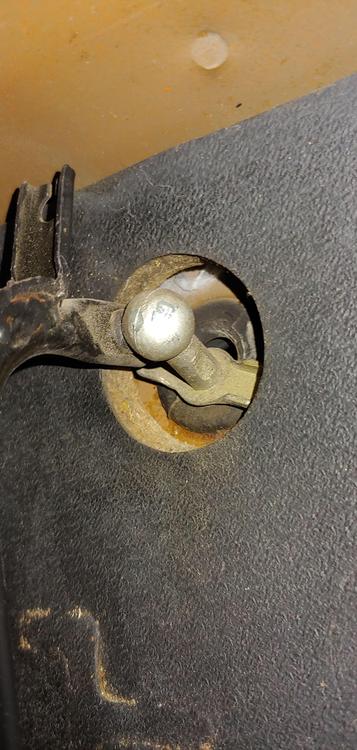
Here is a picture from the parts book and that small collar is not shown. Maybe it is a part that comes with the rubber boot and like you suggest is inside the end of the small end. My car has a retainer that is between the pedal end nut and the threaded ball end that prevents the assembly from pulling through the hole in firewall. I need a replacement boot as well. Mine is missing that small collar. The parts book does confirm how the parts are threaded. I hope this helps somewhat. Cheers Mike


-
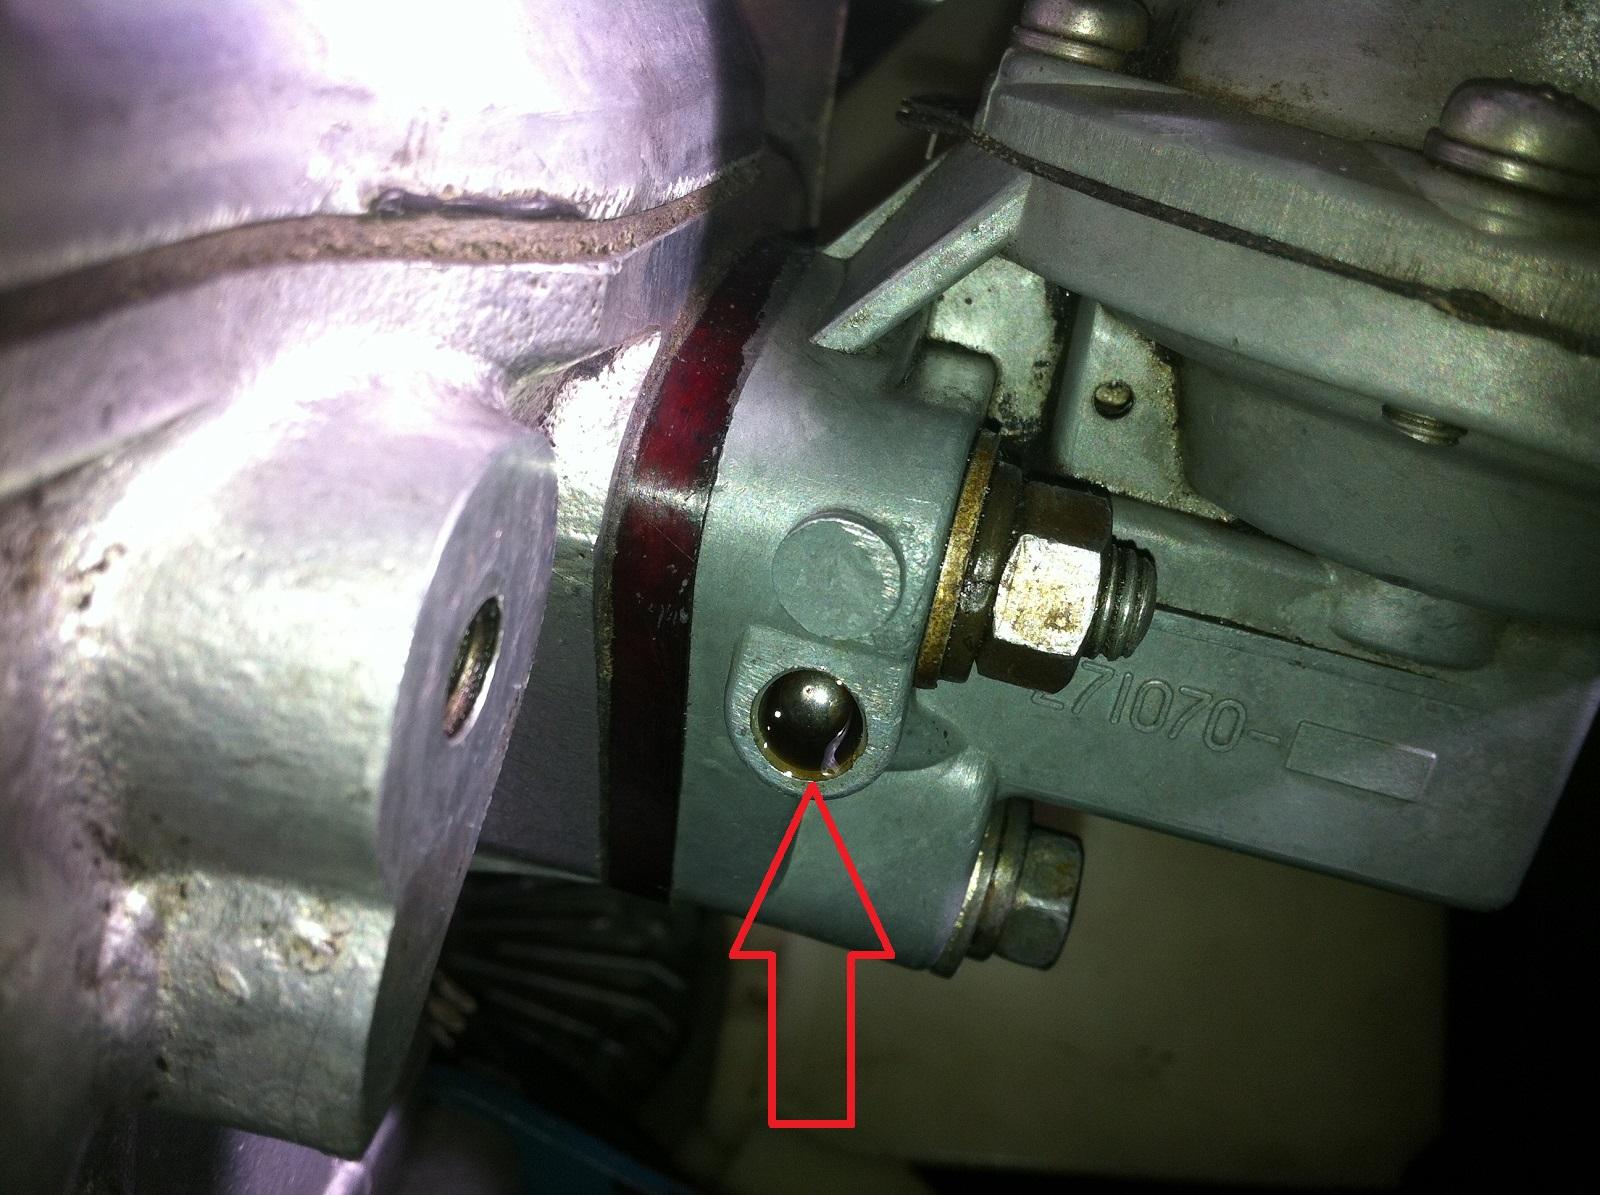
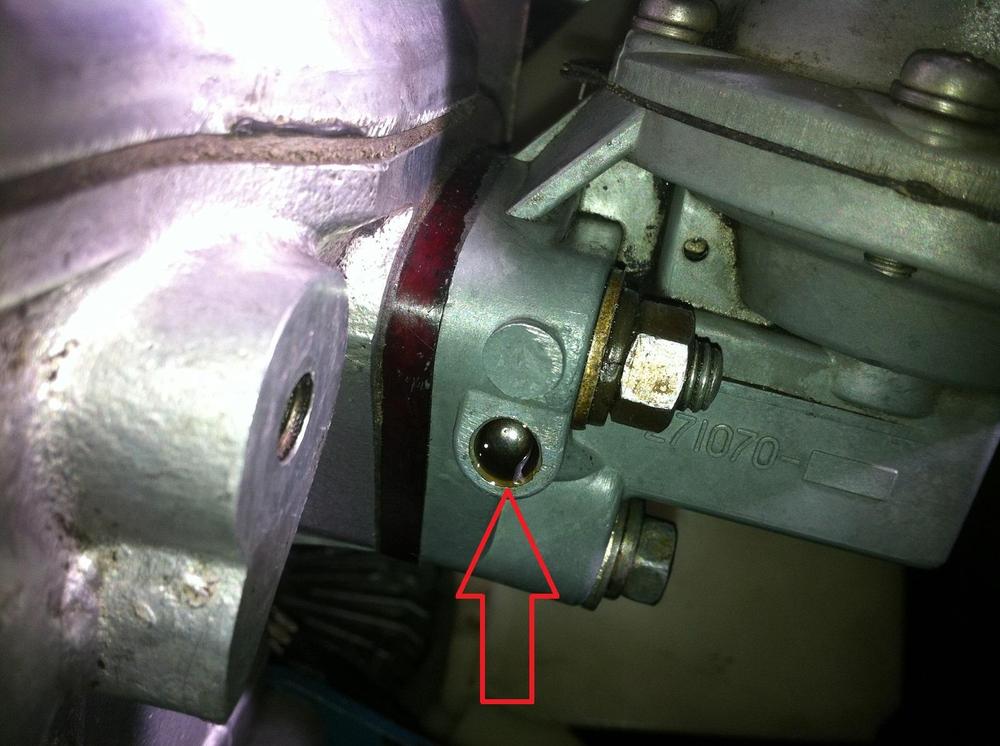
Mine leaks at the pin for the rocker arm. Just a very small leak, but it makes a hell of a mess over time if I don't wipe it up on a regular basis. To bad that pin is not serviceable.?
-
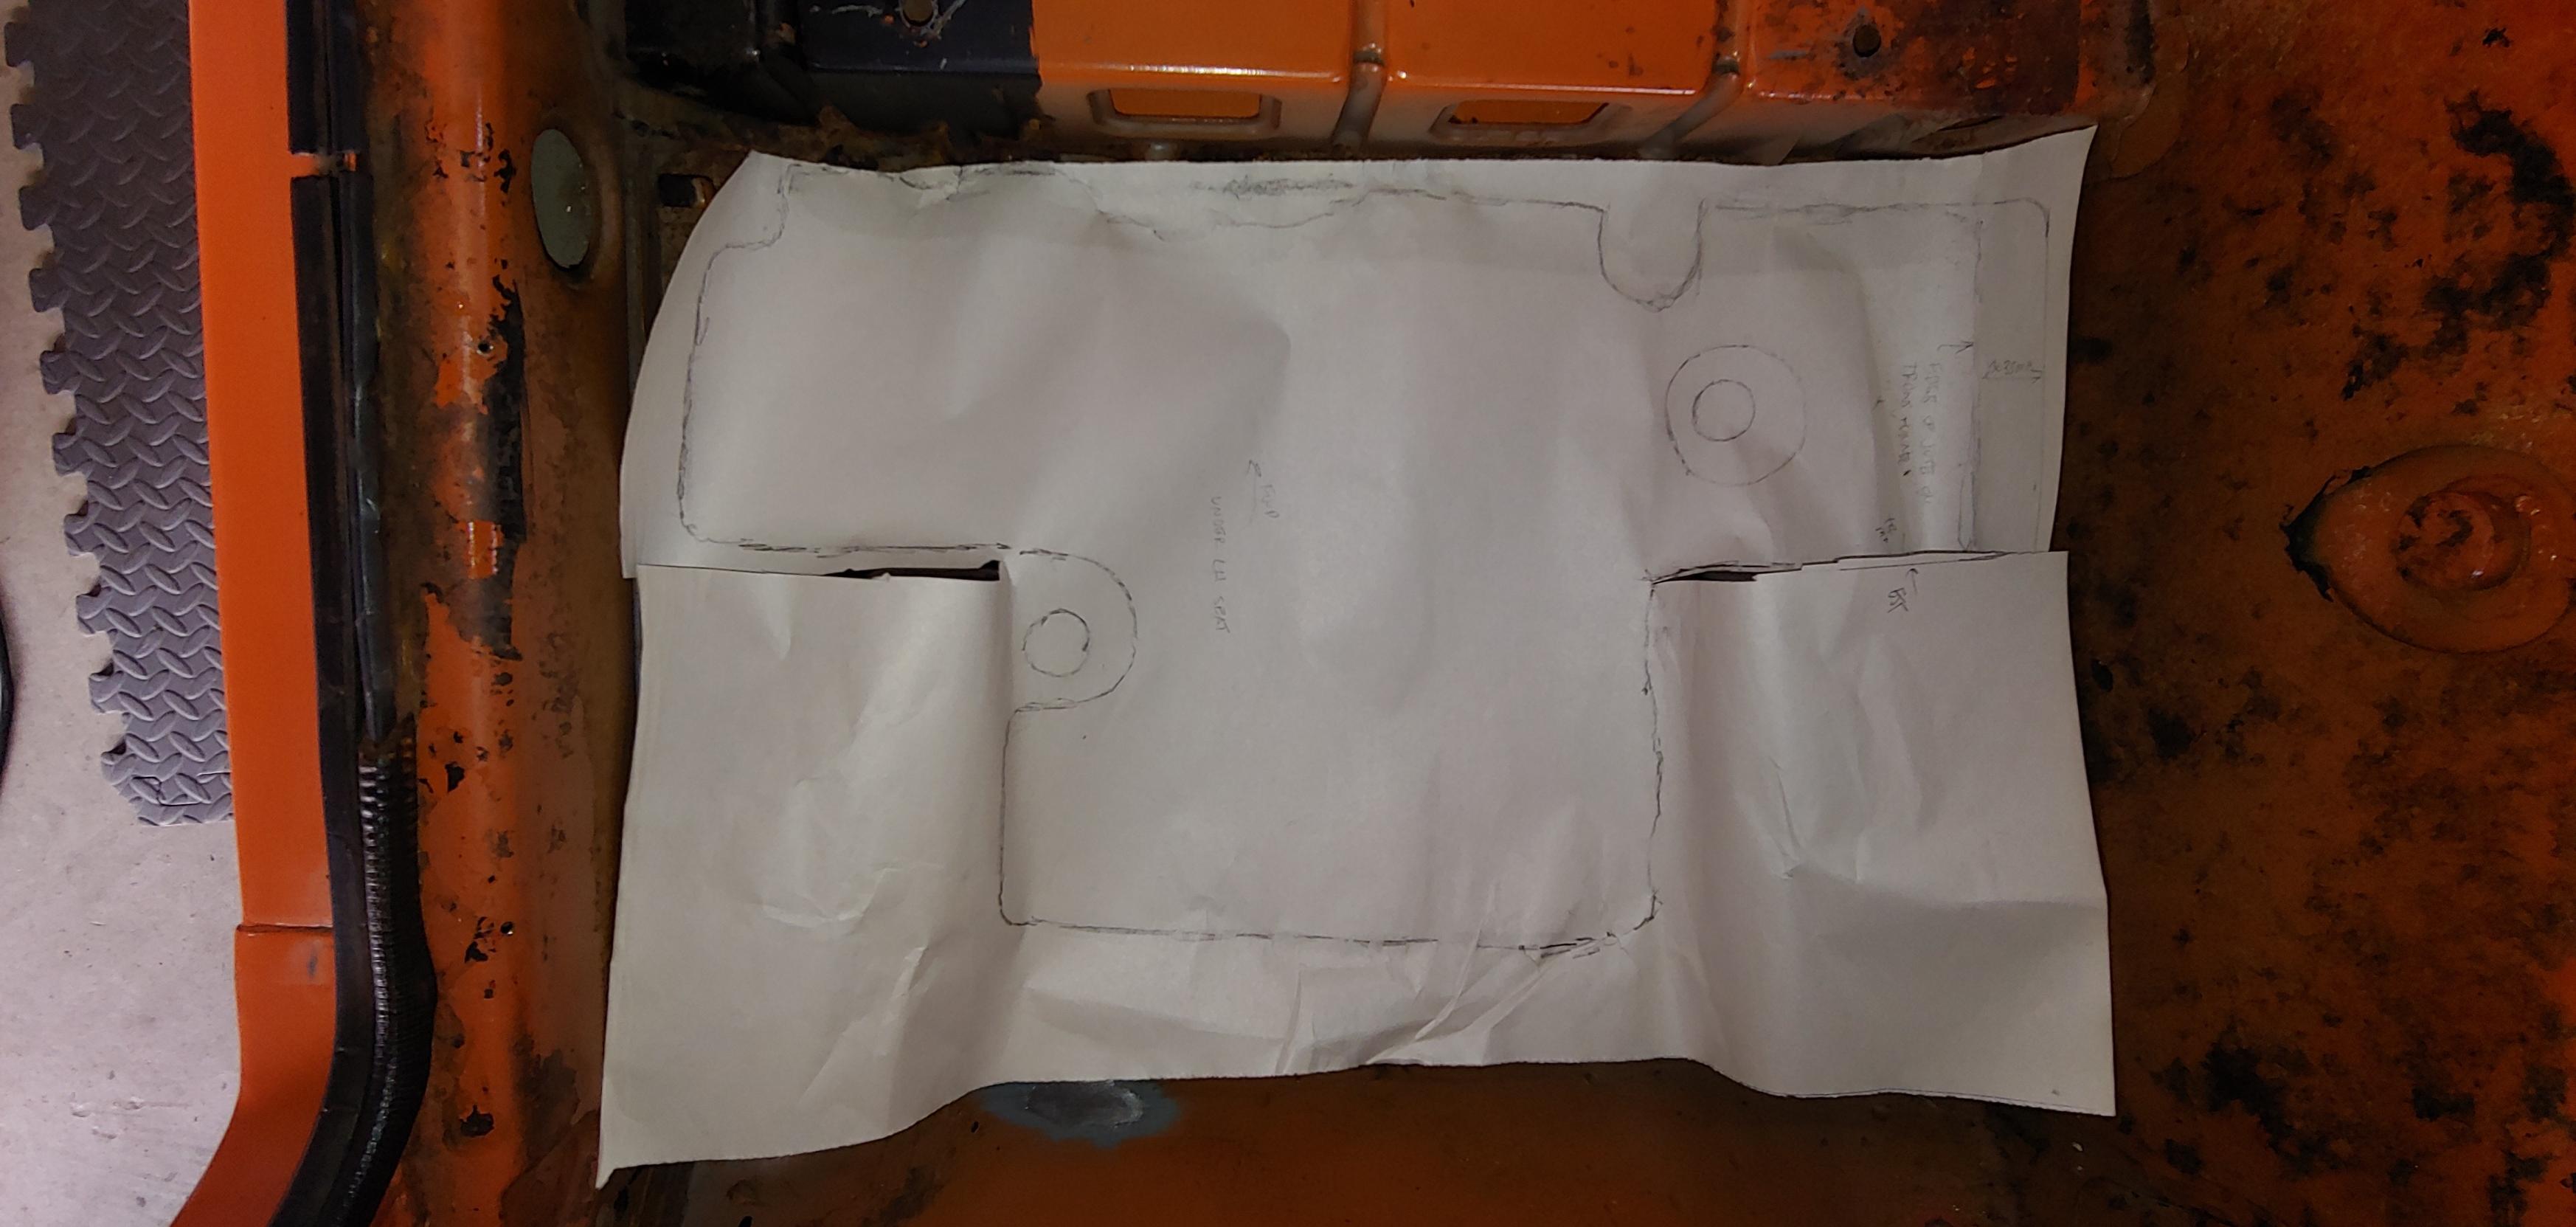
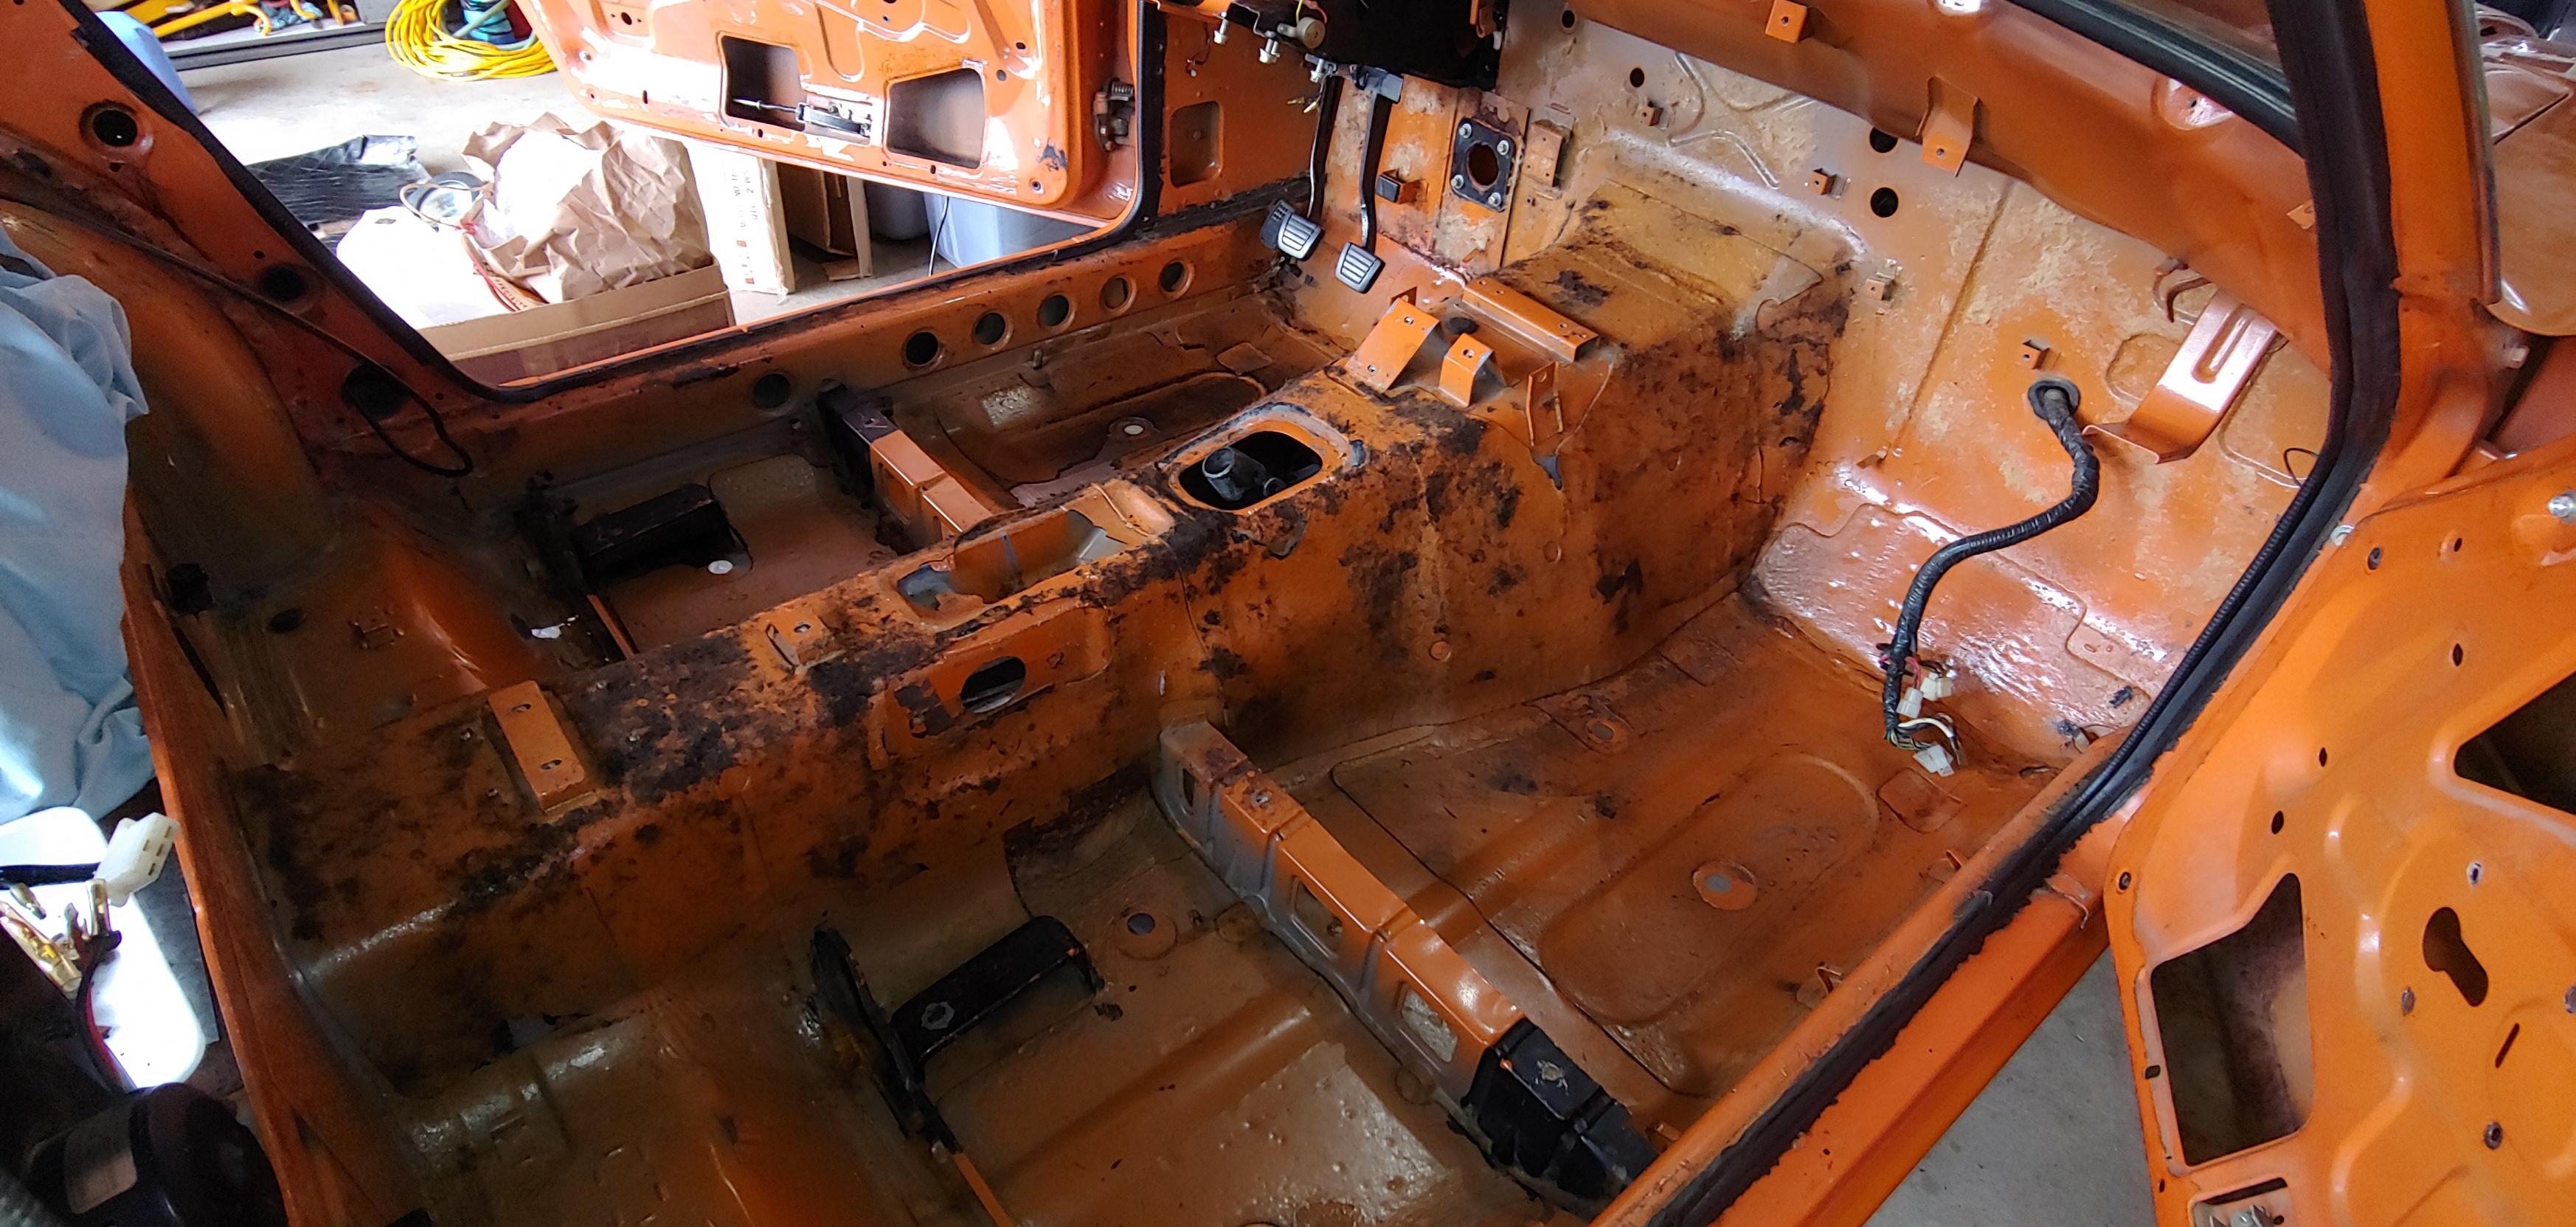
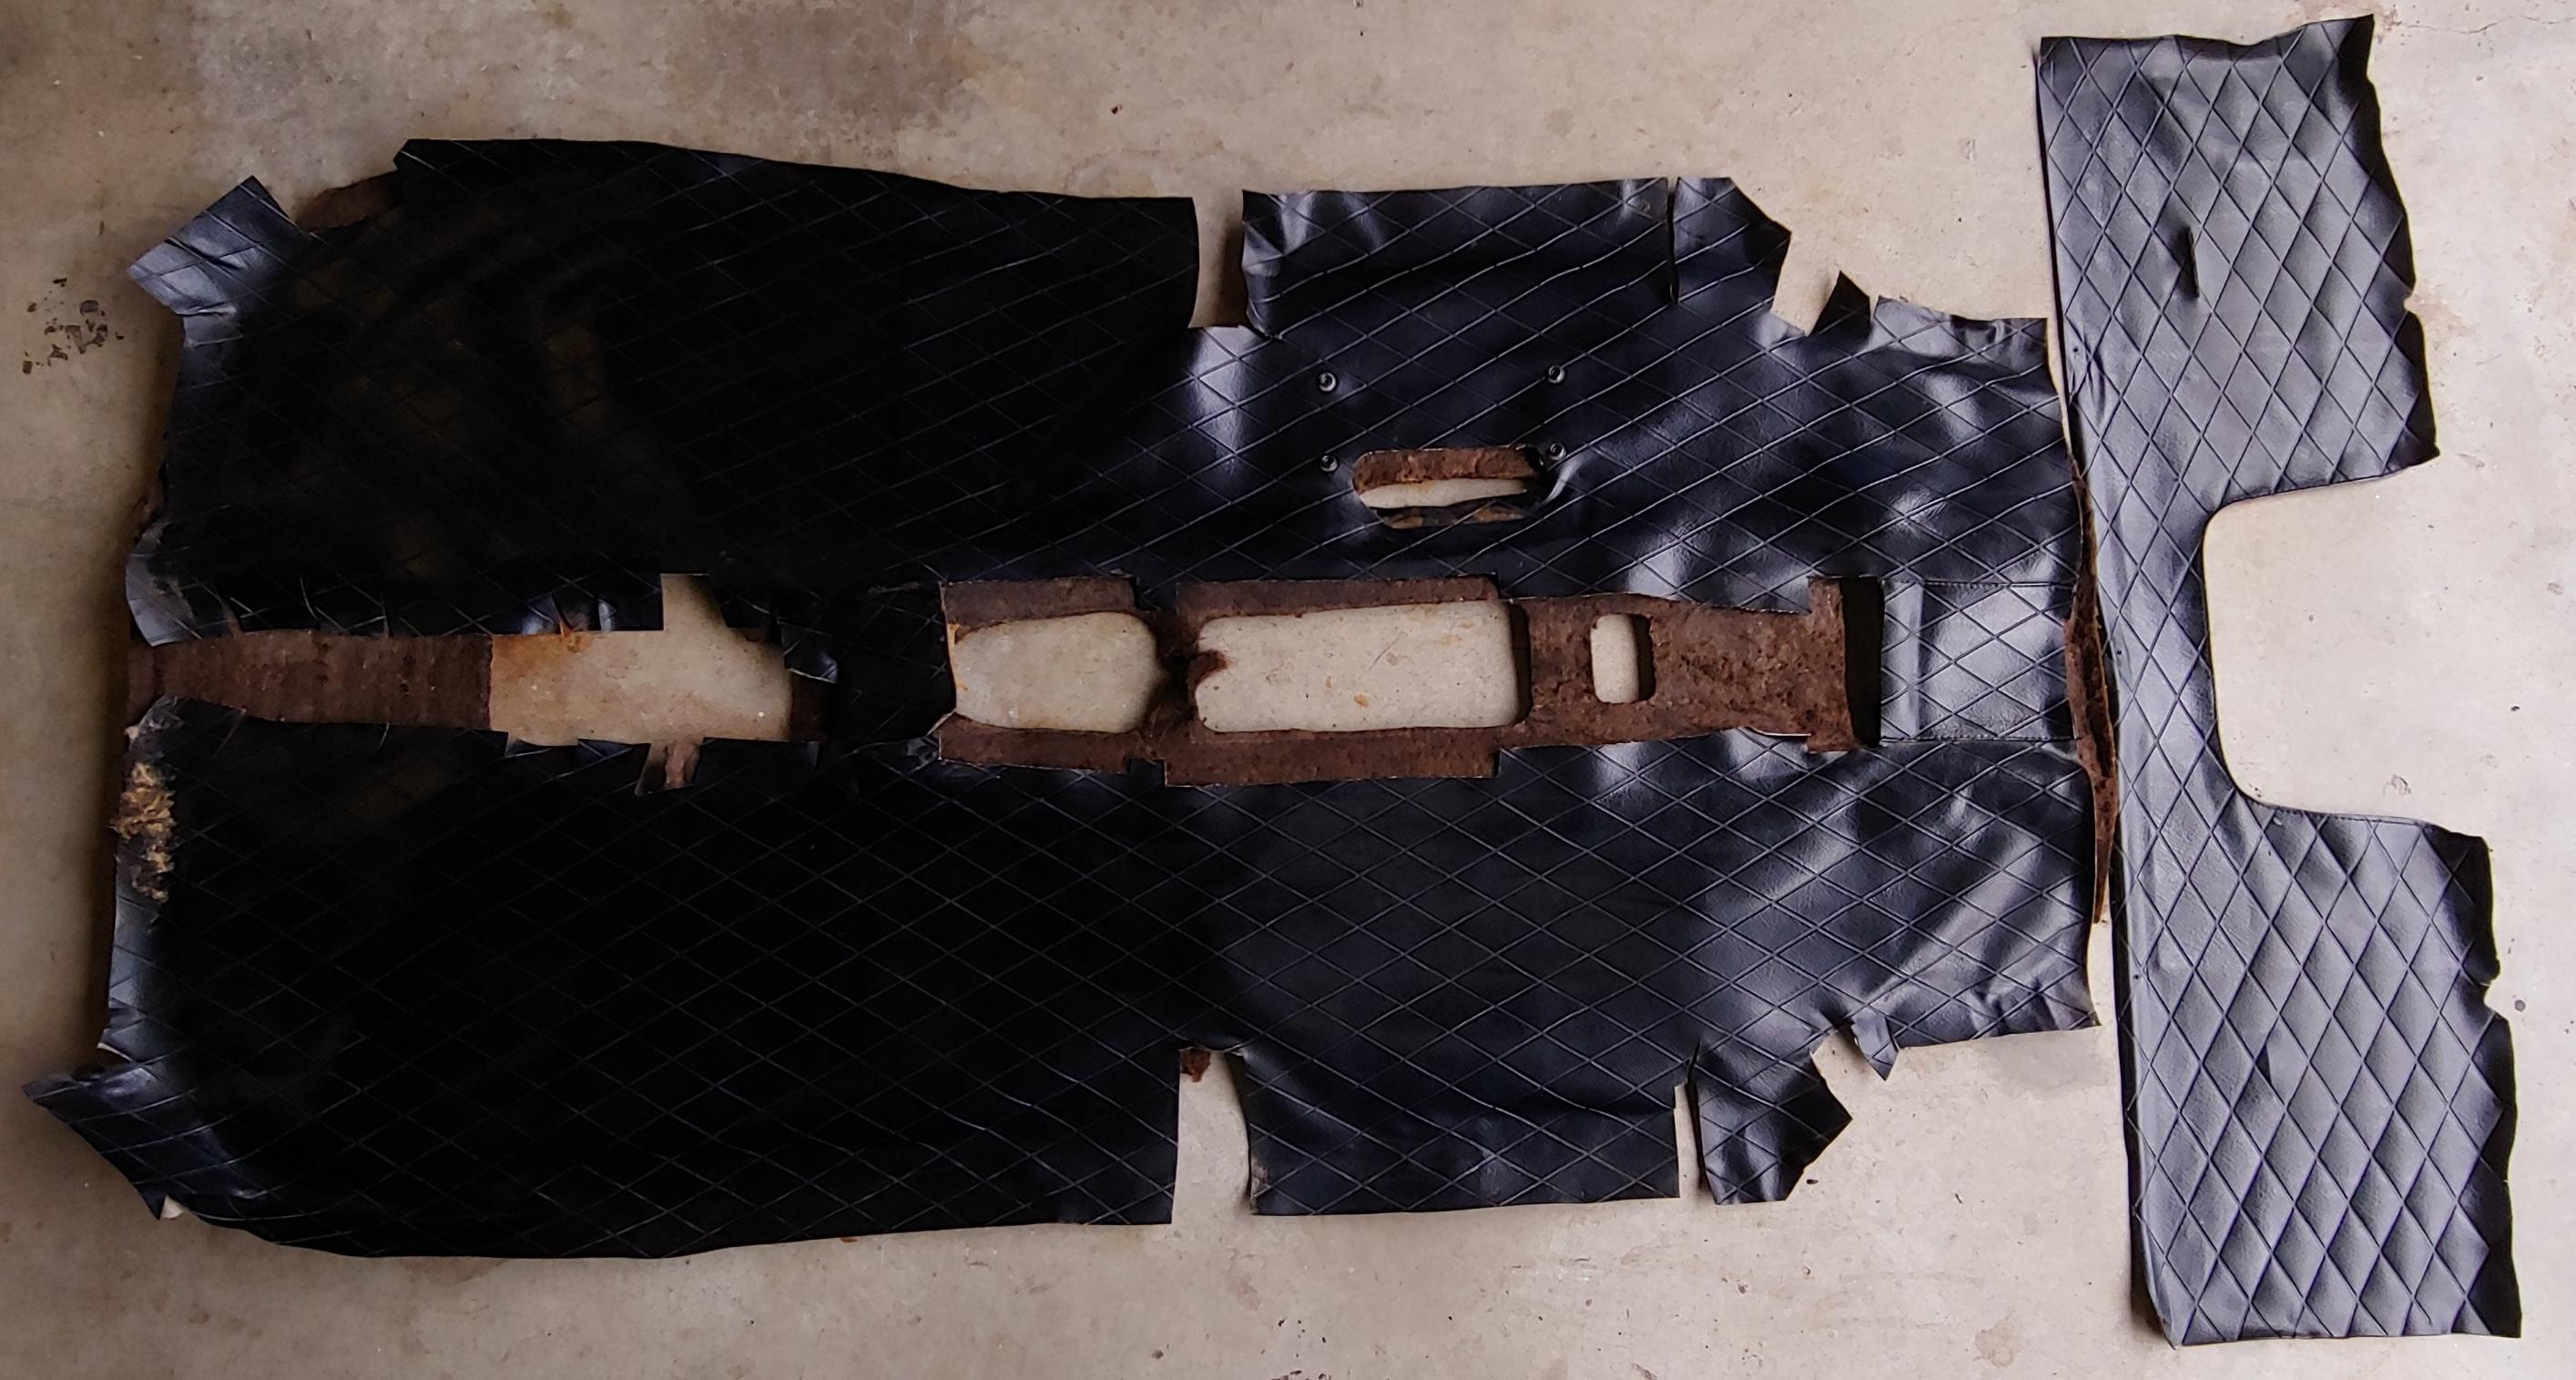
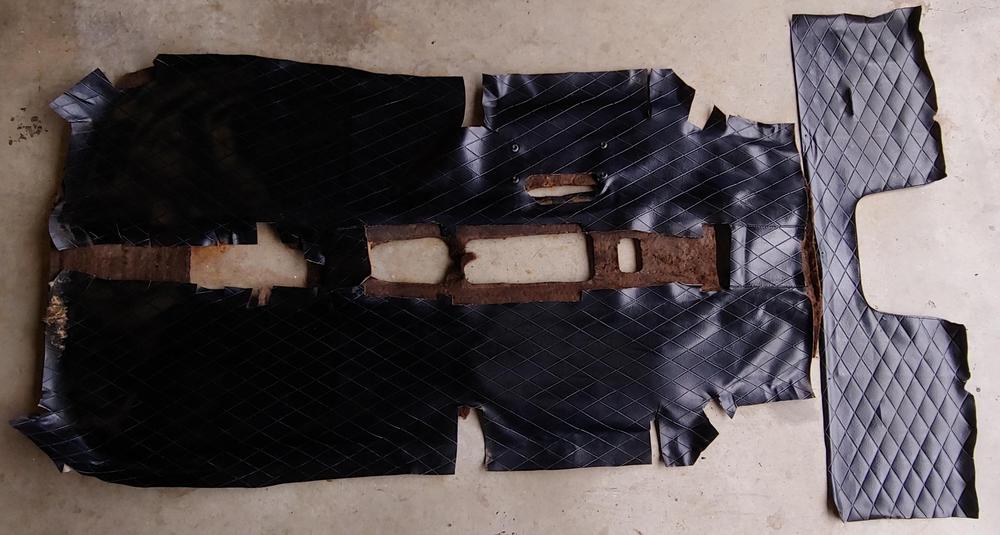
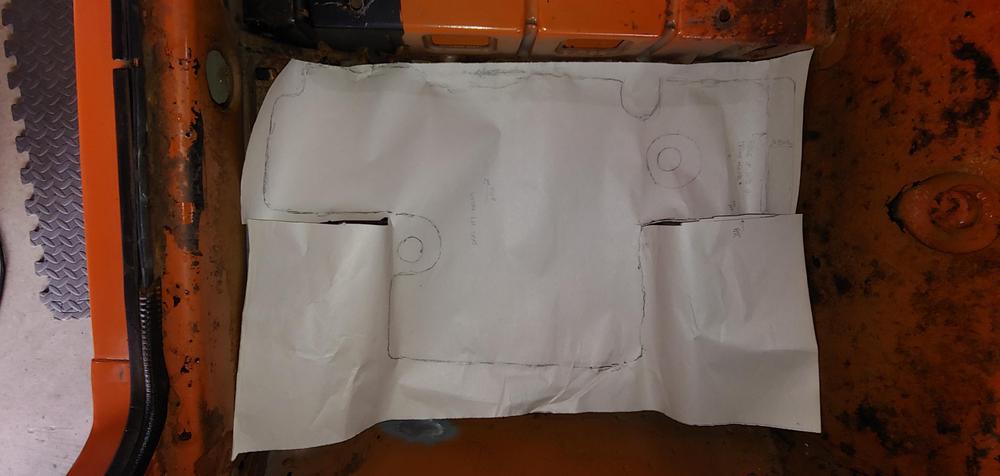
Yesterday I removed the black vinyl from my transmission tunnel and the bulkhead behind the seats. I also removed the insulating material from the firewall and the jute insulation from the transmission tunnel, with careful use of a scraper while gently lifting all the jute came off cleanly with out much damage. I'm very happy that all of the insulating materials and vinyl can be reused. Next I will be removing the tar mats from the floors to inspect for rust. Before removal I am following the lead of @inline6and creating templates of the tar mats so that I can make replacements to use at re-assembly. Here is a pic of the first one, If time permits I will be creating cad profiles of the tar mats that would be suitable to make printable templates. If I get to this I will upload them to cad file section in our downloads area.


-
My plan is to trace the original tar mats on my car before I remove them and if I have time, create cad files from the tracings. If I am able to make the cad files I will upload them to our cad files section in downloads here.
-
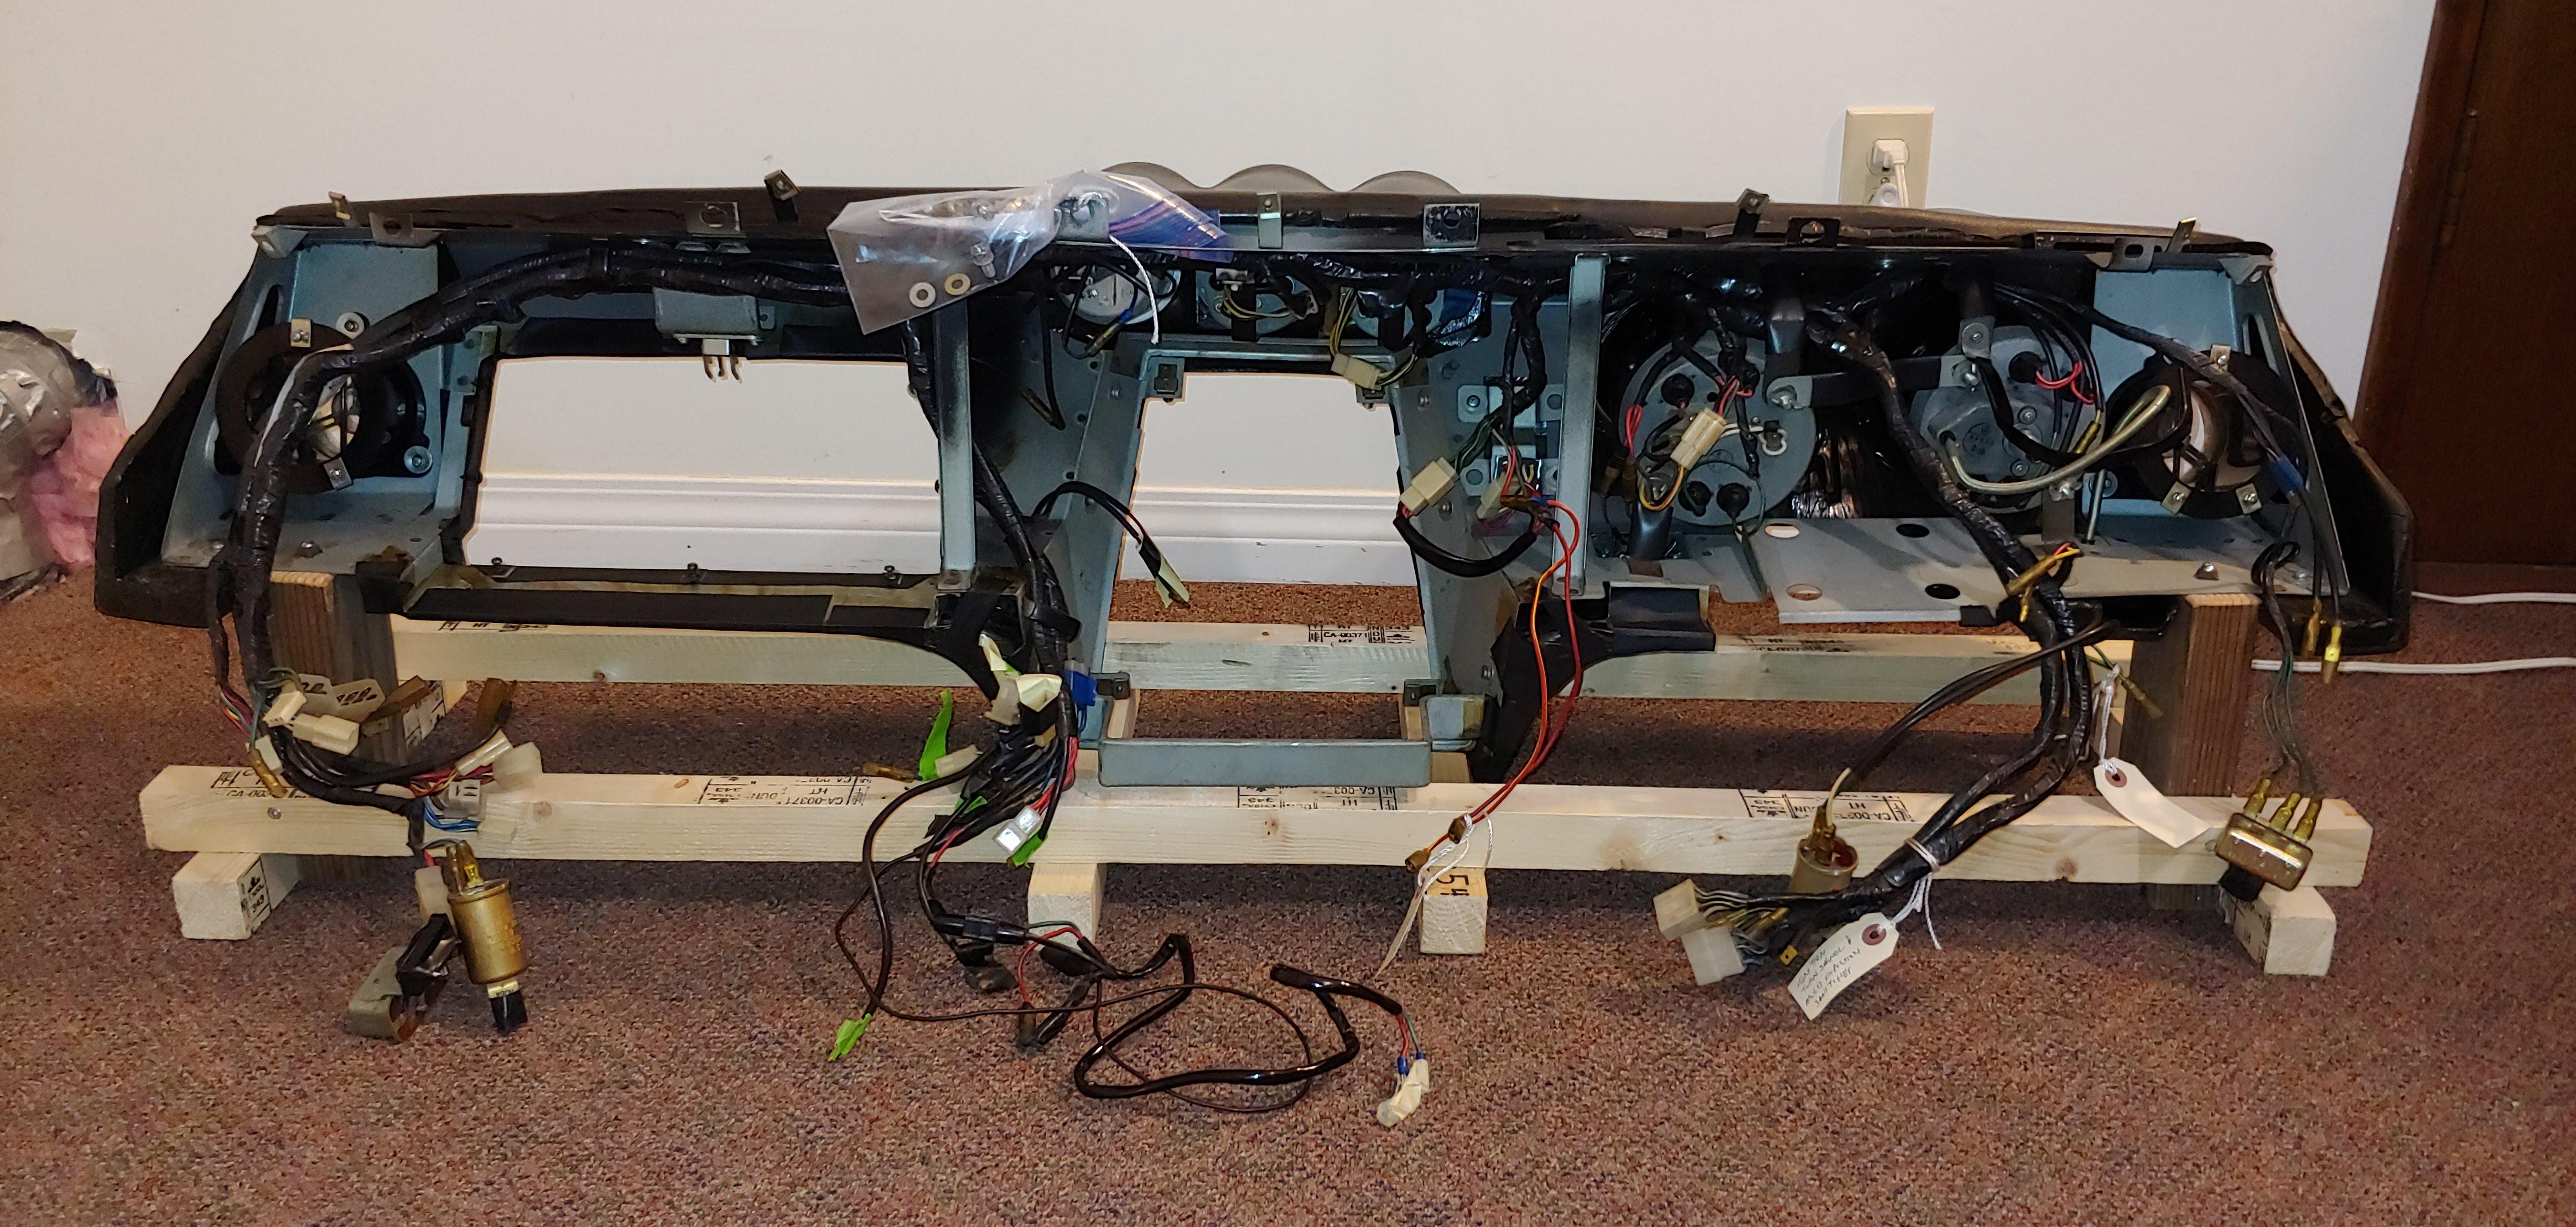
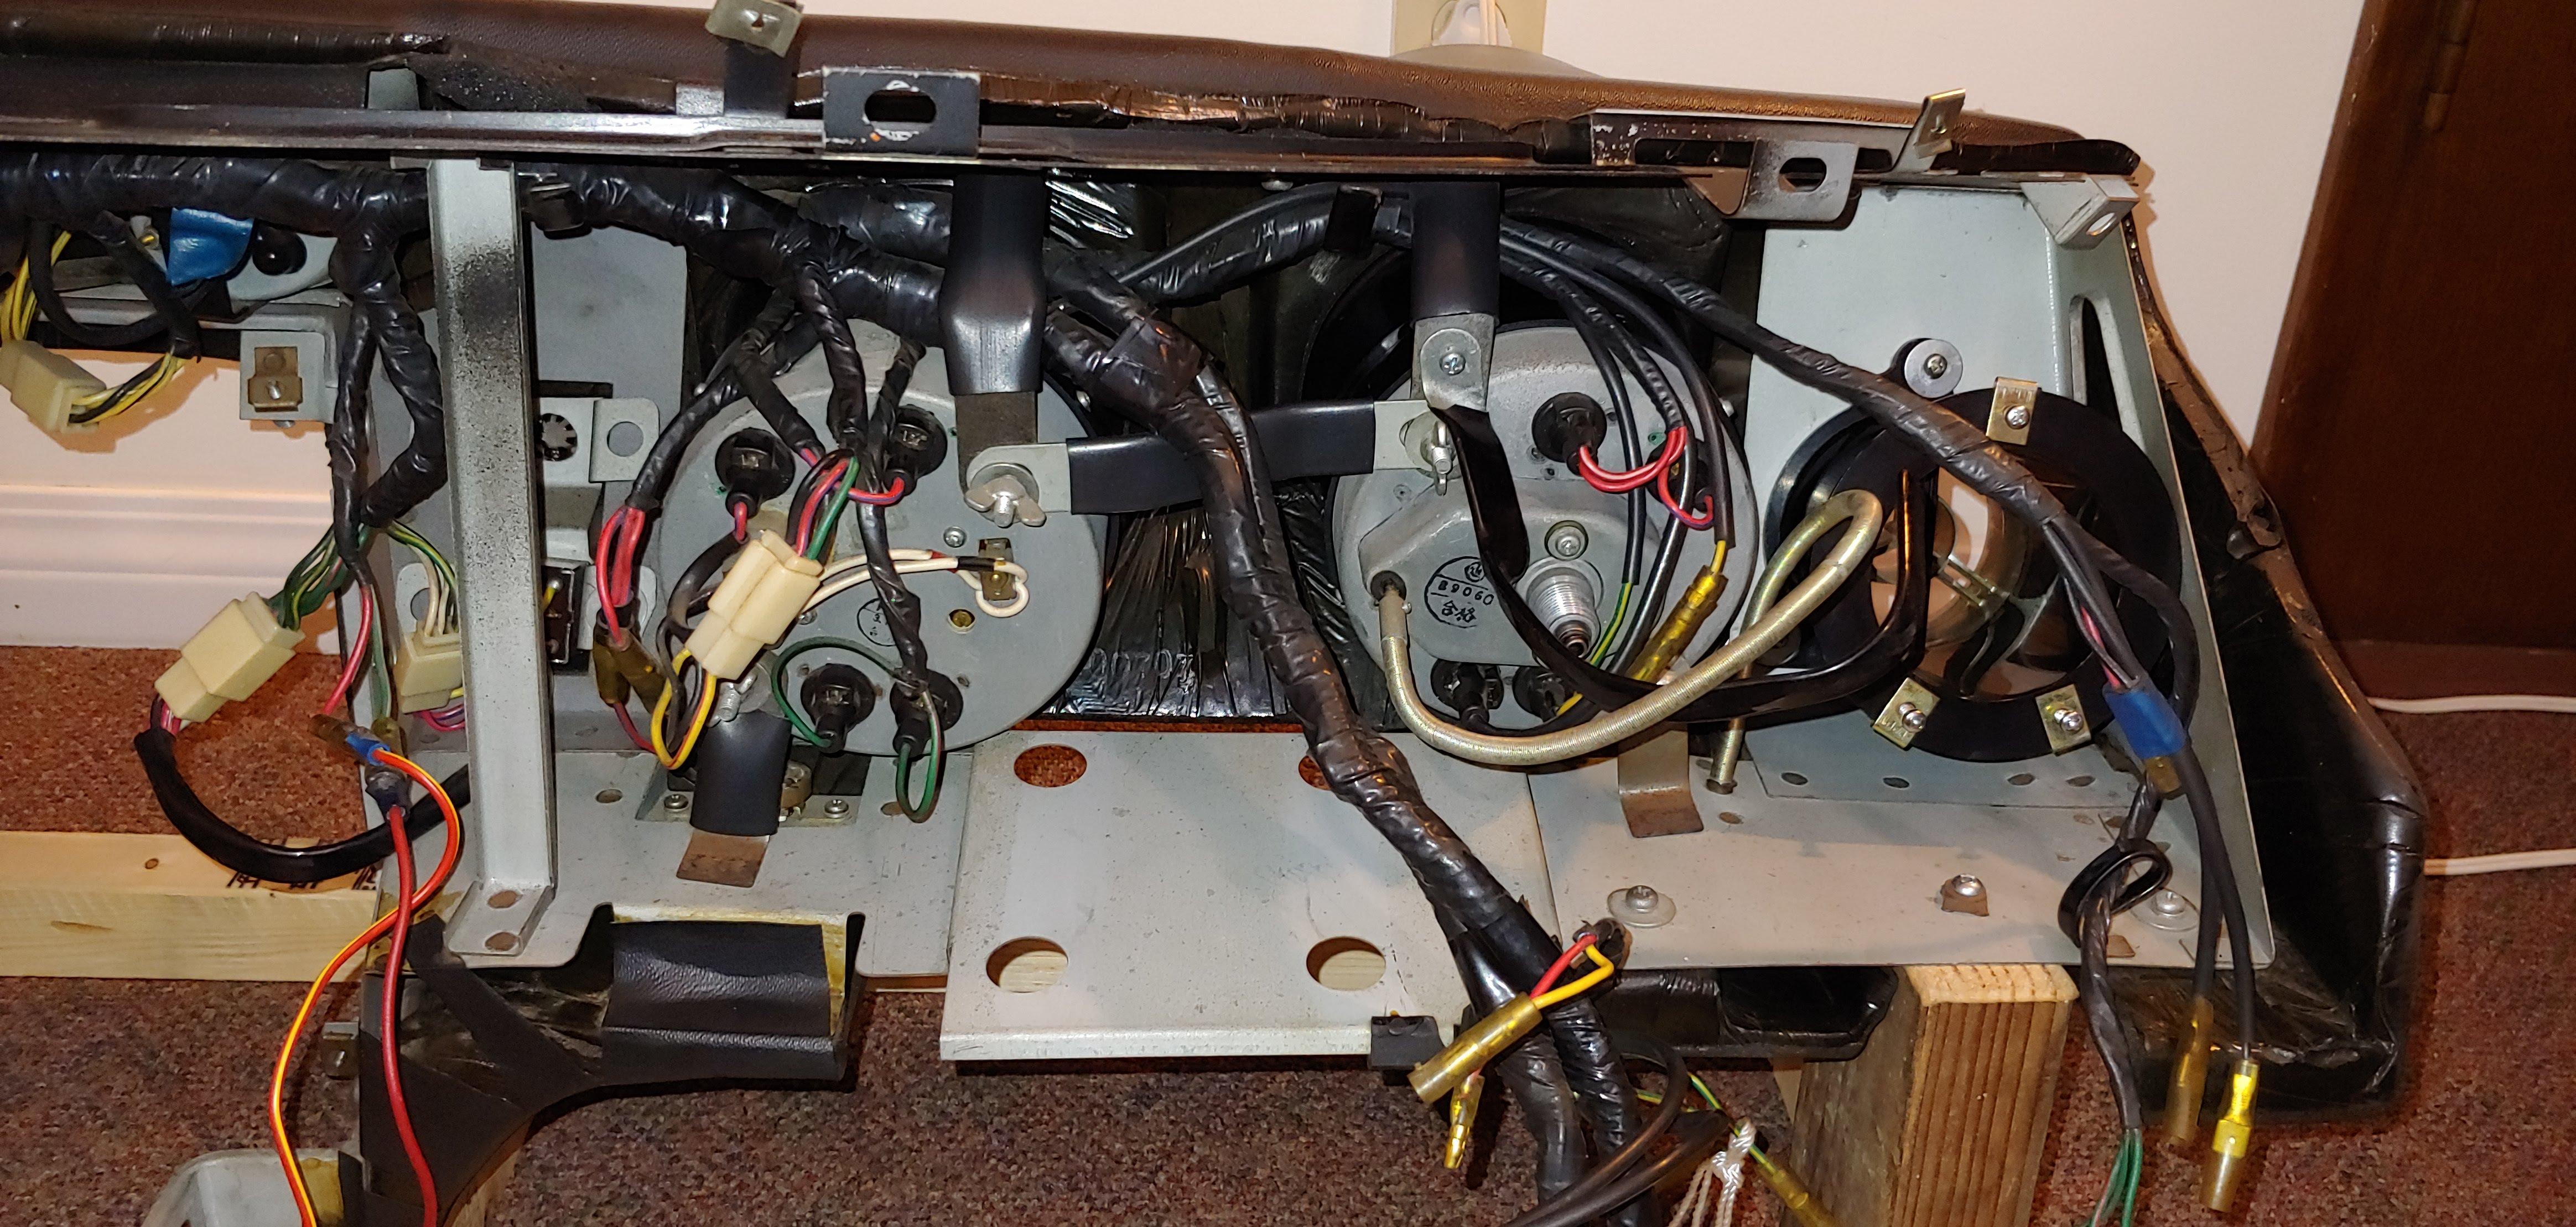
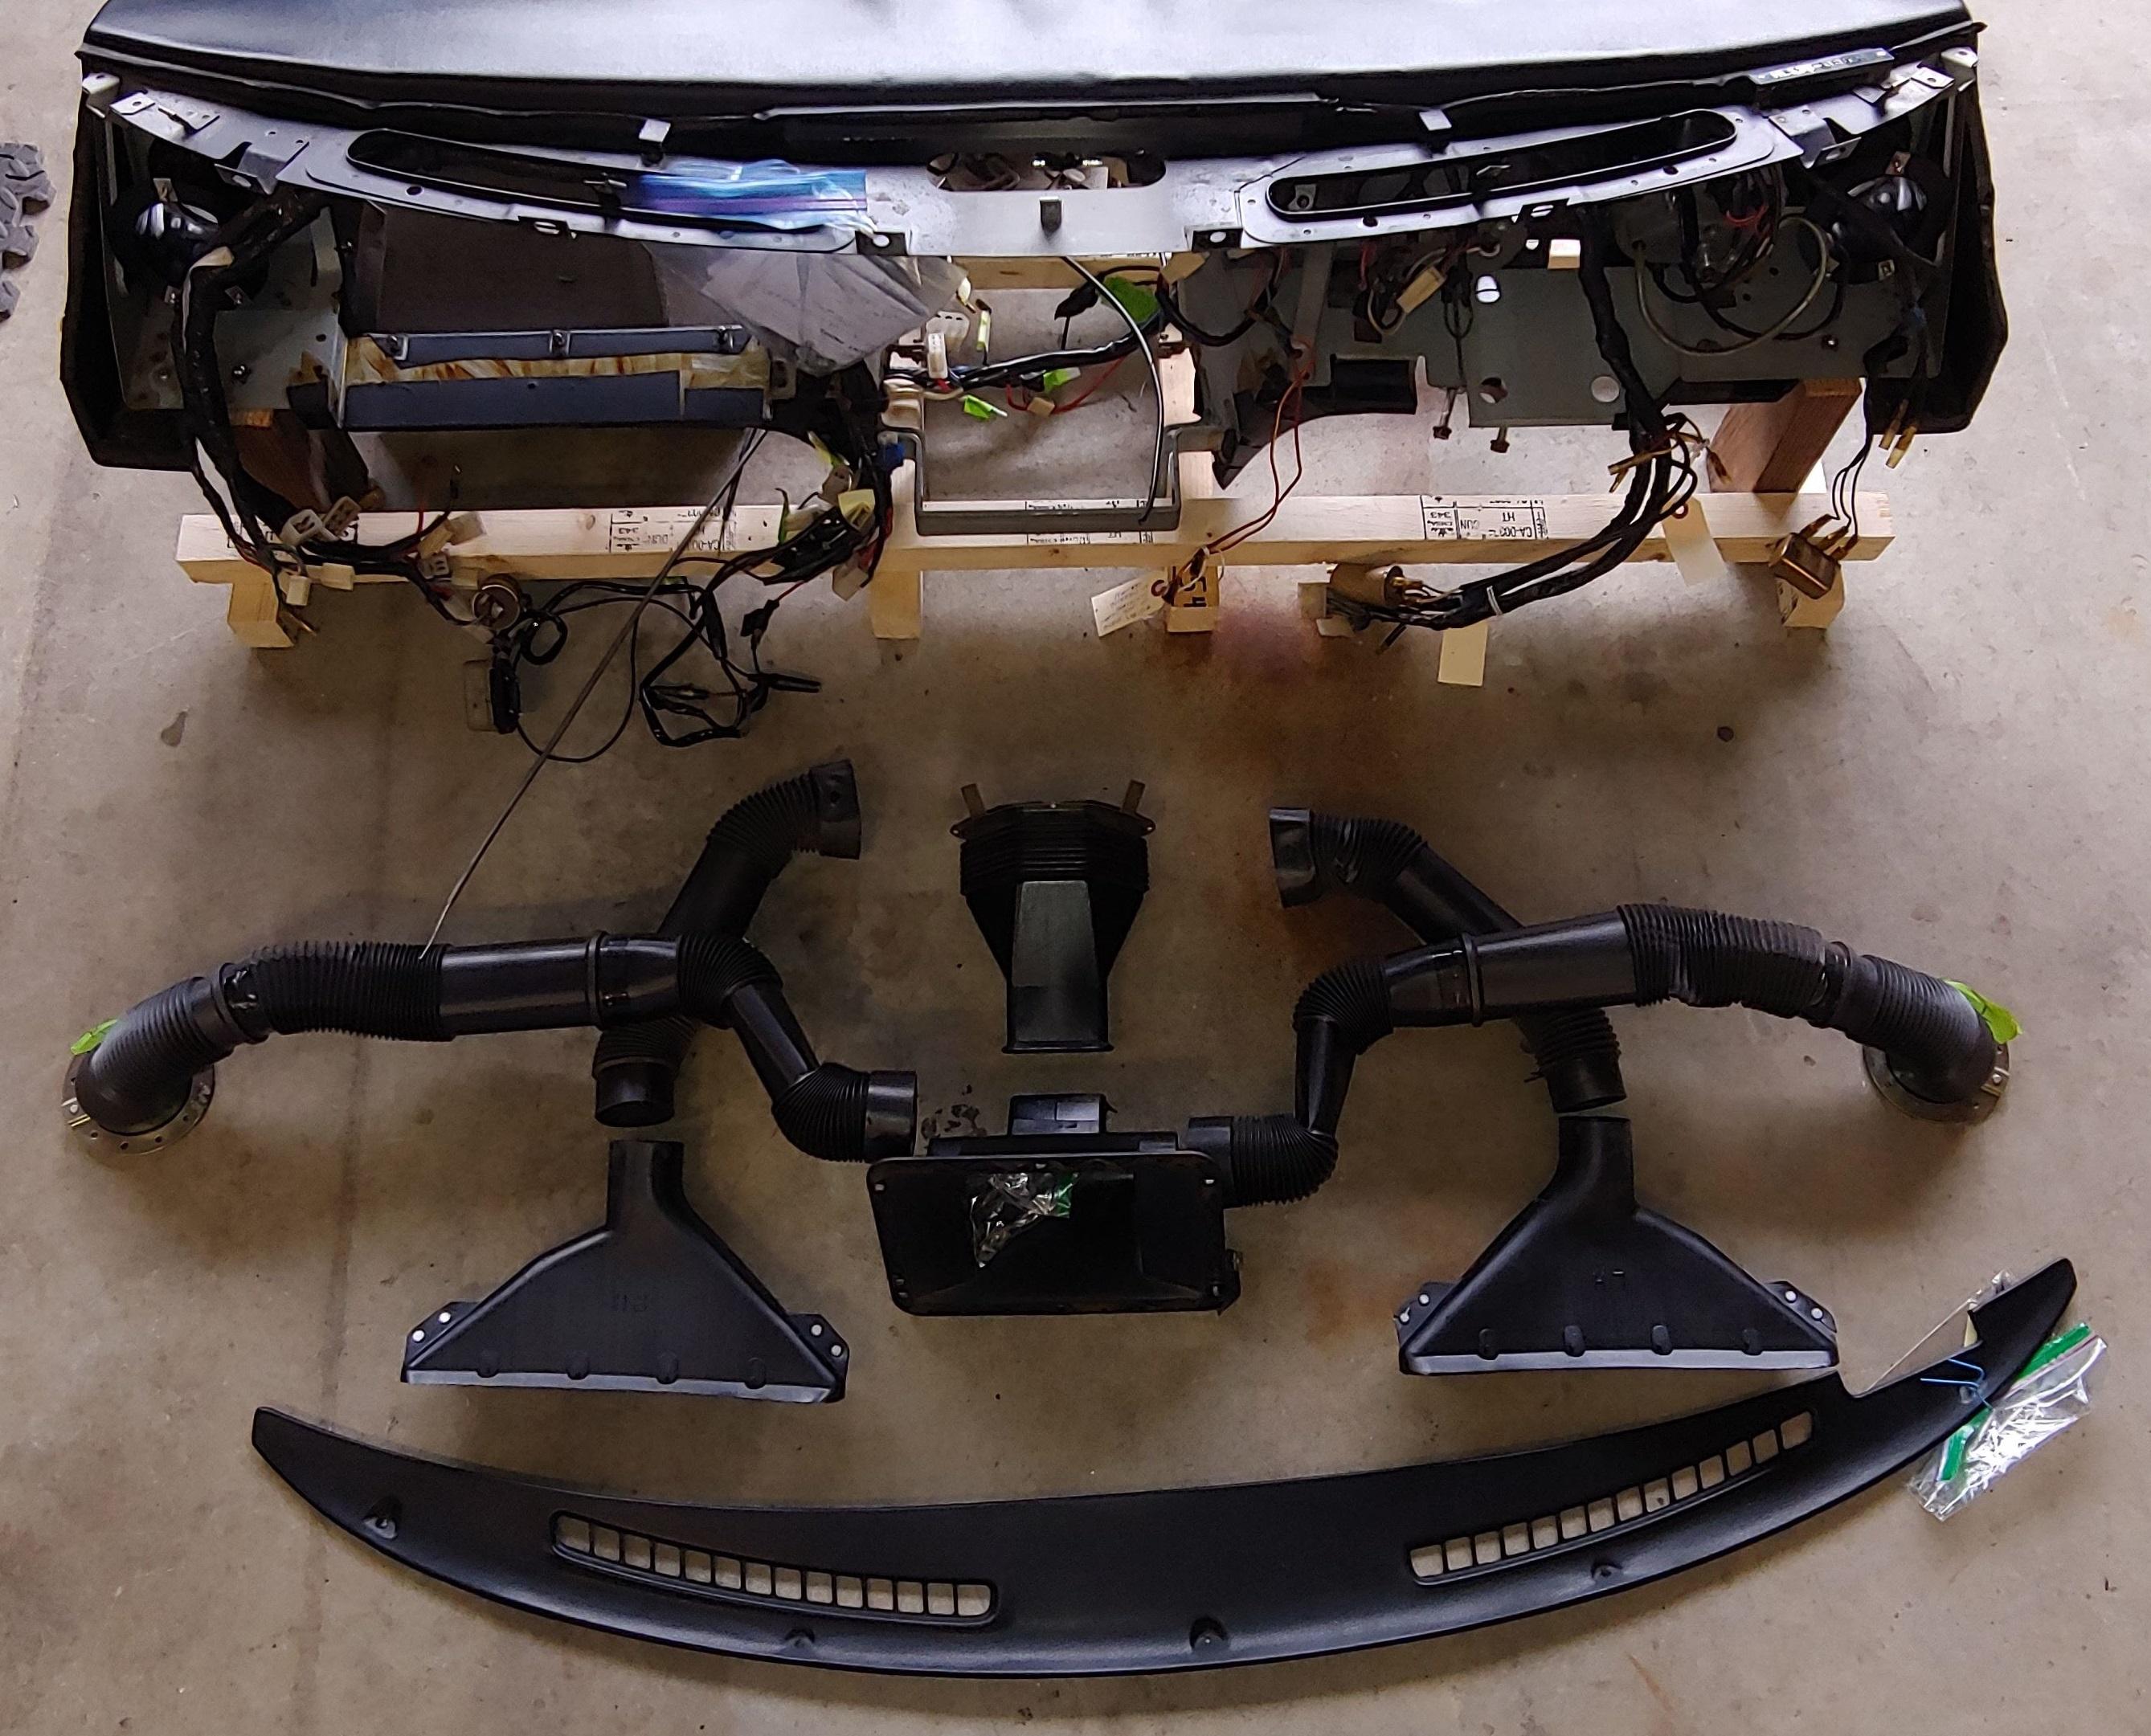
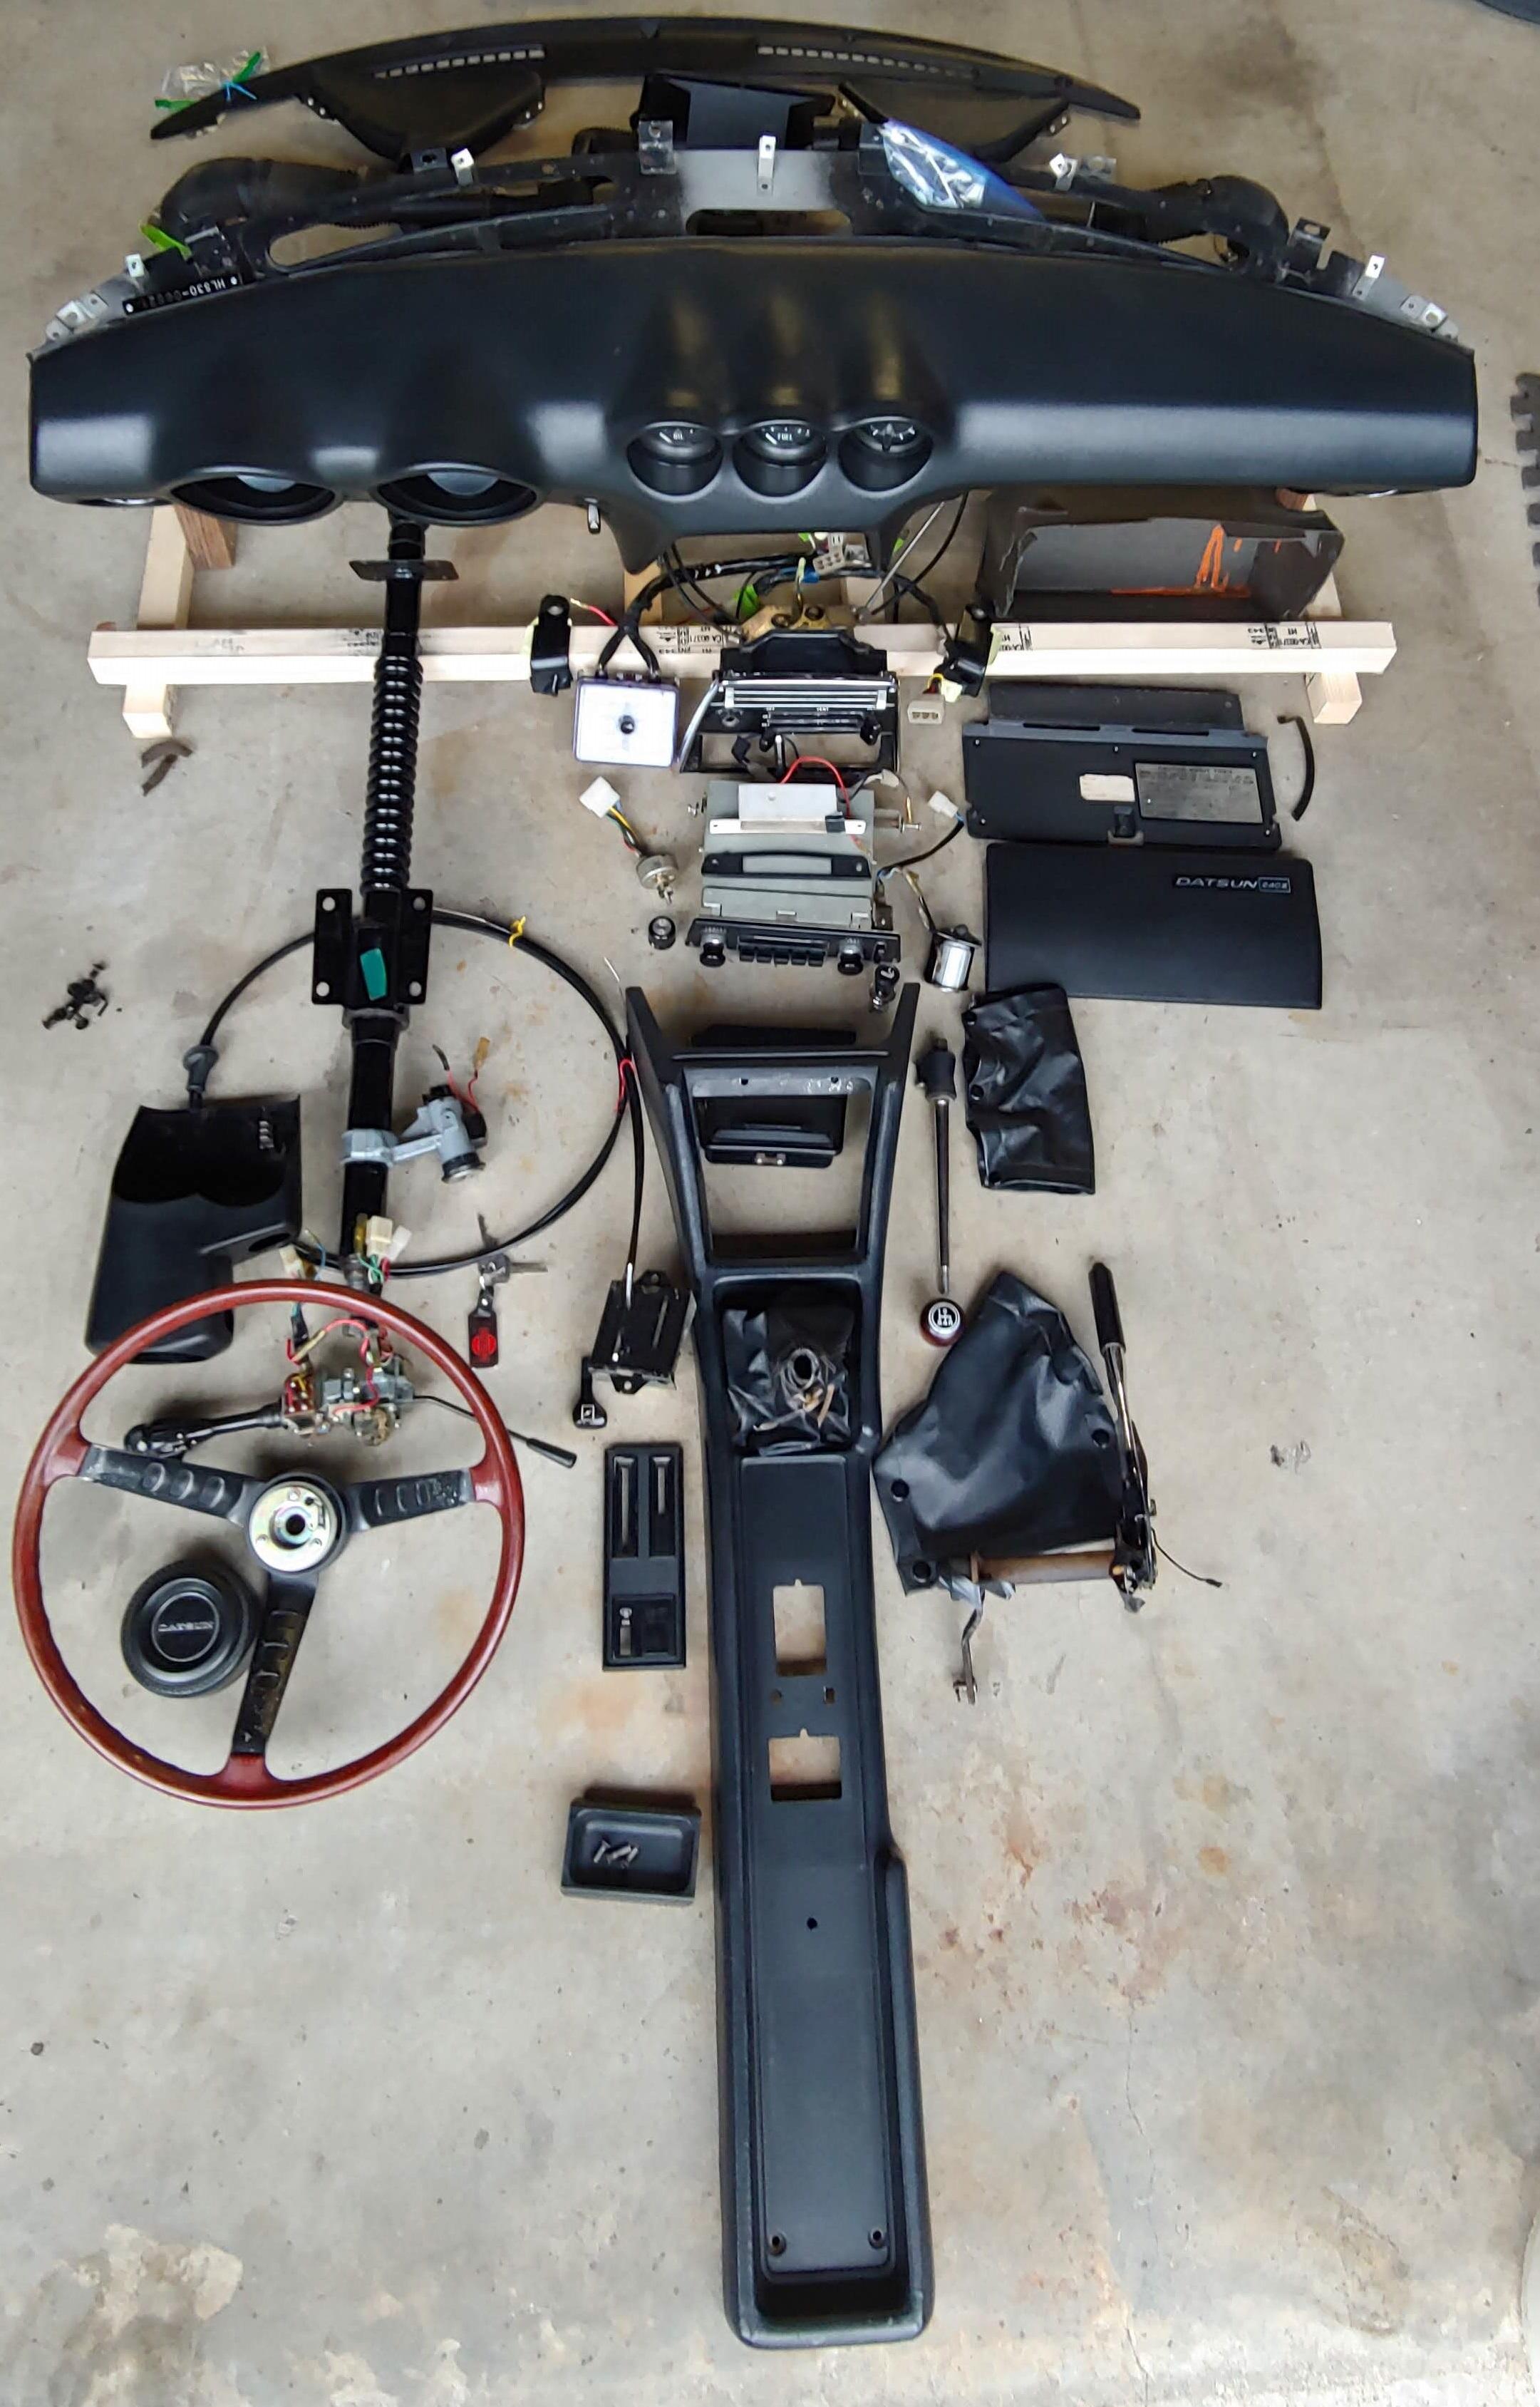
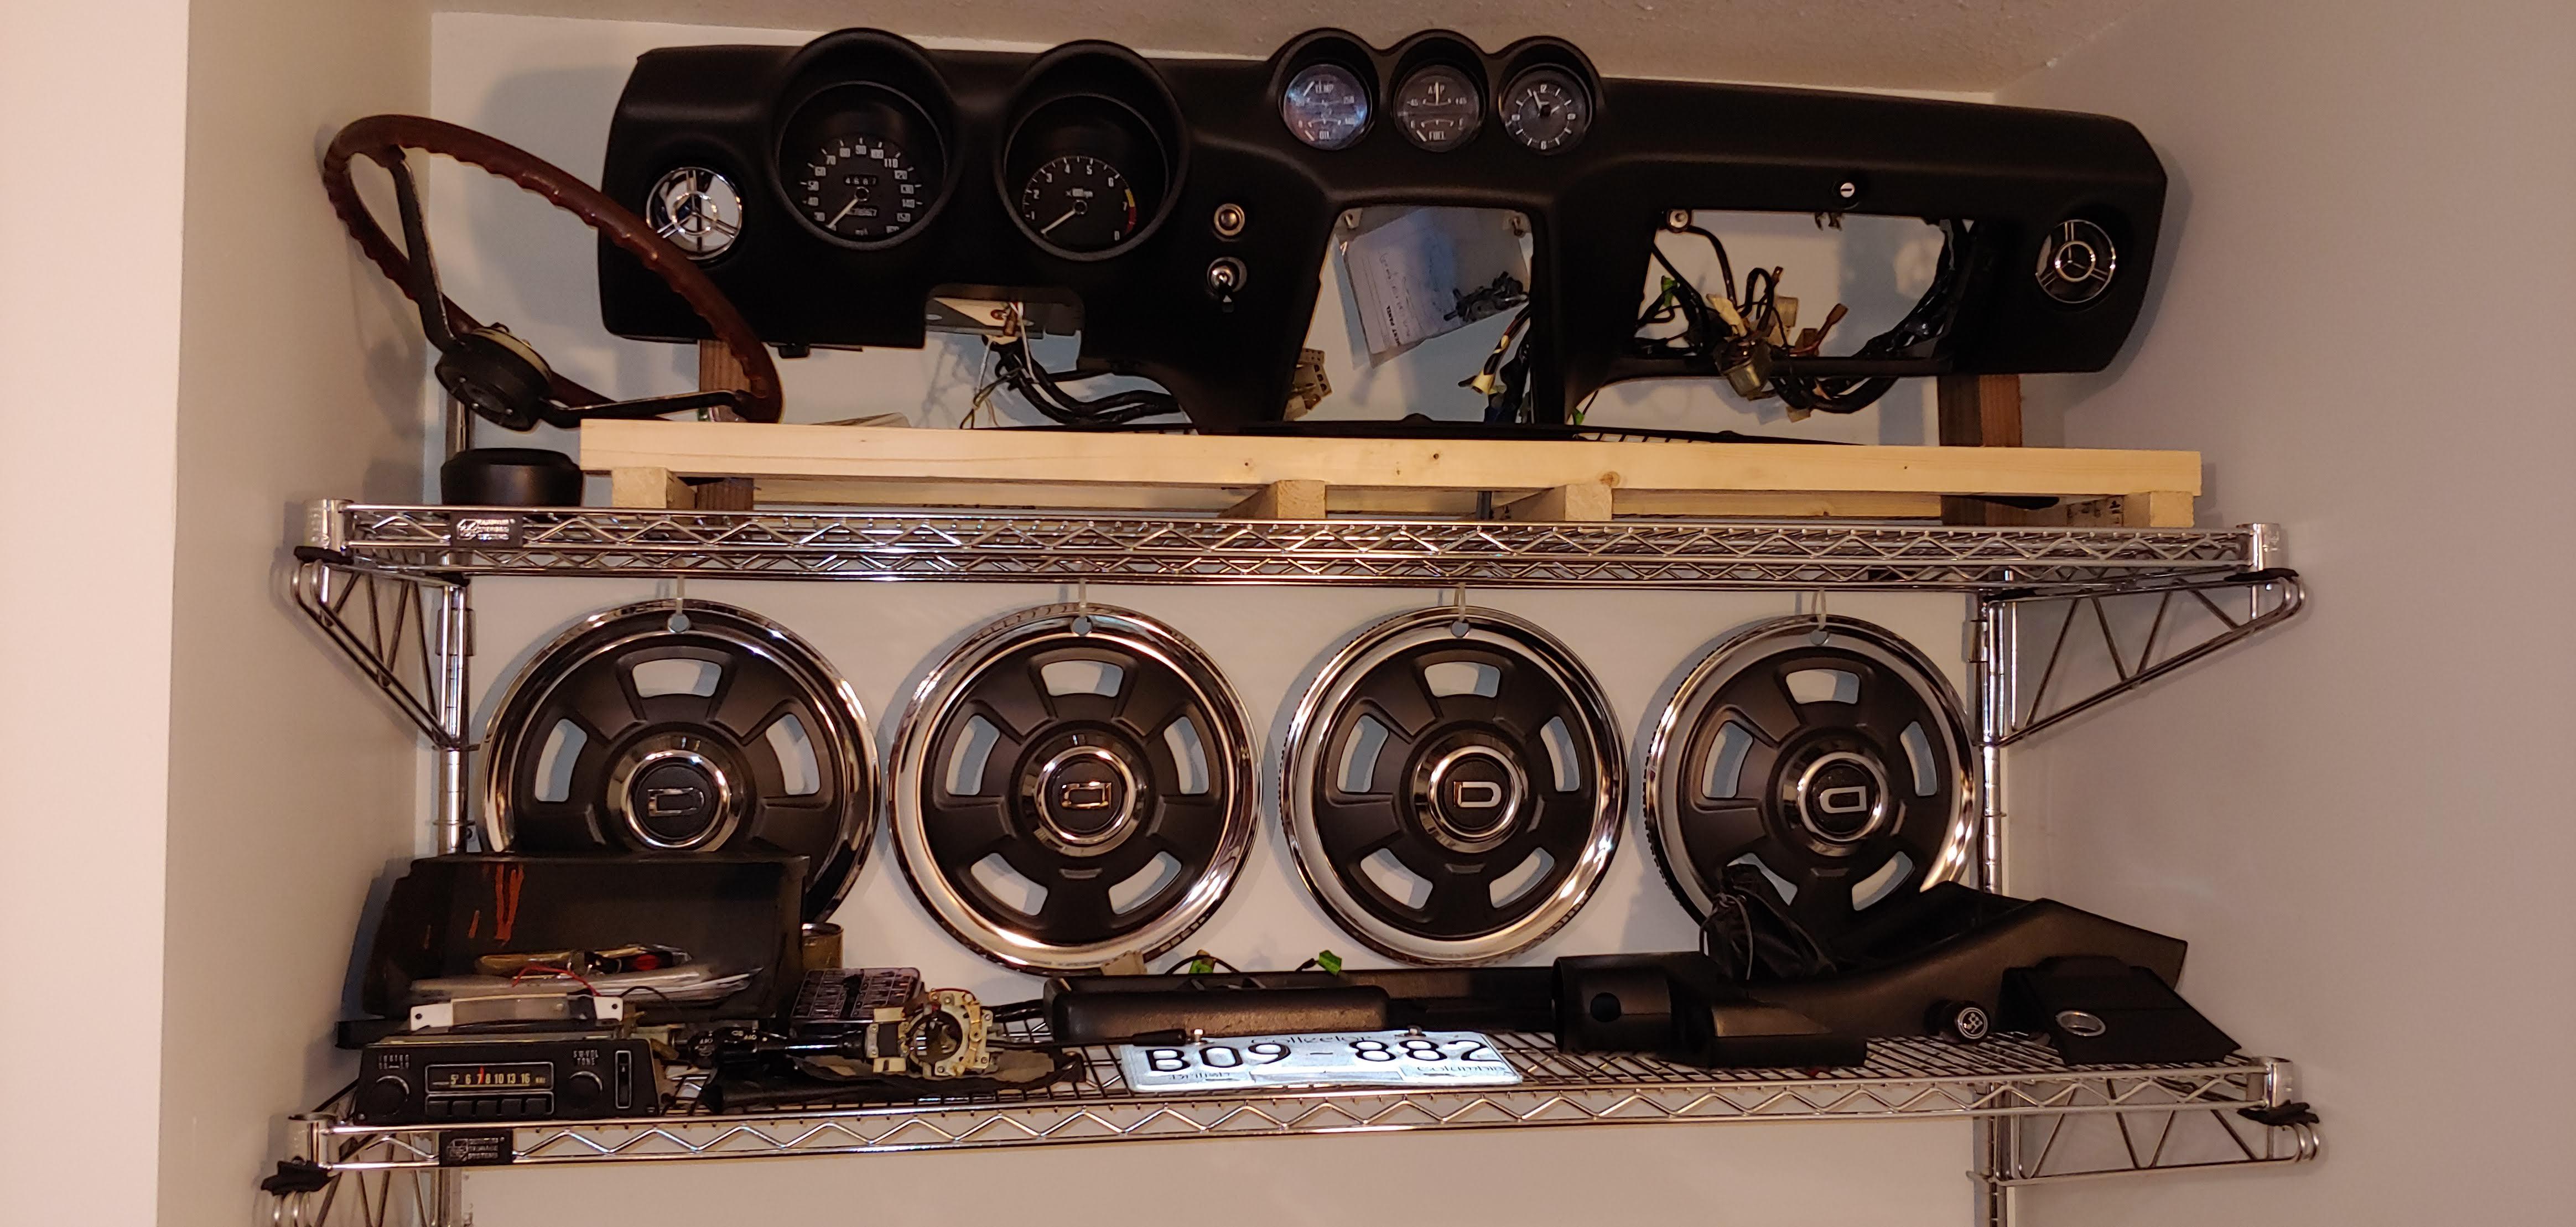
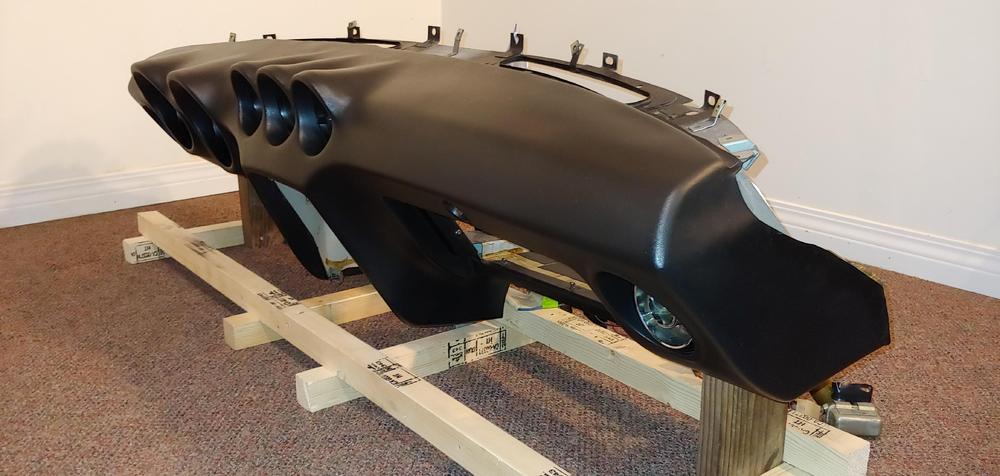
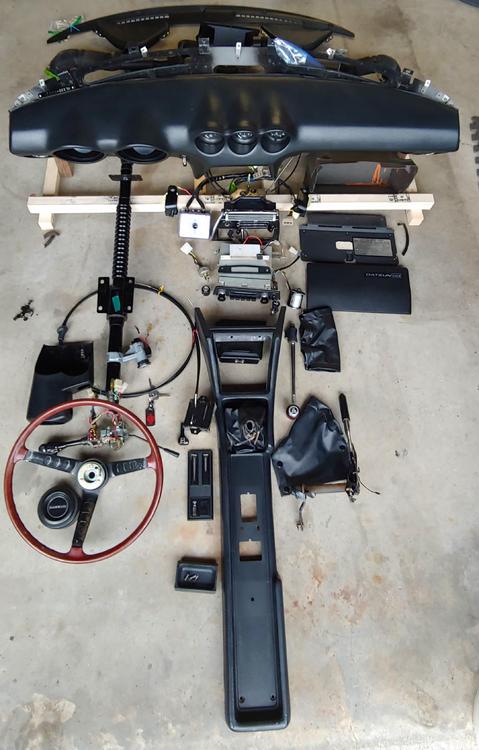
Spent some time yesterday cleaning the dash and some of the ventilation system parts to ready for storage. I am storing select parts on shelves in my office the rest will in my crawl space and organized on shelves and bins in my garage. I under estimated the space required but I'm doing my best to be organized so that I won't have to rely to much on my memory when I eventually get on to re-assembly.


-
Great work on the floors. I will be using this as a reference when I get to this point on my restoration. I'm going to make templates from my floors soon, before I remove the existing sound deadening material.
-
Very nice looking car. Regarding head room, there are usually some hex shaped plastic spacers under the seats that can be removed. You might gain an inch or so of head room.