CanTechZ
Free Member
-
Joined
-
Last visited
Everything posted by CanTechZ
-
 Great to hear everything worked out and good luck with the surgery.
 -
Looks like you're all sorted but here are some pictures as well.


-
Good images. I will pull off my air cleaner housing and get you some good pictures for comparison.
-
No problem, will do when I get home tonight.
-
Thanks and your welcome. Let me know if you need any specific pictures, I haven't pulled the engine yet.
-
Not pictures but here is a video of my engine bay, 7/70 car, that I shot as a reference before dismantling for a restoration, it's long but I hope it helps. Cheers Mike
-
-
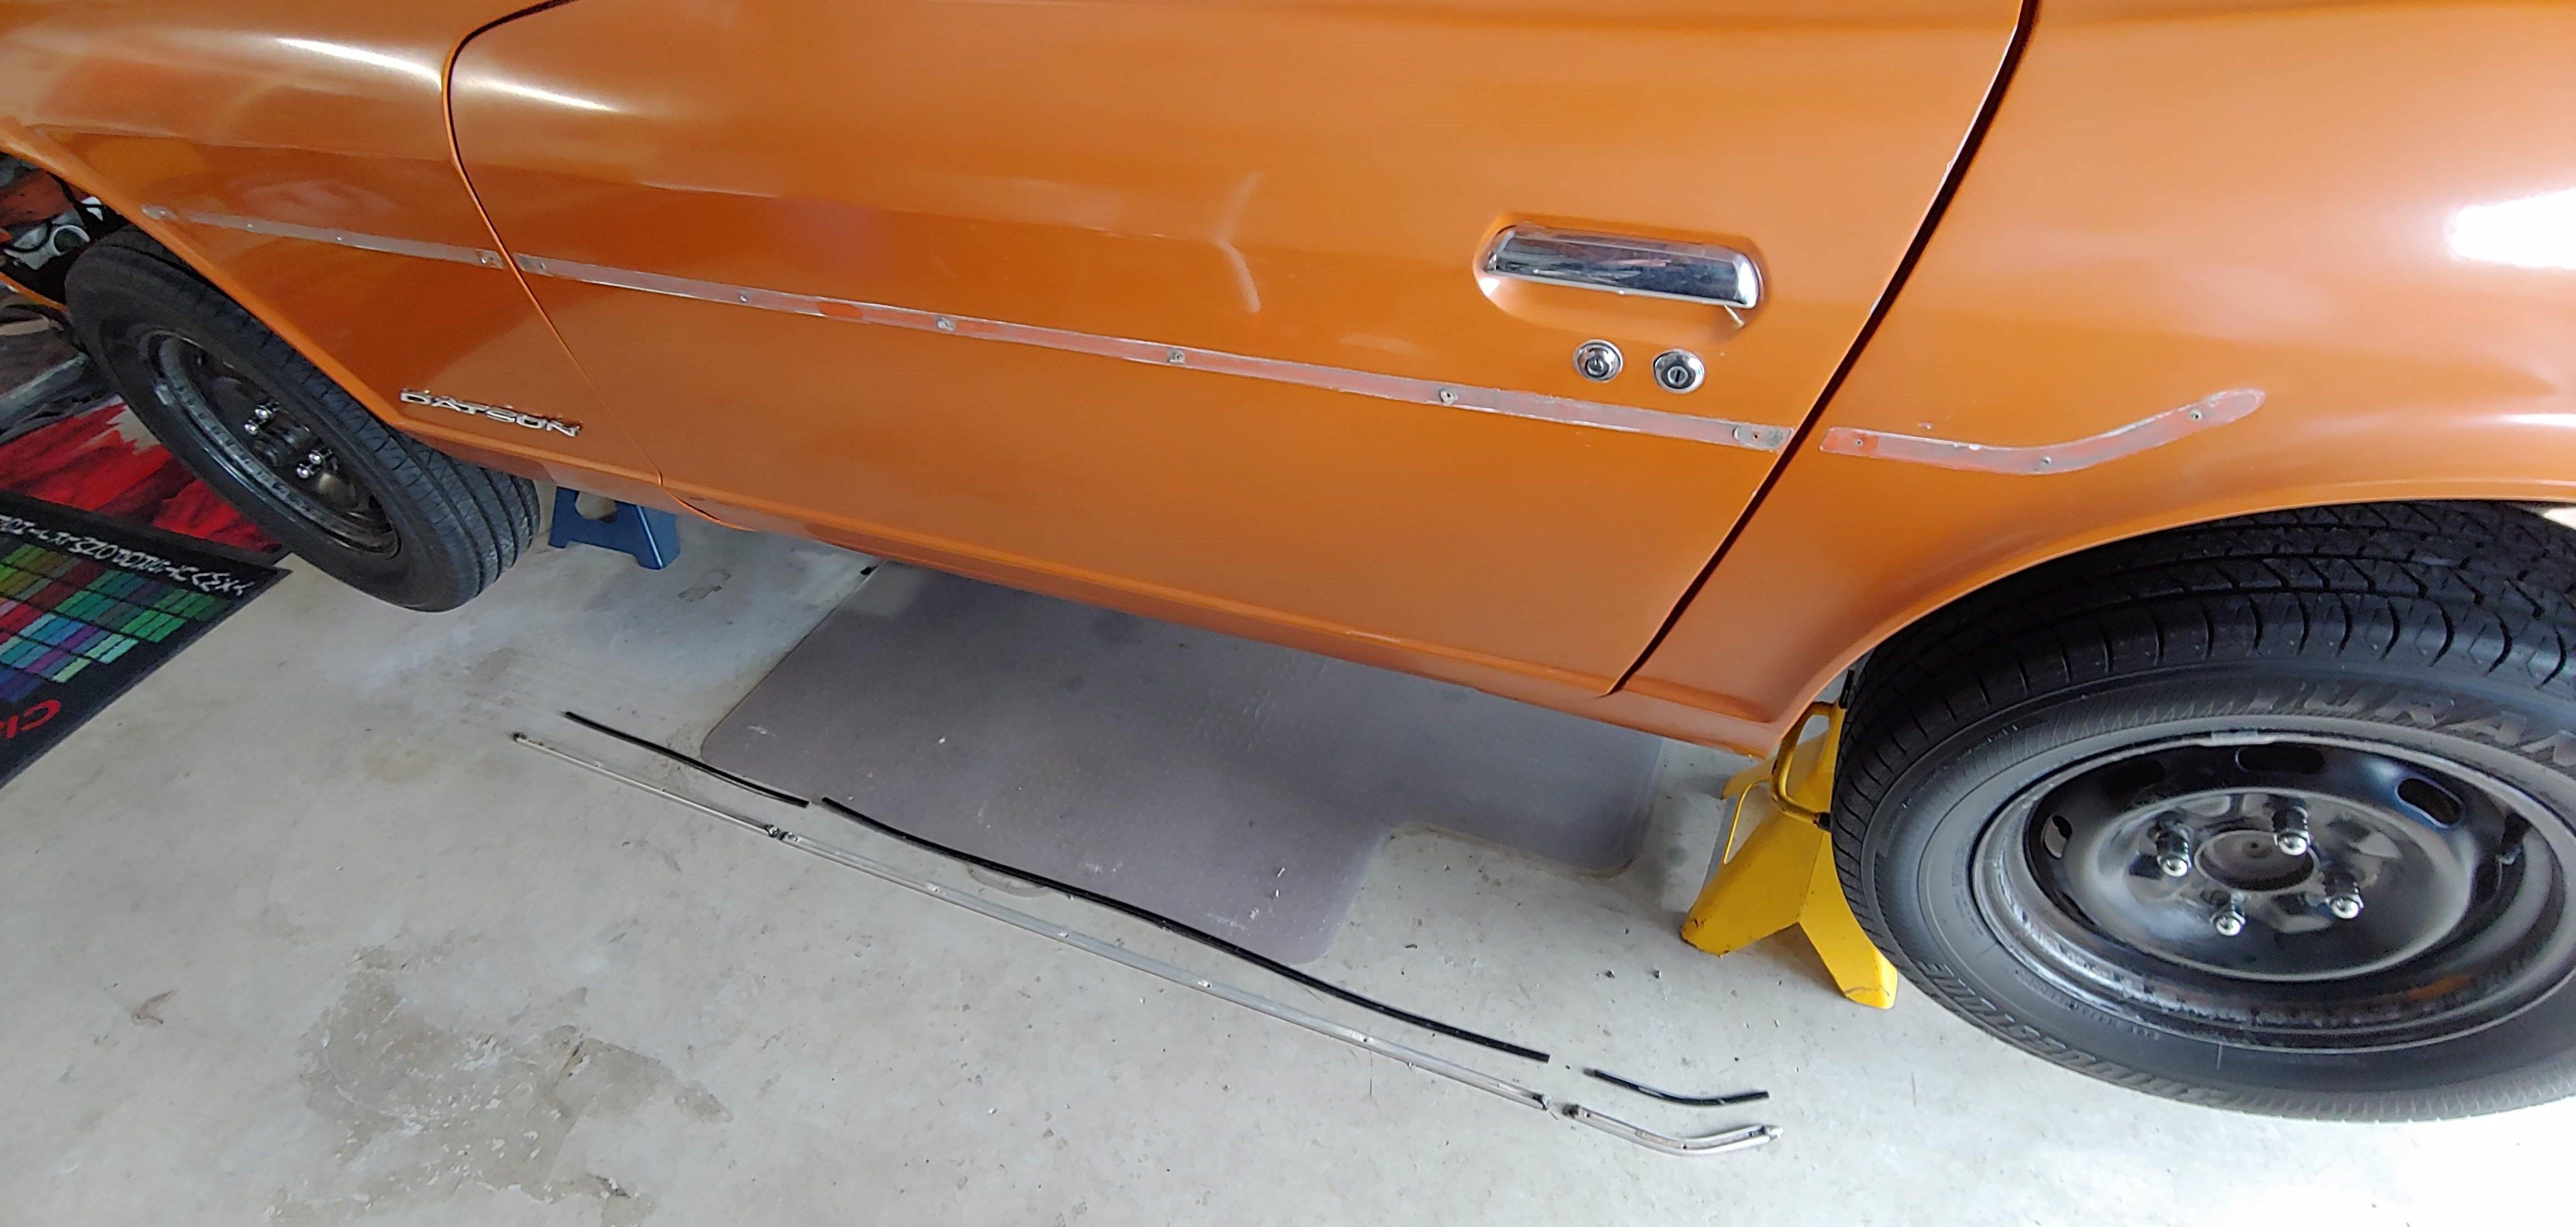
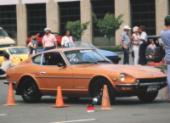
Basically I'm doing what I should have done during my first restoration back in the 80's. I recently cleaned off most of the old undercoating and discovered more chassis rust than I expected to see, probably will replace the front frame rail on the left side and replace the let side floor plus other rust repair as required. Before I bought the car in 1978 it had a cheap paint and bondo over rust paint job. As it has had two re-paints I will go to bare metal and then go back to original color, it is currently Ontario Orange Metallic, a '71 Corvette color. This will be a glass out, drivetrain out complete job. I will get into more detail soon as well as describe in more detail what was done during the first resto.
-
Thanks Dan, I can't explain why my car has the emissions decal, just one of those strange mysteries I guess. I put the header on back in the early 80's and sadly I didn't save the exhaust manifold. At the time it didn't seem important. The early ones without the air tubes are next to impossible to find now.
-
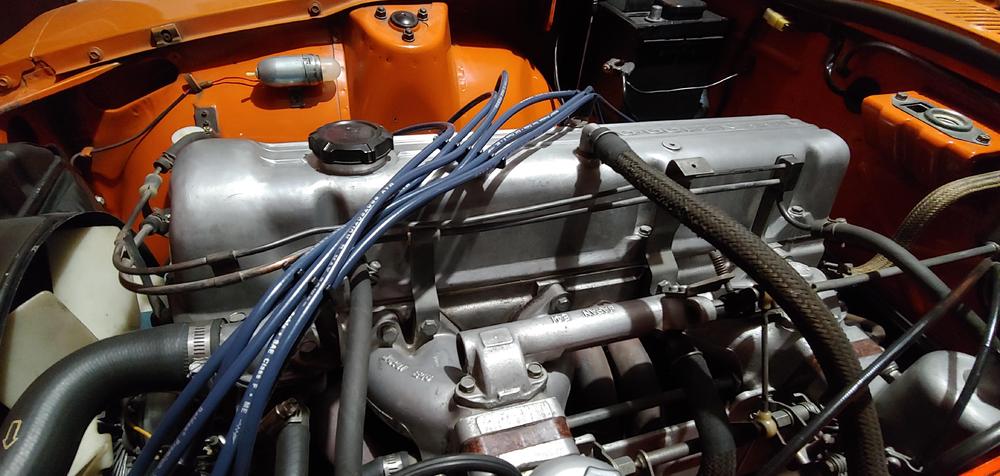
Good news to report, my Samurai sold so I now have the room to start disassembling my car, and no more excuses not to start, LOL. The first order of business was to document the existing condition. In a addition to taking countless pictures I shot several videos of the exterior, engine bay, interior and chassis. Hopefully these will be a help when it comes time to put my car back together. It's amazing to me that no matter how many pictures I take to document things, I still manage to miss things. For those you are interested, I am posting the videos here. Just a warning, I will not be responsible for the time lost if you watch them. They are quite long. Exterior condition; Engine bay condition: Interior condition (1 of 2): Interior condition (2 of 2): Chassis condition (1 of 2): Chassis condition (2 of 2): Oops this is 1 of 2, don't seem to be able to delete a video link here is 2 of 2
-
This is a great project with an equally great story. I look forward to seeing this one progress.
-
My 7/70, #6521, has them.
-
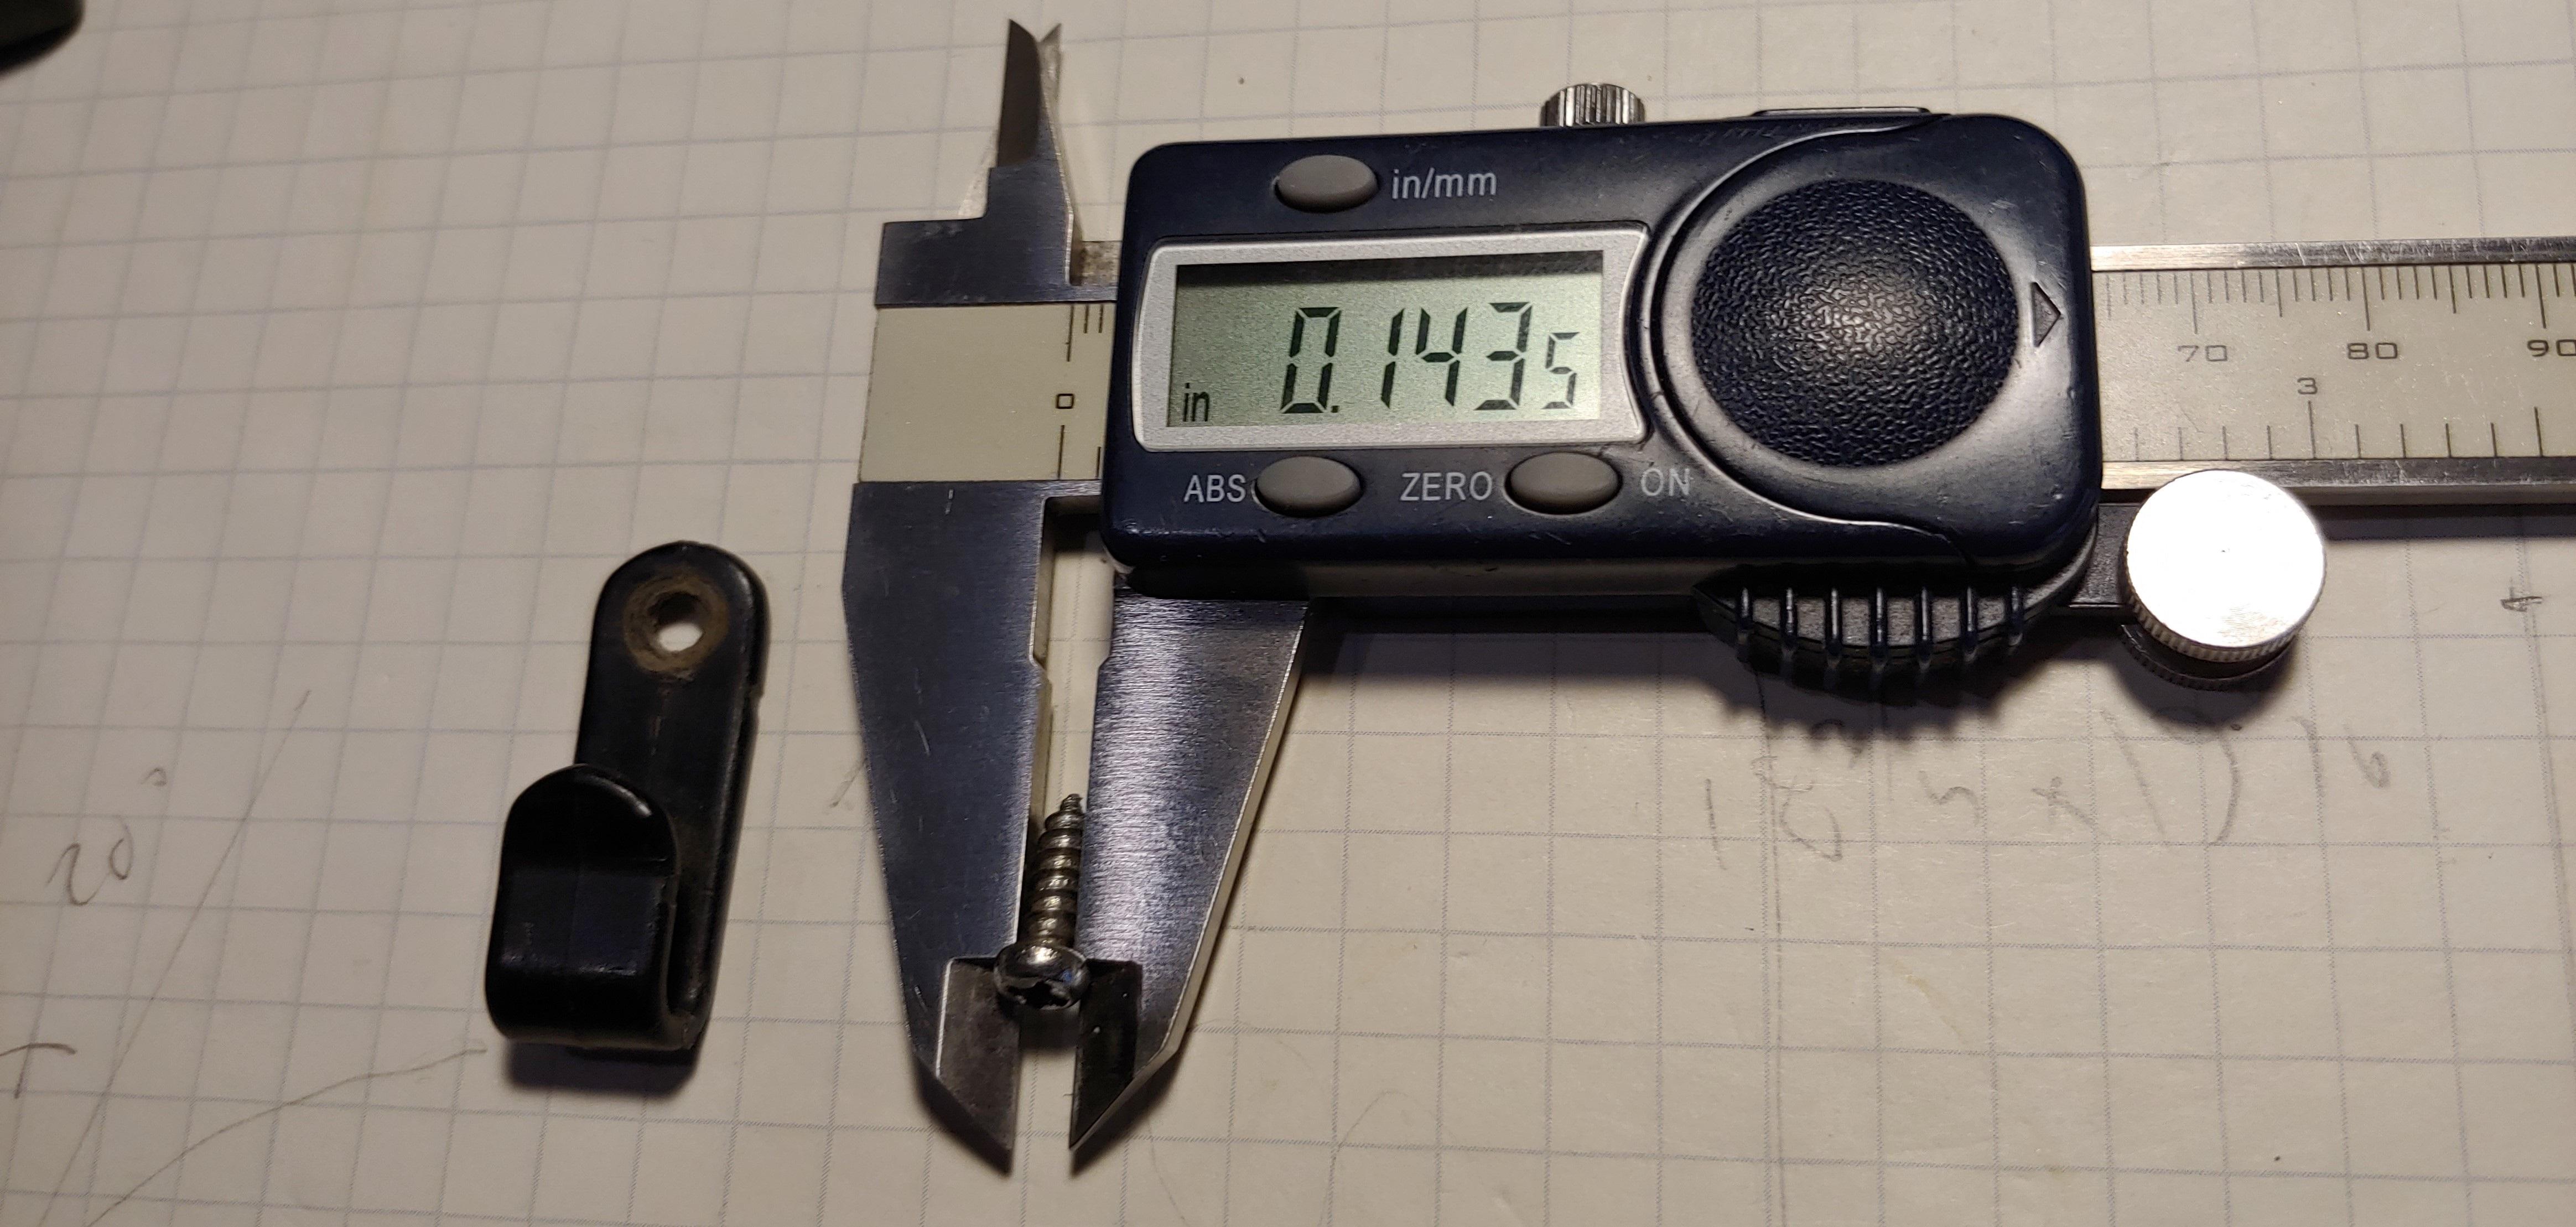
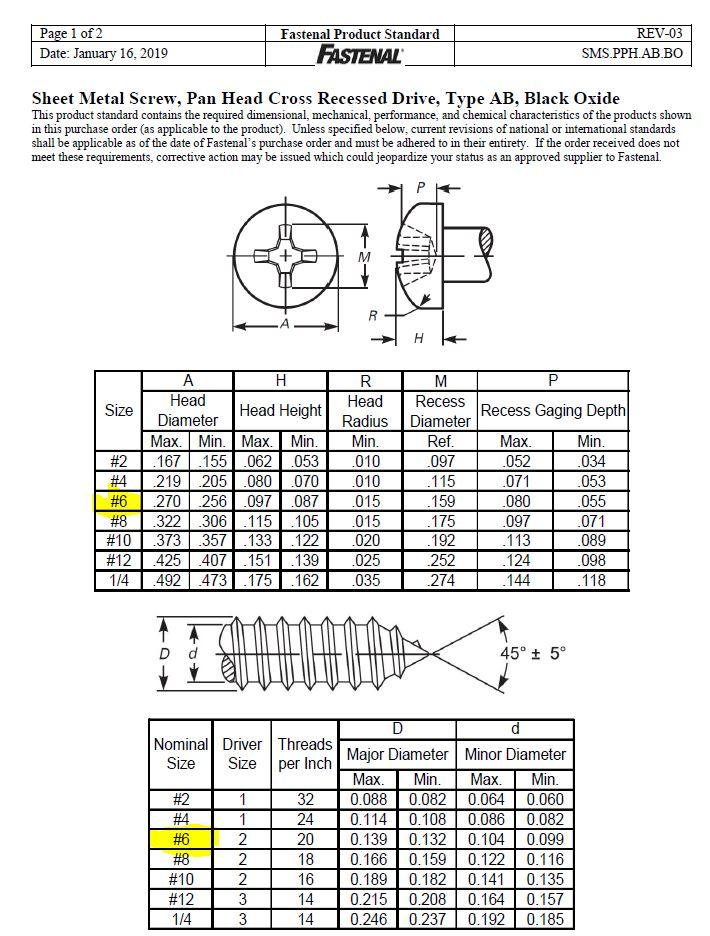
Mine are plated steel but the plating appears more like chrome or nickel. The length is 1/2" under the head.
-
Sheet metal screws work well for this application. The screw doesn't bottom out when tight, allowing the hook to swivel and not do damage to the vinyl seat back covering.
-
-
You might want to check out this guy in the UK. I think I saw a picture of that part on his face book page.
-
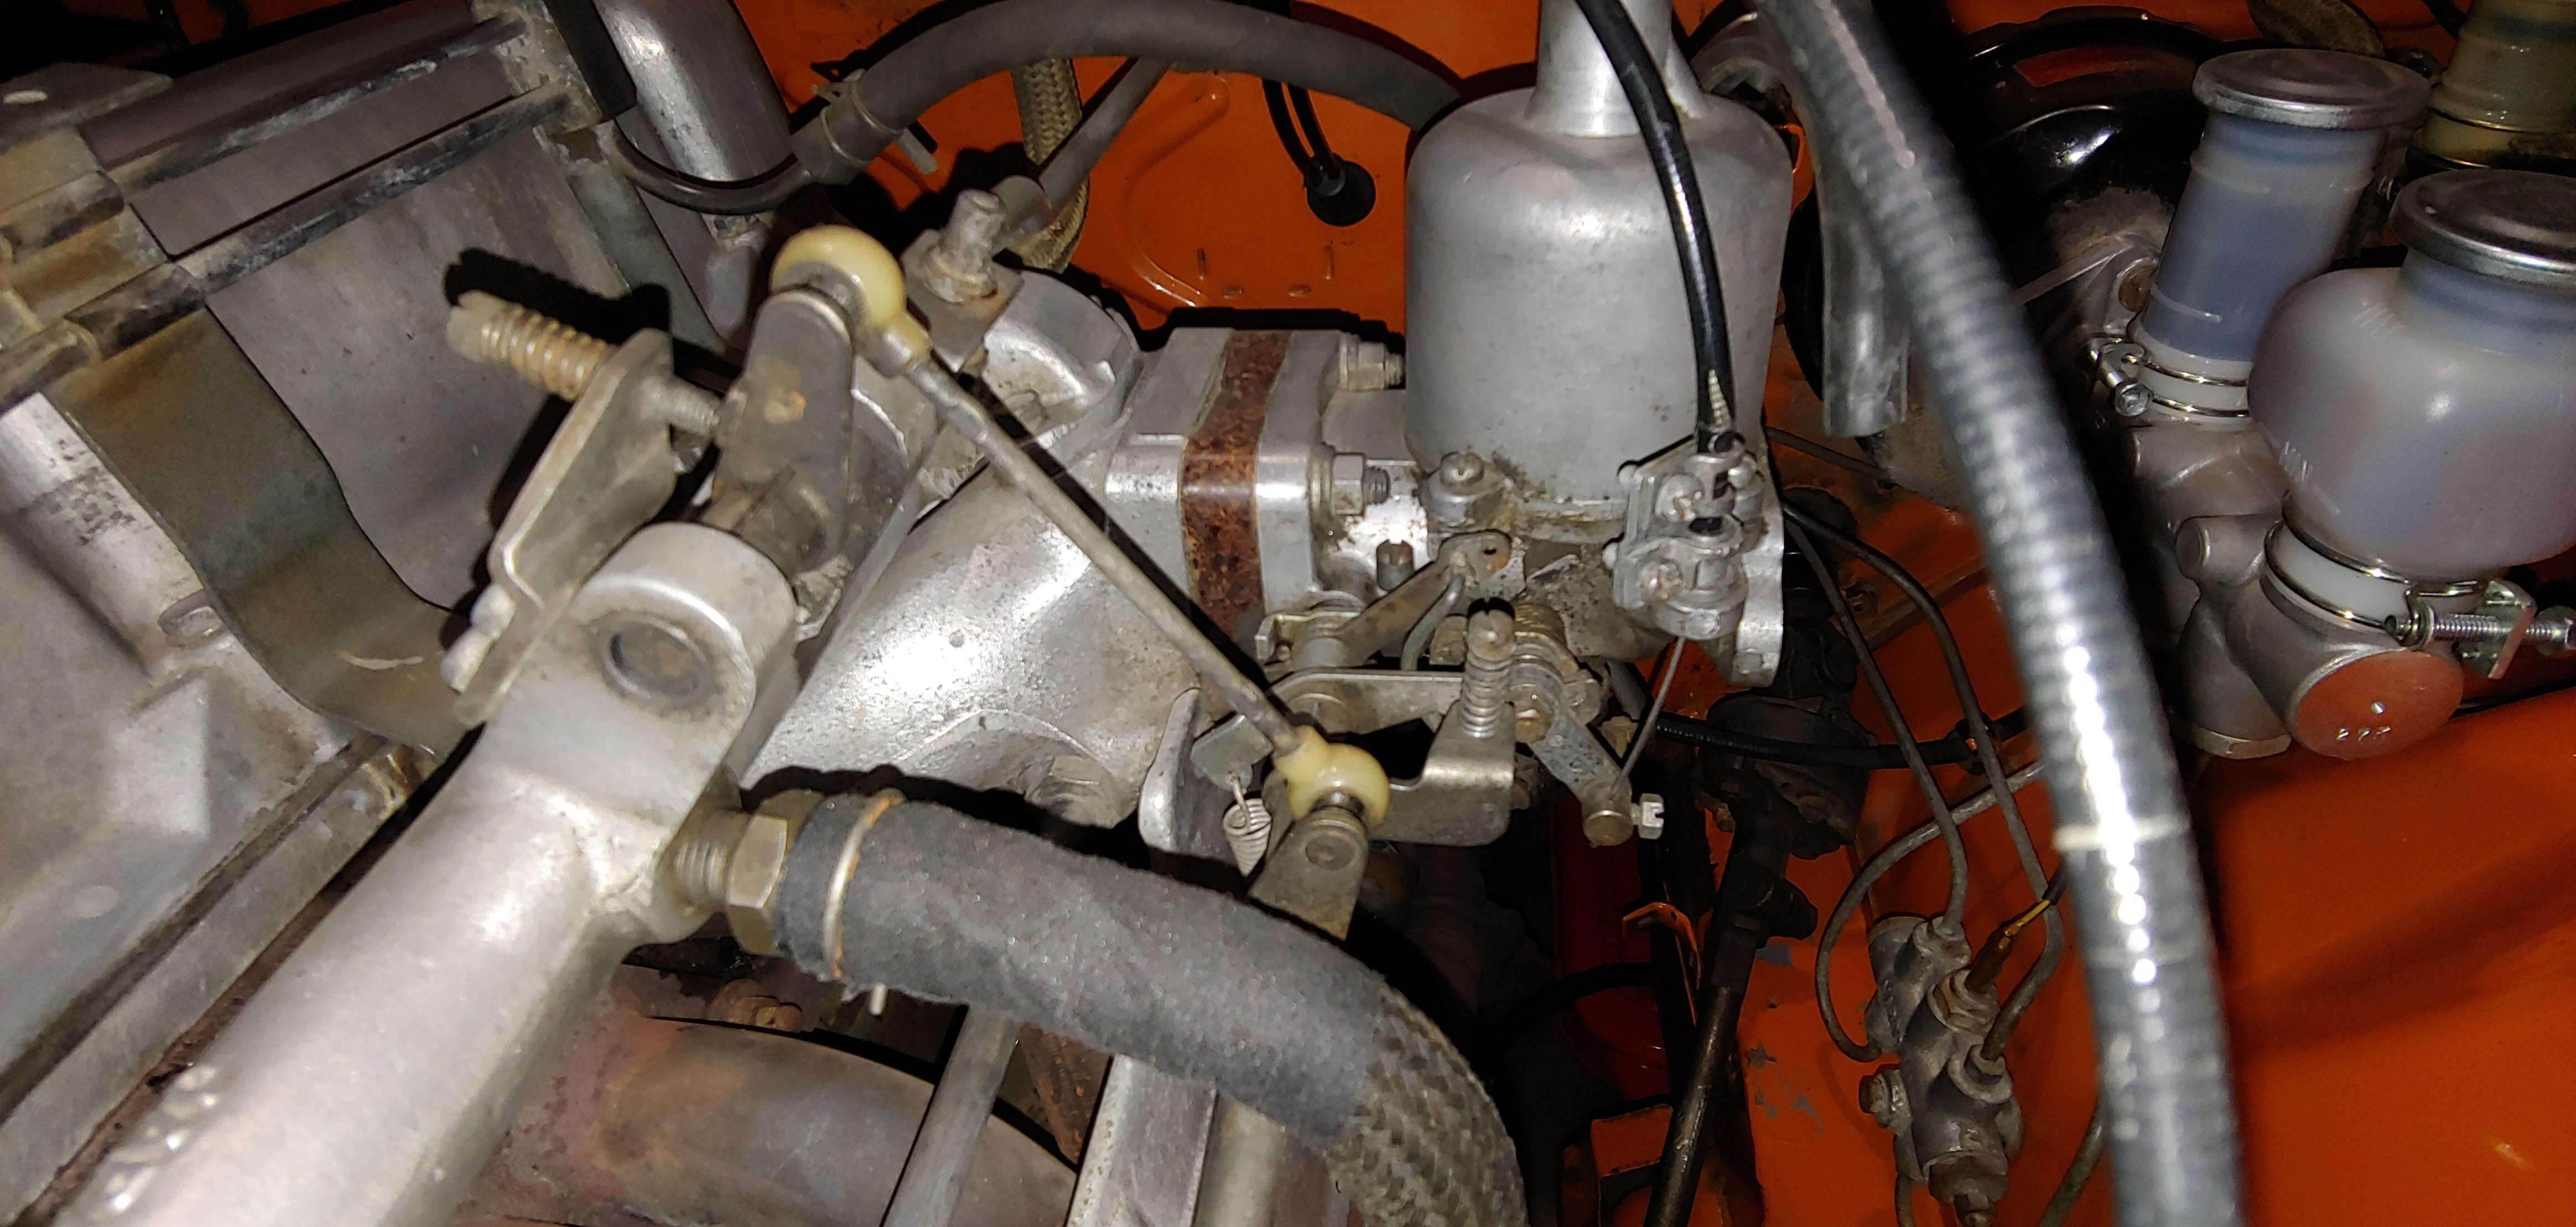
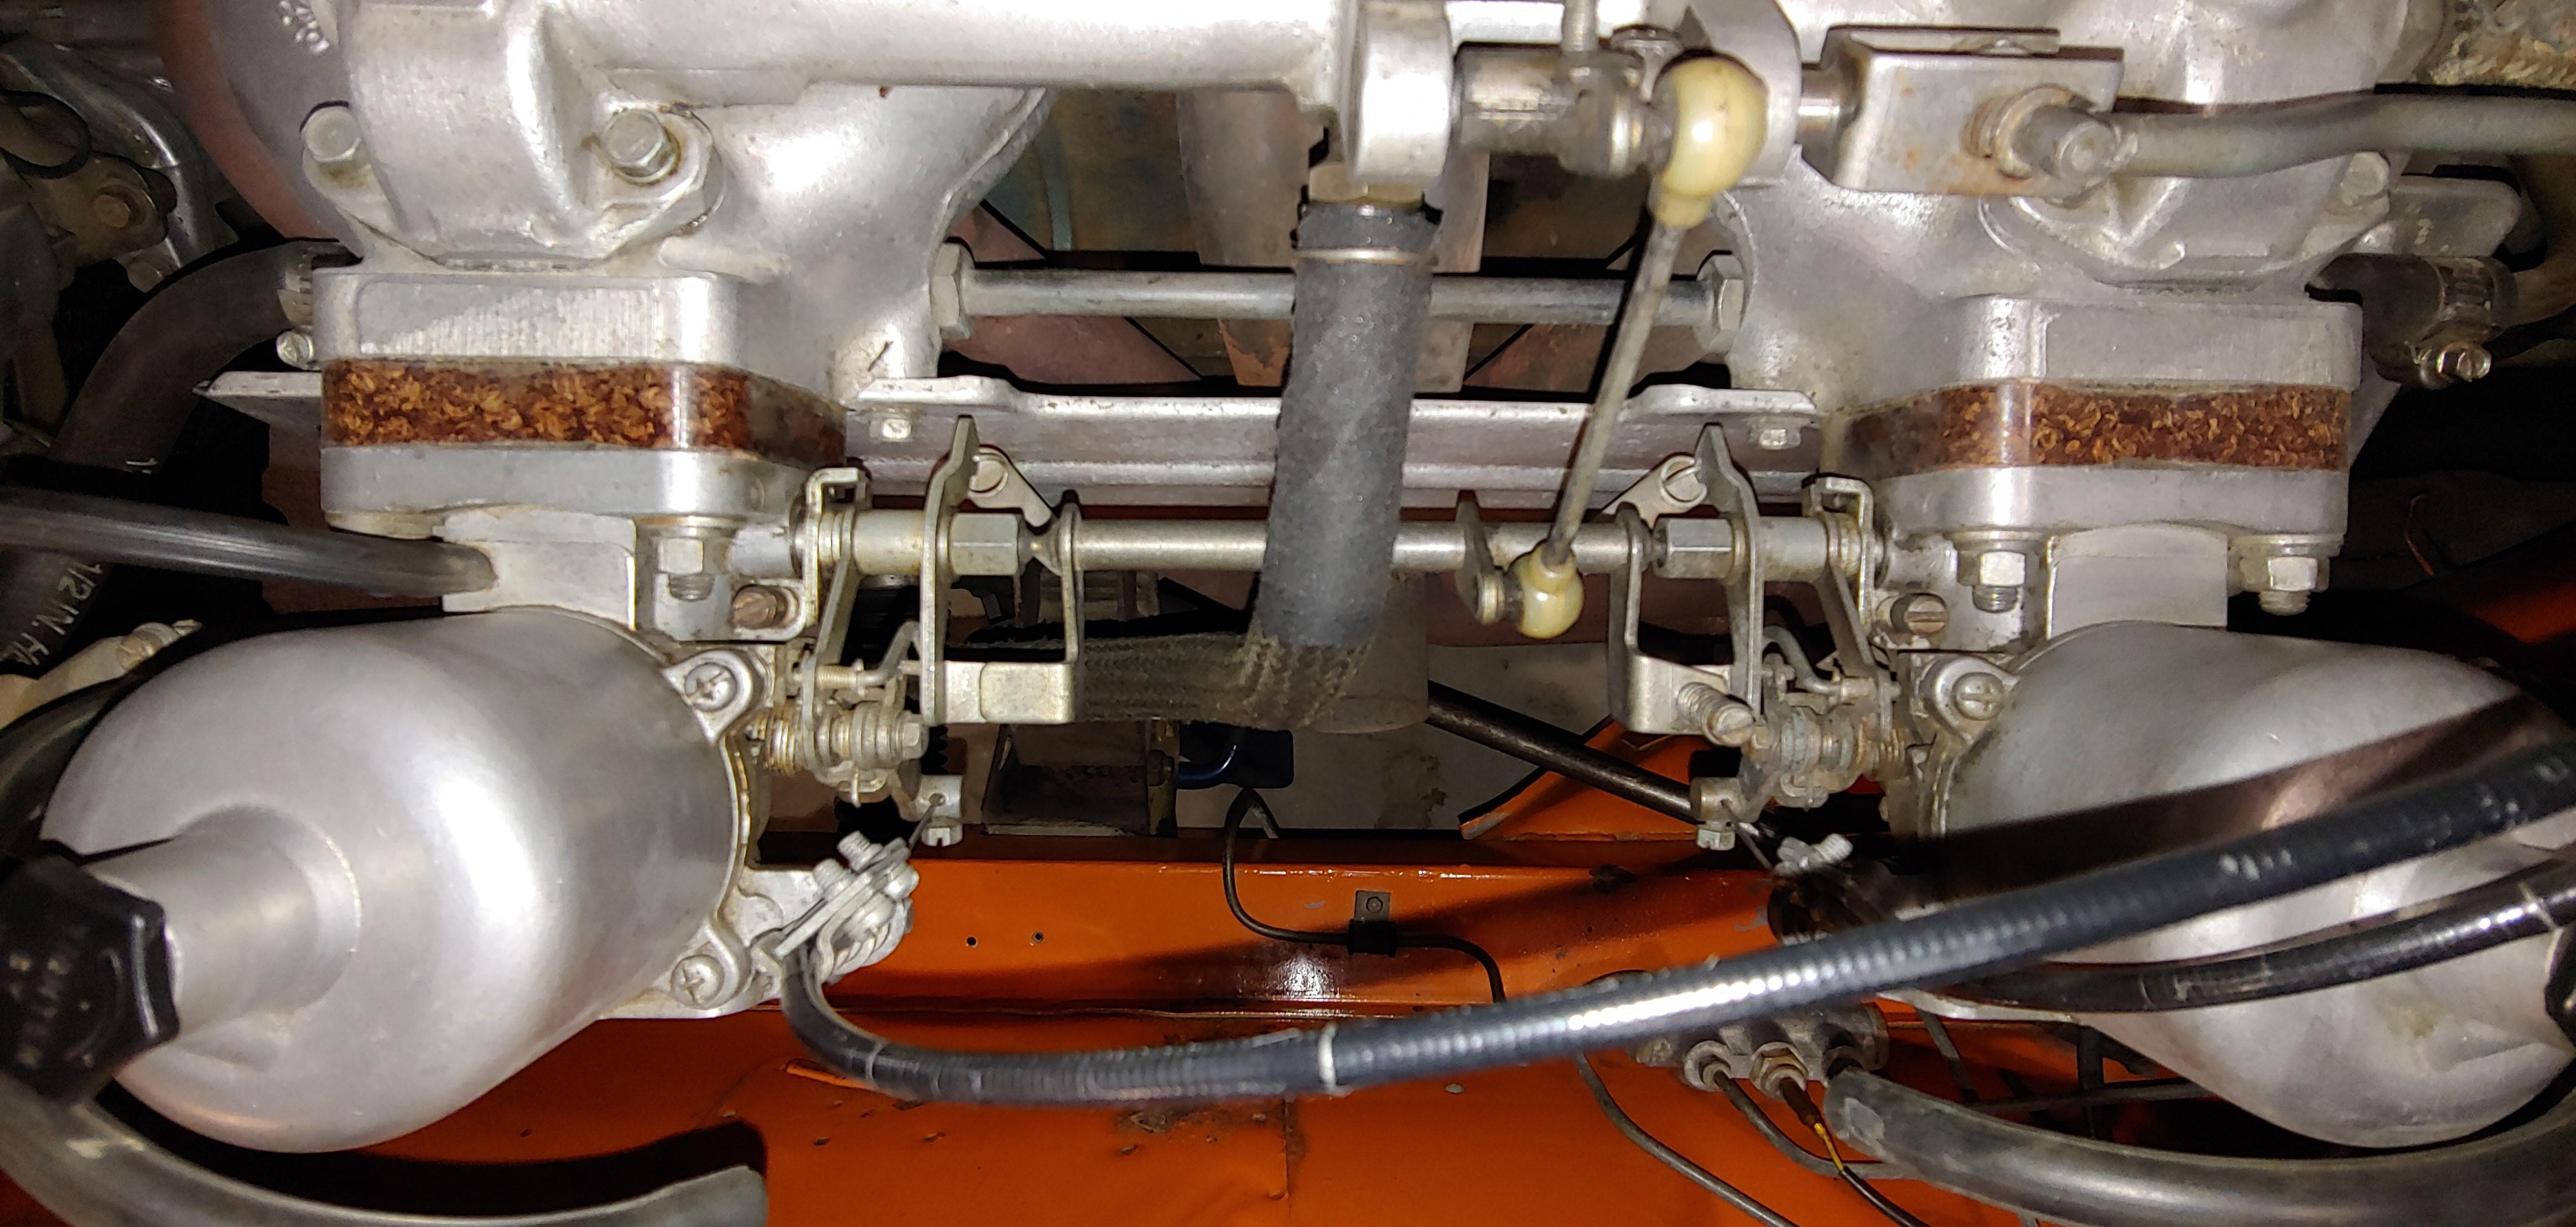
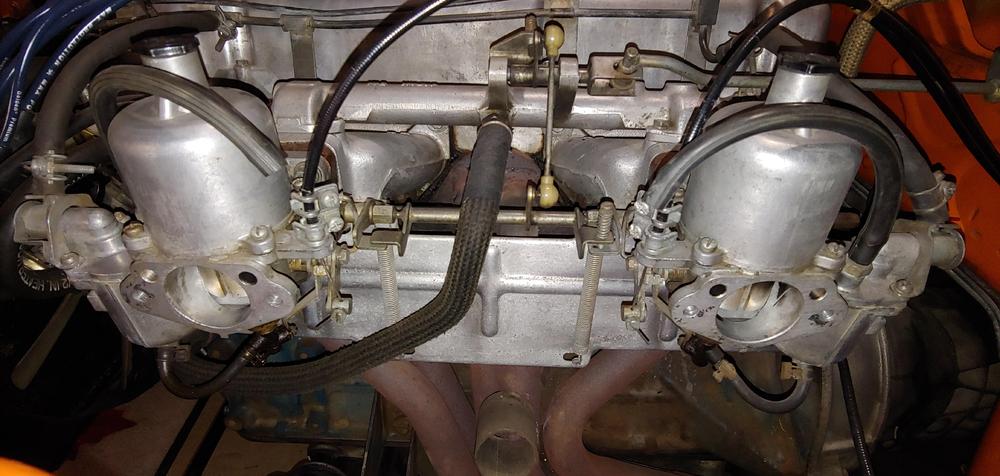
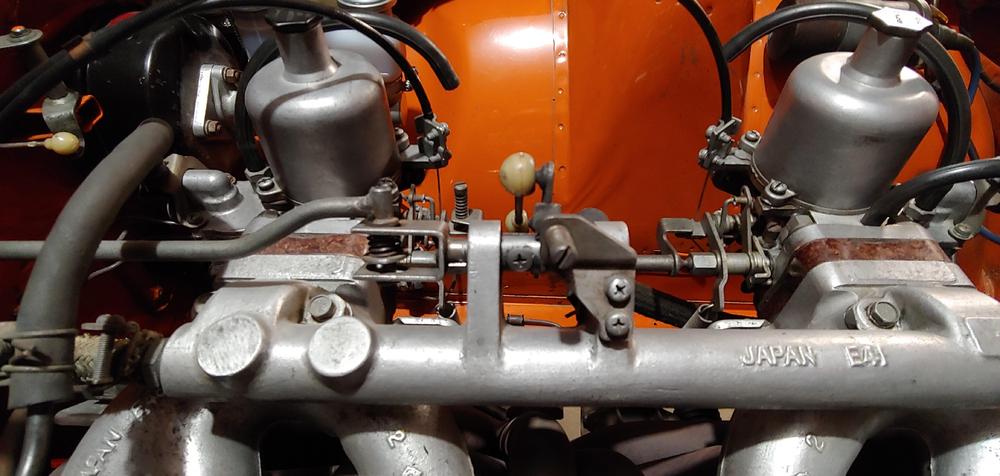
For reference here is a pic of the fuel rail from my 7/70 car. It's similar to your '71-72 fuel rail but it has the wide mounting bracket like your "unique" one. The wide mounting bracket on mine has a bent over tab at the top with a tapped hole. I have no idea what that tapped hole is for.
-
-
@Av8ferg I just uploaded a drawing of the key to our downloads section at the request of another user. Previously I uploaded models of the lock parts as well. Just sending this in case you need to make your own parts HTH Mike
-
 This a detail drawing of the key used to lock the Interpart louvres that were commonly added as an aftermarket accessory to S30's. Included is a DWG (AutoCAD) profile at 1:1 scale that would be suitable for laser or waterjet cutting.Free
 -
Thats interesting @ZCarFever my 7/70 car with a black interior has the access covers. I wonder if different colors had the panel with covers introduced at different dates to use up existing inventory.
-
Series 1 cars up to SN 21000 had a 140 psi oil pressure gauge using a 10kg pressure switch, it was a very common complaint that they read to low. SN 21001 and up has a 90 psi gauge using a 6kg switch so that the needle would read more to the center of the gage. It would make sense that the original owner added the extra gage to confirm he had good oil pressure. Here is a discussion on this subject:
-
I'm happy to here that your experience has been good. GLWTA
-
I got a response from BAT within a half day of my submission with the following response: Thanks for the submission and detailed photos and info. Neat Samurai. This is one we would be open to listing in a no reserve auction and it could go live in the next 2 weeks or so. Will that work for you? I had a good email exchange with the BAT representative but in the end I declined to list as they would not budge on the no reserve point. I asked what factors are considered in determining when no reserve would apply and was told, "price range and location" and that "they are inundated with submissions in this price range and unfortunately simply cannot list them all". In my case being located in Canada was probably the main reason as I have seen a number of Samurai's listed from the US over the last couple of years that did not have "no reserve". I understand their reasons and don't regret making a submission. I was impressed that they were quick to respond to my questions even after I declined to list.
-
Thanks @golfer racer for sharing your BAT experience, sorry it was not good. Glad that in the end you sold your car for a price you were happy with. Over the weekend I did a submission to BAT to hopefully sell my Samurai. Hopefully my experience will be better than yours. Mike