CanTechZ
Member
-
Joined
-
Last visited
Everything posted by CanTechZ
-
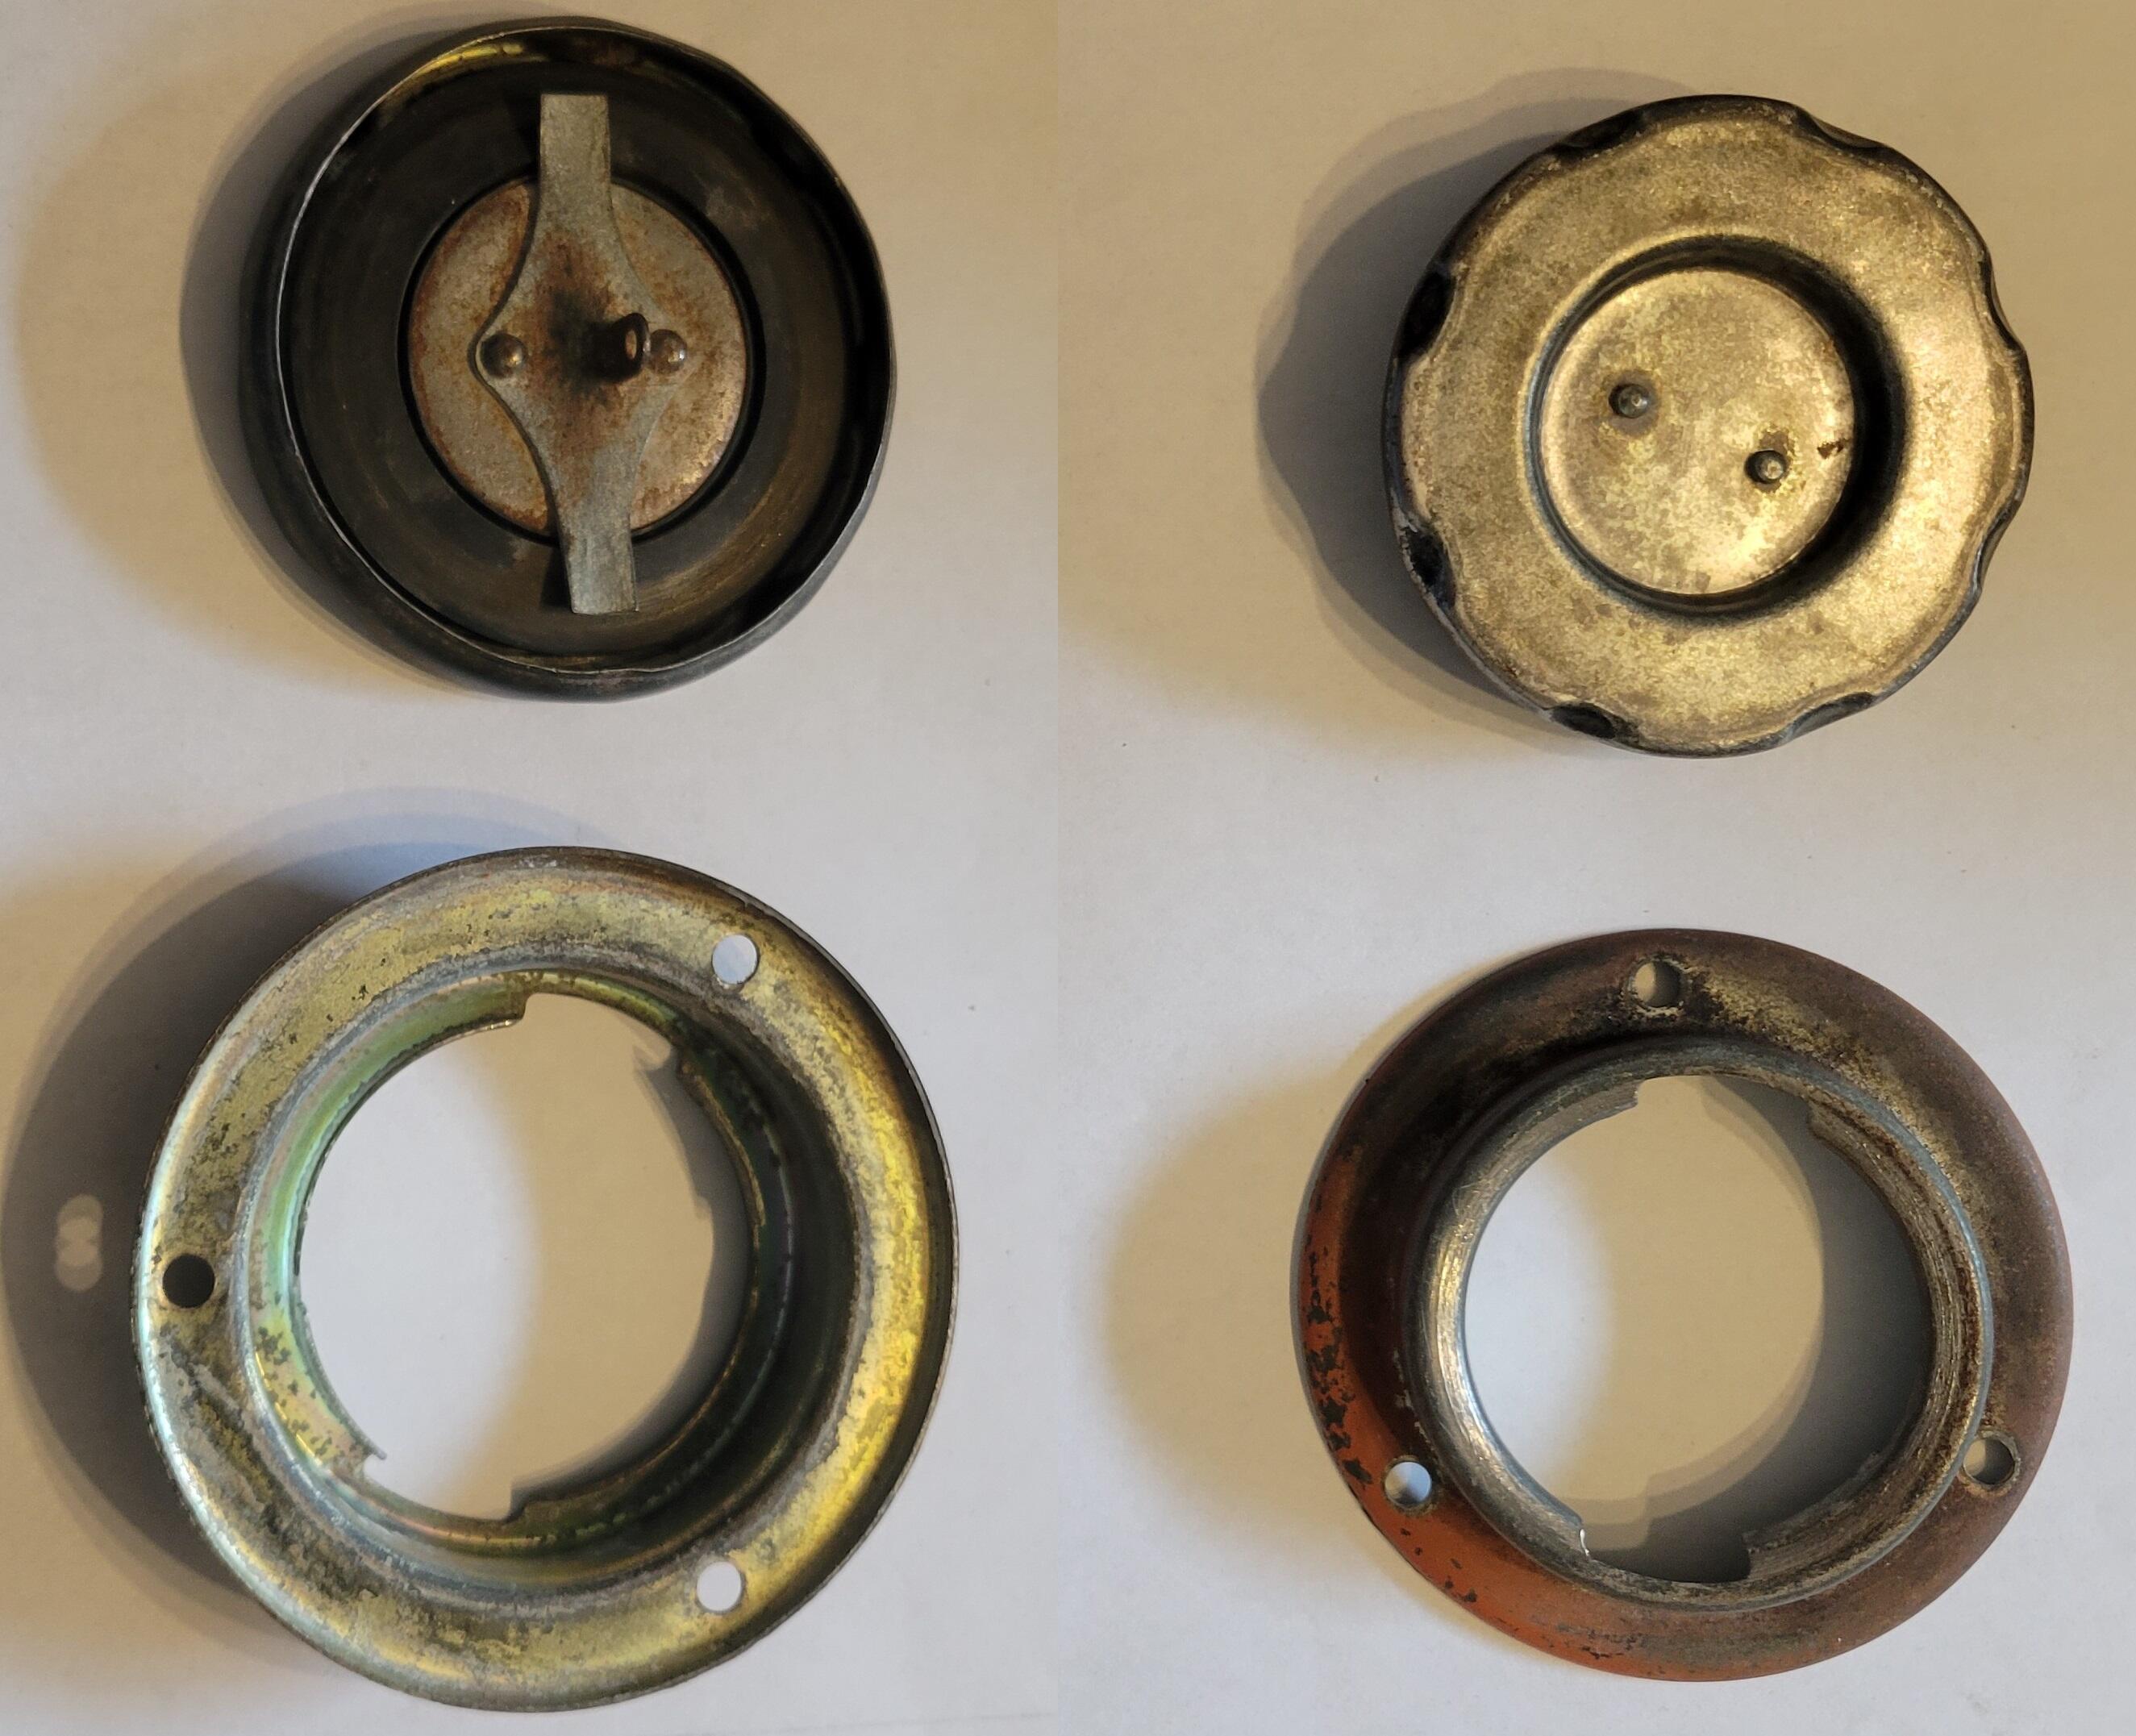
 My 7/70 #6521 is a bit of an anomaly. It is a Canadian market non-emissions car and has the early cap with the clip on the back for a chain but the mounting ring has no provision for a chain. I've owned the car since 1978 and never replaced the cap. My guess is it either came this way or the previous owner lost the original cap, with no chain, and replaced it with what he (or she) could get.
-
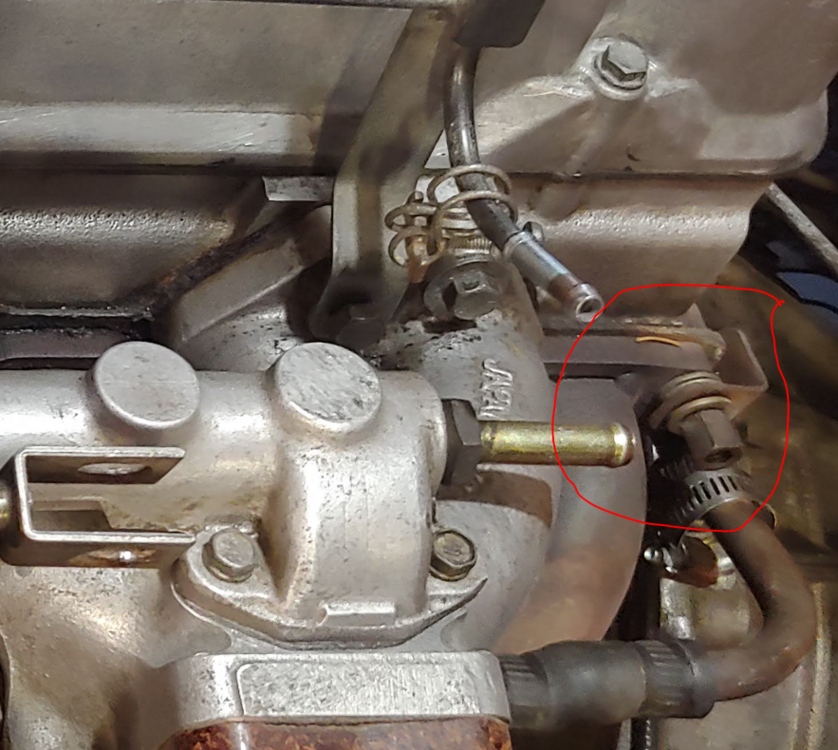
Thanks for proofing my work, you are correct on the washer at the the top center stud, good eye. I have edited the image above to reflect this, it was a typo. And thanks for clarifying the type of nut on the rear stud, I was wondering about that. I believe that someone did add the stack of washers and that tall nut when the header and a custom exhaust were added. That location should have a lockwasher and regular nut, no flat washers. Thanks again.
-
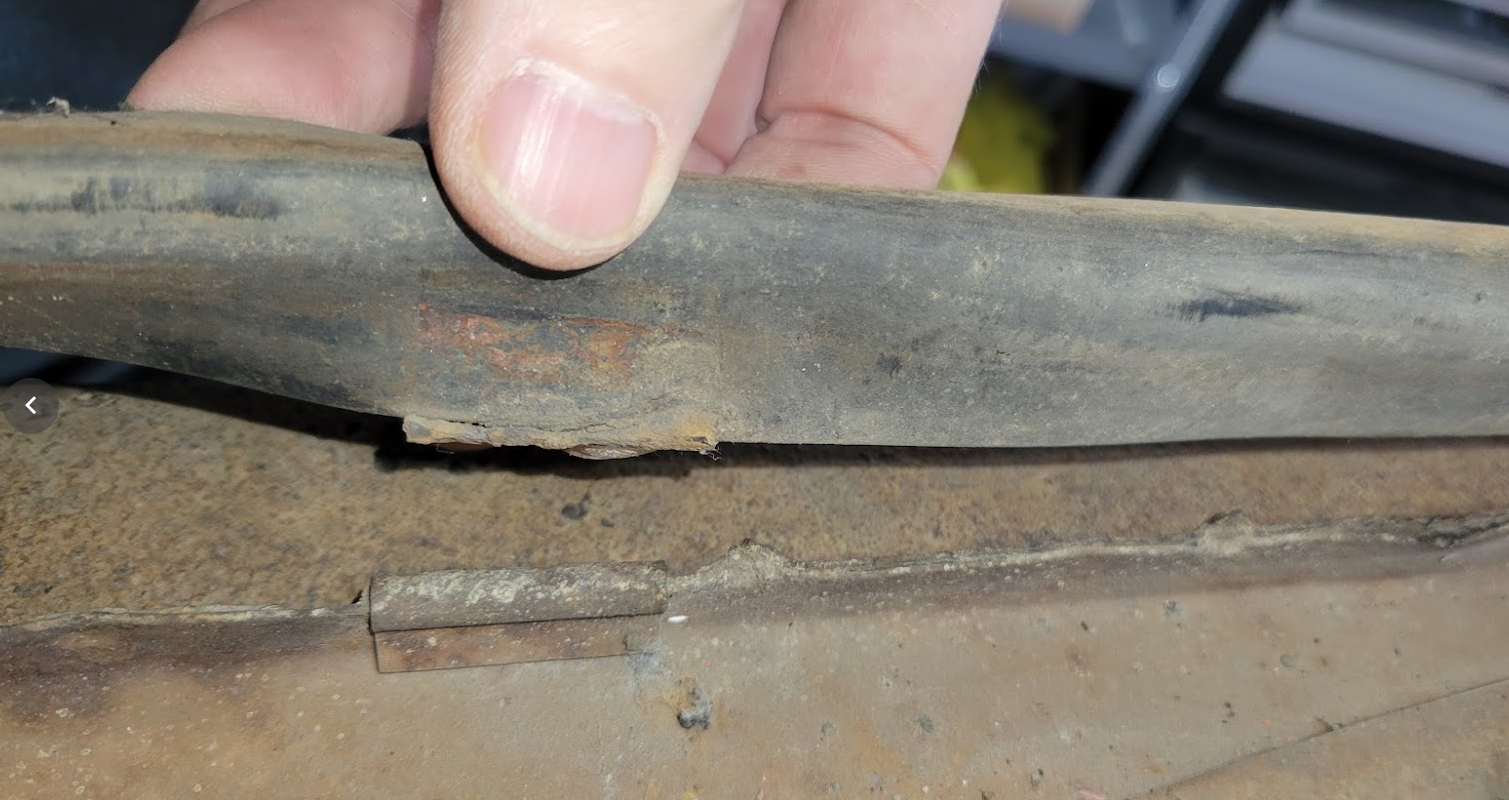
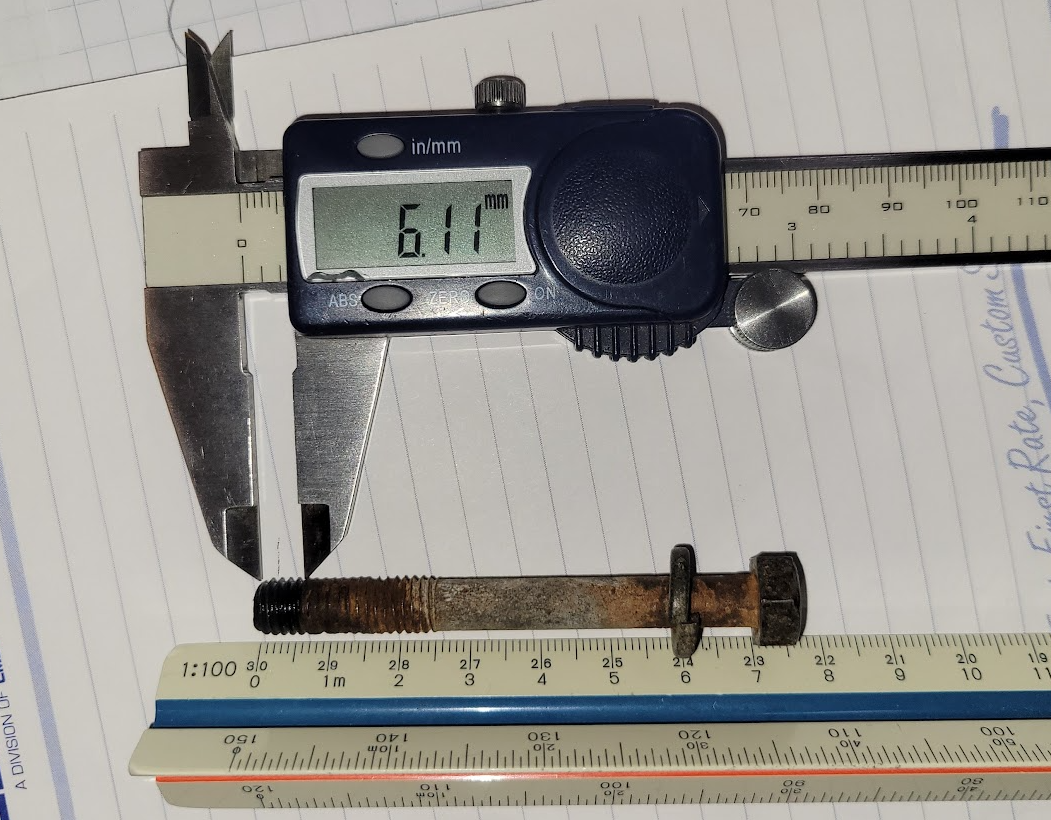
Thanks for this Jim, good to know. I just had another look at my long bolt and it only appears to use about 6mm thread engagement length, based on where the rust starts. When I put my caliper through that M8 hole in the head it bottoms at about 15mm when it contacts the guide as it is currently adjusted. Definitely something to be aware of, thanks again.
-
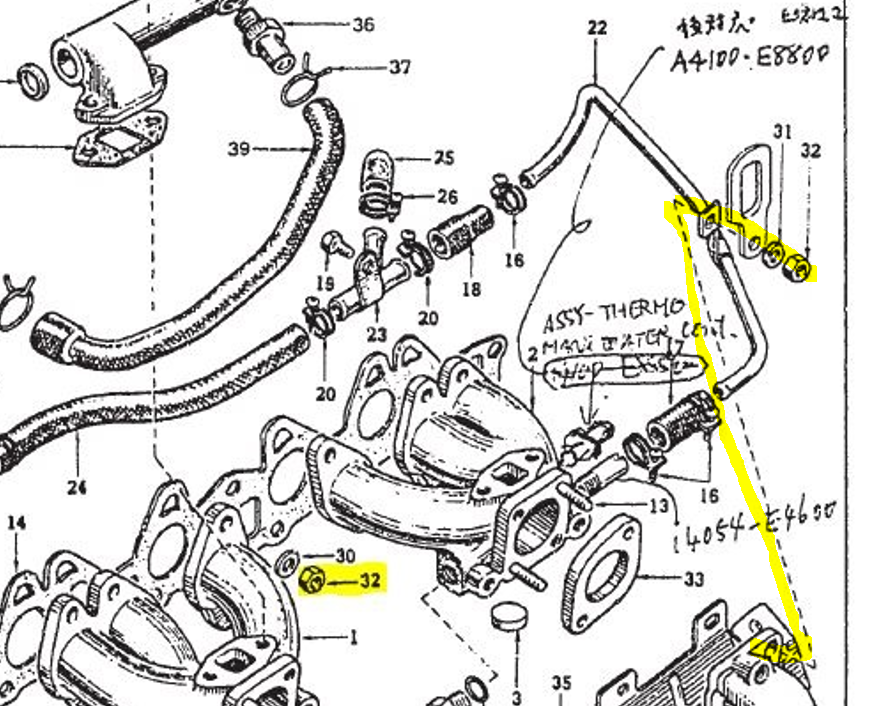
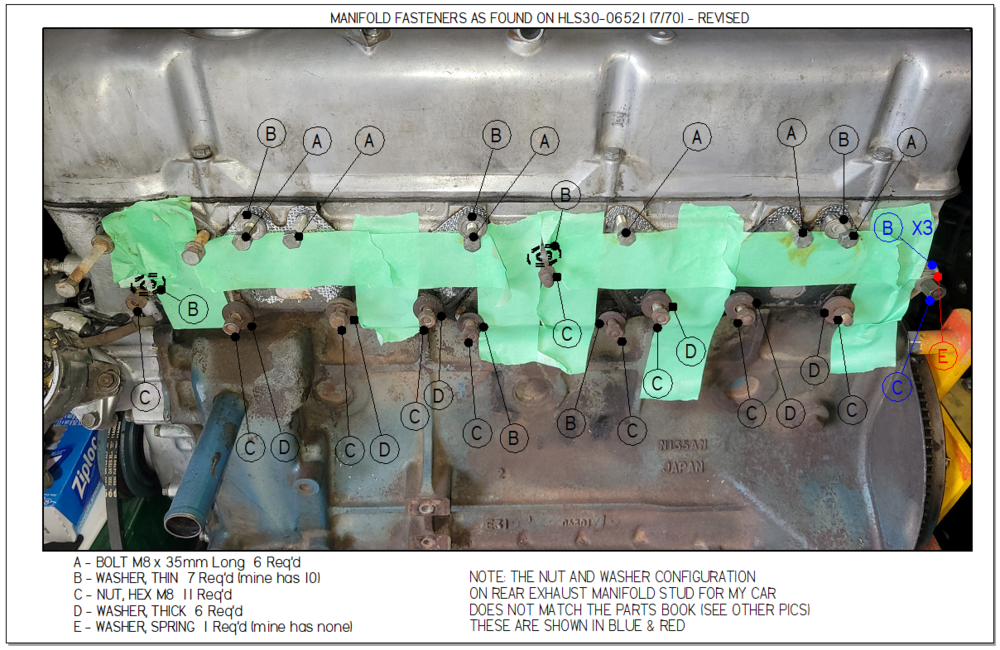
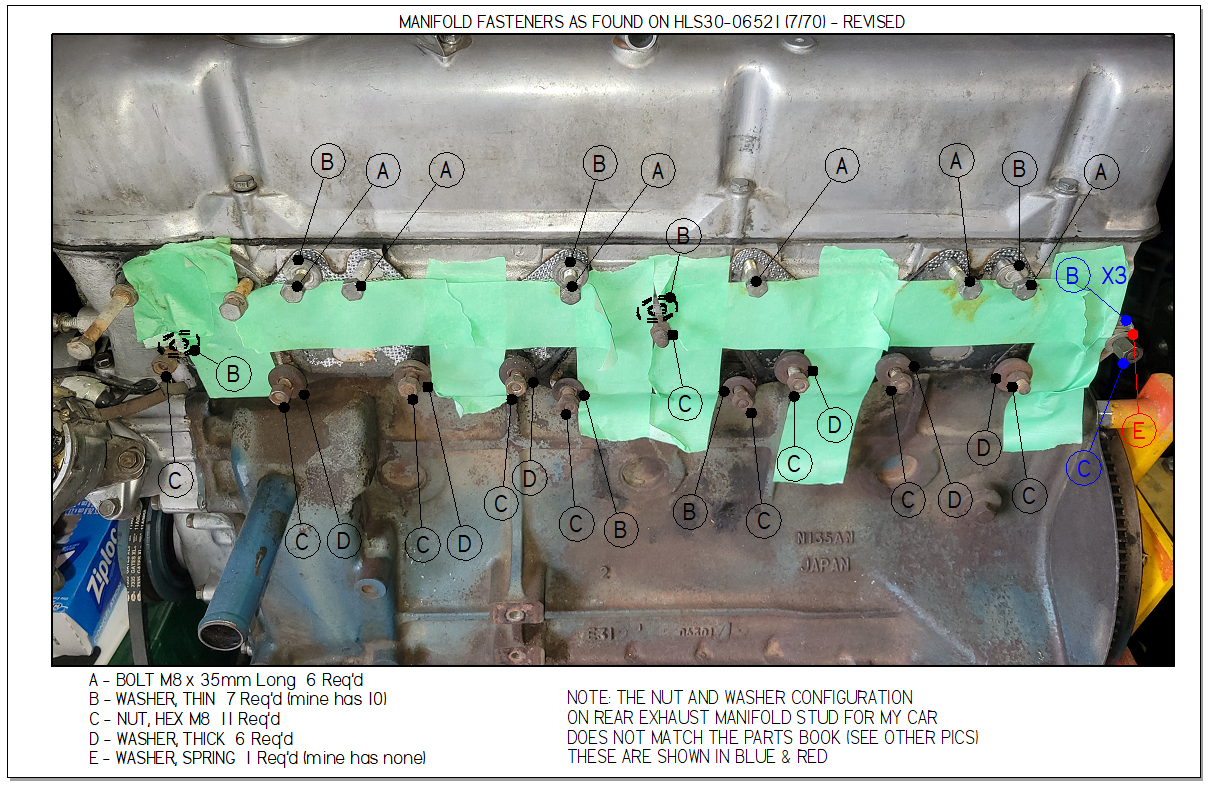
For reference, as I promised in post #33 here is a picture marked up with the bolt, washer and nut locations as they are on my long time own 7/70. EDIT - center top stud changed to "B" thin type as observed by @inline6 see post #48 below, thanks Here is picture of the nut and washers noted above in blue and red. In the parts book the exhaust manifold stud in this location supports the coolant pipe that goes around the back of the block and the rear engine lifting lug. and no flat washer is used, just a nut and lockwasher. The JDM parts book show it more clearly than the N.A. book.
-
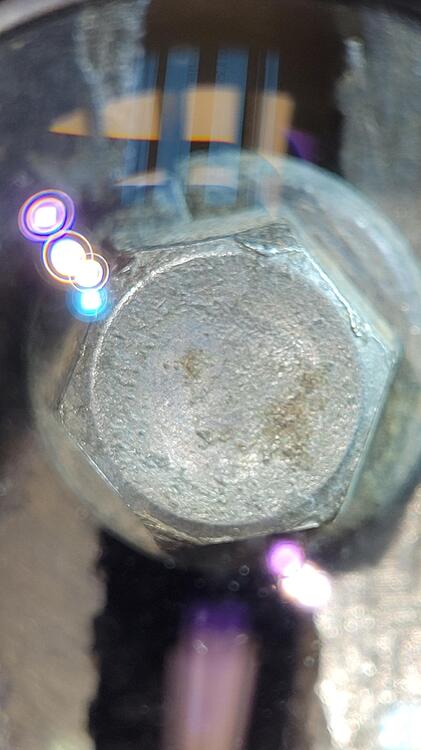
Mine is 70mm long (under head) with 25mm thread length. The short one is 30mm long with 24mm thread length. Best I can tell they are yellow zinc (chromate) plated, but there is not much evidence left. Both have a lockwasher, no flat washer.
-
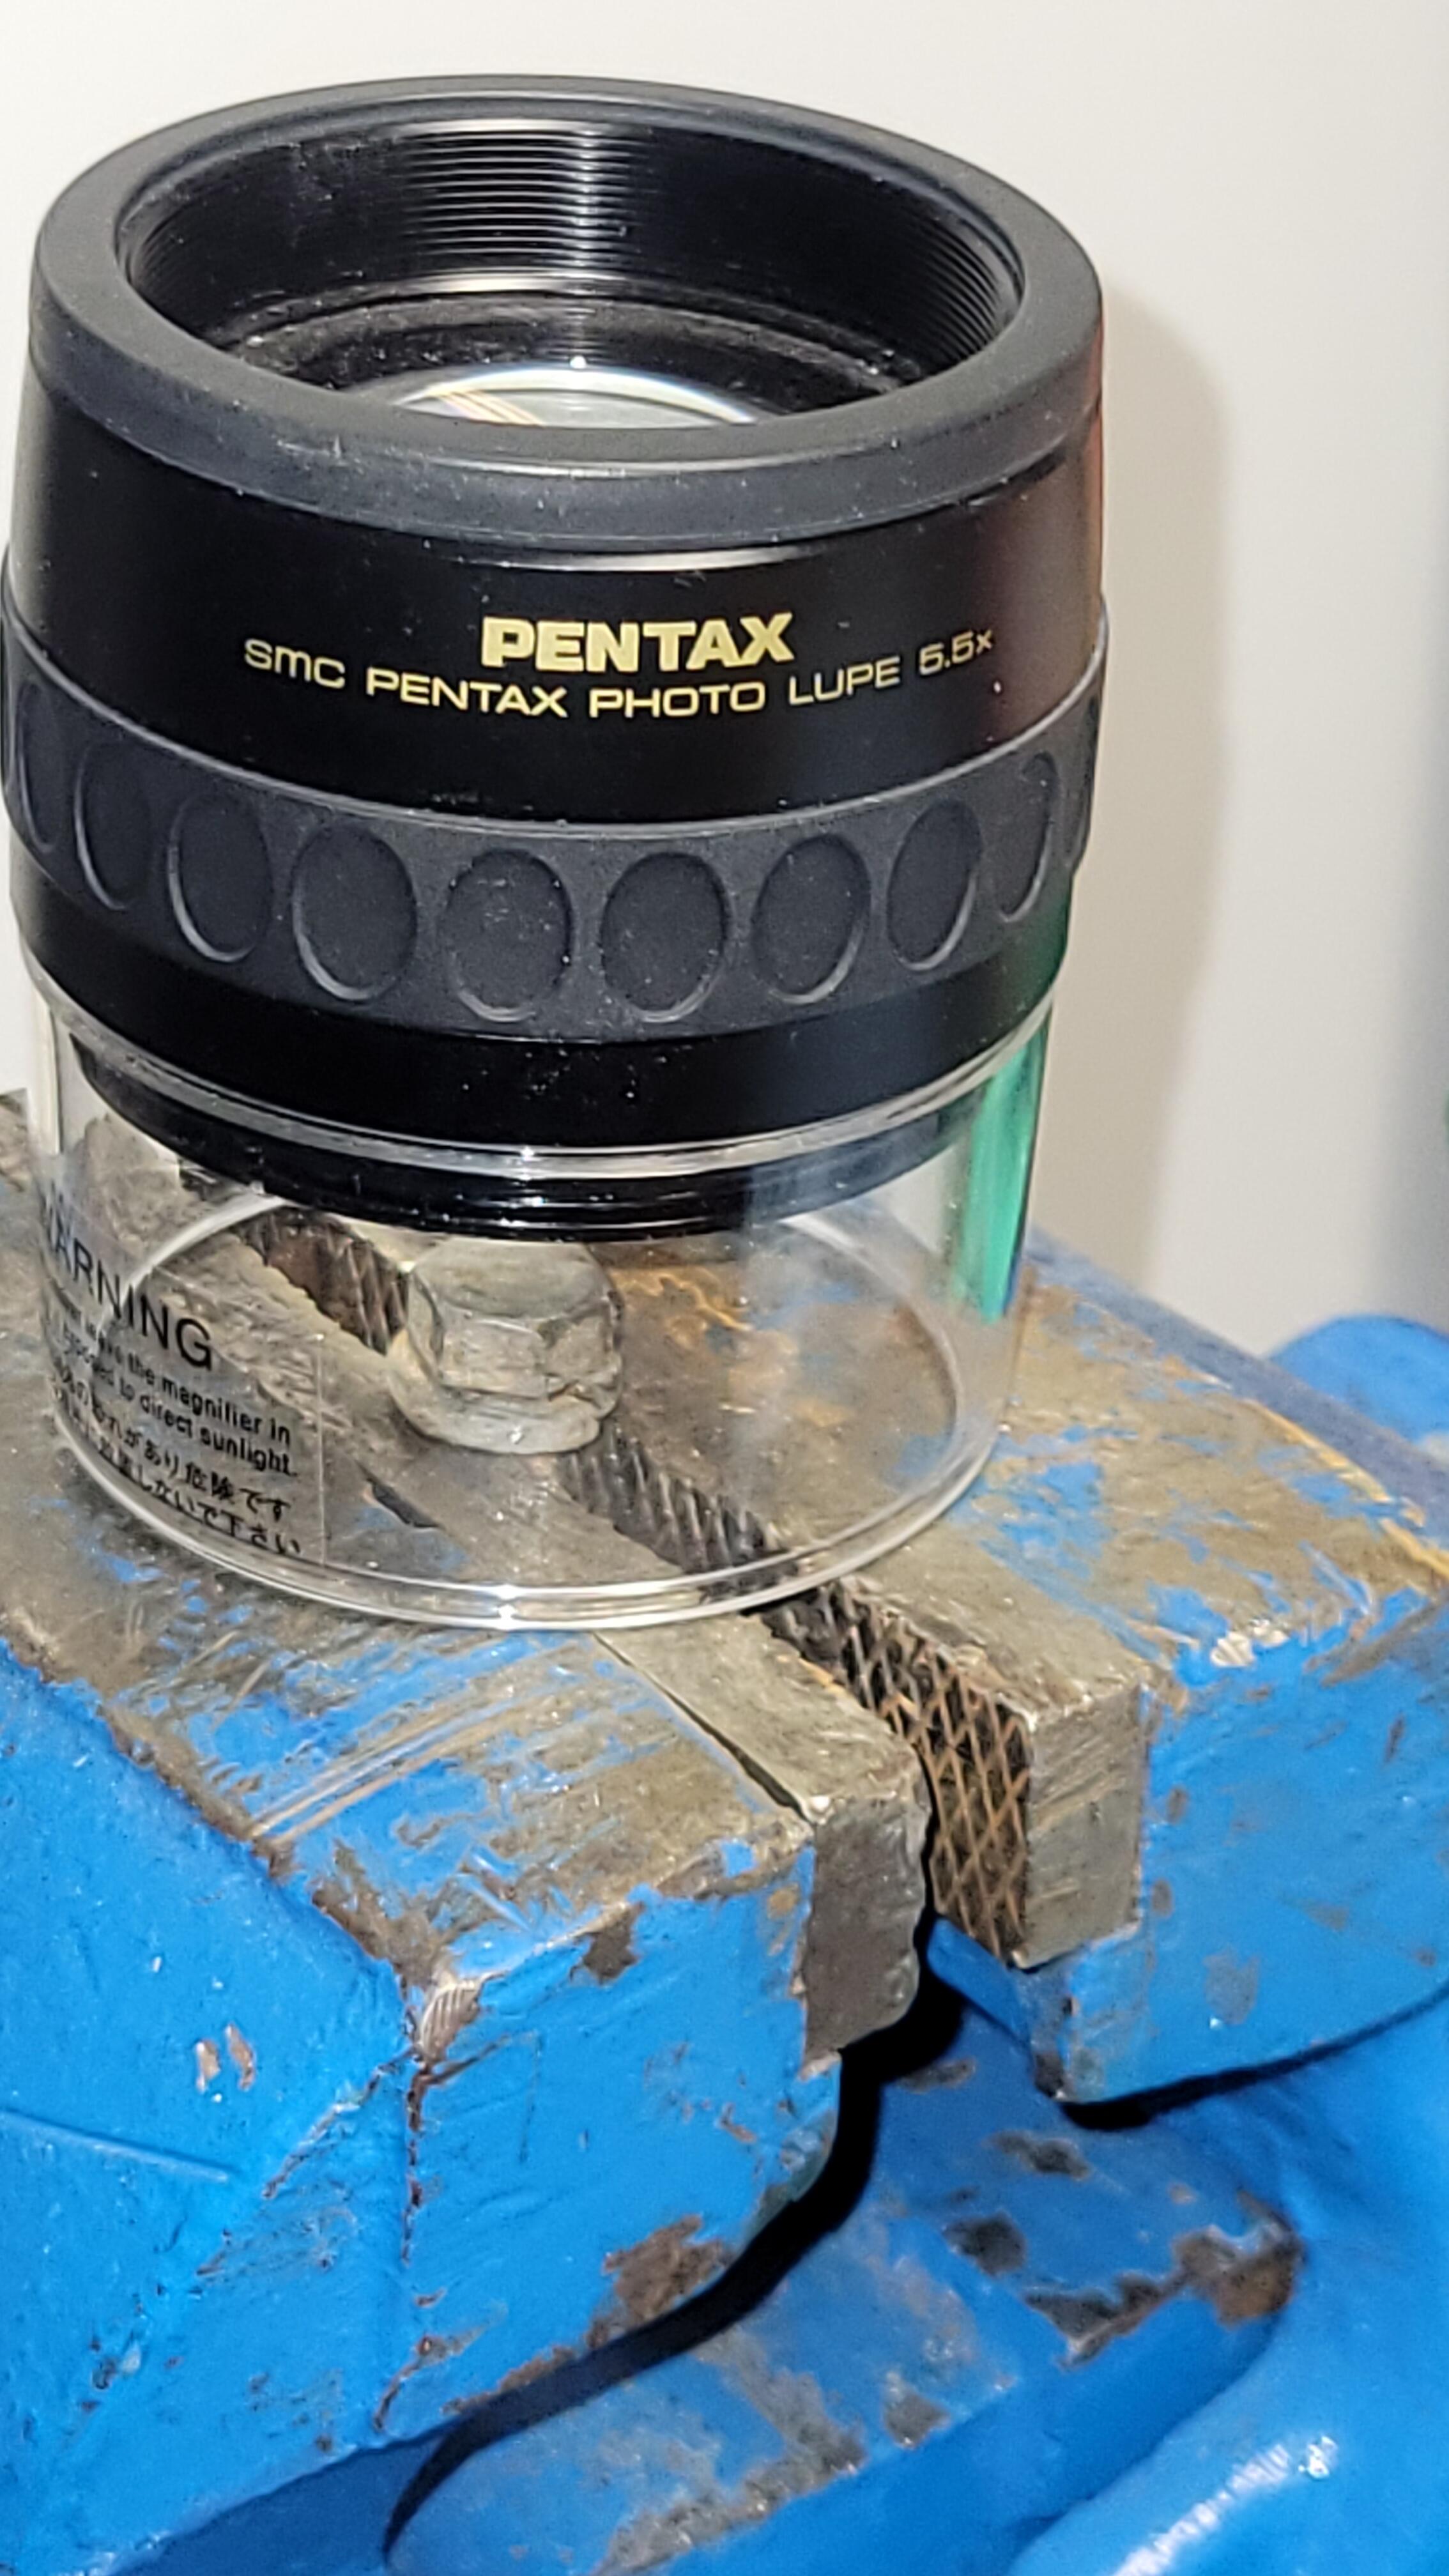
On mine I don't see any markings on the head of that bolt, even using a 5.5X loupe. The short bolt is a recessed hex head type with "4" on it.

-
The washers on the intake bolts (M8 x 35mm long) are the same as the thin exhaust washers, 21.5mm OD x 8.5mm ID x 2.5mm thick. Thanks for sharing your fastener spreadsheet.
-
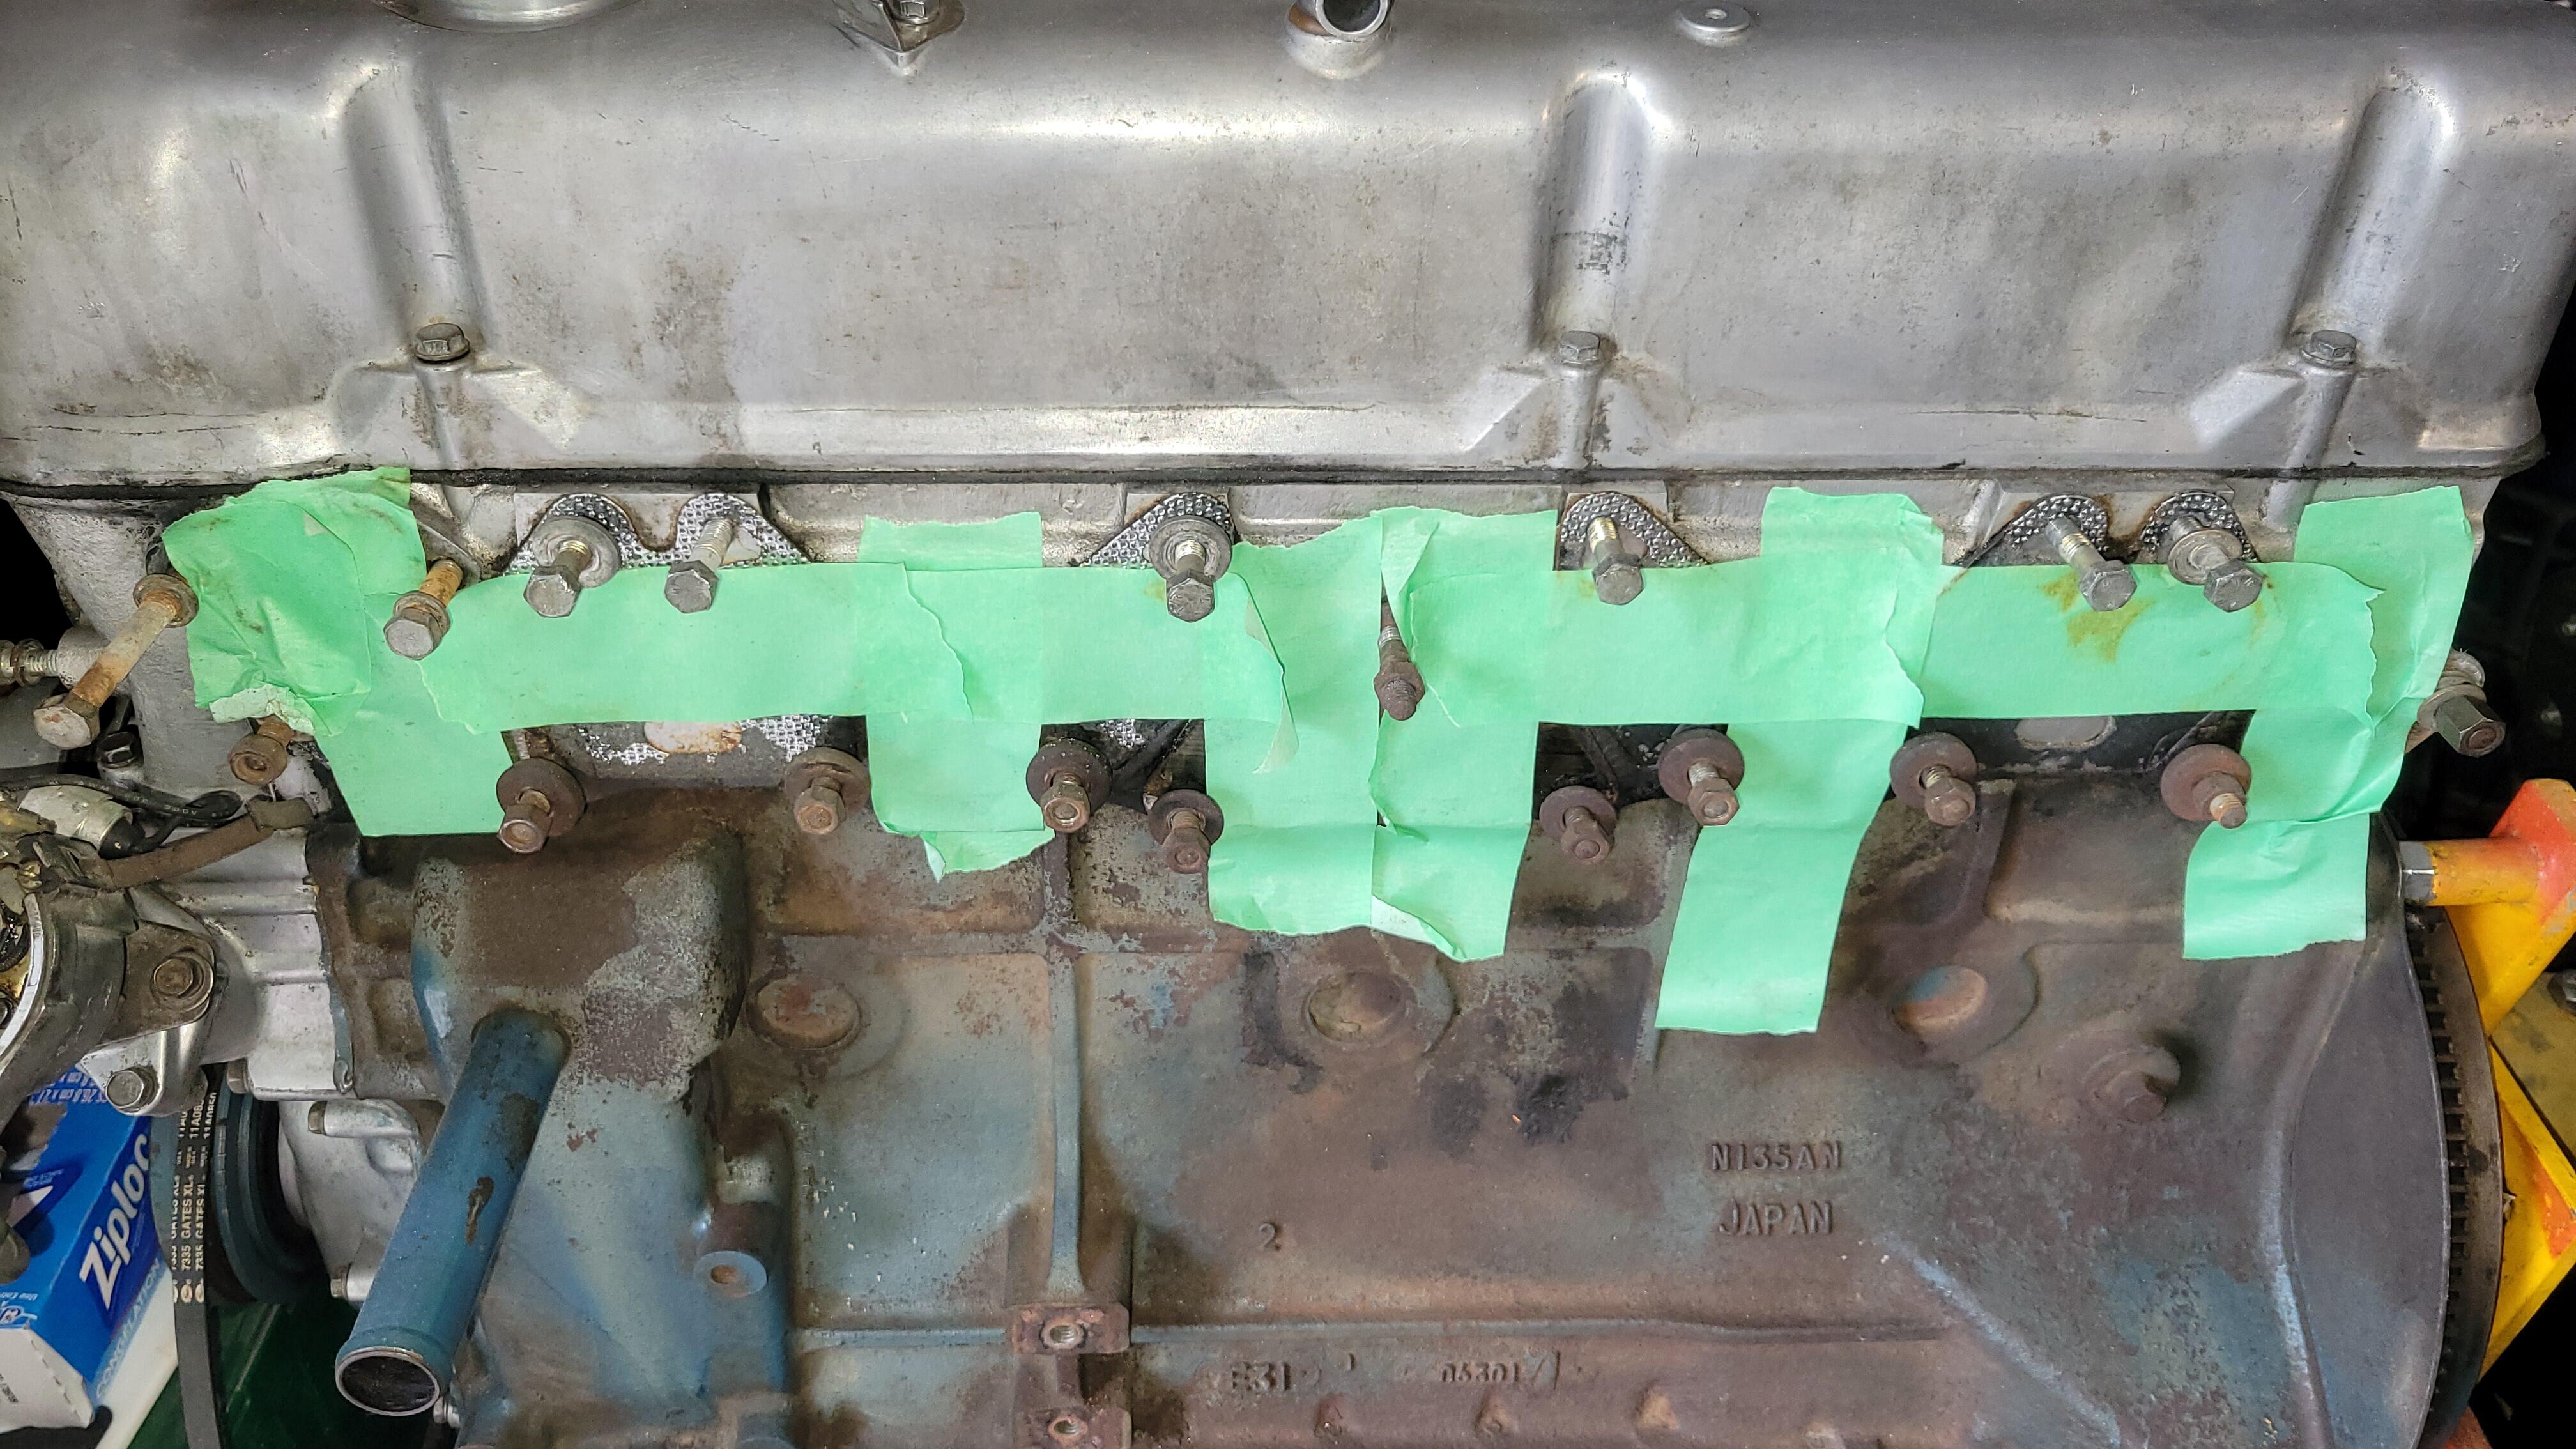
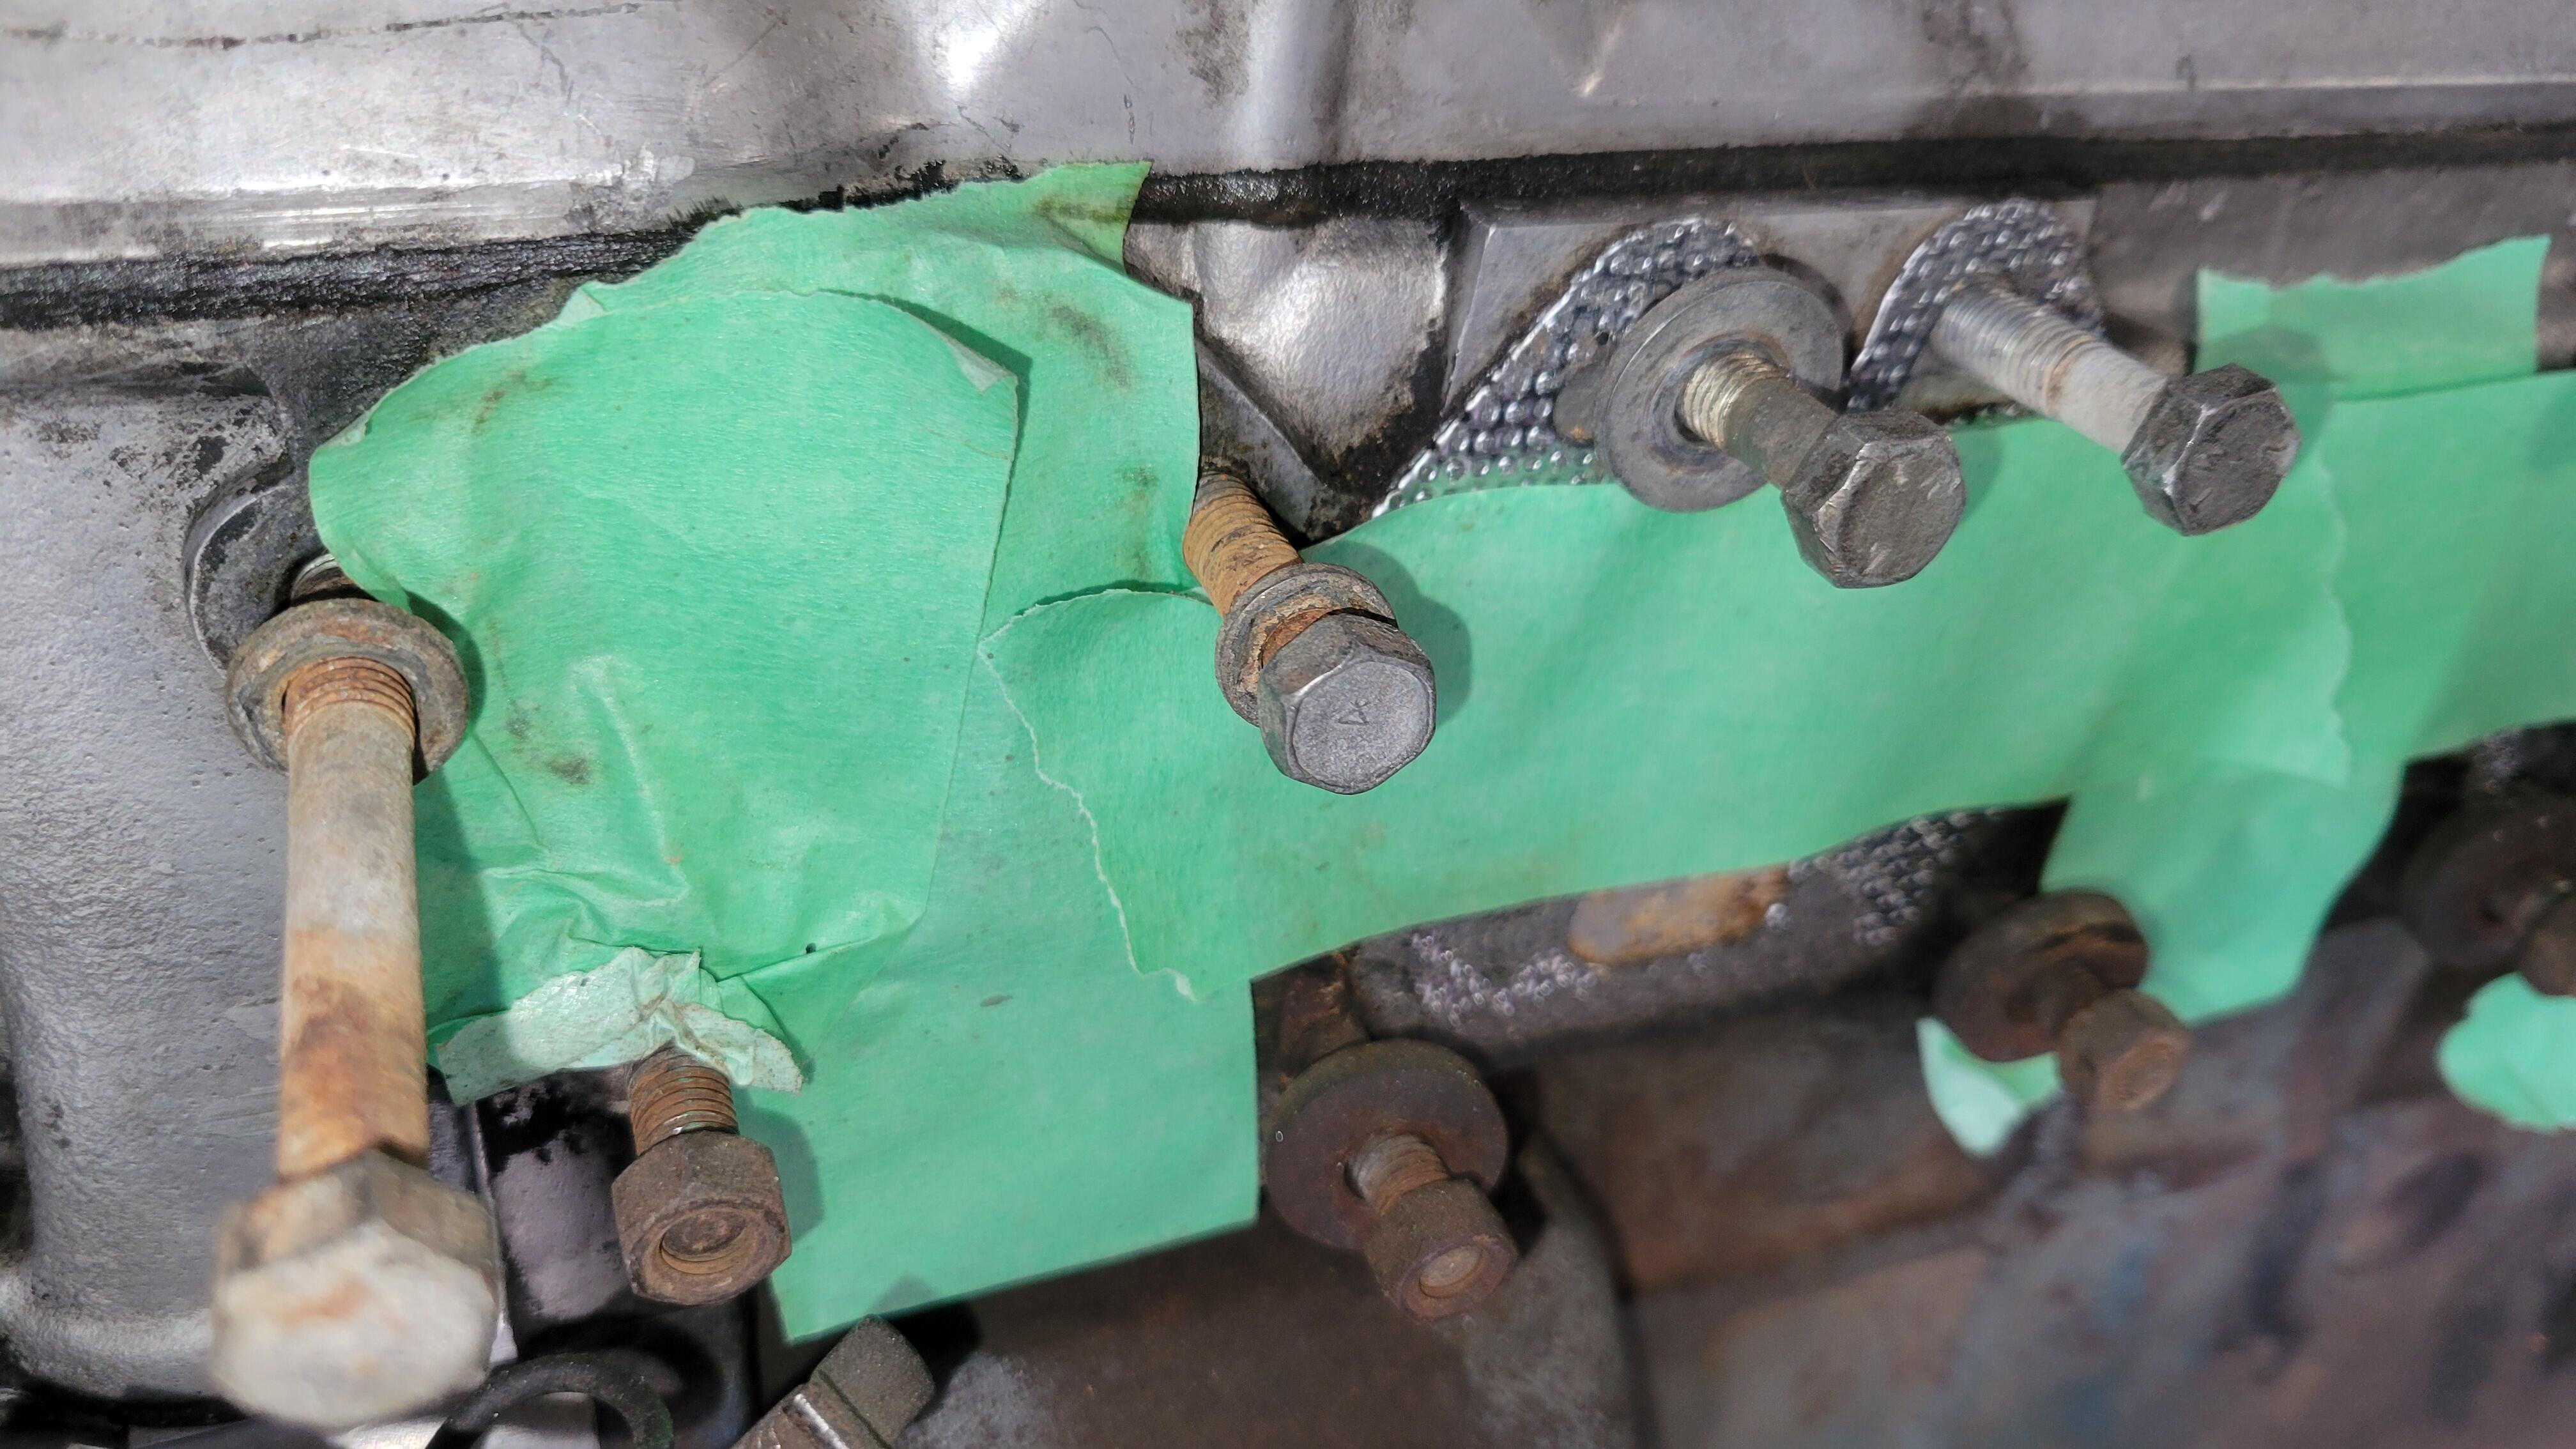
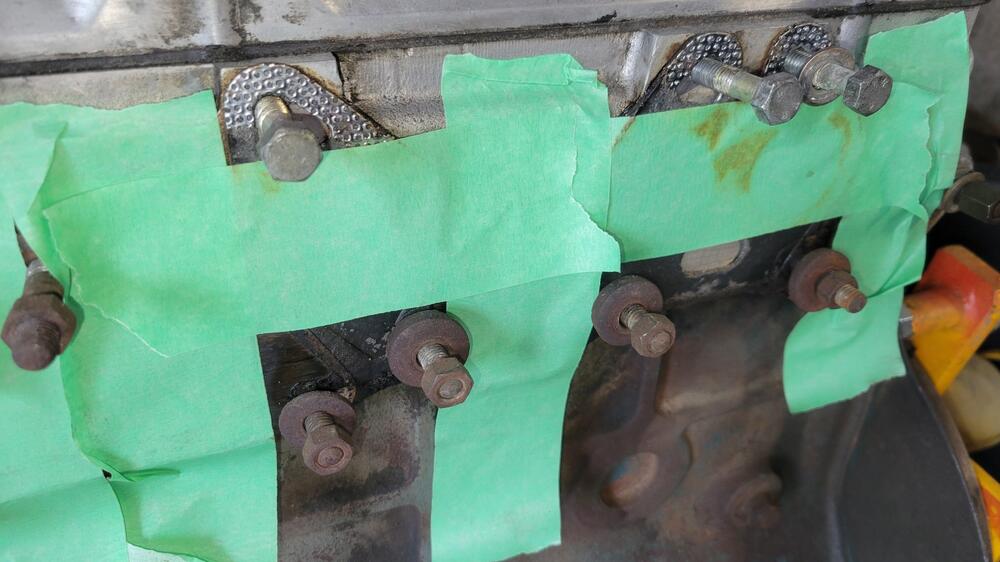
I've owned the car since 1978 and the only time that I am aware the intake was off would have been during a rebuild in the early eighties, that was done at my local Datsun dealership, Chilliwack Datsun, before they changed to the Nissan name. Those three screws are also for mounting the fuel rail, I'm thinking that the mounting brackets act as a washer in those areas so as not to have bolt length issues. Here's a pic when I was loosening the fasteners prior to removal.
.thumb.jpg.16d7a19bed0ac22fcbab946d2f9801e2.jpg)
-
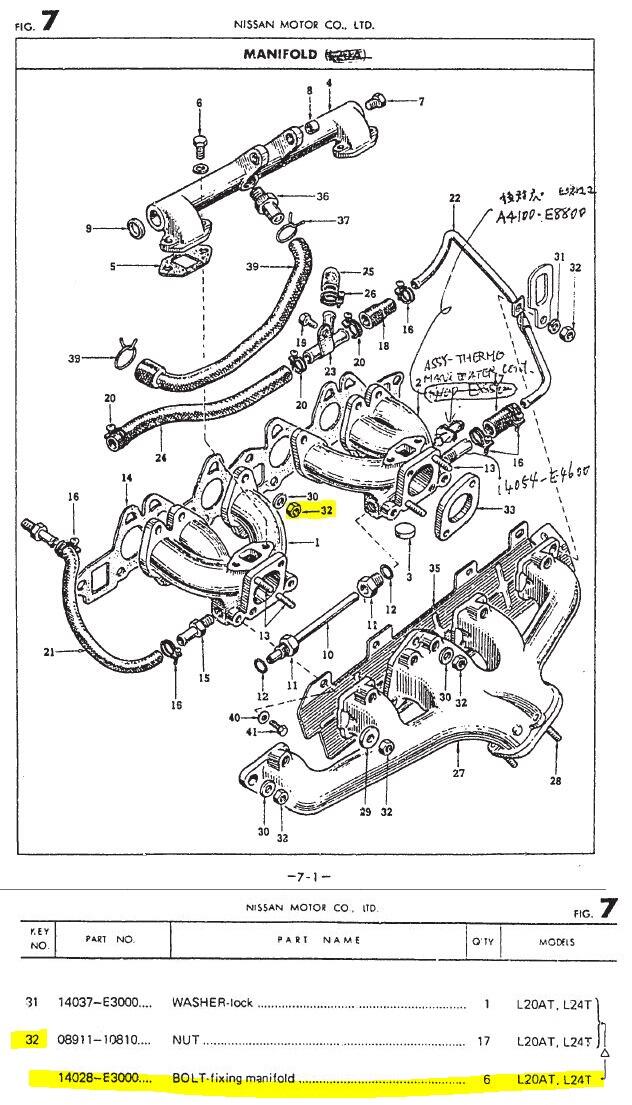
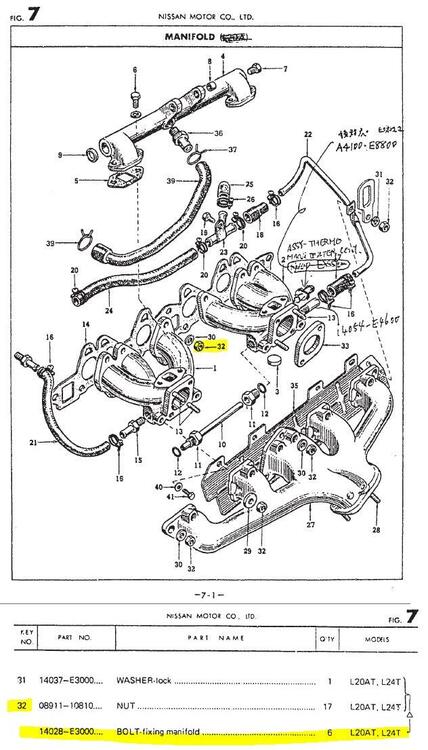
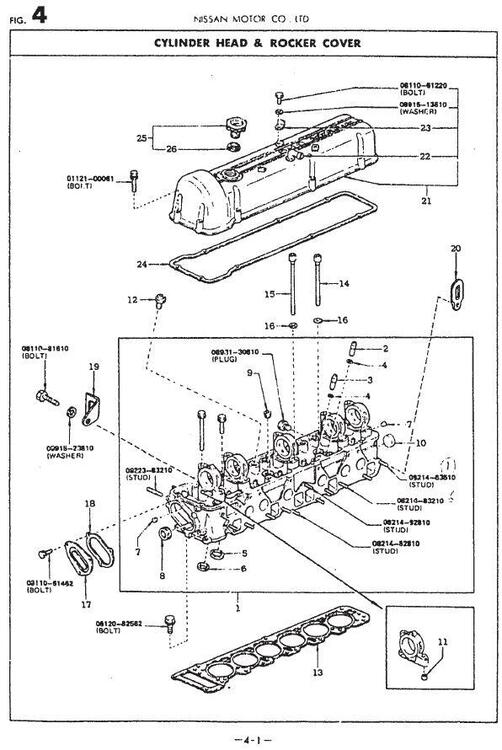
@Namerowregarding your original post about studs vs bolts for the upper six intake manifold fasteners, I found something interesting in the 1973 JDM S30 parts fiche. The nut (item 32) is described by two options, one a nut and the other "BOLT - fixing manifold". These pages are for up to 1973-2. Not exactly clear but interesting none the less. The studs are shown on a different page for the cylinder head, The JDM parts book has great illustrations and in a lot of cases more detail than the N.A. parts book. It can be found here: Thanks @hr369
-
The thin ones are 21.5mm OD x 8.5mm ID x 2.5mm thick. Over the next couple of days I will mark up a picture with the occurrence of each type and post it here.
-
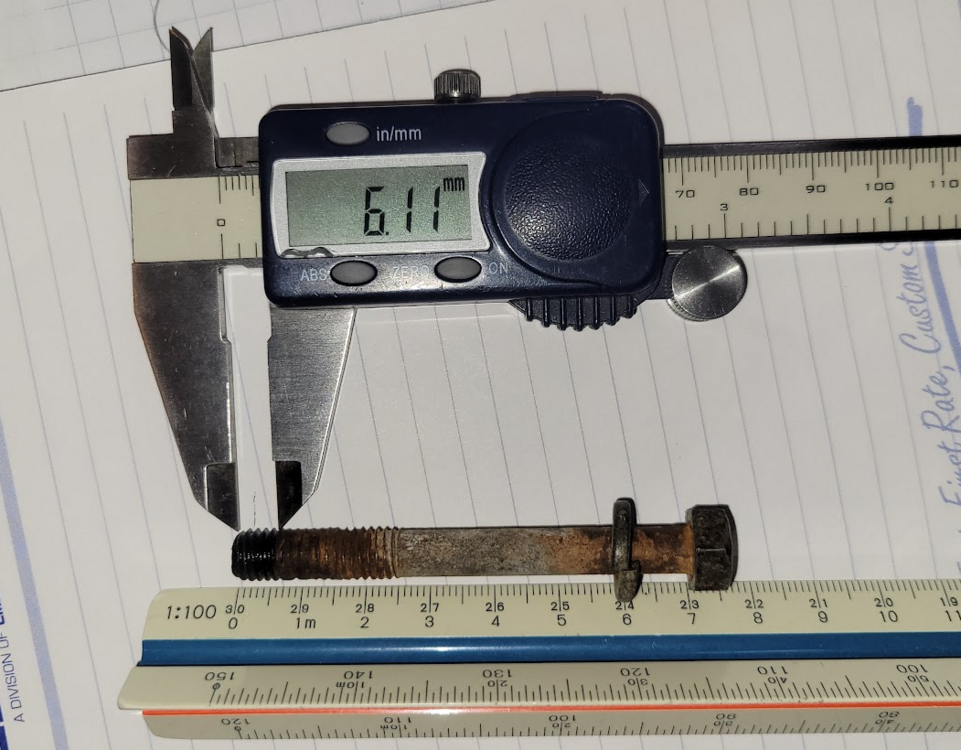
Here are some pics from my 7/70, after removing the intake and exhaust manifolds, I replaced the hardware in the locations that I found them. No lockwashers are used, except for the two capscrews that attach the thermostat housing. The thick exhaust manifold washers are 23.6mm OD x 9.0mm ID x 6.1mm thick on mine. The intake capscrews have "7" and "T" and "R" marks. Hope this helps.


-
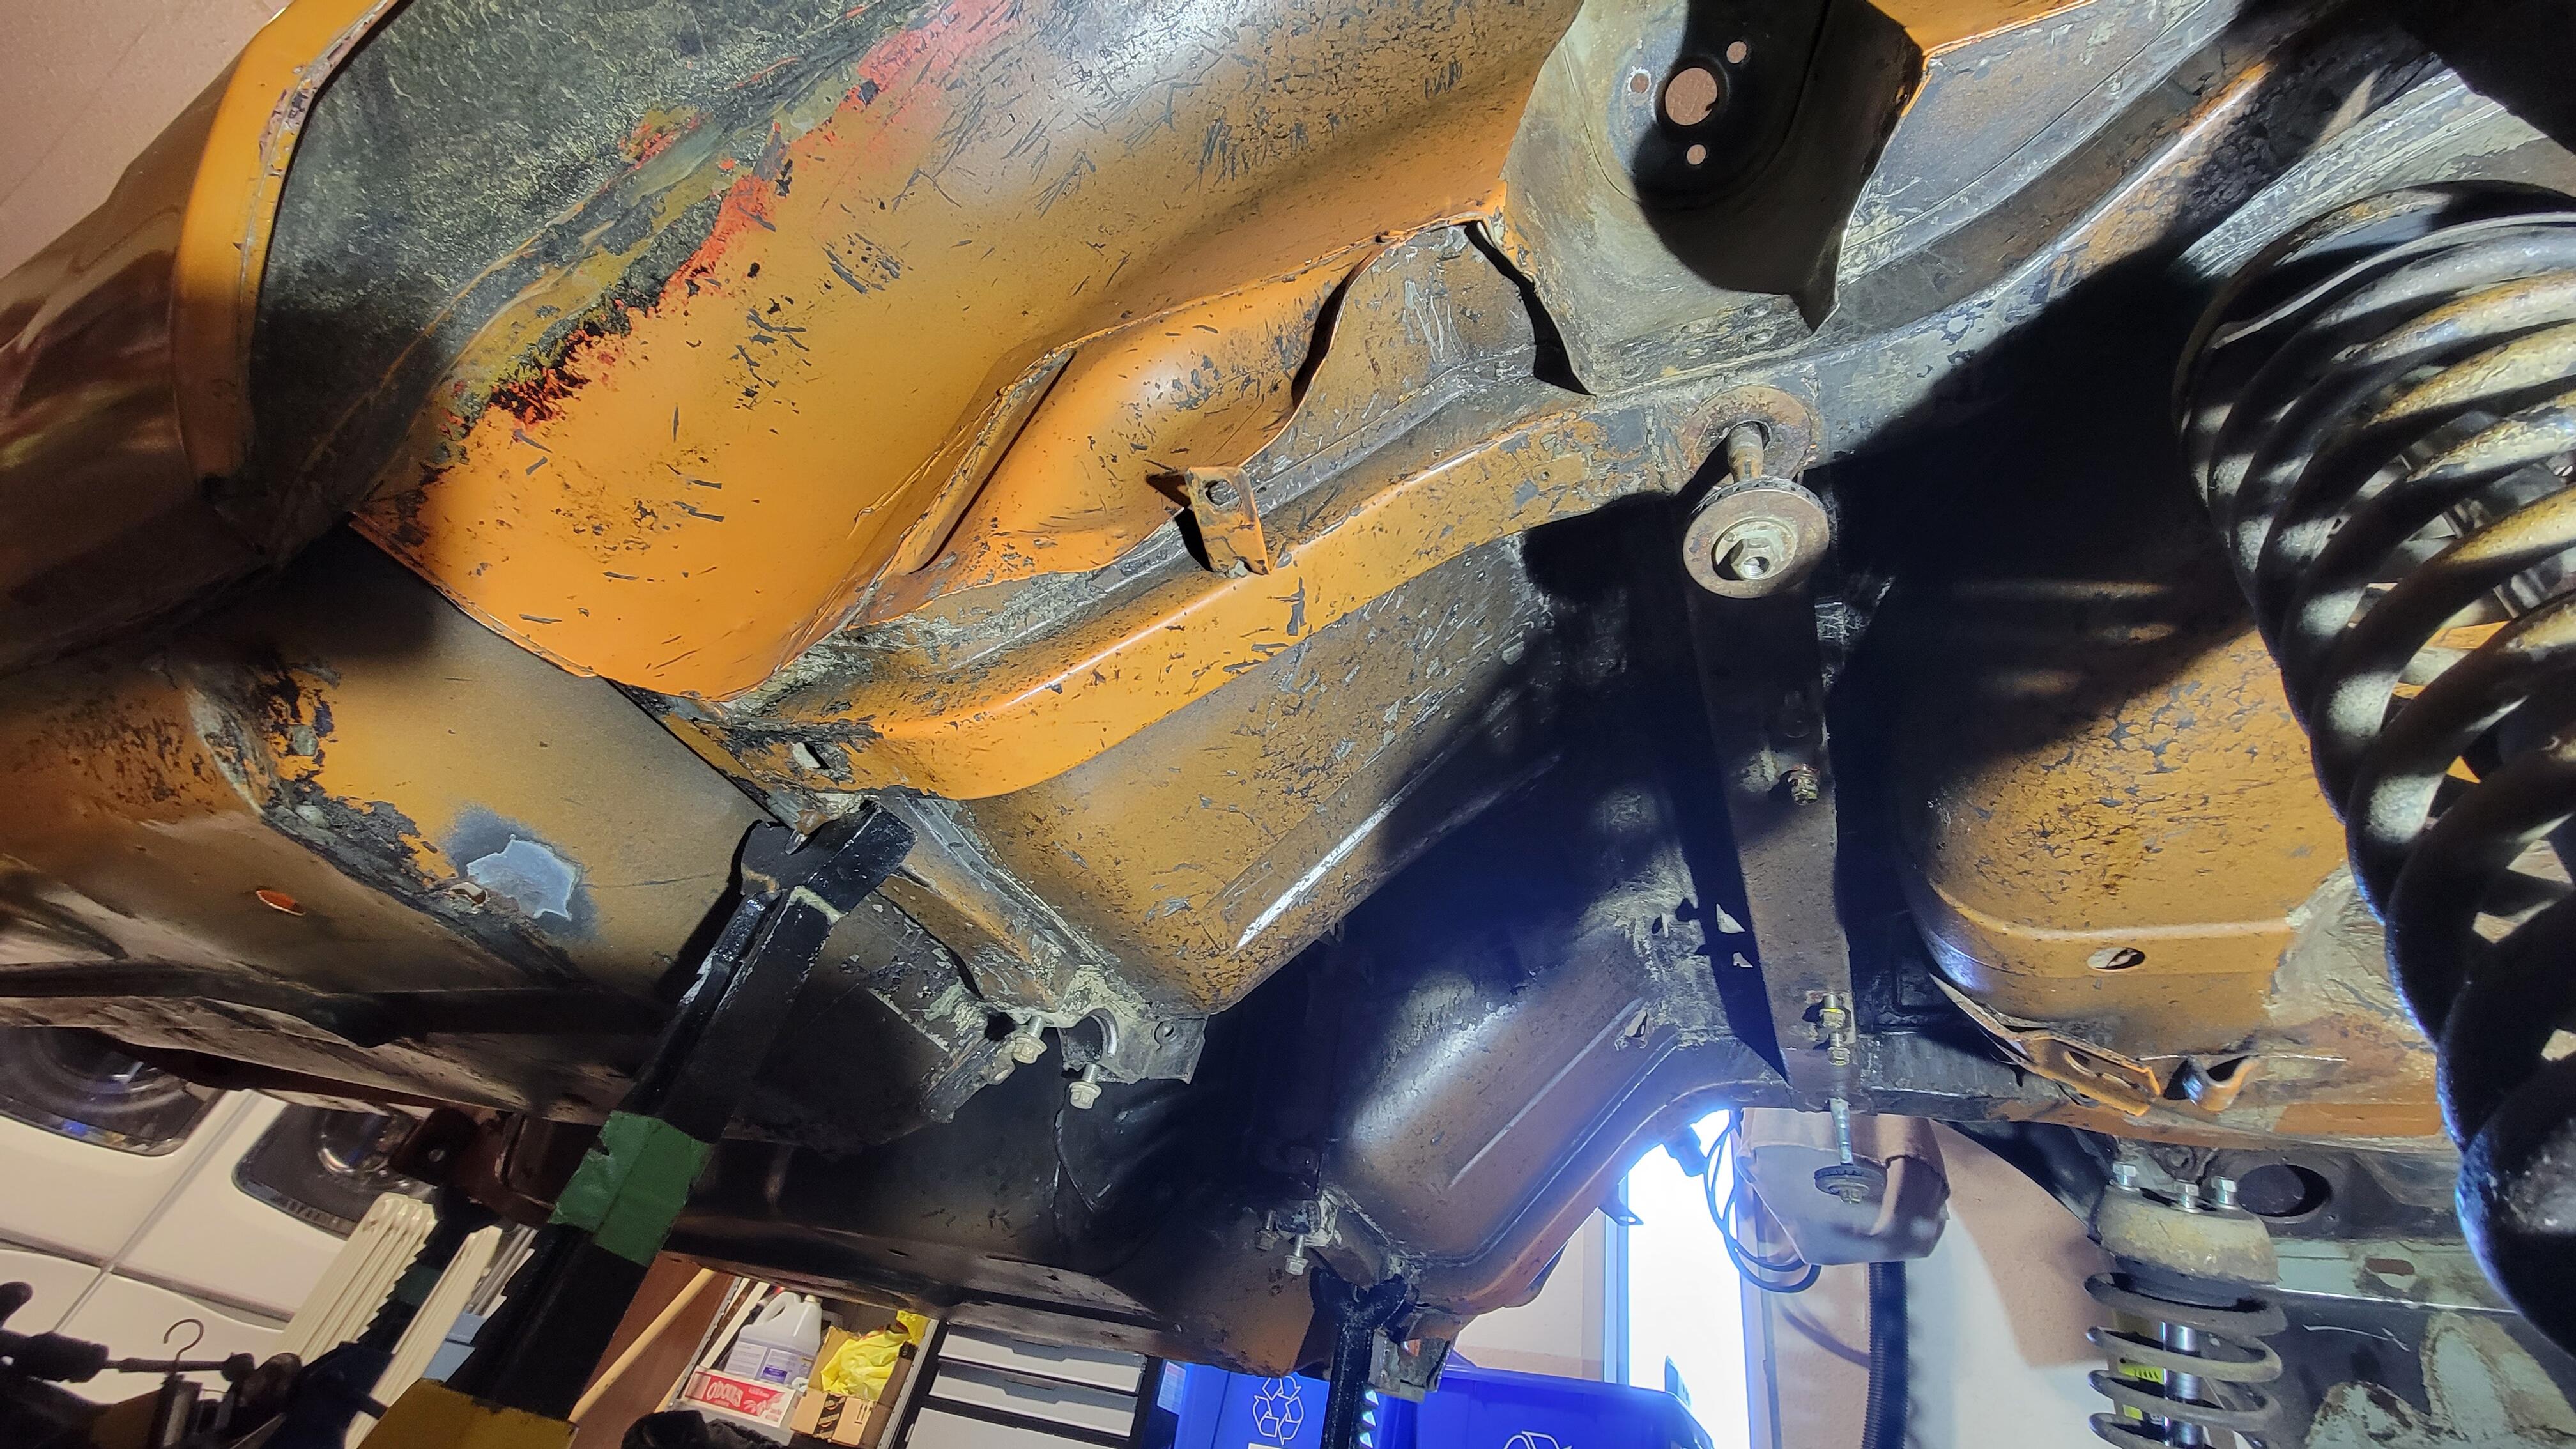
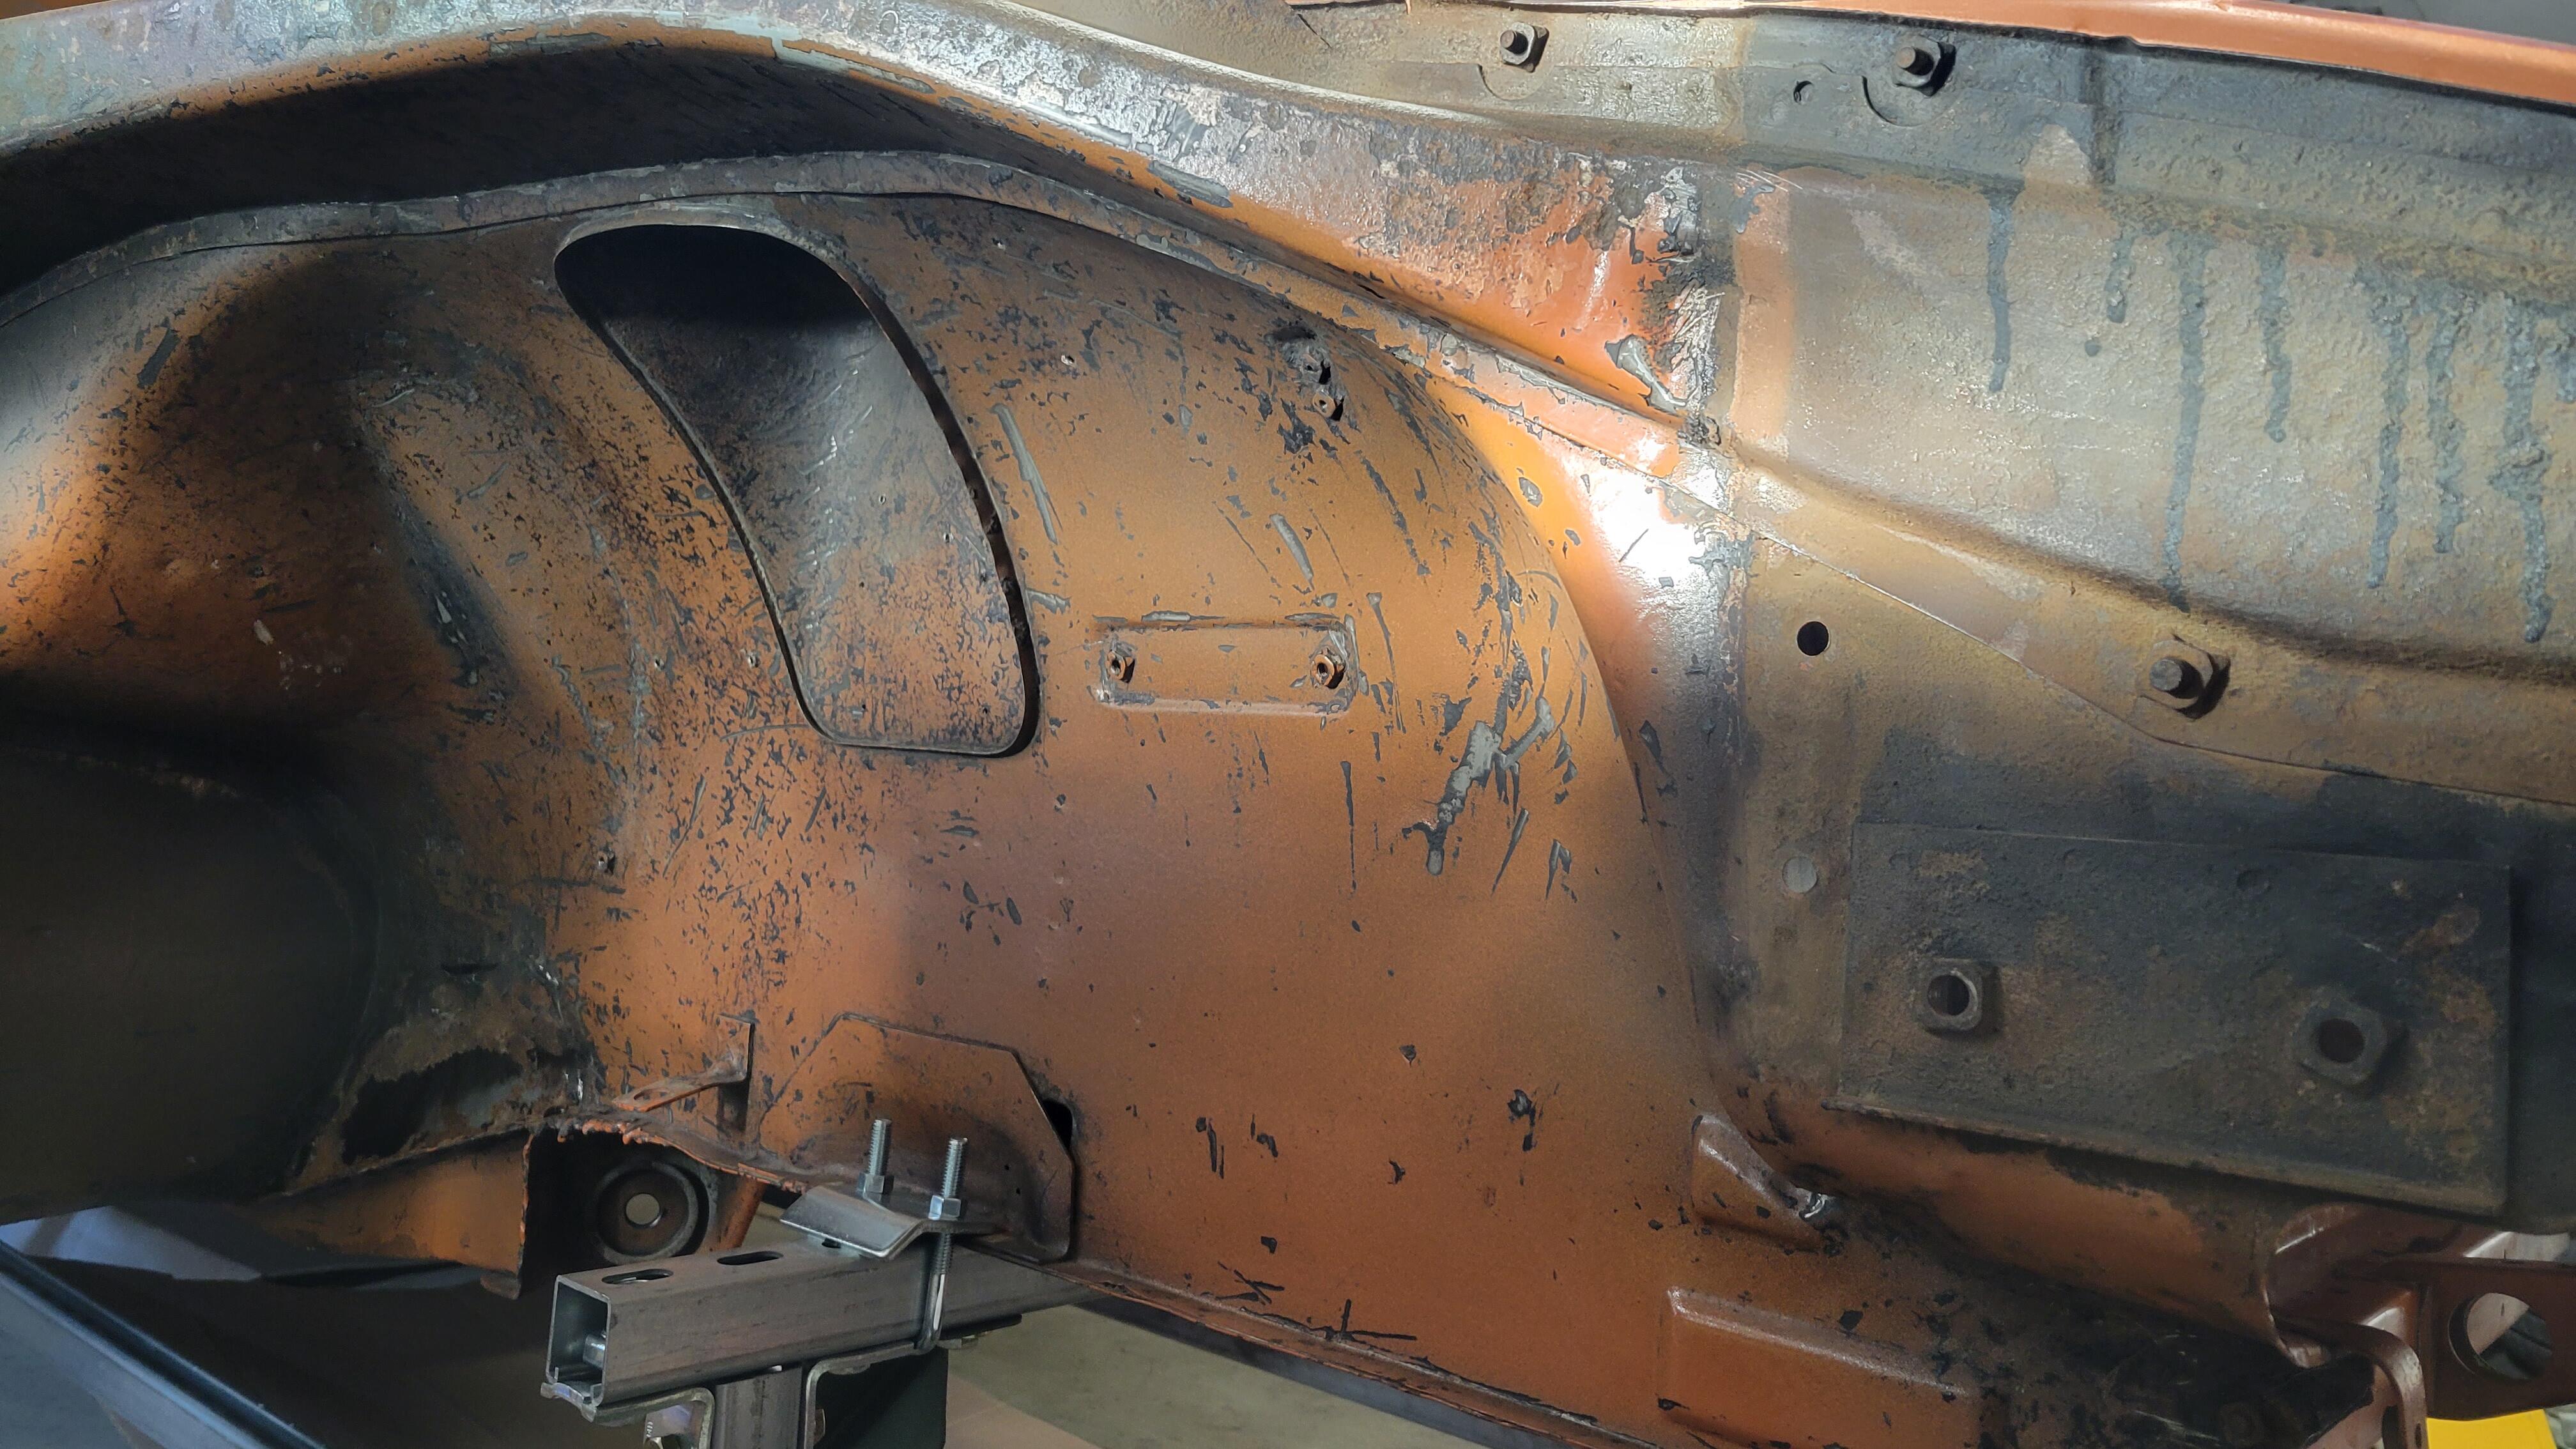
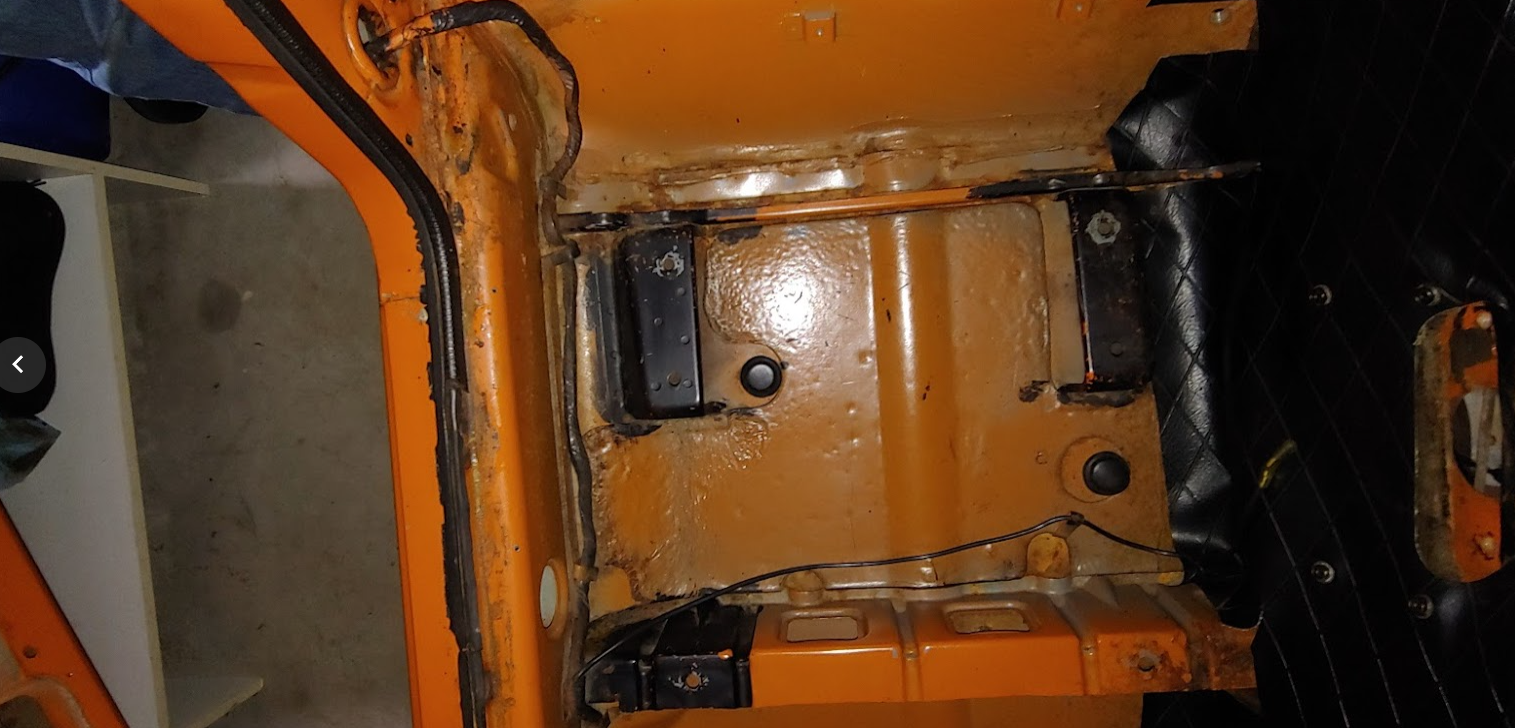
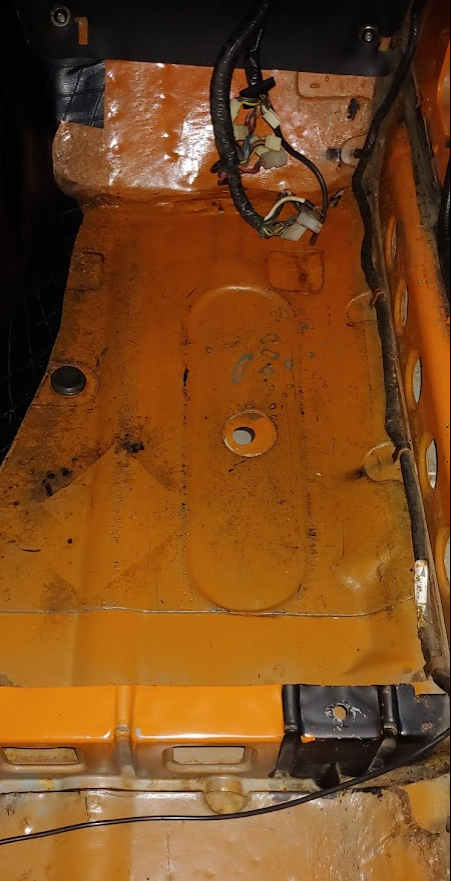
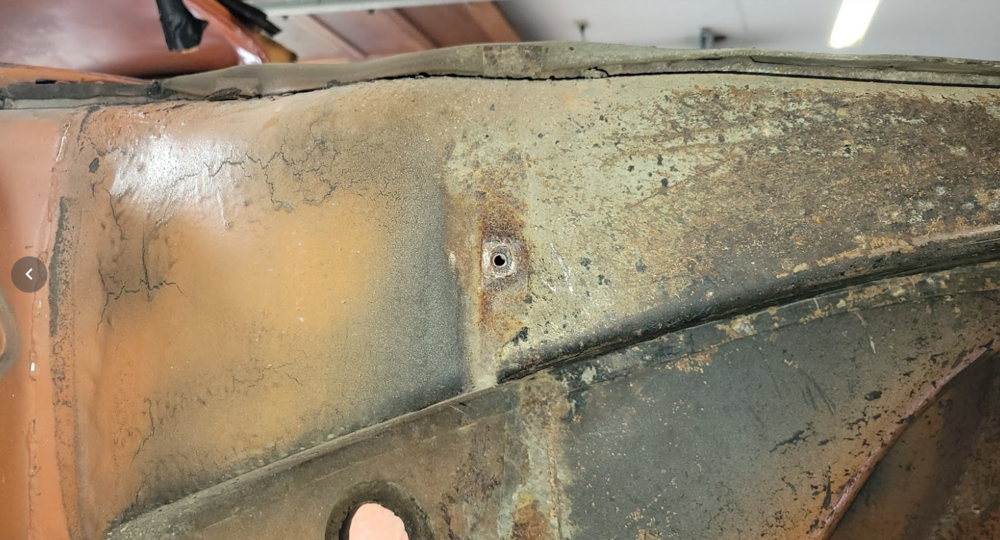
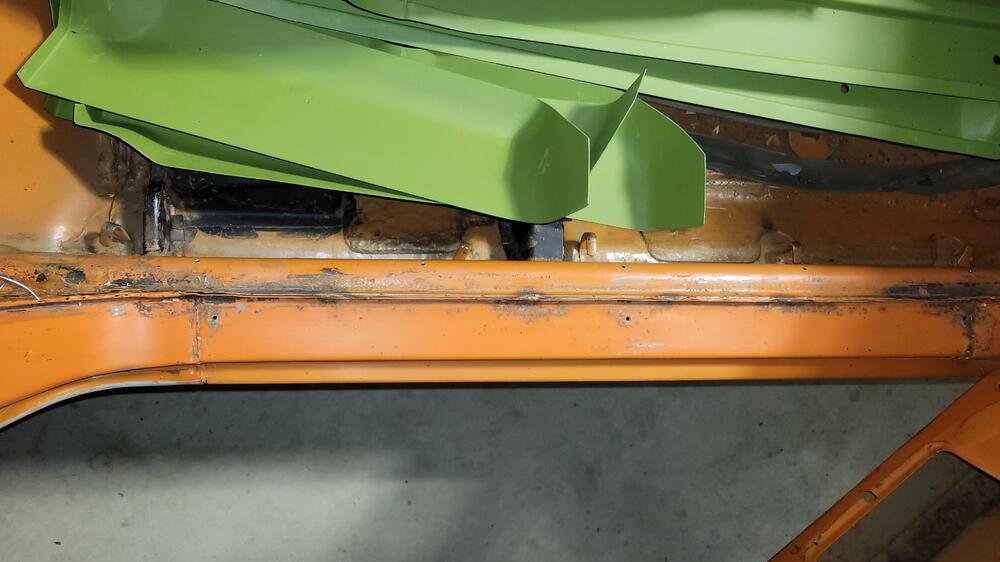
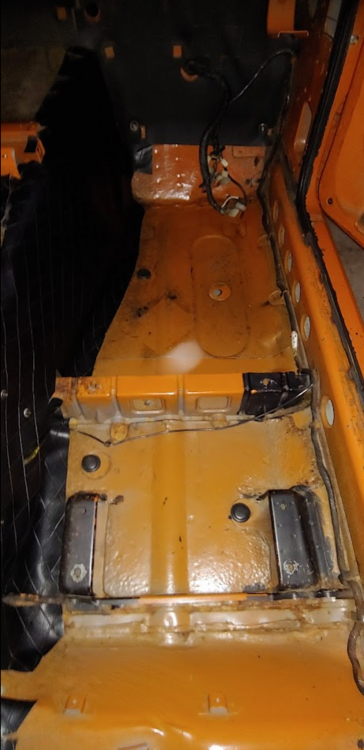
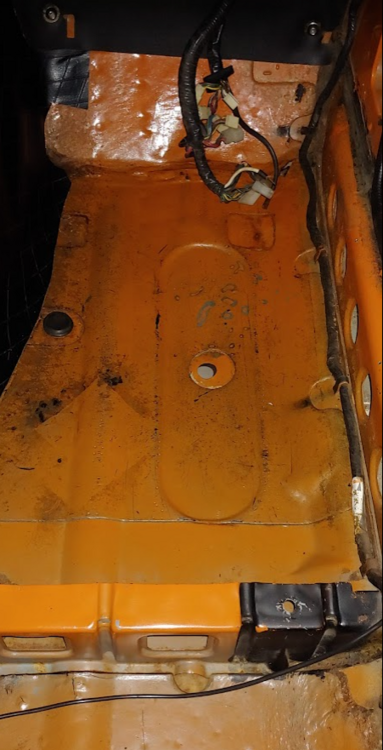
Early 240Z's did come from the factory with body color paint on the underside. Most in my area got dealer applied black undercoating of some type. My 7/70 car #6521 got the very thick tar like undercoating which I have removed during my restoration exposing original 918 orange paint throughout. On my car I found that under the 918 paint the front wheel wells and the transmission tunnel, front to rear, plus between and including the underfloor frame rails, got a very heavy dark charcoal grey primer. The top coat of paint in these areas is very thin and the dark grey color shows through, especially in the transmission tunnel. The area under the floors and the rear wheel wells had a lighter blueish grey primer and the top orange coat was much closer to the upper exposed surfaces. Here are some pics of mine.


-
Fan Blade? This is a snippet from the next picture.
-
There is this: http://www.carpartsmanual.com/datsun/Z-1969-1978 Or you can support the club and purchase a pdf version, found in the downloads section for the very reasonable price of $15, https://www.classiczcars.com/files/file/53-s30-zcar-microfiche-downloadable-cdrom/
-
KF Vintage JDM has them for the 240Z, they go up to just below the shock towers. I'm not sure how close they are to the 280Z but might be a starting point. I purchased a pair to use on my resto. They can be purchased individually.

-
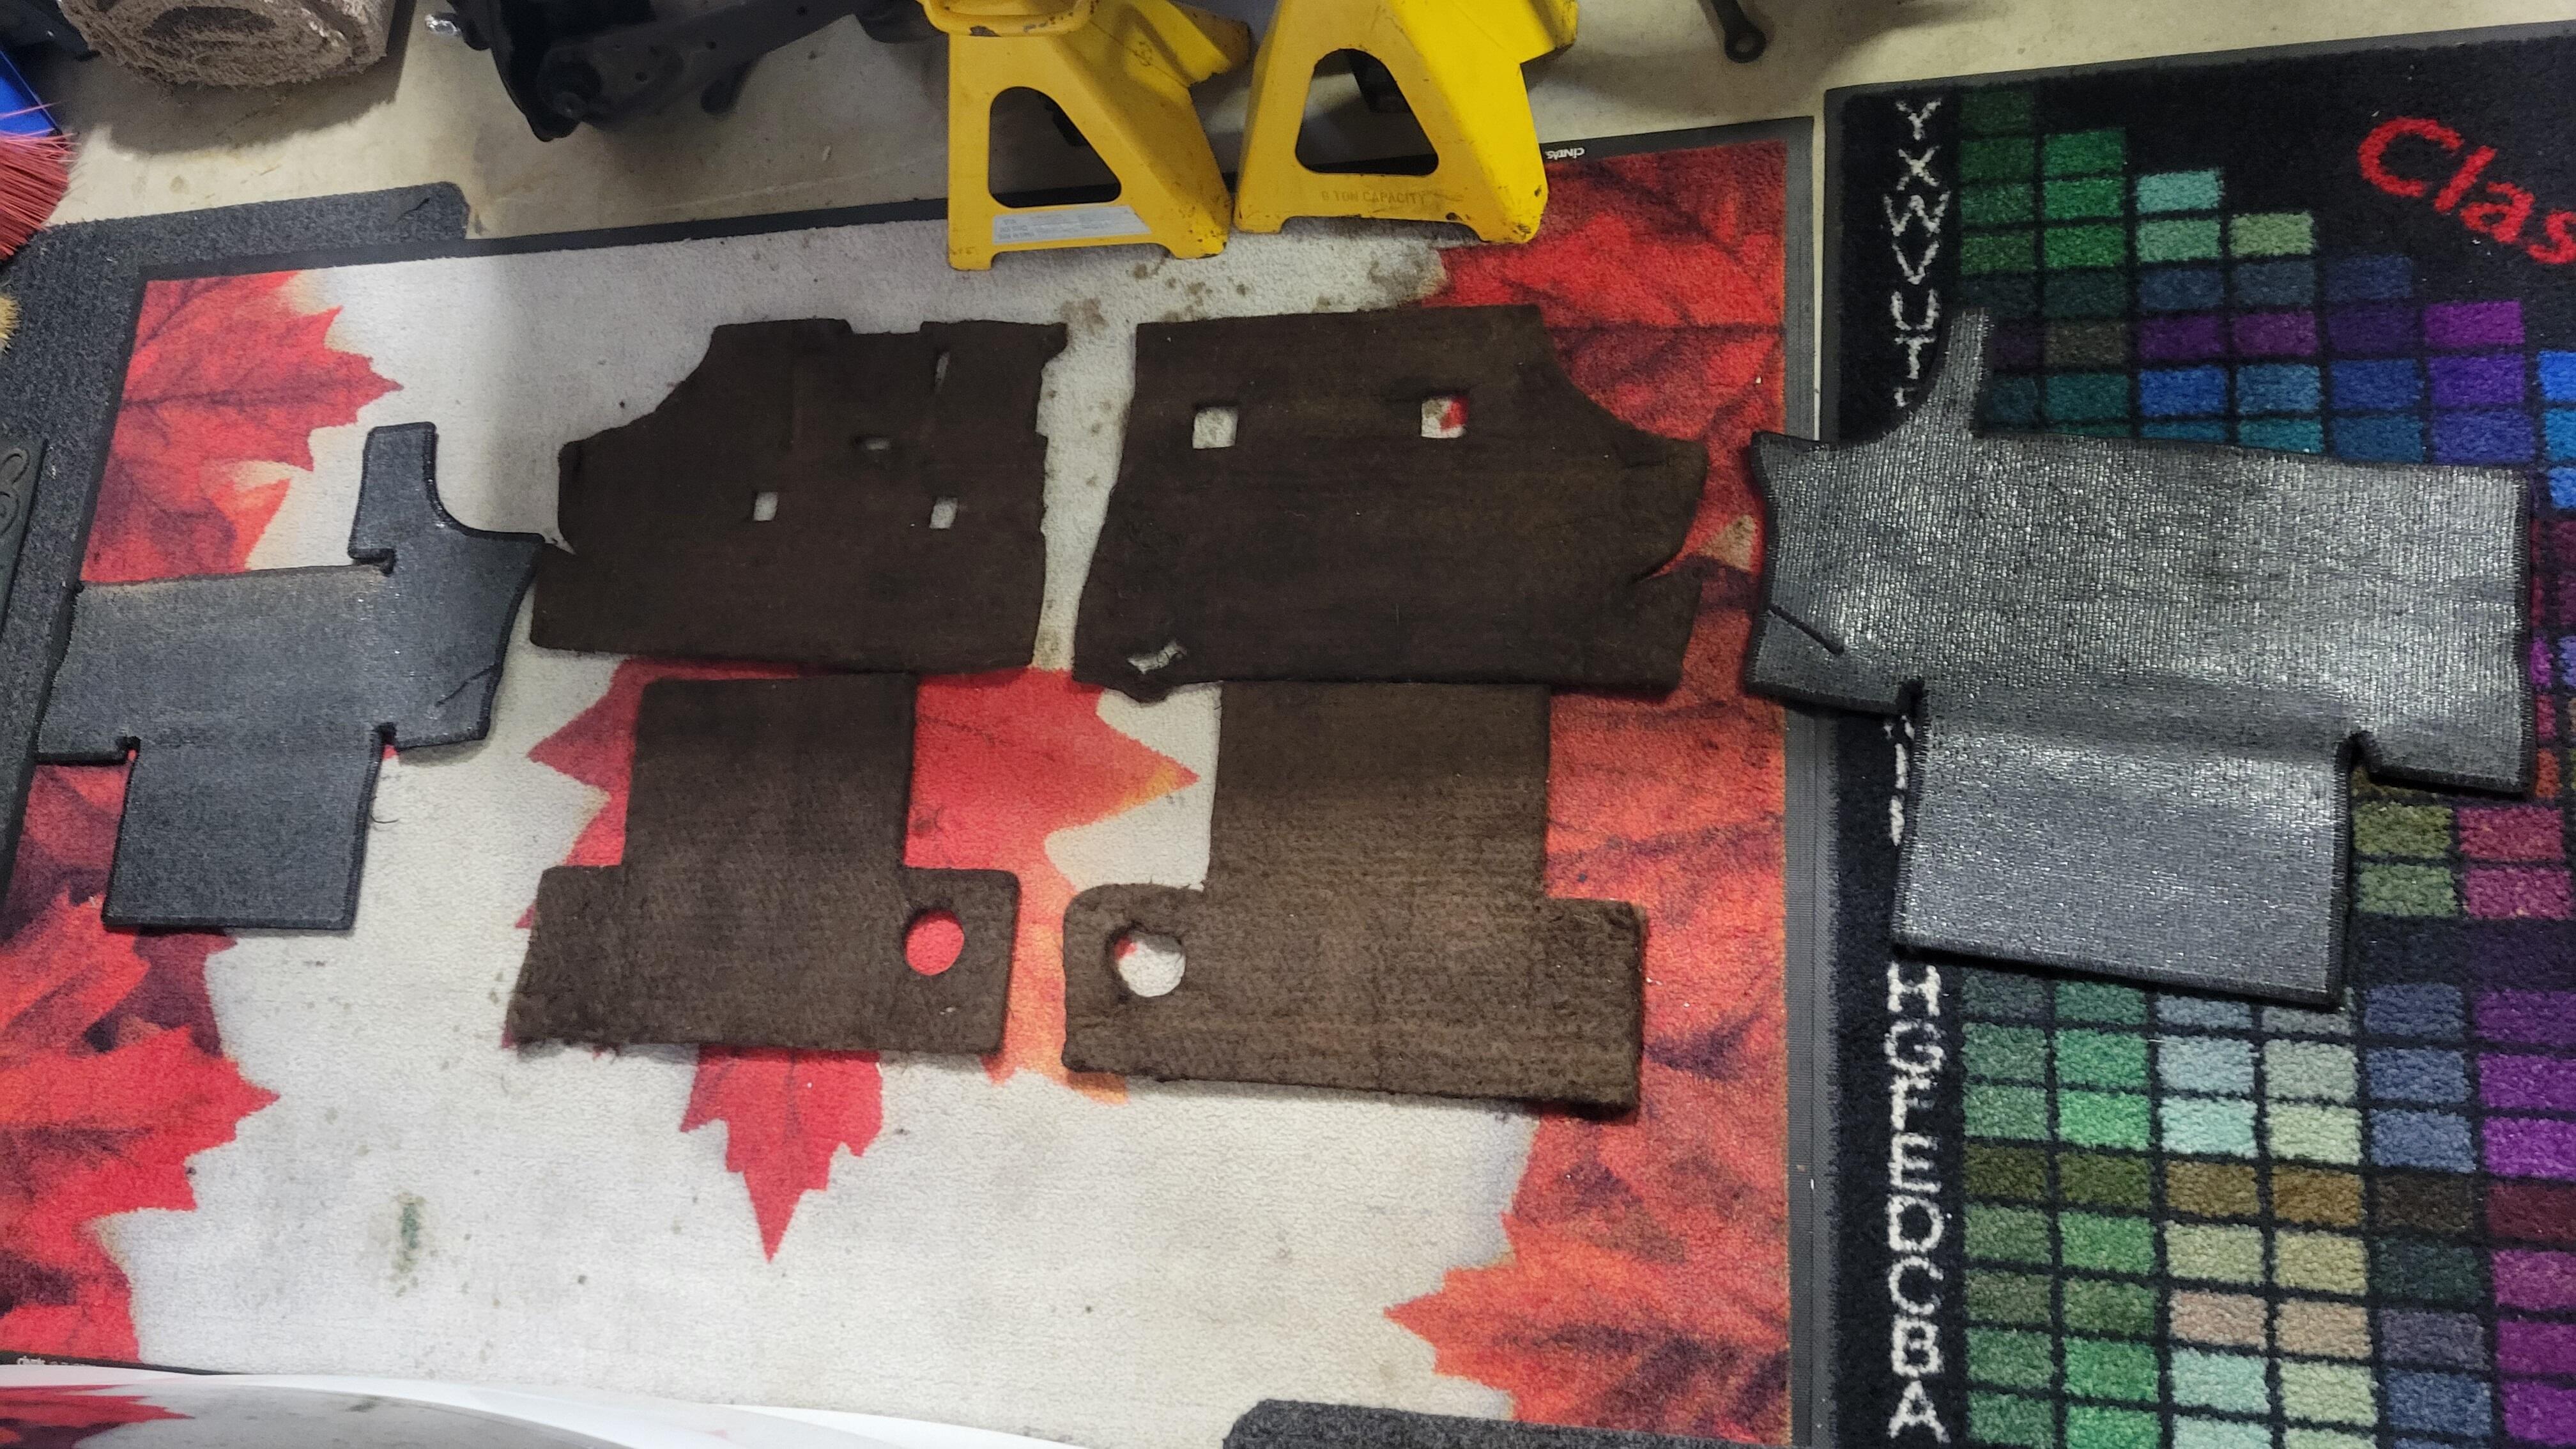
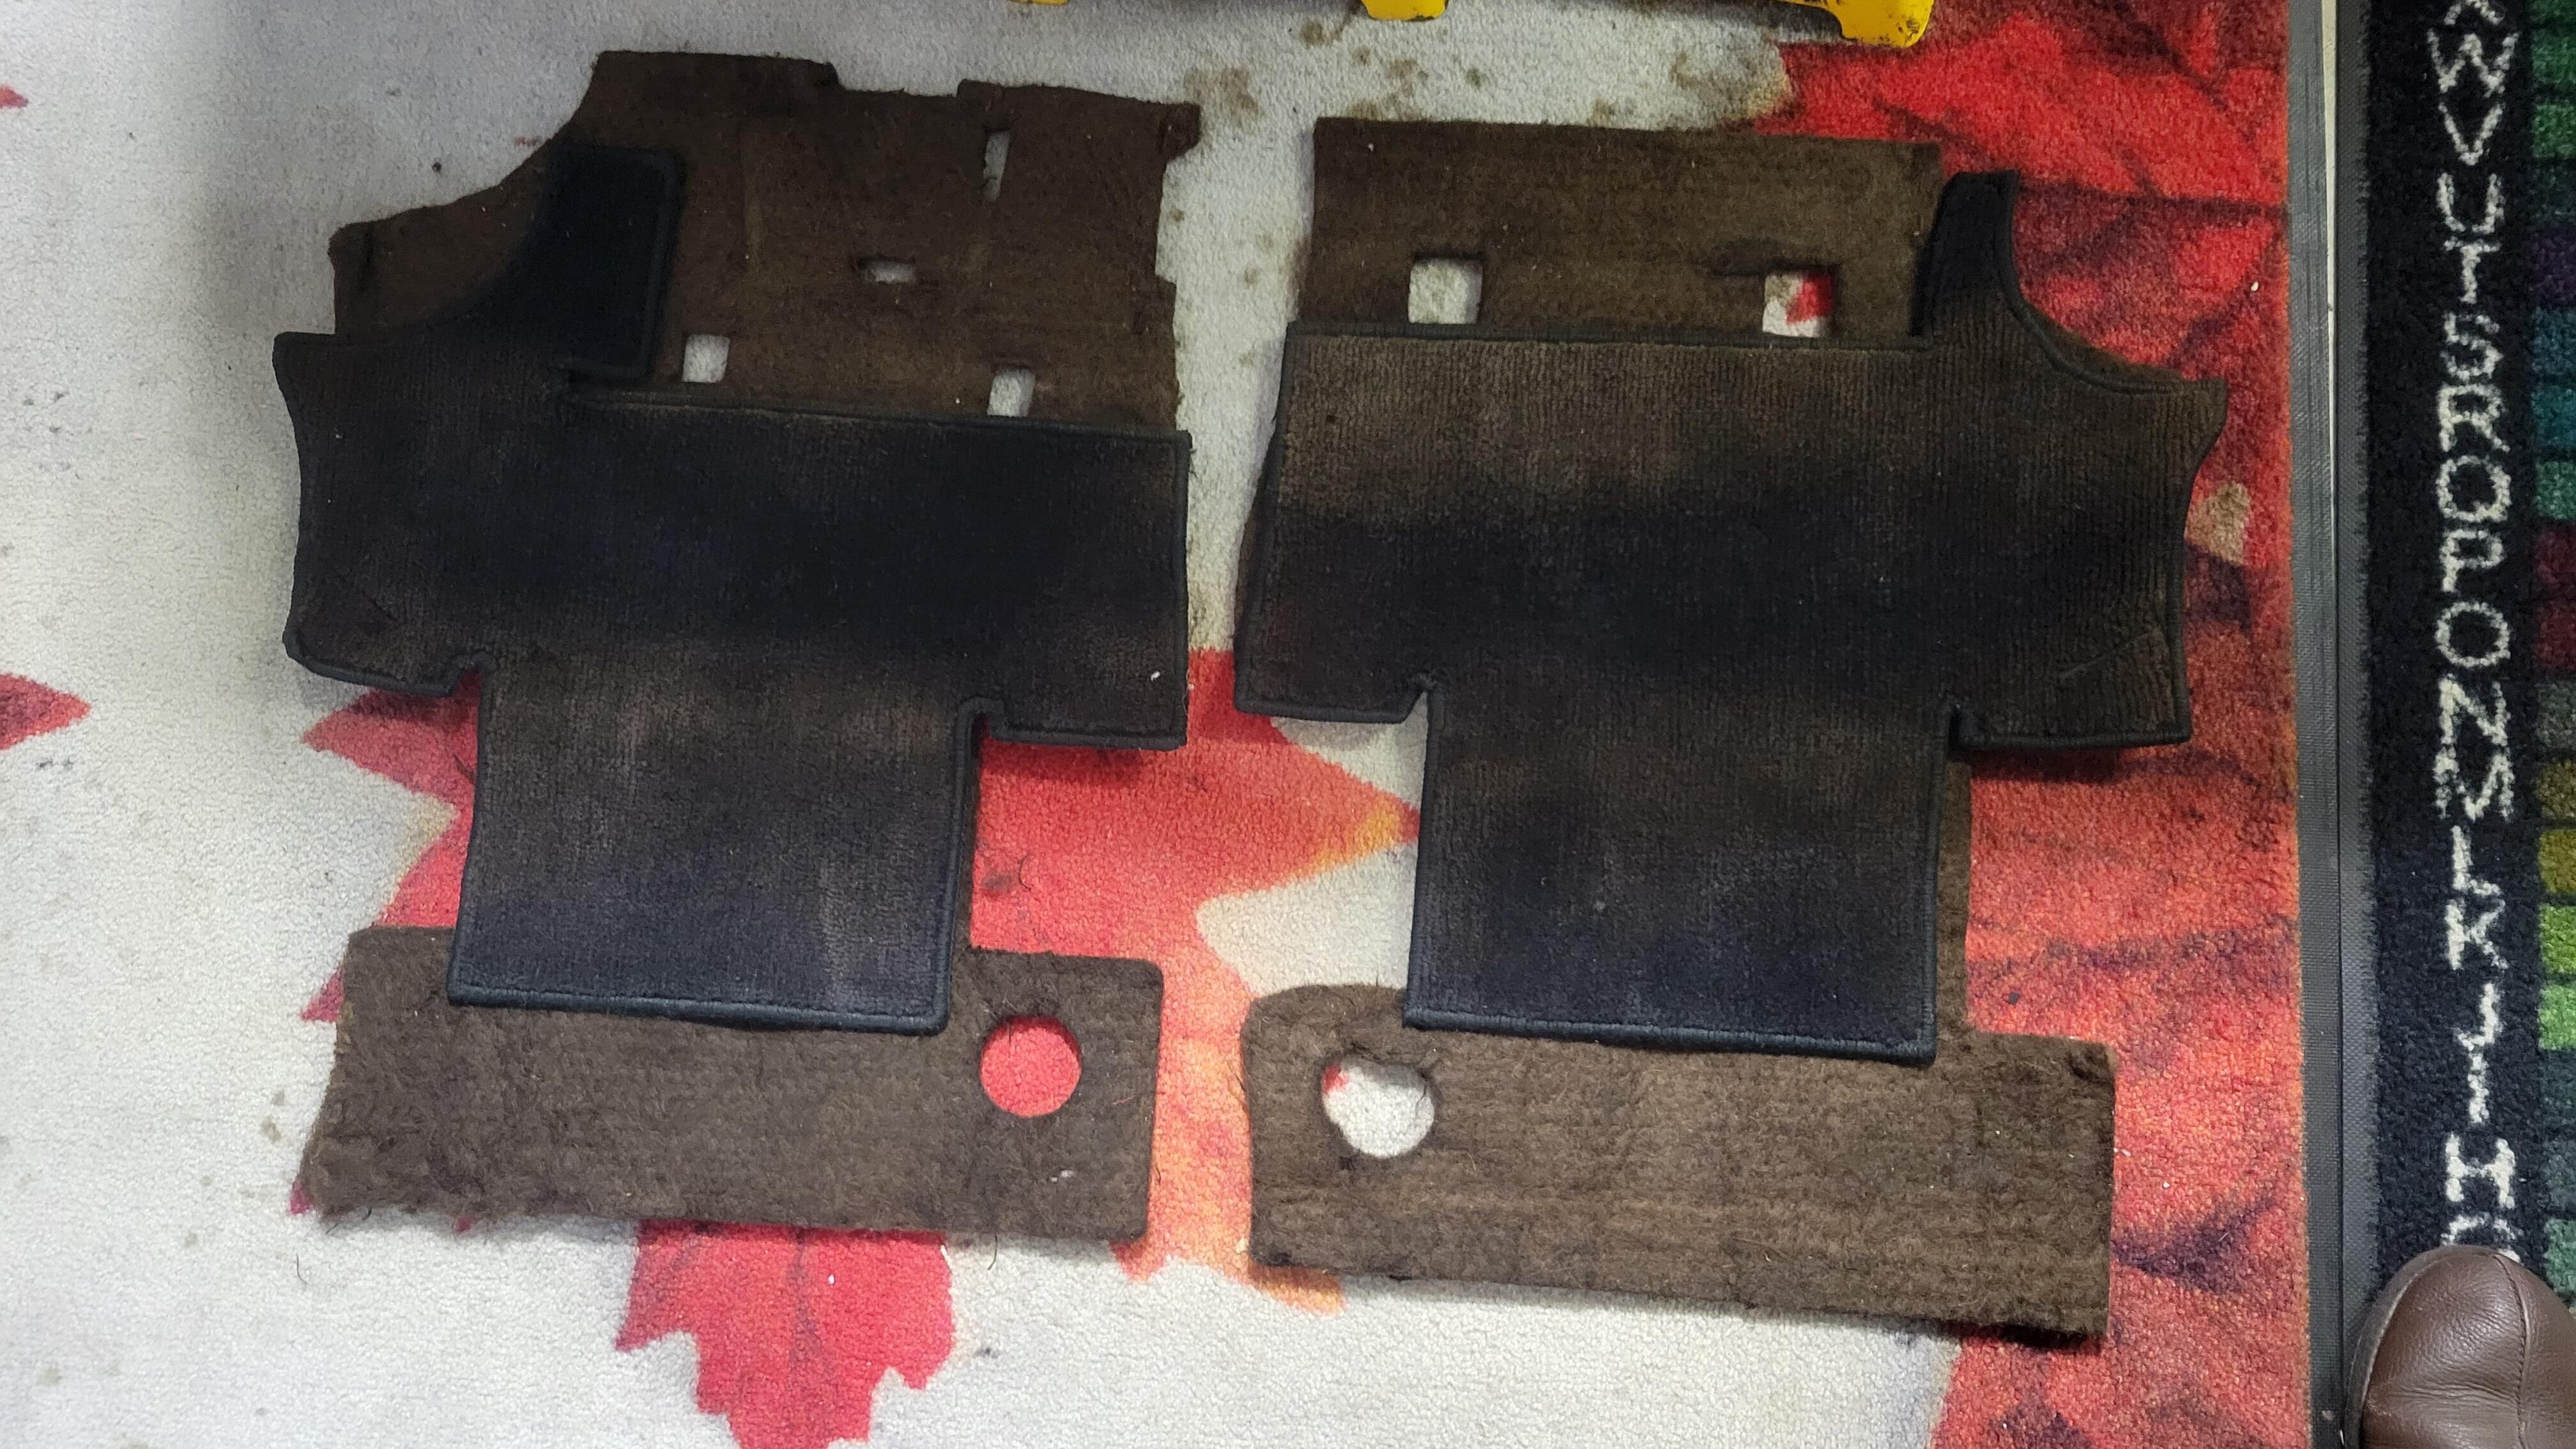
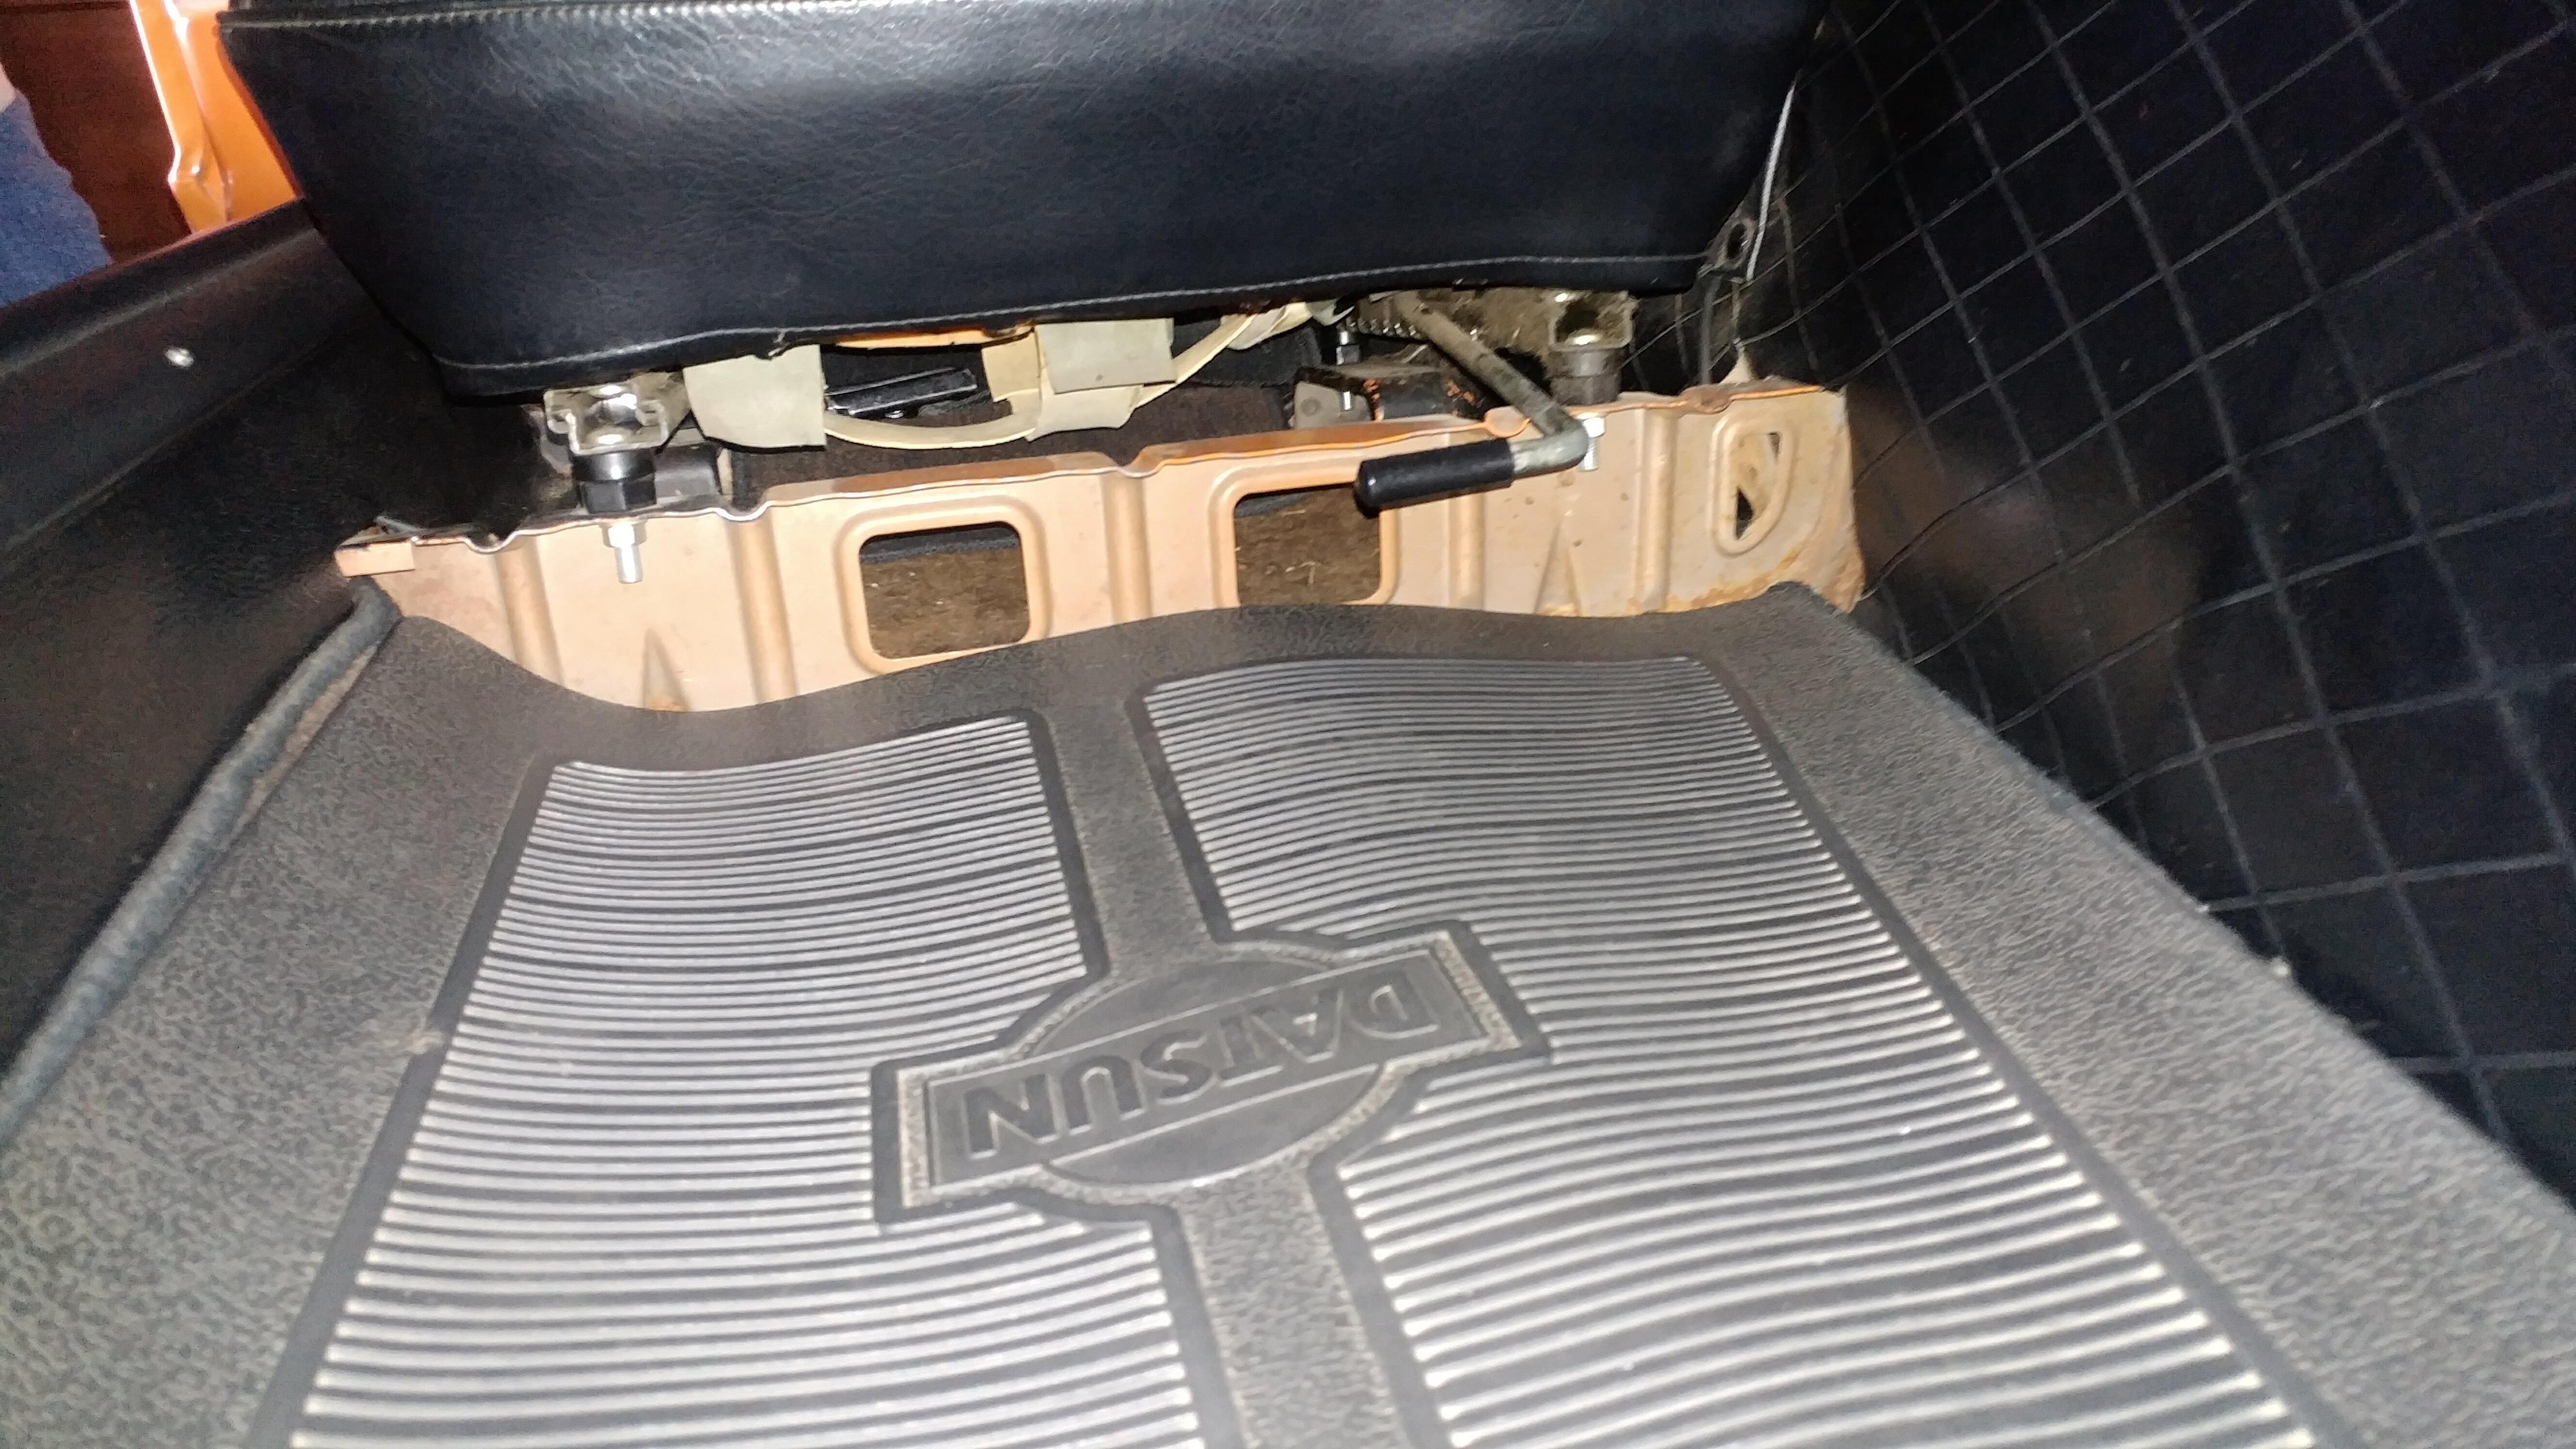
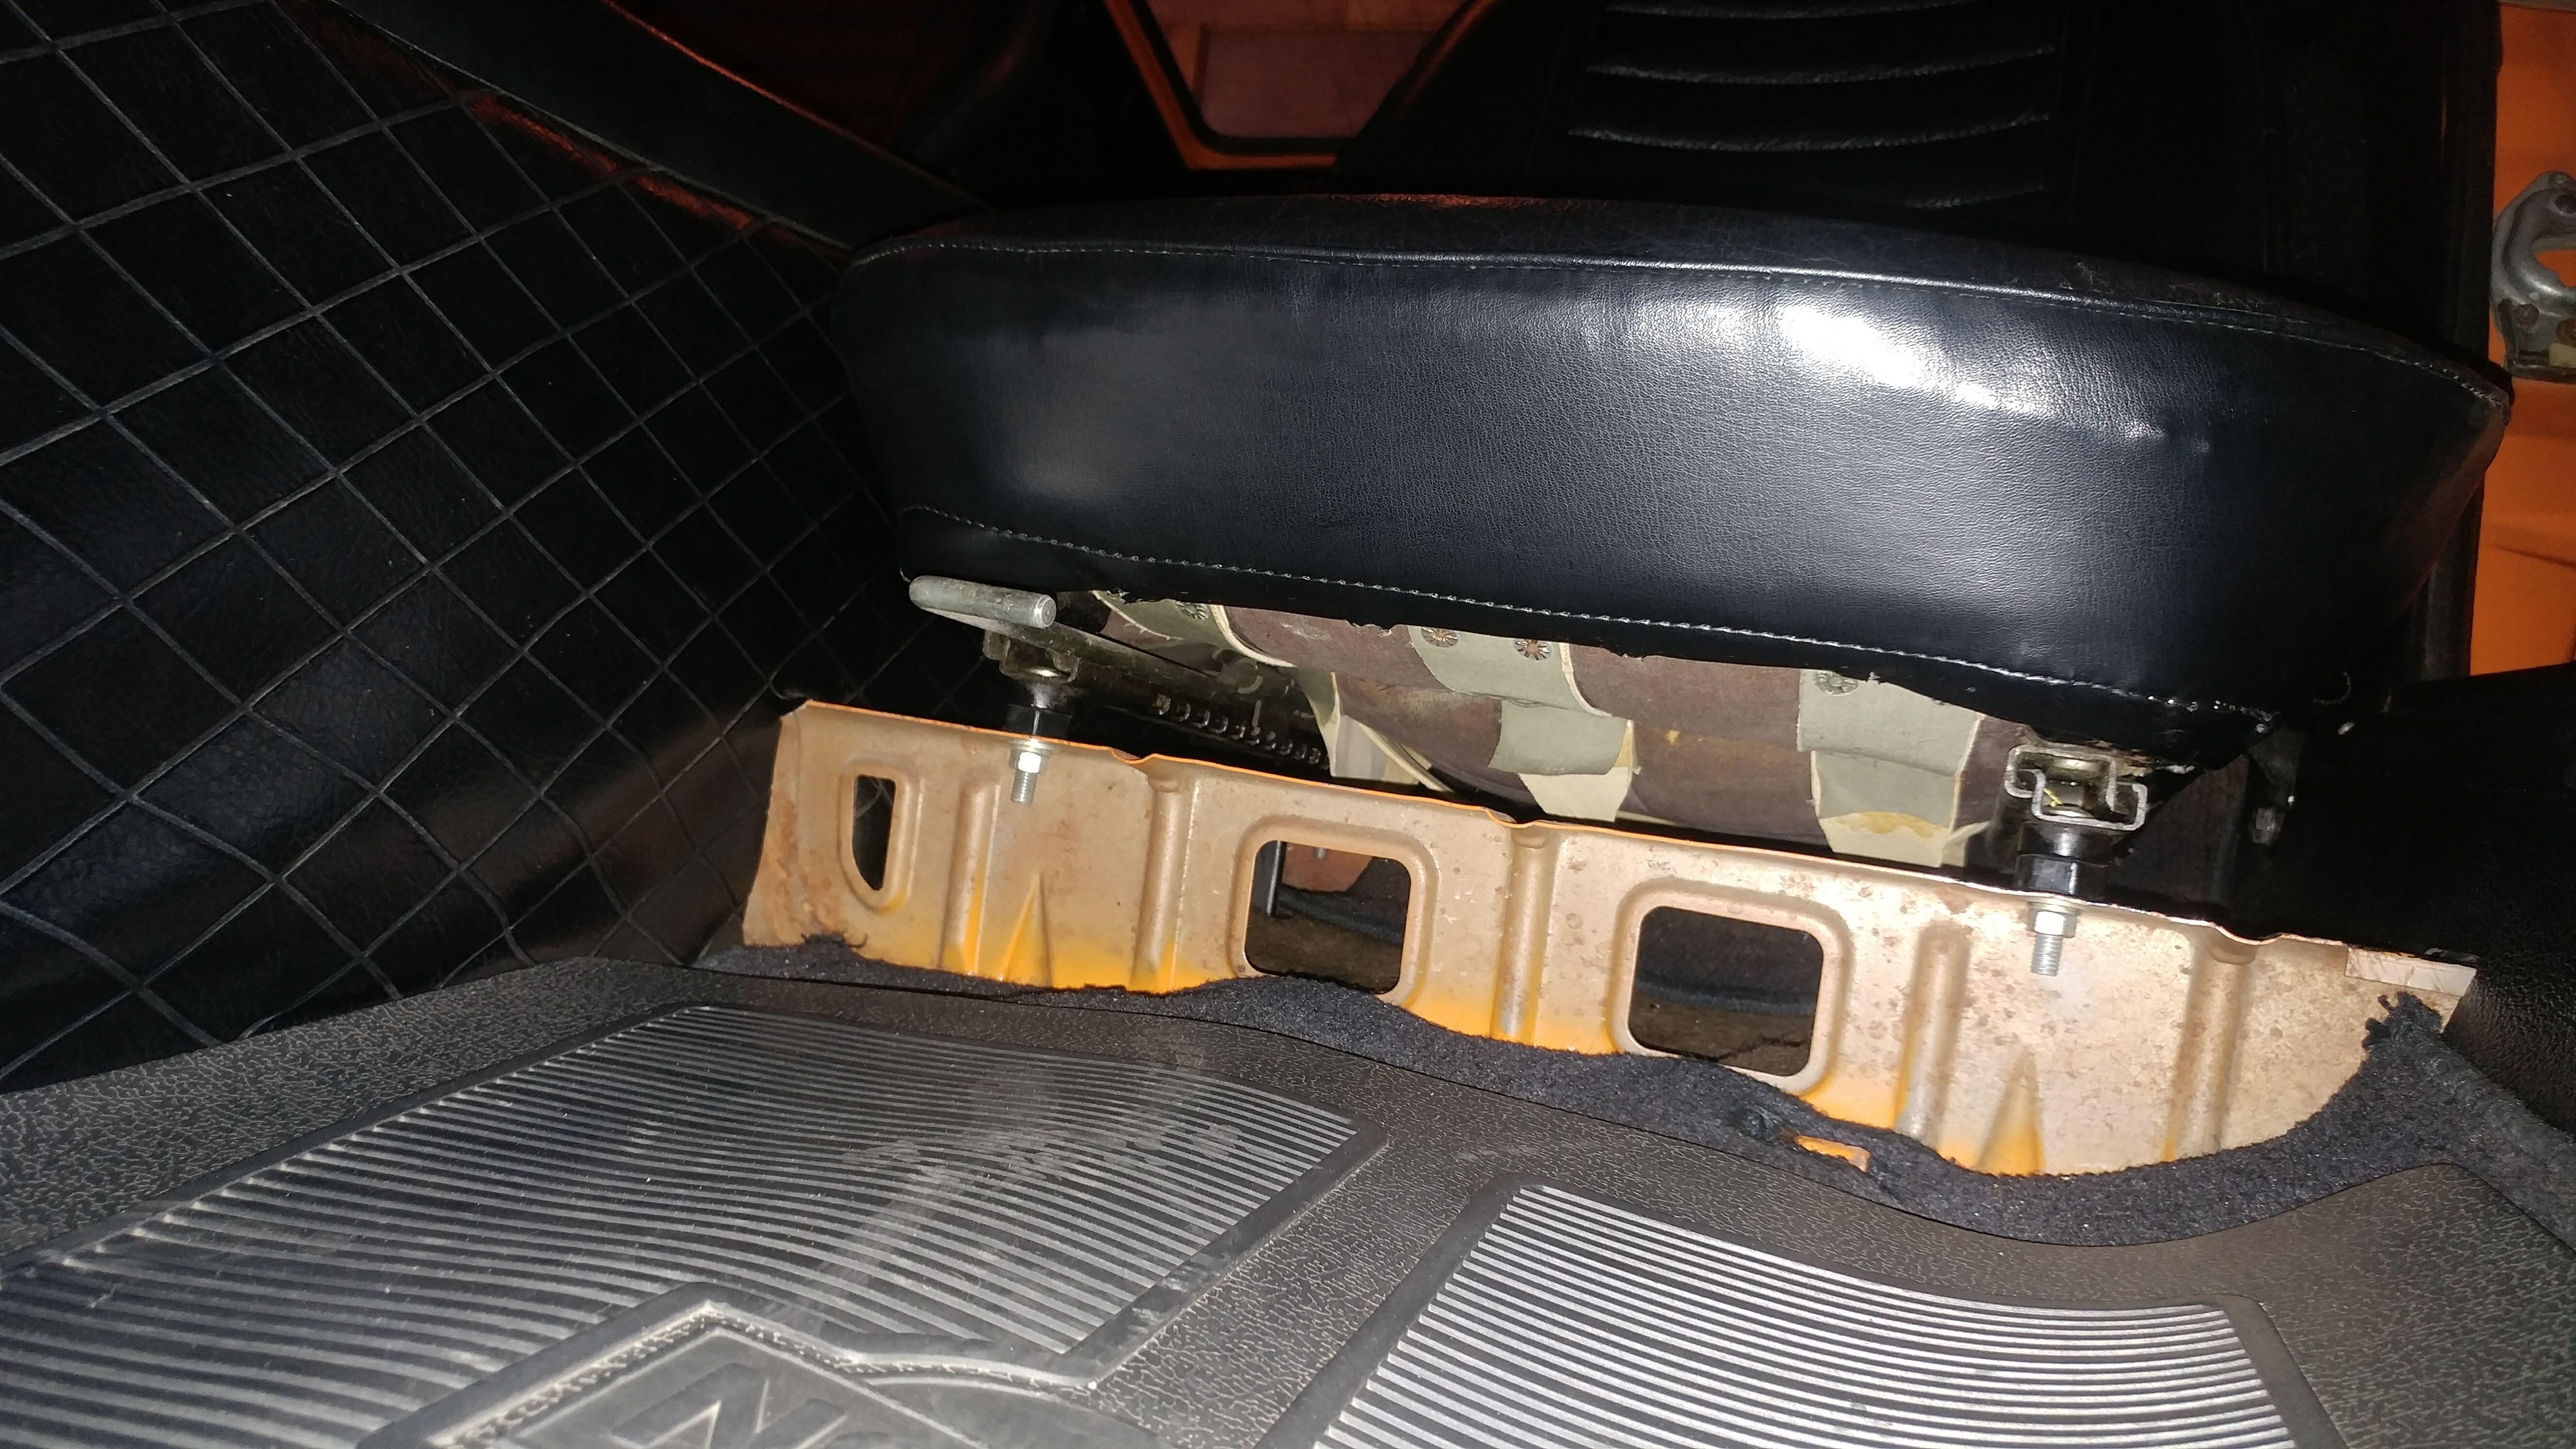
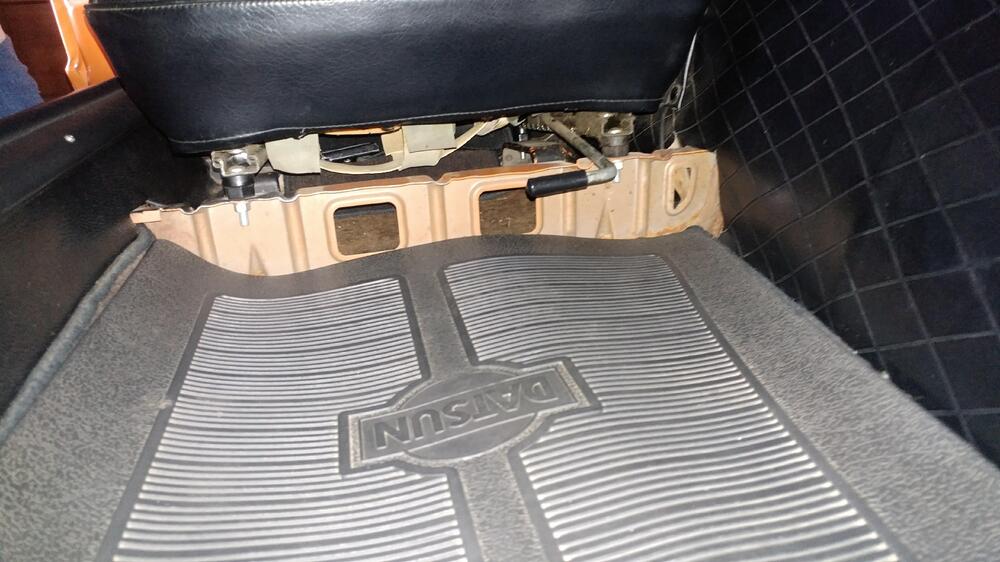
For comparison I pulled out the early under and behind seat jute and carpet from my 7/70 #6521 out of my crawl space. Here are few pictures, on each side there are two jute pieces and one carpet piece that goes part way under the seat and up to the plastic toolbox covers. The rear jute pieces go into the toolbox area. Looks like when the toolboxes were moved to the rear deck the jute and carpet changed, 1/71 I think. @zed2A while back you messaged me about these jute pieces, now that I was able to get access to them is there any info you were still looking for?


-
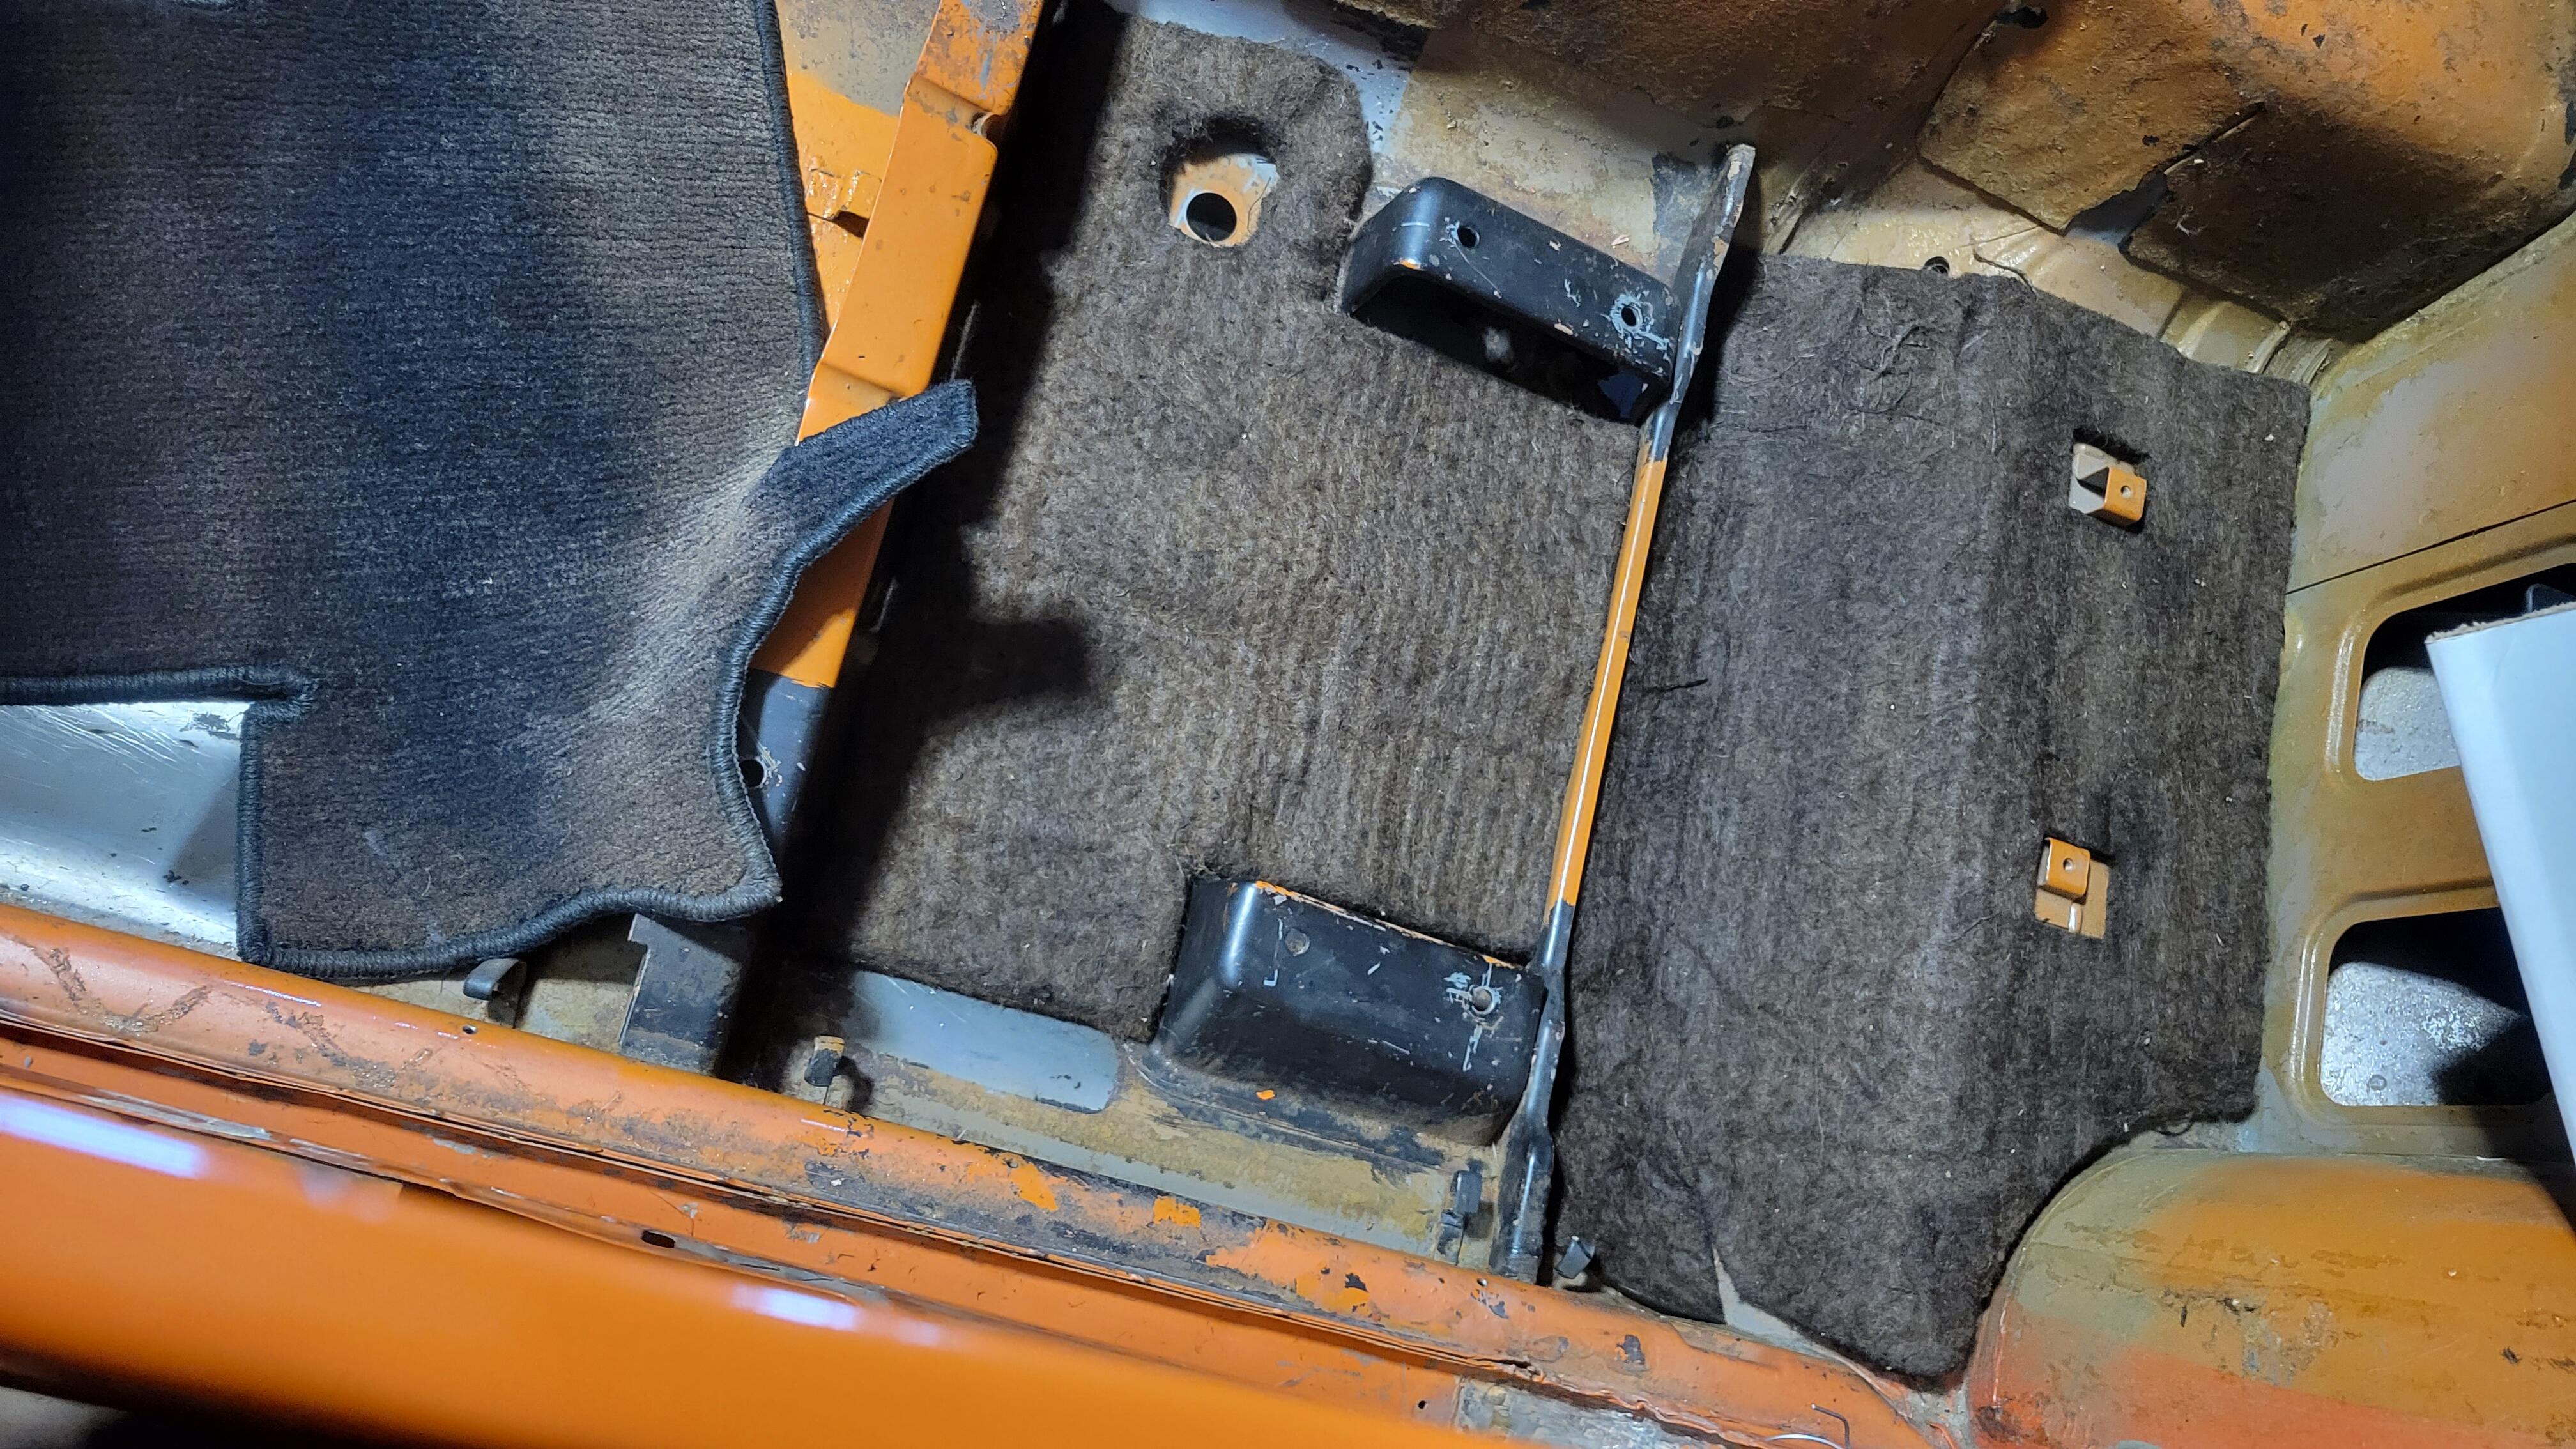
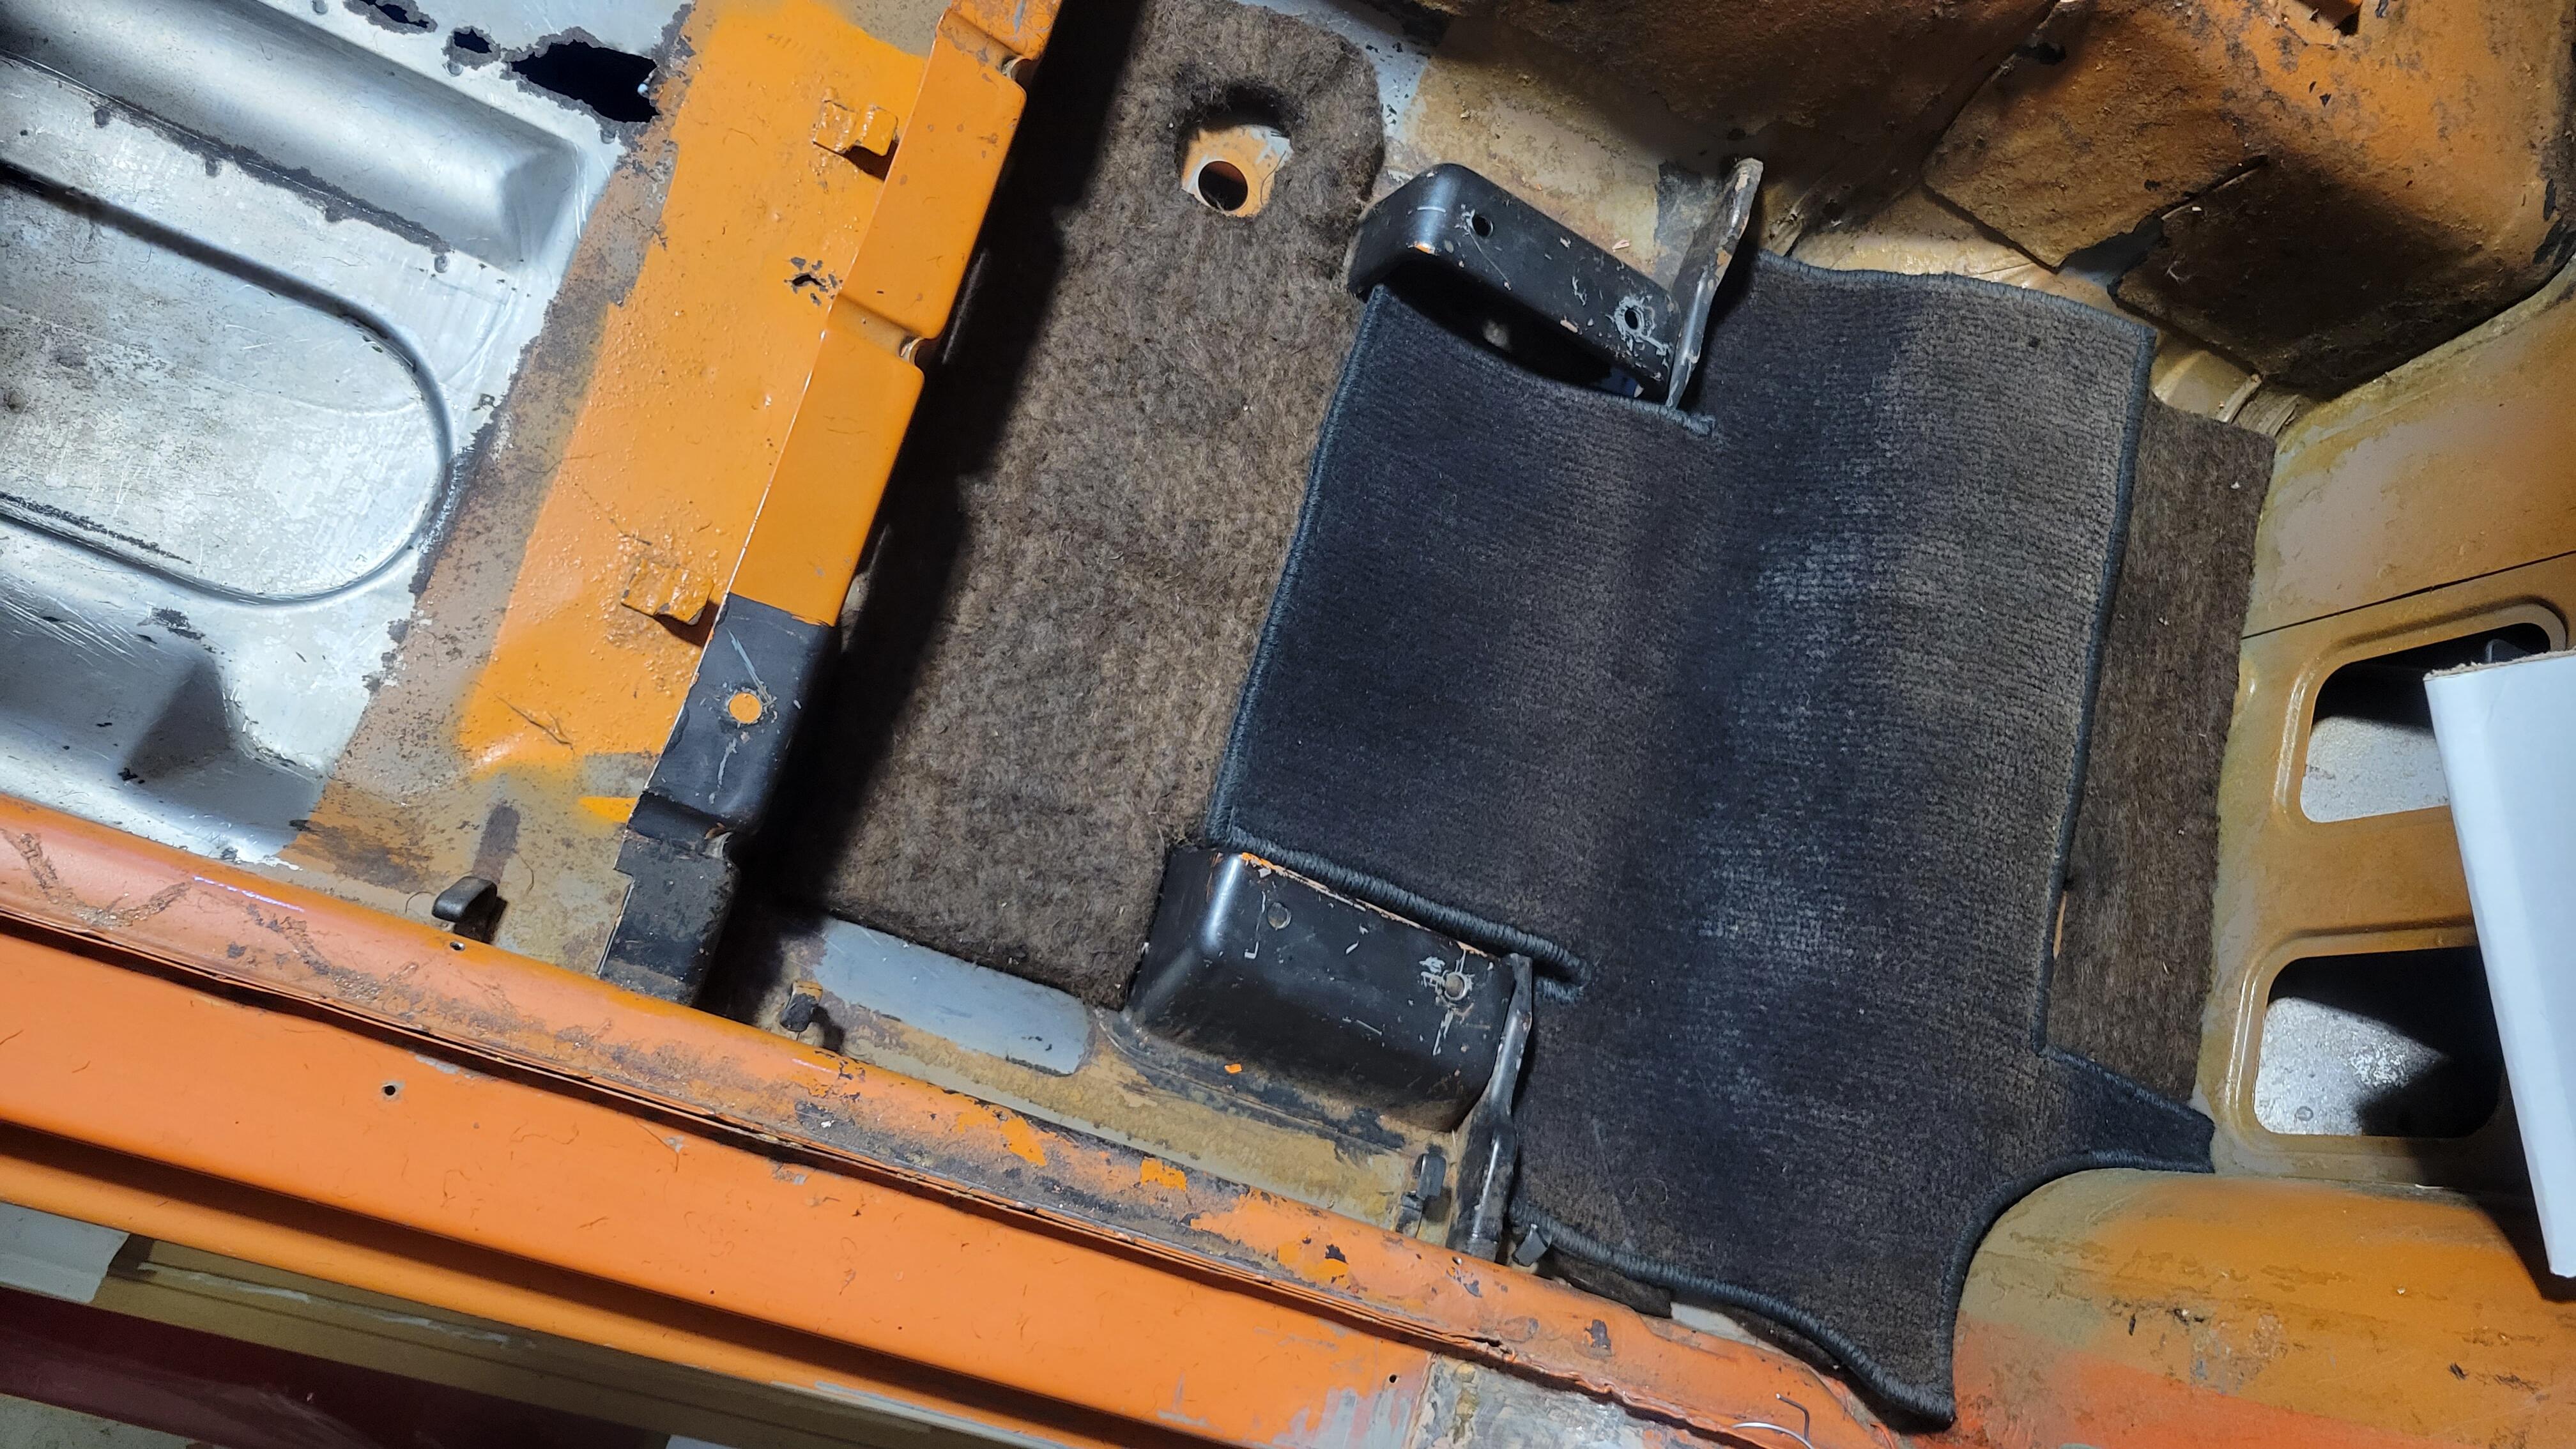
For 1970 and I think 71 cars with plastic tool box covers, the carpet that is behind the seats only partially covers the jute under the seats. These are the only pictures I have of mine before starting the resto on my 7/70. There are some pictures that might be of interest in this discussion,

-
Interesting, the Datsun dealership service department in my home town installed mine in '79 as pictured on the passenger side. I paid the outrageous price of $30 plus $24 for labor. Lol
-
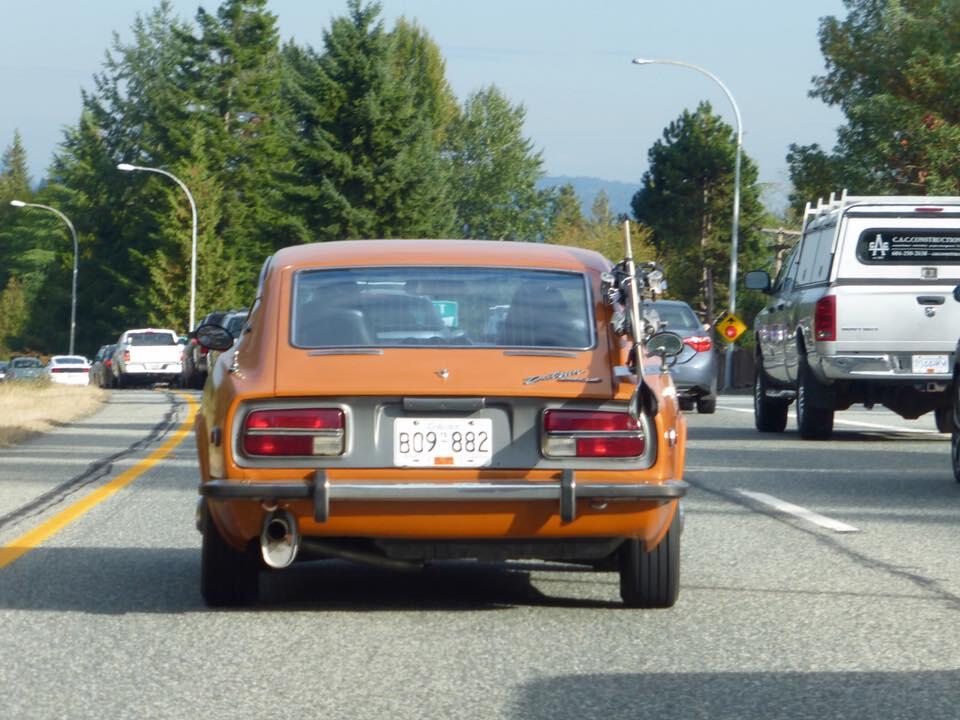
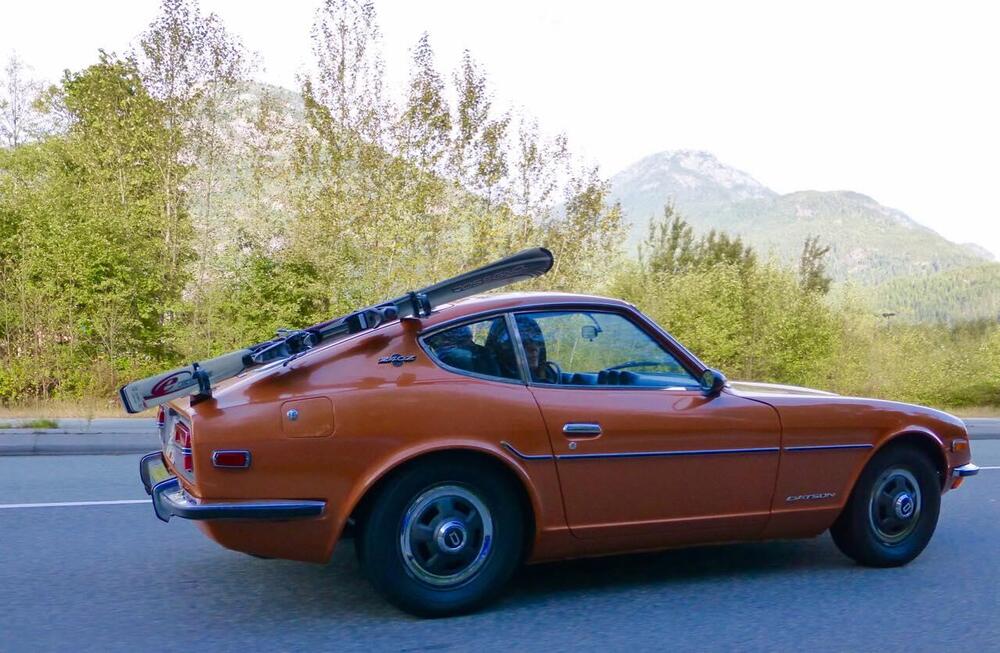
I still have my side mount ski rack, purchased in 1979 at my local Datsun dealership. It was made by a Canadian accessory company, Candar Products, out of Montreal. Here are a couple of pics from 2017 on a club run from Vancouver to Whistler. Got more than a few thumbs up on the Sea to Sky Highway. Cheers, from another Mike
-
Thanks, I've been planning to place an order with vintage rubber but I didn't notice they offered those clips.
-
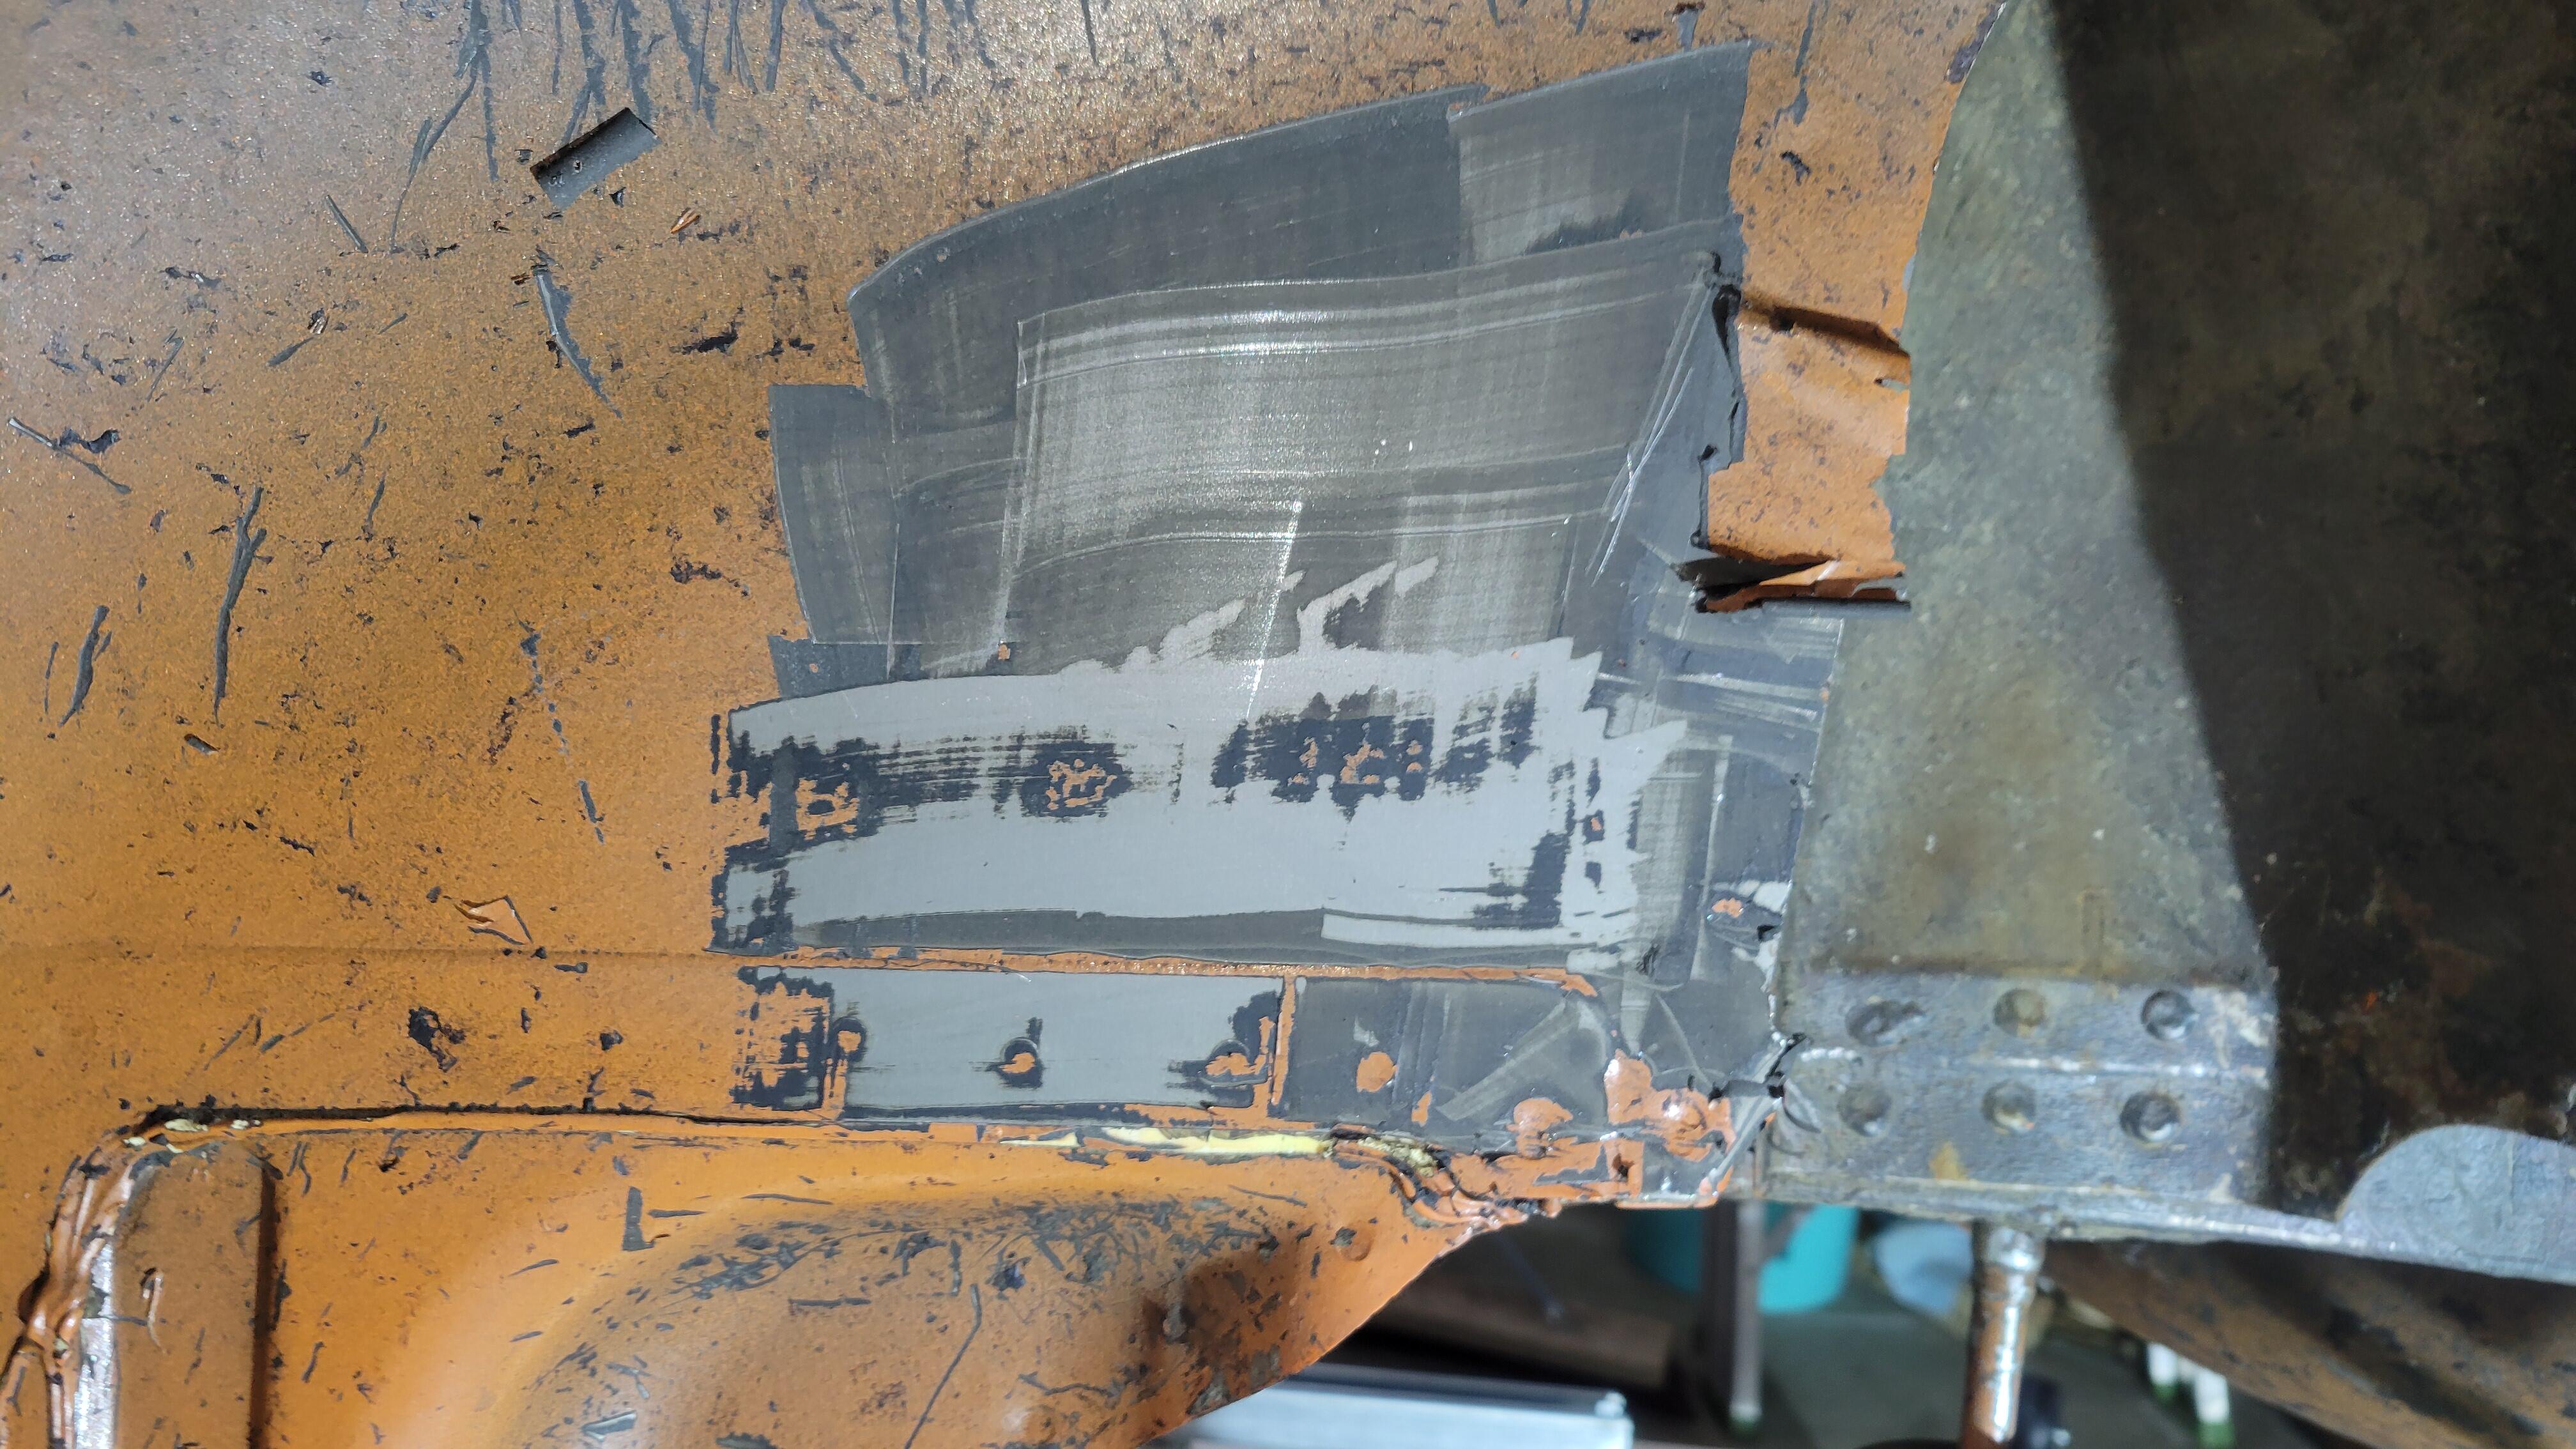
Very good work, I will be using this as a reference when I get there on my resto. You're lucky that the clips were in good shape, most of mine are not salvageable. Hopefully I can find some. Here is my before, hopefully my after will look at least half as good as yours.

-
Is this a one time move? You might consider shrink wrapping if someone offers that service near you. https://www.atlanticshrinkwrap.com/2019/04/30/i-need-to-ship-a-car-can-i-shrink-wrap-it-pasadena-maryland/
-
-
Hopefully these pics might help.


-
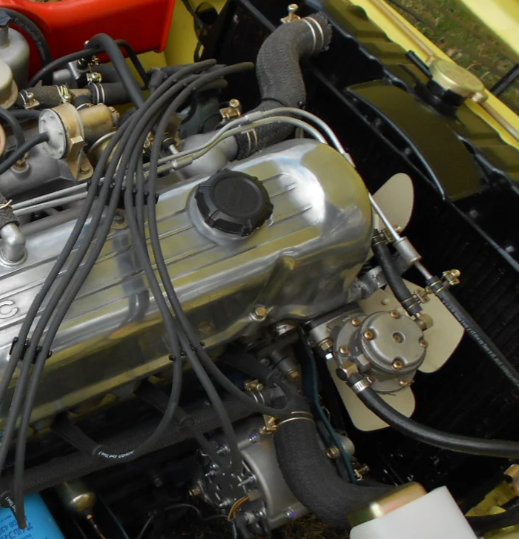
Here are some pictures before I removed the wiring harnesses from my 7/70.


.jpg.a56b32681c9cc8fe1016a9cc4a32054f.jpg)