CanTechZ
Member
-
Joined
-
Last visited
Everything posted by CanTechZ
-
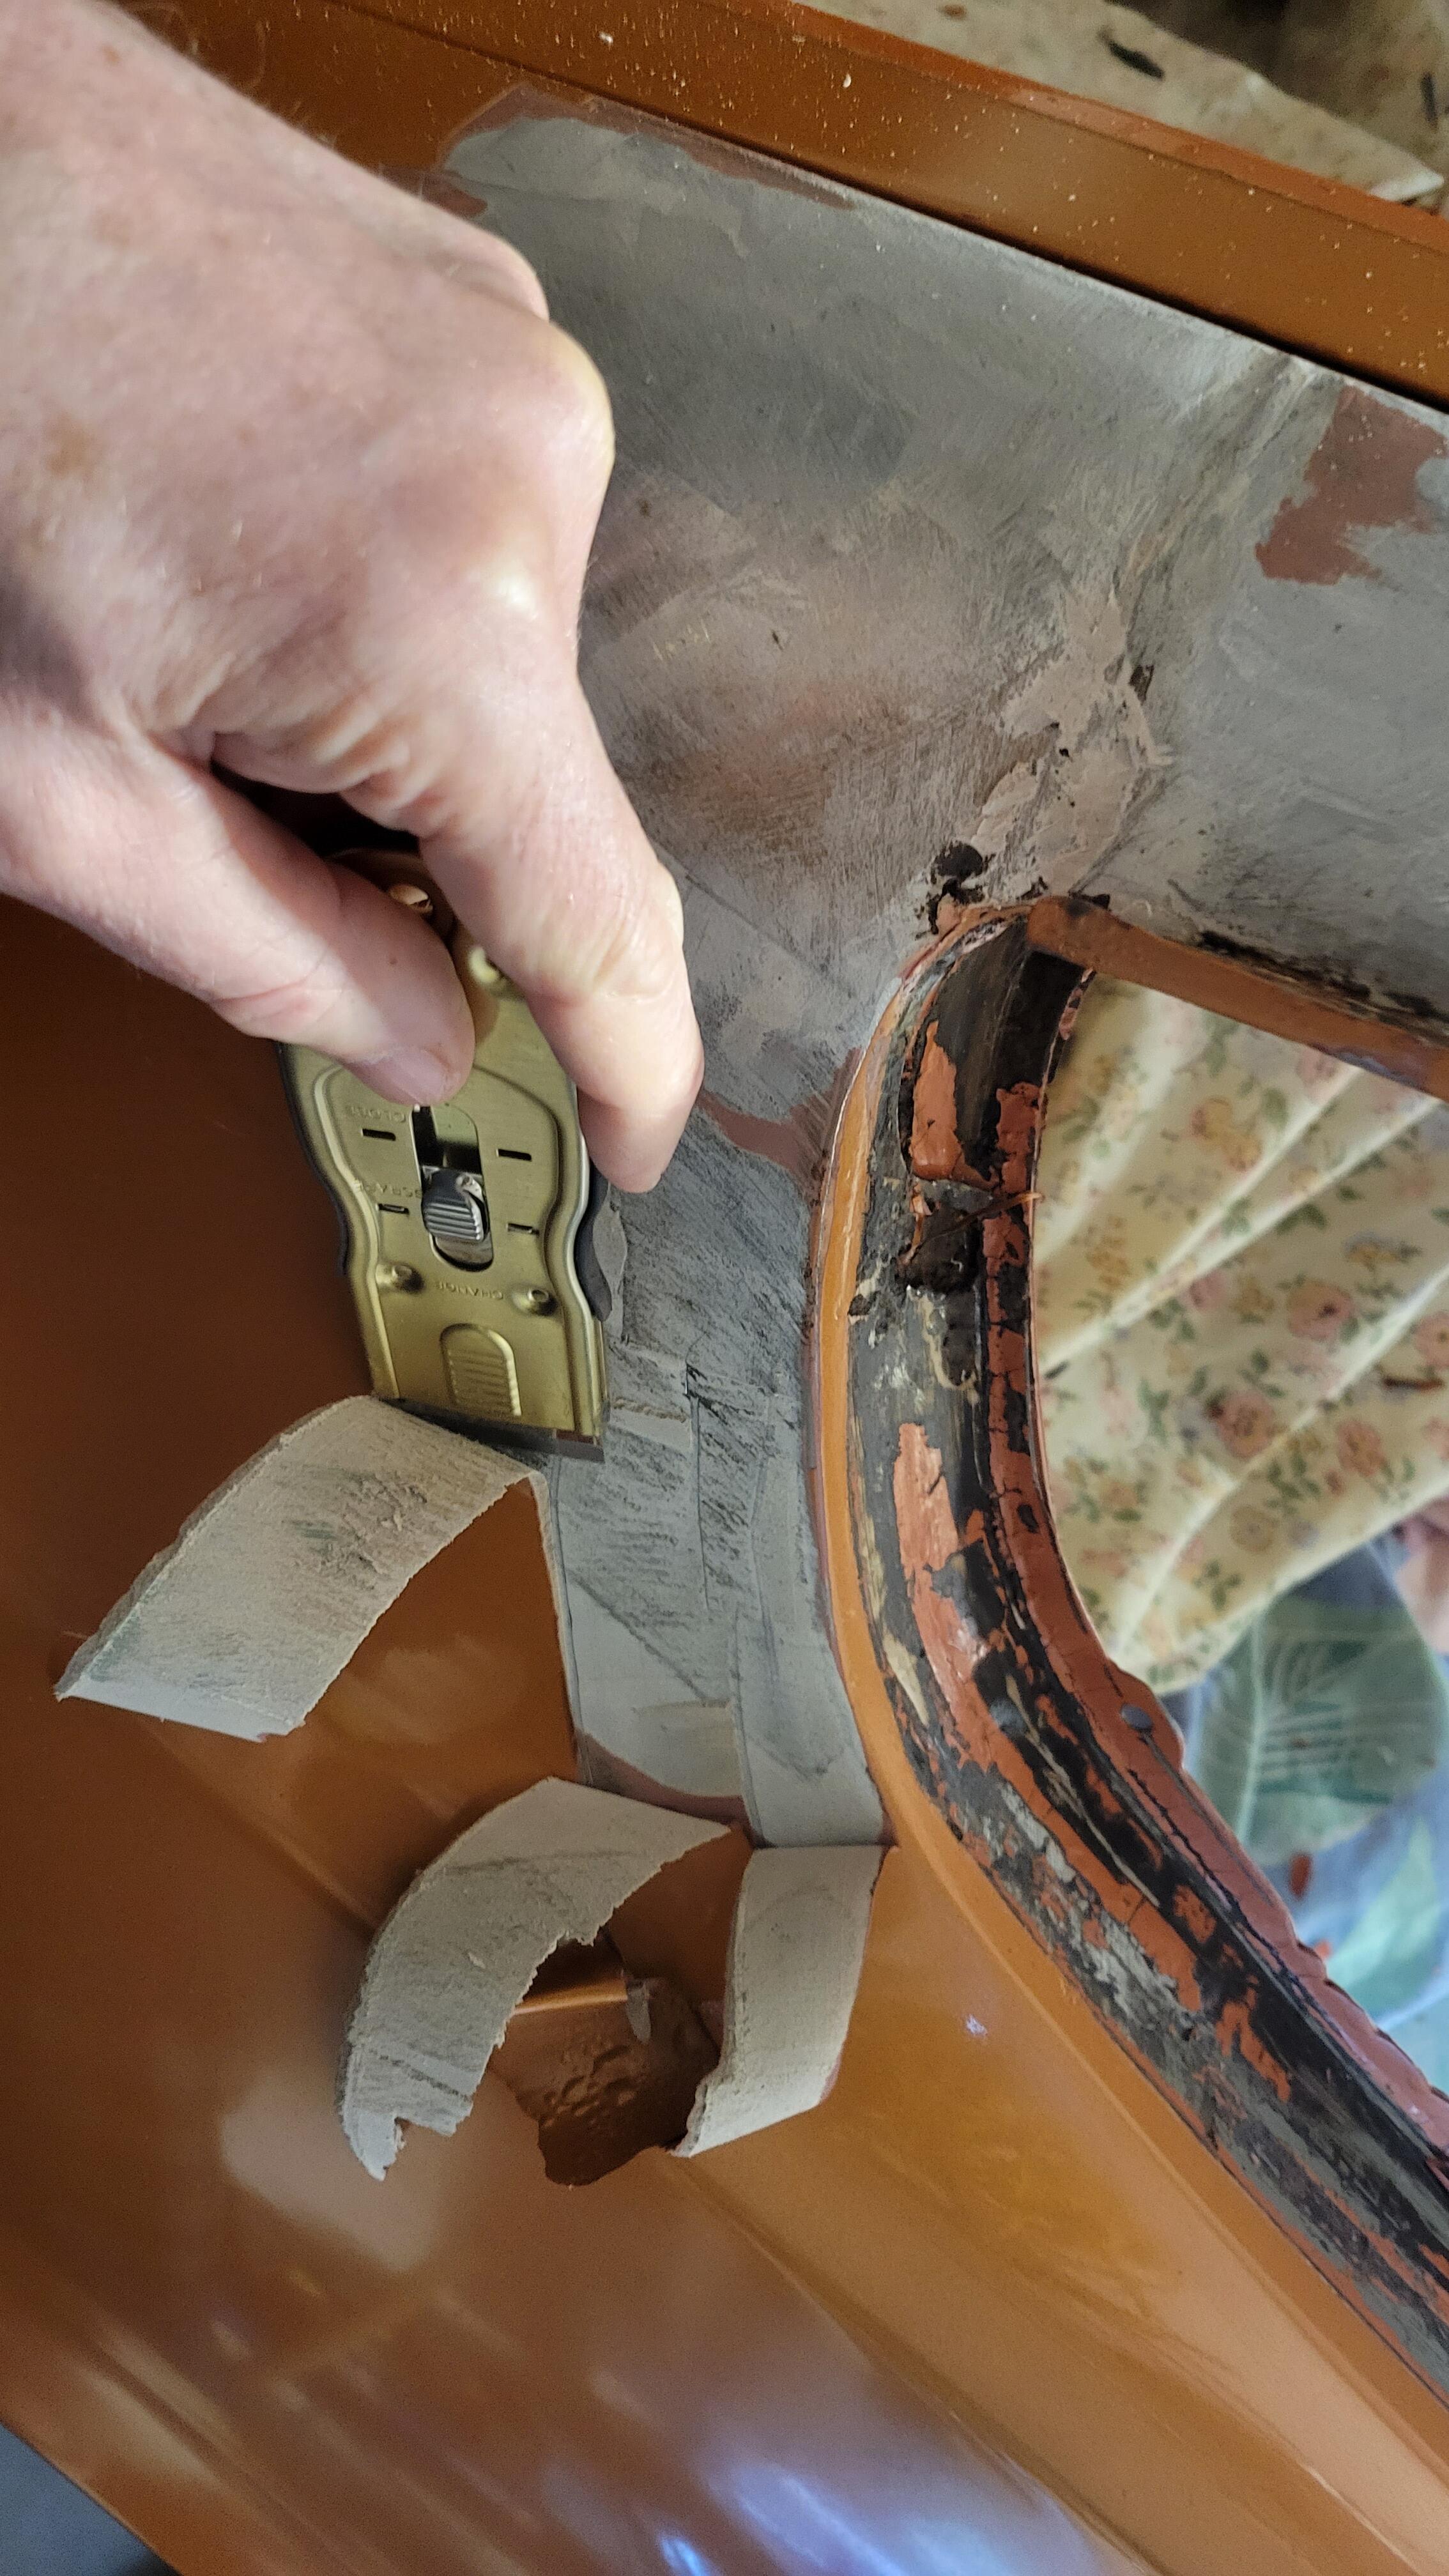
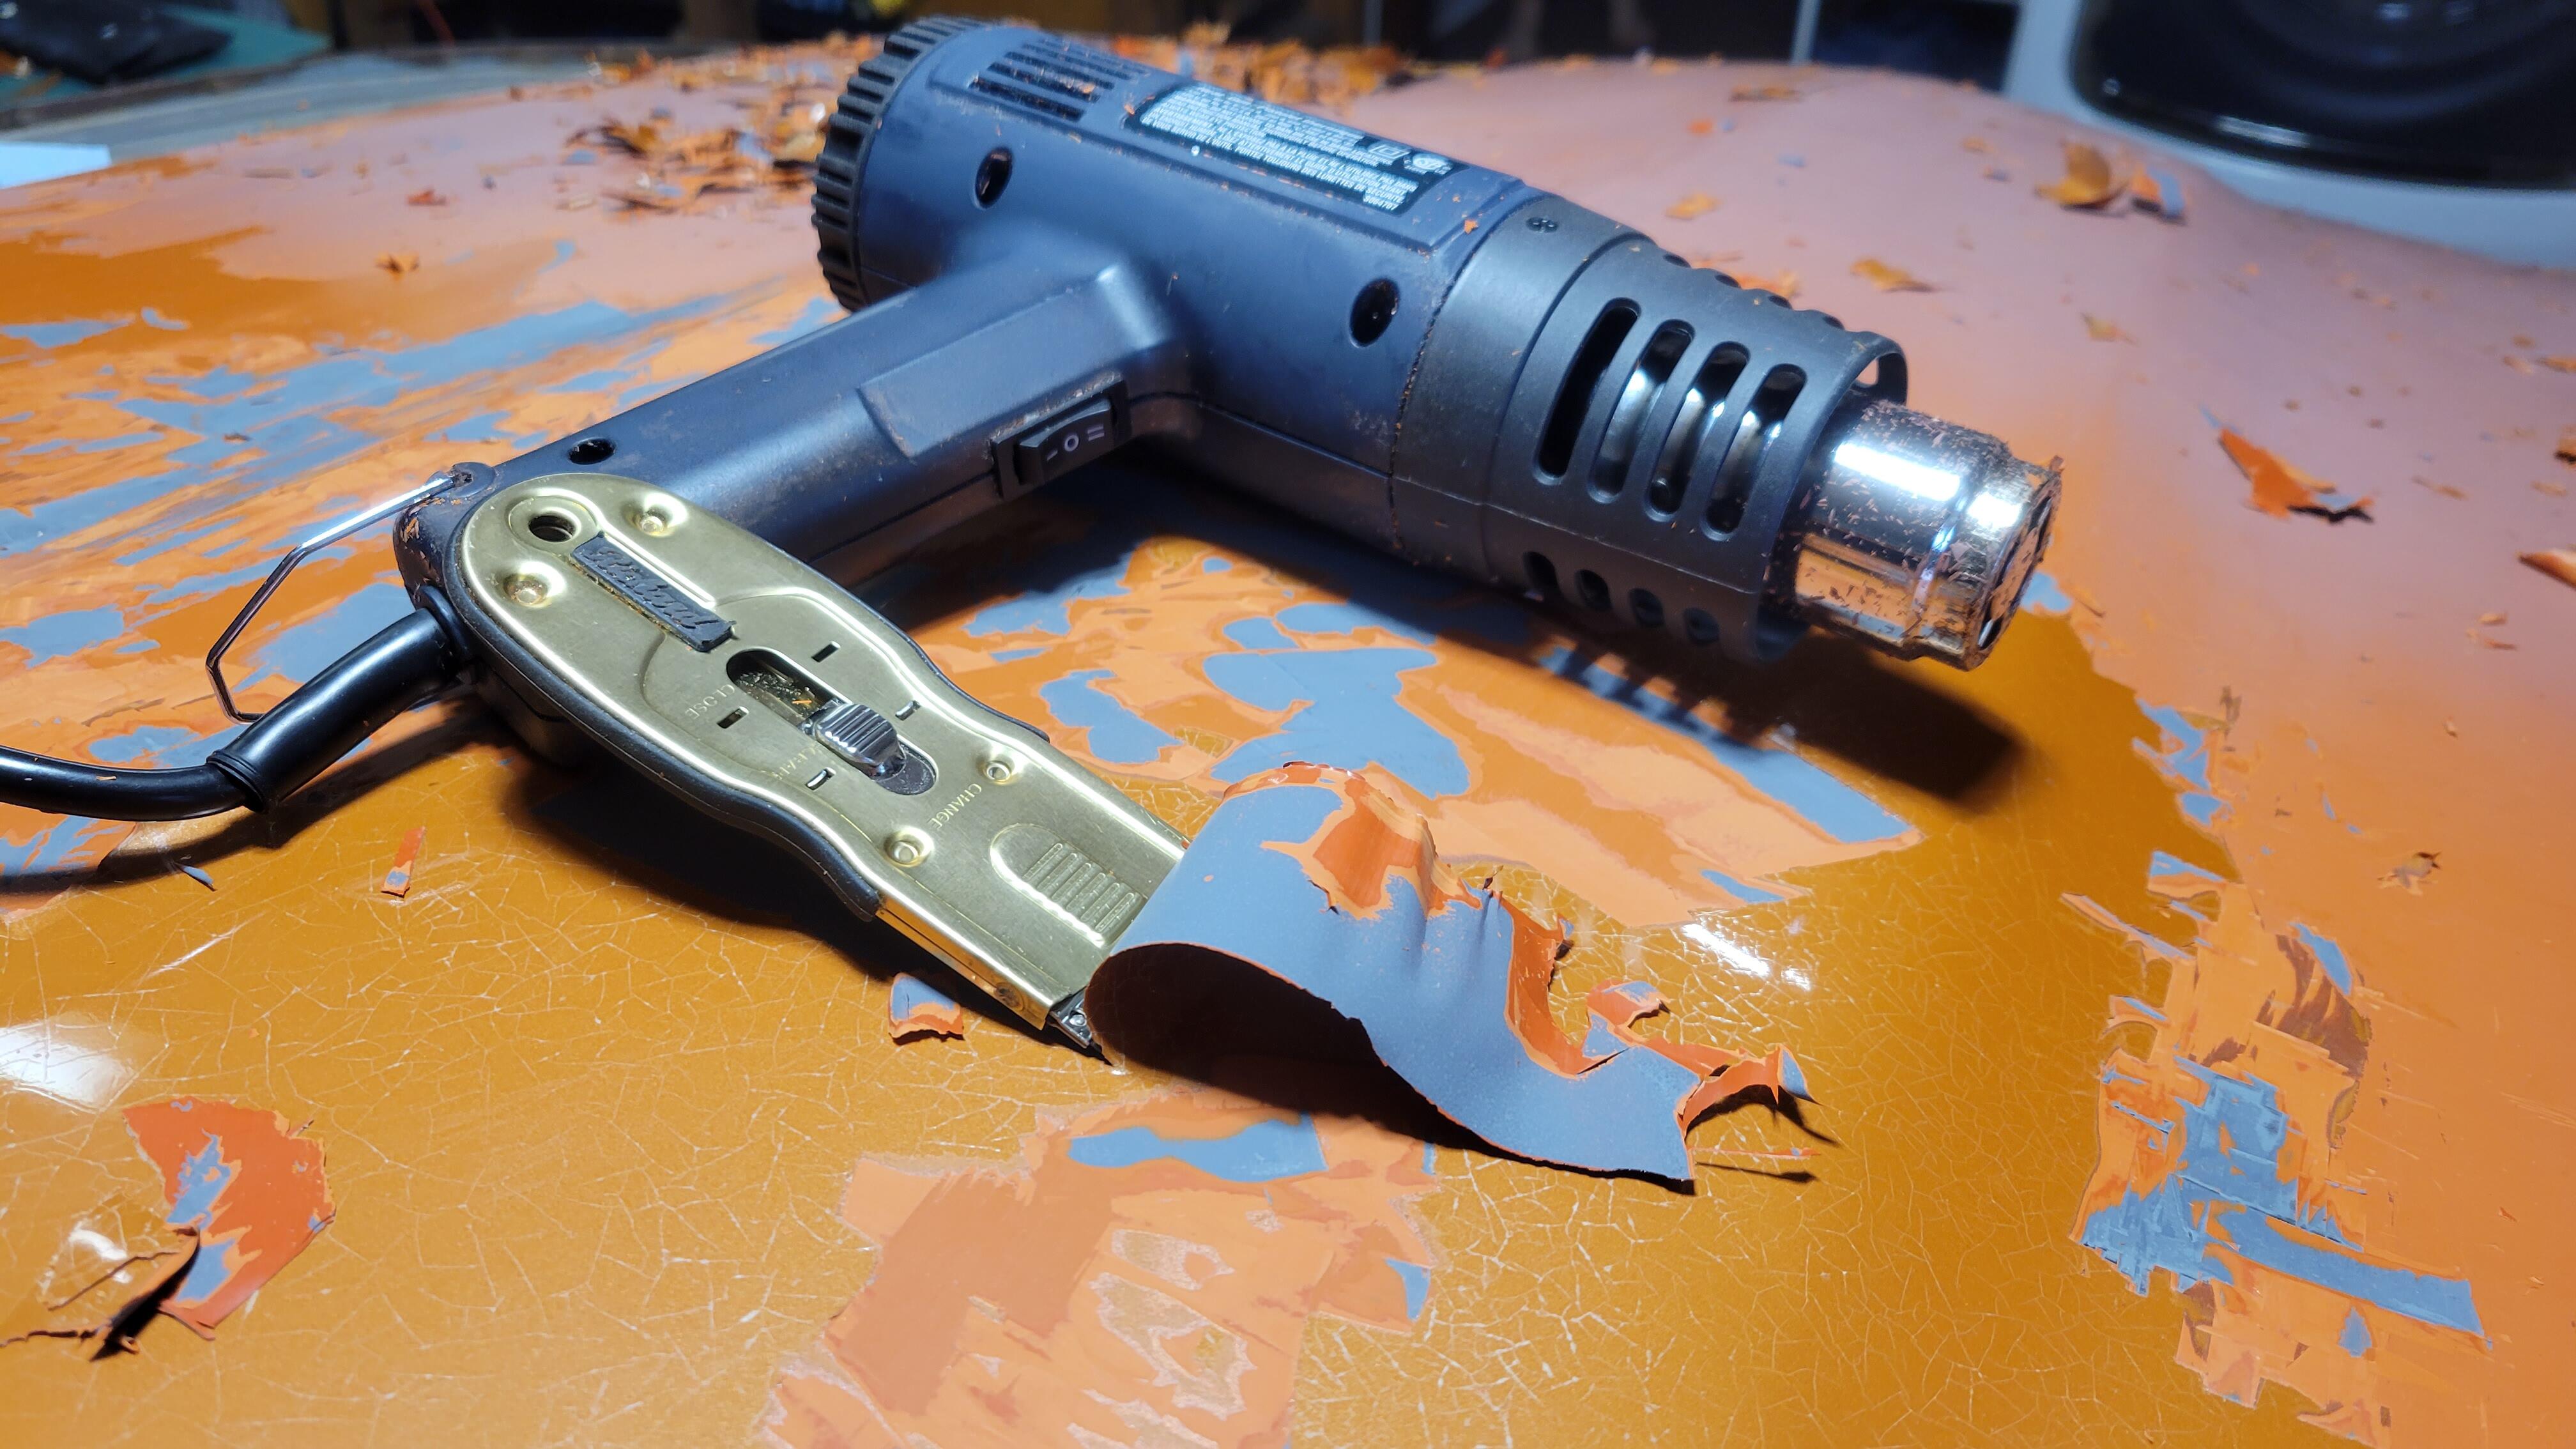
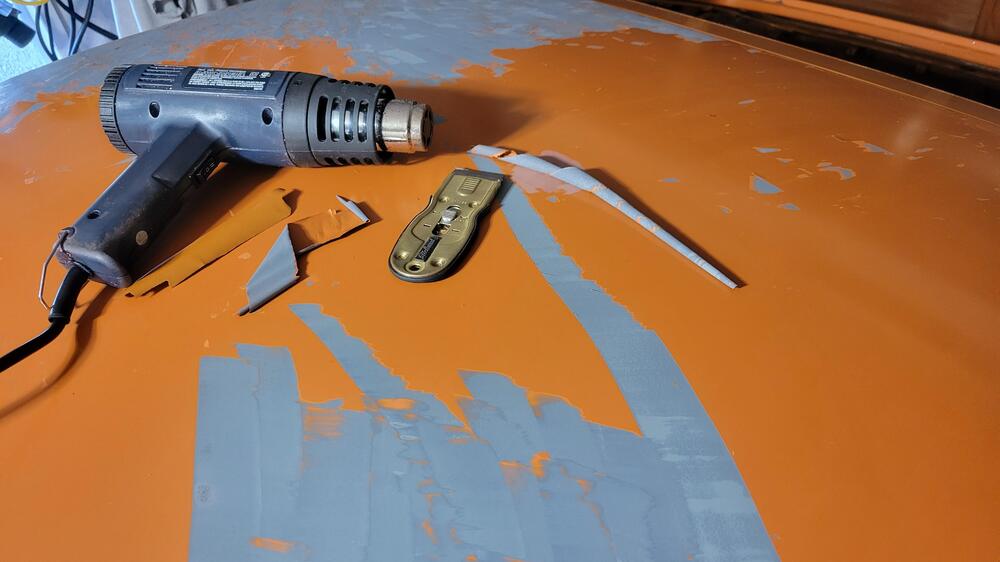
 I should expand on the low quality of the Titan import blades from Amazon. It's not only that they don't last as long, but how they wear as well. They don't seem to wear evenly and loose sharpness on part of the edge, this makes it difficult to make even straight cuts. The blade wants to turn and tends to gouge, especially on concave curved surfaces. If anyone tries this method also make sure to use only enough heat to slightly soften the paint, especially on flat areas like the hood. I found that on flat areas if I couldn't hold my hand on the heated surface for at least 3 to 5 seconds, it was too hot. Good to move around quite bit. It's surprising how little heat it takes to warp the metal.
 -
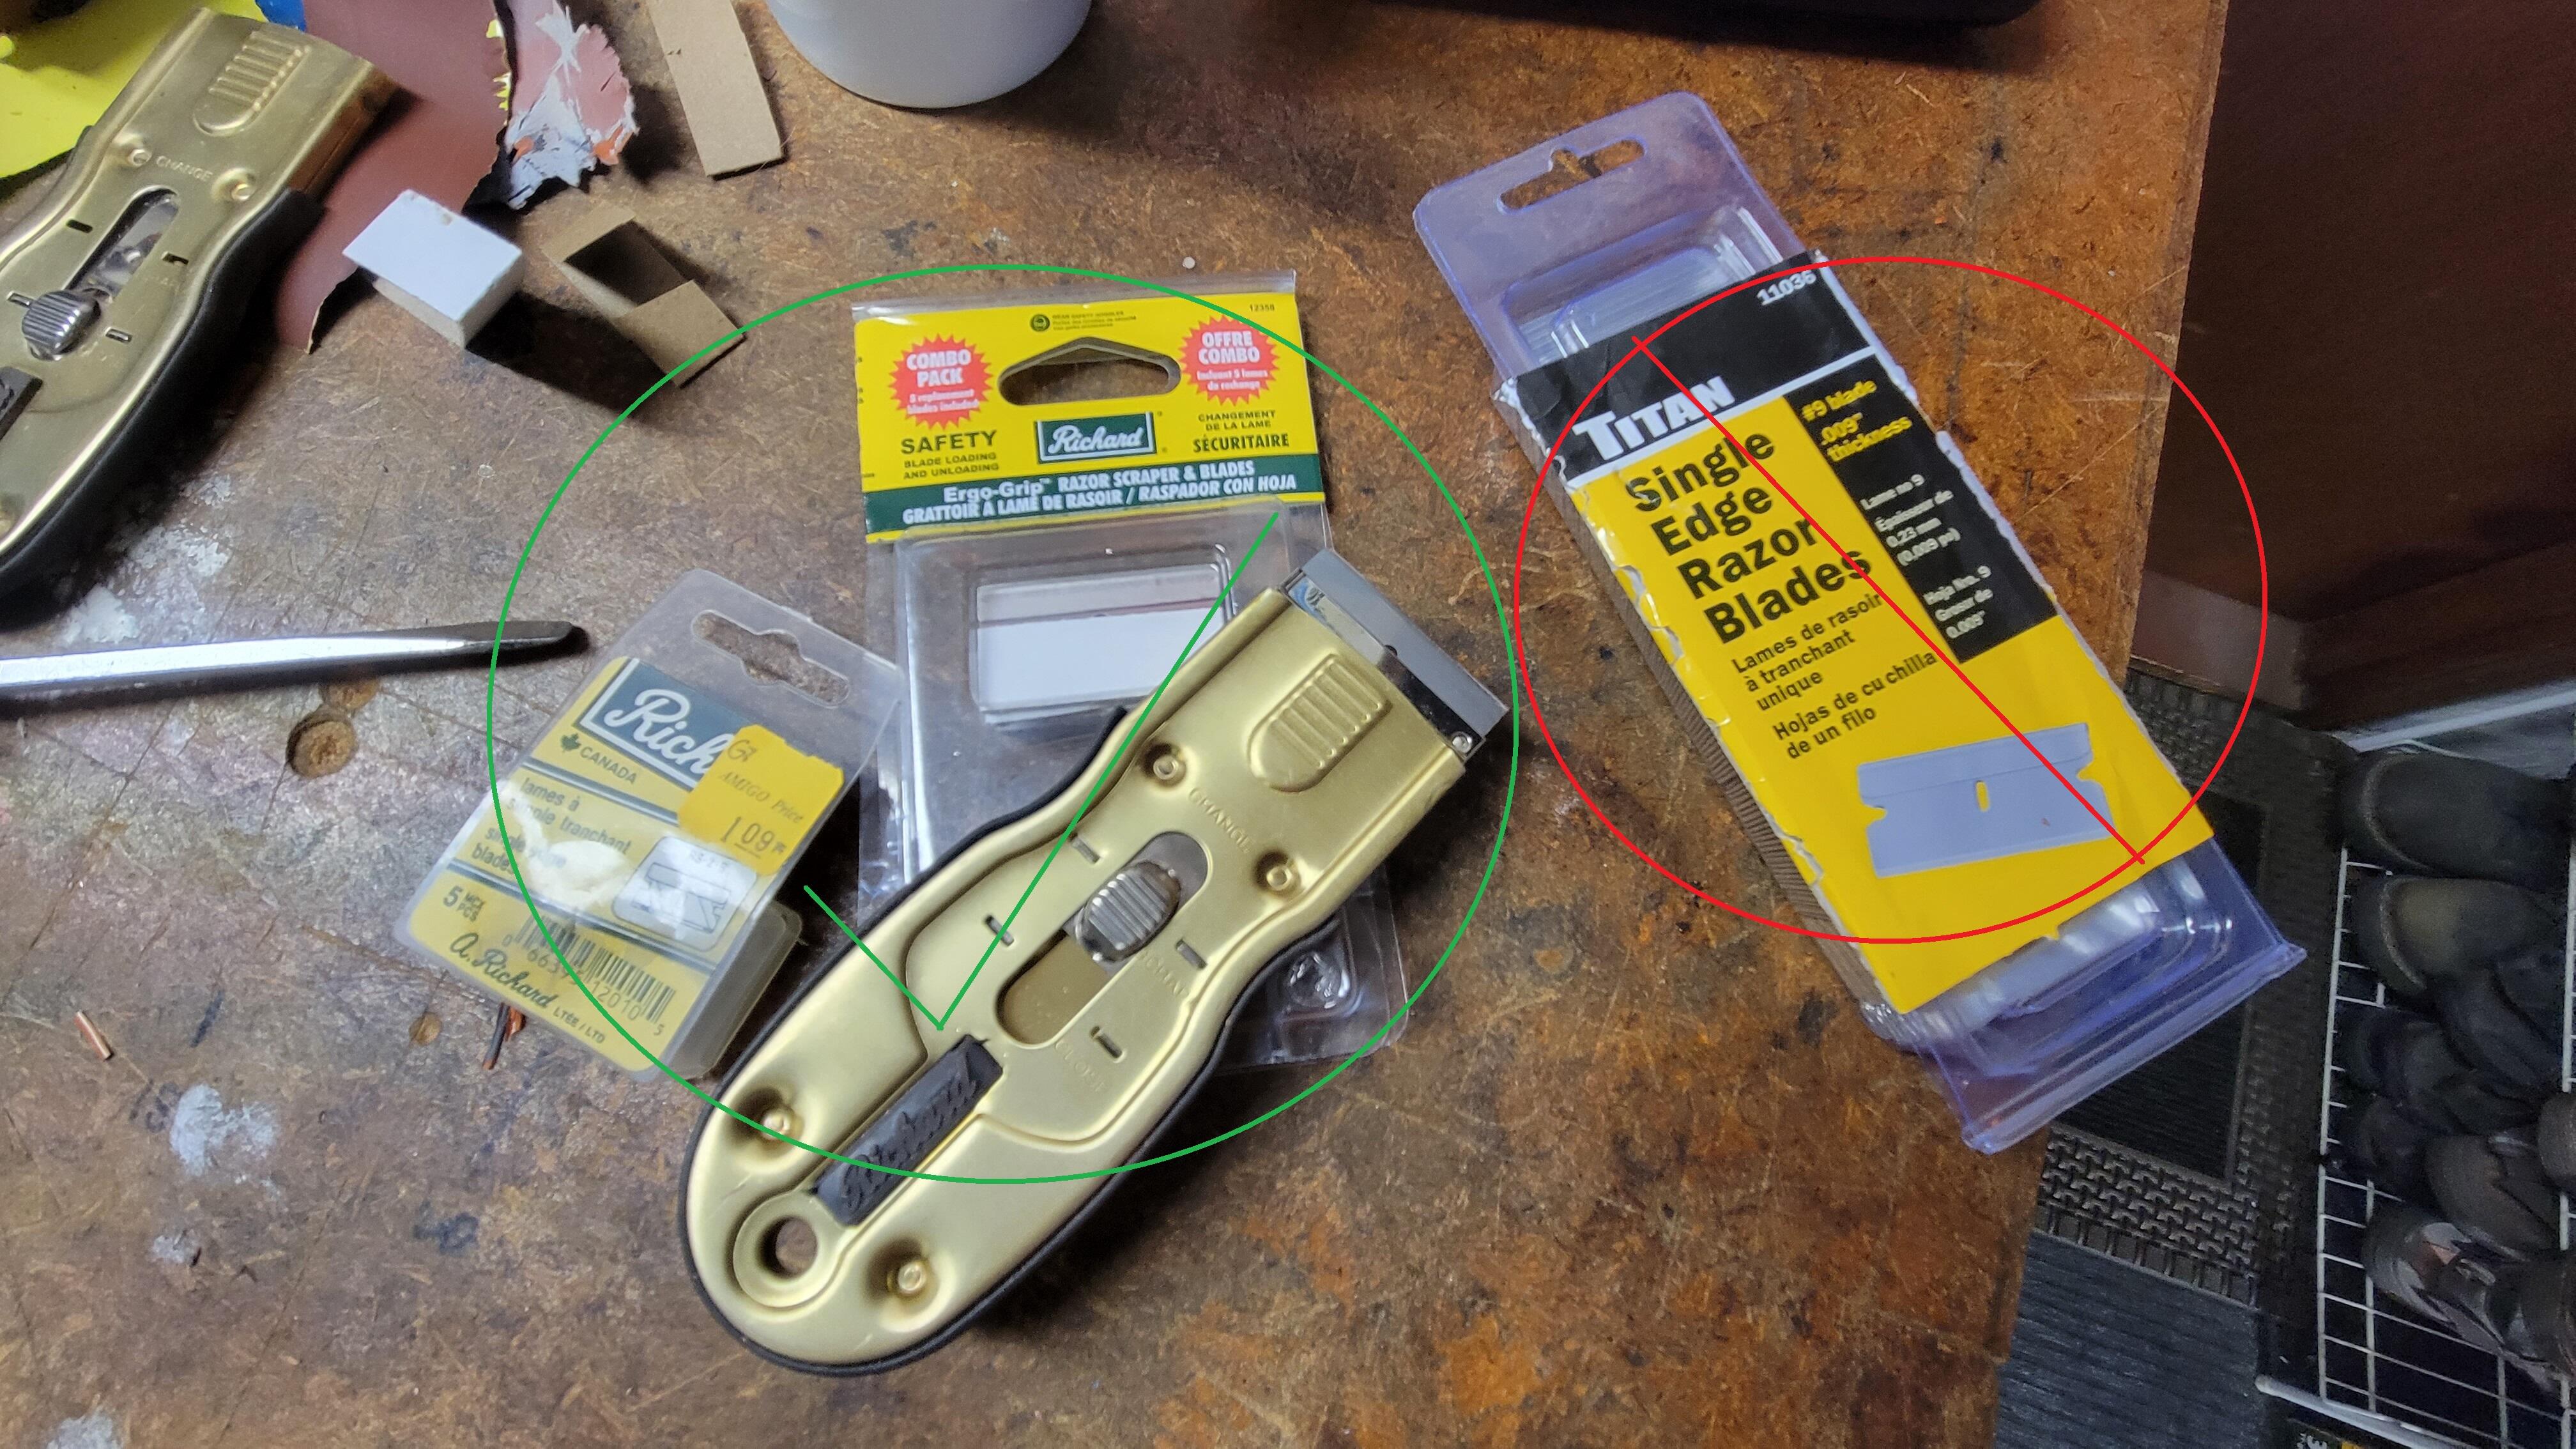
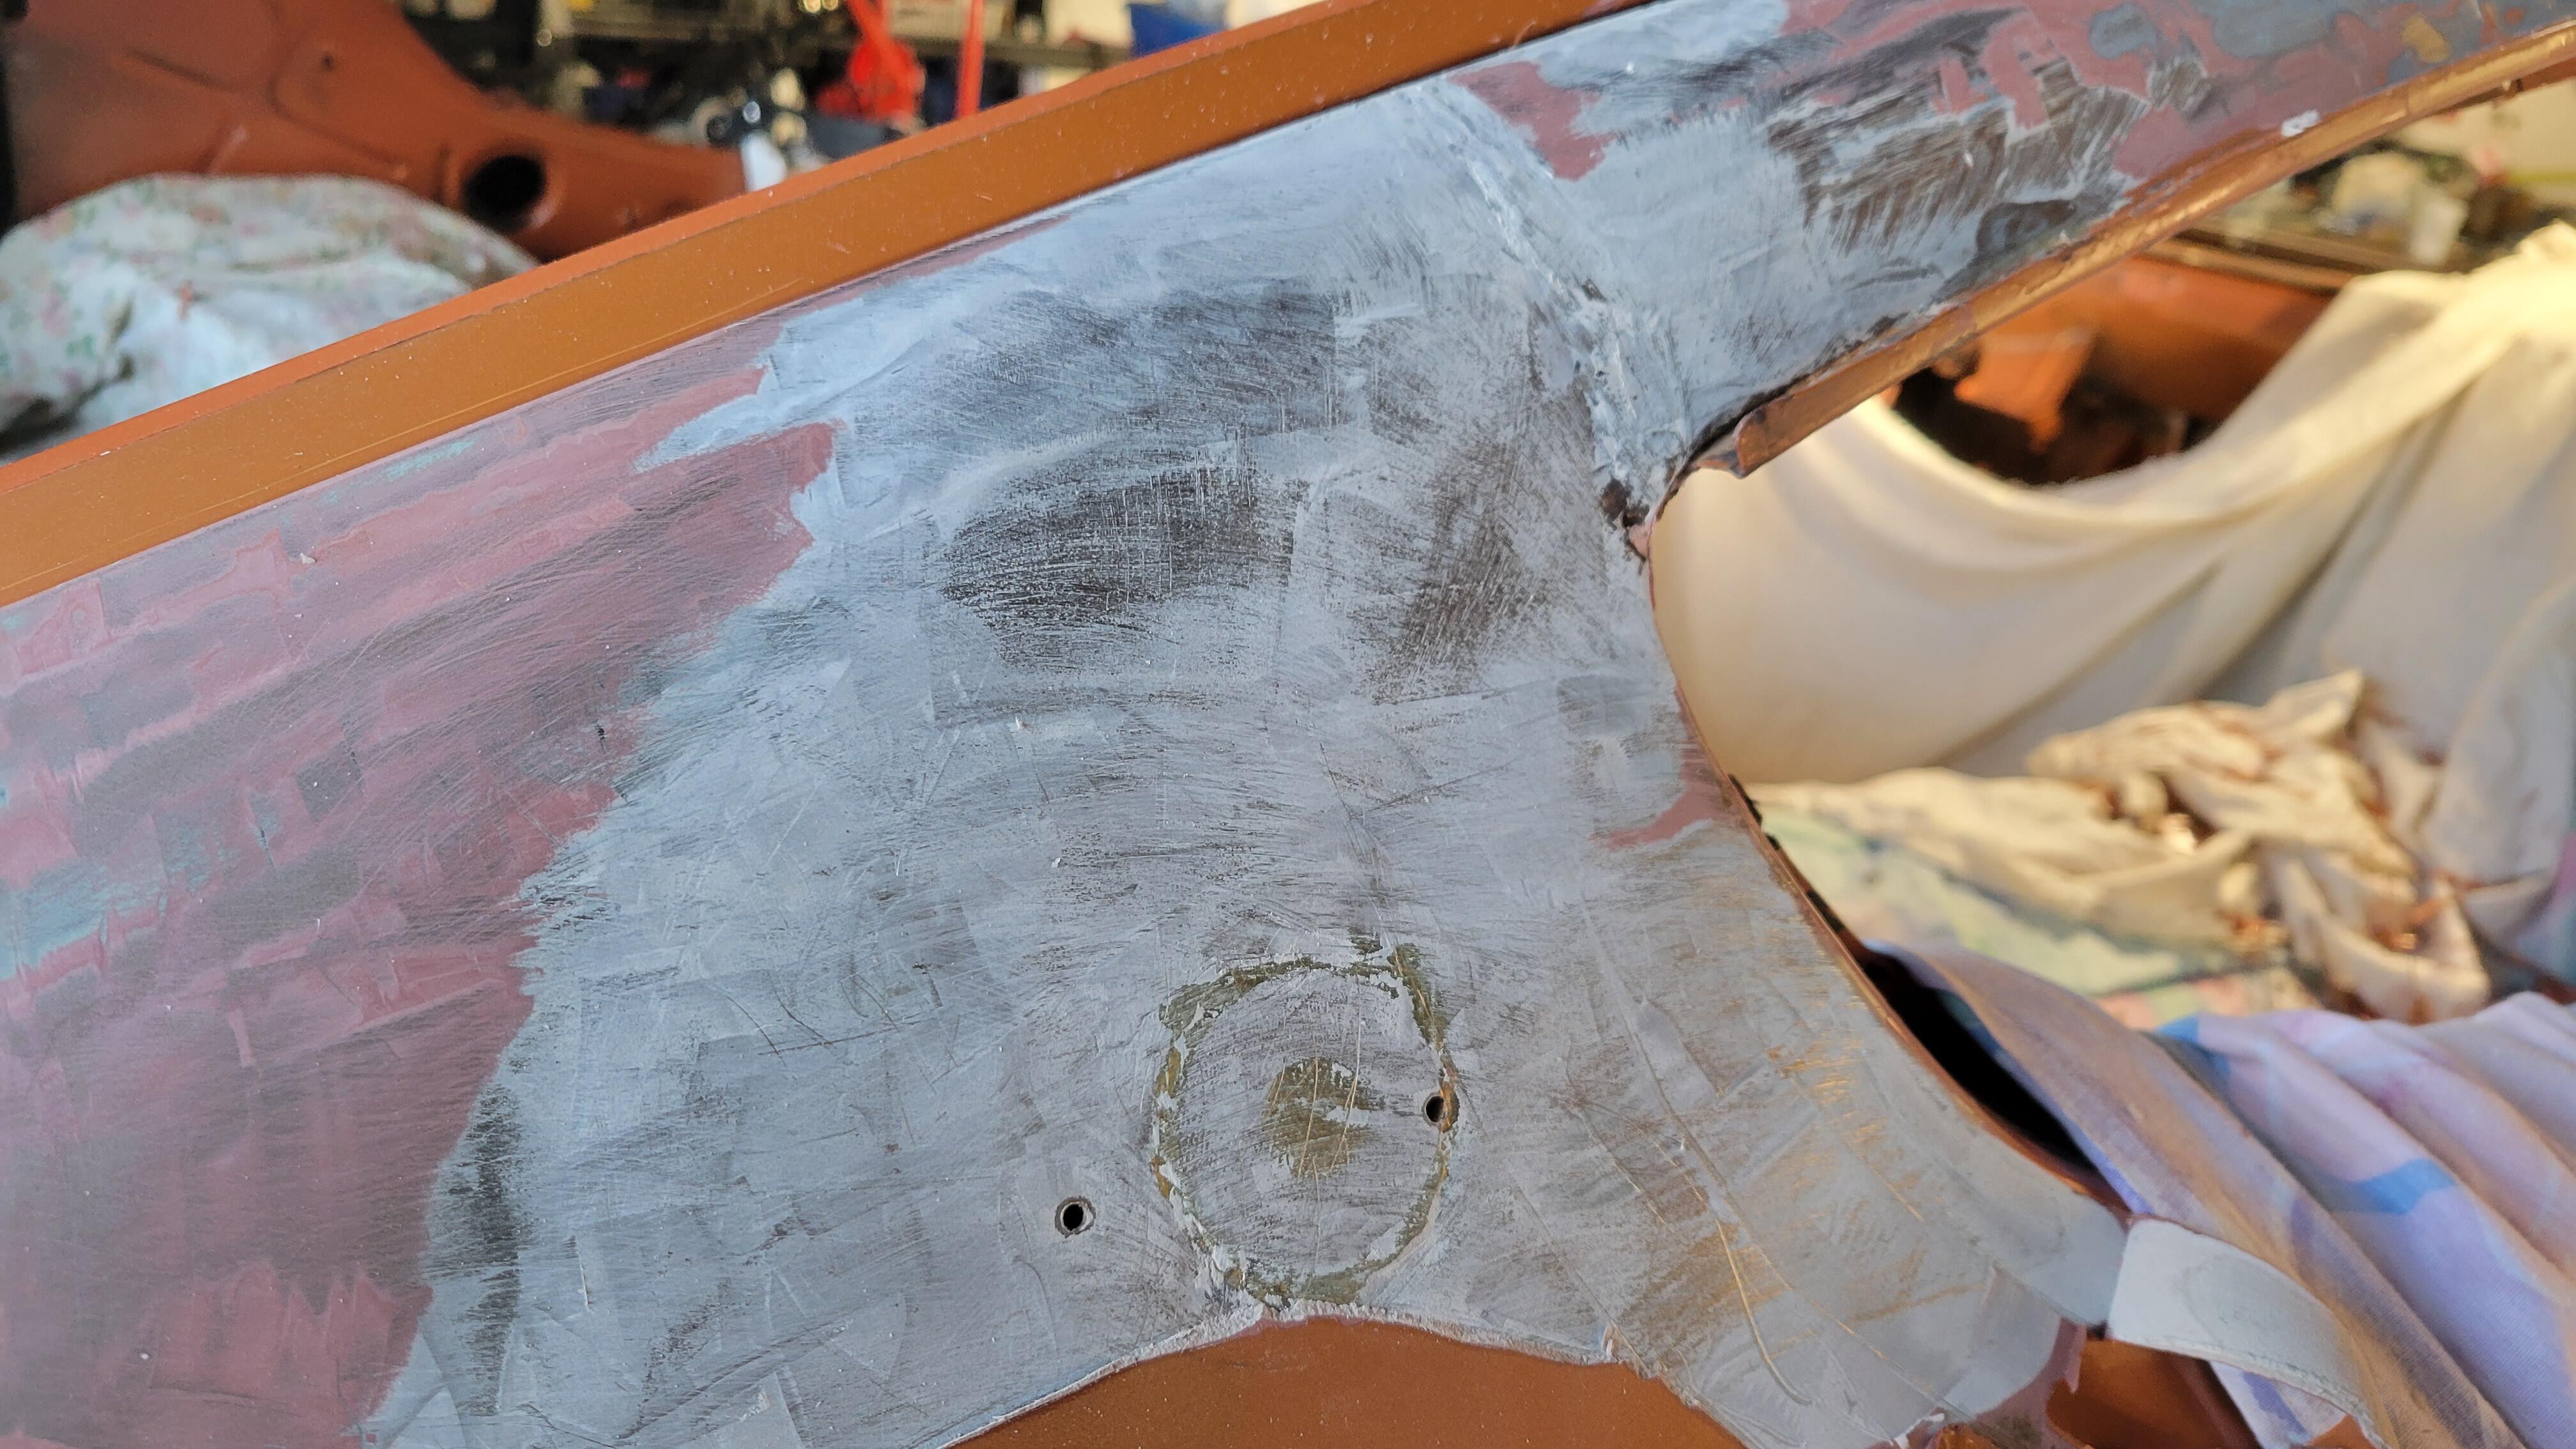
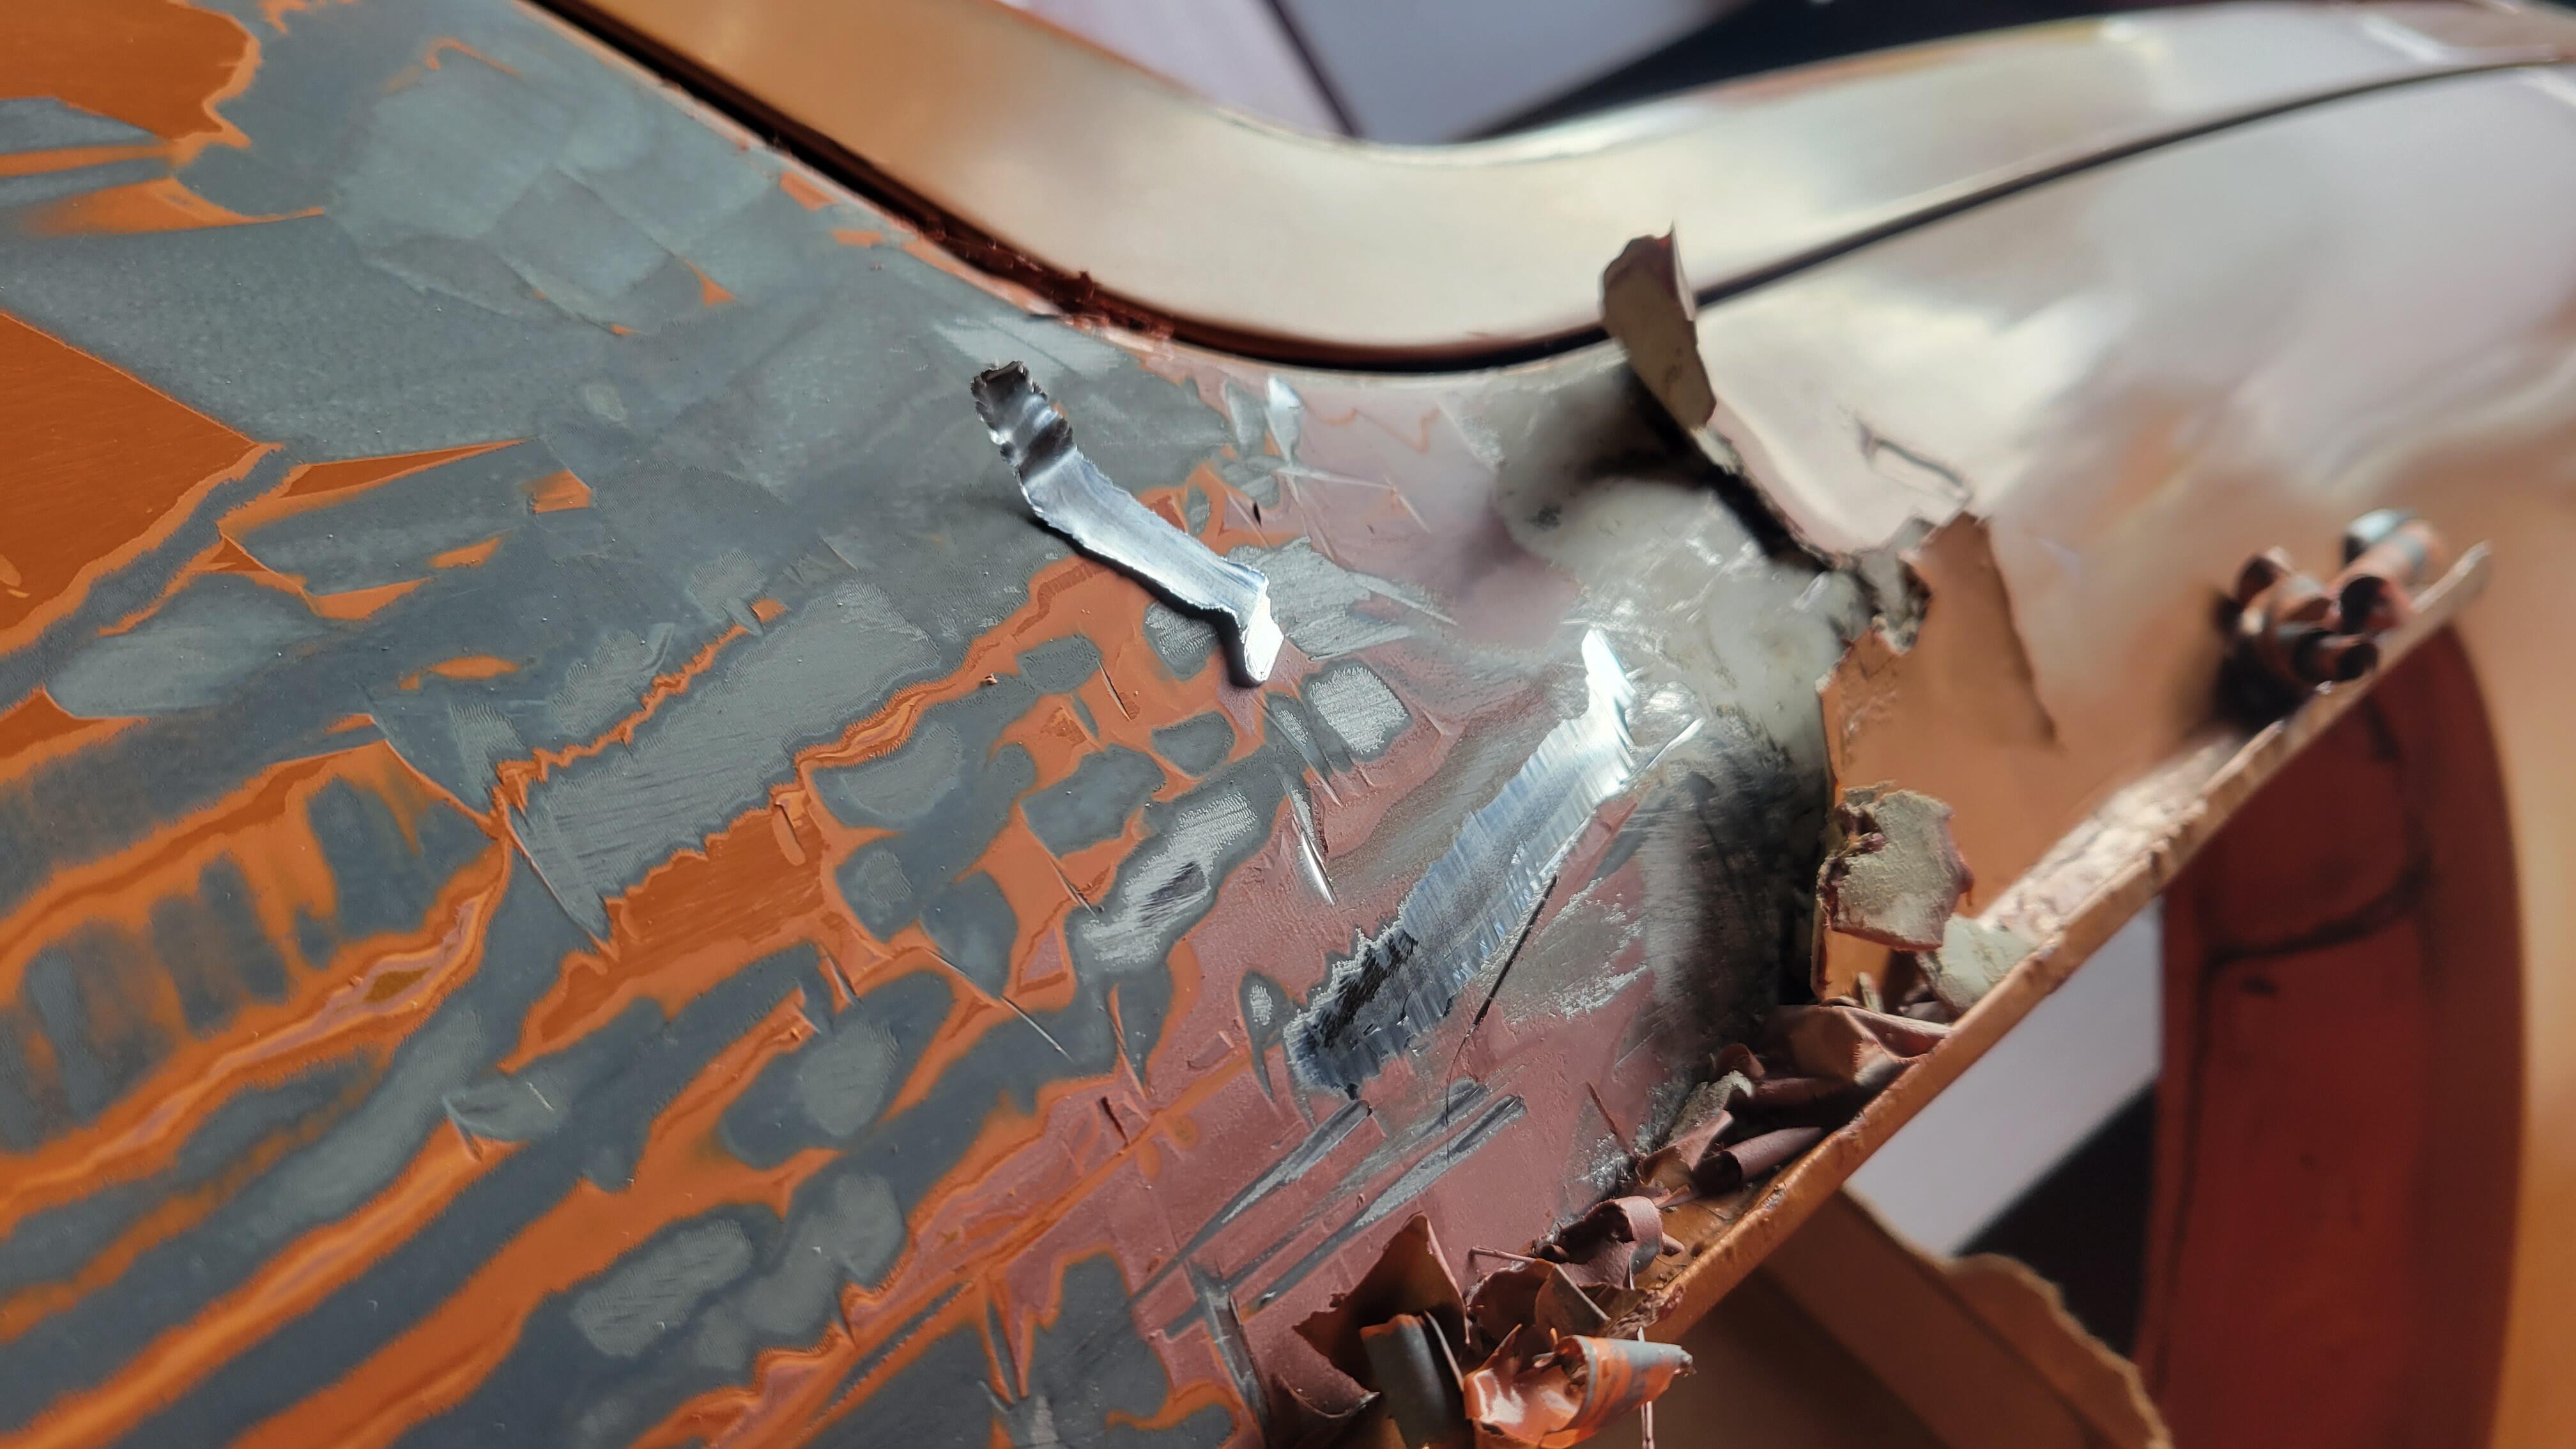
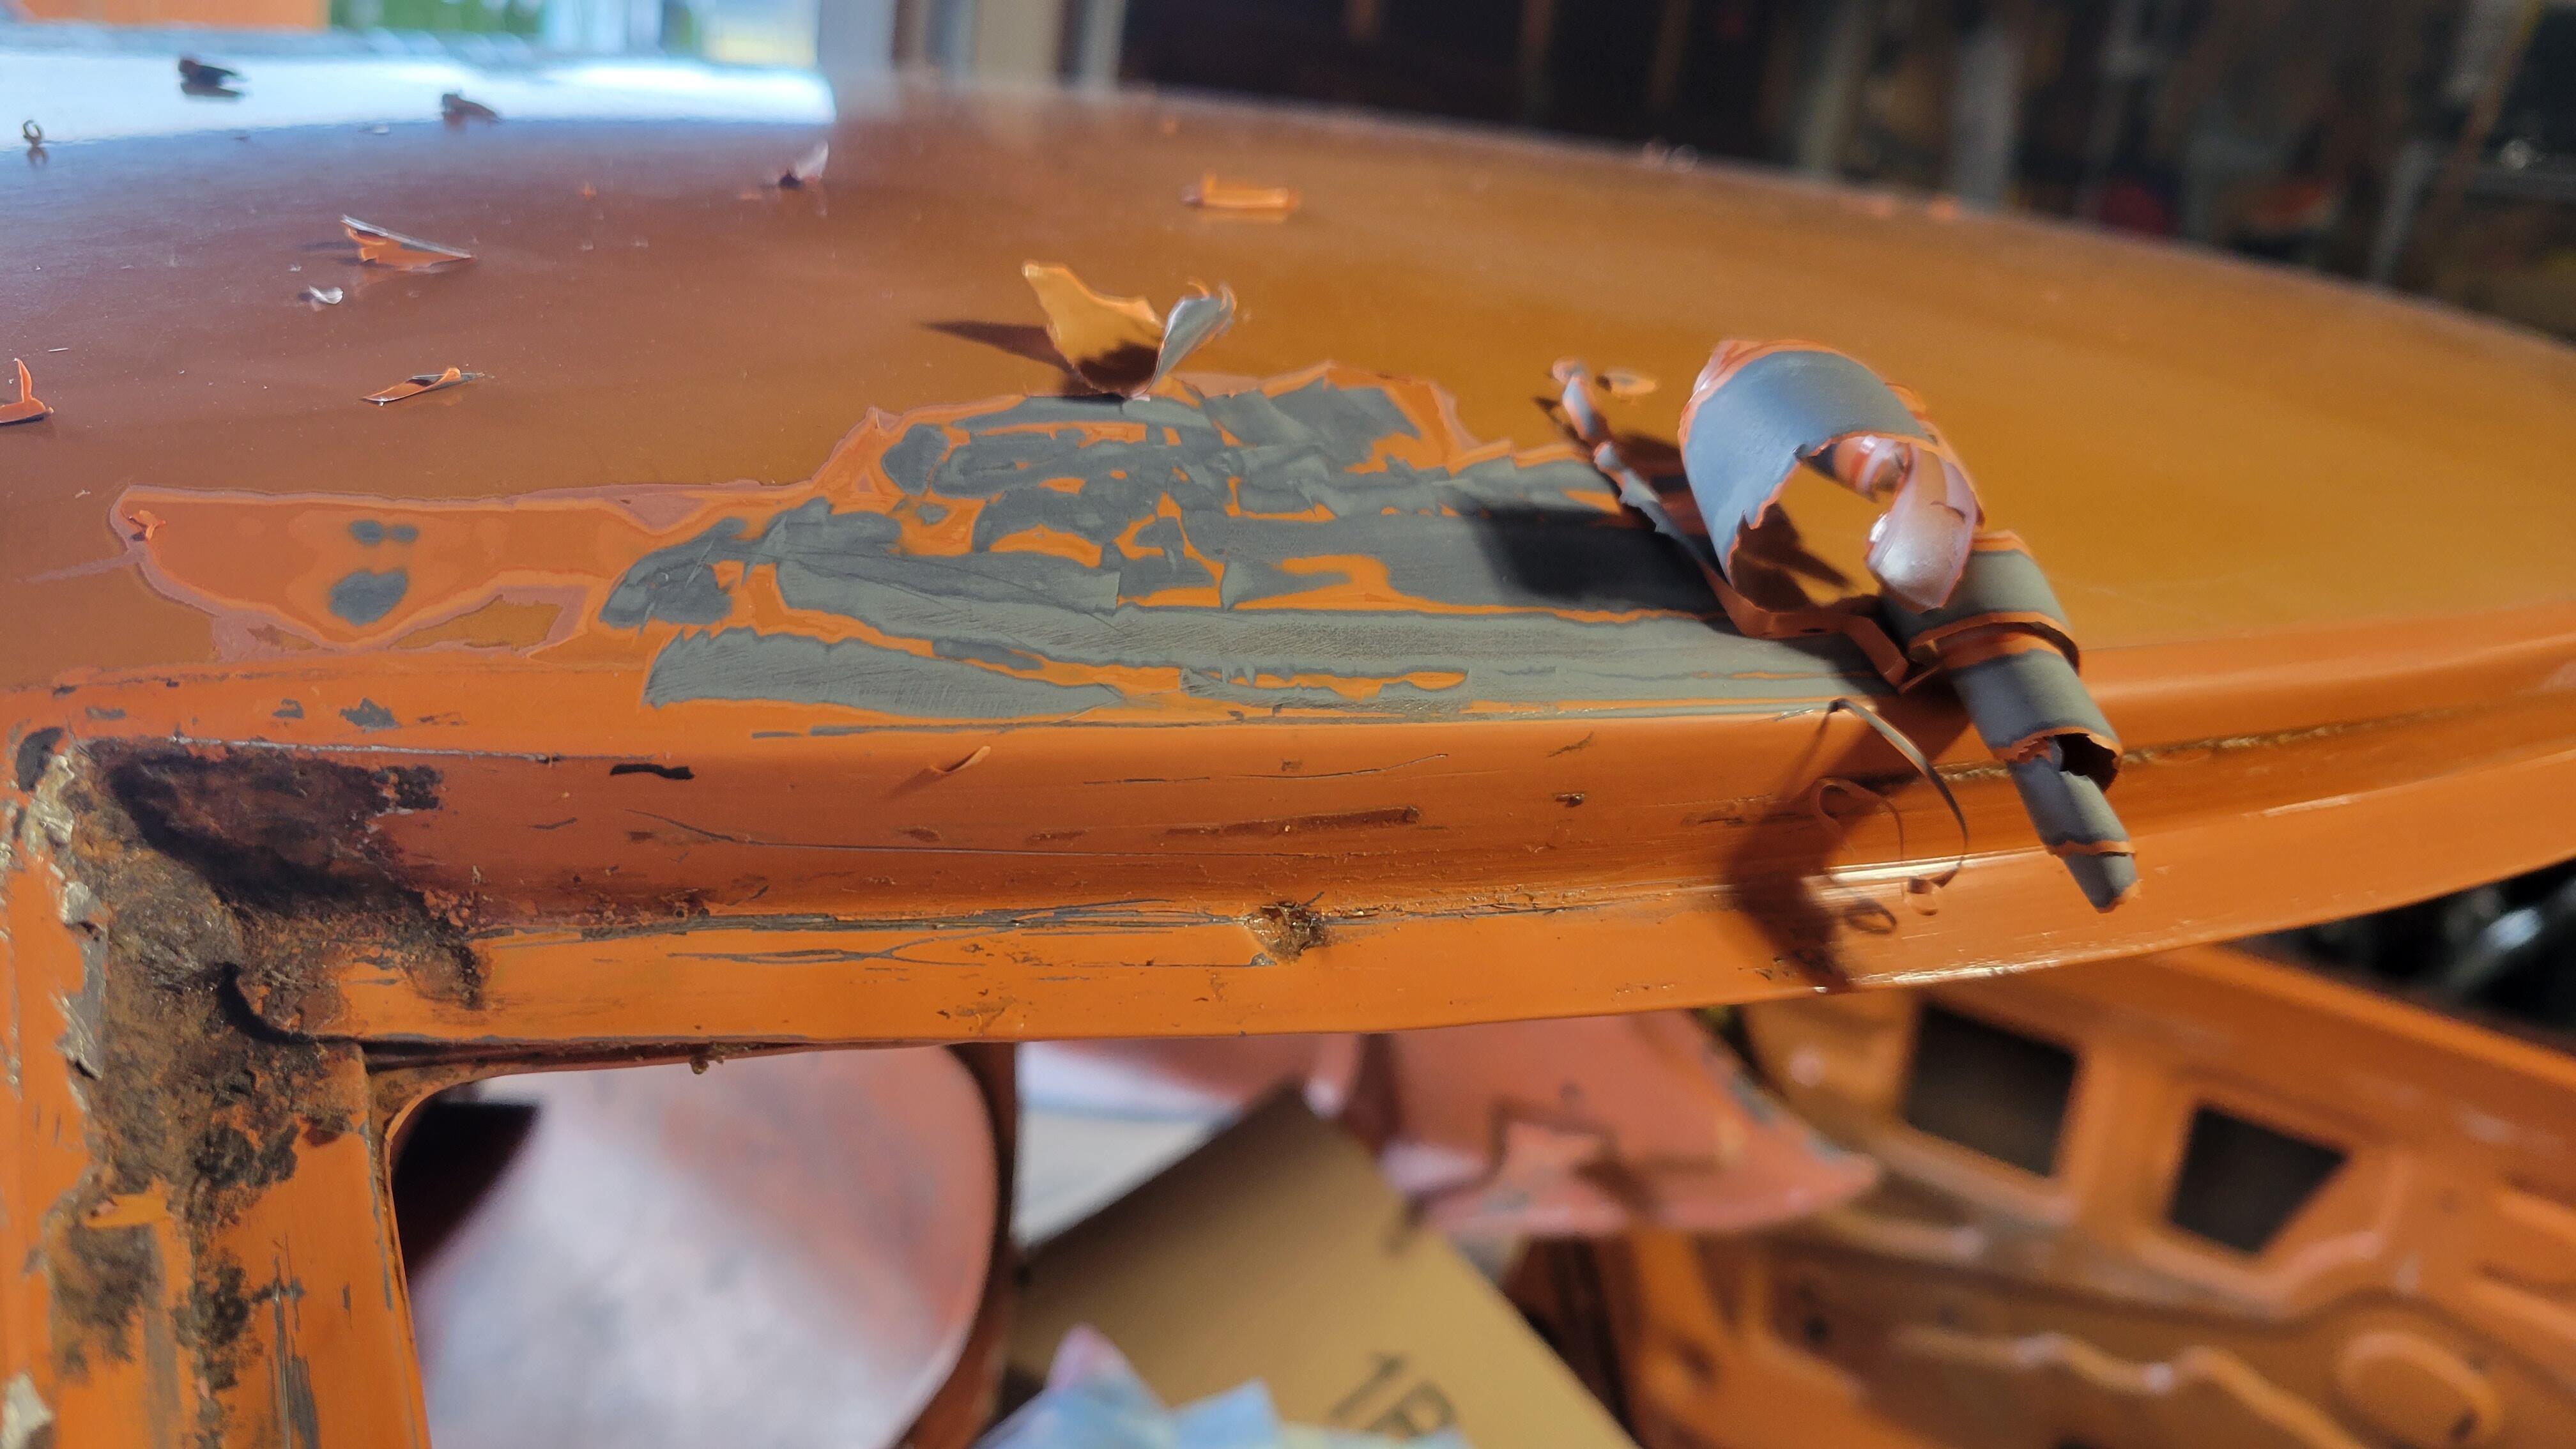
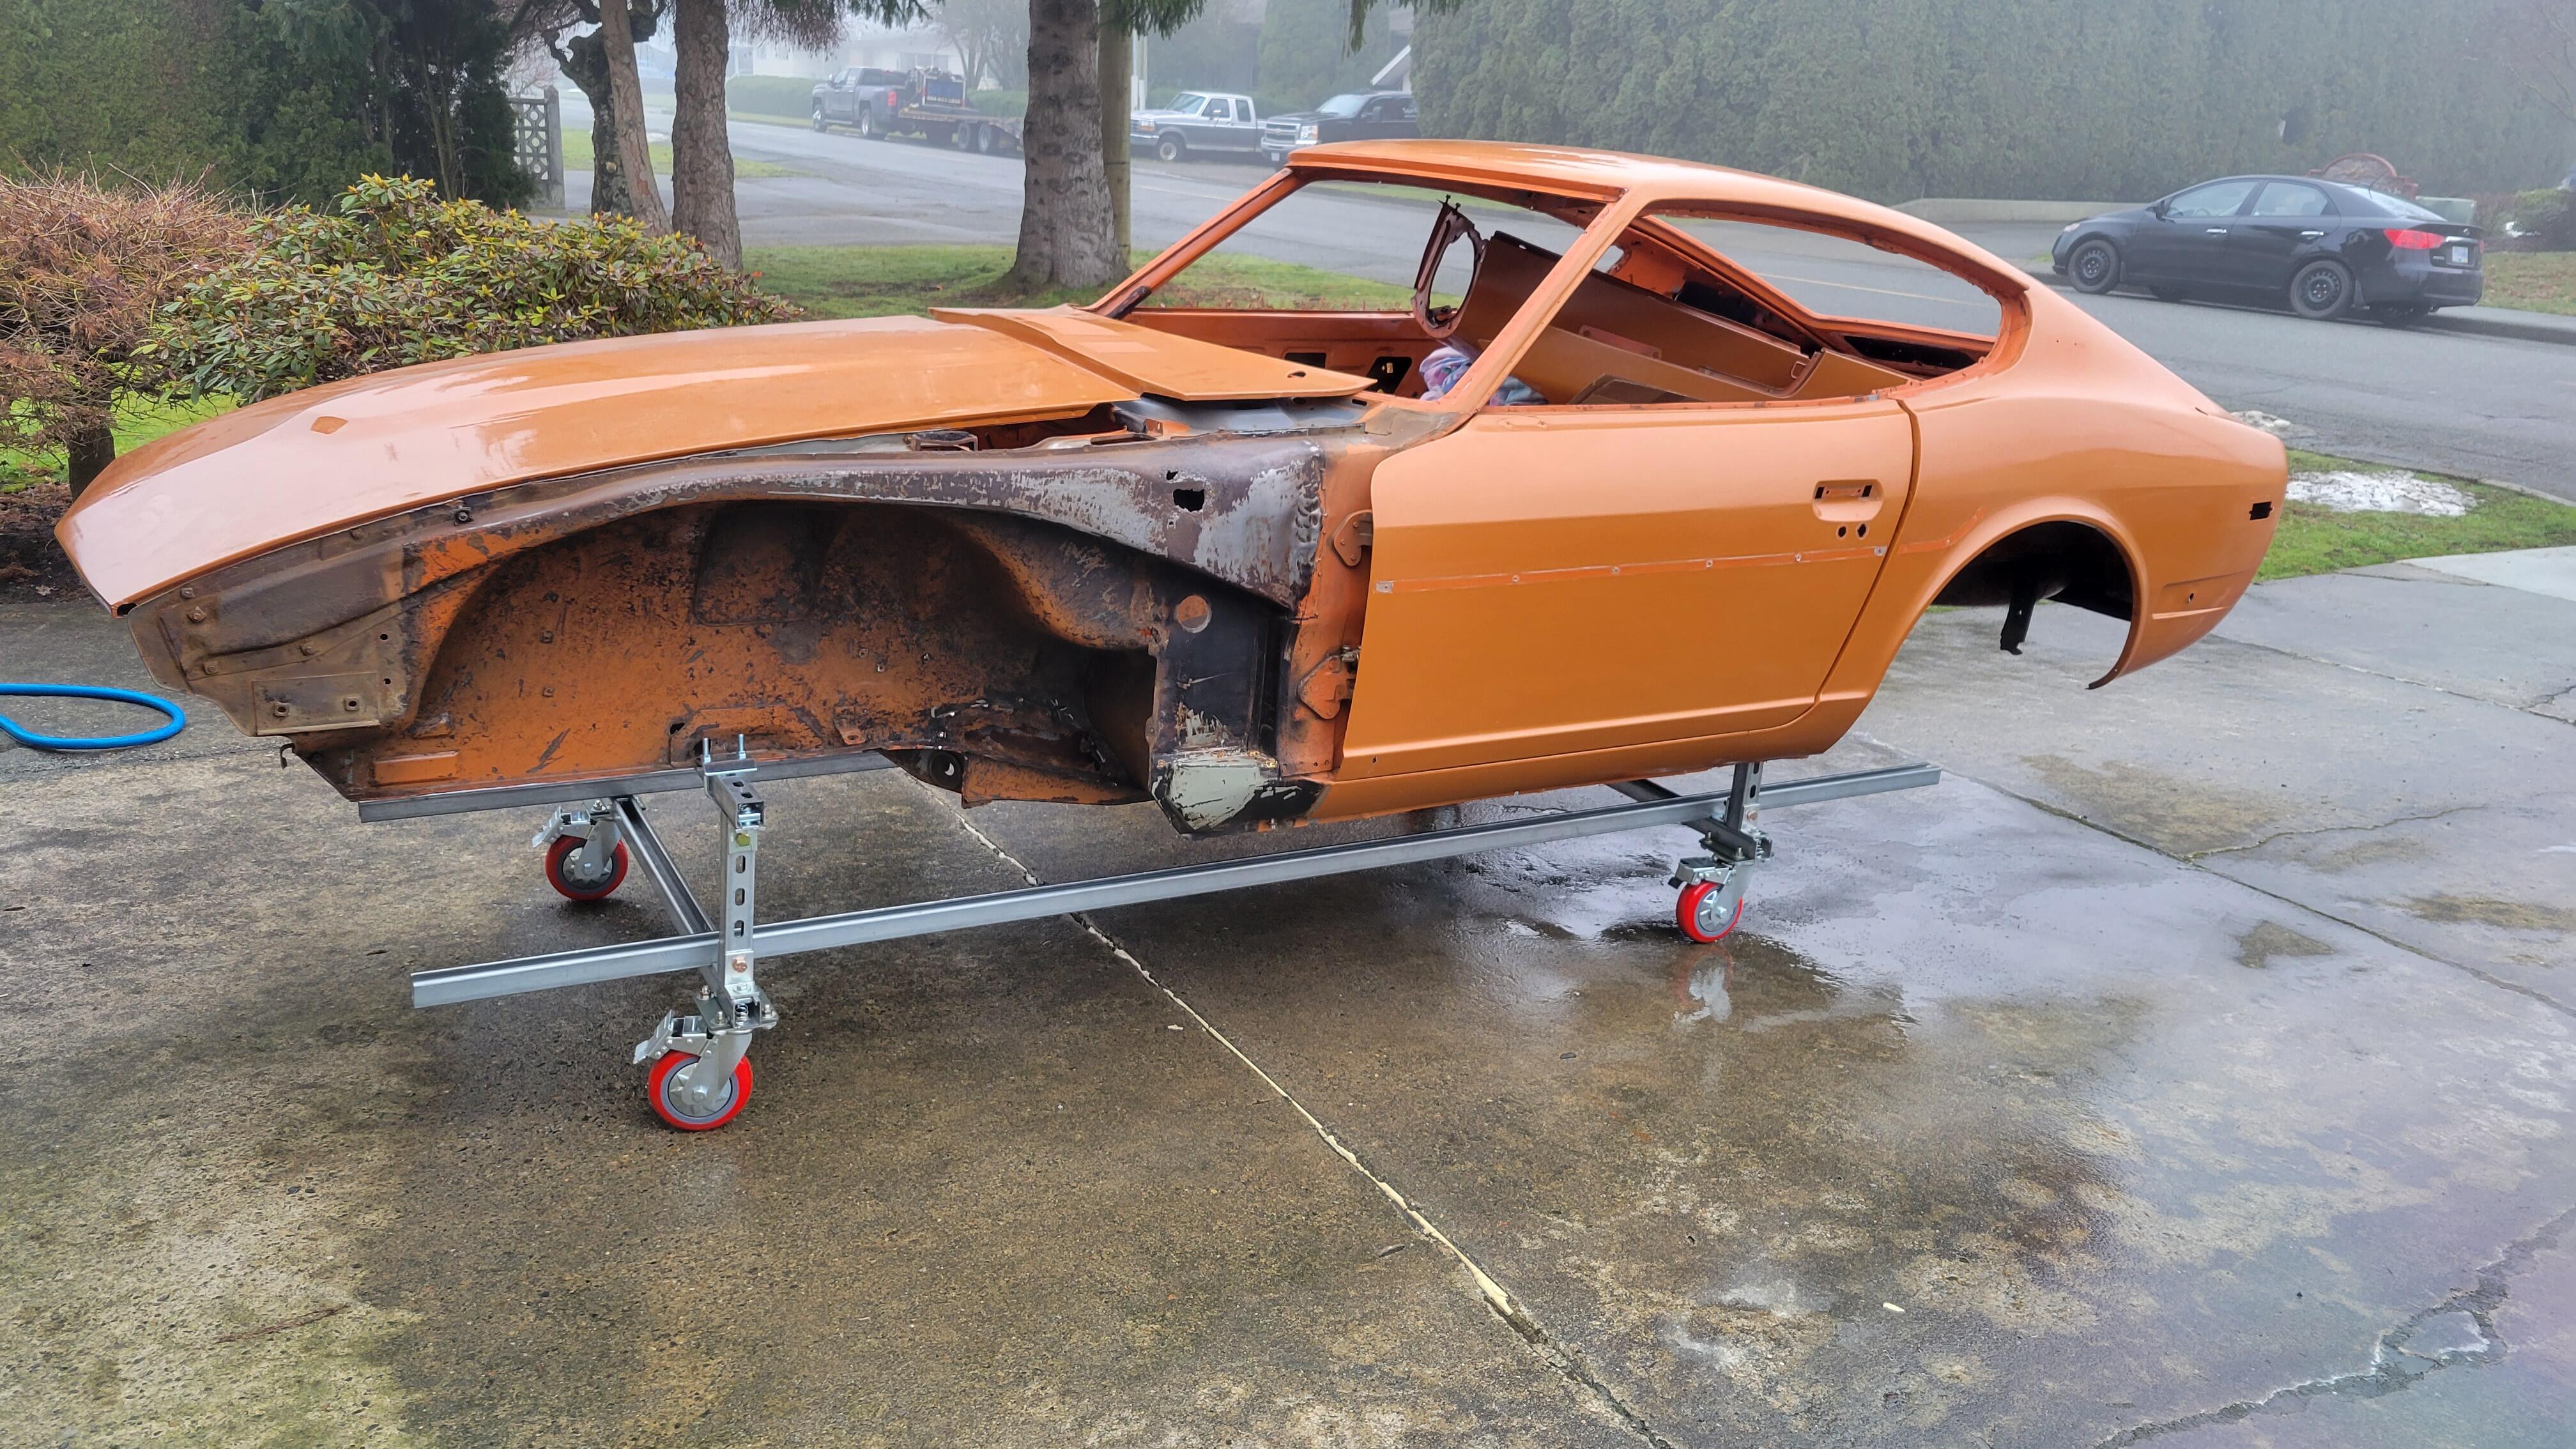
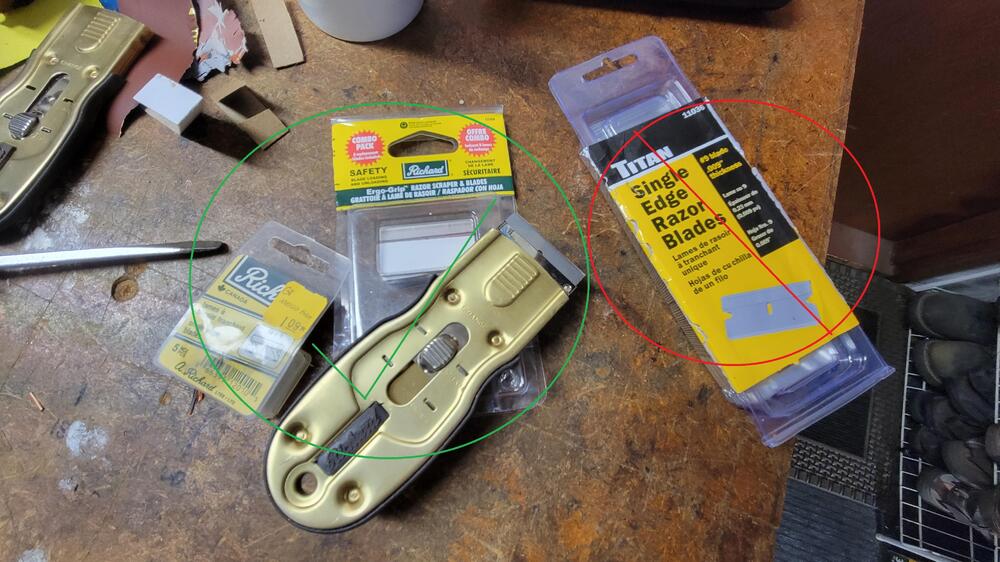
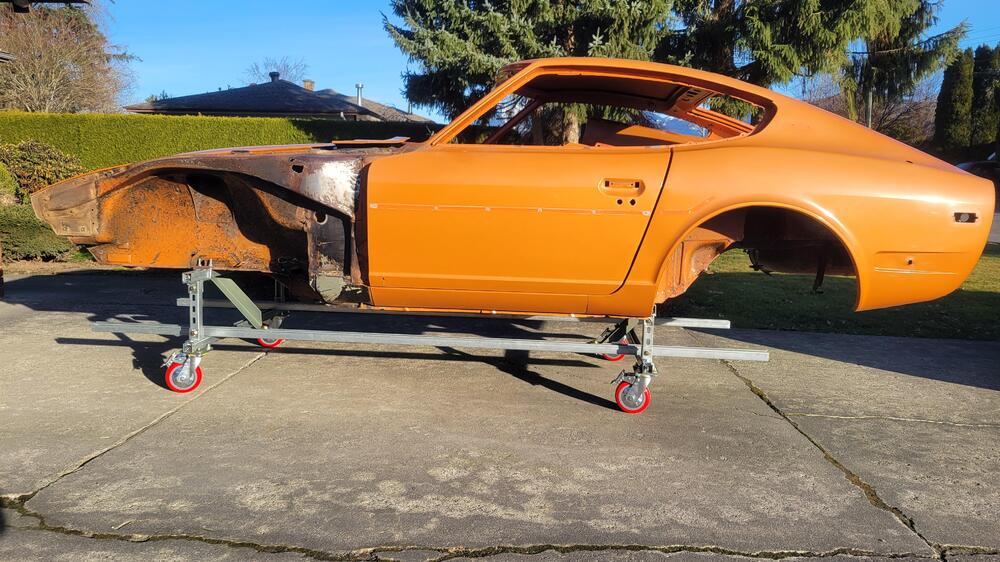
Continuing with the paint removal today. For others who try this method don't cheap out on the razor blades. I started out using Richard brand made in the USA blades, which work very well and stay sharp for quite a while. Then I used some cheap ones I ordered on amazon, Titan brand made in China. First off they were loose in the holder and and they lost the sharp edge quite fast. I'm back to using the Richard blades. Today I've been working on the RH quarter panel. I had the quarters replaced in the early 1980's and even then my local Datsun dealer was not able to get a 70/71 panel, so I had to have my body man weld in a patch to close the vent hole. I found evidence of the repair while doing the paint removal this morning. During the paint removal I found body filler in that area that was up to .10" (2.5mm) thick, but with heat and razor blading the paint and filler came off in one go. Here is another video showing removal of paint and filler (glazing putty?) on the LH quarter.


-
Actually I did strip all of the dealer applied heavy tar like undercoating from my wheel wells and the full underside of the car myself, with a scraper. For me the money I save on things I can do myself goes to parts and things that I can't do. I wish the list of things I cant do was shorter. Yes I agree that lead is very soft as far as metals go, but that little piece I shaved of was surprisingly sharp, especially with the jagged edges.
-
-
-
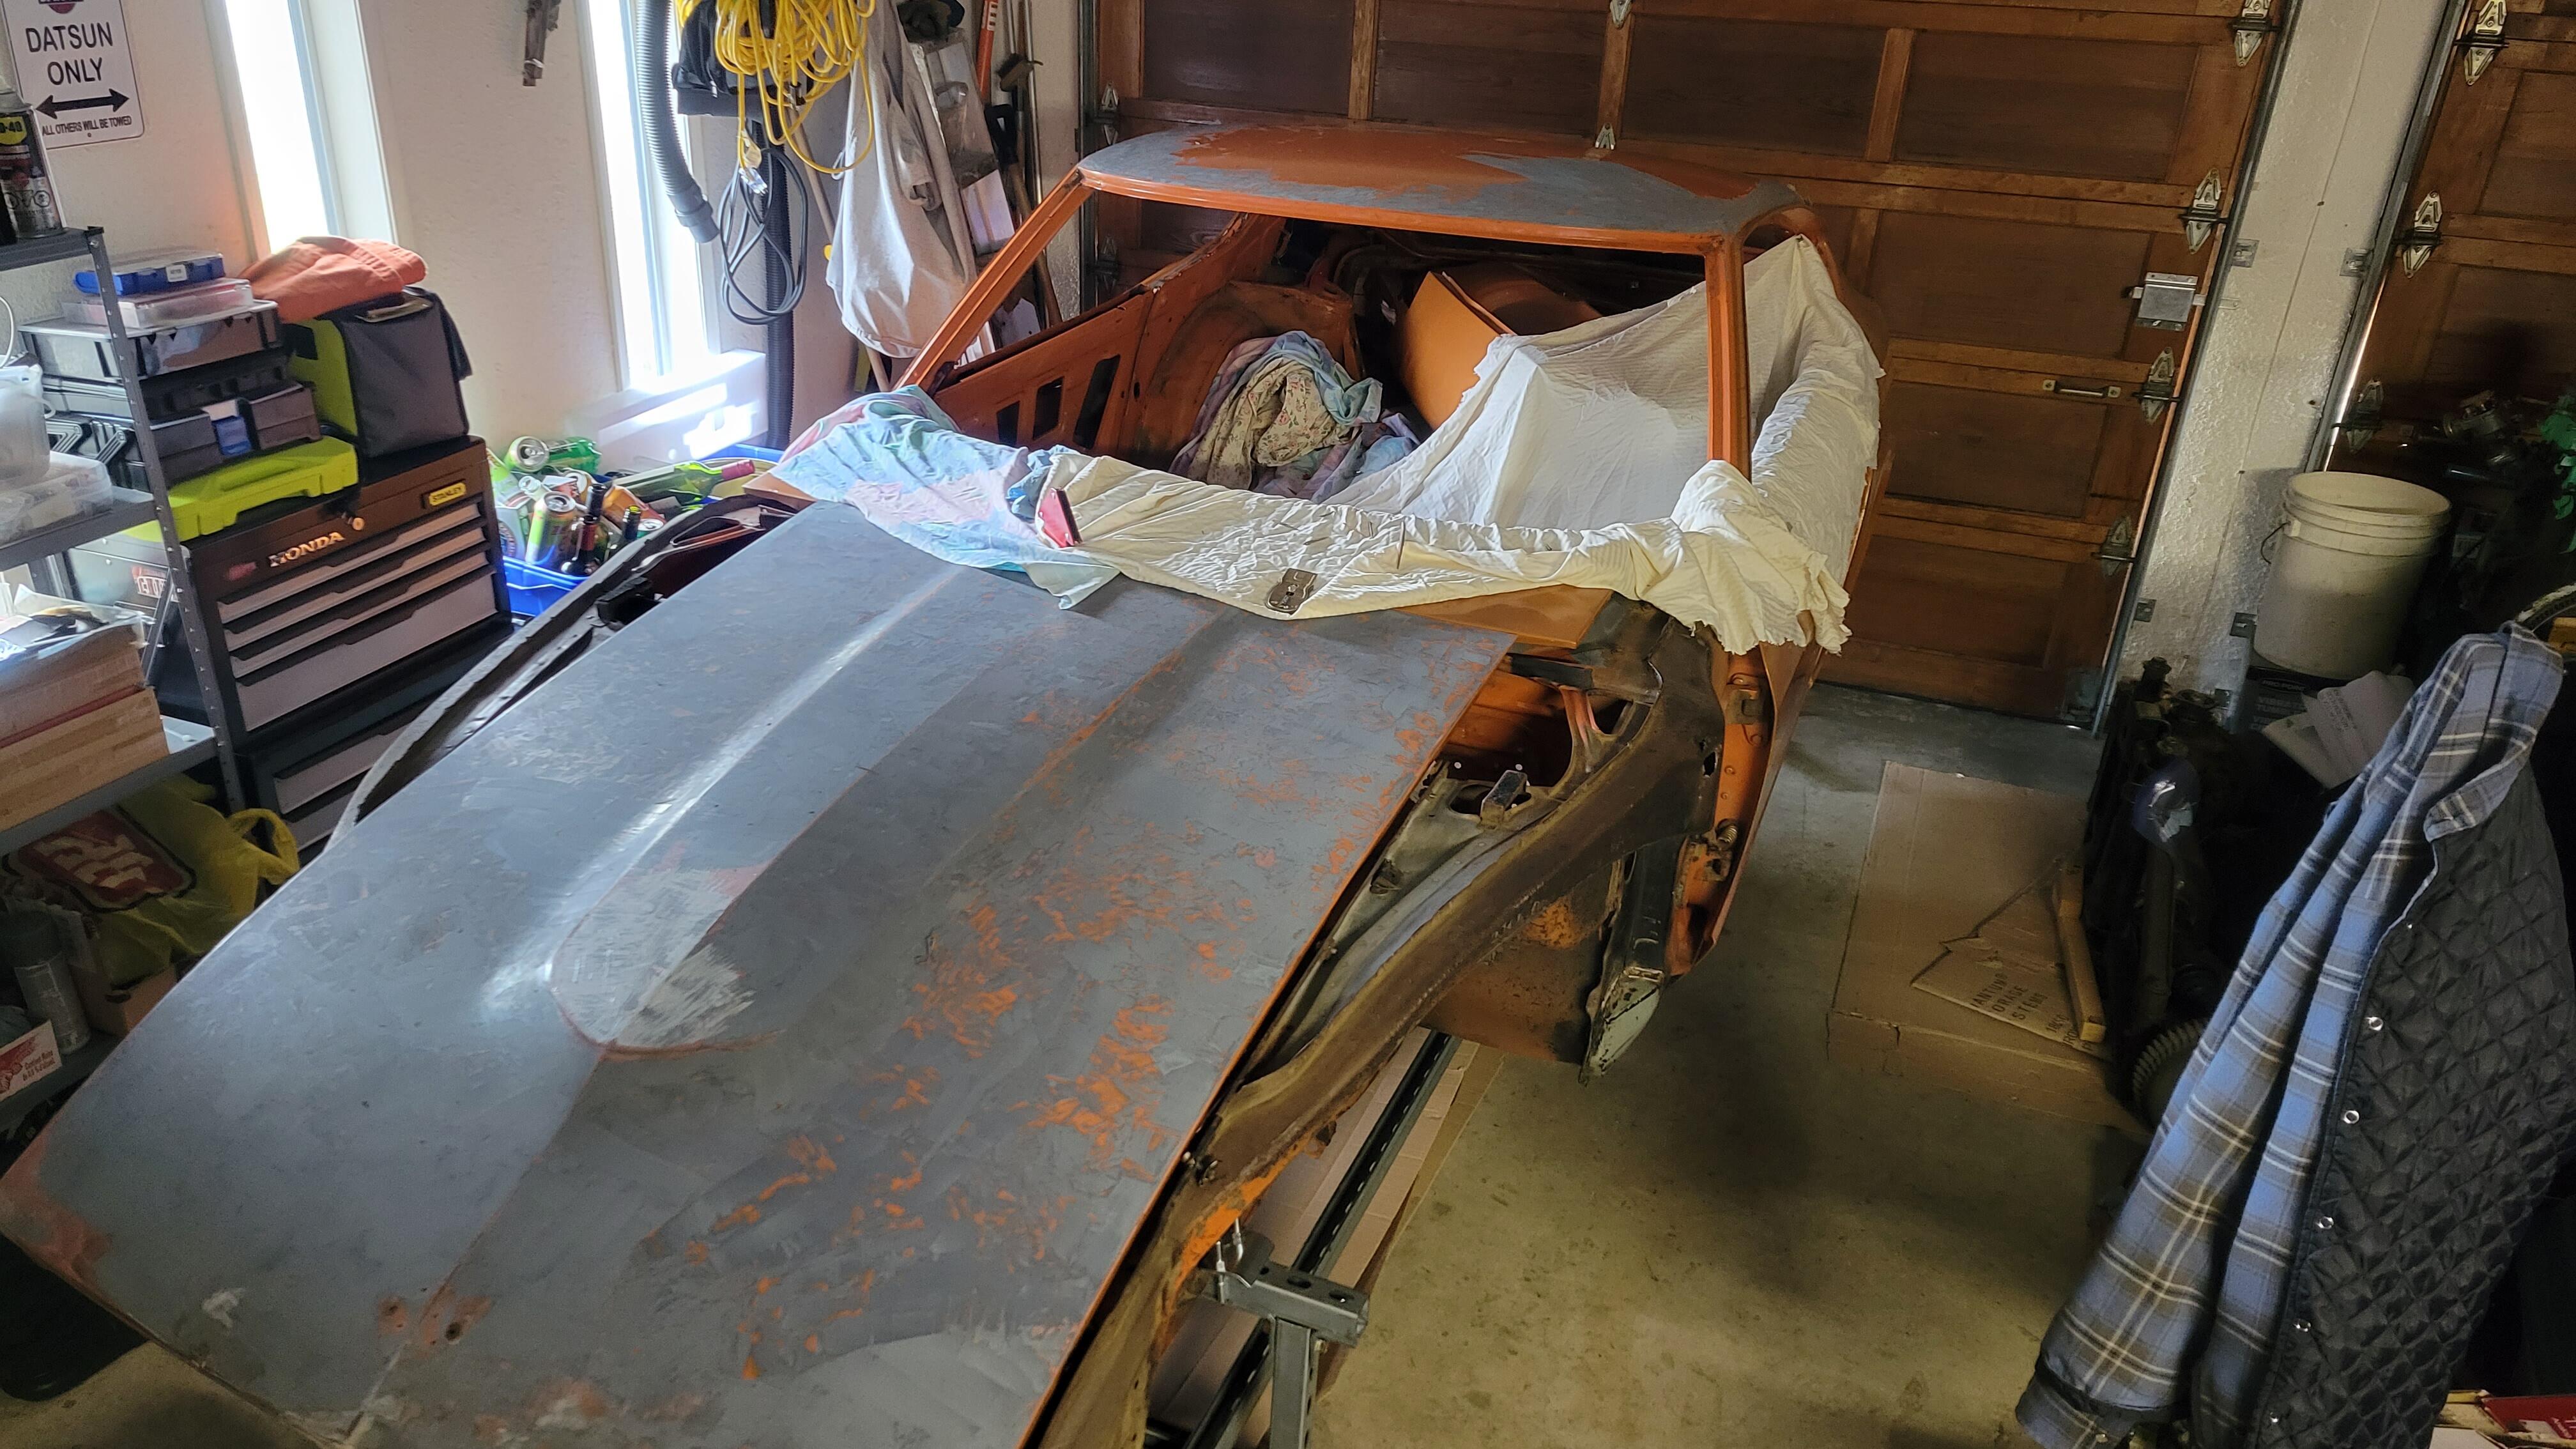
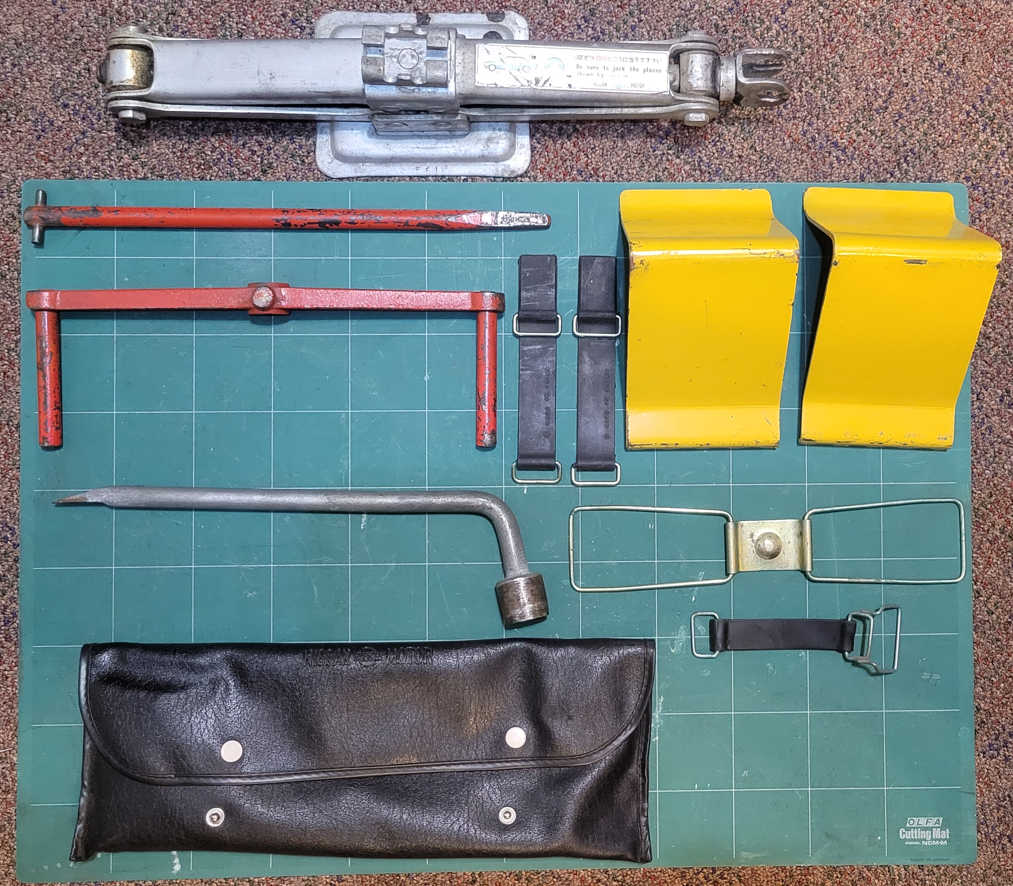
Still waiting for my body guy to complete a project before he can start on my car, so I decided to start the process of paint removal. I had planned to leave this to my body guy but decided to do part of it. After considering sanding or chemical stripper I decided to try razor blading. Using single sided 1.5" wide x .009" thick razor blades and a heat gun, it seems to work quite well and cleanup is very easy. Anyone else tried this method? Here is a short video clip and a few pictures.


-
Thanks for posting this image. It's probably the best image I've seen to show the difference between Phillips and JIS drivers. You can immediately see why Phillips drivers tend to "cam" out of JIS screws causing damage. Here is a good link about the differences, https://bike.bikegremlin.com/10583/phillips-vs-jis-vs-pozidriv/ FYI, just to add to the confusion note all JIS screws have the dot marking.
-
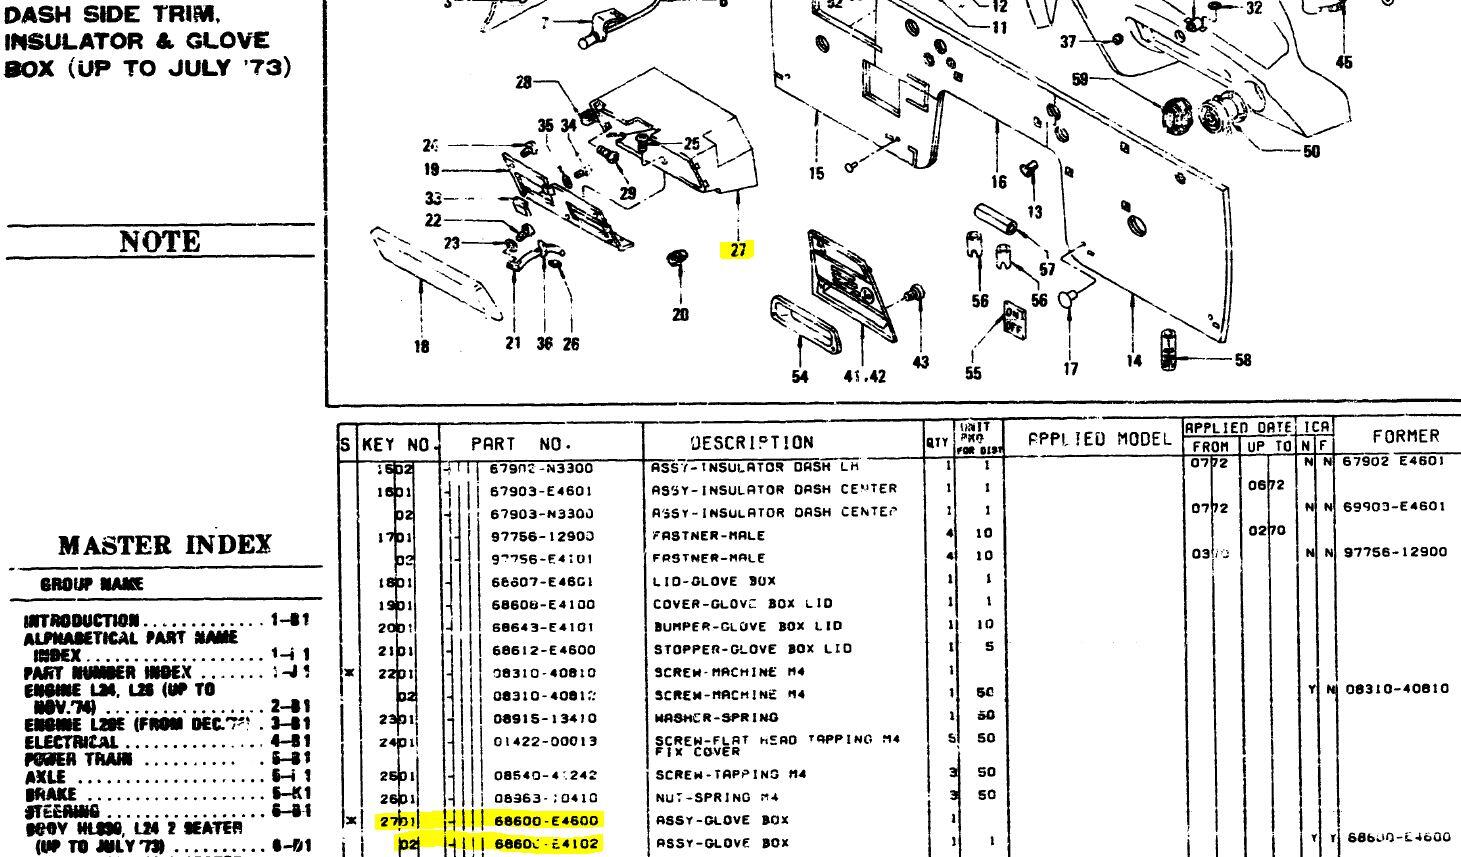
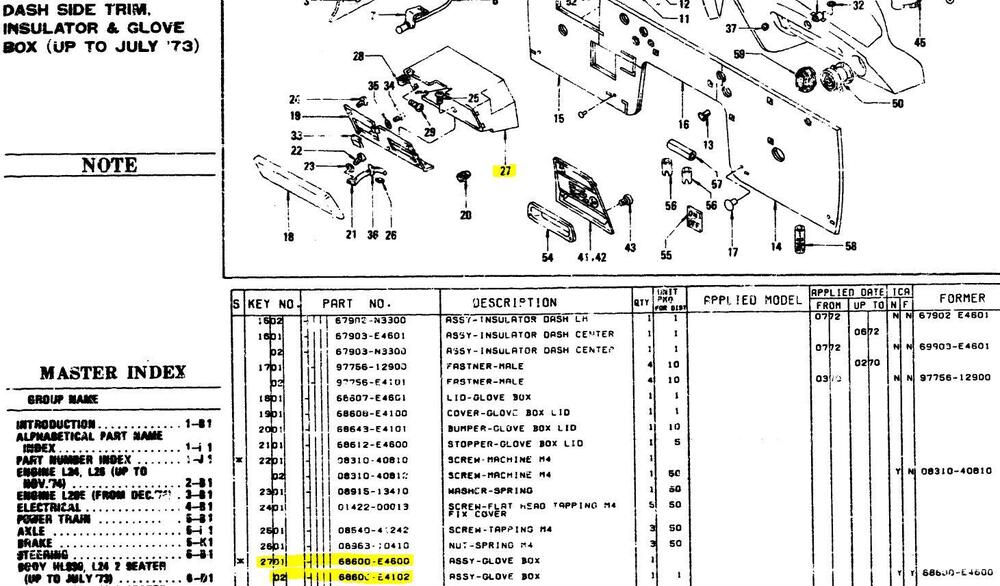
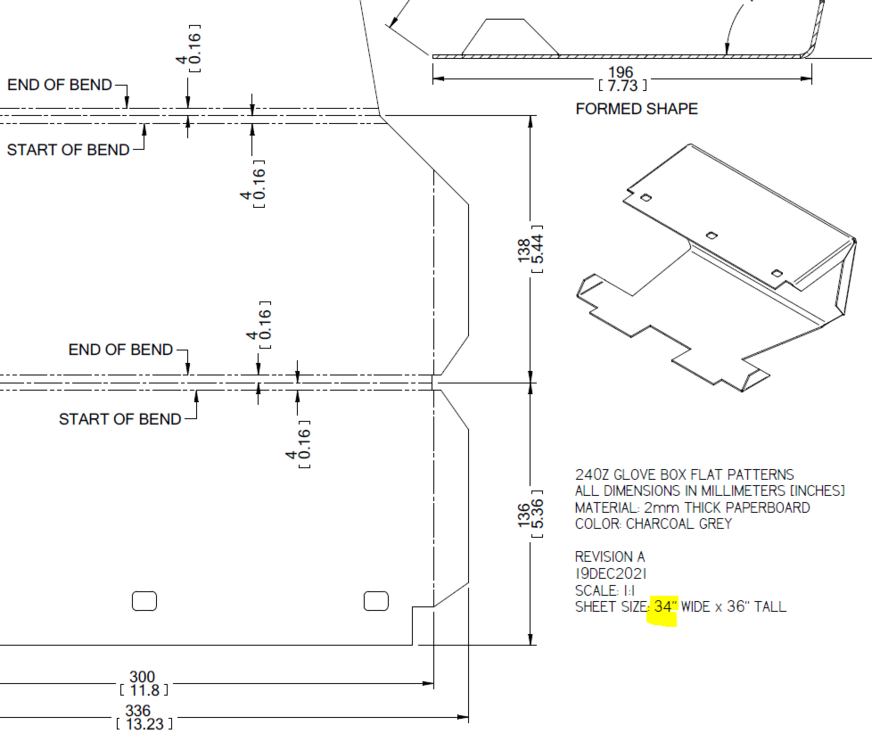
Great stats. I had a look at my 1978 North American parts book pdf and like you mention it does show the -E4600 and -E4102 P/N's but no date ranges. Interesting that the picture shows the early version with one notch. The 1973 JDM parts book pdf I have shows the -E4100 and -E4102 P/N's, and is again pictured with the early single notch, but opposite side. My guess is it was early 1970 when the change to -E4102 with two notches was used for all markets.

-
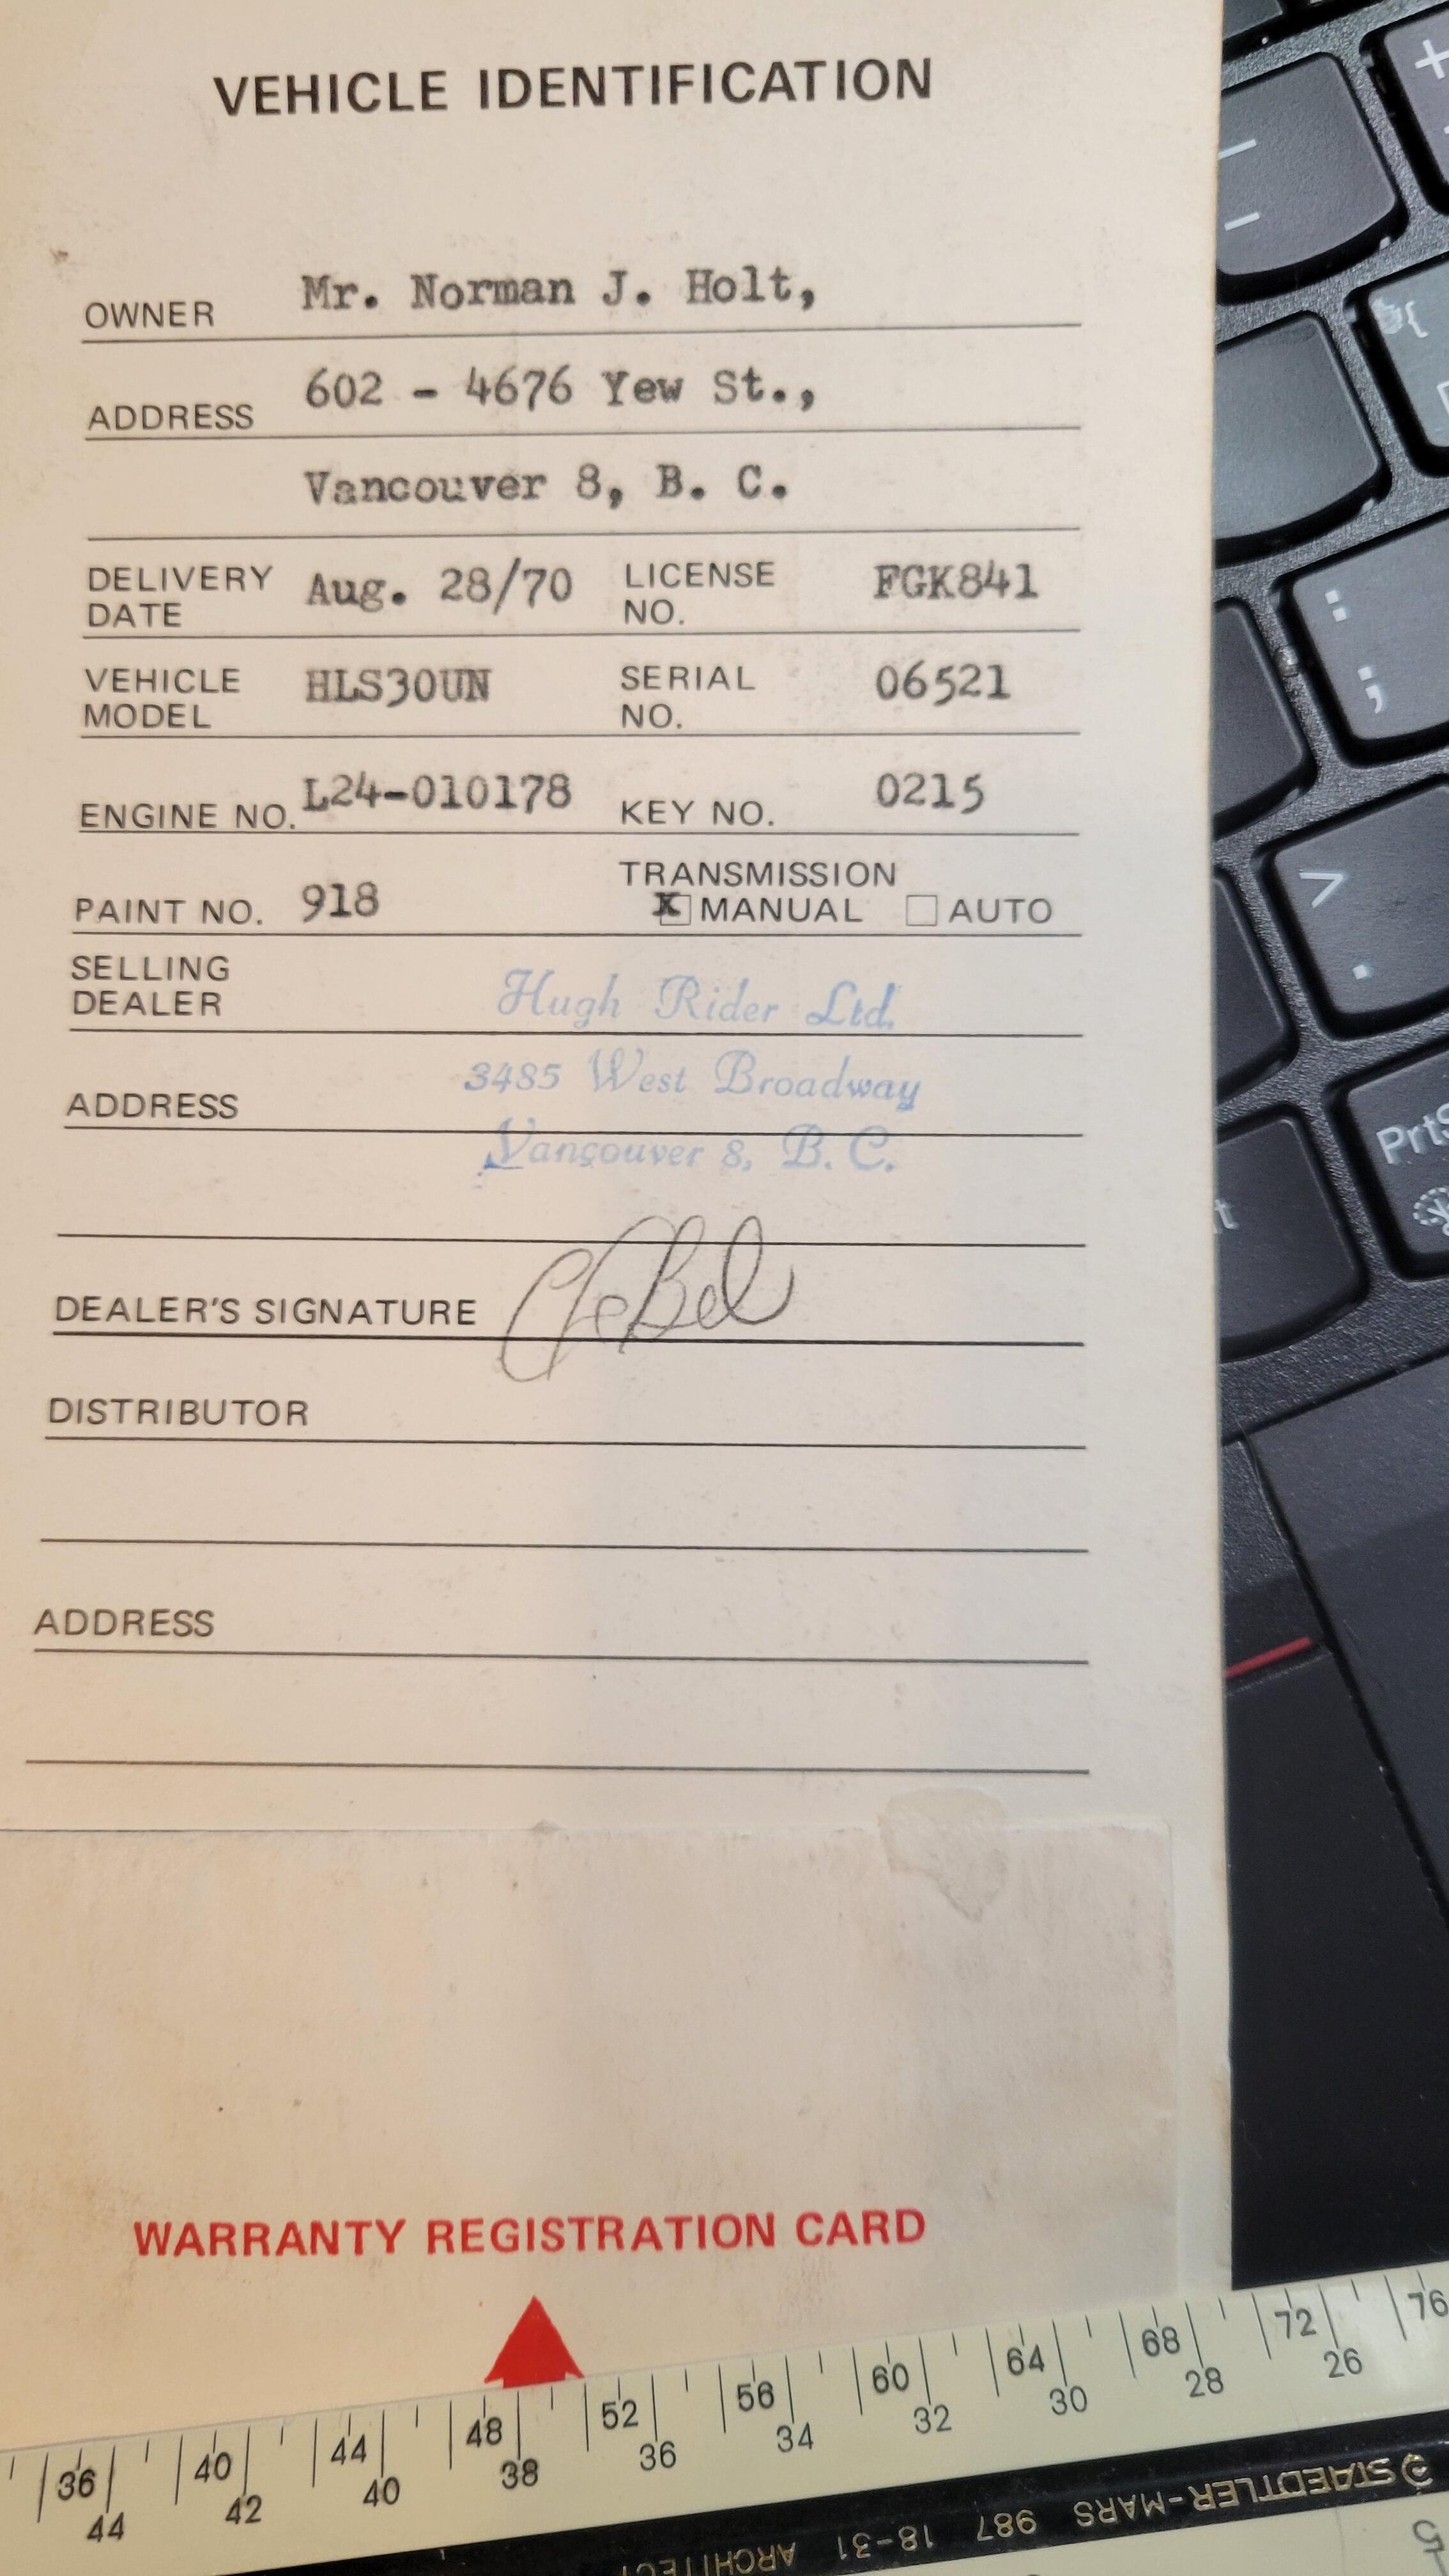
Interesting, actually my car is a Canadian market car. It's an HLS30UN model (non emissions). I guess the "A" is still a mystery.
-
You're welcome Kats, those chalk marks are interesting. My 7/70 HLS30 has an "A" marking. Any significance? It's not an automatic.
-
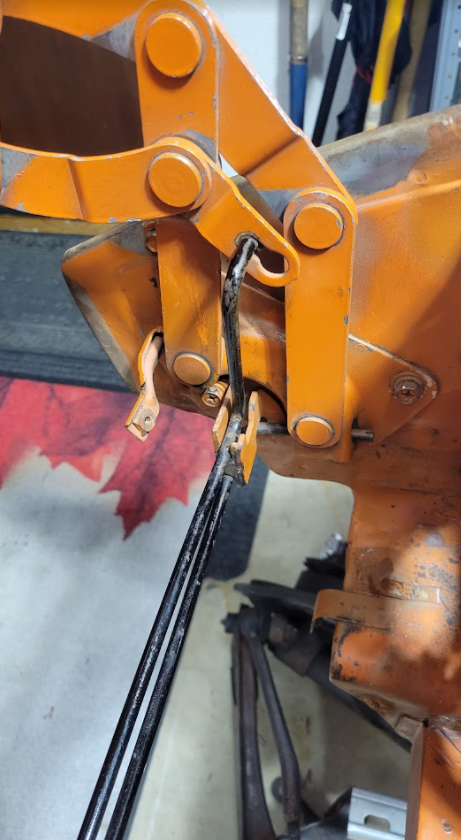
The hood hinge torsion rods should be black, so I would assume they were off, when originally painted. Here is a pic of my 7/70 car, there is no evidence of overspray on them, not even the ends. Never been painted under the hood.

-
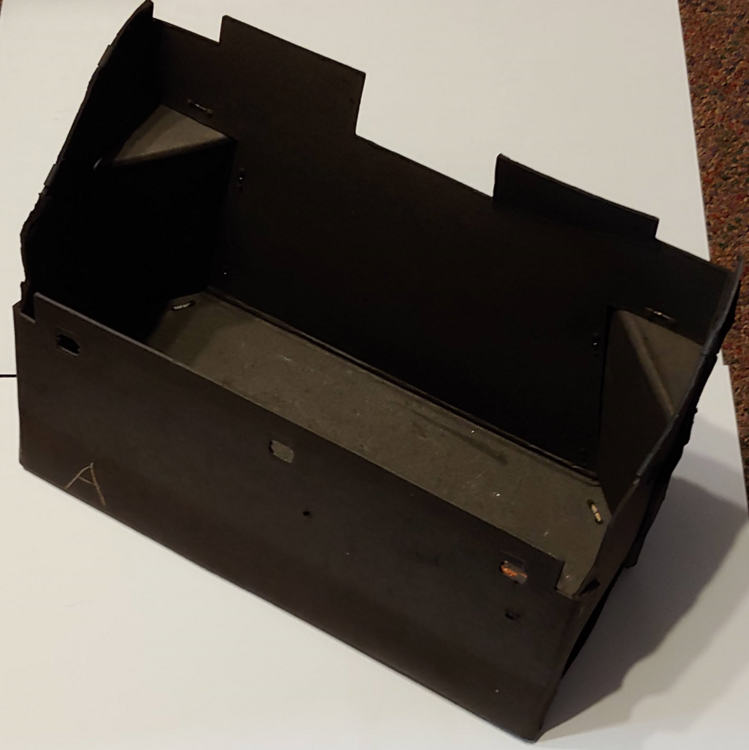
If it helps, I created a 3D step model and flat patterns from a 12/70 parts car glove box I have and uploaded the files here. The flat patterns are in acad.dwg format and pdf as well. It's from a Canadian market LHD car but hopefully it might help. FYI, I just noticed a typo for the sheet size I noted on the template drawing. It should be 24" wide x 36" tall, scale is 1:1 when printed on that size of sheet.
-
Were you actually referring to the North American parts book regarding seal order, I saw that it is incorrect there. I have noticed other errors in the NA parts book. Another source for info is the JDM parts book that can be found in the downloads, microfiche section, posted by @hr369. The illustrations are much better than the NA parts book and it is a great reference. Here is a snippet from that book that shows the seal placement, as you correctly thought it should be.
-
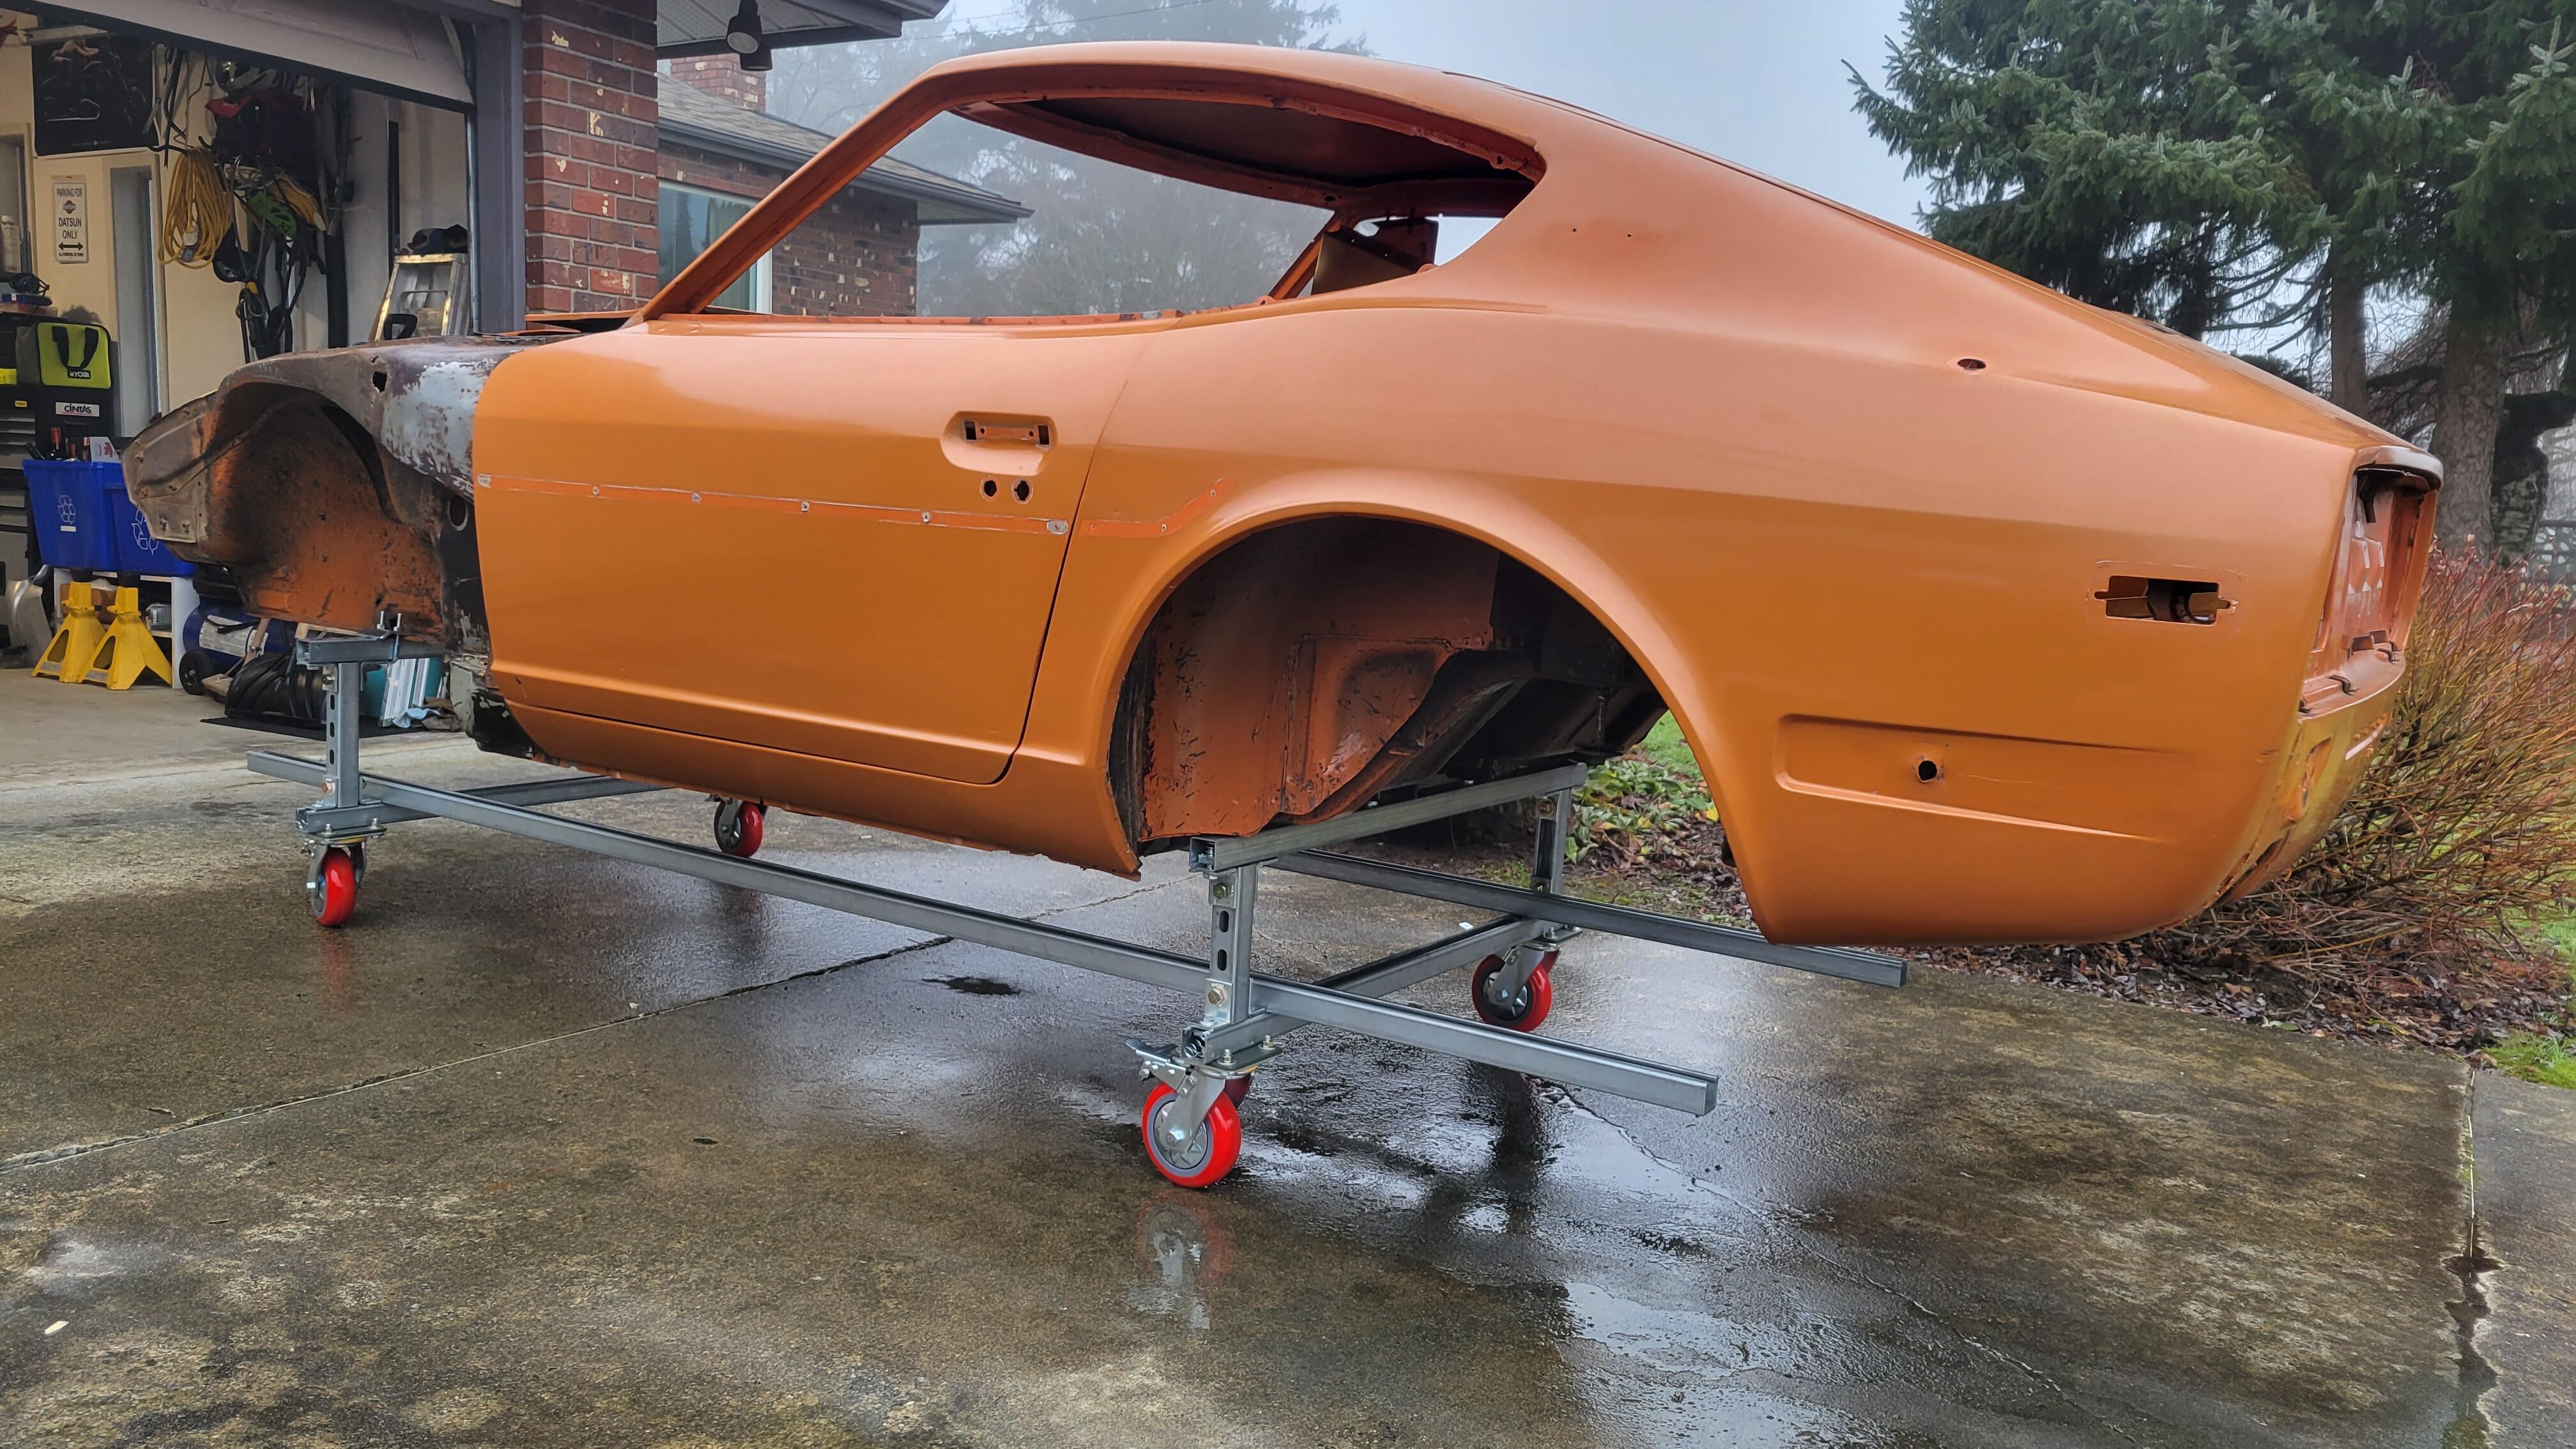
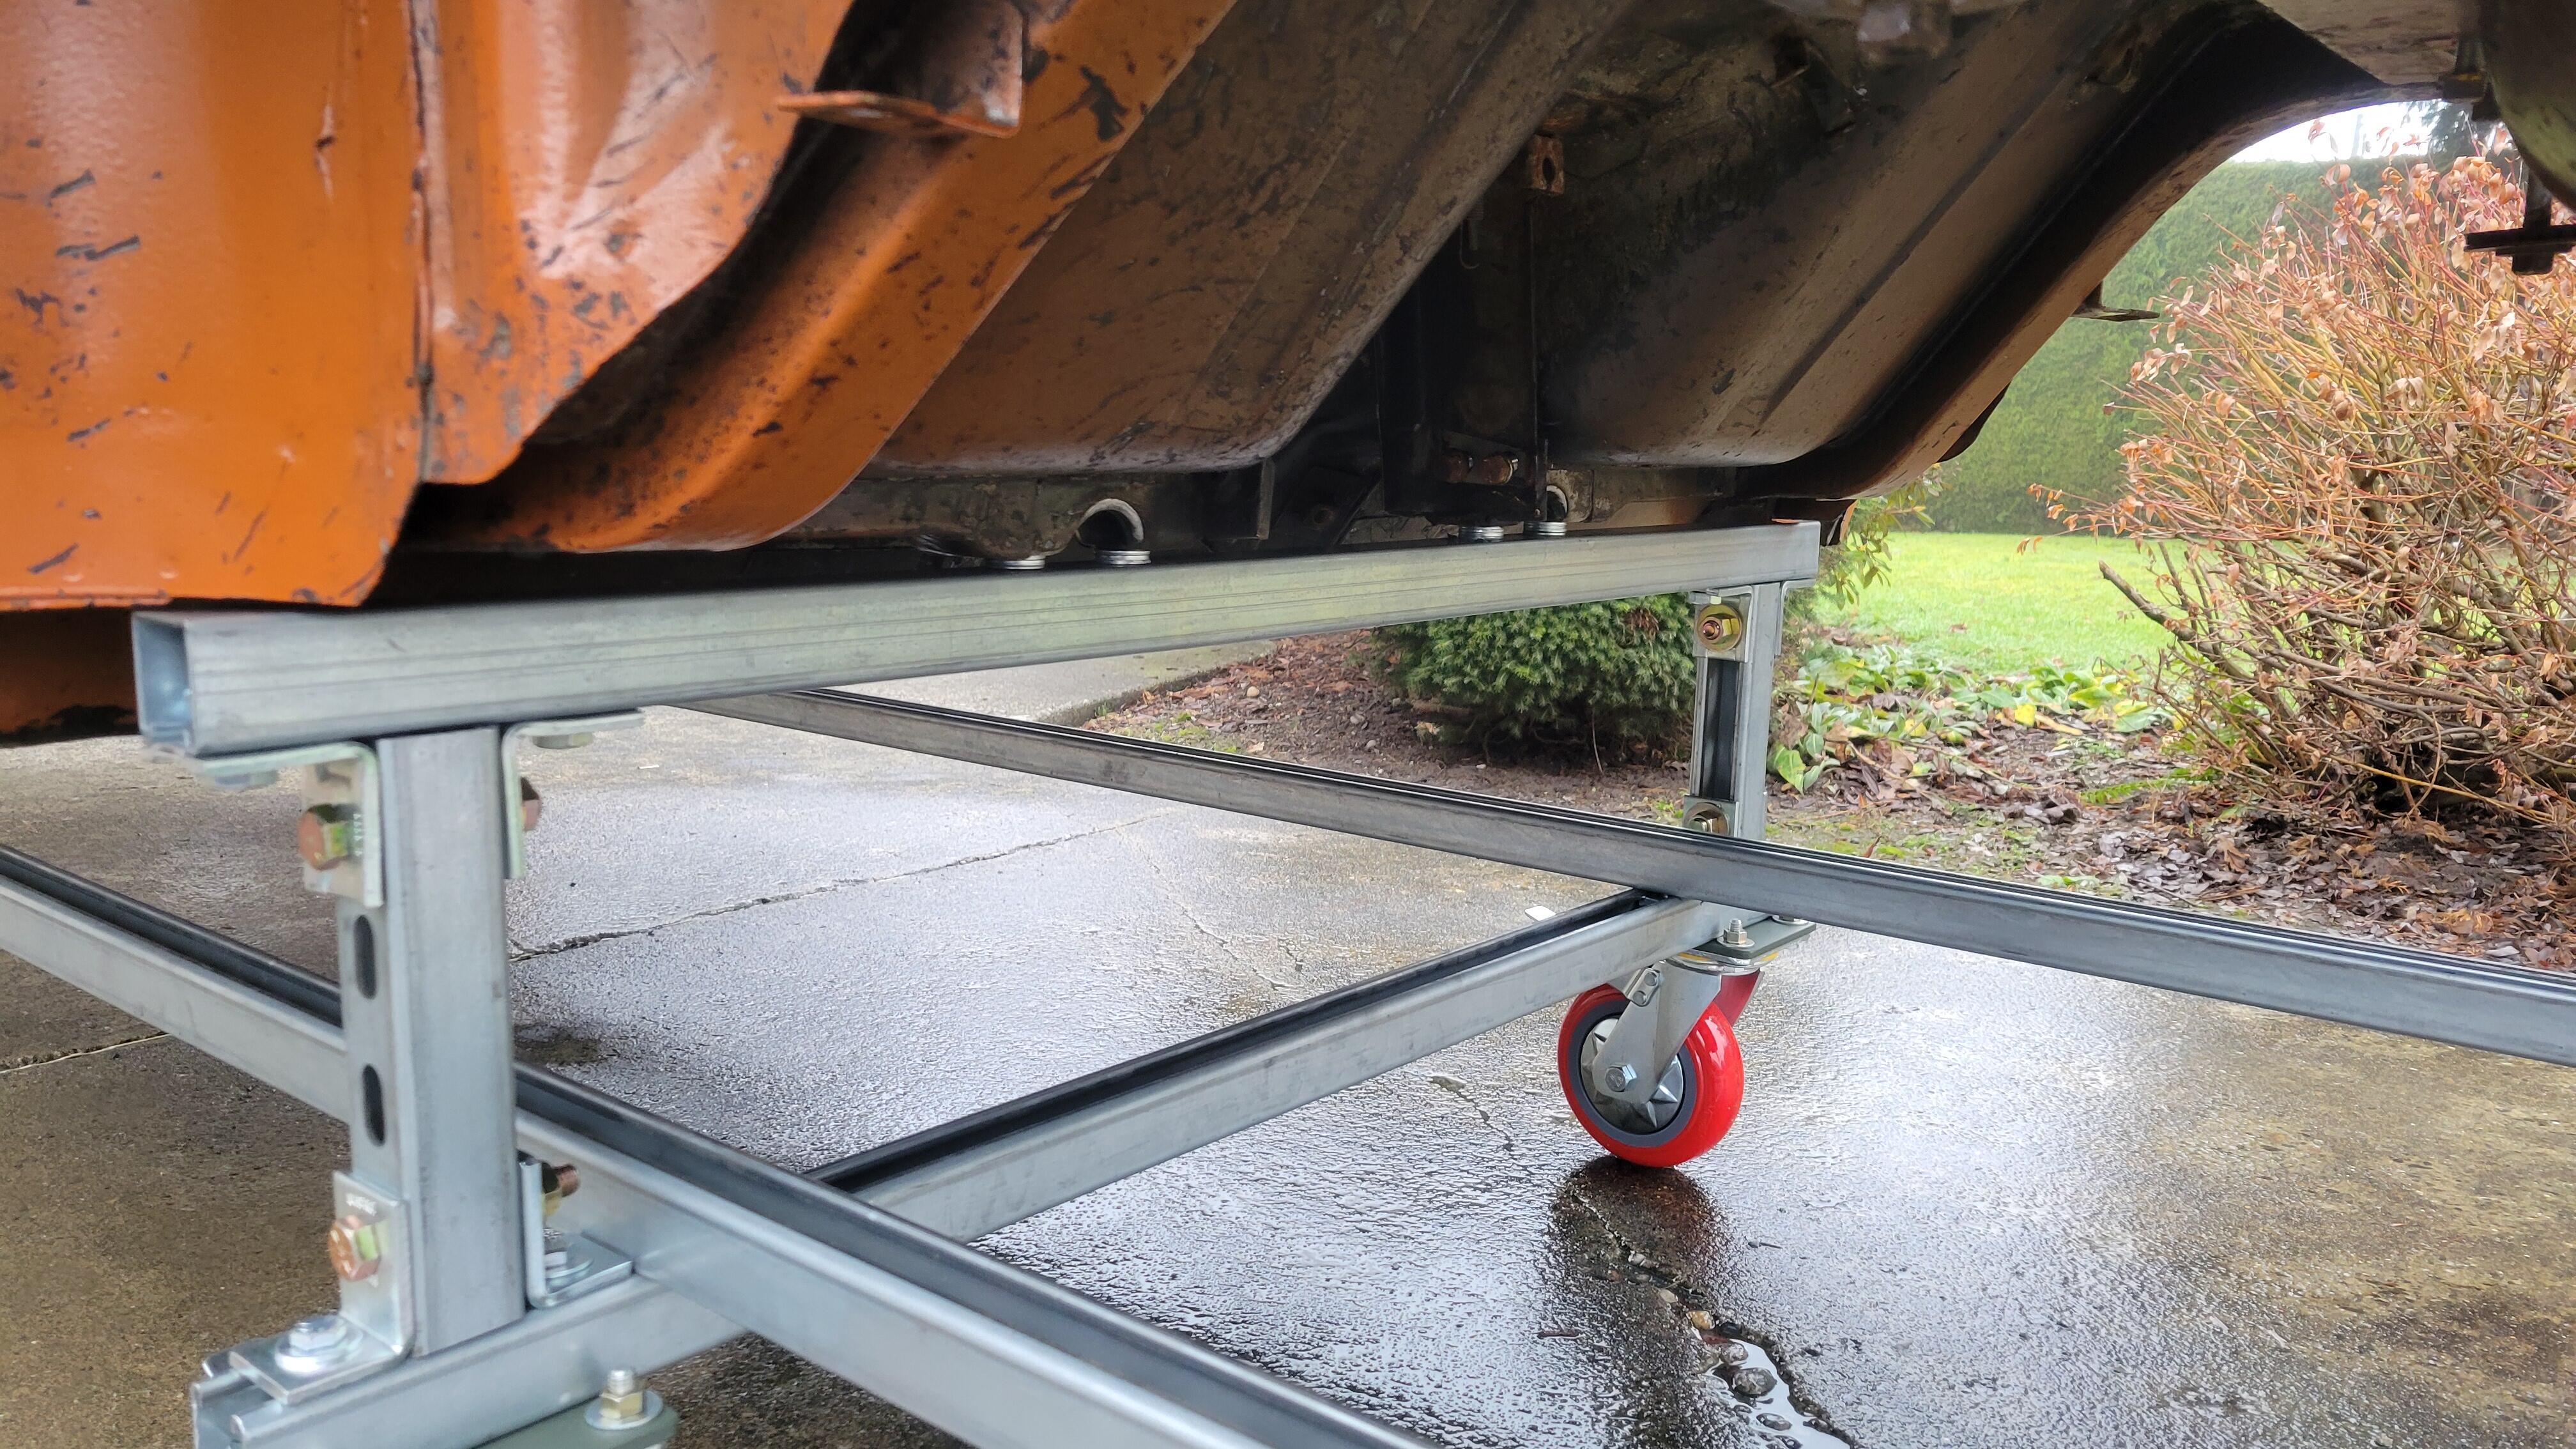
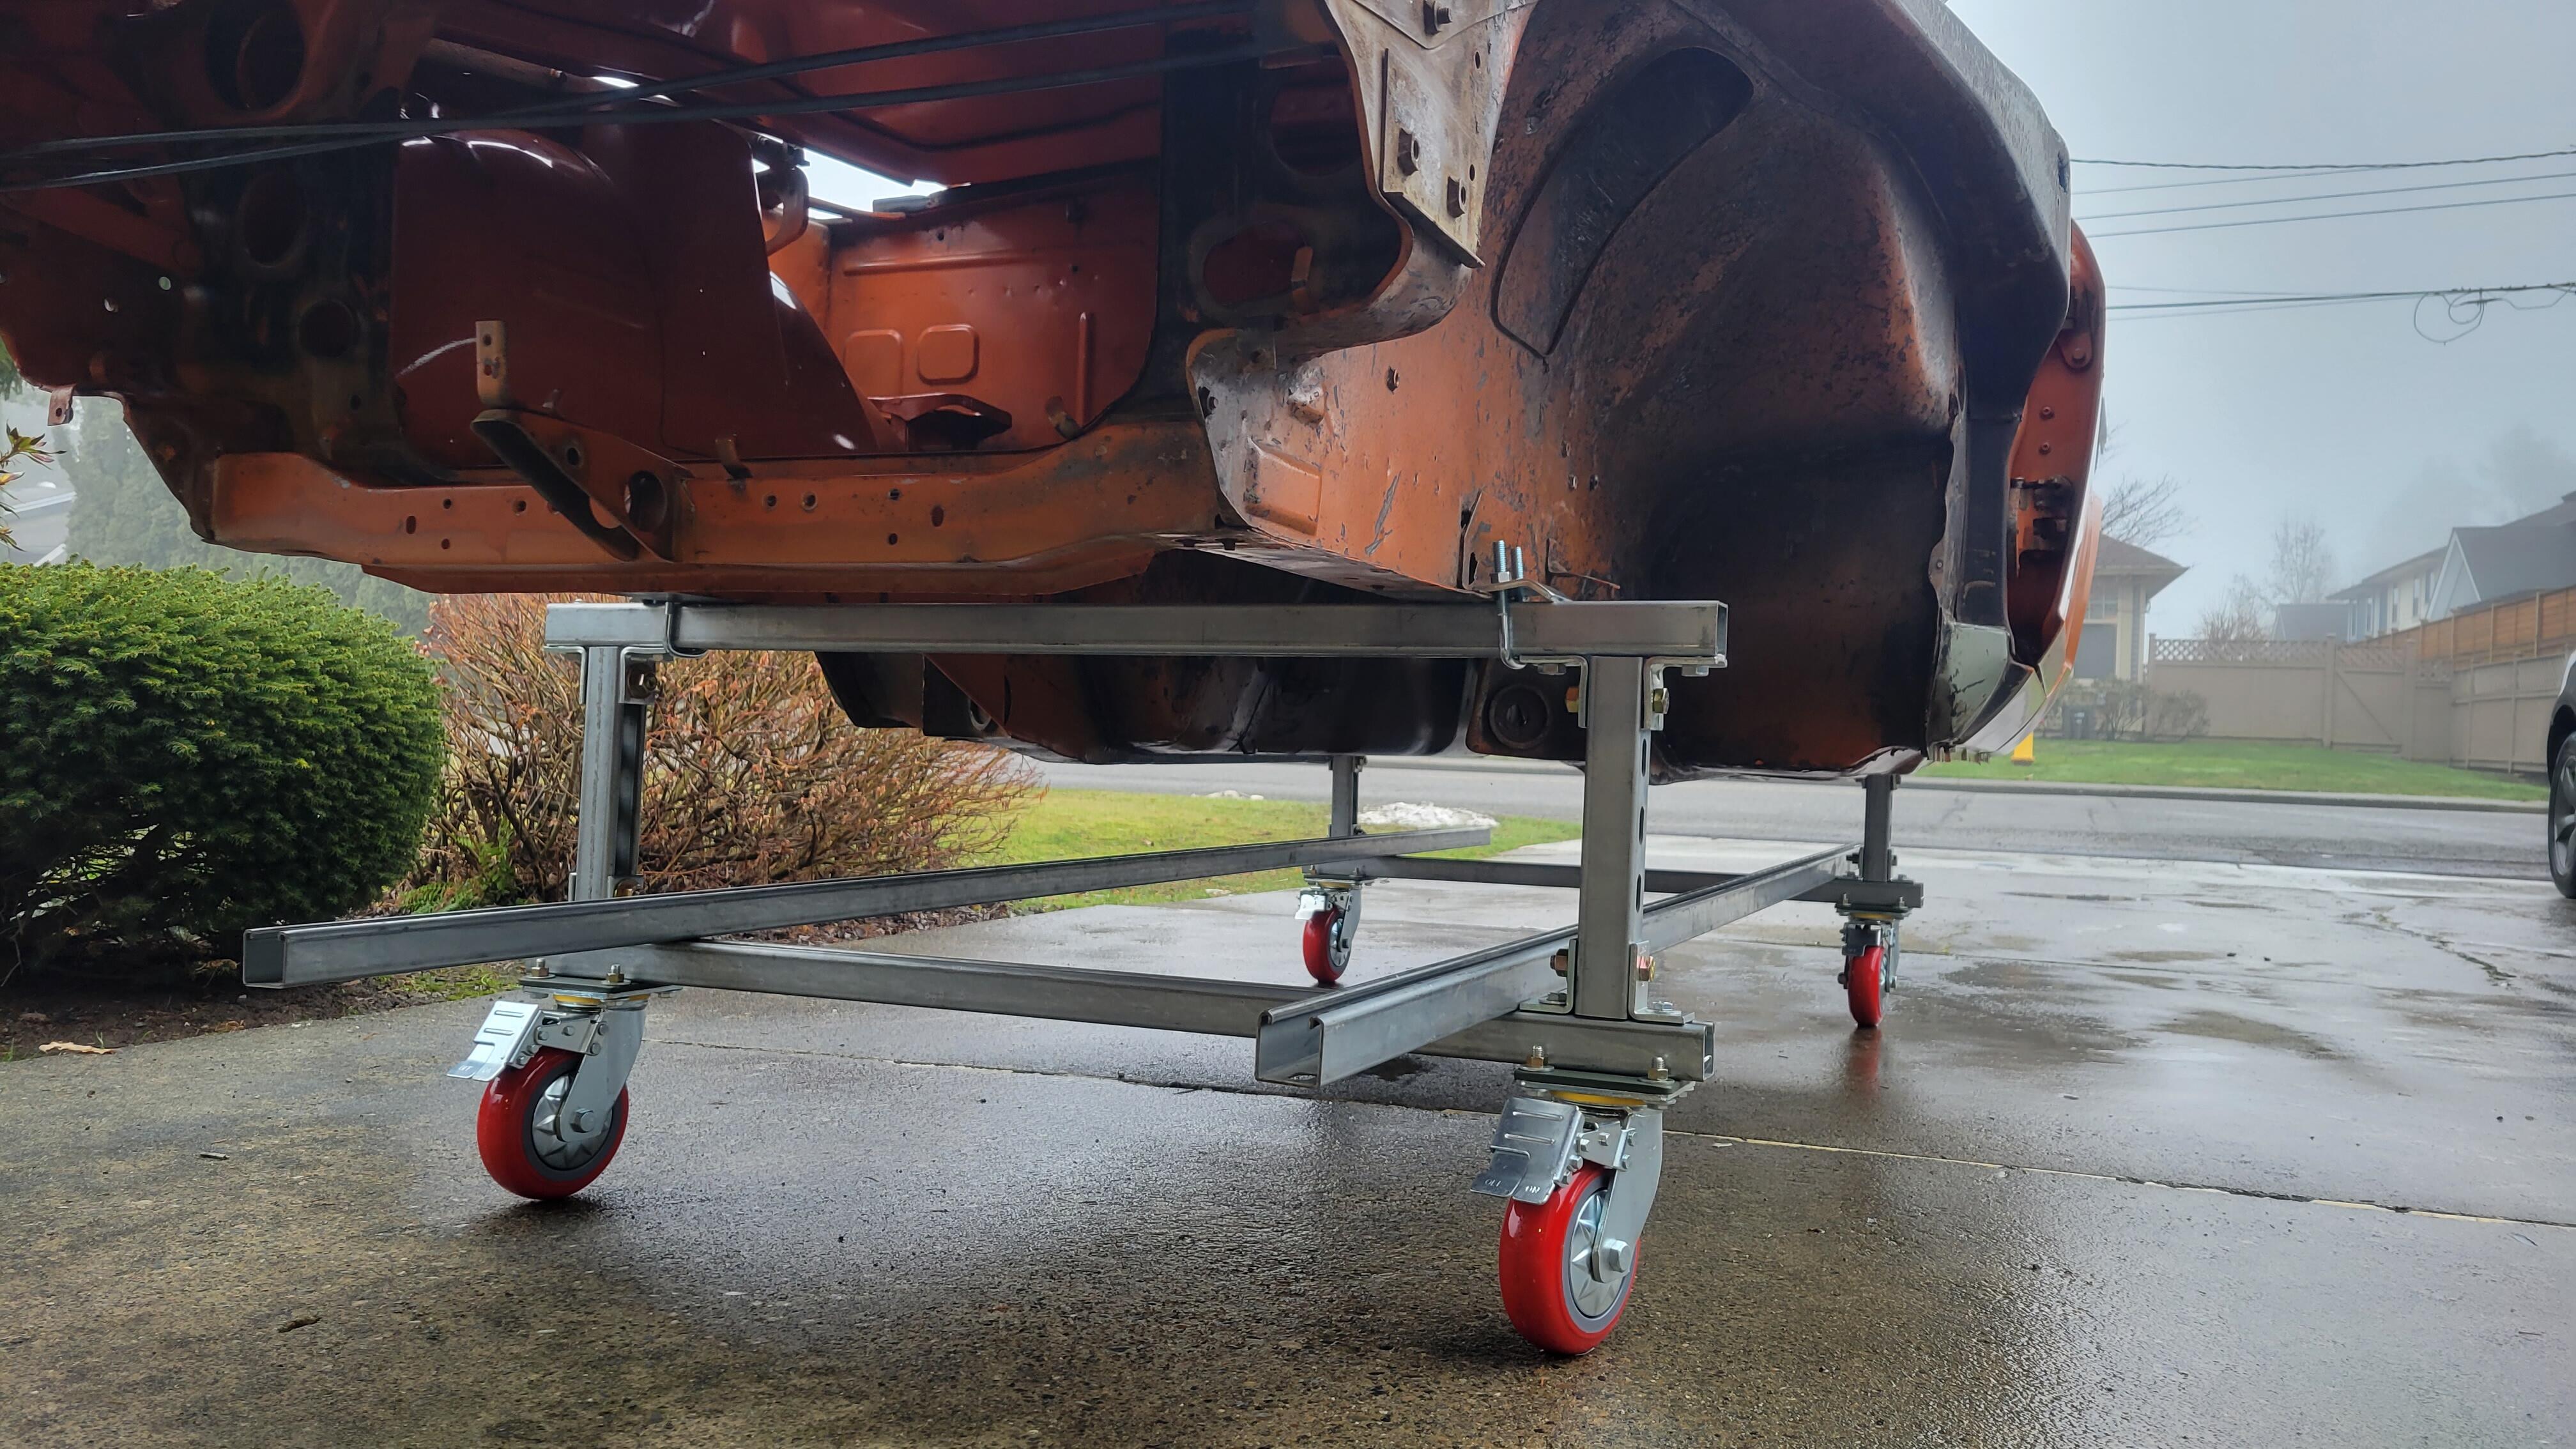
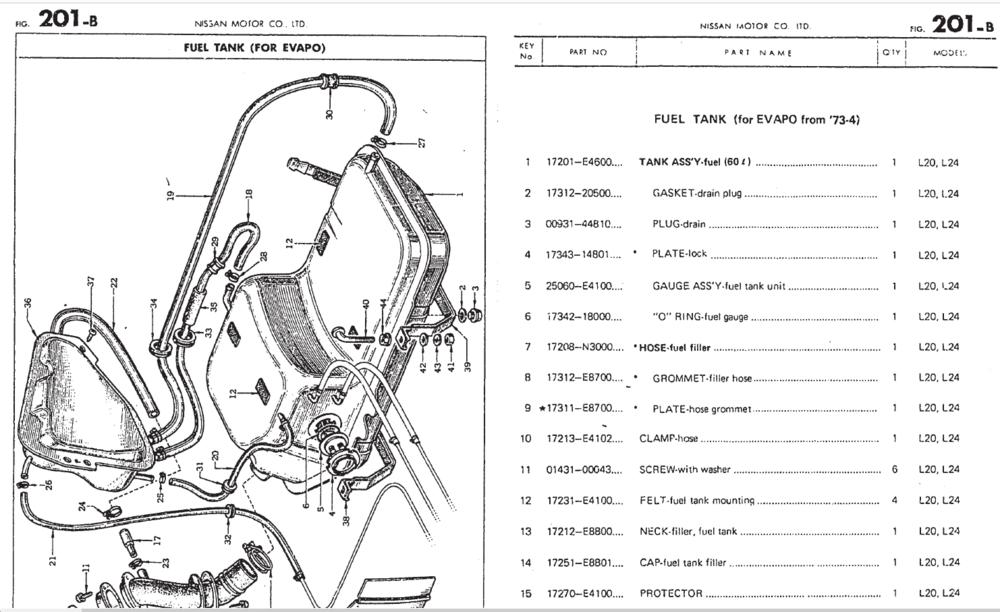
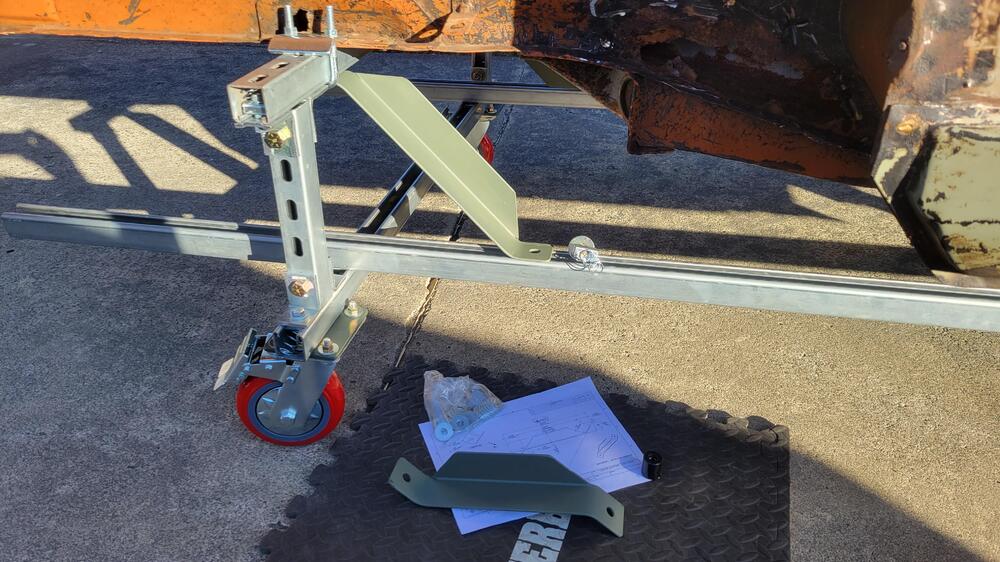
Yesterday I made and installed four diagonal braces to complete my rolling chassis support. Deb, my better half, has renamed it "The Two Forty A La Carte". In keeping with my no welding theme, the braces are simple angle iron parts, cut/drilled/formed and then bolted in using Unistrut channel nuts. I don't have much experience making parts like this and it was enjoyable to practice some basic techniques.

-
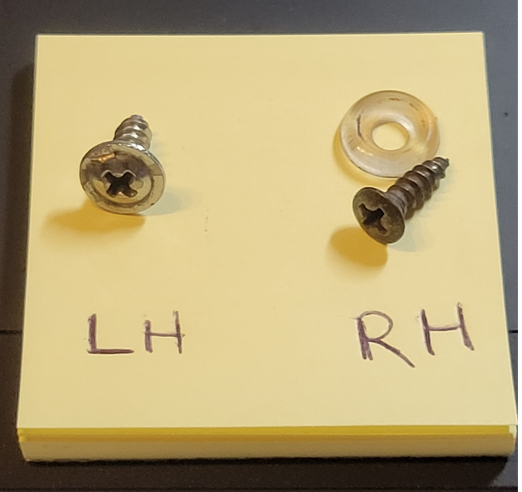
Thanks for posting this, my 1970 has the exact same screw and washer on the right side, but it has a self tapping screw on the left side that has an integral washer. Now I know which is correct. Strange that this screw and washer is not documented in the parts book.
-
No problem. It is Friday after all.
-
I believe those ones go between the inside of the fender and the in inner dome shaped headlight bucket for the bulb. That one is also available from vintage rubber. The one we are looking for goes between the front of the fender and the back of the headlight case aka sugar scoop.
-
Yes, mine are missing too. In the case of early cars, I think 70/71, the headlight cases are FRP. So it's not actually metal to metal on them, but all should have them.

-
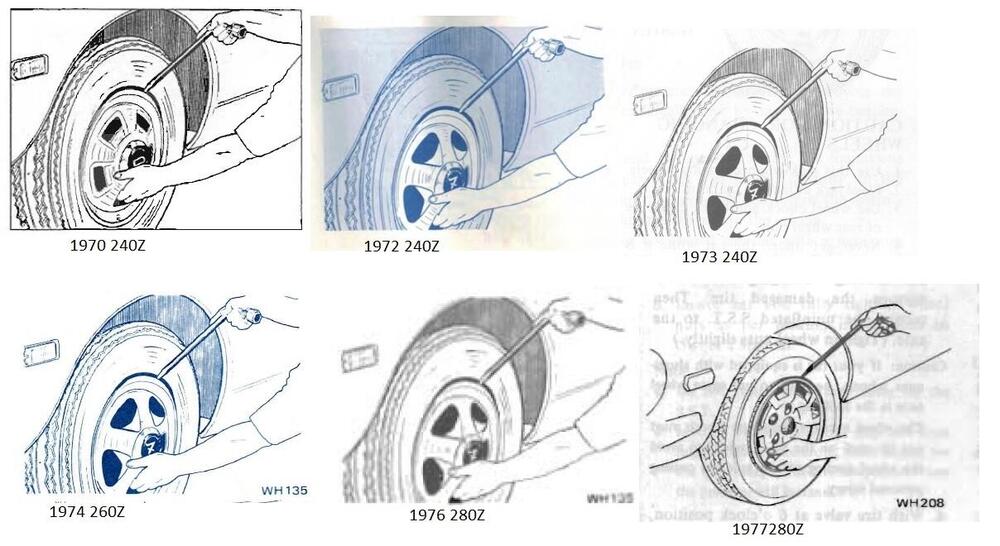
At least the Nissan illustrators added the correct hubcaps for each manual. The image I made by cutting and pasting happens to show the evolution over the years. 😆
-
Thanks for checking the date code on my Jack, I appreciate it. I really like comparing these details on our cars. Cheers, Mike
-
Except for all of the robocalls around election time.
-
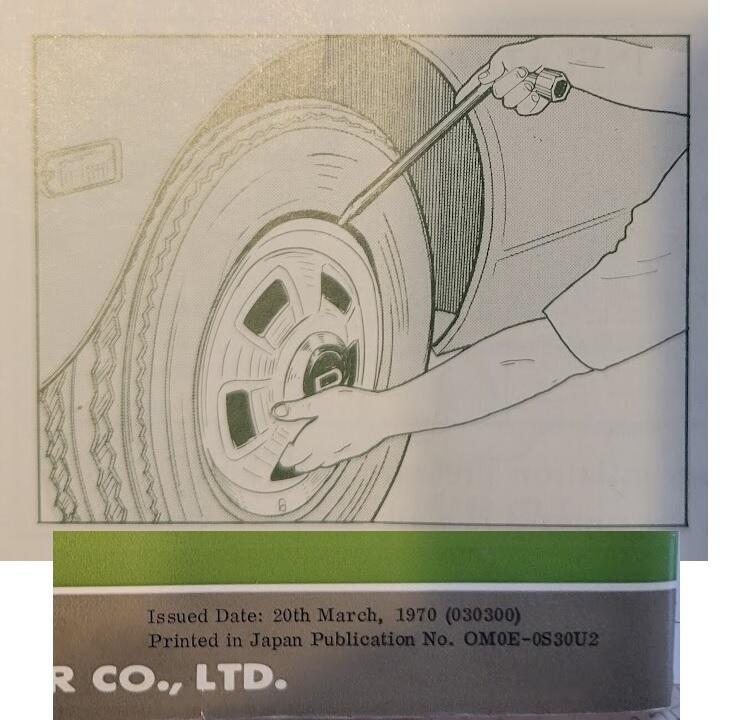
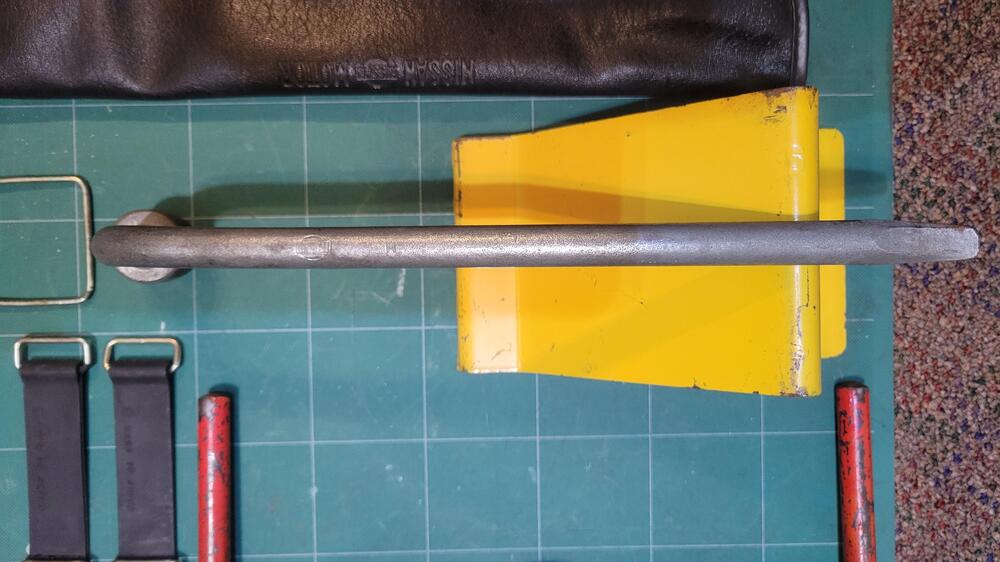
Out of interest I checked the owner manual that came with my 7/70, it is dated 20 March 1970 and shows the wheel lug wrench I have. I also checked my collection of scanned owners manual for 240Z's, 260Z, 280Z's. Interesting they all show the same early type of lug wrench. Or at least the person is holding them the same way?
-
My 7/70 has the bottom, perpendicular, style. It has the Nissan hamburger and the letter M but no Nissan Motor stamping.

-
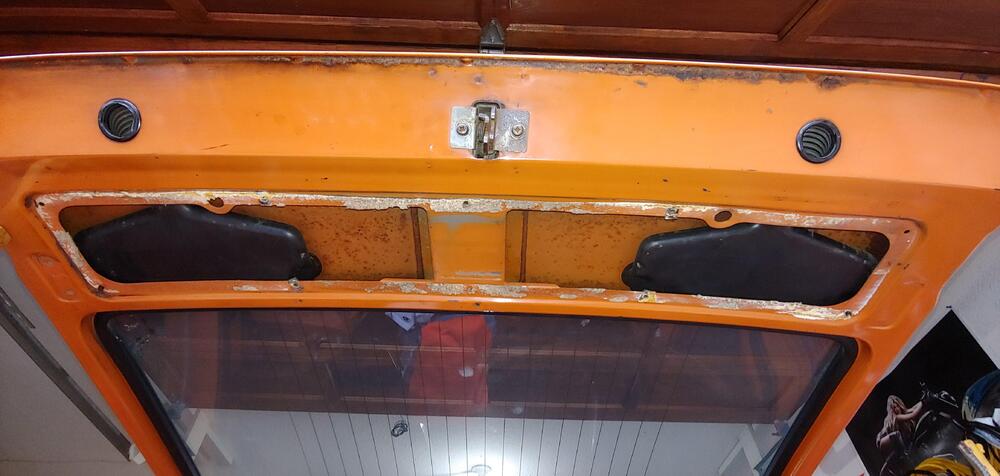
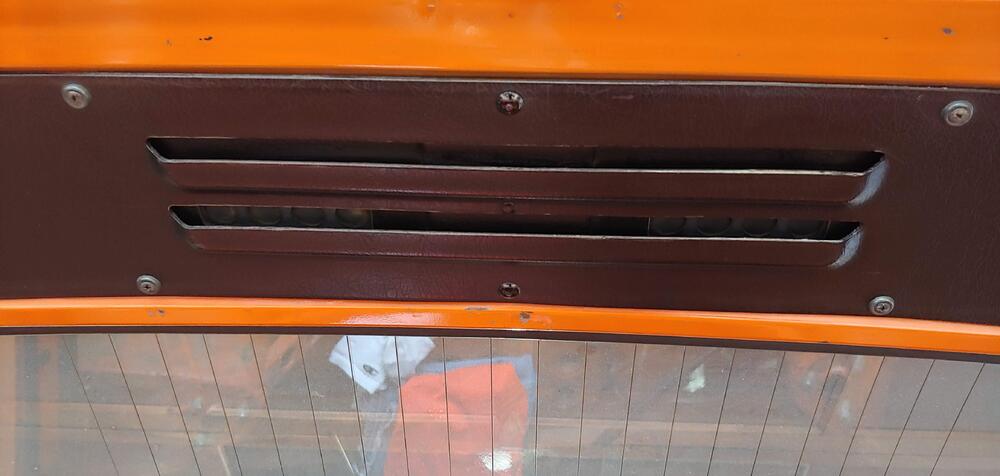
I agree with @Terrapin Z' but I would like to add one small point. Unless I'm mistaken, the function of the openings in the black panel on the inside of the hatch is to let air escape (not enter) through attached rubber flaps that act as a one way check valve. Supposedly to block exhaust fumes from entering. Here are a few pics from my 7/70 car while I was taking it apart, hope they help.


-