CanTechZ
Free Member
-
Joined
-
Last visited
Everything posted by CanTechZ
-
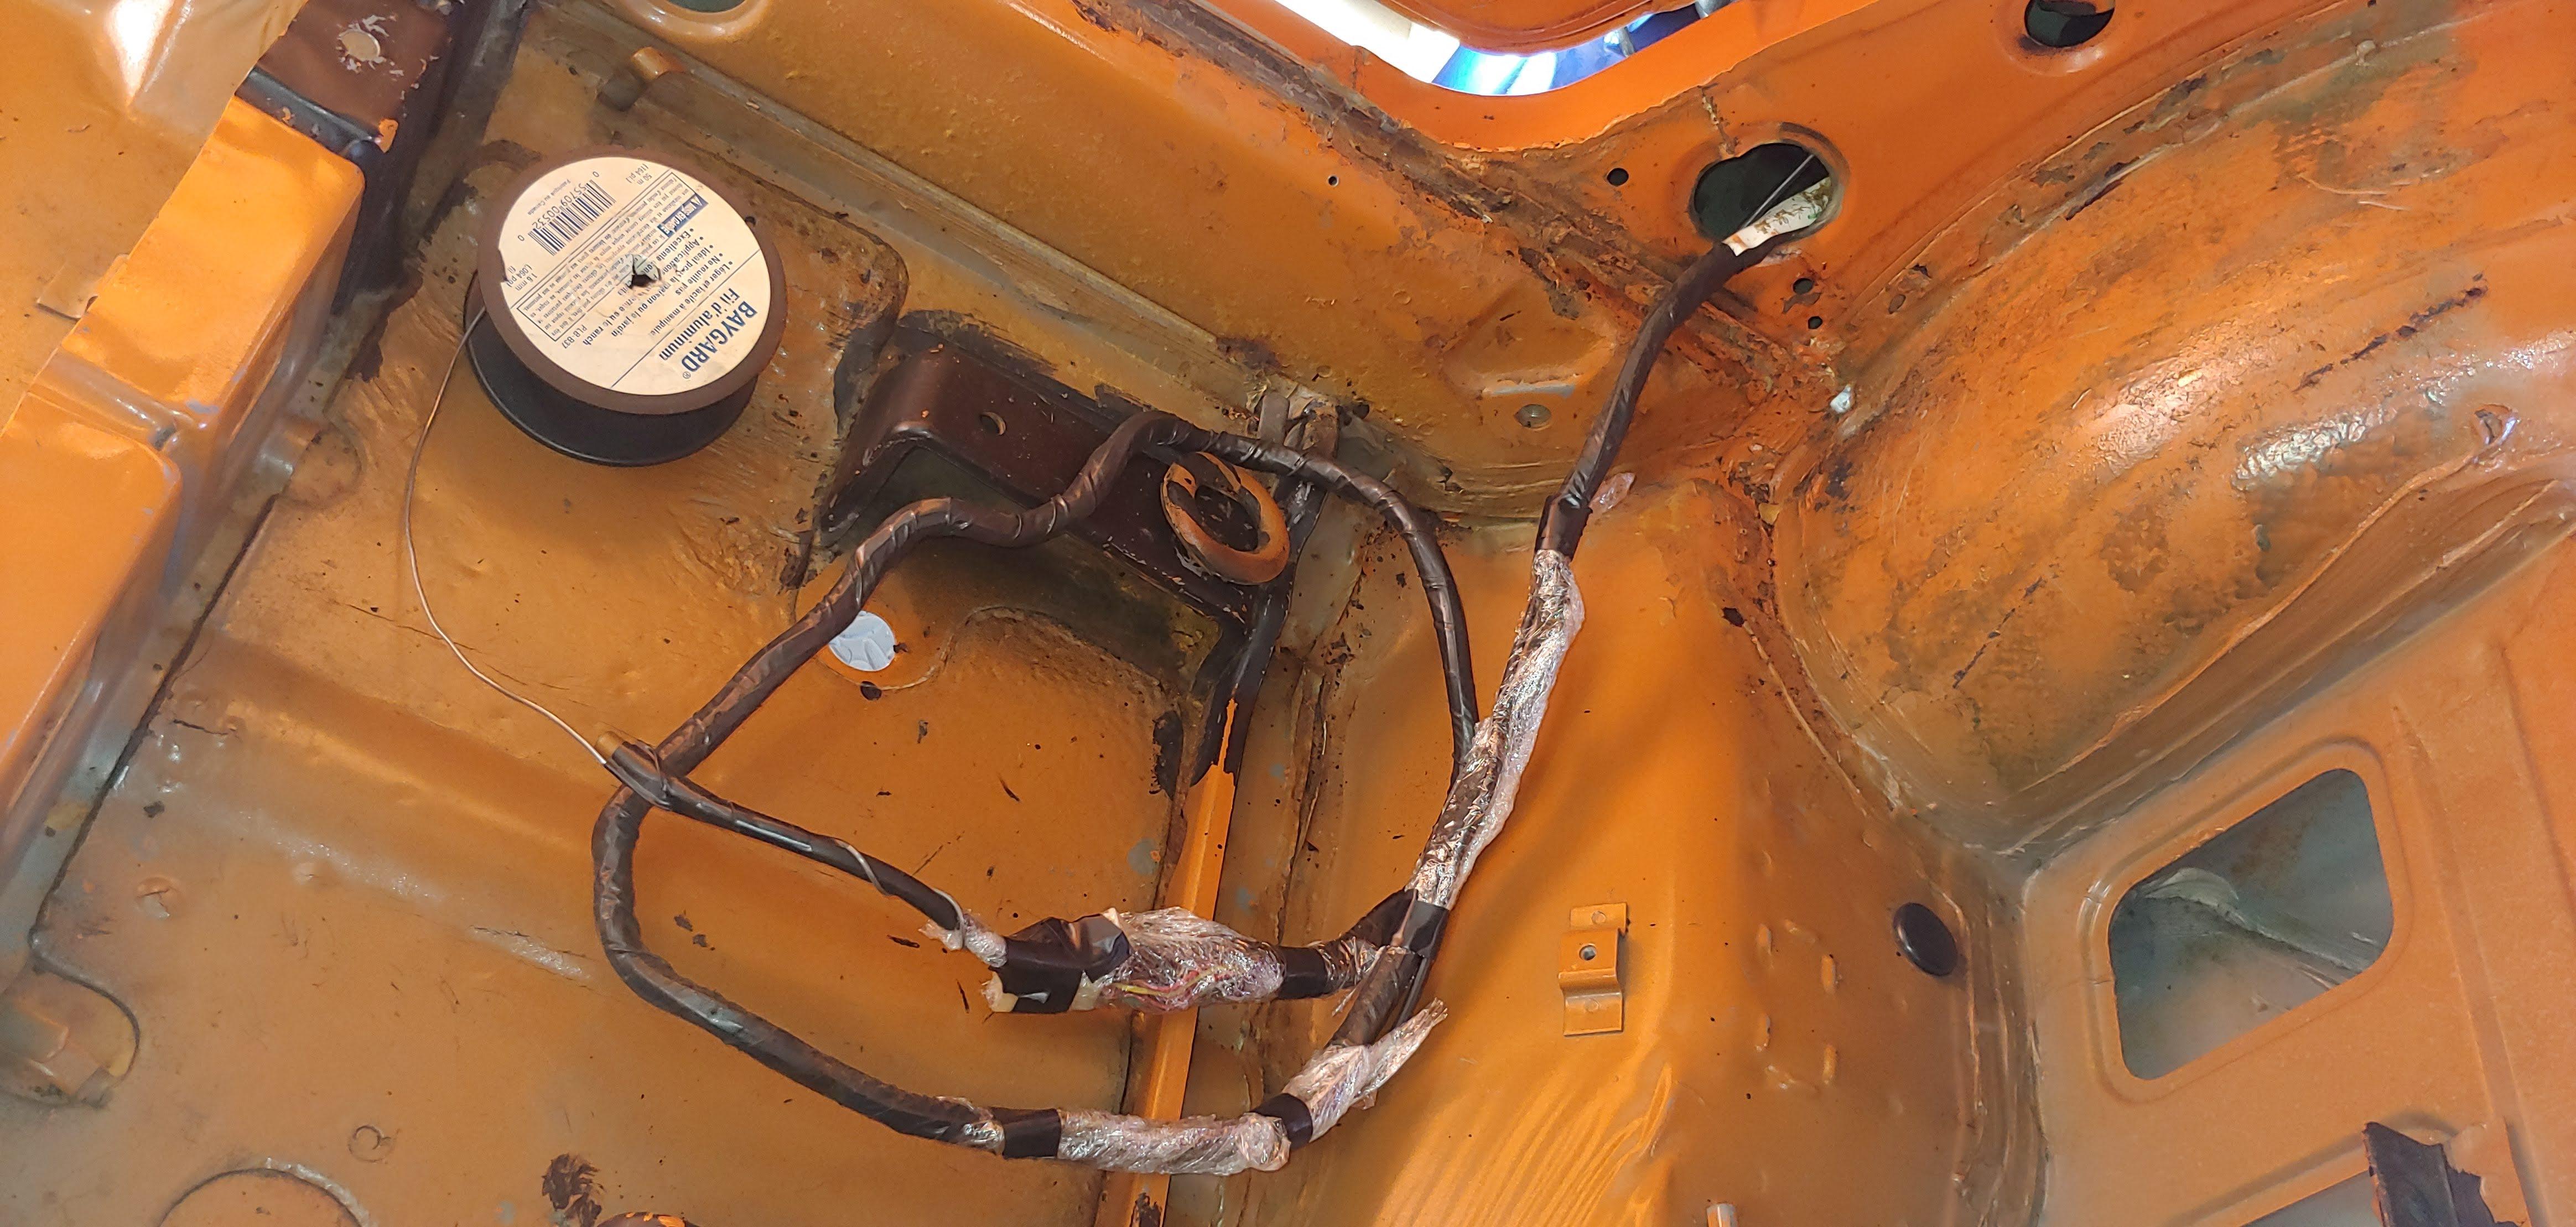
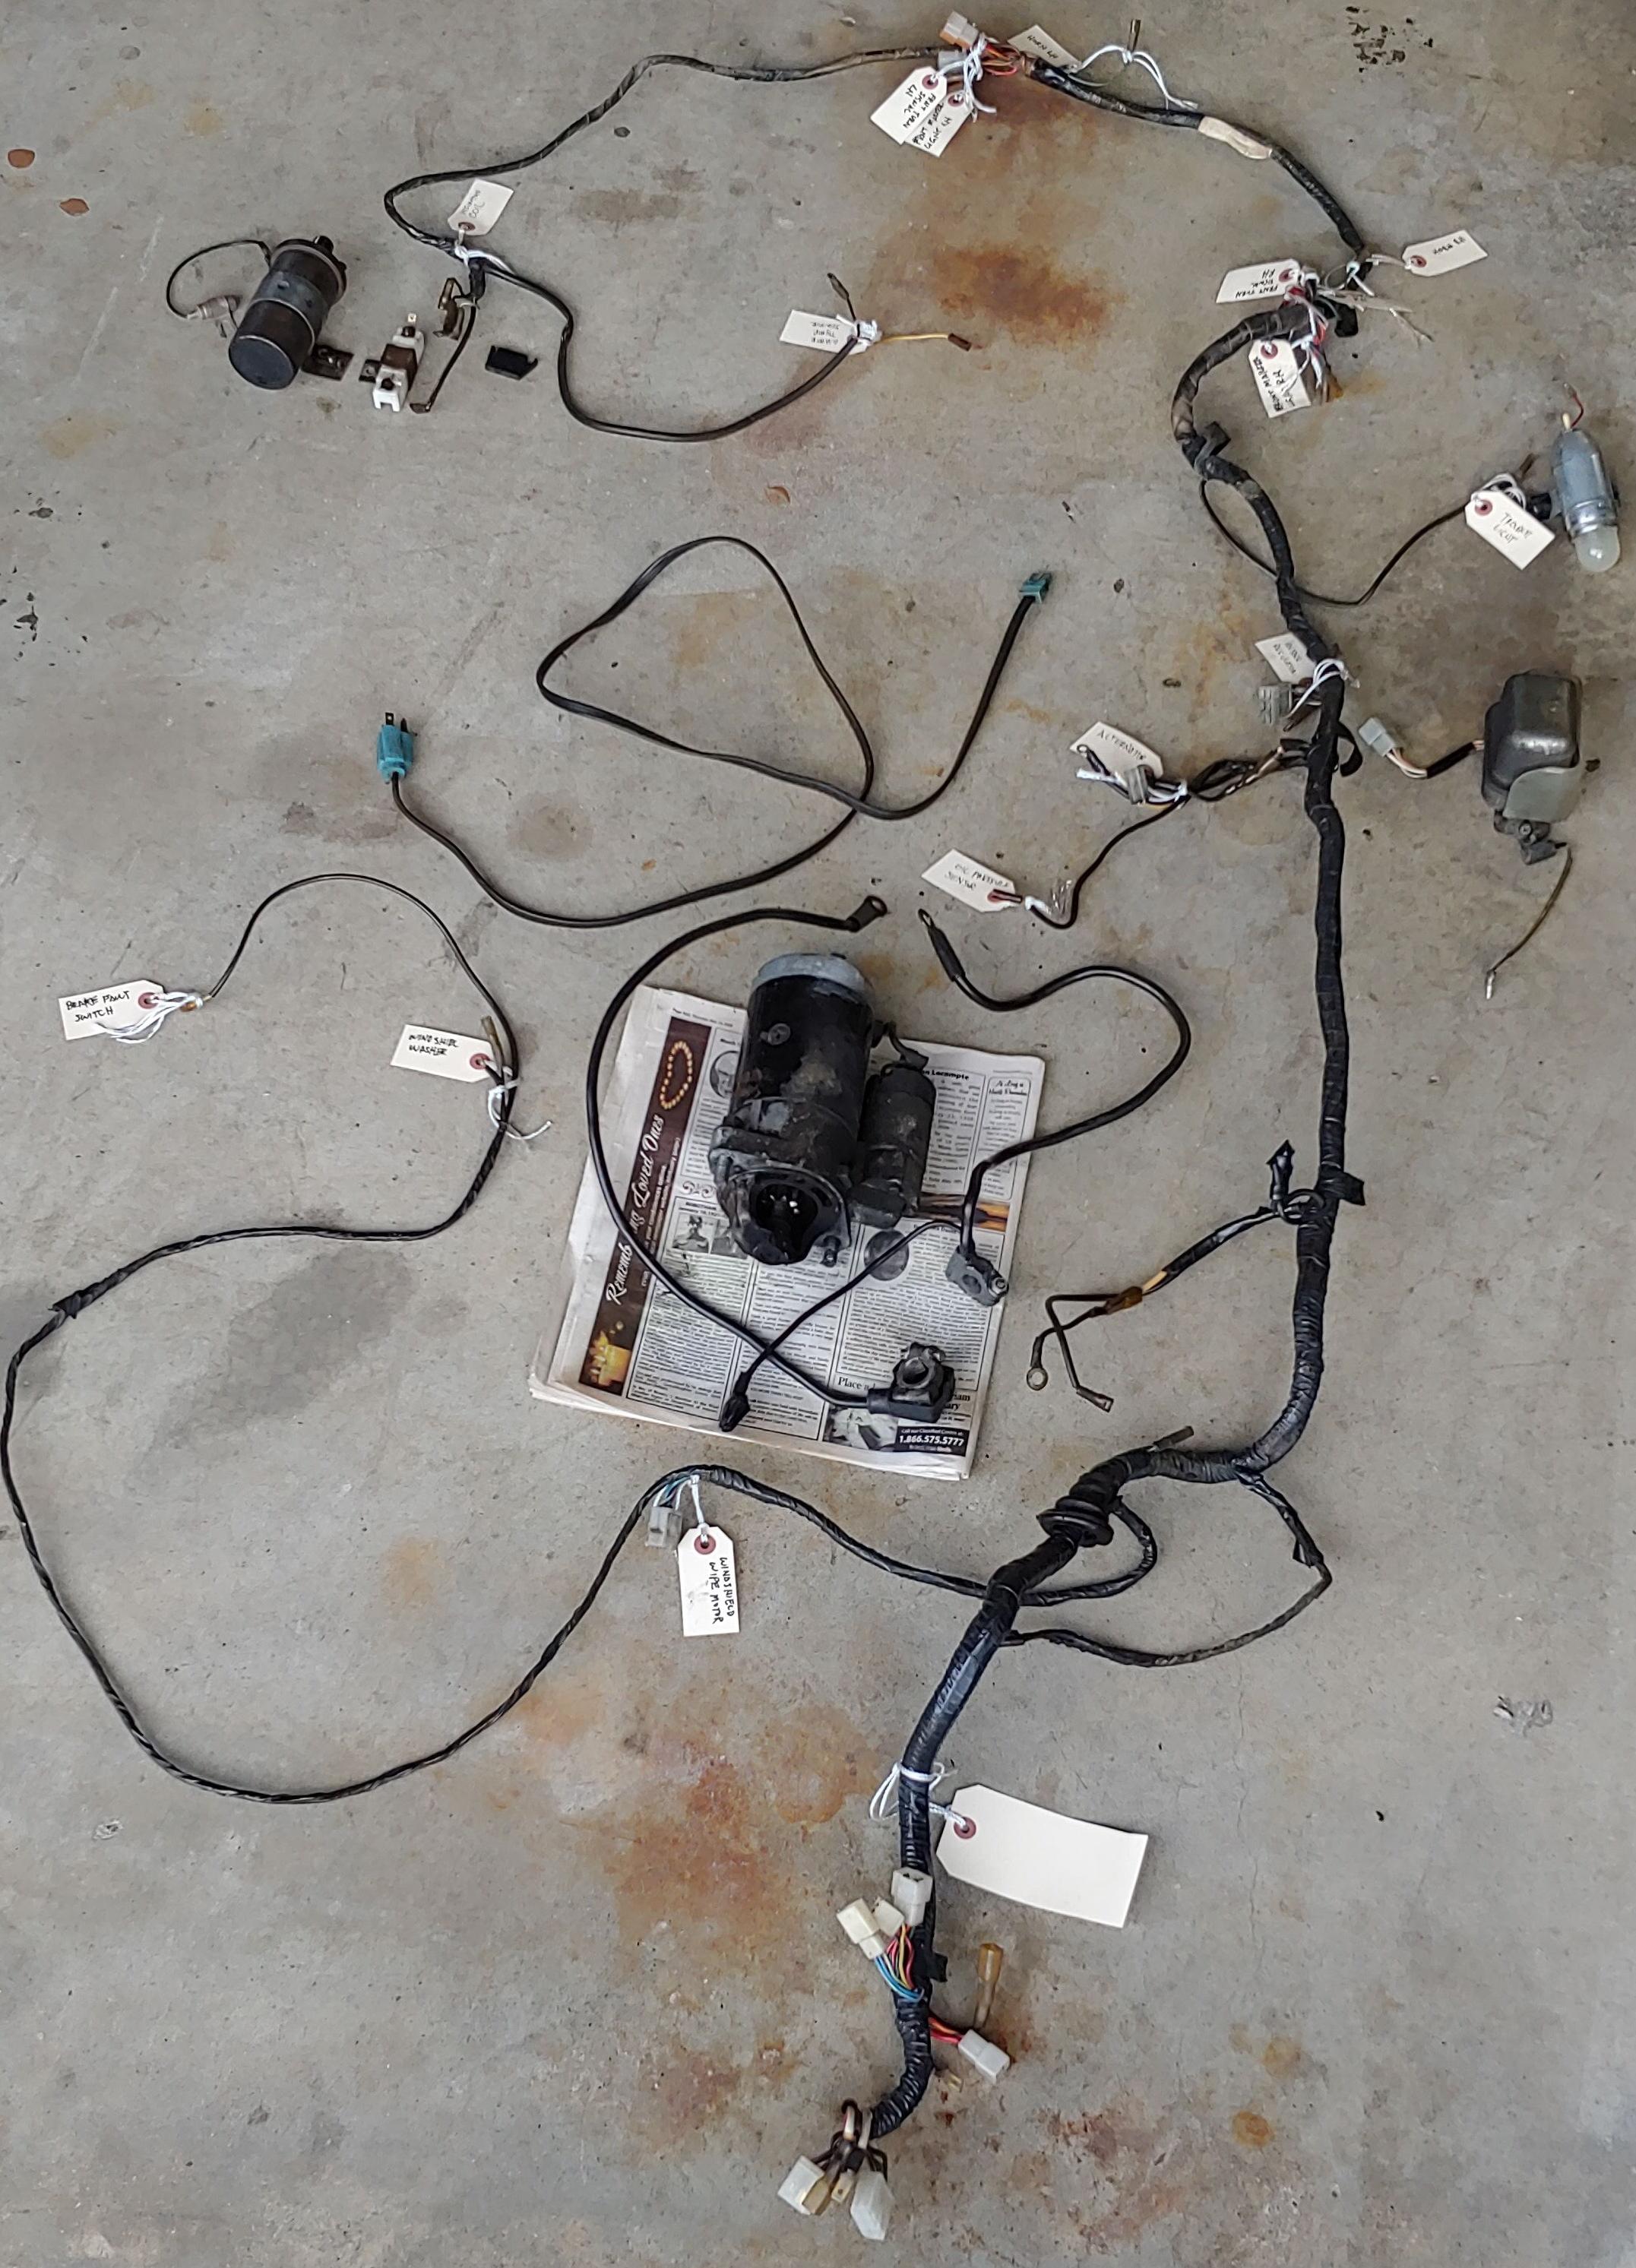
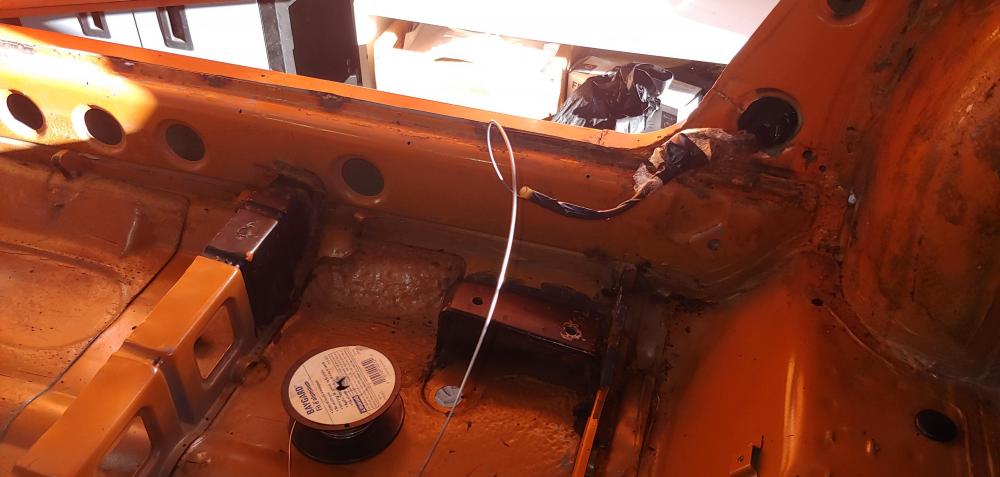
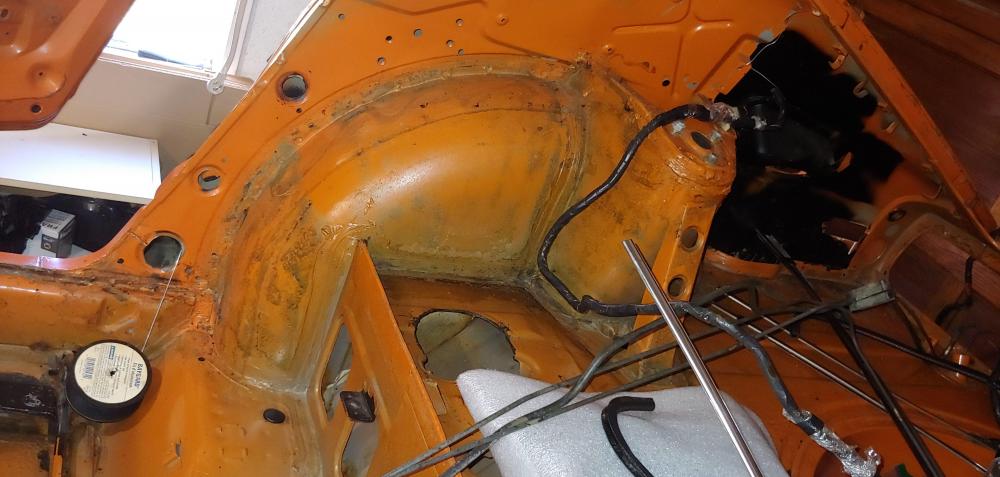
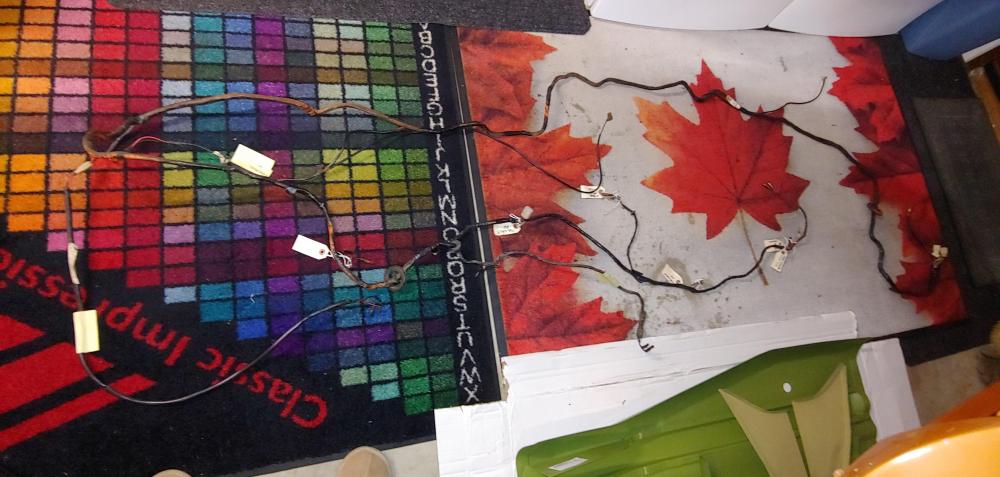
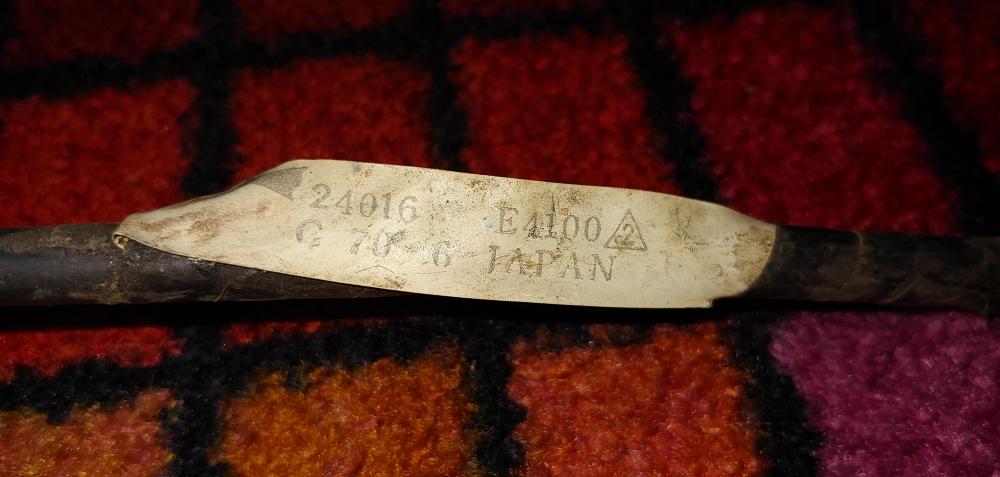
 Been a while since my last update. Not much to report but yesterday I removed the main body electrical harness, interior light and rear defrost harnesses and the body antenna cable. When removing these I attached wire to the ends before I pulled them out so that it will be easier to fish them back in when it's time to re-assemble. I also used cling wrap and tape to cover and hold the connectors and branch wires against the main harness bundle, to prevent the harness assembly from getting snagged as I pulled it through the body. Seemed to work well. All of the electrical has now been removed. I will have a bit of work to cleanup this harness but I didn't do any damage, even the grommets are salvageable. The harness all have the original date coded tags intact. Here are pictures of the main body harness, followed by the interior light harness. I was wondering what the number 2 in the triangle after the part number indicates. I thinking that is a revision to the assembly that is still backwards compatible and not requiring a change to the part number.

-
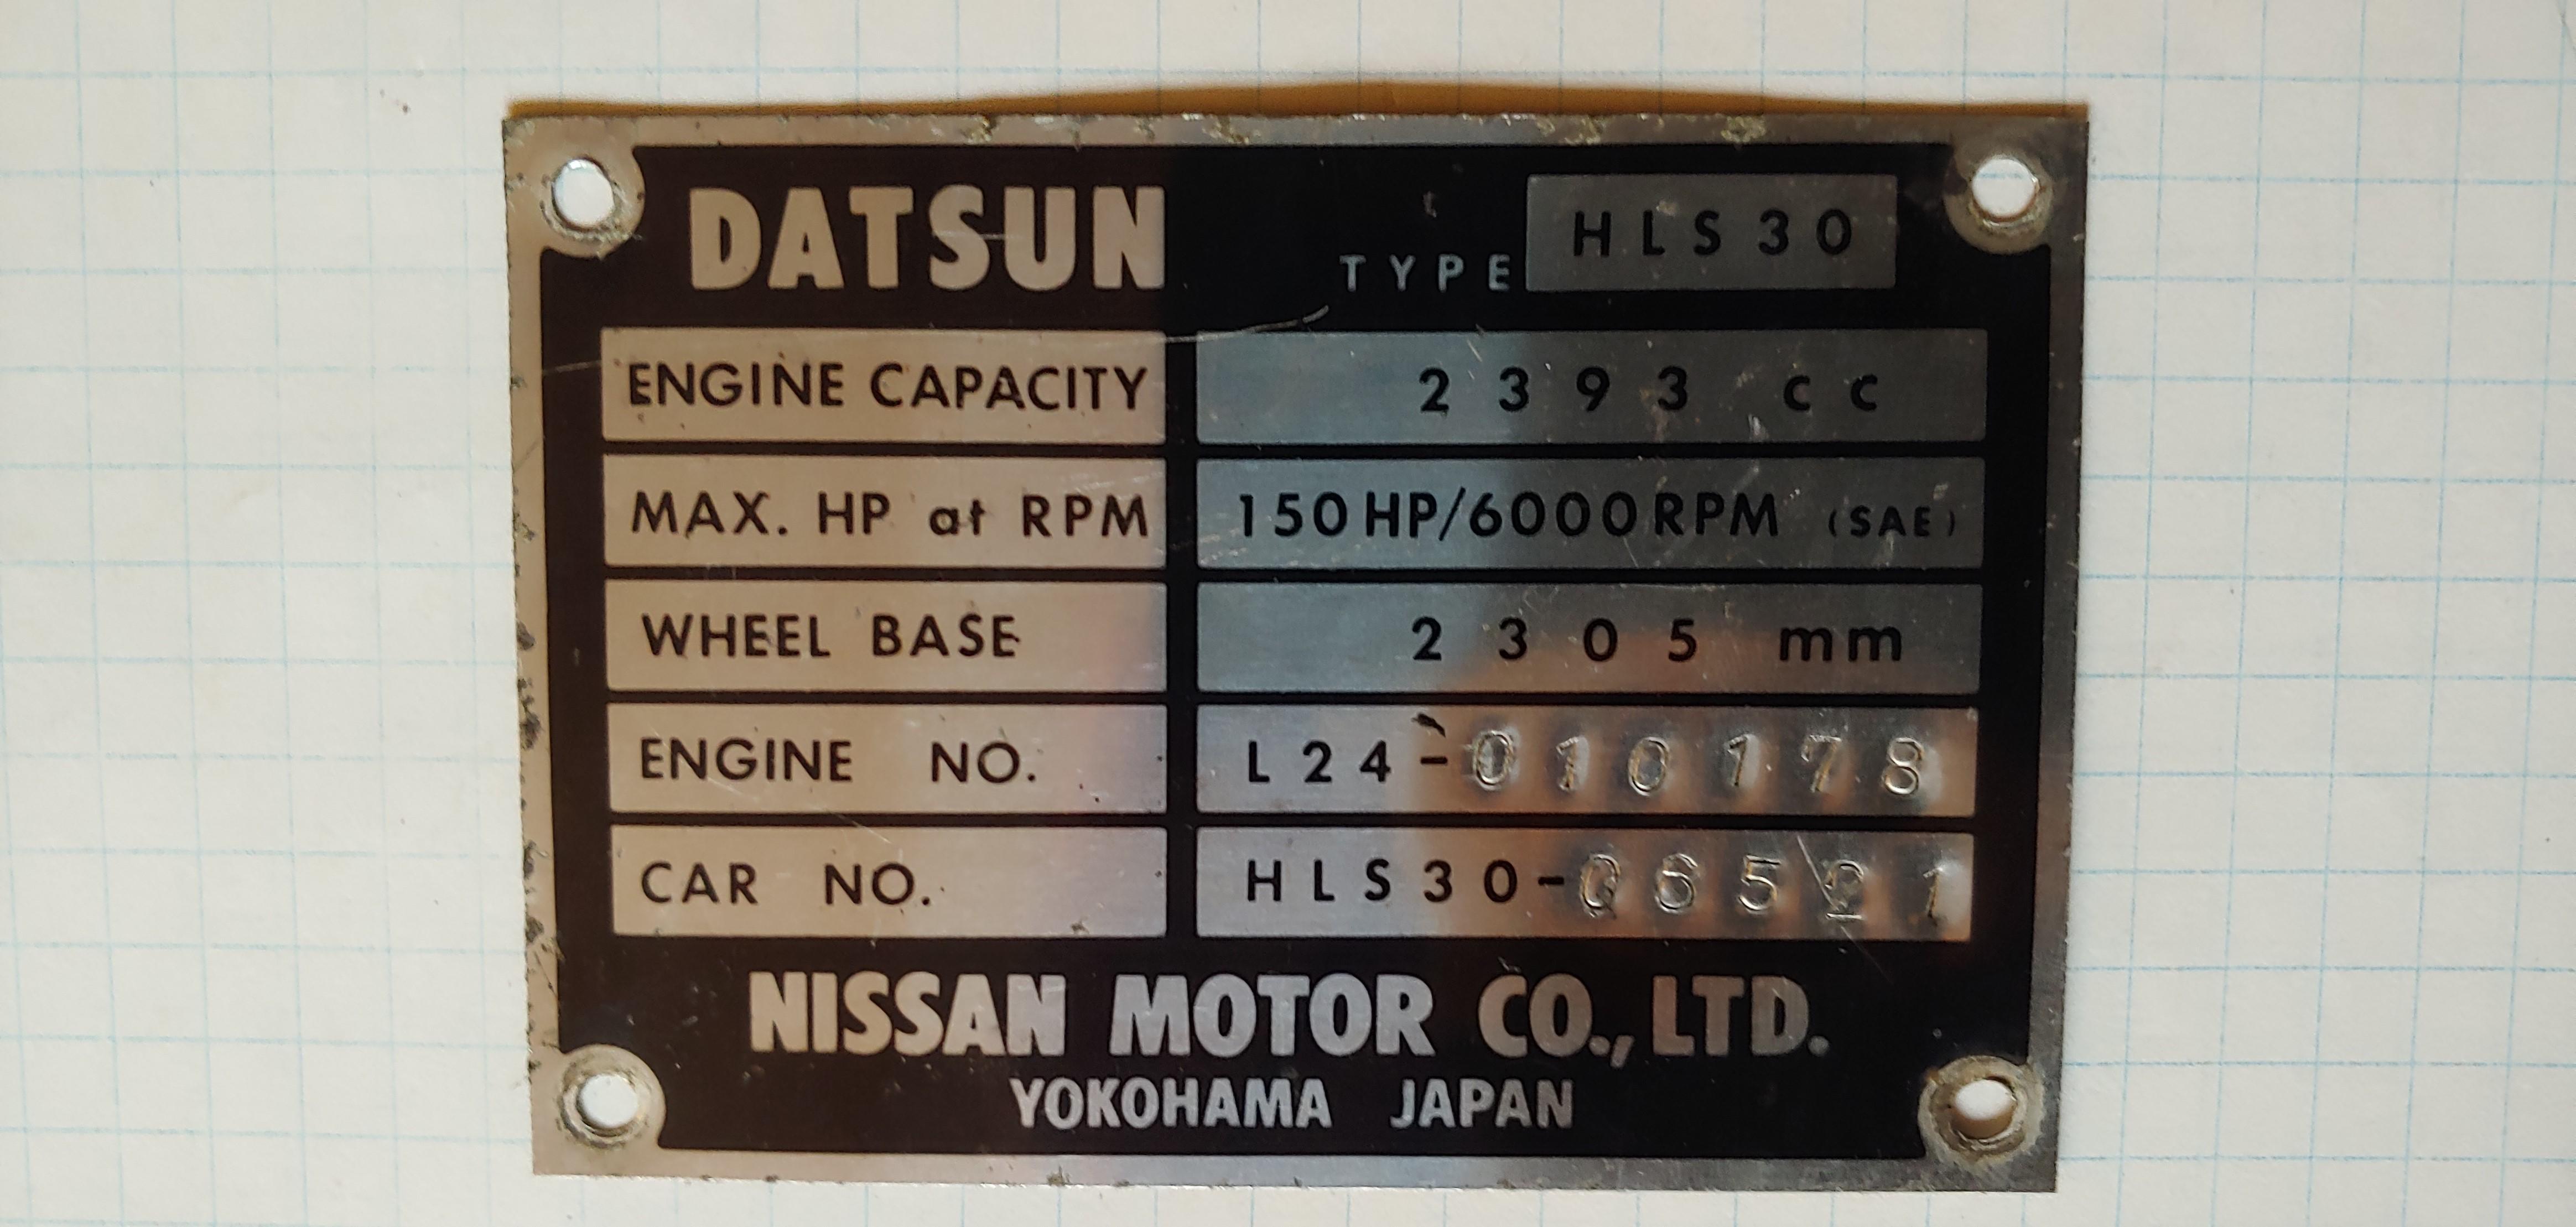
Here is a picture of the tag from the engine bay of my 7/70. The numbers measure 3.5mm in height and are stamped evenly spaced and at a slight angle.

-
Those parts look great. My body guy told me about them a while back, and also said that they do really good work. Great to get another positive reference.
-
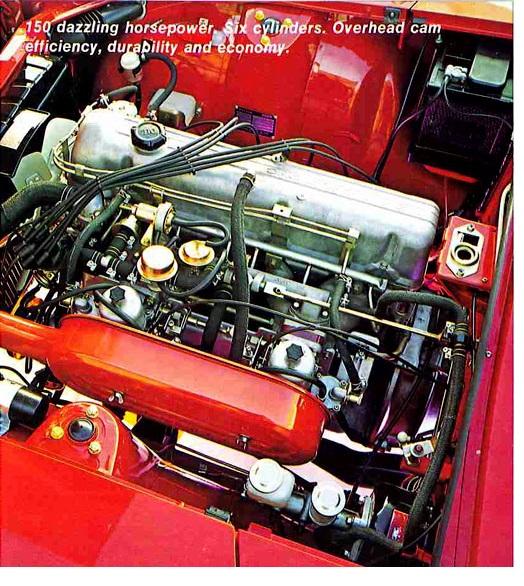
Definitely nothing wrong with having two. Here is a picture from a 1970 brochure.
-
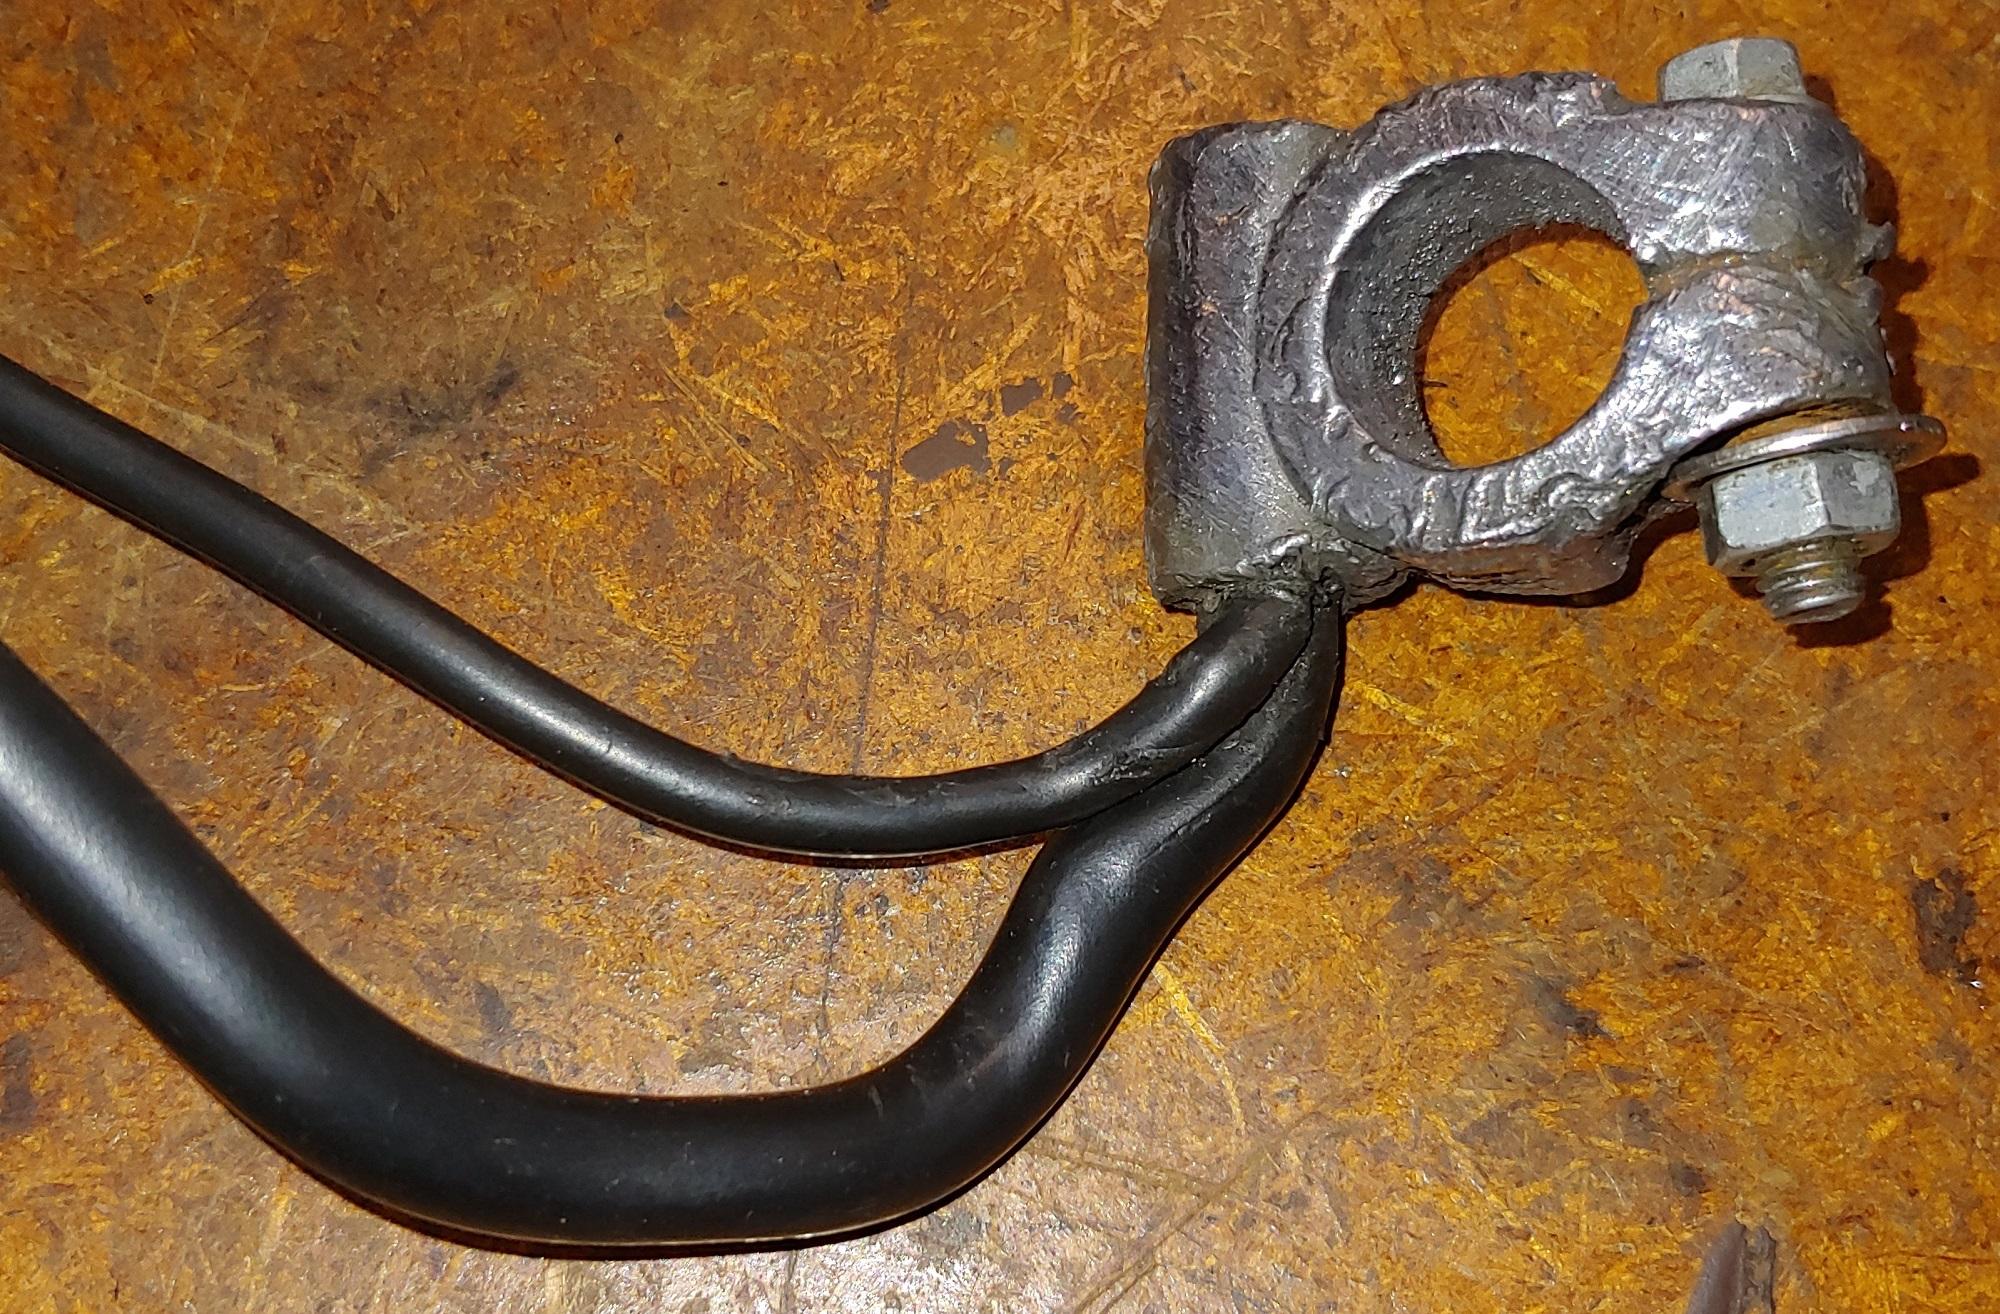
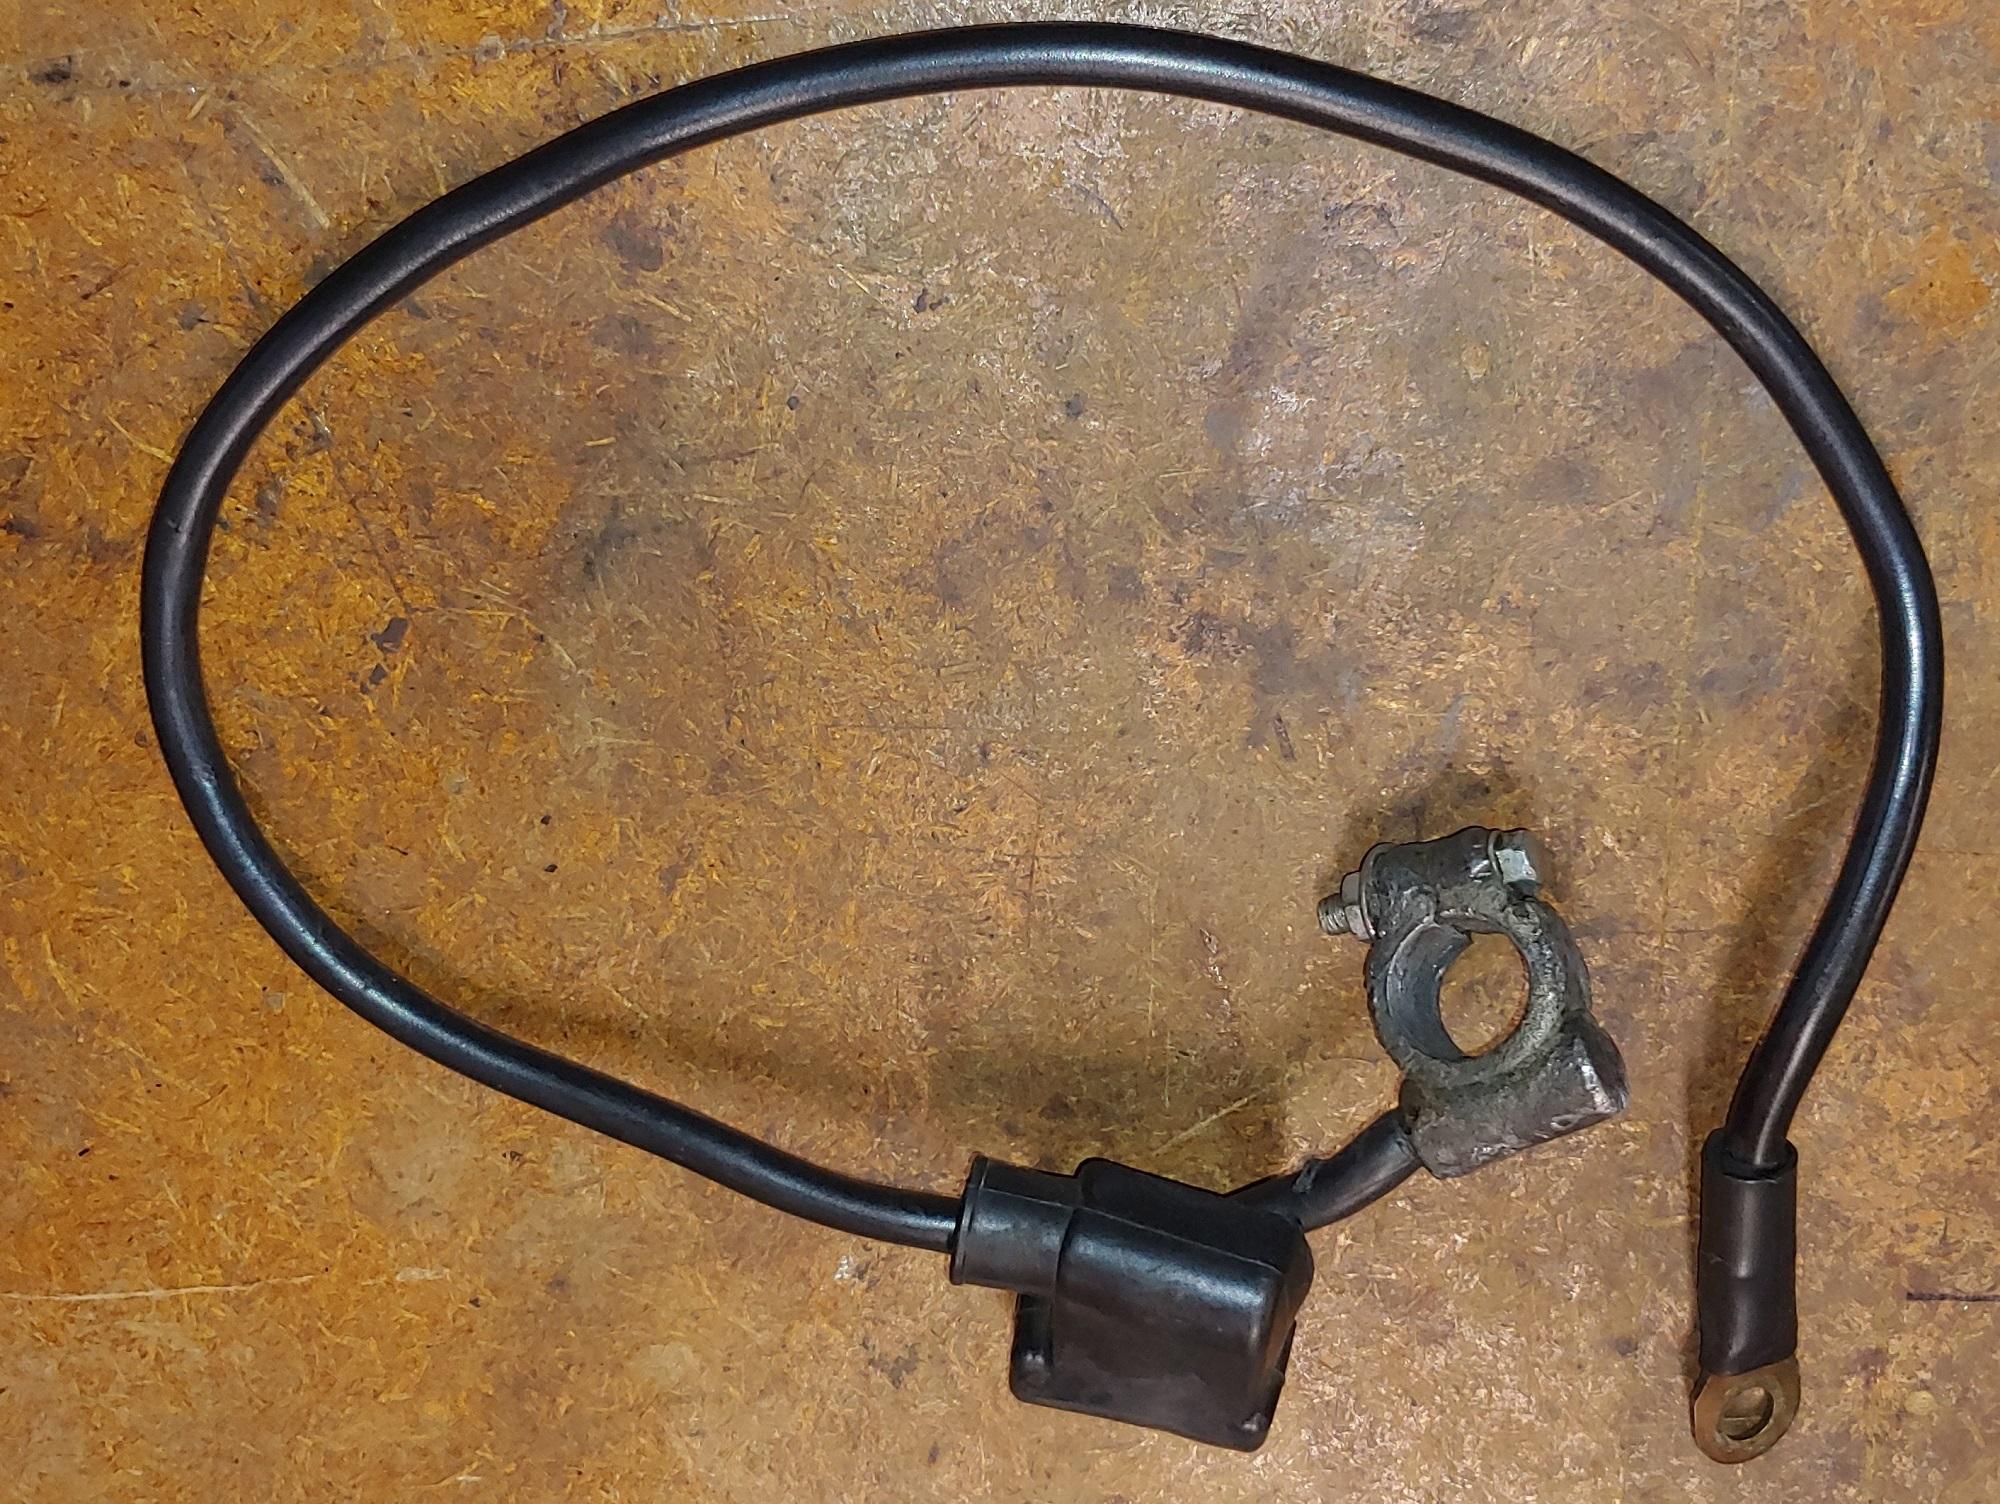
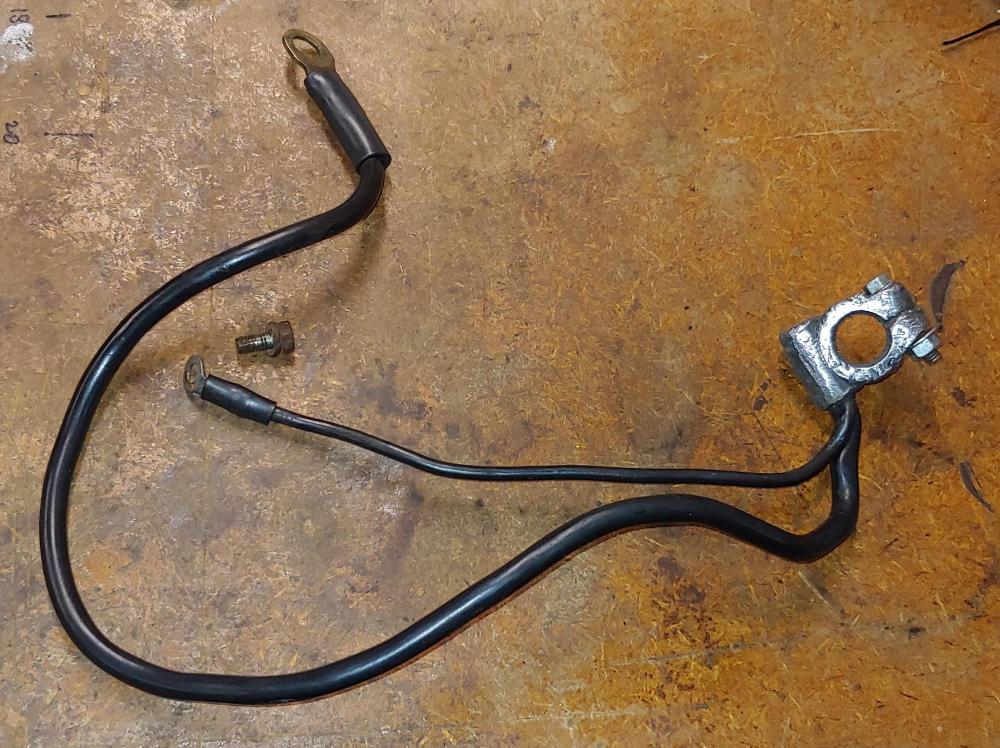
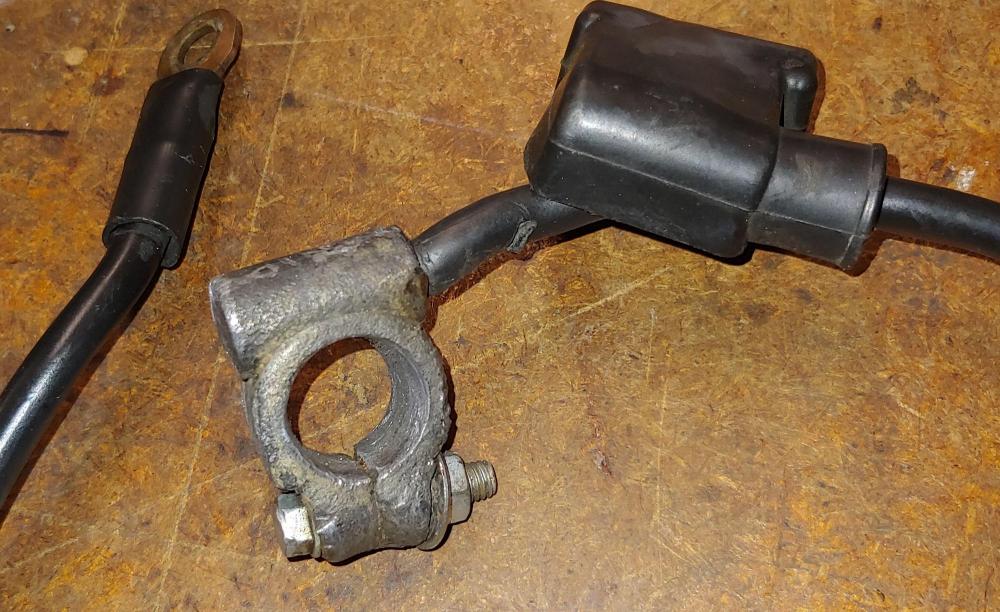
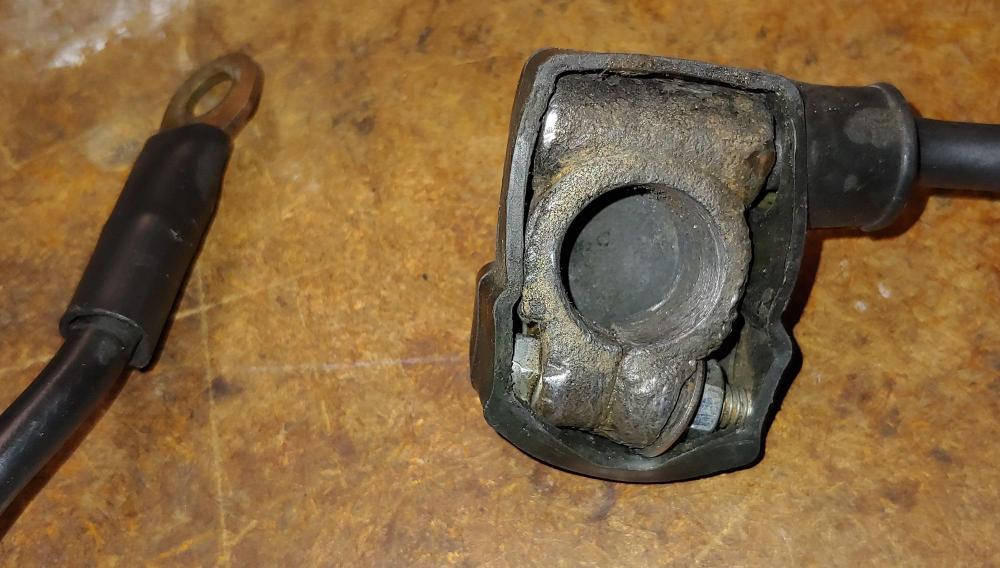
Here are some pictures of the original cables from my 7/70 240Z. @240dkw Hey Dan, I thought that only the positive terminal connector that the "blob" and the negative one was uncovered. Negative: Positive:


-
Not sure if this will help but recently I uploaded templates for the floor tar mat insulators to our cad files area. They include the cut out locations for the areas marked with x's in the picture above. Here a link to the files:
-
Here are a couple of pics from when I was taking mine out. Here is before removal.

-
That sag is on all four sides of four screw carb isolators. I believe it was intentional as the sag looks the same on all four. Three screw carb isolators are flat on three sides and a different shape on the bottom for the water passage.
-
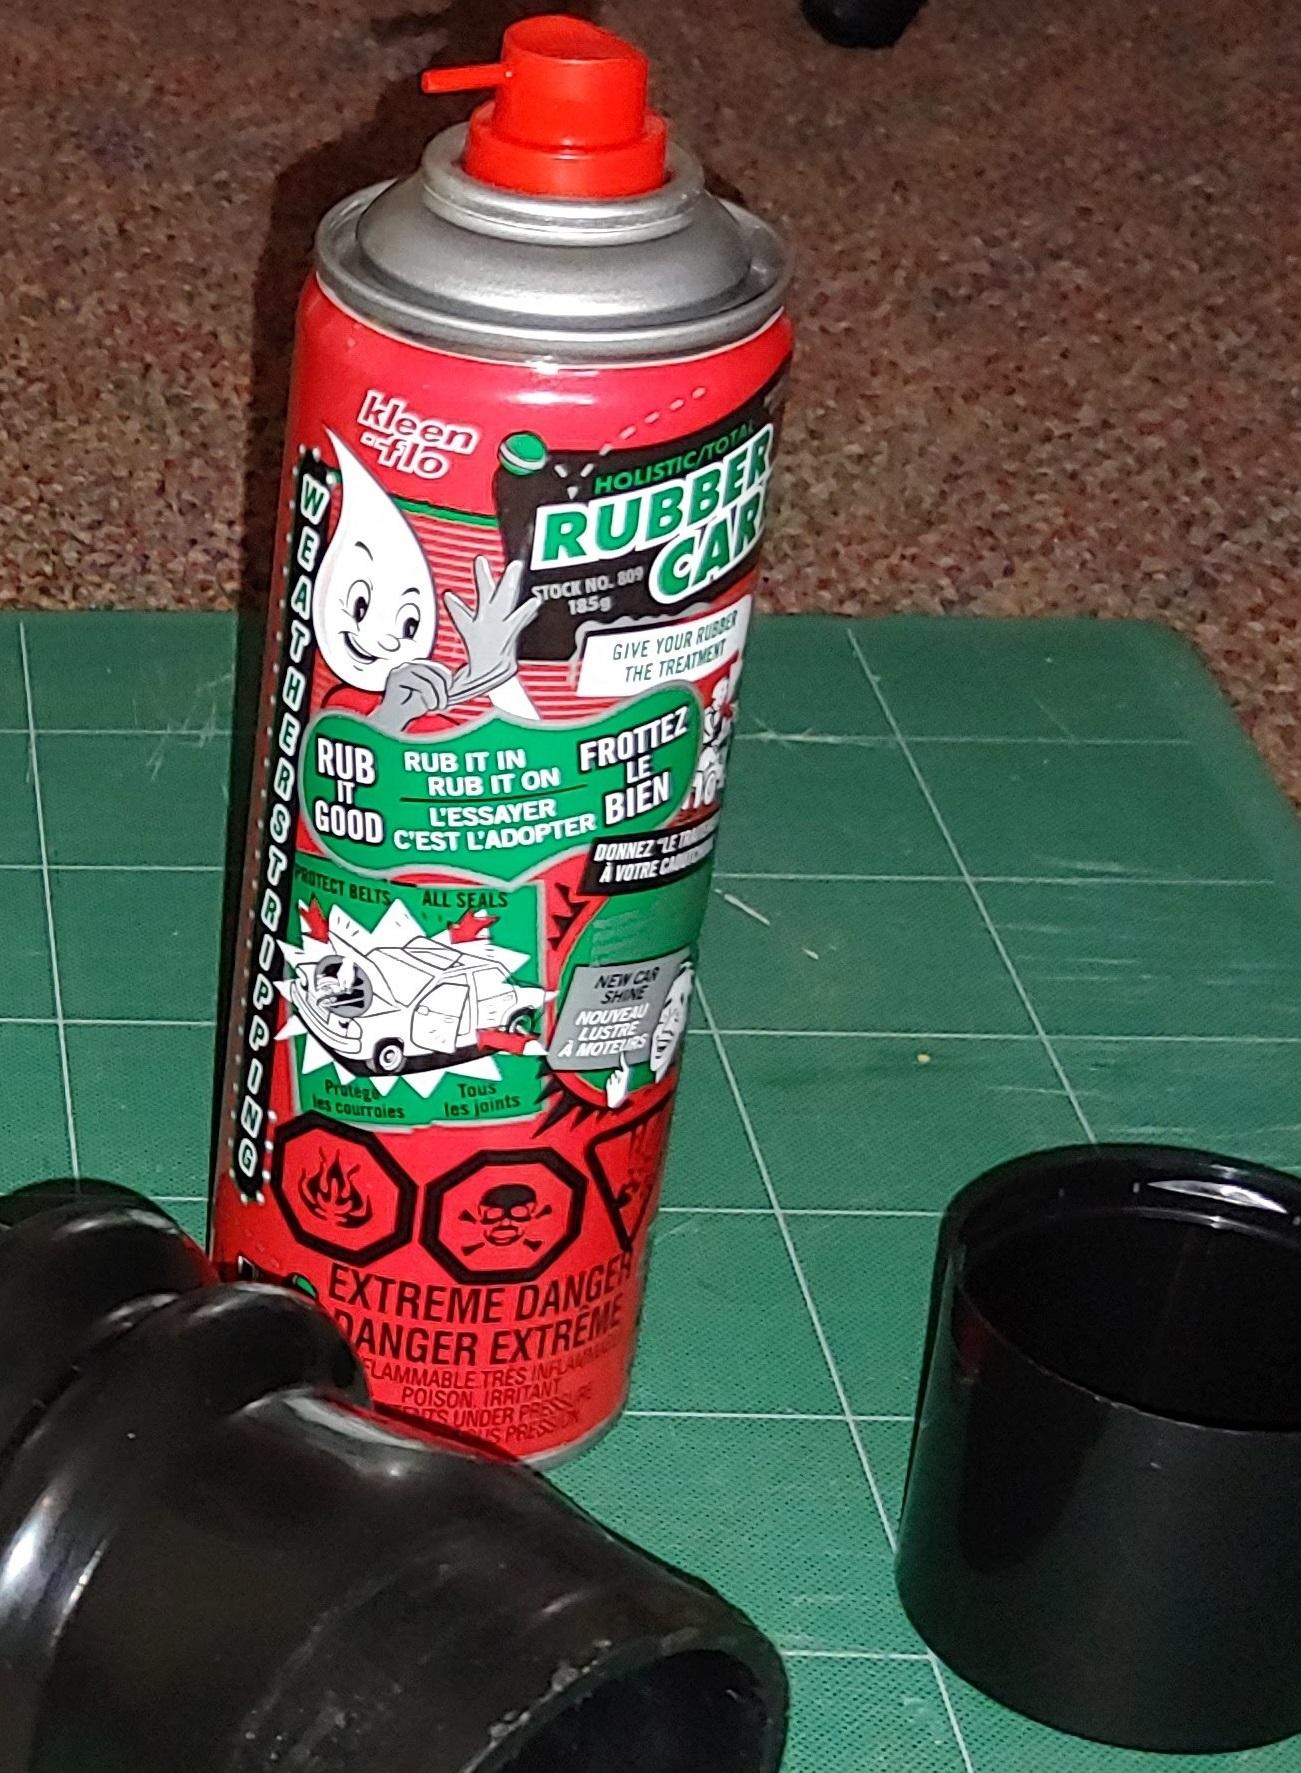
Another great video Ryan, thanks for posting. Nice to see your hatch hinge seals came out in good shape. For cleaning those up I plan to use a Kleen-Flo product called Honey Goo Holistic Rubber Care. It's mainly for weather stripping but works well on softening most rubber parts like marker light and tail light seals as well as floor plugs and grommets etc. I sprayed this stuff liberally on the firewall grommets for hoses and electrical before removal and it worked wonders on these 50 year old rubber bits. http://www.kleenflo.com/products/809.html#:~:text=Honey-Goo Holistic Rubber Care,for that new look shine. Nice that the handbrake cable assembly came out so easily for you. Mine was a *itch getting those cable clips off, you made it look so easy. Although I must say I did it the hard way by not removing the rear axle and diff assembly first. Cheers, Mike

-
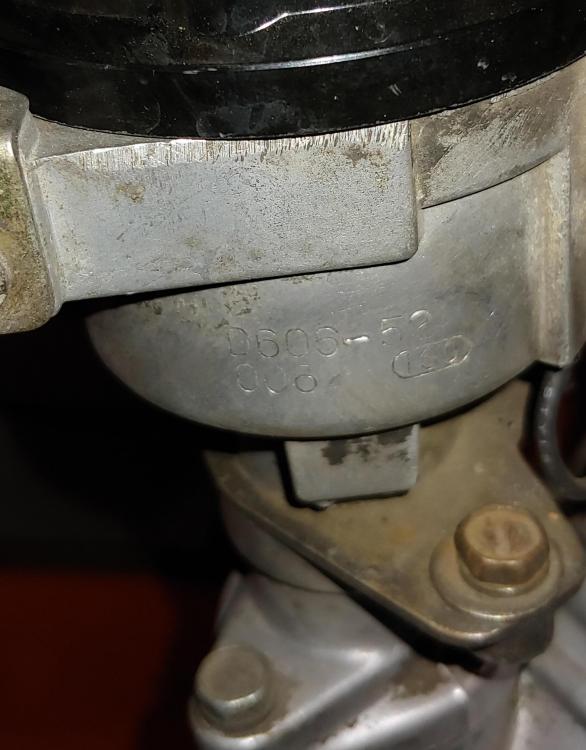
Interesting Jim, with my car being a UN, Only 12 cars older than @240dkw's UN car, I thought I would check my dizzy for a painted on number. I found that mine is a D606-52, but the number is engraved, not painted. Lot's of small variances with our cars. Cheers, Mike
-
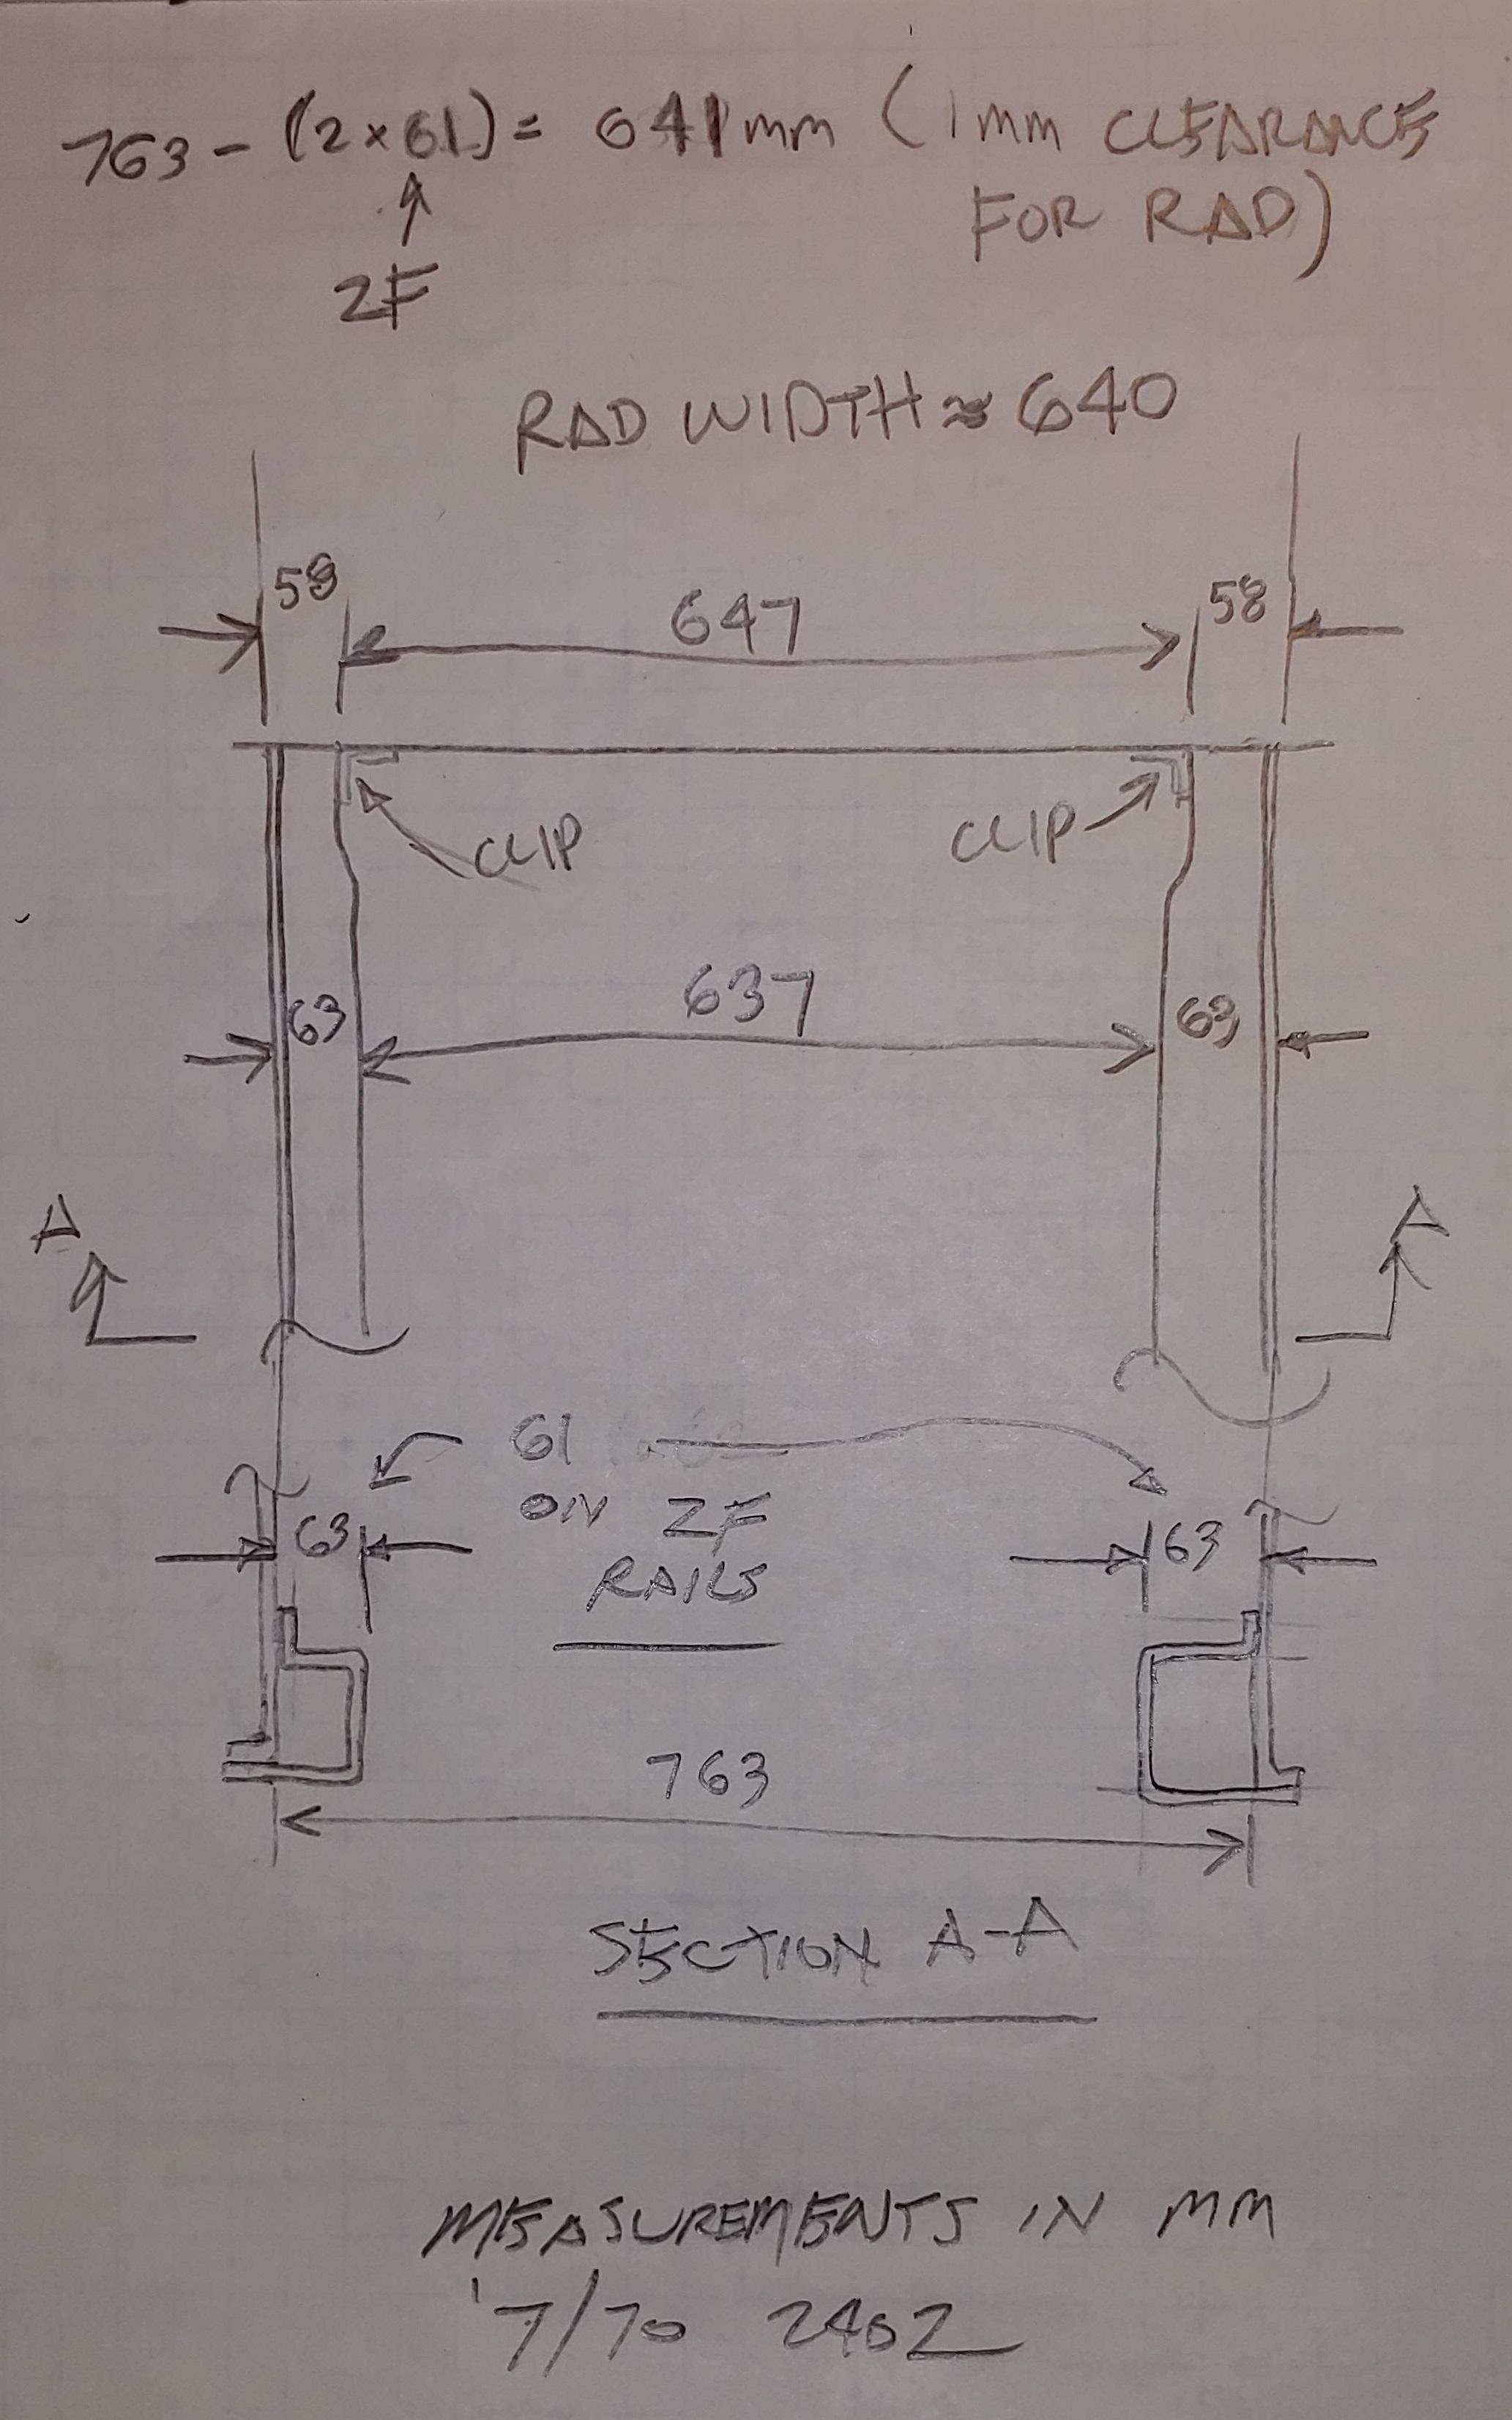
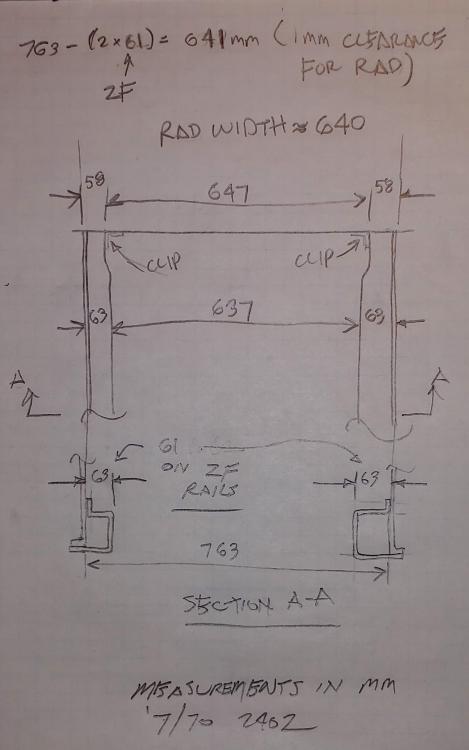
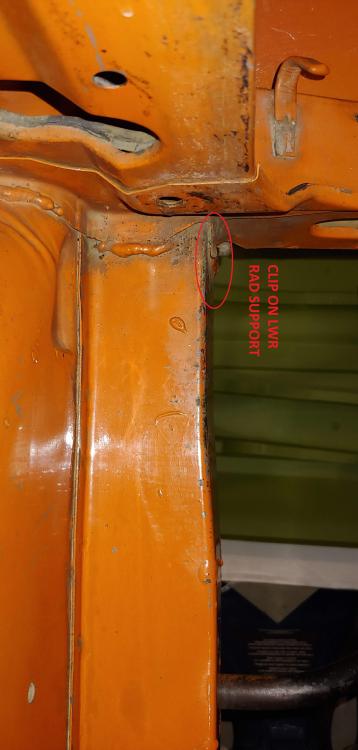
I recently received a pair of front frame rails from ZeddFindings. They measured slightly narrower than the originals by 2mm. The ZF rails are 61mm wide and originals on my 7/70 240Z measured 63mm and 58mm wide at the narrow part in the rad area. My rad measured 640mm wide at the bottom, in the area my frame rails measured 647mm inside. With ZF rails that would be 641mm., or only 1mm clearance for the rad. But in reality it will be tighter as there also formed clips on the lower rad support that may interfere. Here is a sketch and picture to help explain.
-
I wonder if from factory they used a clear chromate conversion coating like clear alodine to give a small level of protection.

-
It is strange that no decimal point can be seen in those mil readings. For reference the seller of the "Green Monster" claimed 2 - 5 mils on BAT and posted a video of the readings on that car and other cars. https://bringatrailer.com/listing/1971-datsun-240z-124/
-
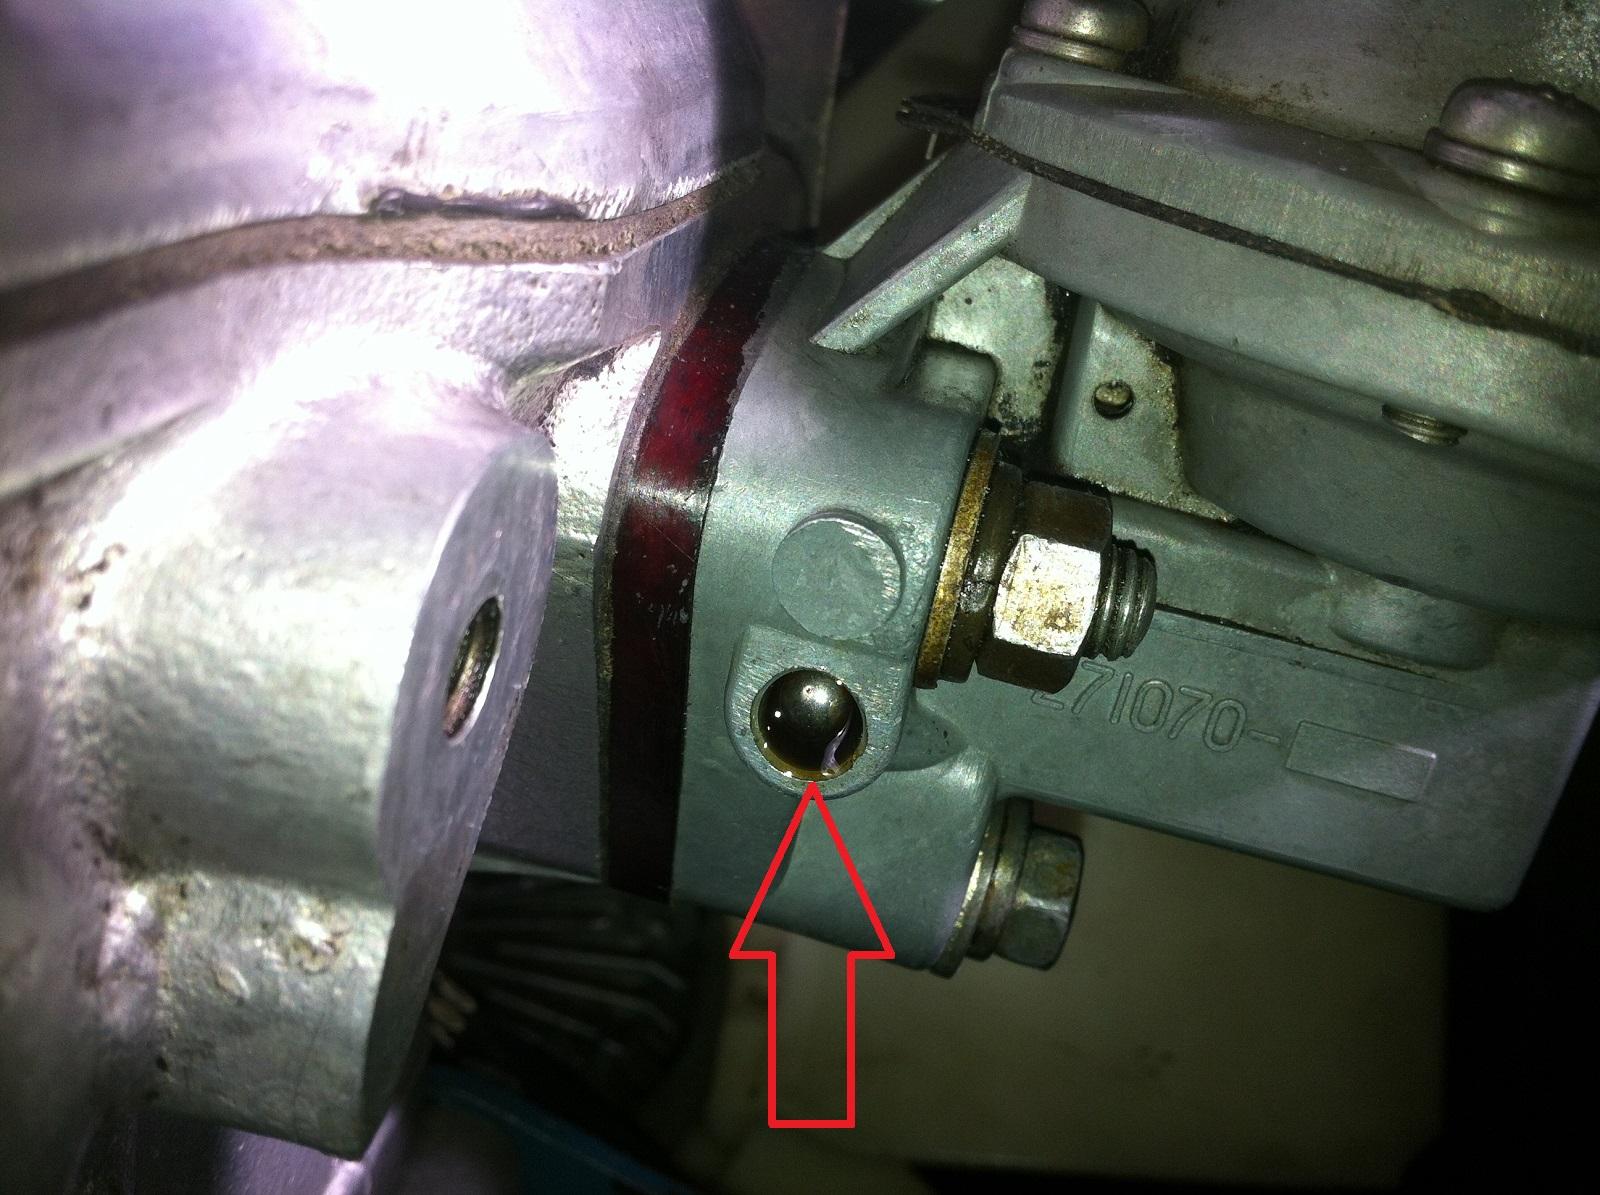
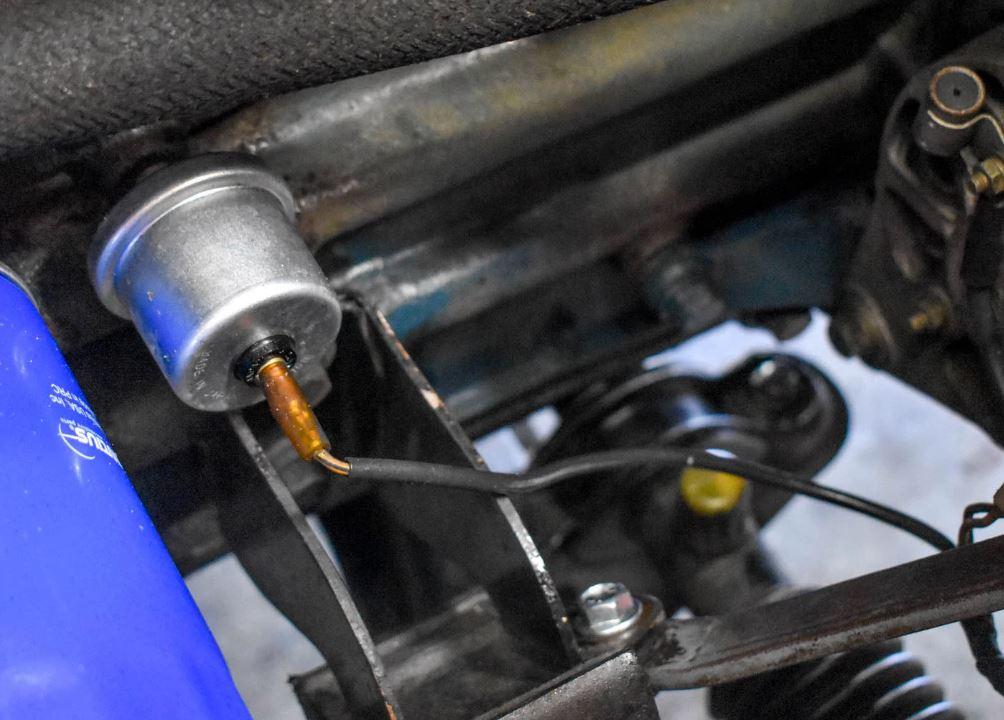
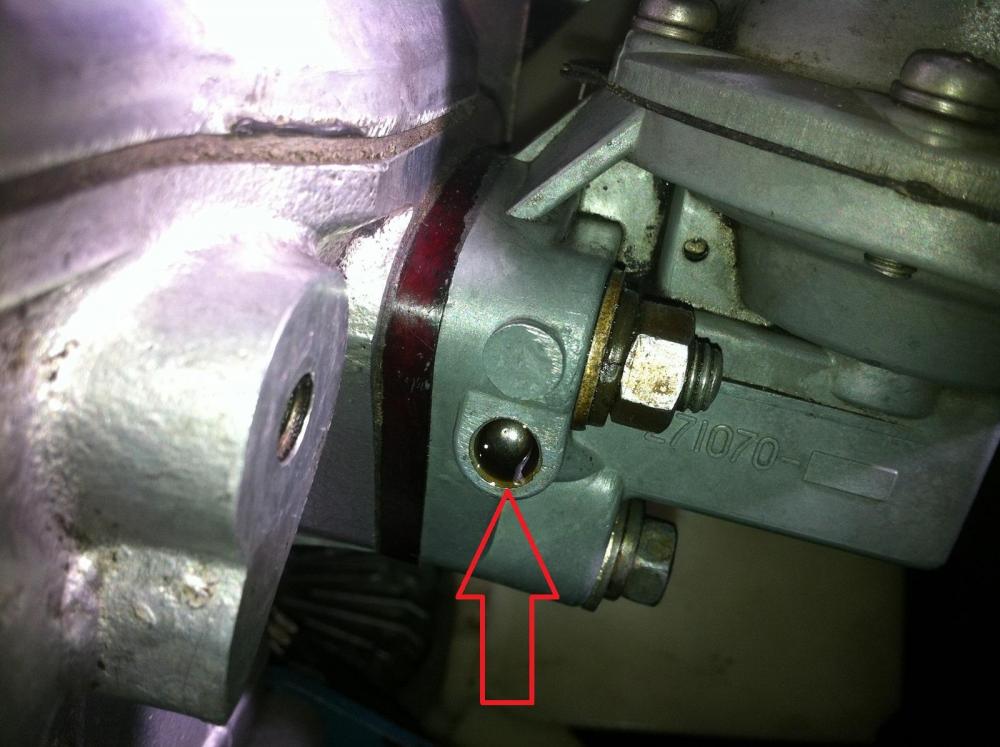
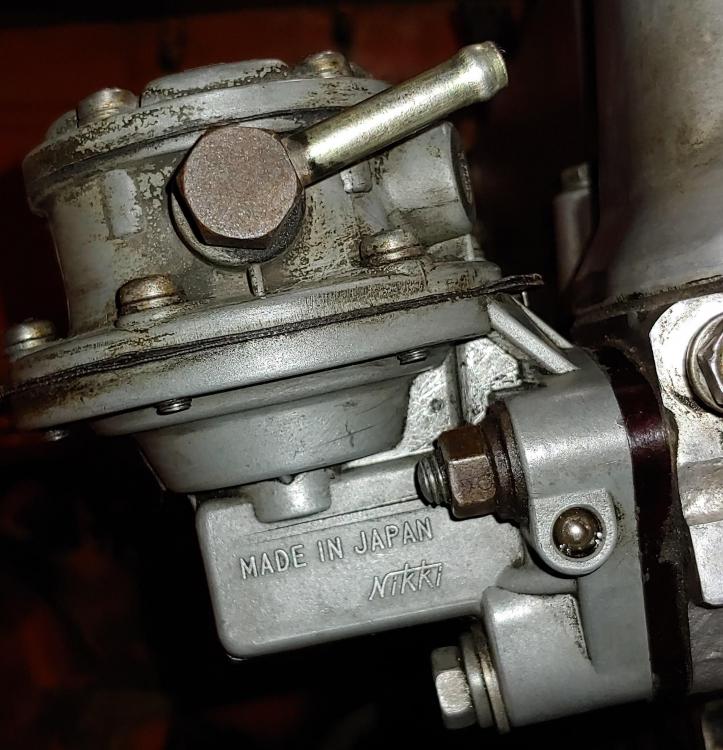
Thanks Dan, the weep hole on my Nikki pump is in a different location and doesn't seem to be leaking at that point. My weep hole is on the opposite side just above the pump fastening nut. It does seem to be leaking at the pin, here is are a couple of pictures. I am interested in your kit, as my parts car engine also has a Nikki pump that hopefully I can rebuild. If your kit will work with a Nikki please PM me.
-
Nothing wrong with your math. I thought the red car readings were 2.2 Mil average. I didn't zoom in, 22 Mil sounds to heavy.
-
Not a paint expert but when you convert the white paint readings from metric to imperial you get 9.8 mil, 7.9 mil, 5.9 mil respectively. If the repaint had a heavy primer plus top coat over the original paint you might get those kind of readings.
-
-
Thanks Ryan, I appreciate the kind words. Mechanically most components are in good shape, so it will mainly be a clean and re-assemble effort. I do have a few oil leaks to deal with and the fuel pump will need to be replaced. I will have to do lots of plating and source a few parts, like a mirror and shock tower vinyl, but most parts are reusable with a little elbow grease and some painting. I am lucky that my car has been kept mostly stock for it's whole life and retains virtually all of it's original parts. It is fortunate that most hard to find items, like the dash, console, early radio are in good to very good condition. Also electrically speaking my car has very few issues, mostly good except for the very intermittently working clock. I have really enjoyed the videos you have been posting in your build thread and seeing the progress. Cheers, Mike
-
Here is an old discussion that has lots of good info on the subject of engine casting numbers, post #44 is close to yours and is a P30
-
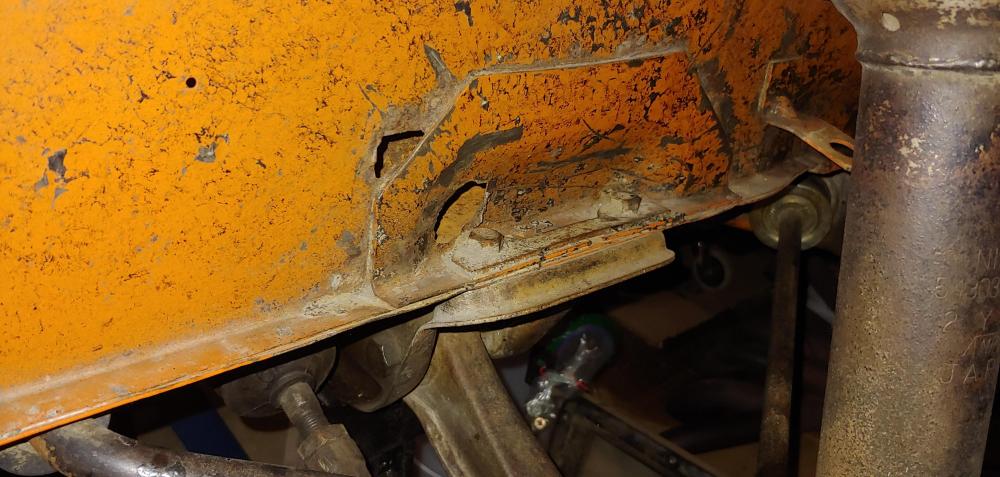
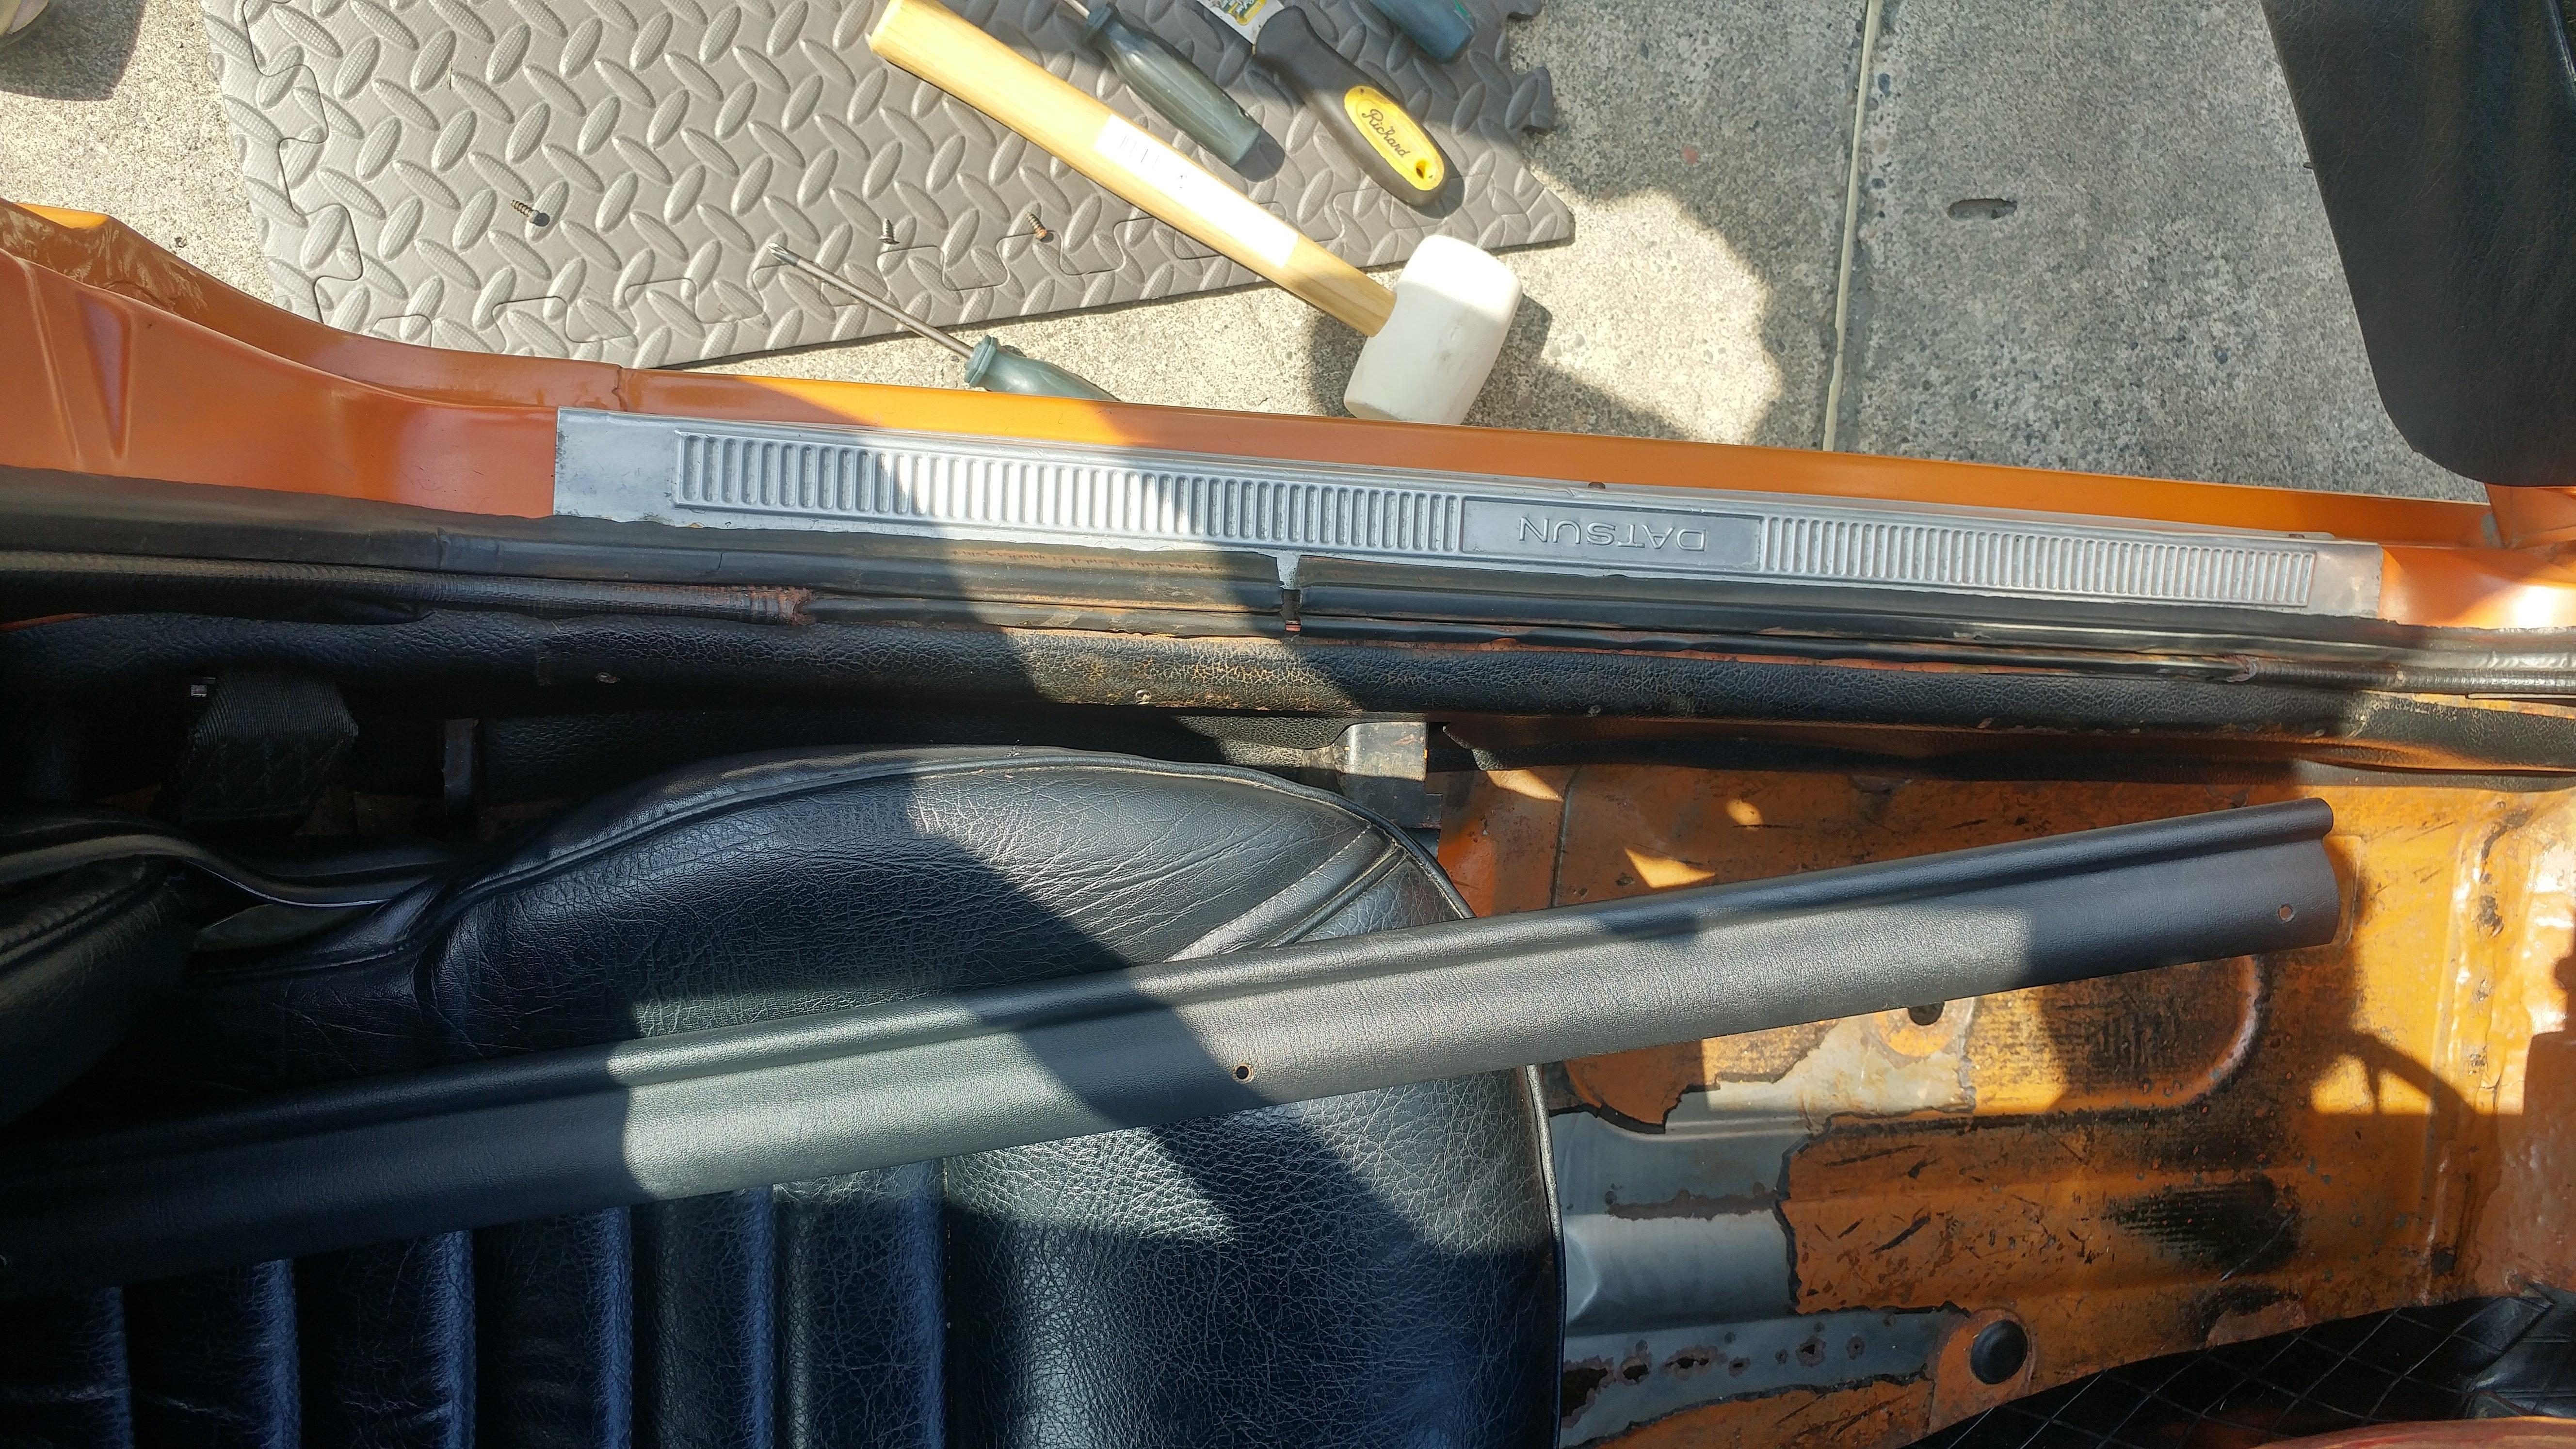
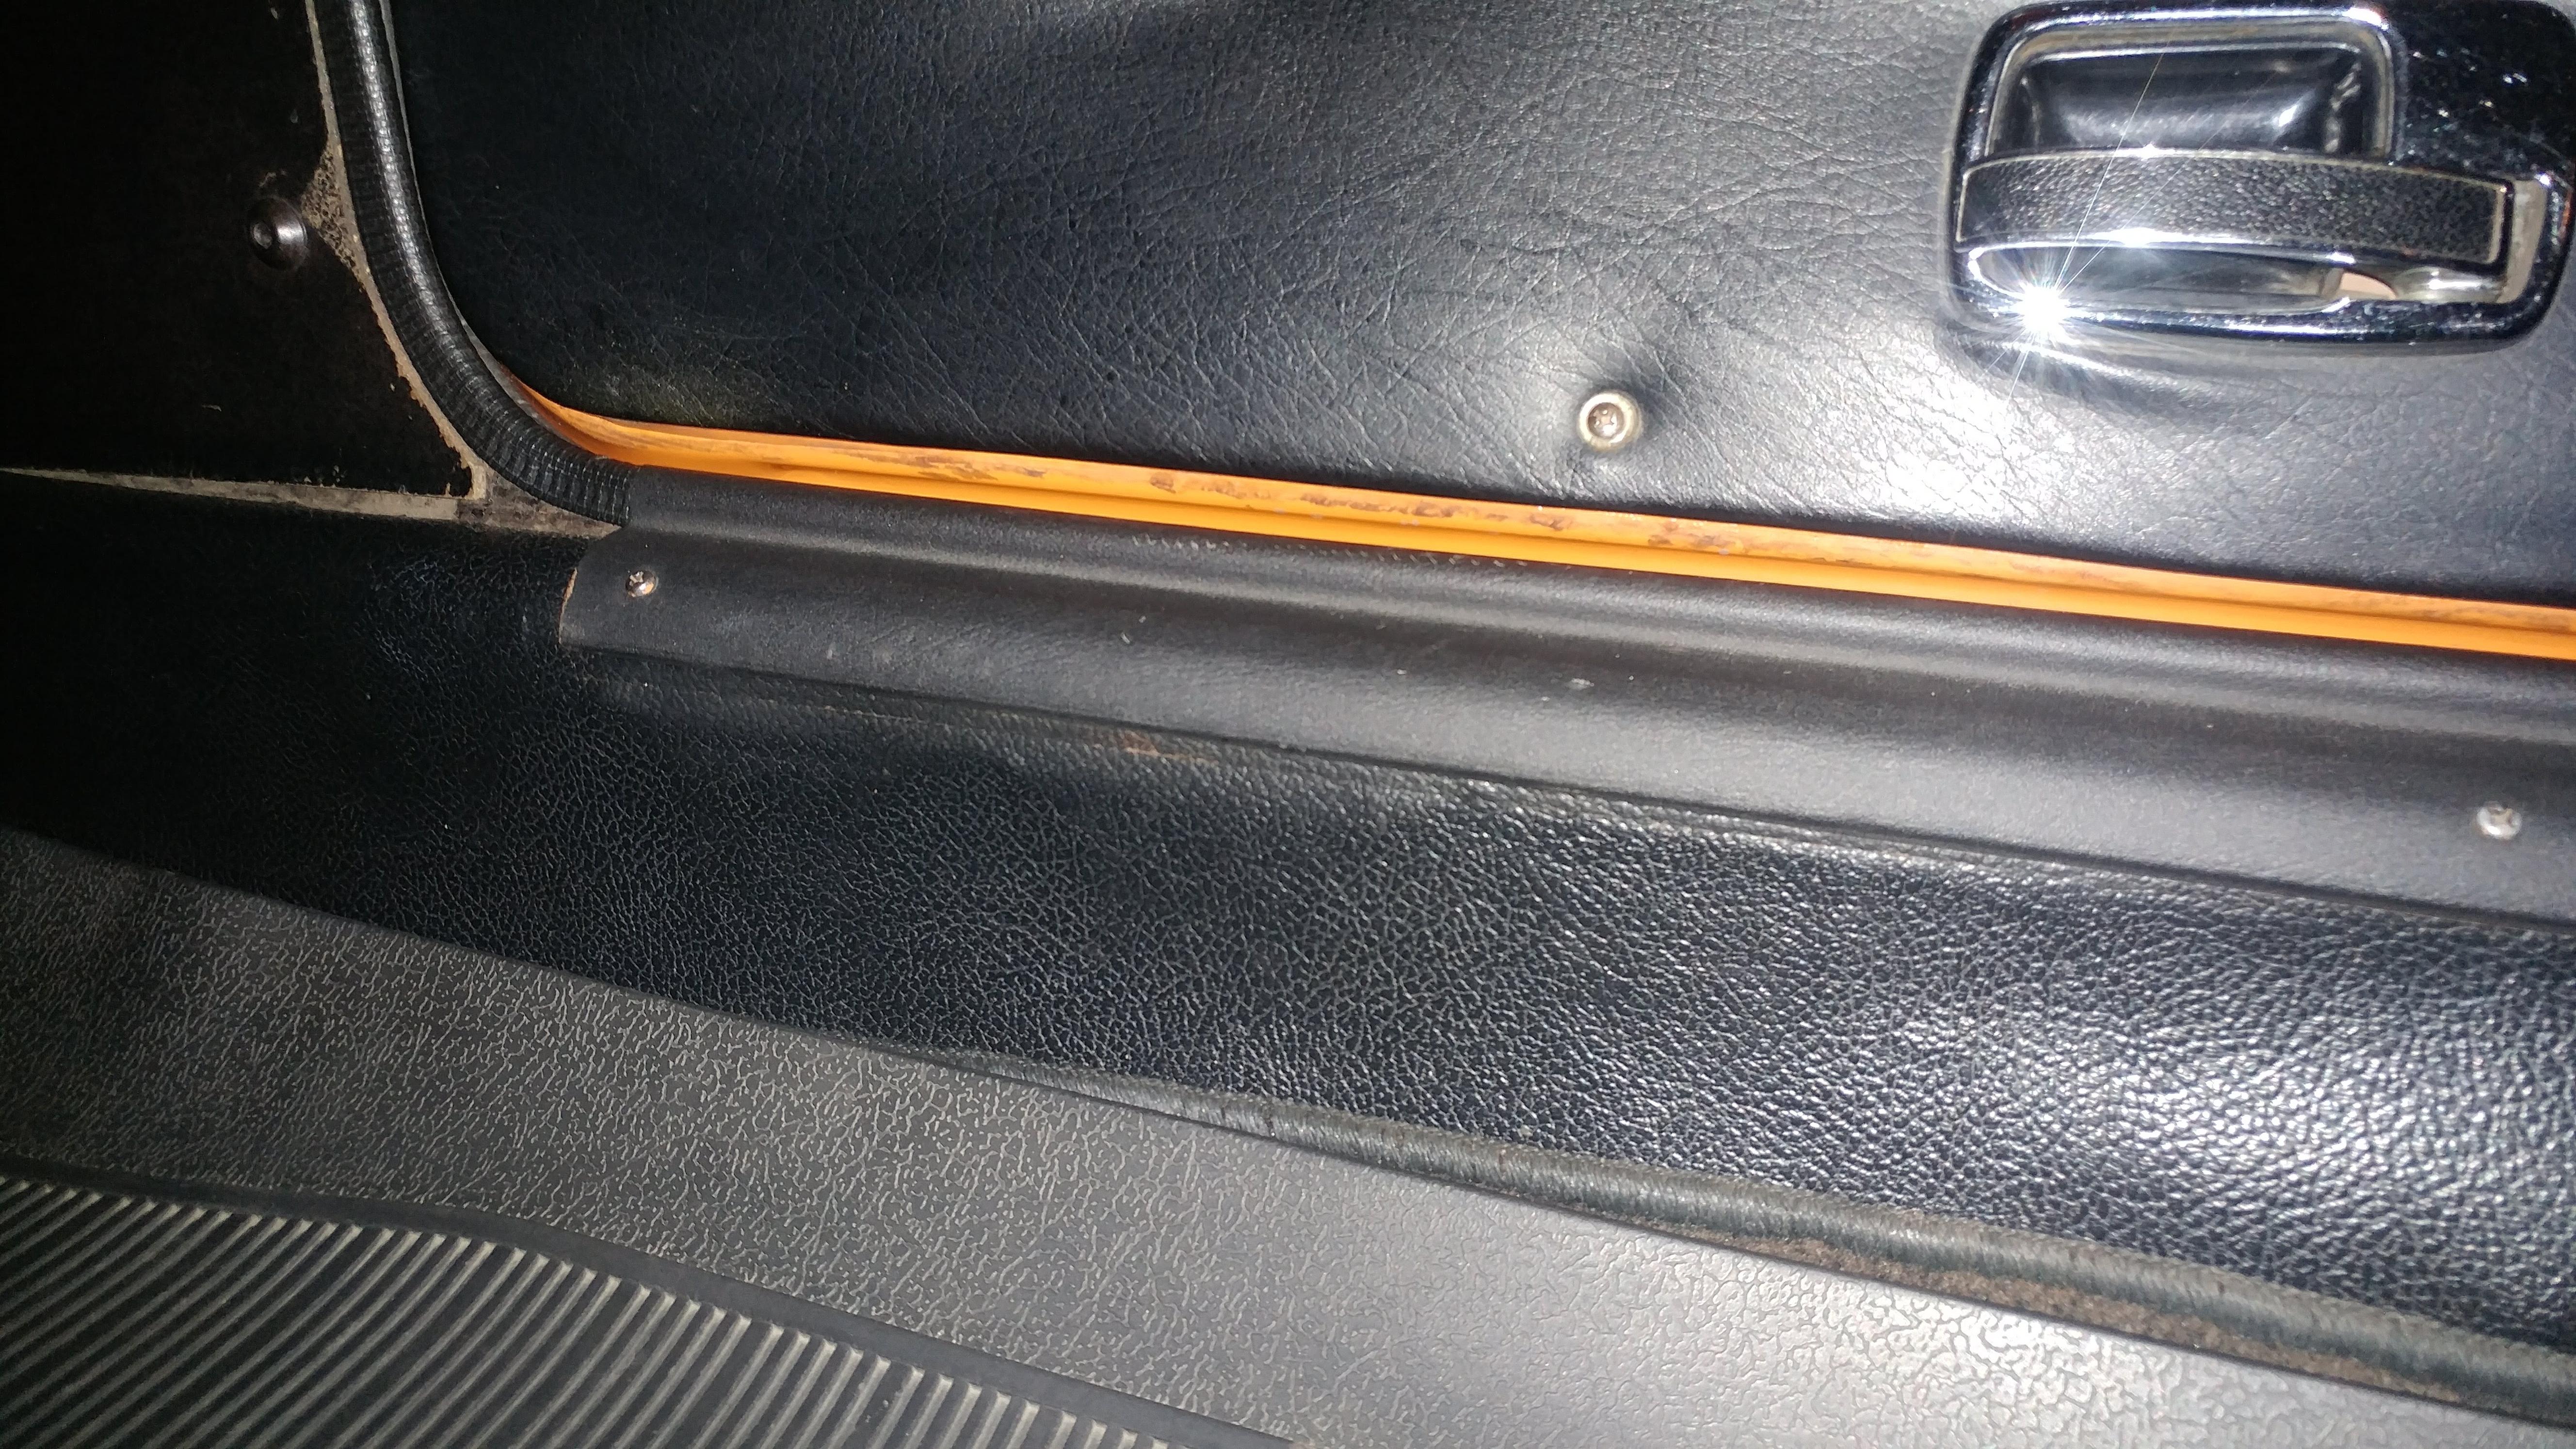
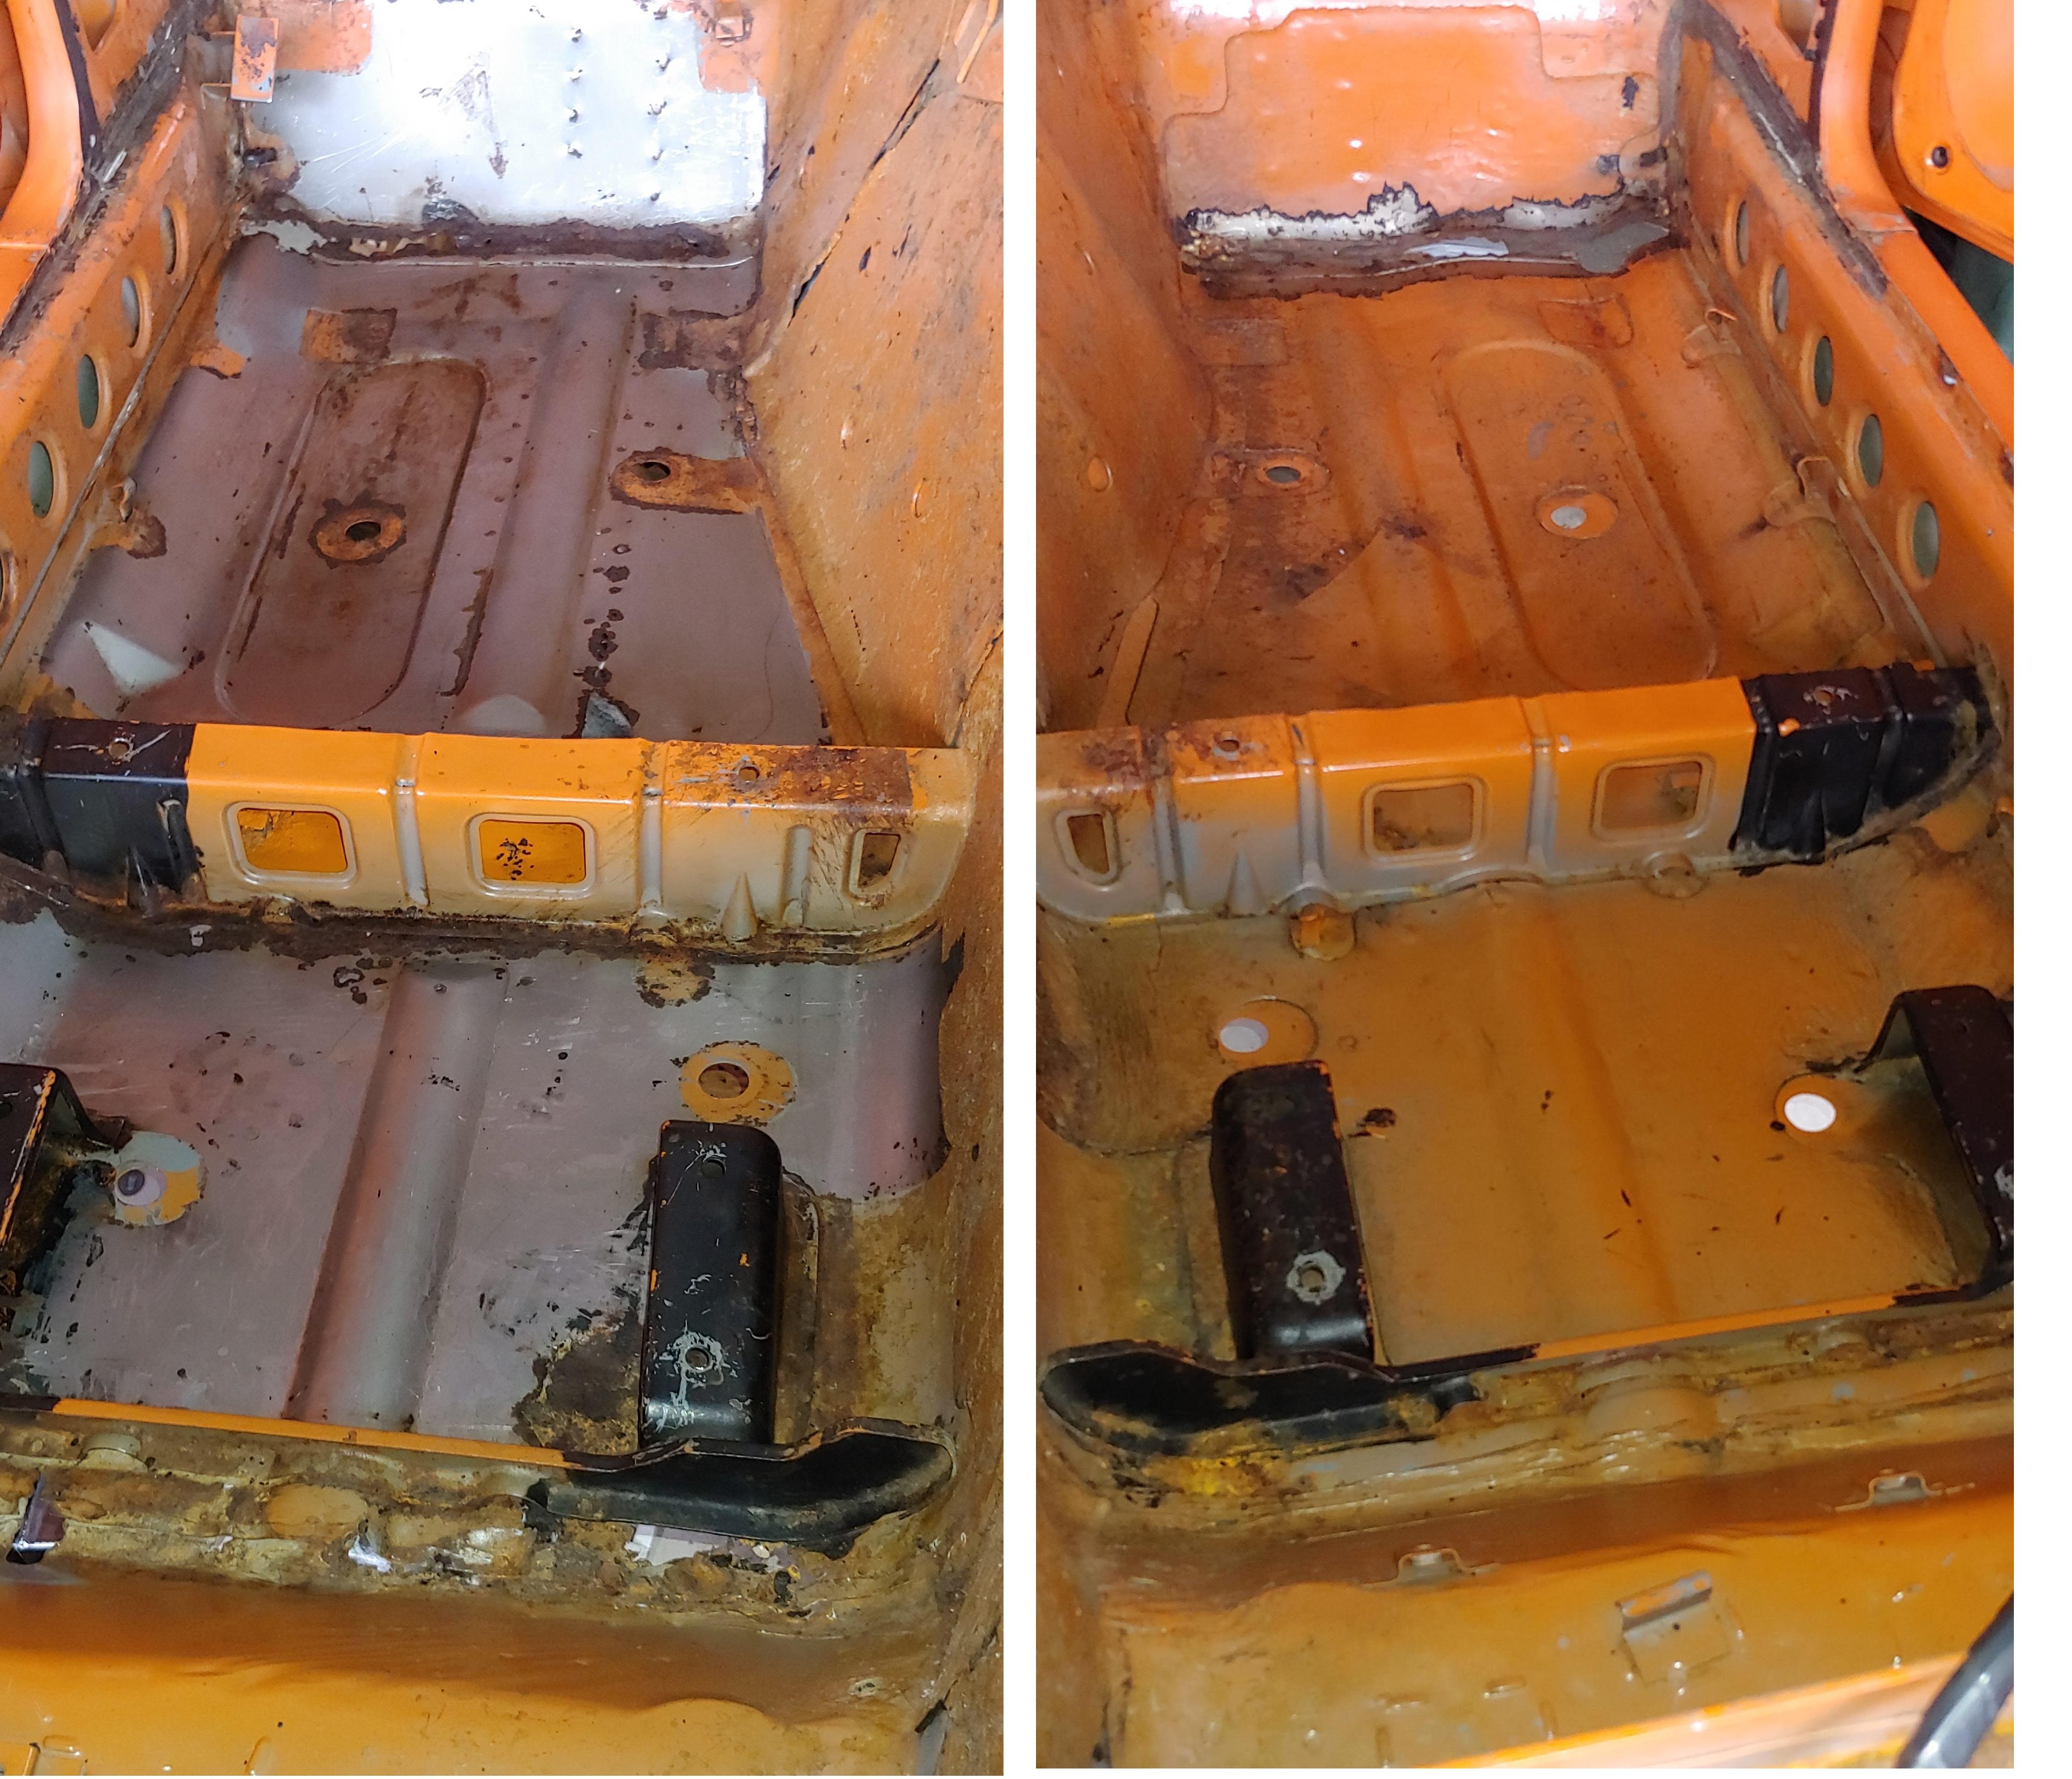
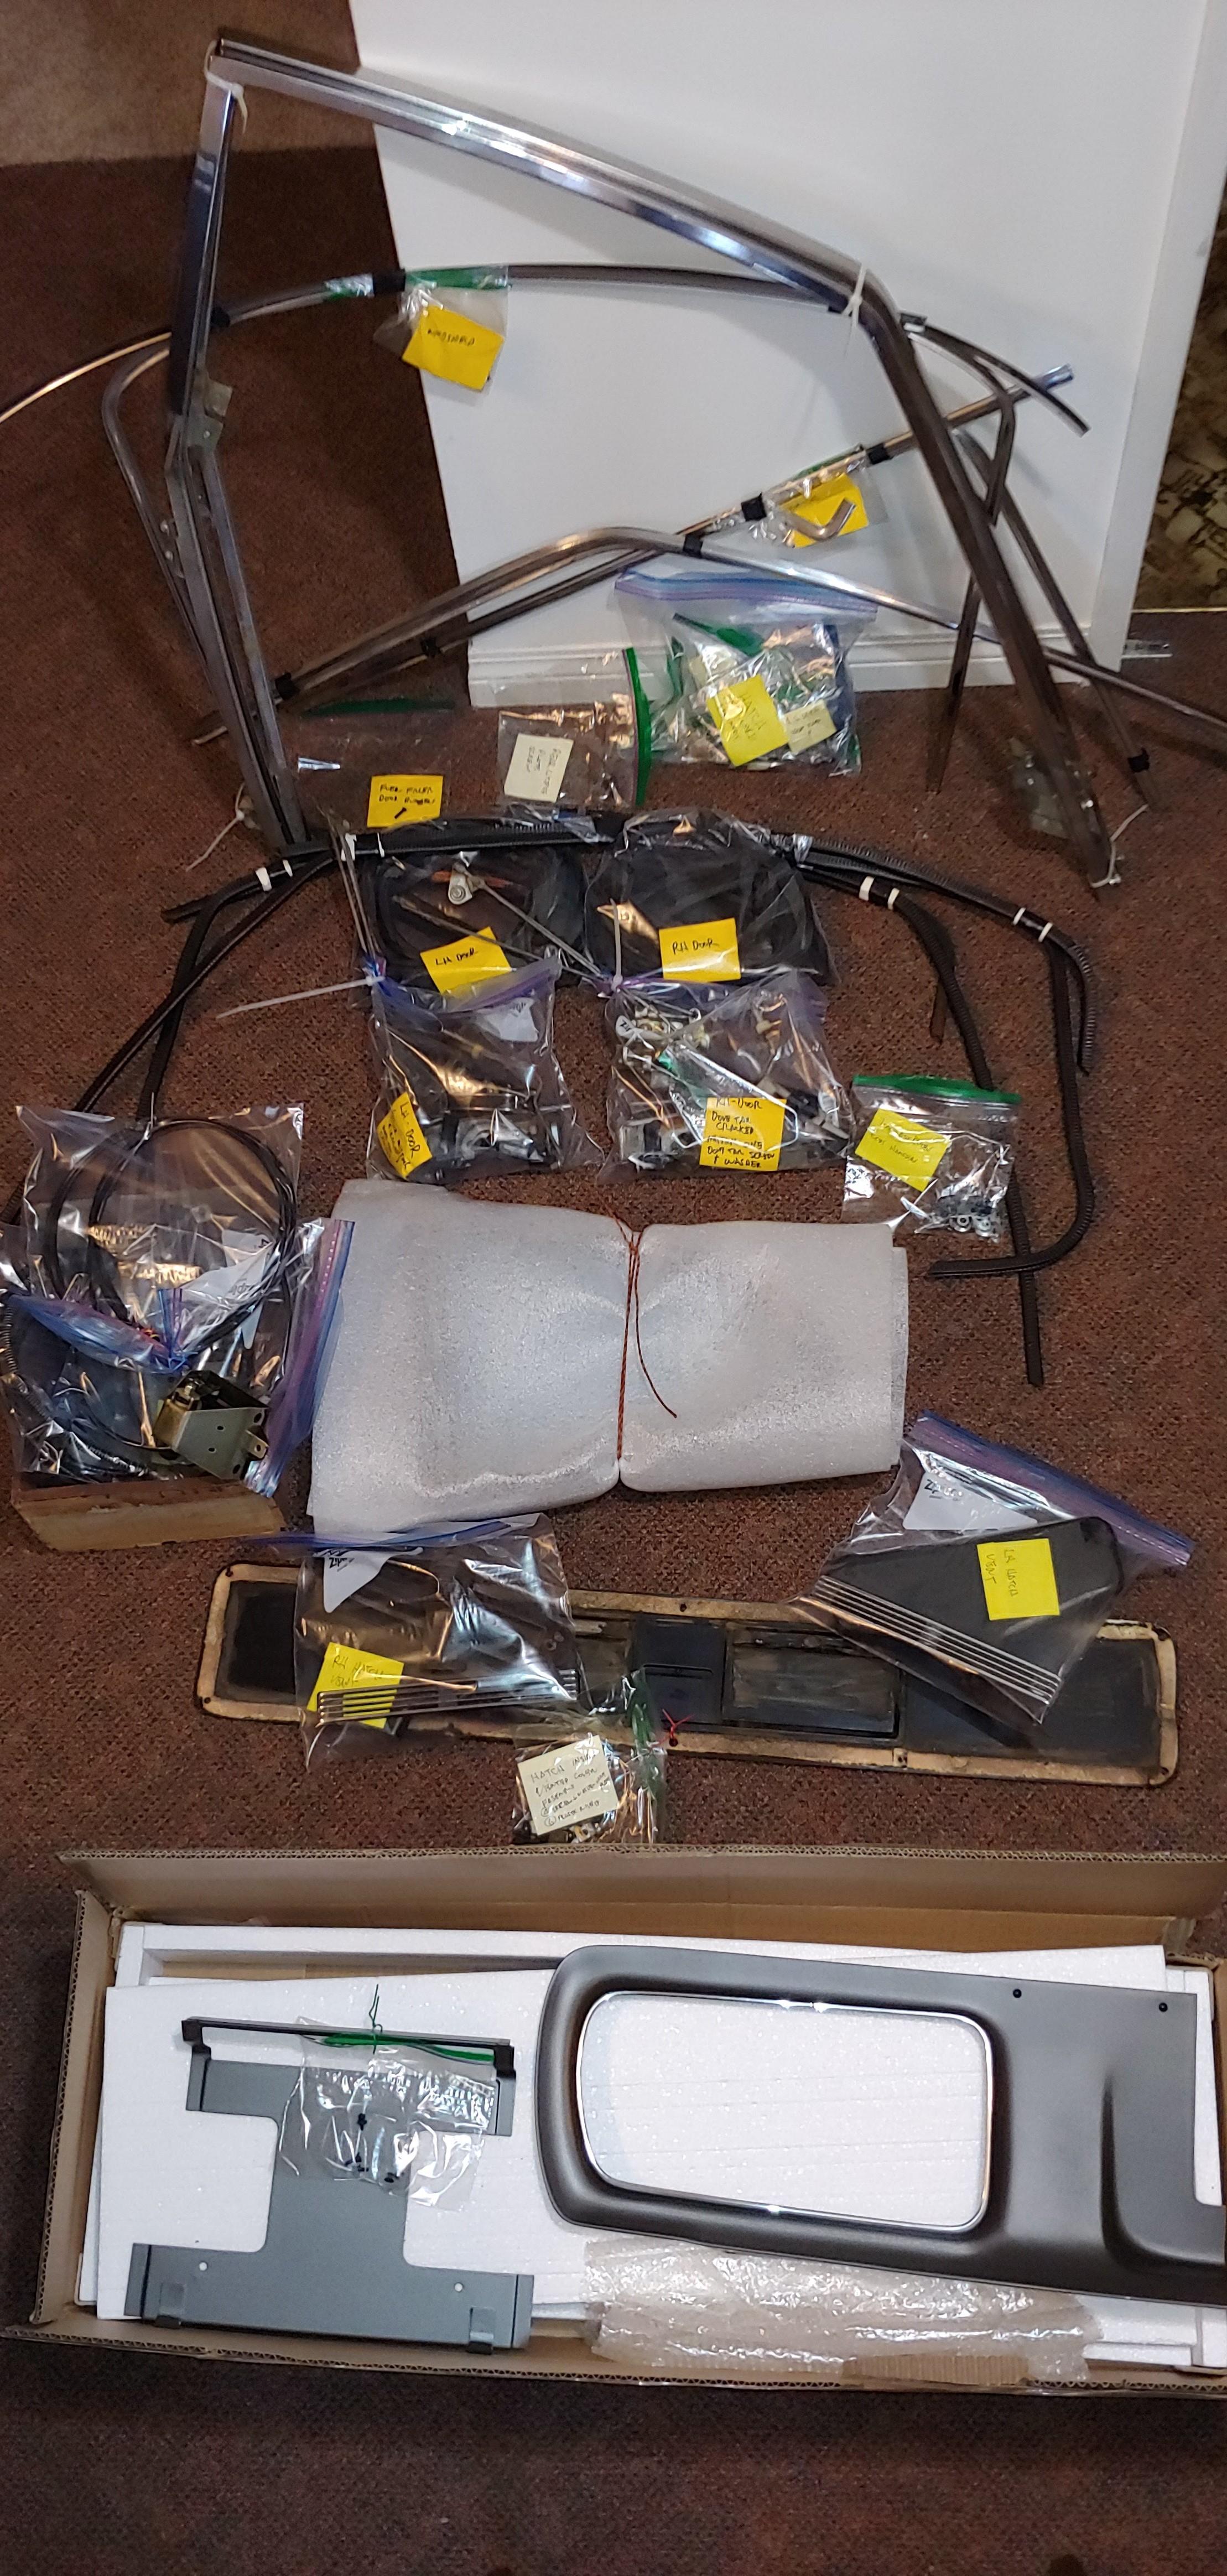
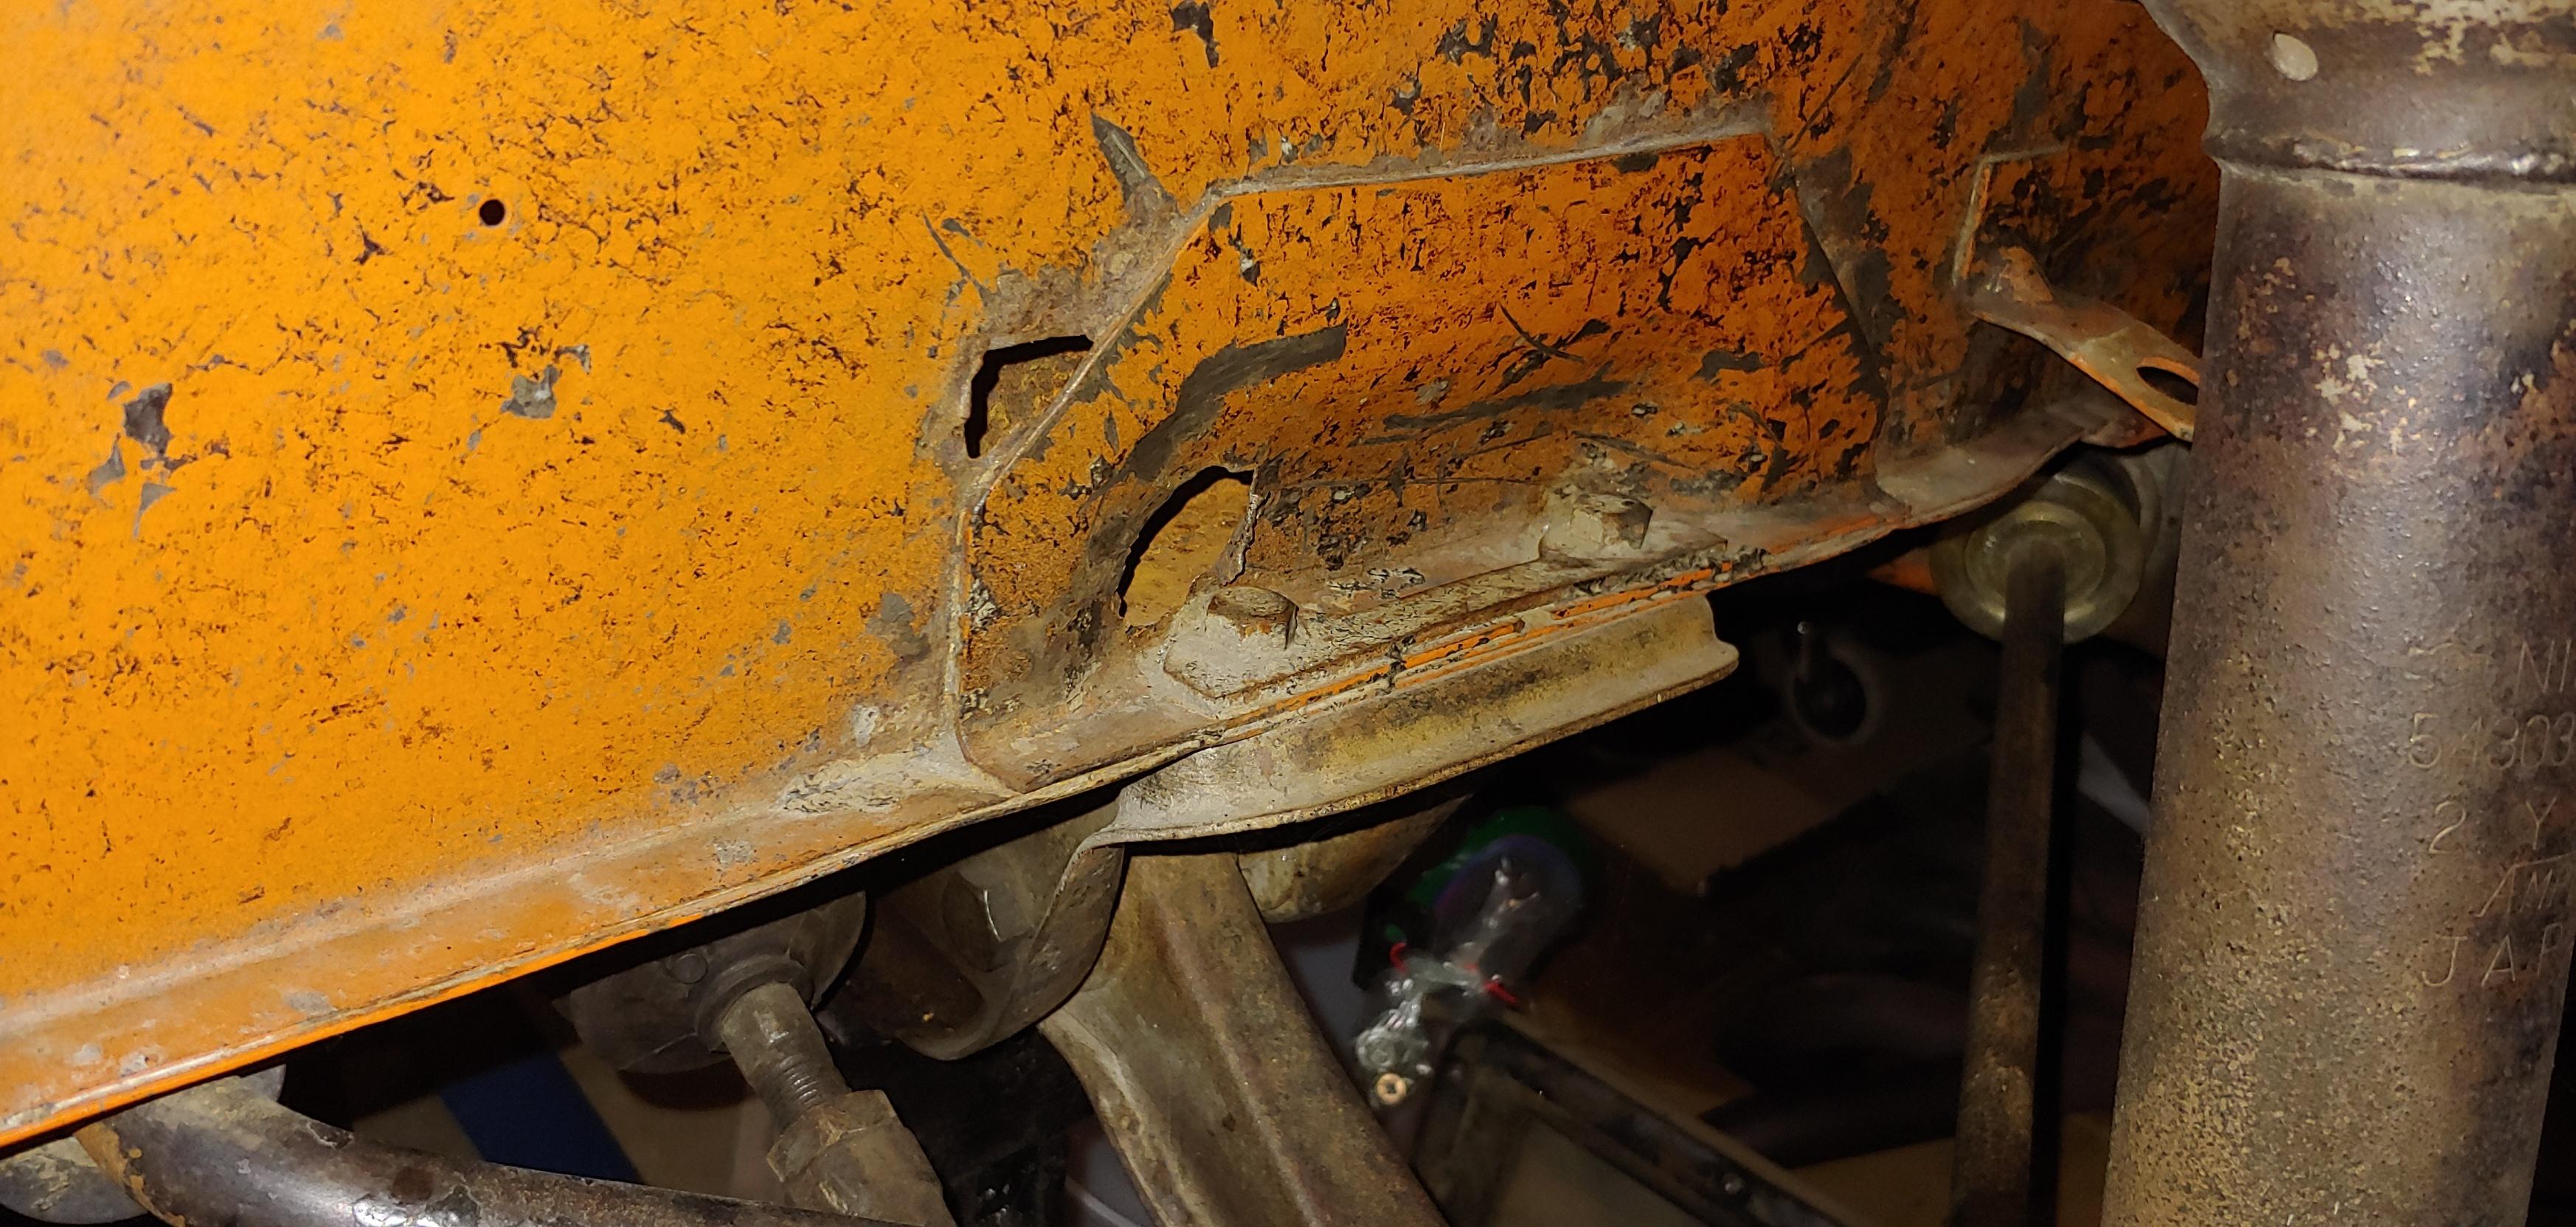
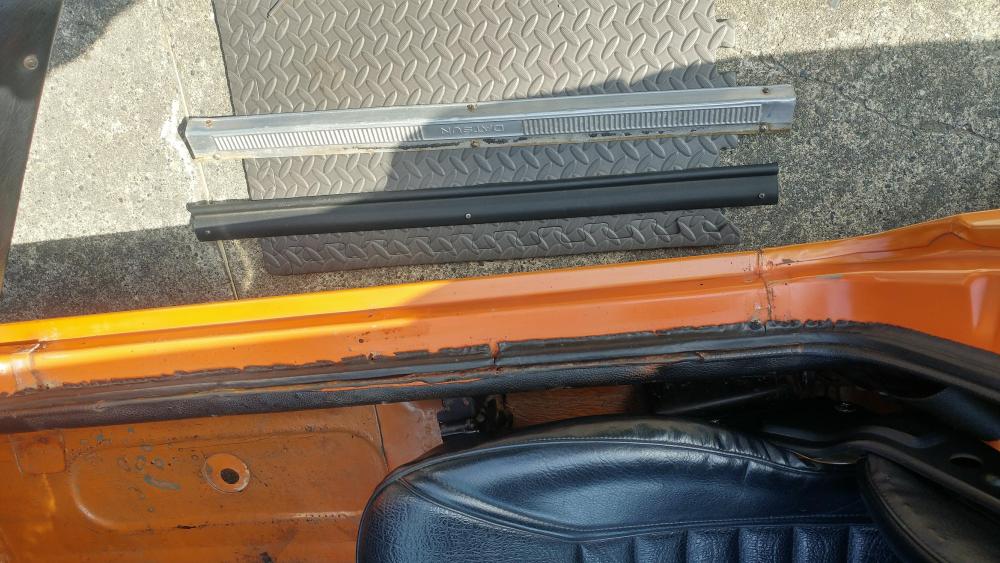
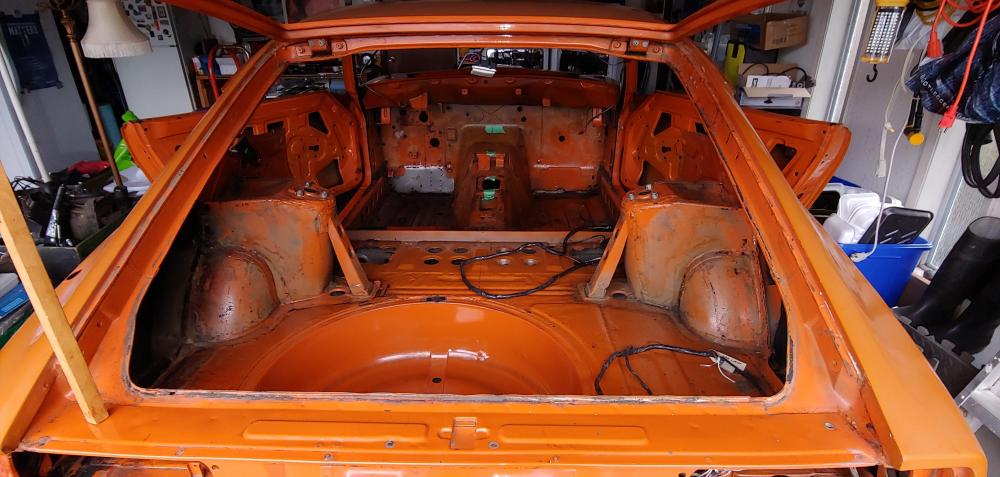
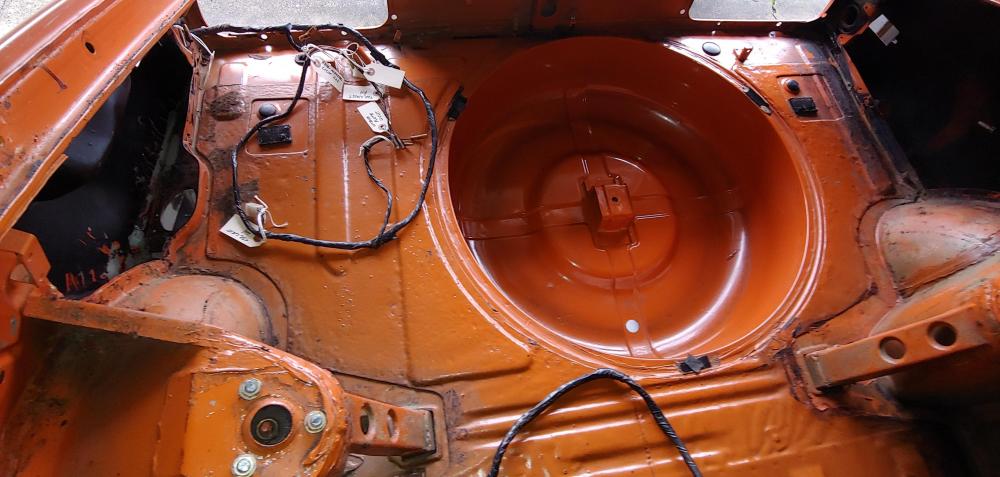
This weekend I removed the E-brake cable and the long brake tubes and fuel lines from under the car. I also removed the pedal box and related bits, and stripped the tar mat insulator from the LH front floor and under the seat. The interior is getting quite bare. Here is how the floors look, It amazes me how rusty the drivers side is when, except for the toe board area, the passenger side is almost pristine. Even the joint in the floor behind the RH seat, and the areas around the seat supports are perfect. To round out the weekend, I bagged up the parts that have been accumulating in my garage for safe storage, until I get to cleaning them up for re-assembly. I'm doing my best to stay organized.


-
Also no mention of work done to the mustache bar, it looks to like it has the newer style bushings without the flanged ends. Also the washers are the newer type. Normally wouldn't need servicing at 31K miles, IMHO. Regarding @240260280's mention of the oil pressure sensor, the wiring retainer is also missing. The one that picks up an engine mount bolt.

-
It was confusing with two low mileage series 1 cars on BAT at the same time, as your thread doesn't mention the VIN, until you click the link. Also there was a previous discussion on this car started two days before yours.
-
-
-
I agree that it's great to see new and established vendors producing quality parts for our cars. The more we support them the more parts we will see in the future. When I asked KF Vintage JDM sales if they are planning to produce front frame rails their response was "We are planning to make the whole car but it going to take a lot" The area that I am still looking for a solution is the connection for the front cross member.