CanTechZ
Free Member
-
Joined
-
Last visited
Everything posted by CanTechZ
-
 Great work on the floors. I will be using this as a reference when I get to this point on my restoration. I'm going to make templates from my floors soon, before I remove the existing sound deadening material.
 -
Very nice looking car. Regarding head room, there are usually some hex shaped plastic spacers under the seats that can be removed. You might gain an inch or so of head room.
-
Interesting read, thanks for posting.
-
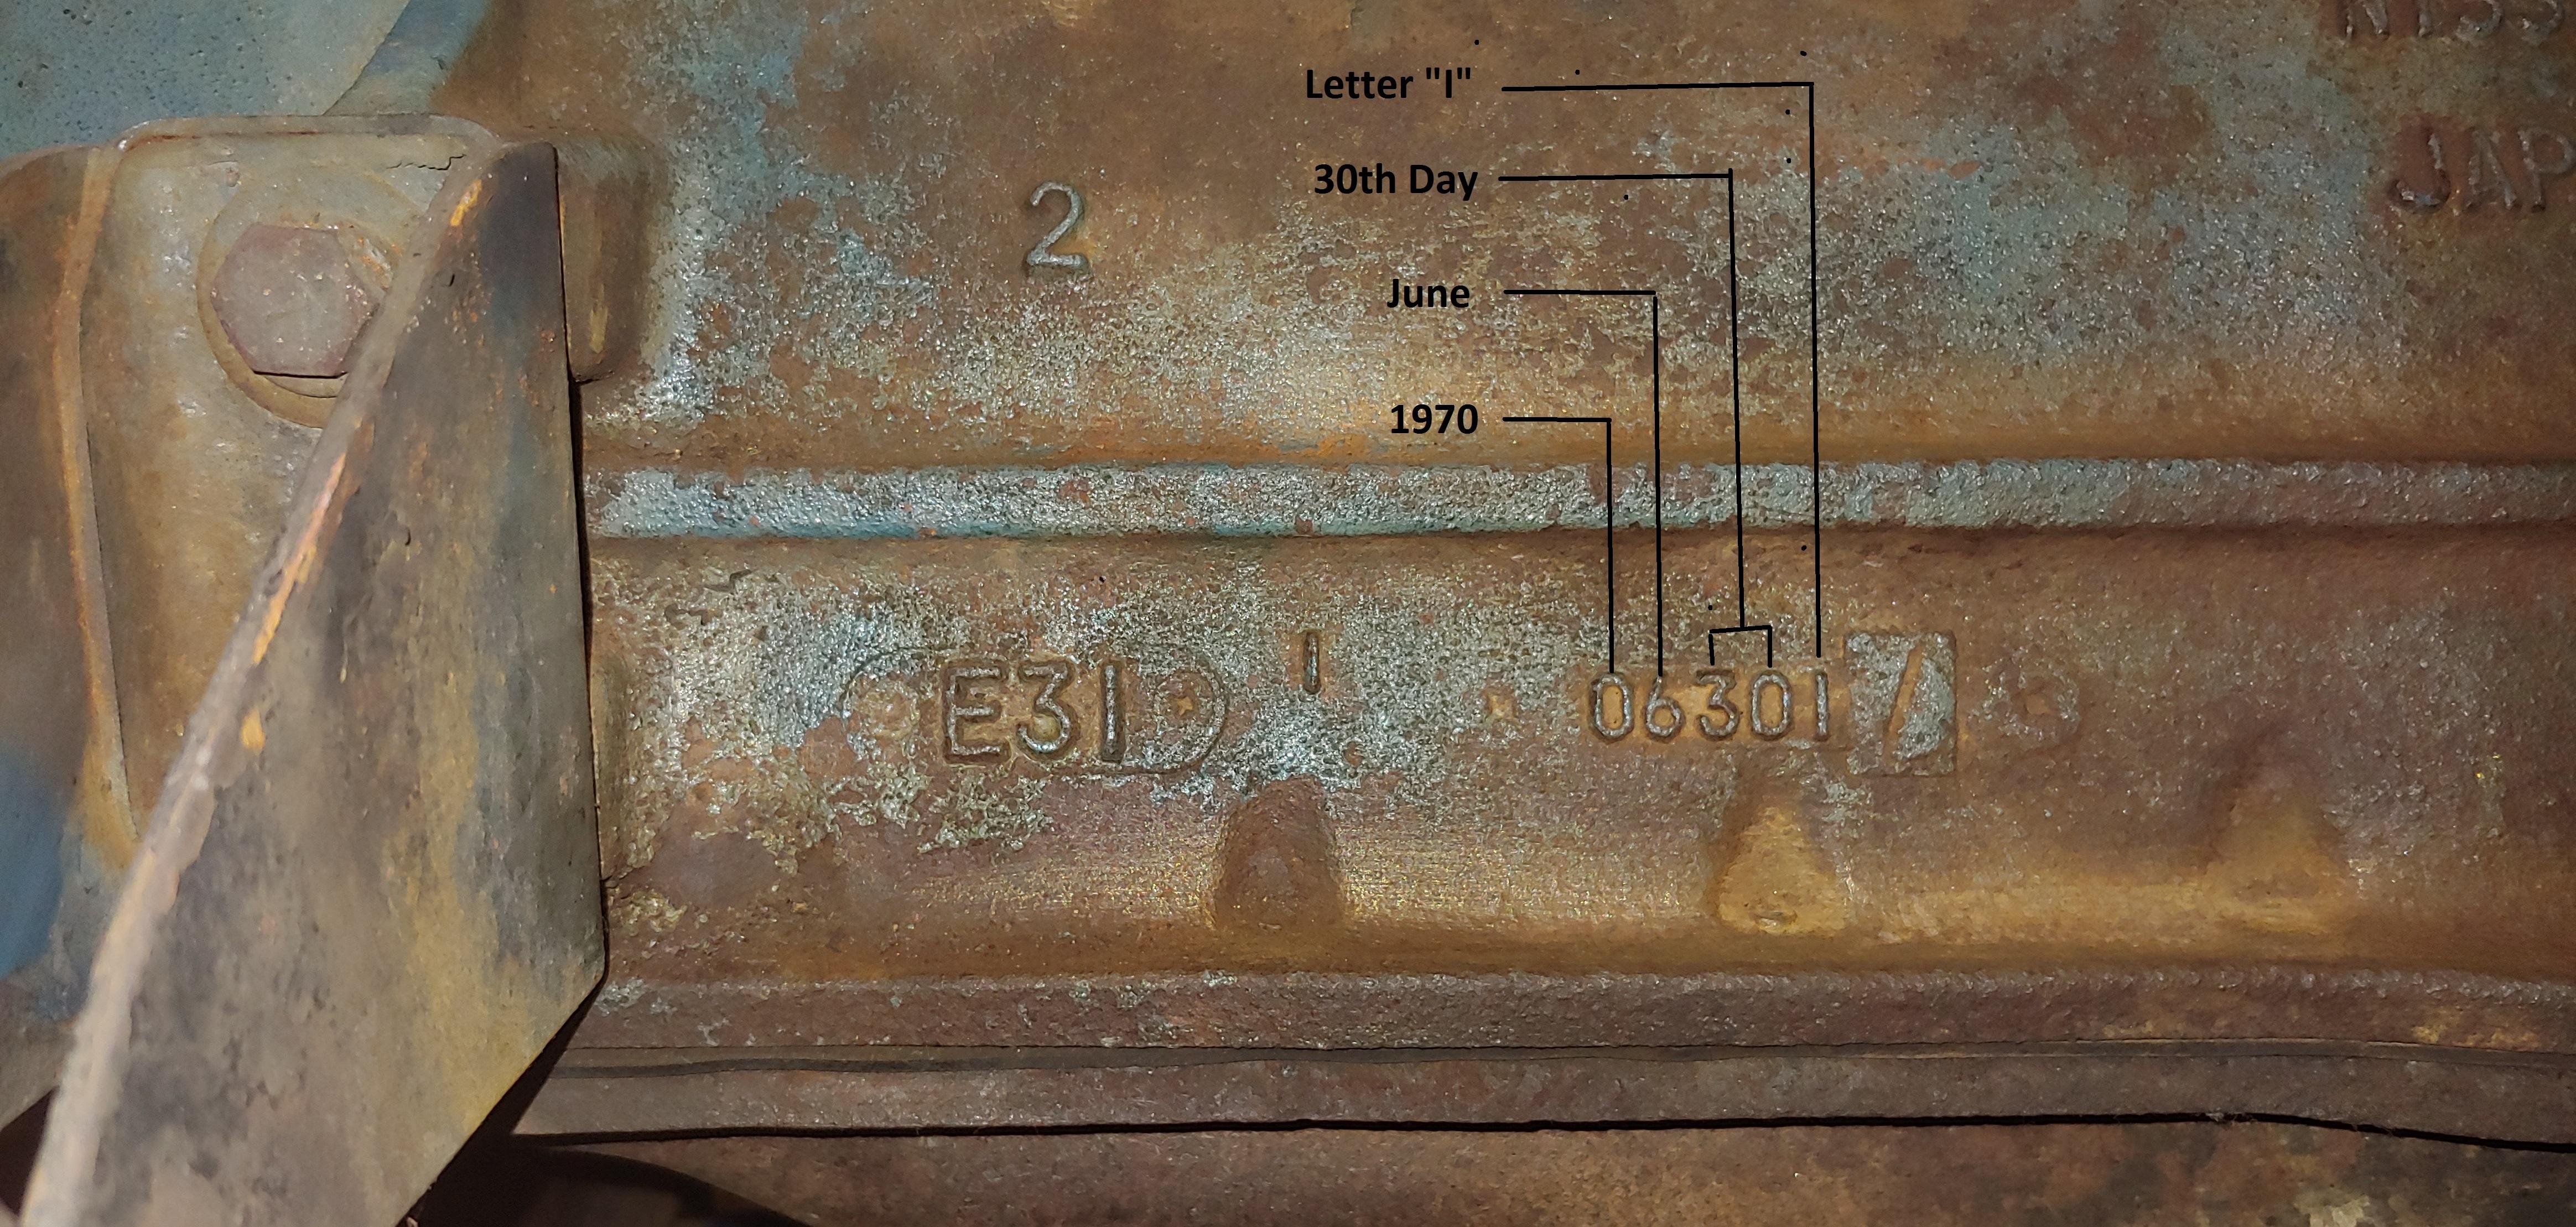
After recently removing my exhaust header I was able read the casting number on my E31 block, The casting number is located low on the left side, just back from center and in raised characters reads "0630I". Using the decoding method suggested by @katsthat would make it 50 years old today. Here is the old topic from back in 2004, where this was discussed:

-
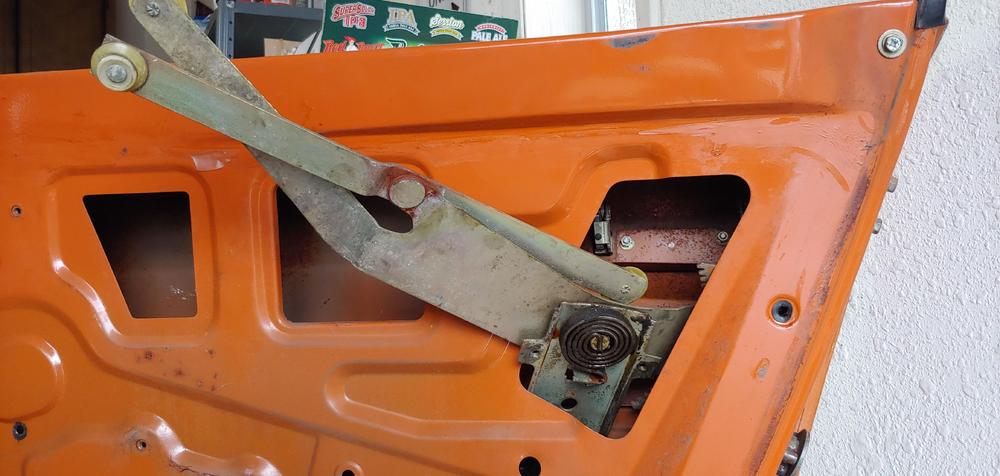
I'm still at a loss as to why those screws would fall out on there own. While plausible l don't think it was a replacement issue, definitely not in the 42 years that I have owned the car. In the case of the right door, it still had the original vapor barrier in place and there was remnants of the factory plastic wrap over the door panel at the fastening points of the arm rest and opener. Still a mystery.
-
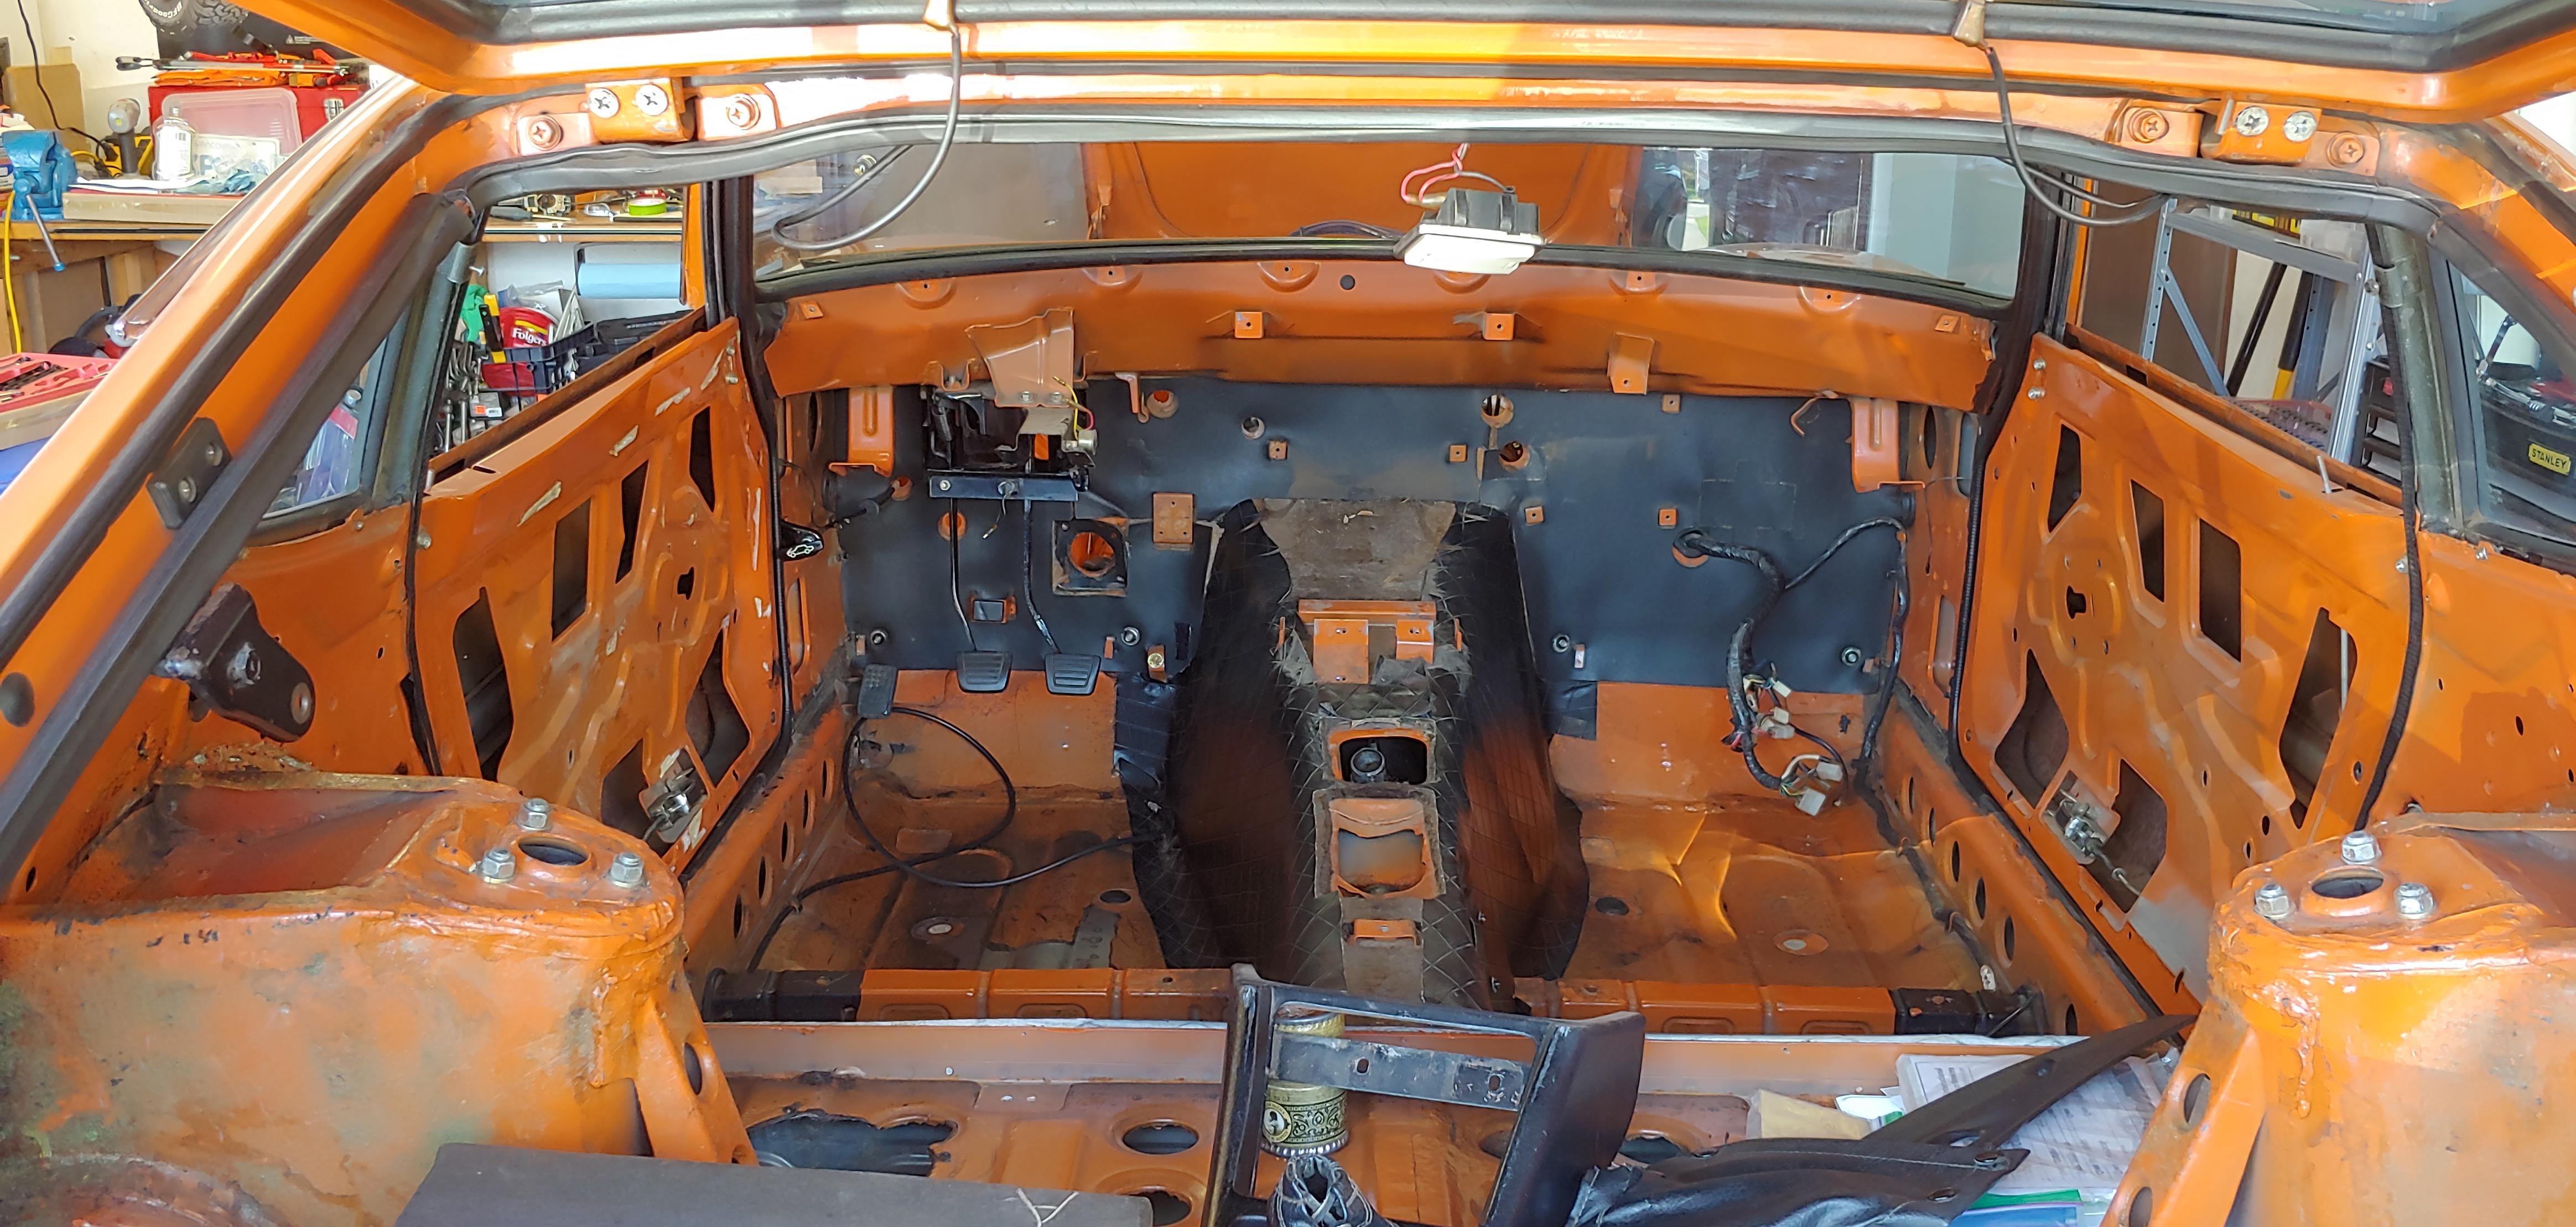
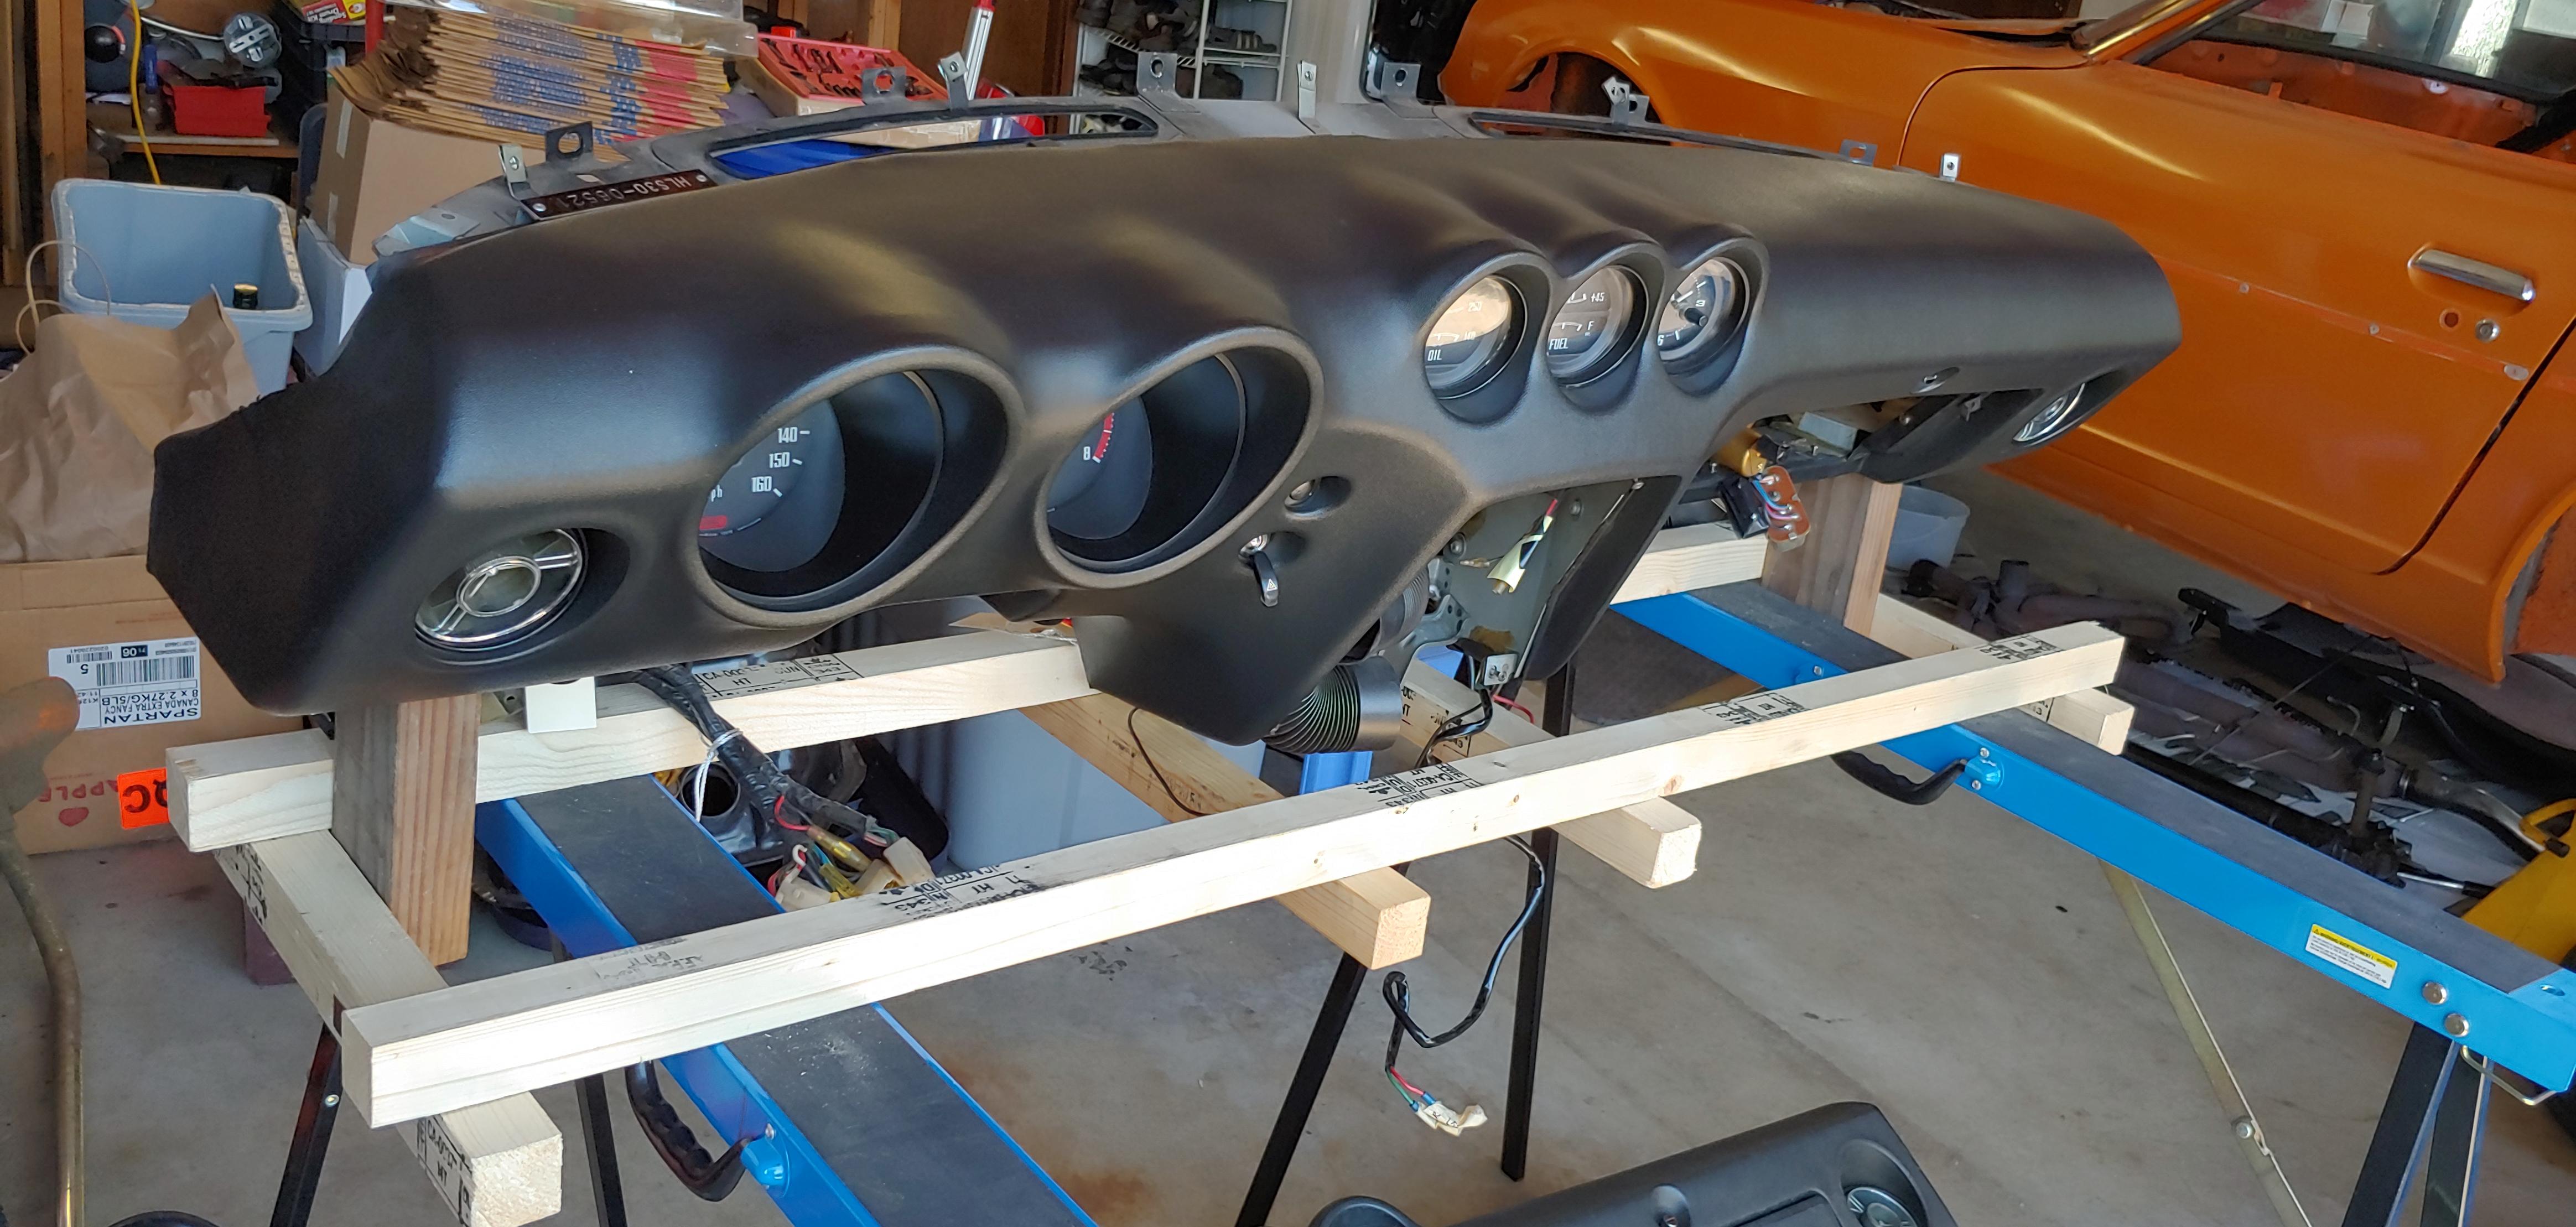
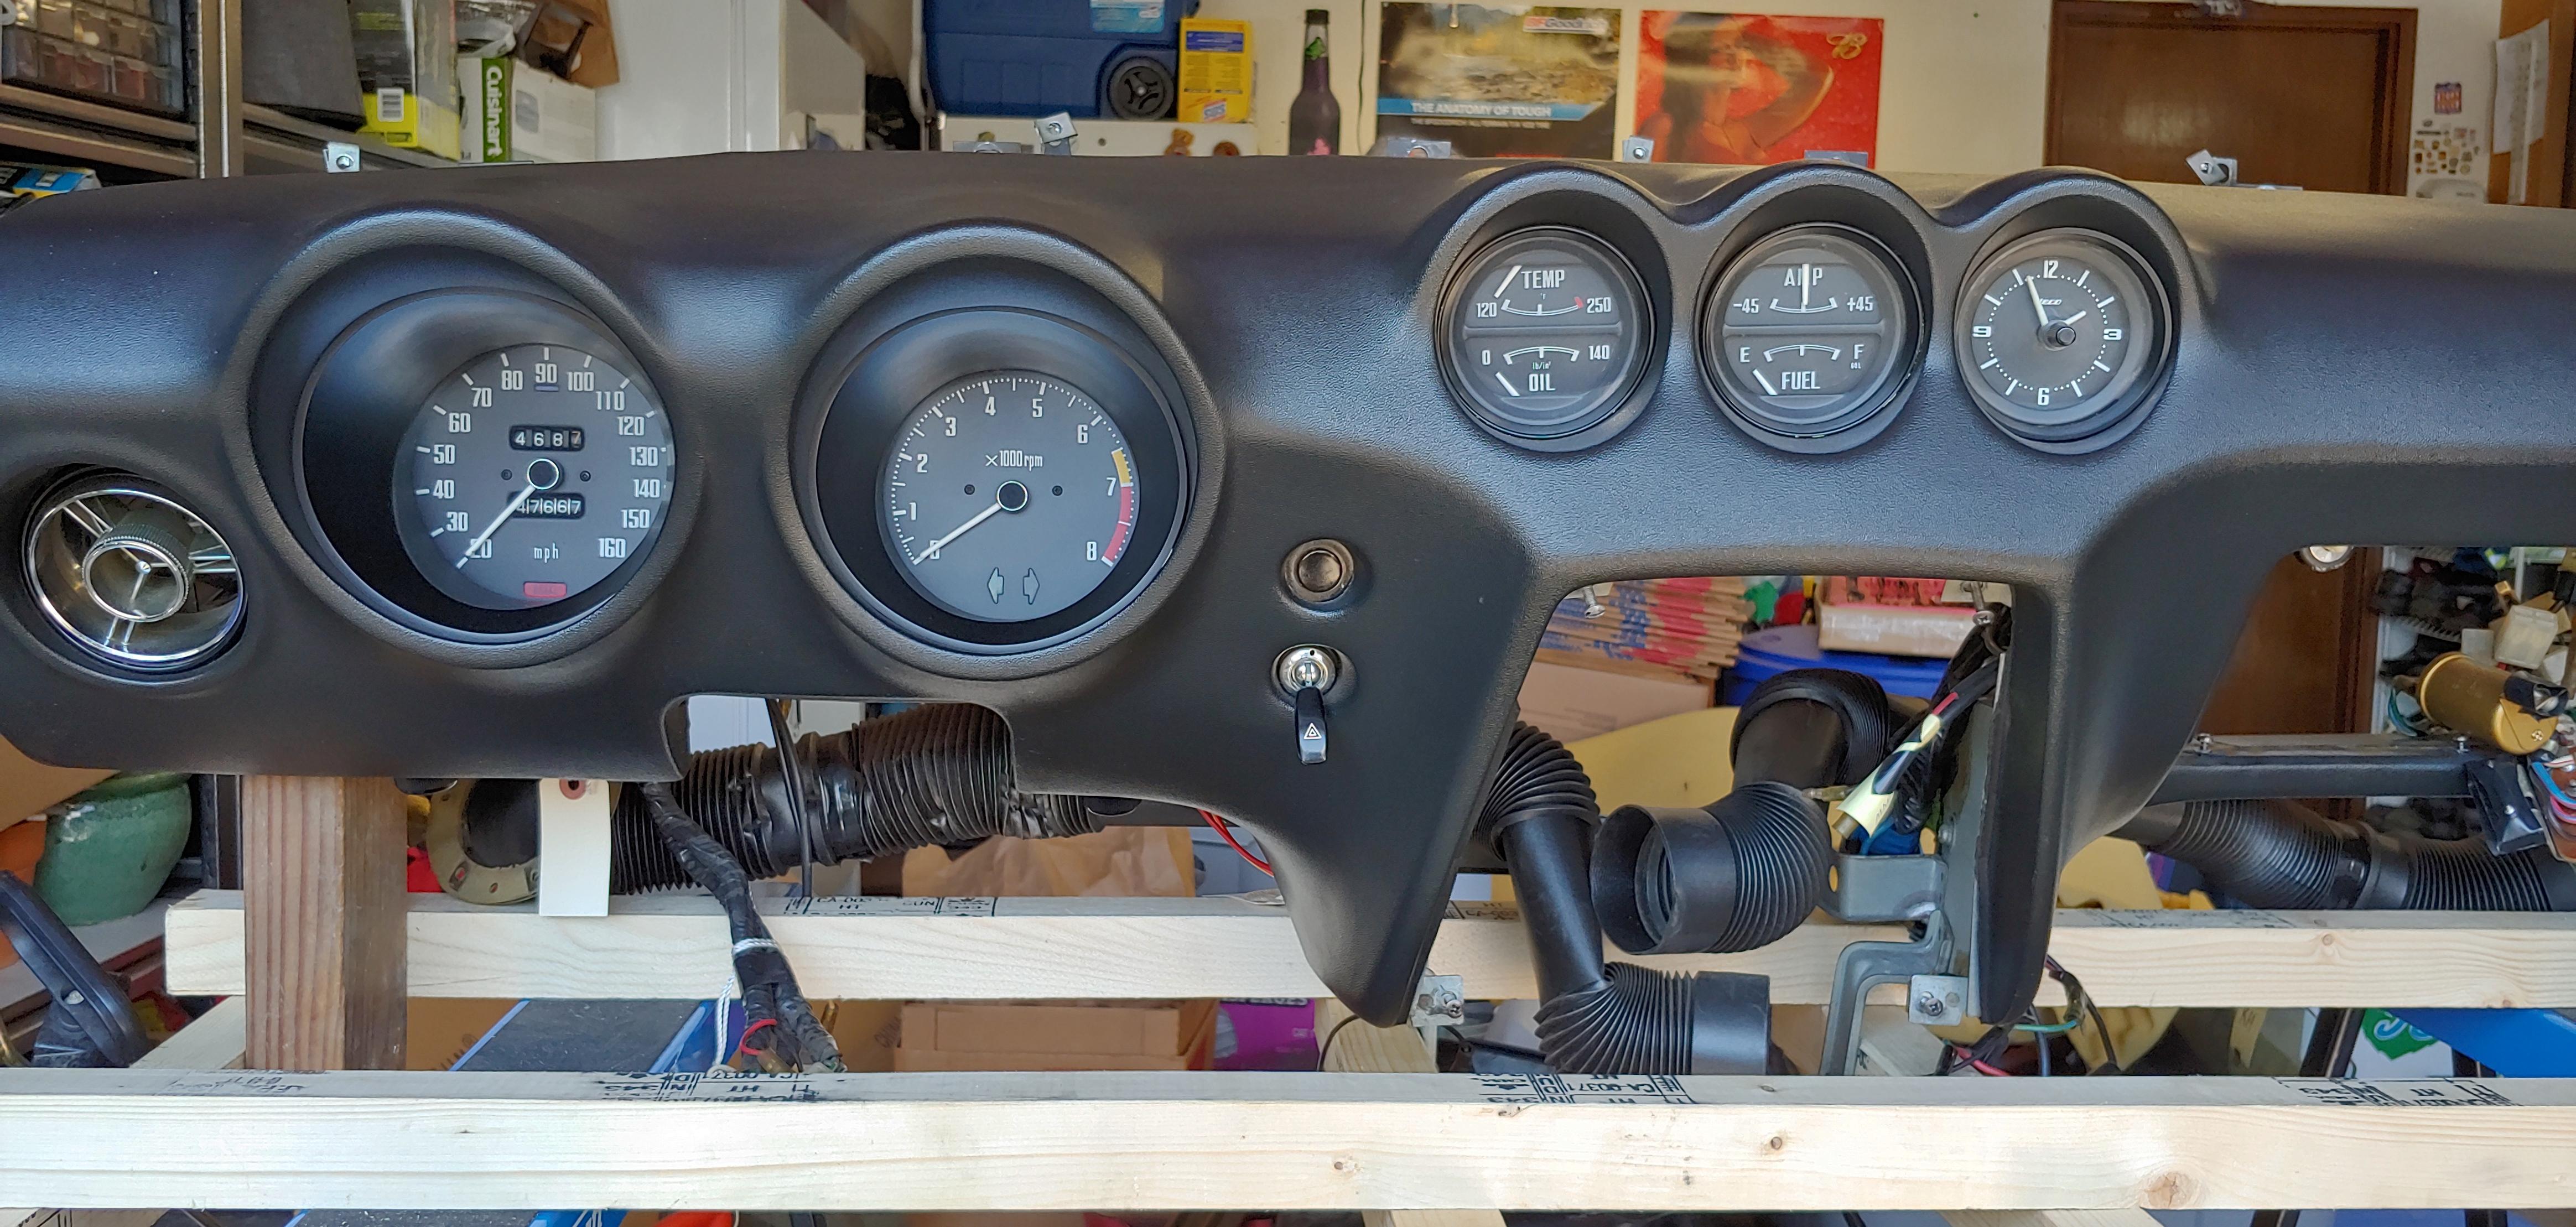
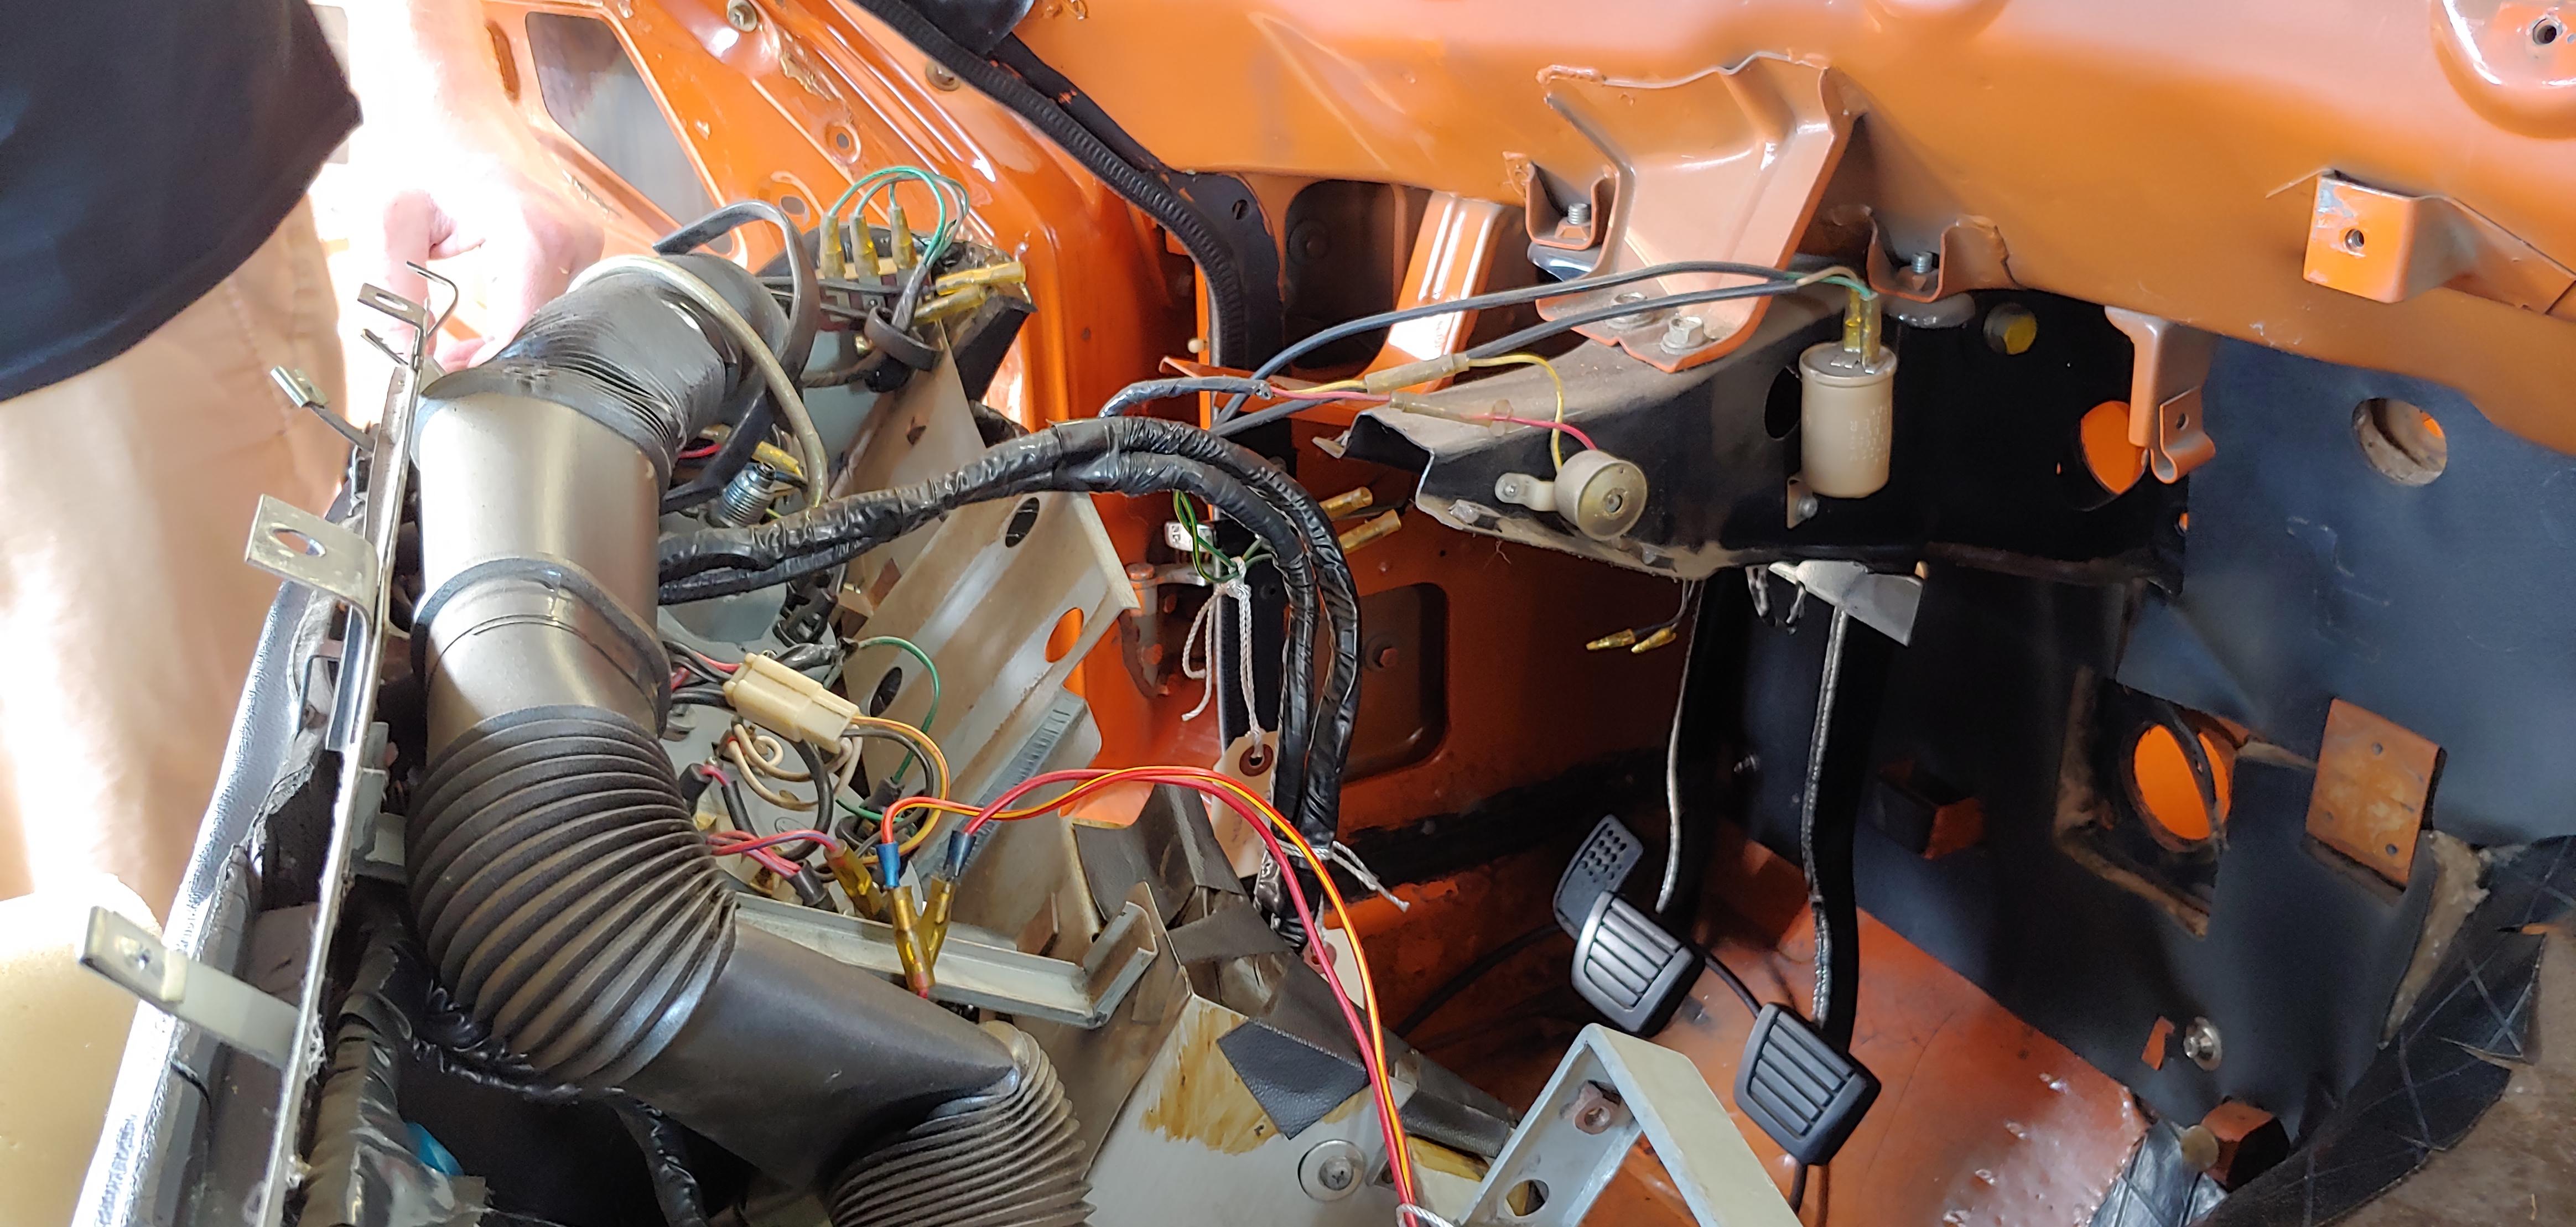
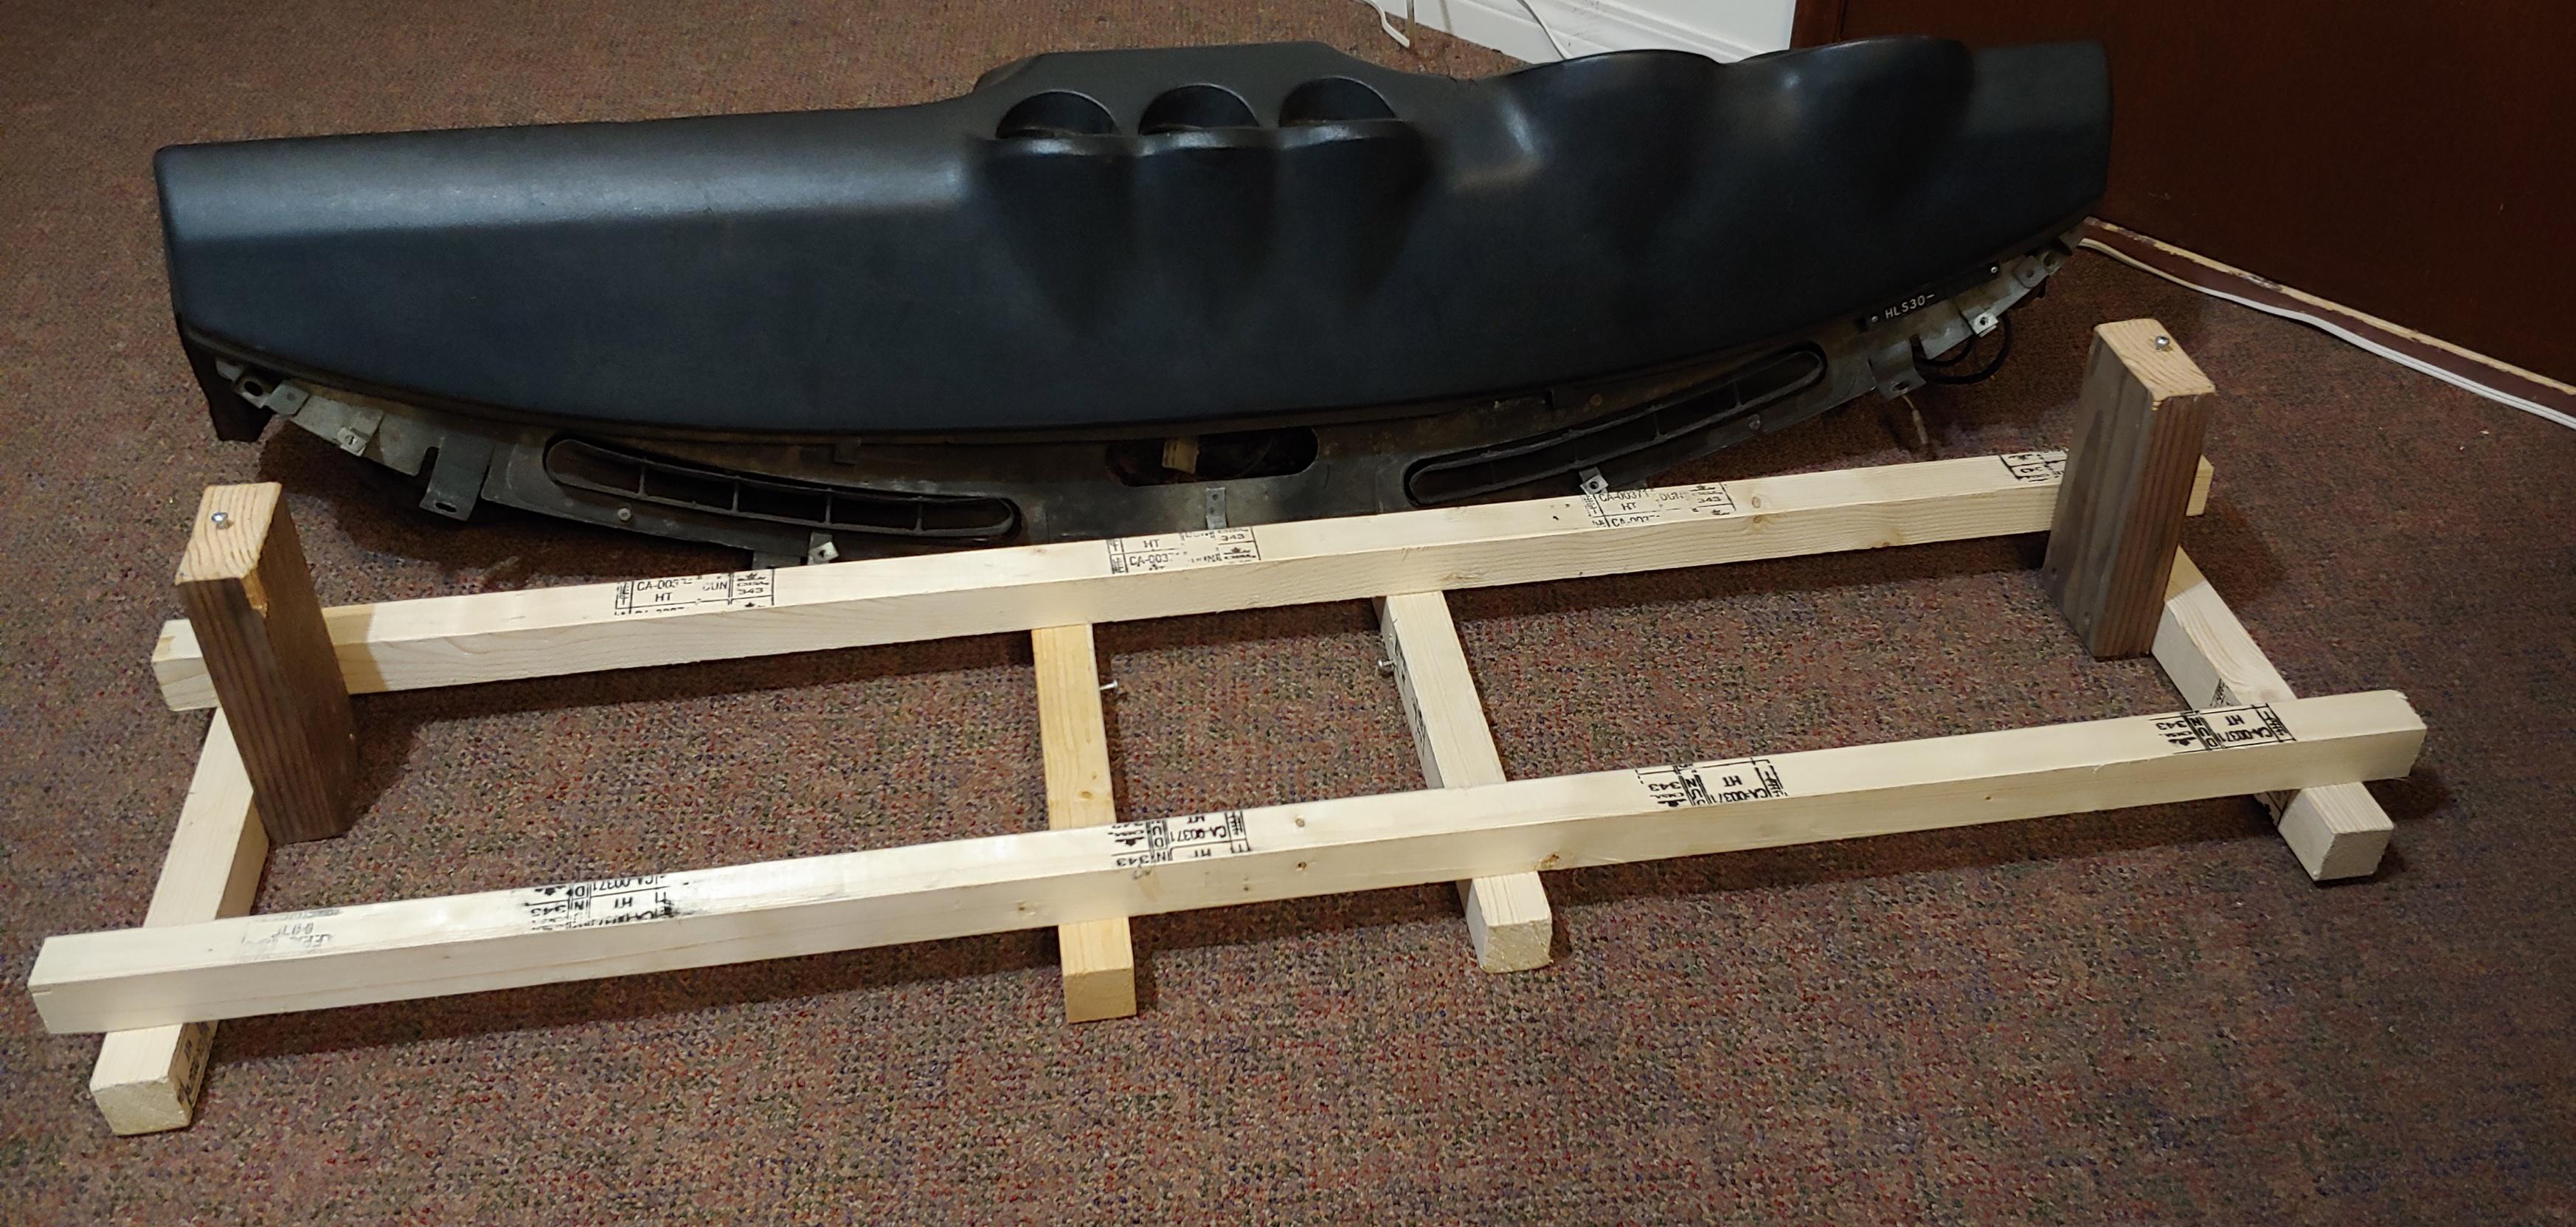
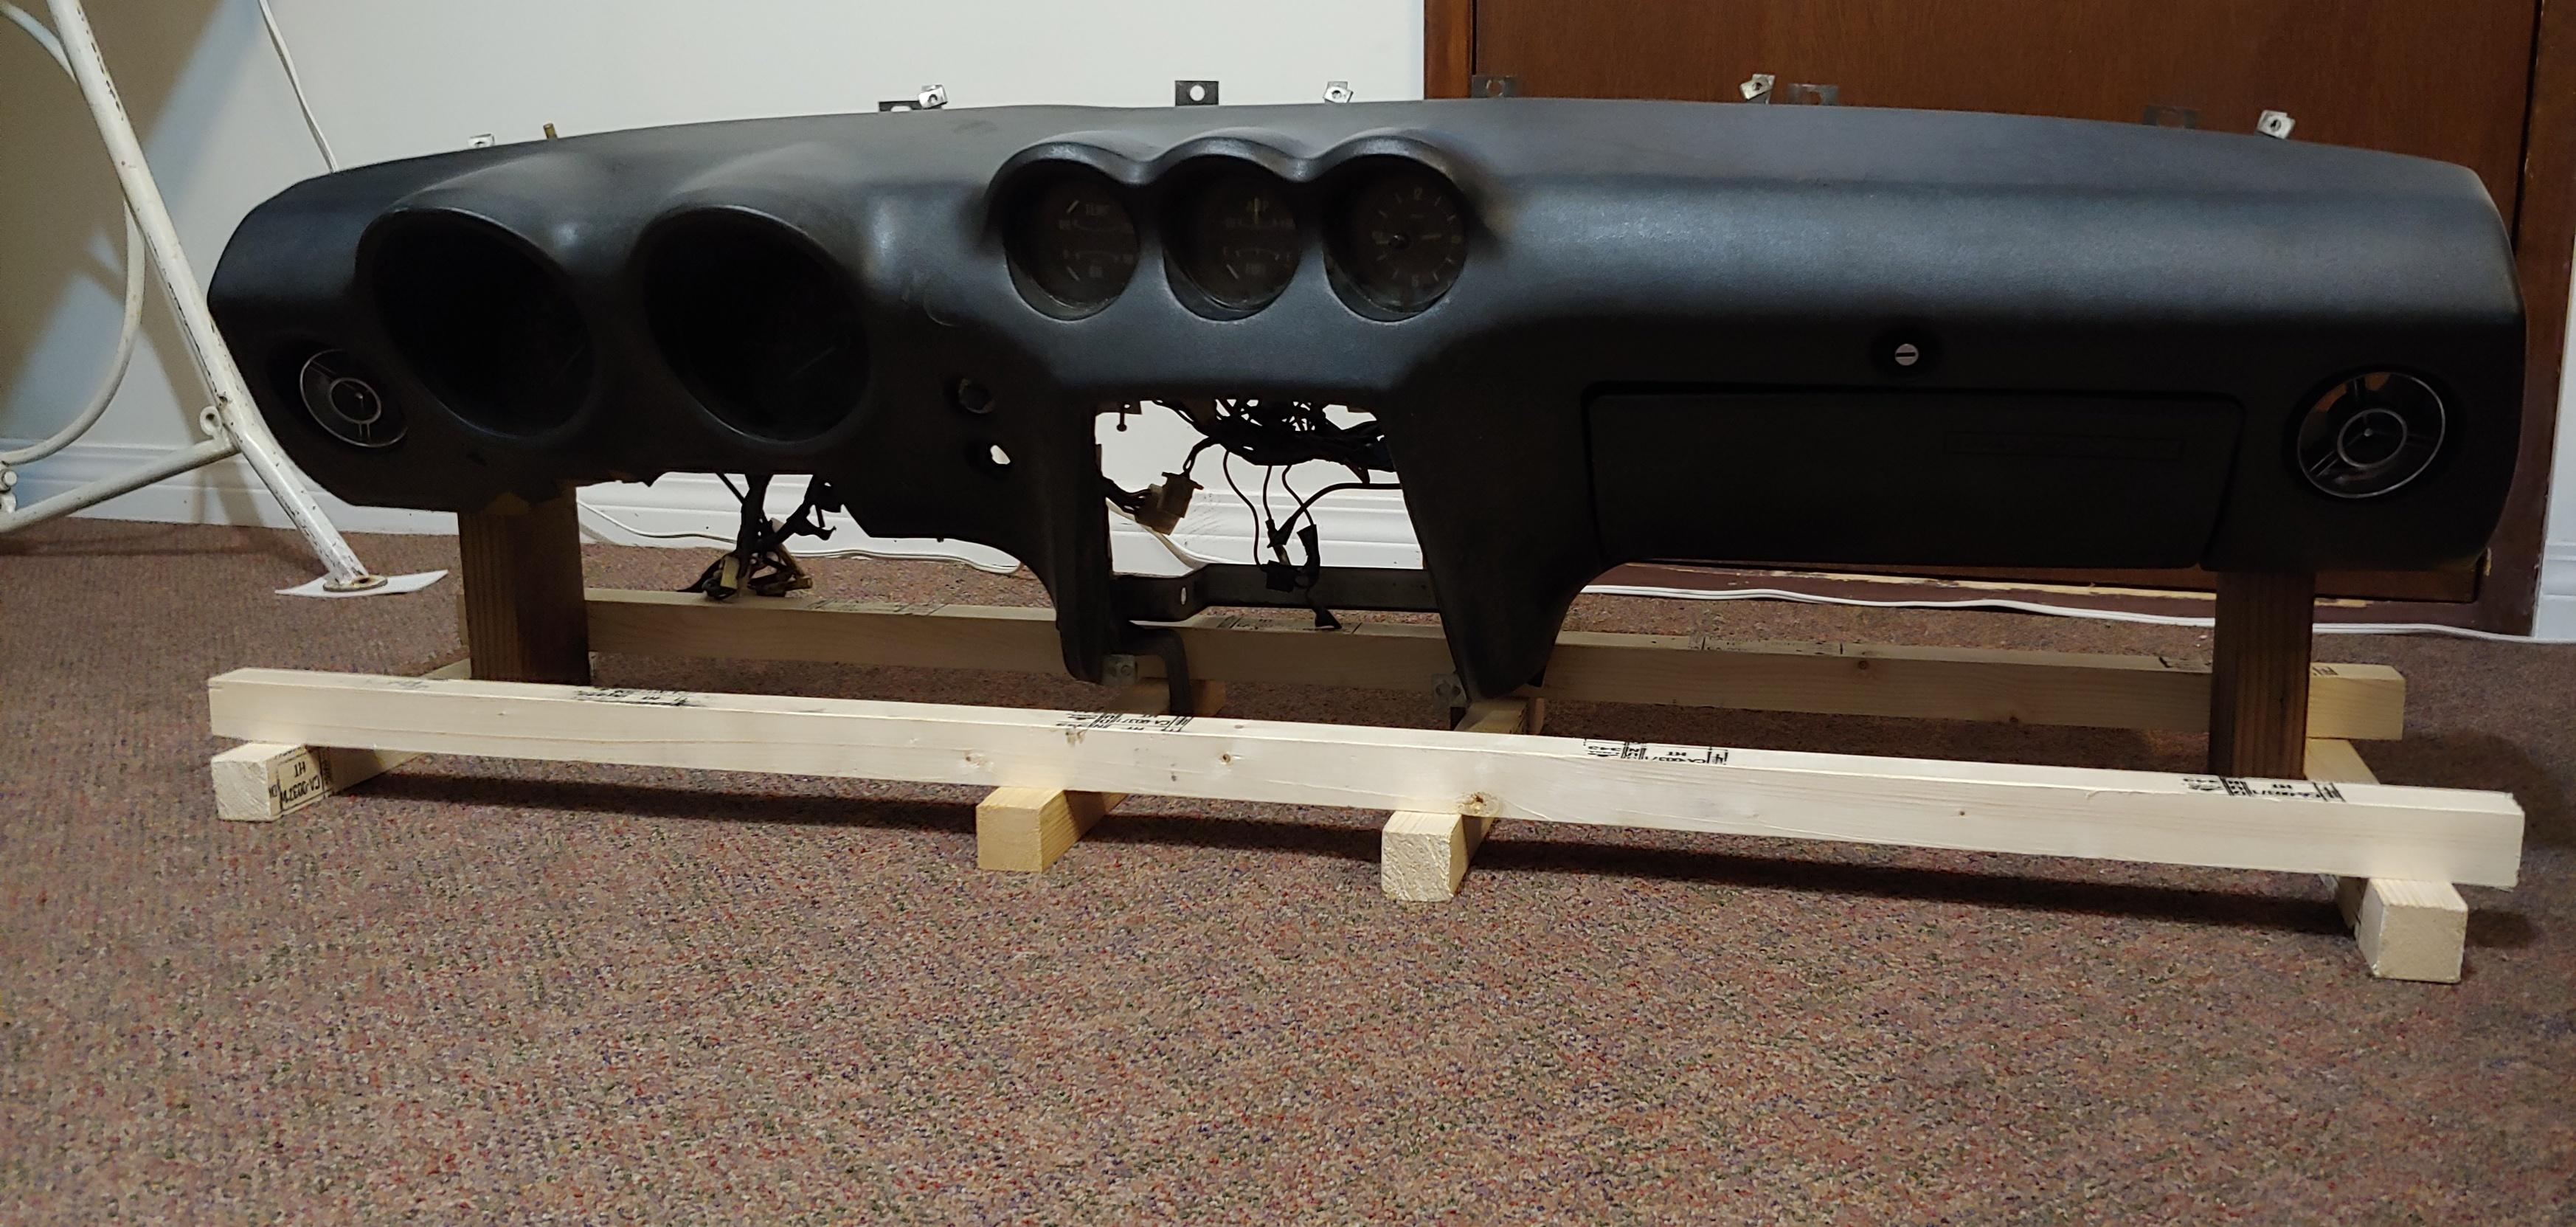
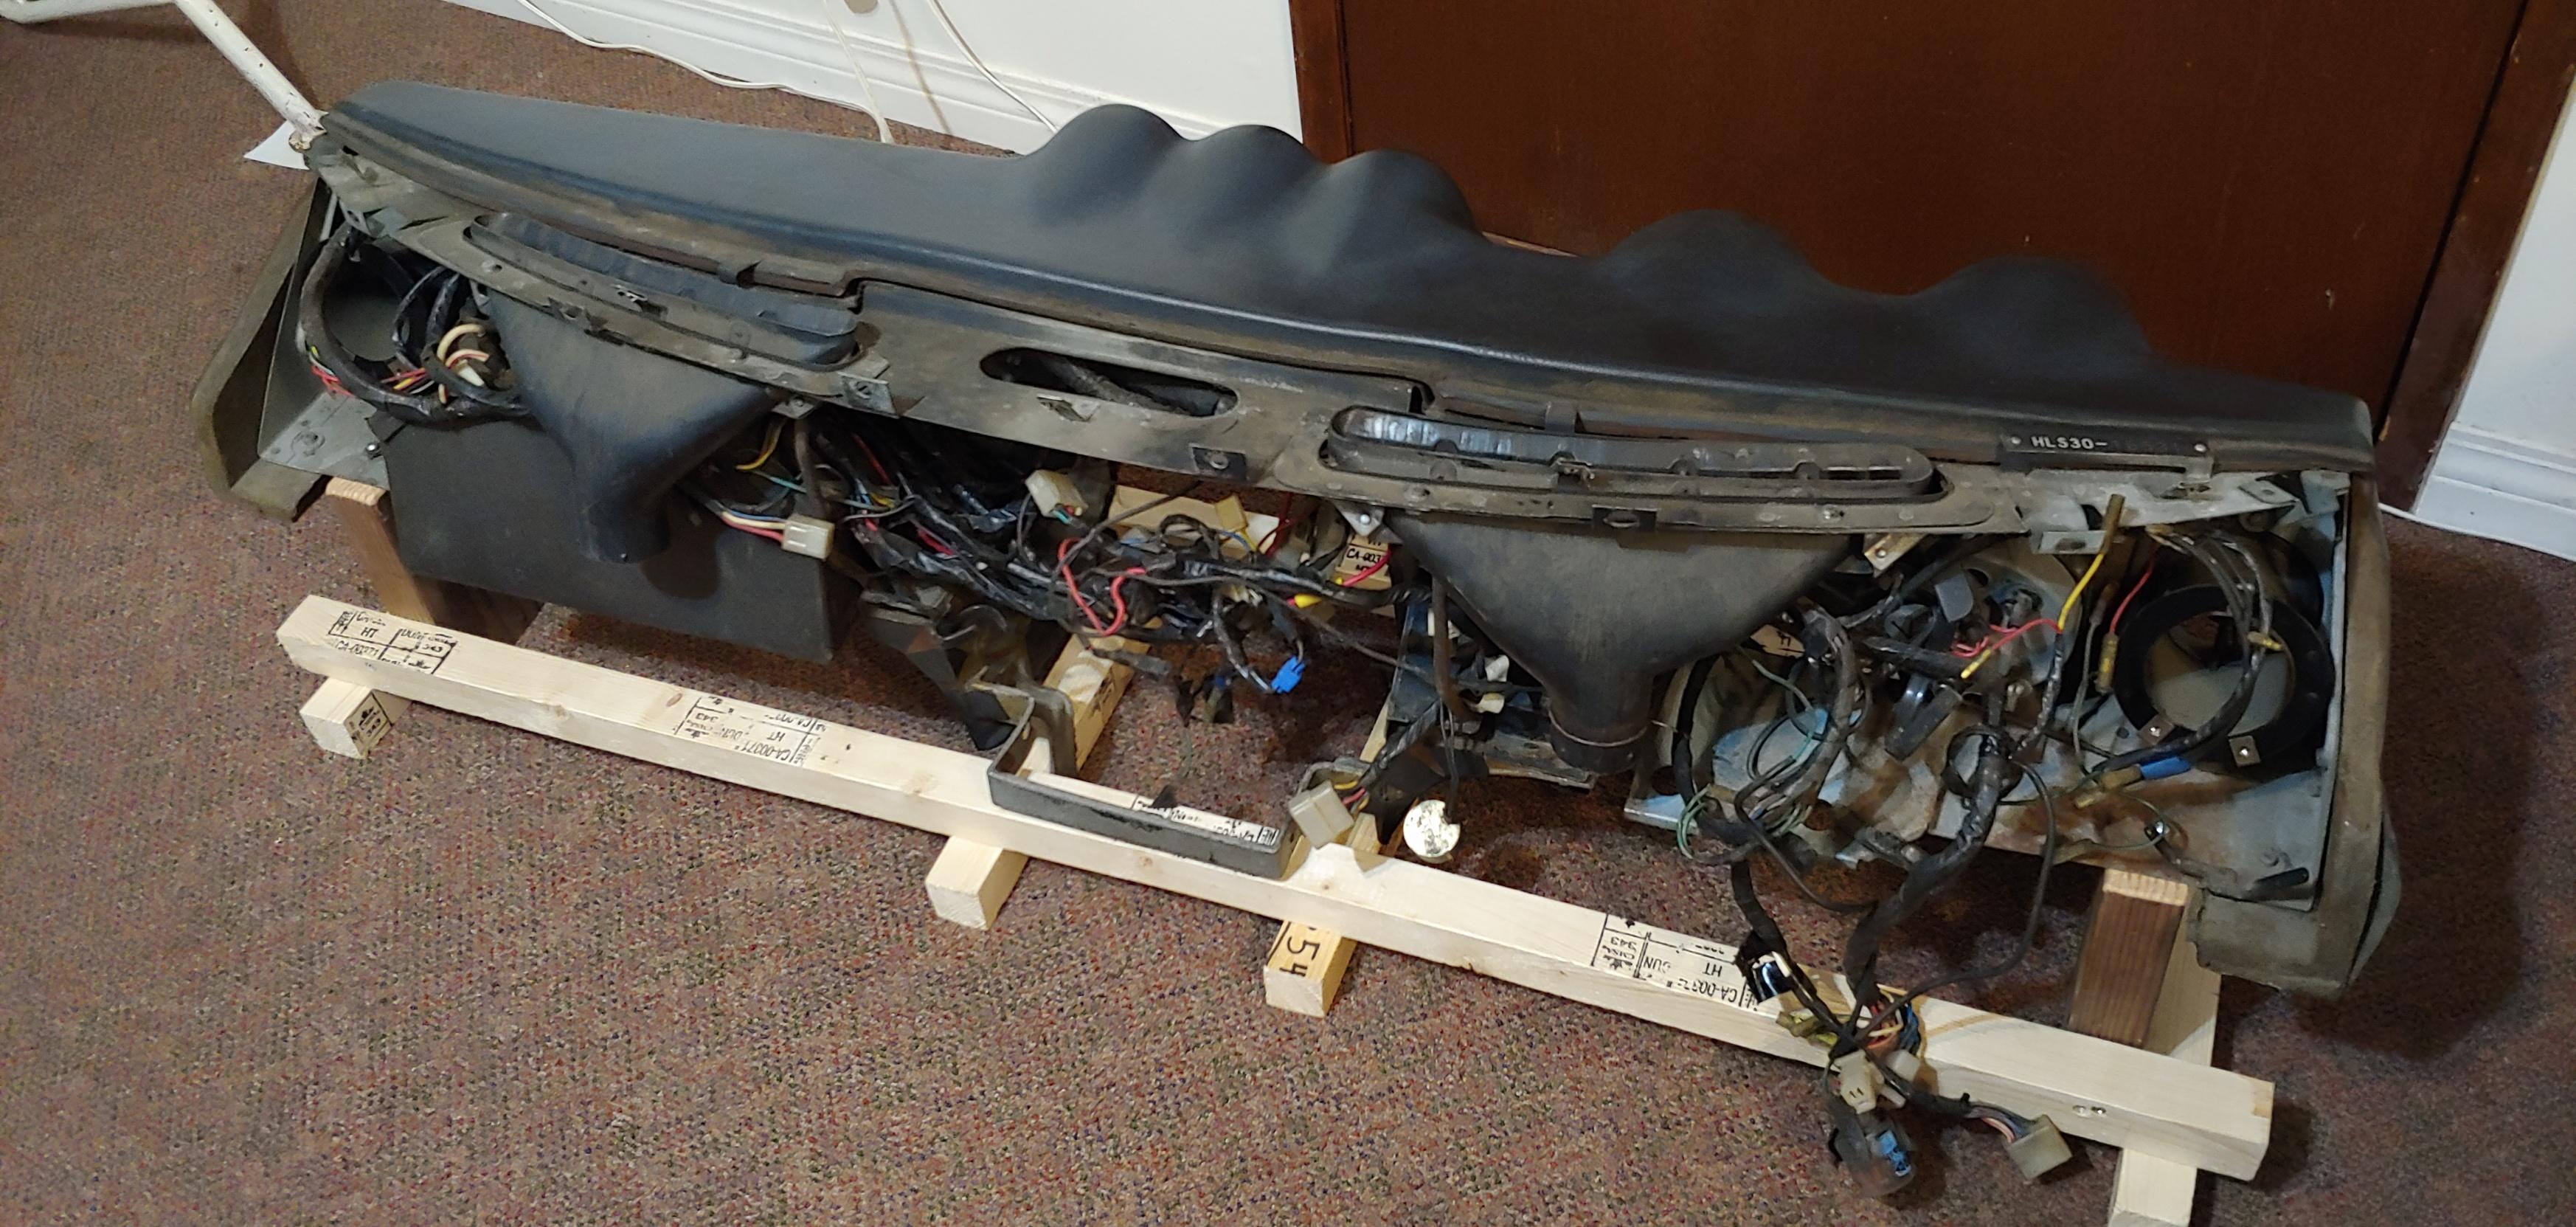
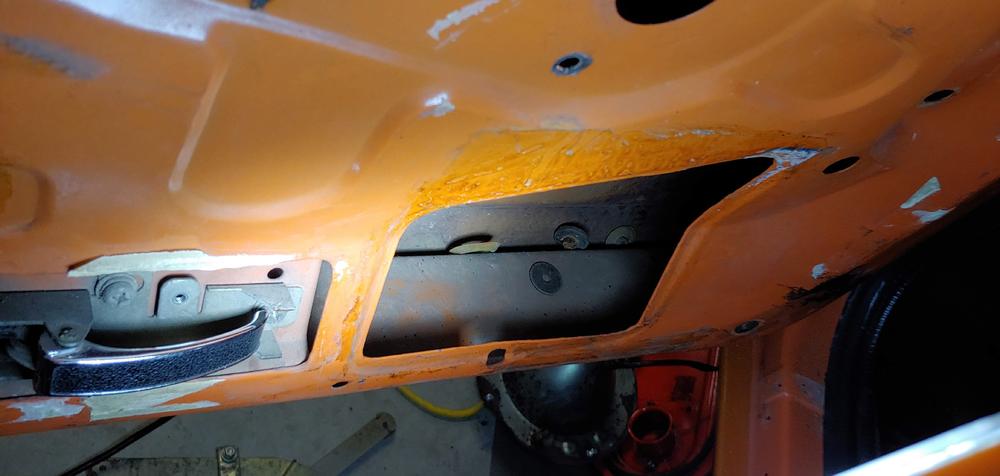
Over the weekend I successfully removed the instrument panel. To make it easier I first removed the steering wheel and column, gear shifter and e-brake. The dash is now safely mounted on the storage rack I previously built. Even with the great resources from this site, my FSM and Wick Humble's book, I still managed to miss disconnecting the flasher unit and a warning buzzer, both mounted at the top of the pedal box. Luckily my son has helping me to do the removal and stabilized the dash while I made those final disconnections, and a potential disaster was averted.


-
-
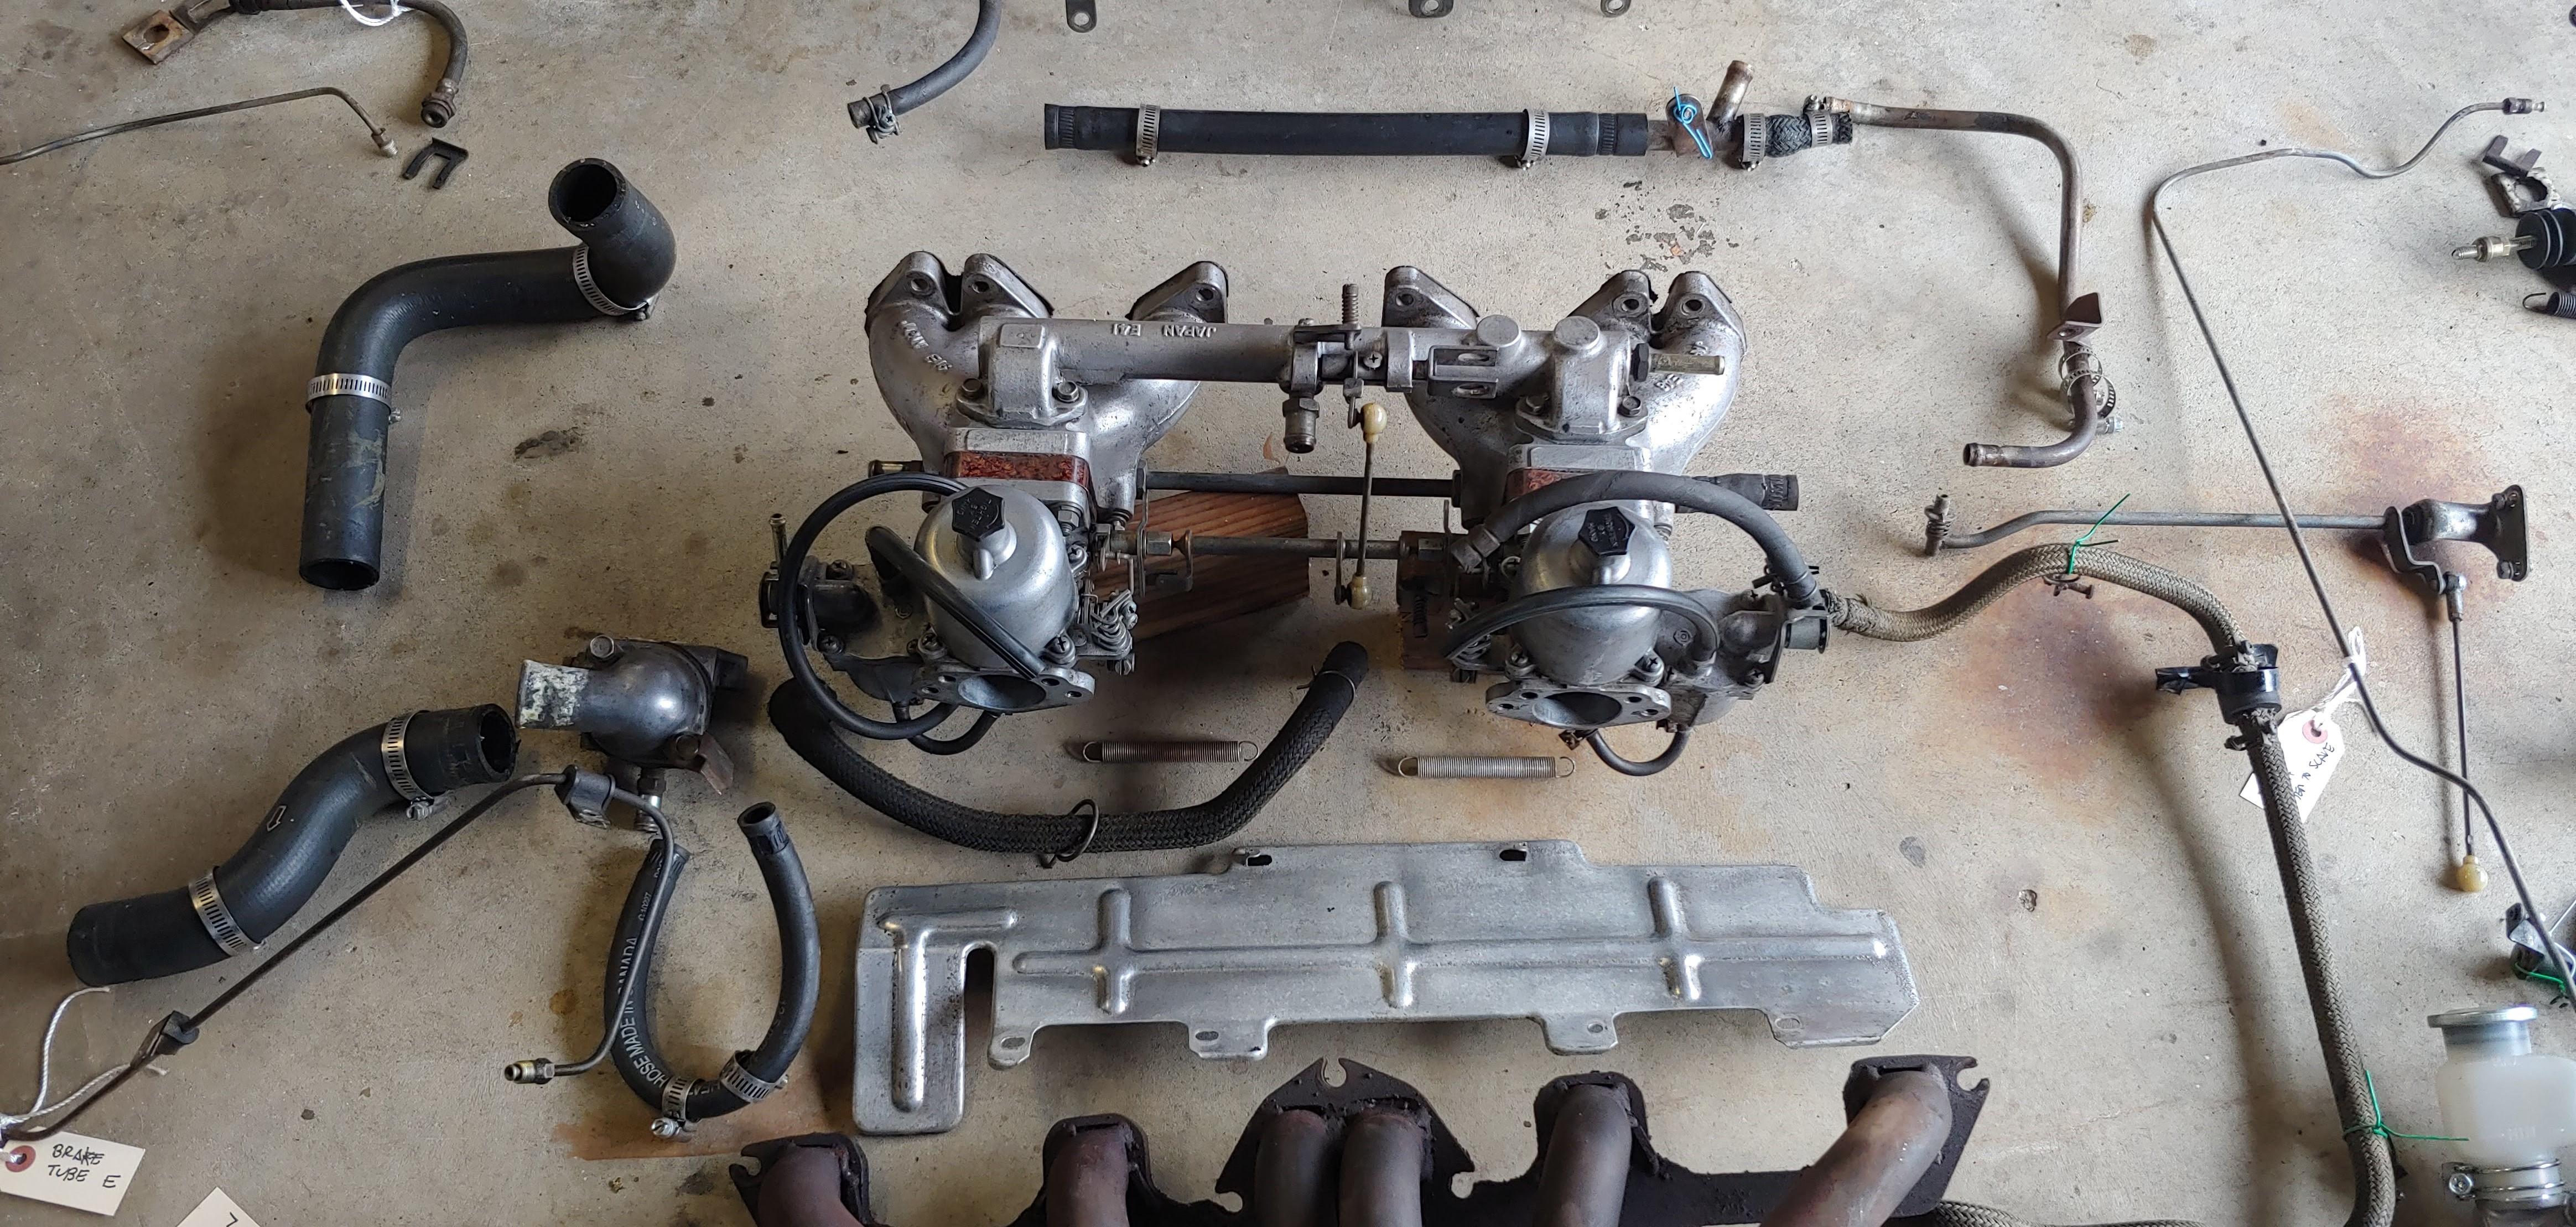
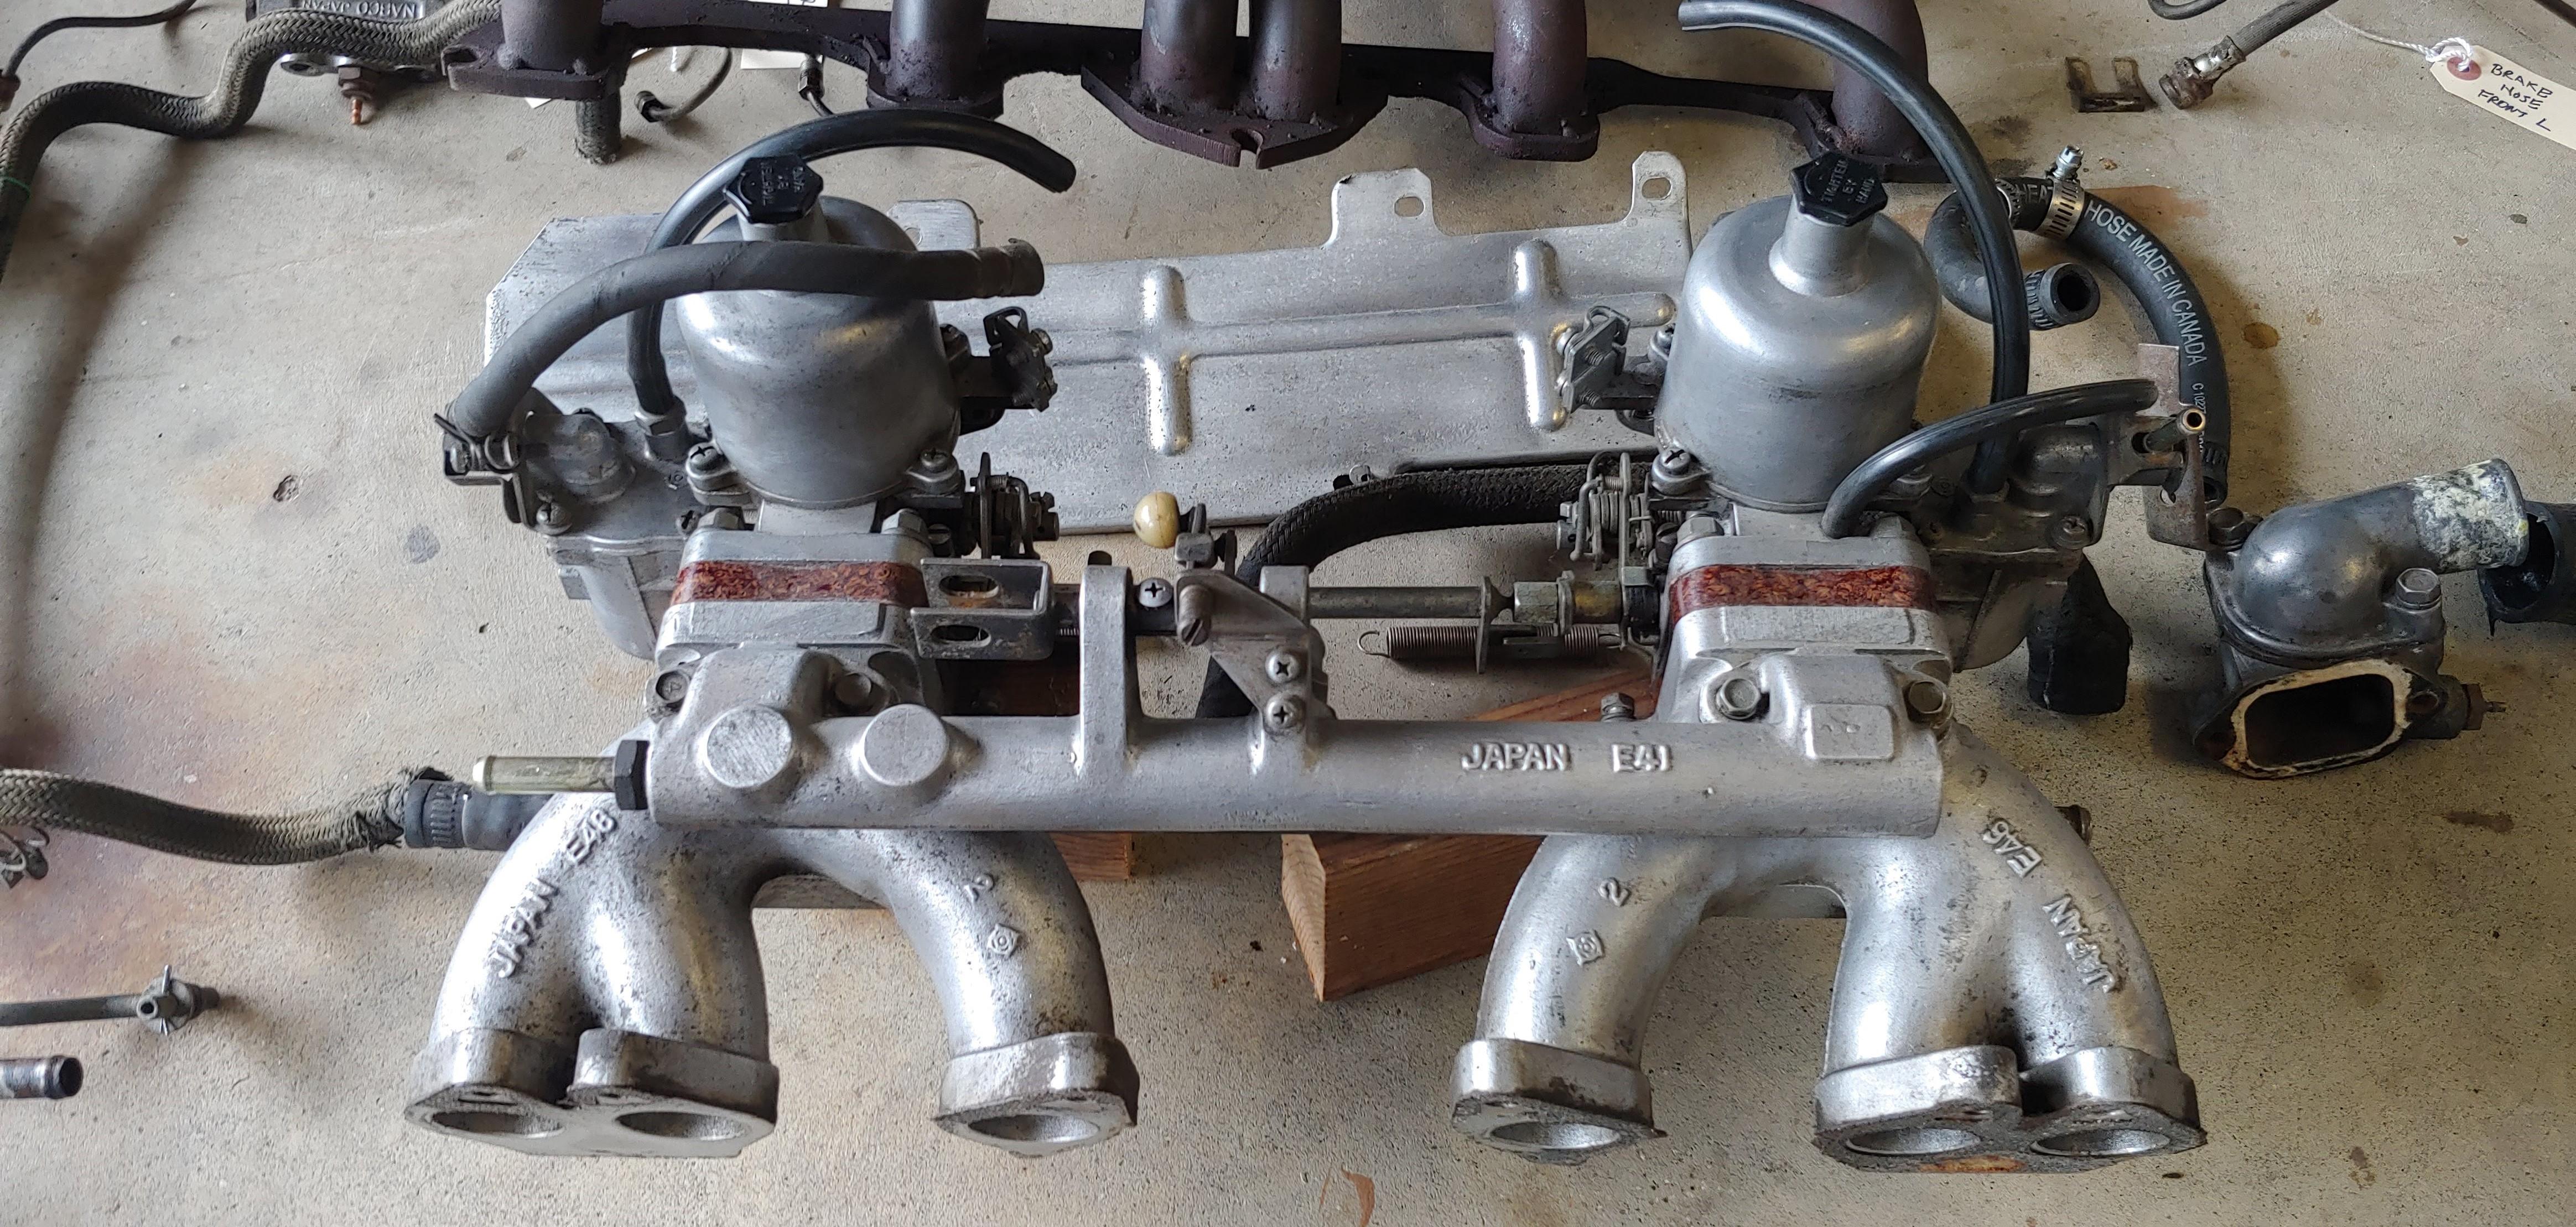
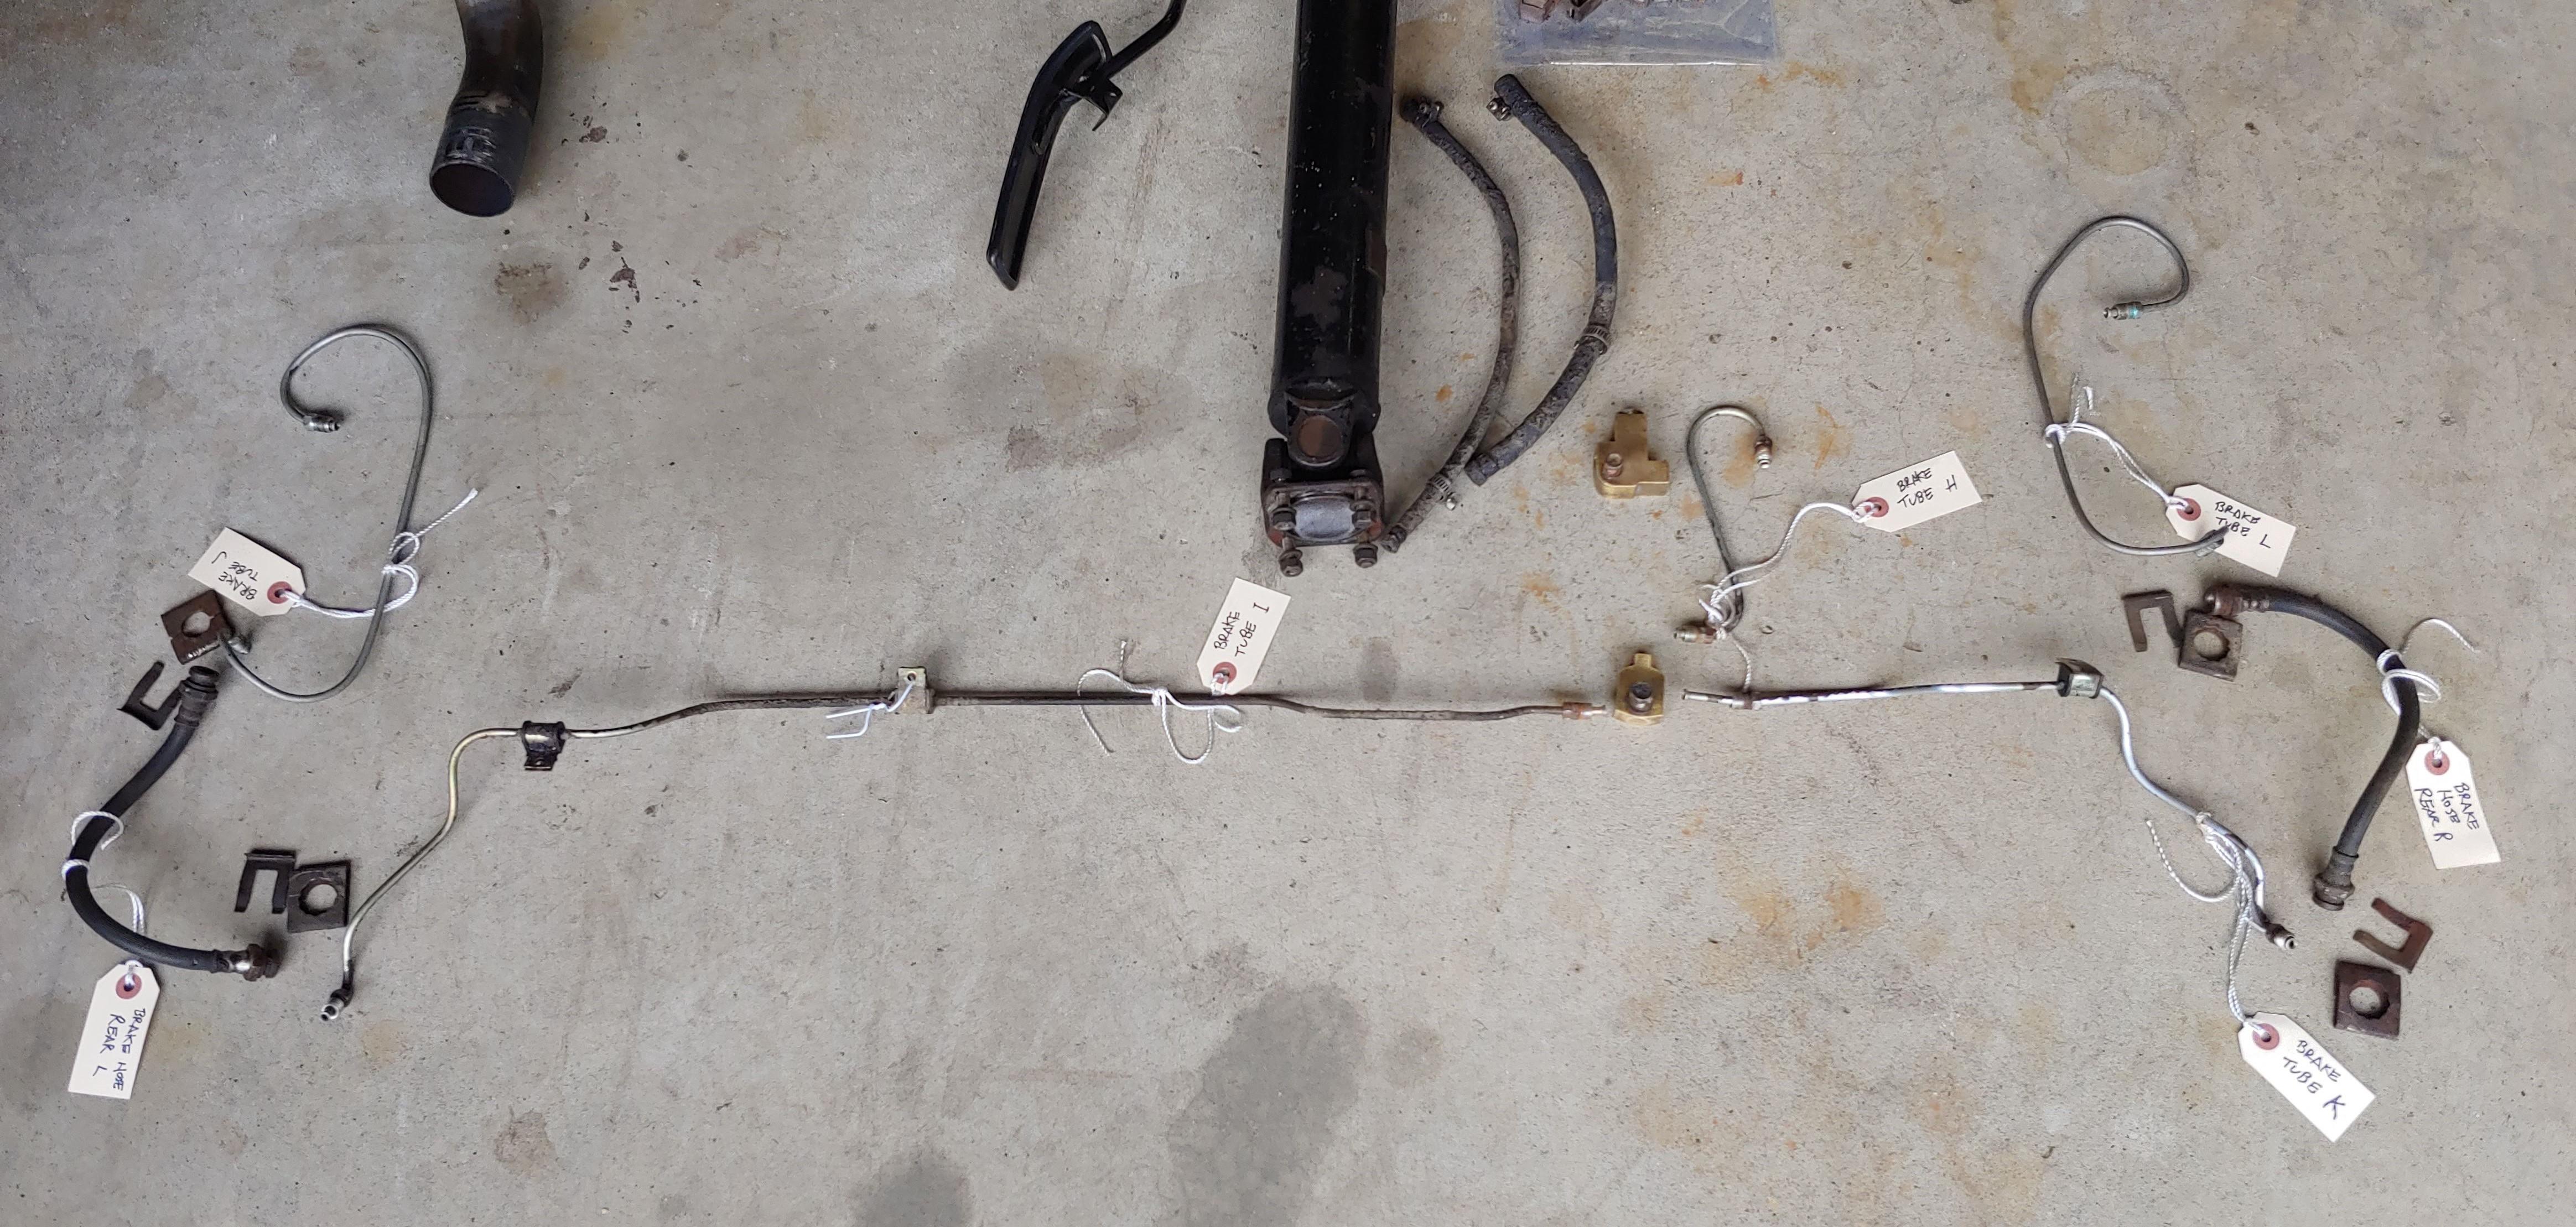
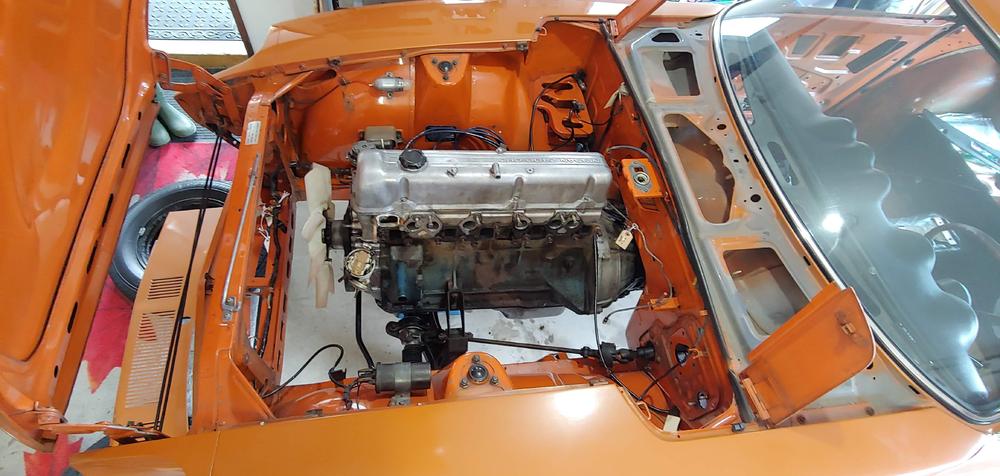
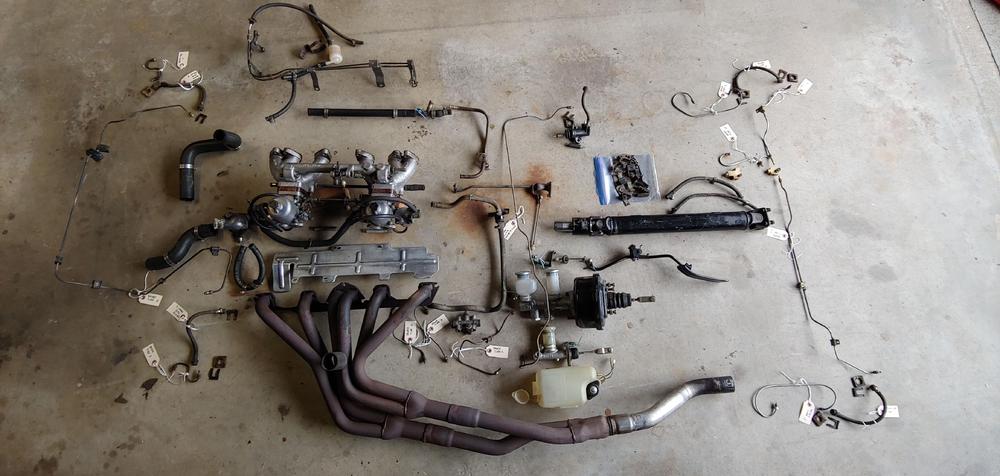
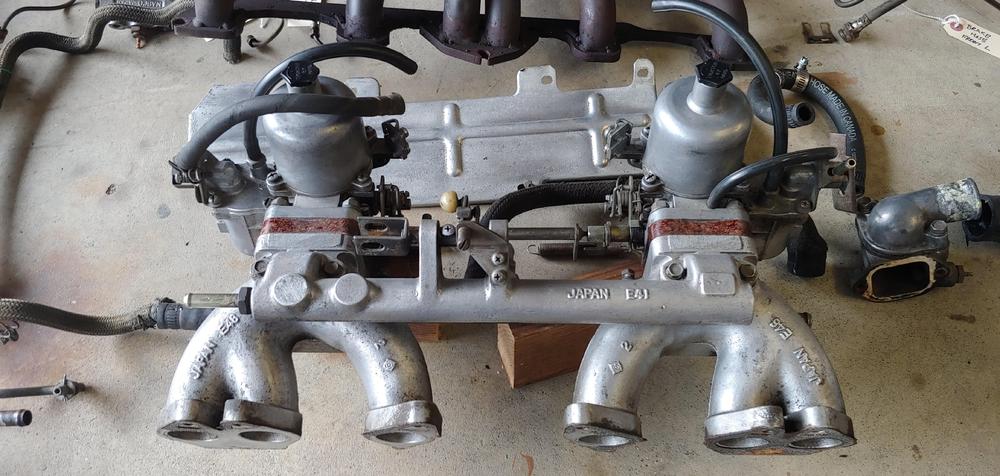
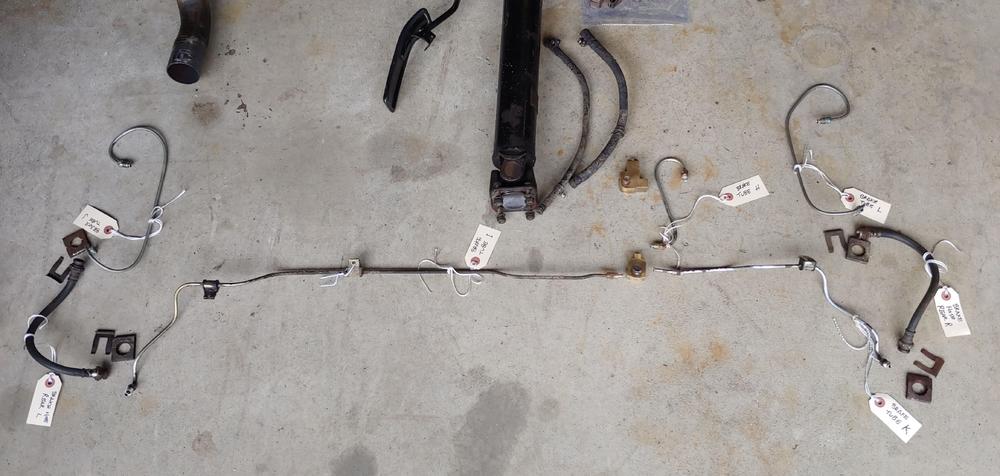
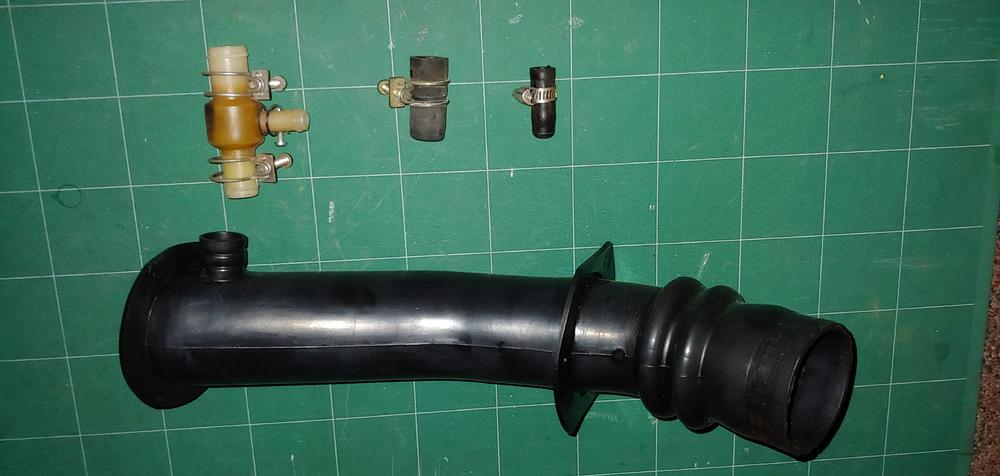
Over the last few weeks I've made a little more progress. Removed the windshield washer fluid reservoir and drained all fluids, brake/clutch fluid and engine, transmission, differential oils. Removed most brake, clutch and fuel line tubes and hoses as well as the brake master cylinder, master vac and clutch master and slave cylinders. Removed the fuel system heat shield and fuel rail. Removed intake and carbs and the exhaust header and pipes forward of the resonator. Removed all remaining coolant hose and tubes from the engine. Getting closer to be able to remove the engine and transmission. I'm trying to decide if I should remove them as a unit or drop out the transmission first.

-
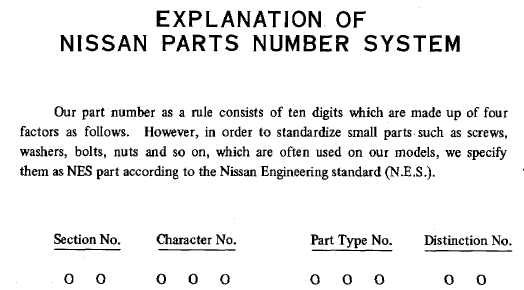
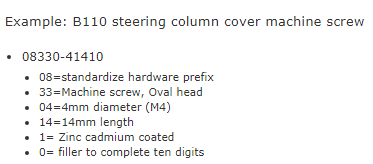
I have a pdf of the 520/521 Datsun Pickup parts catalog and in the explanation of Nissan parts number system it mentions the Nissan NES part numbering system for hardware type items, here is a snippet: This parts catalog doesn't have full detail of the NES system but with a google search i found some interesting info on datsun1200.com. There is an article on the evolution of Nissan part numbers. I can't vouch for it's accuracy but here is a snippet on the 10 digit breakdown that expands on what you describe above: Here is a link to the web page, http://datsun1200.com/modules/mediawiki/index.php?title=NES_Part_Numbers Cheers, Mike I think I found the topic you were looking for, funny its references the same site I found,
-
This is a good topic, I believe the finish on the underside evolved over time. My 7/70 car had the heavy tar like undercoating that was dealer applied. in all of the areas that I have removed it, the finish that is exposed is body color paint. This includes the floor underside, front and rear wheel wells etc. and no factory undercoating. Here is one discussion I have bookmarked:
-
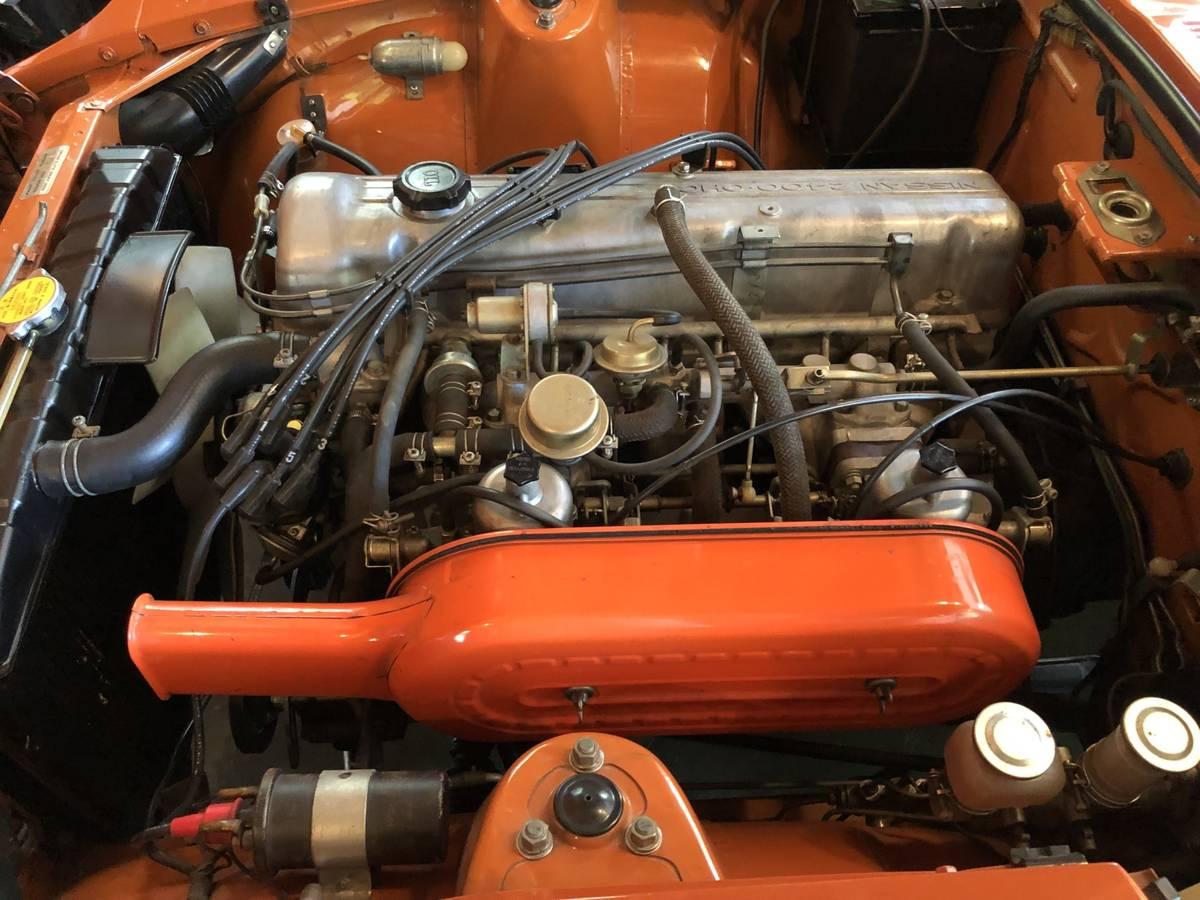
I can respect that. It has the 2400 valve cover, which would be 8/70 or earlier, of course that could have been changed but I suspect it is original. Then again no mention that the engine is original, based on the asking price probably yes. Just noticed that the listing has been "deleted by author". Not sure what you mean by "meaning 1/70 car". My 7/70 has the same black unlit defroster switch. My 12/70 parts had the same switch location but it was amber and lit.
-
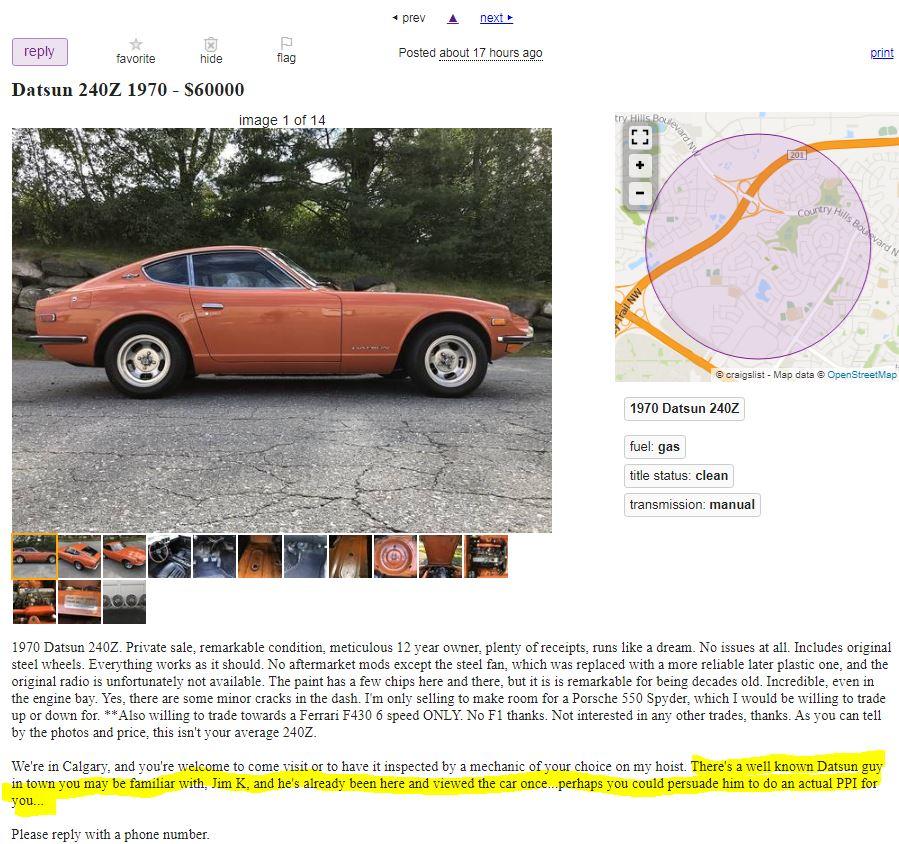
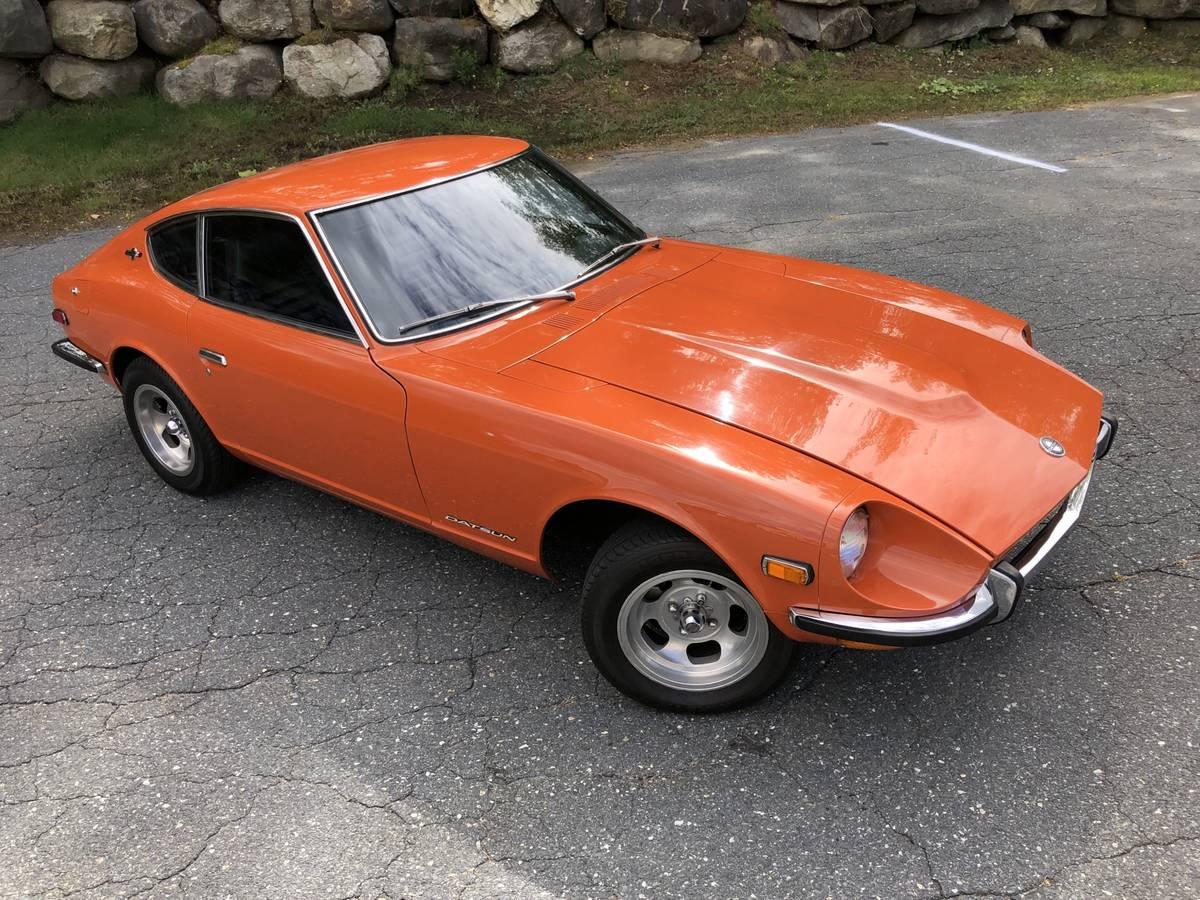
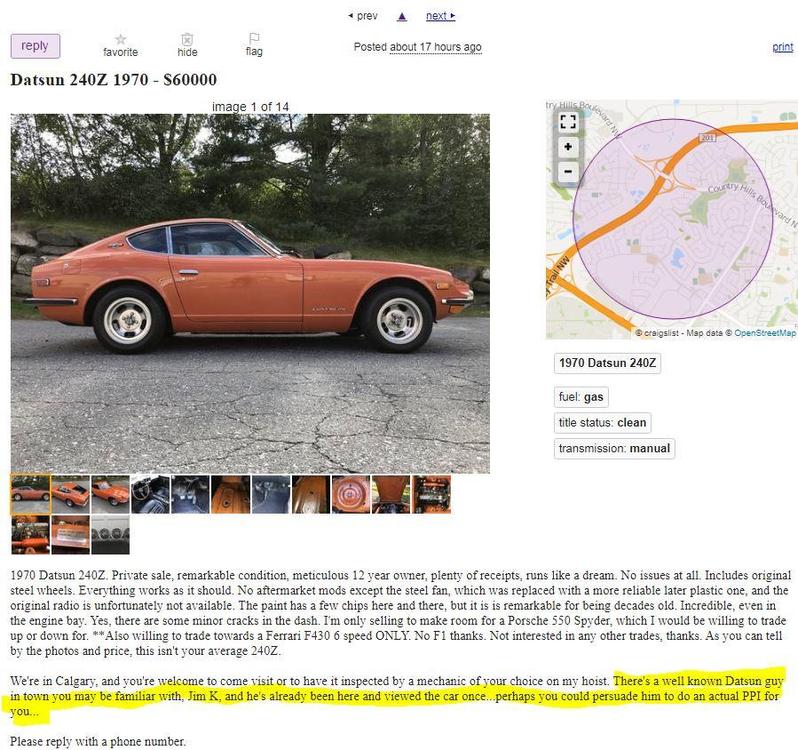
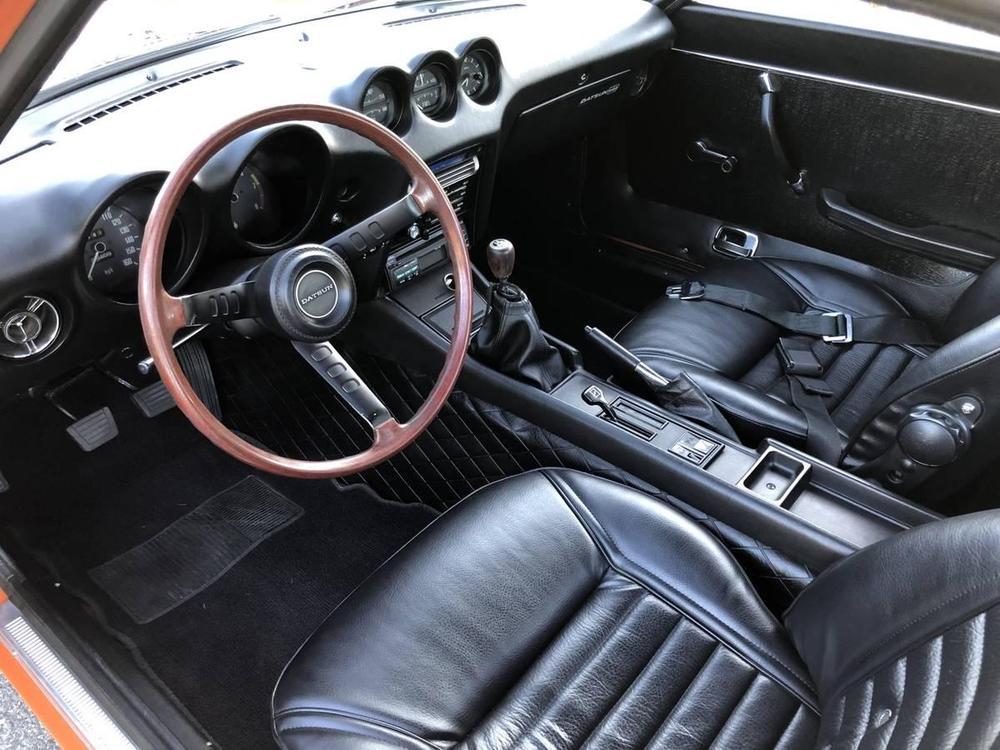
Looks like a very clean unmolested example. The price is up there at C$60,000 (about 45K USD) but it looks very nice. I wonder what the VIN is. @zKars looks like you got tagged in the ad, is this the real deal? ? https://vancouver.craigslist.org/van/cto/d/calgary-datsun-240z-1970/7138888324.html


-
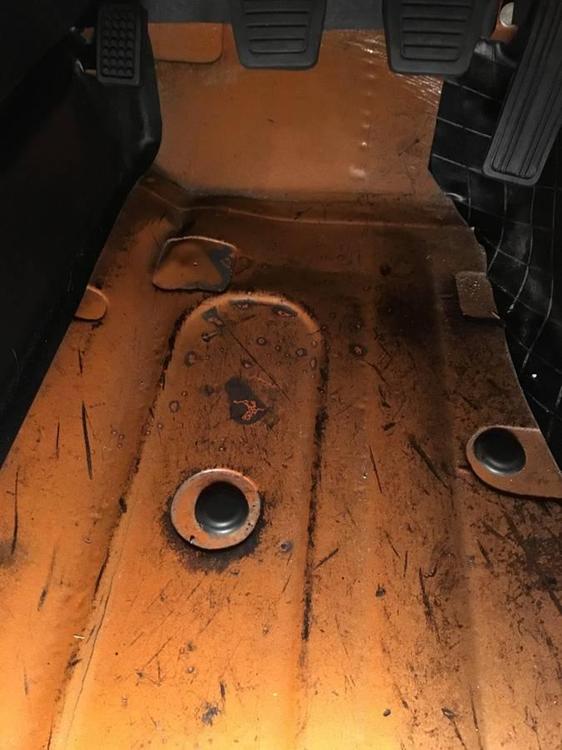
I just removed a few pieces from my floor in front of the left seat and the thickness measured about .090", my car is a 1970 #6521
-
Hi Ed, In our downloads there is a document called "General-Datsun Torque Specifications" you can find it here, thanks @Jarvo2:
-
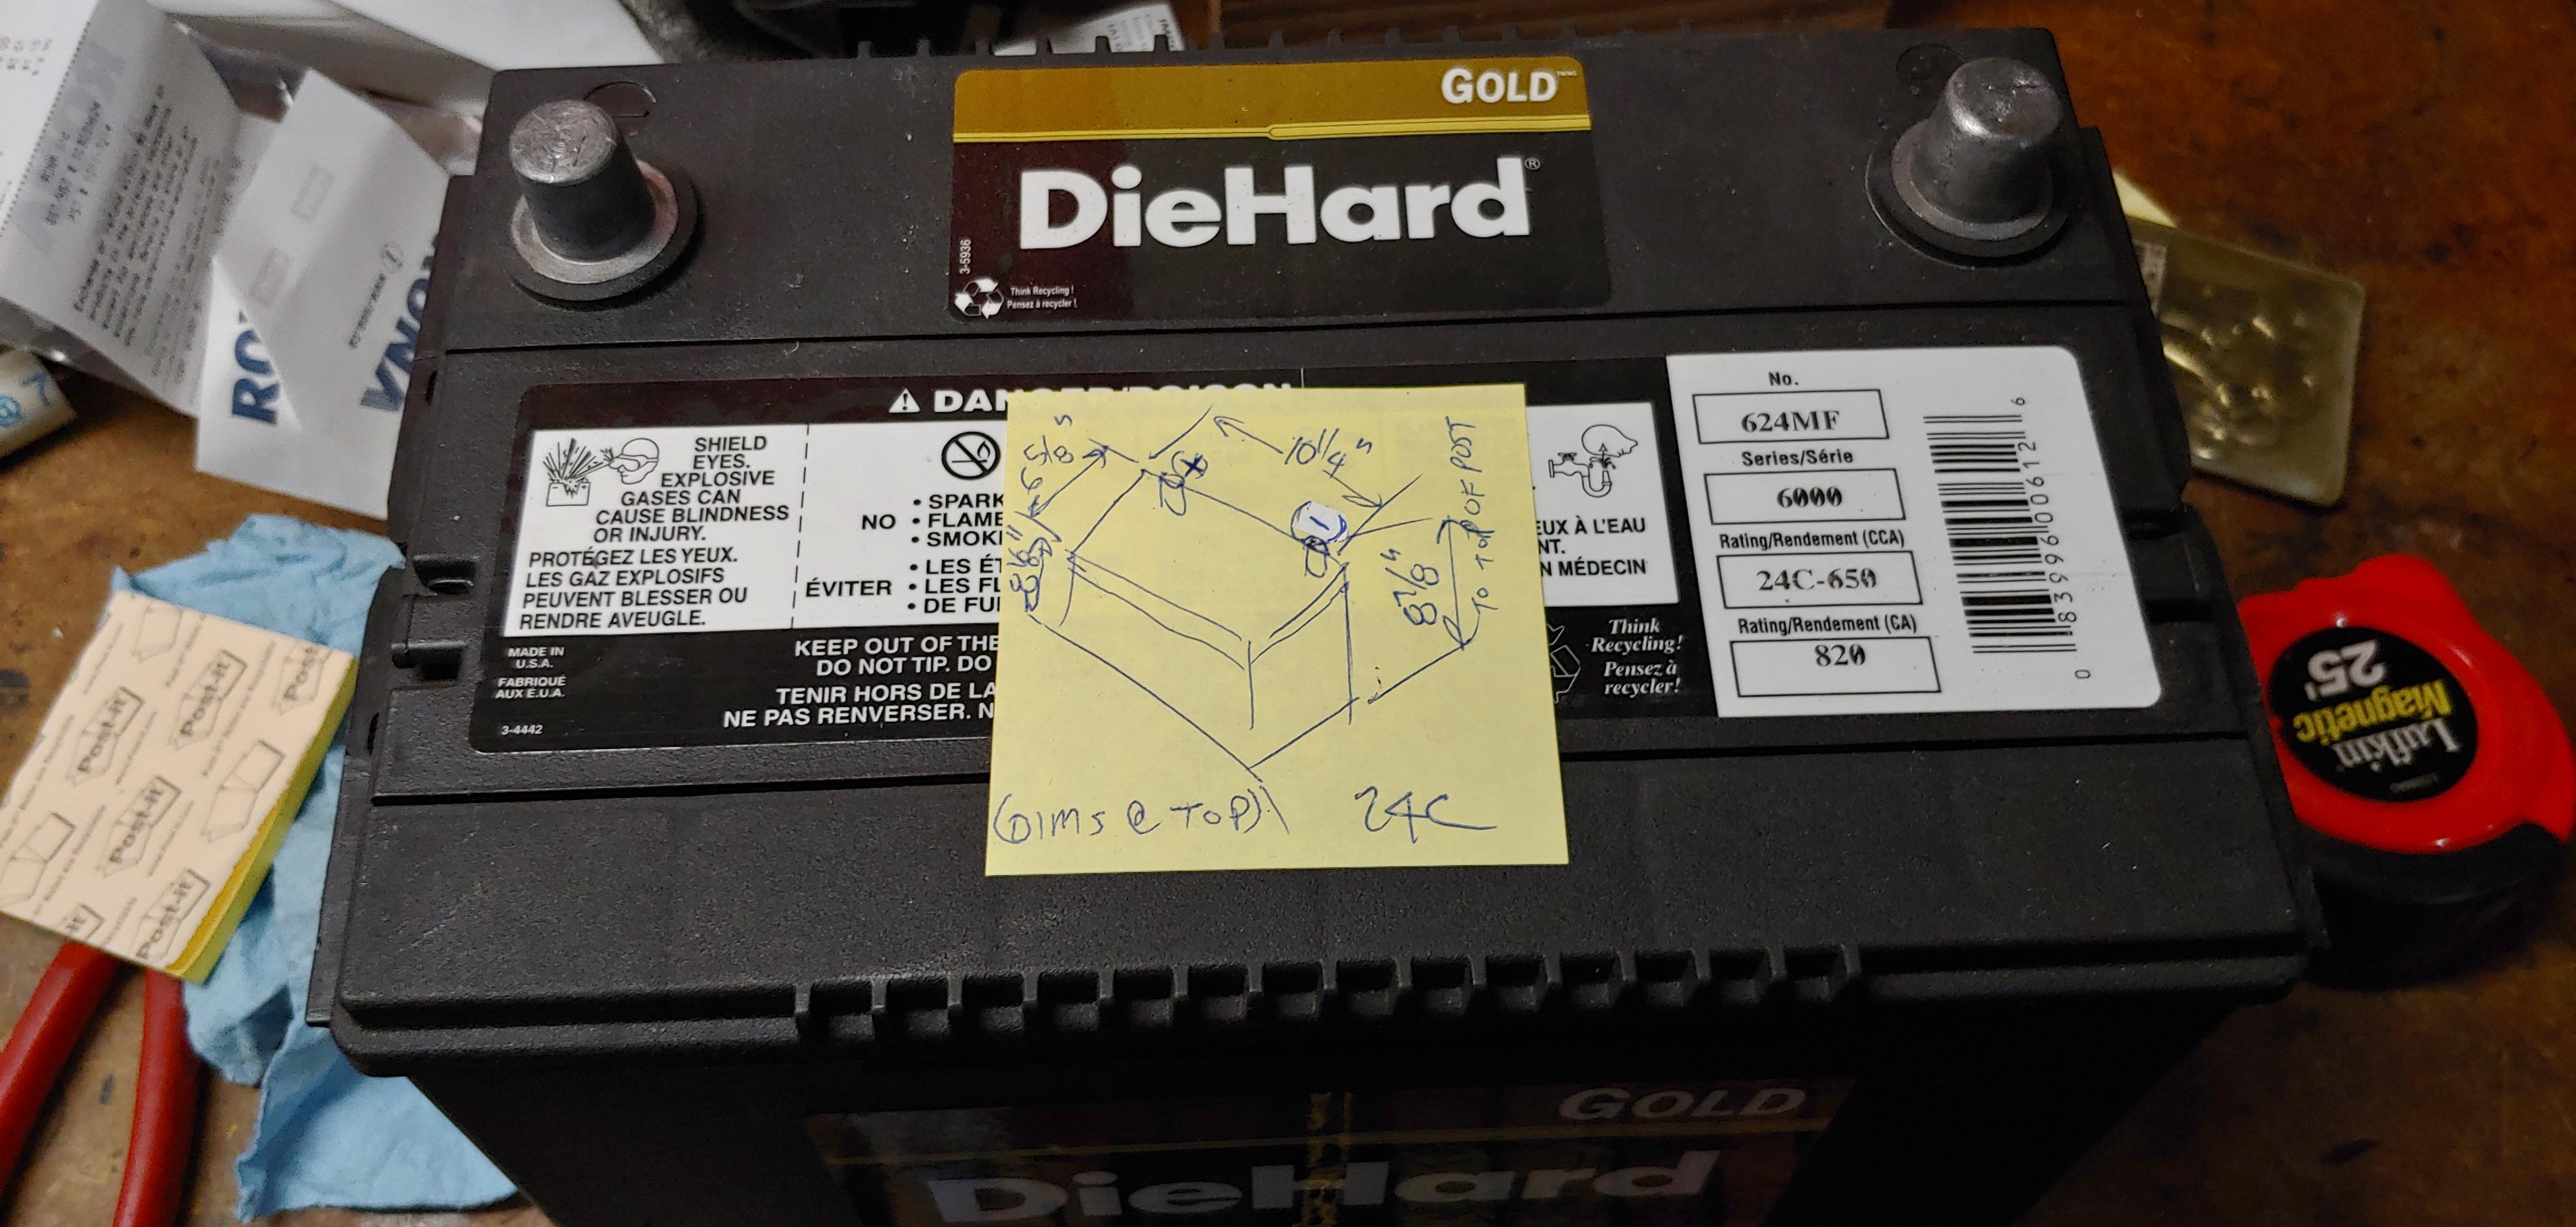
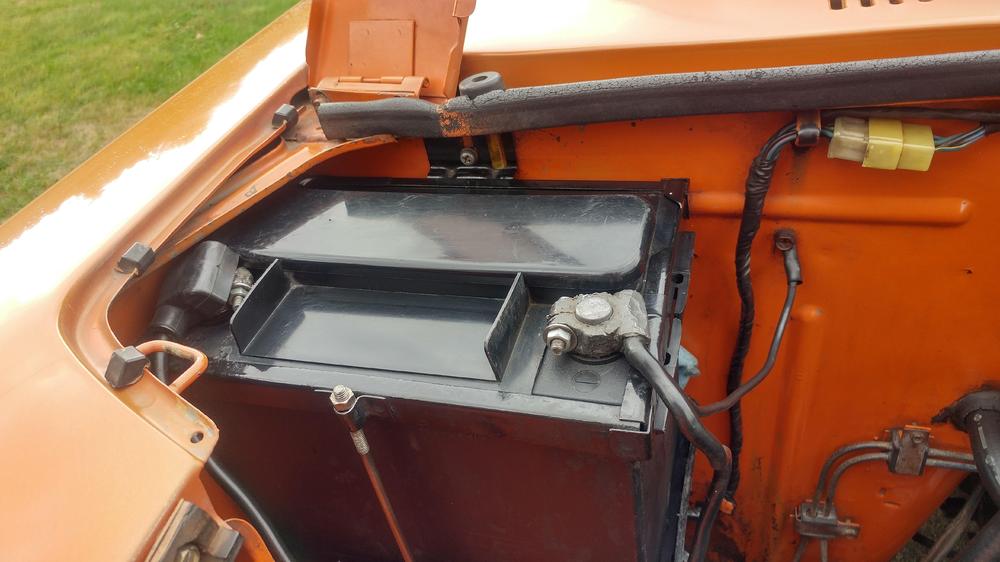
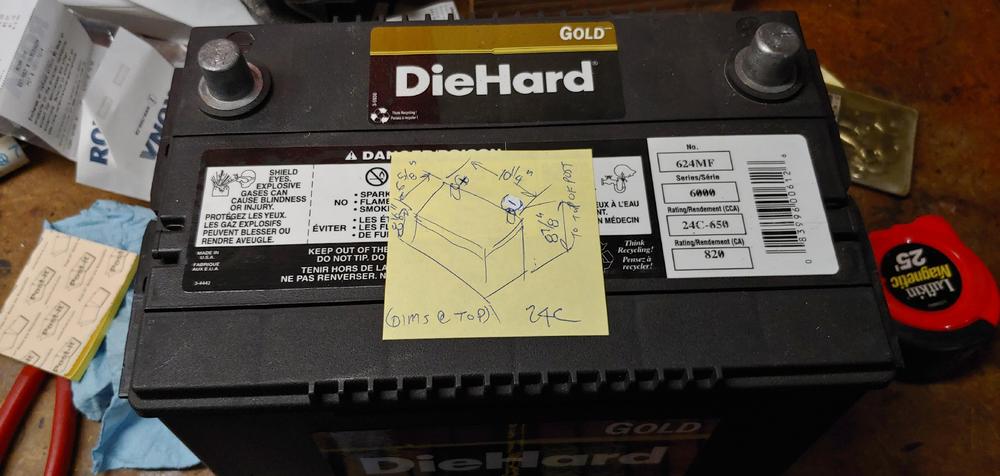
I have been using a DieHard Gold Group 24 battery (same terminal location as OEM) that has top vents but is flat on top and works with the stock cover. Like @Pilgrim mentioned to have no vents you would have to go to a gel battery.
-
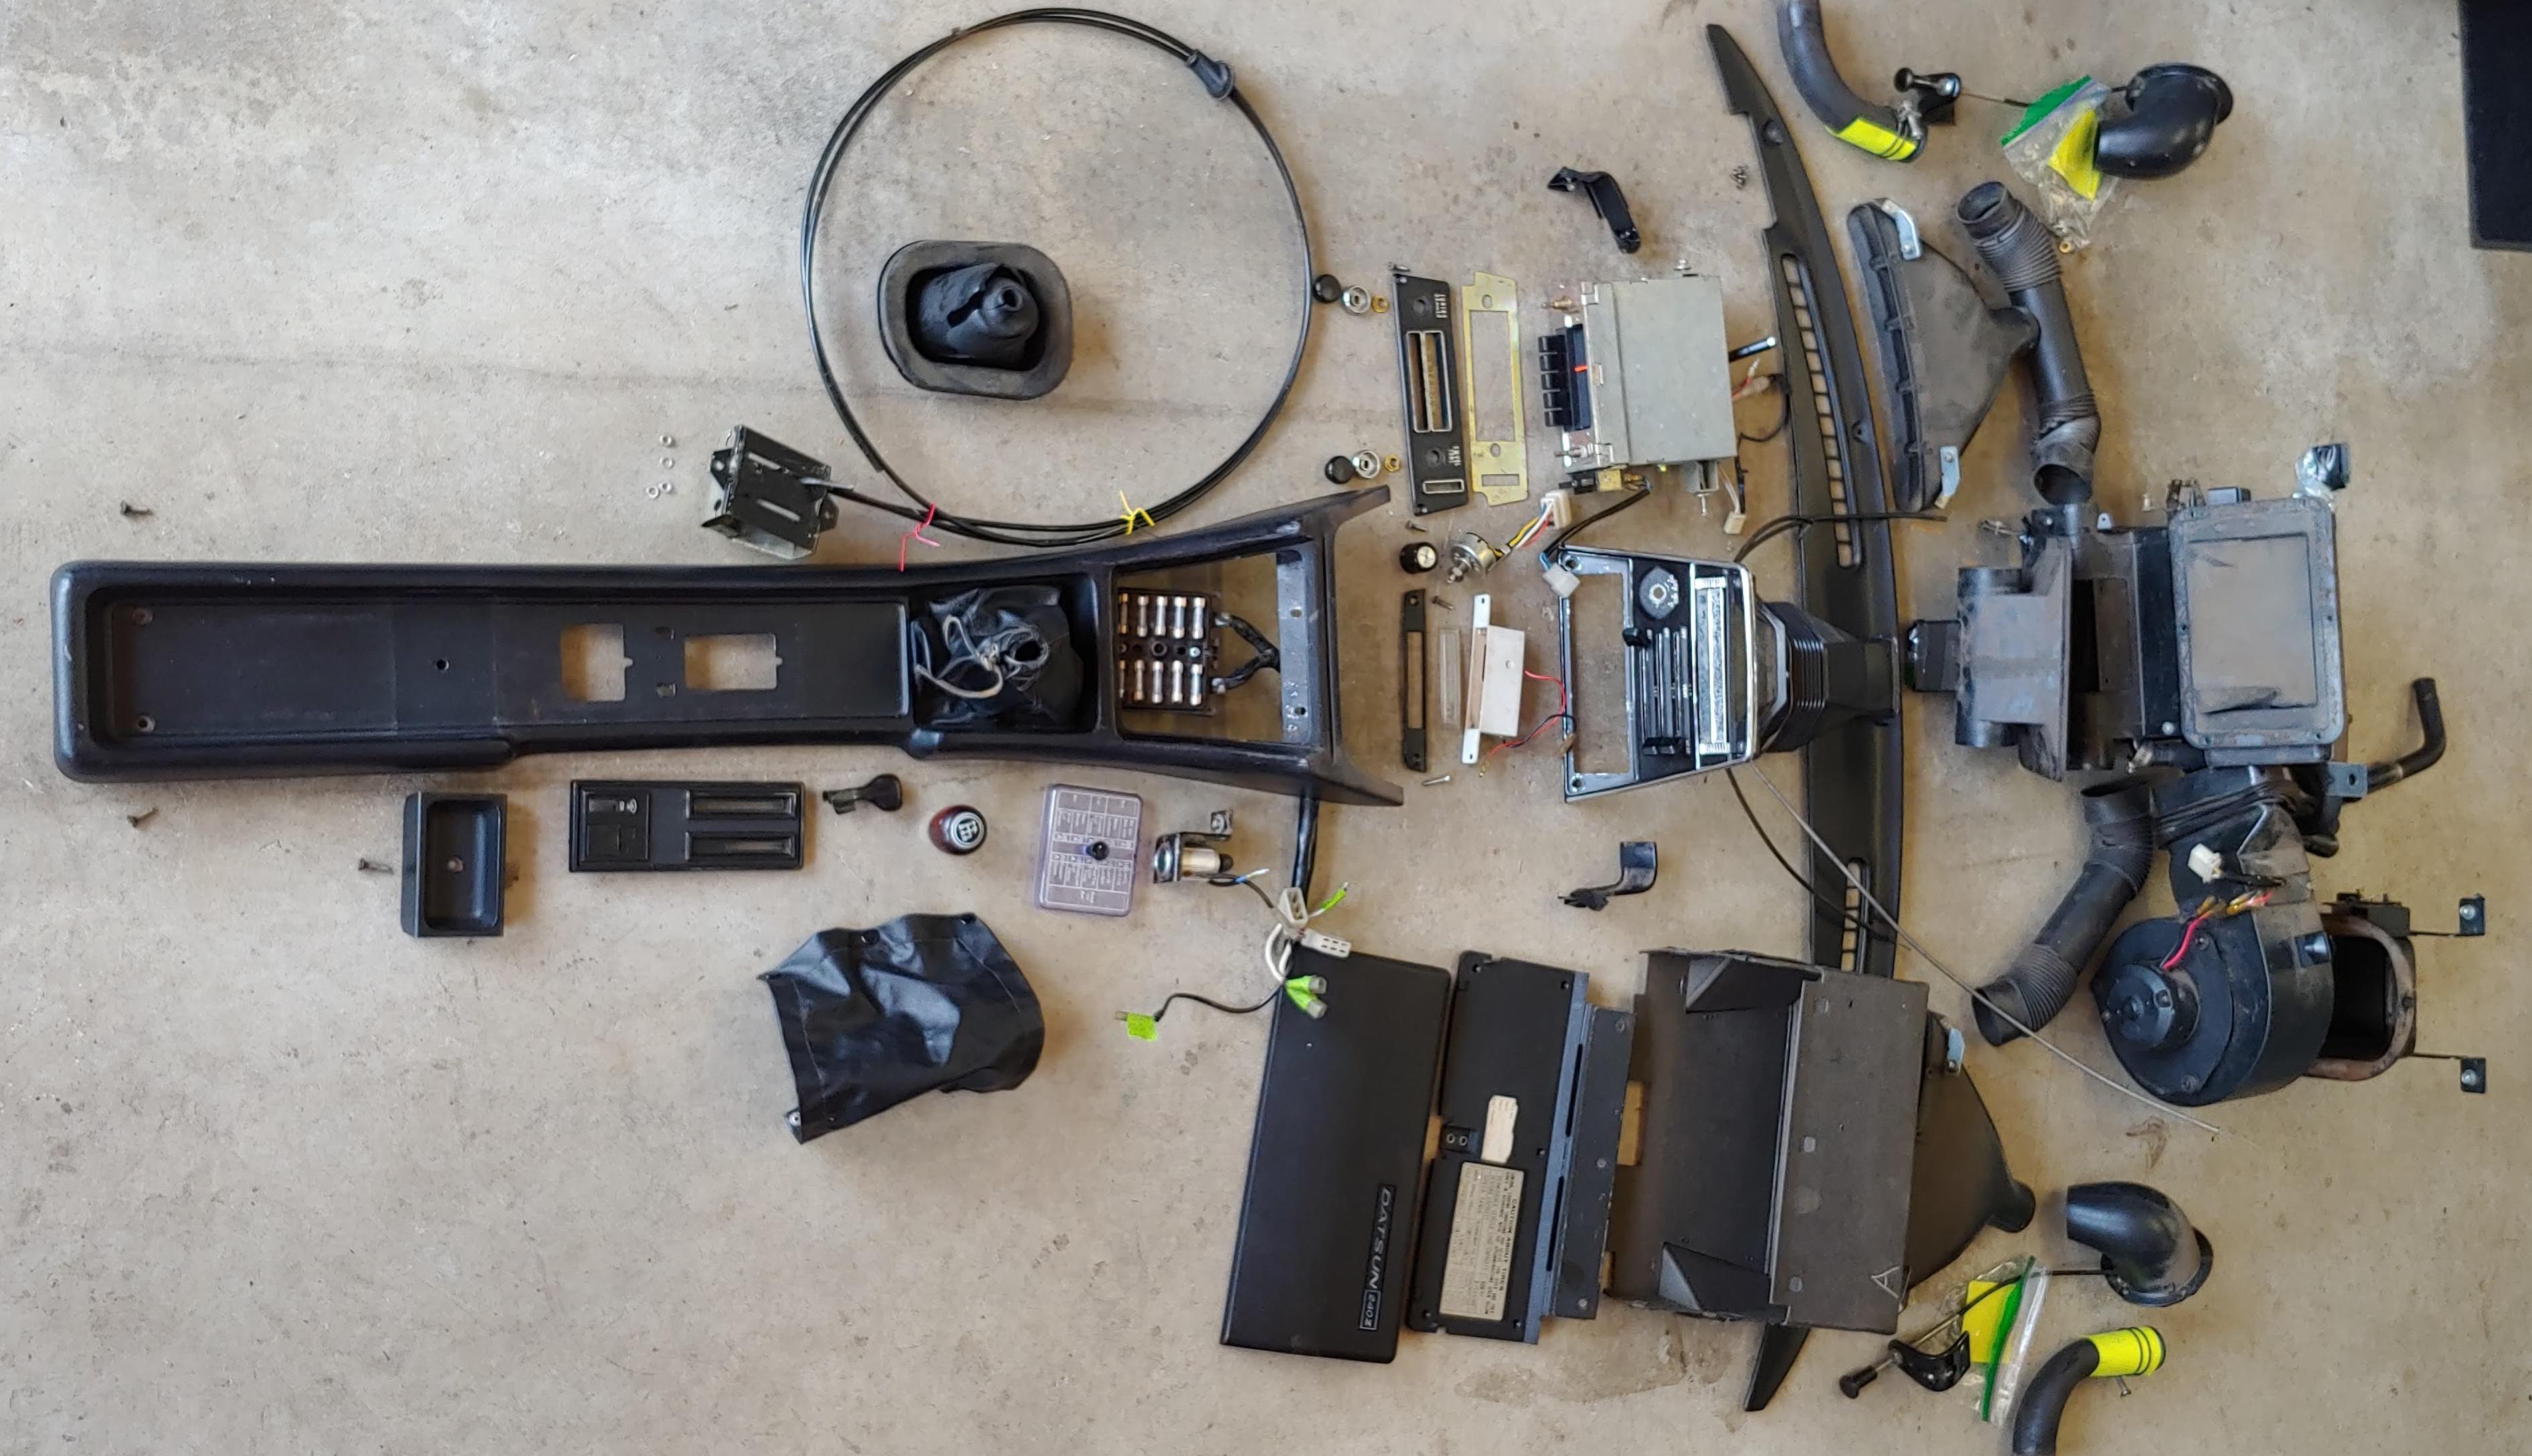
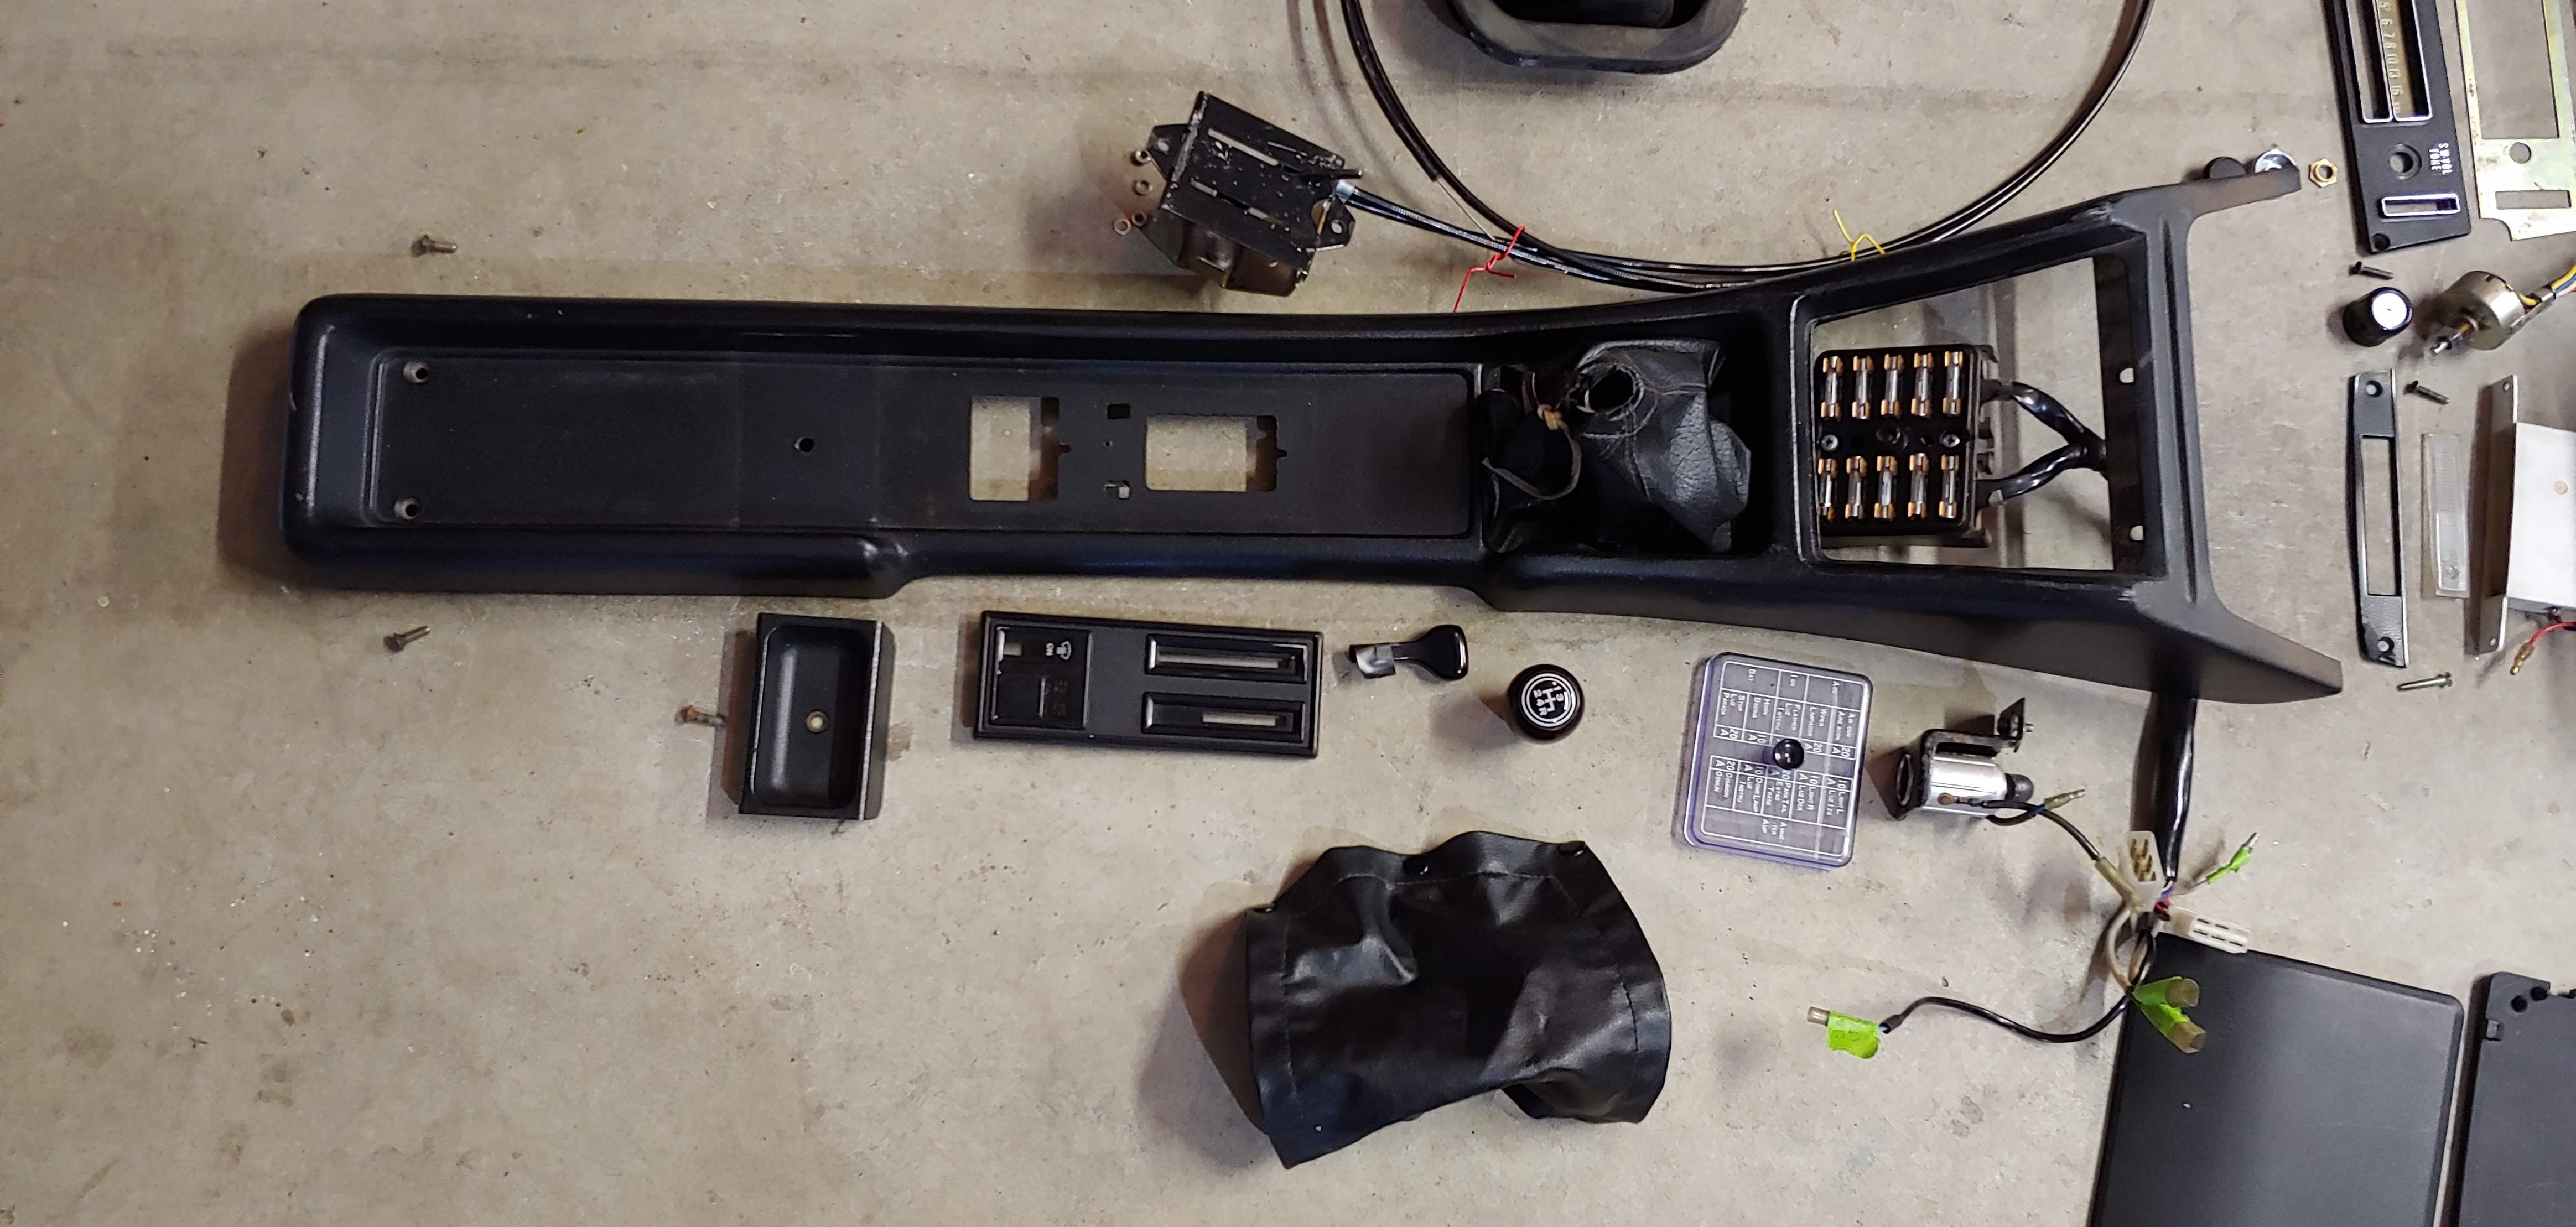
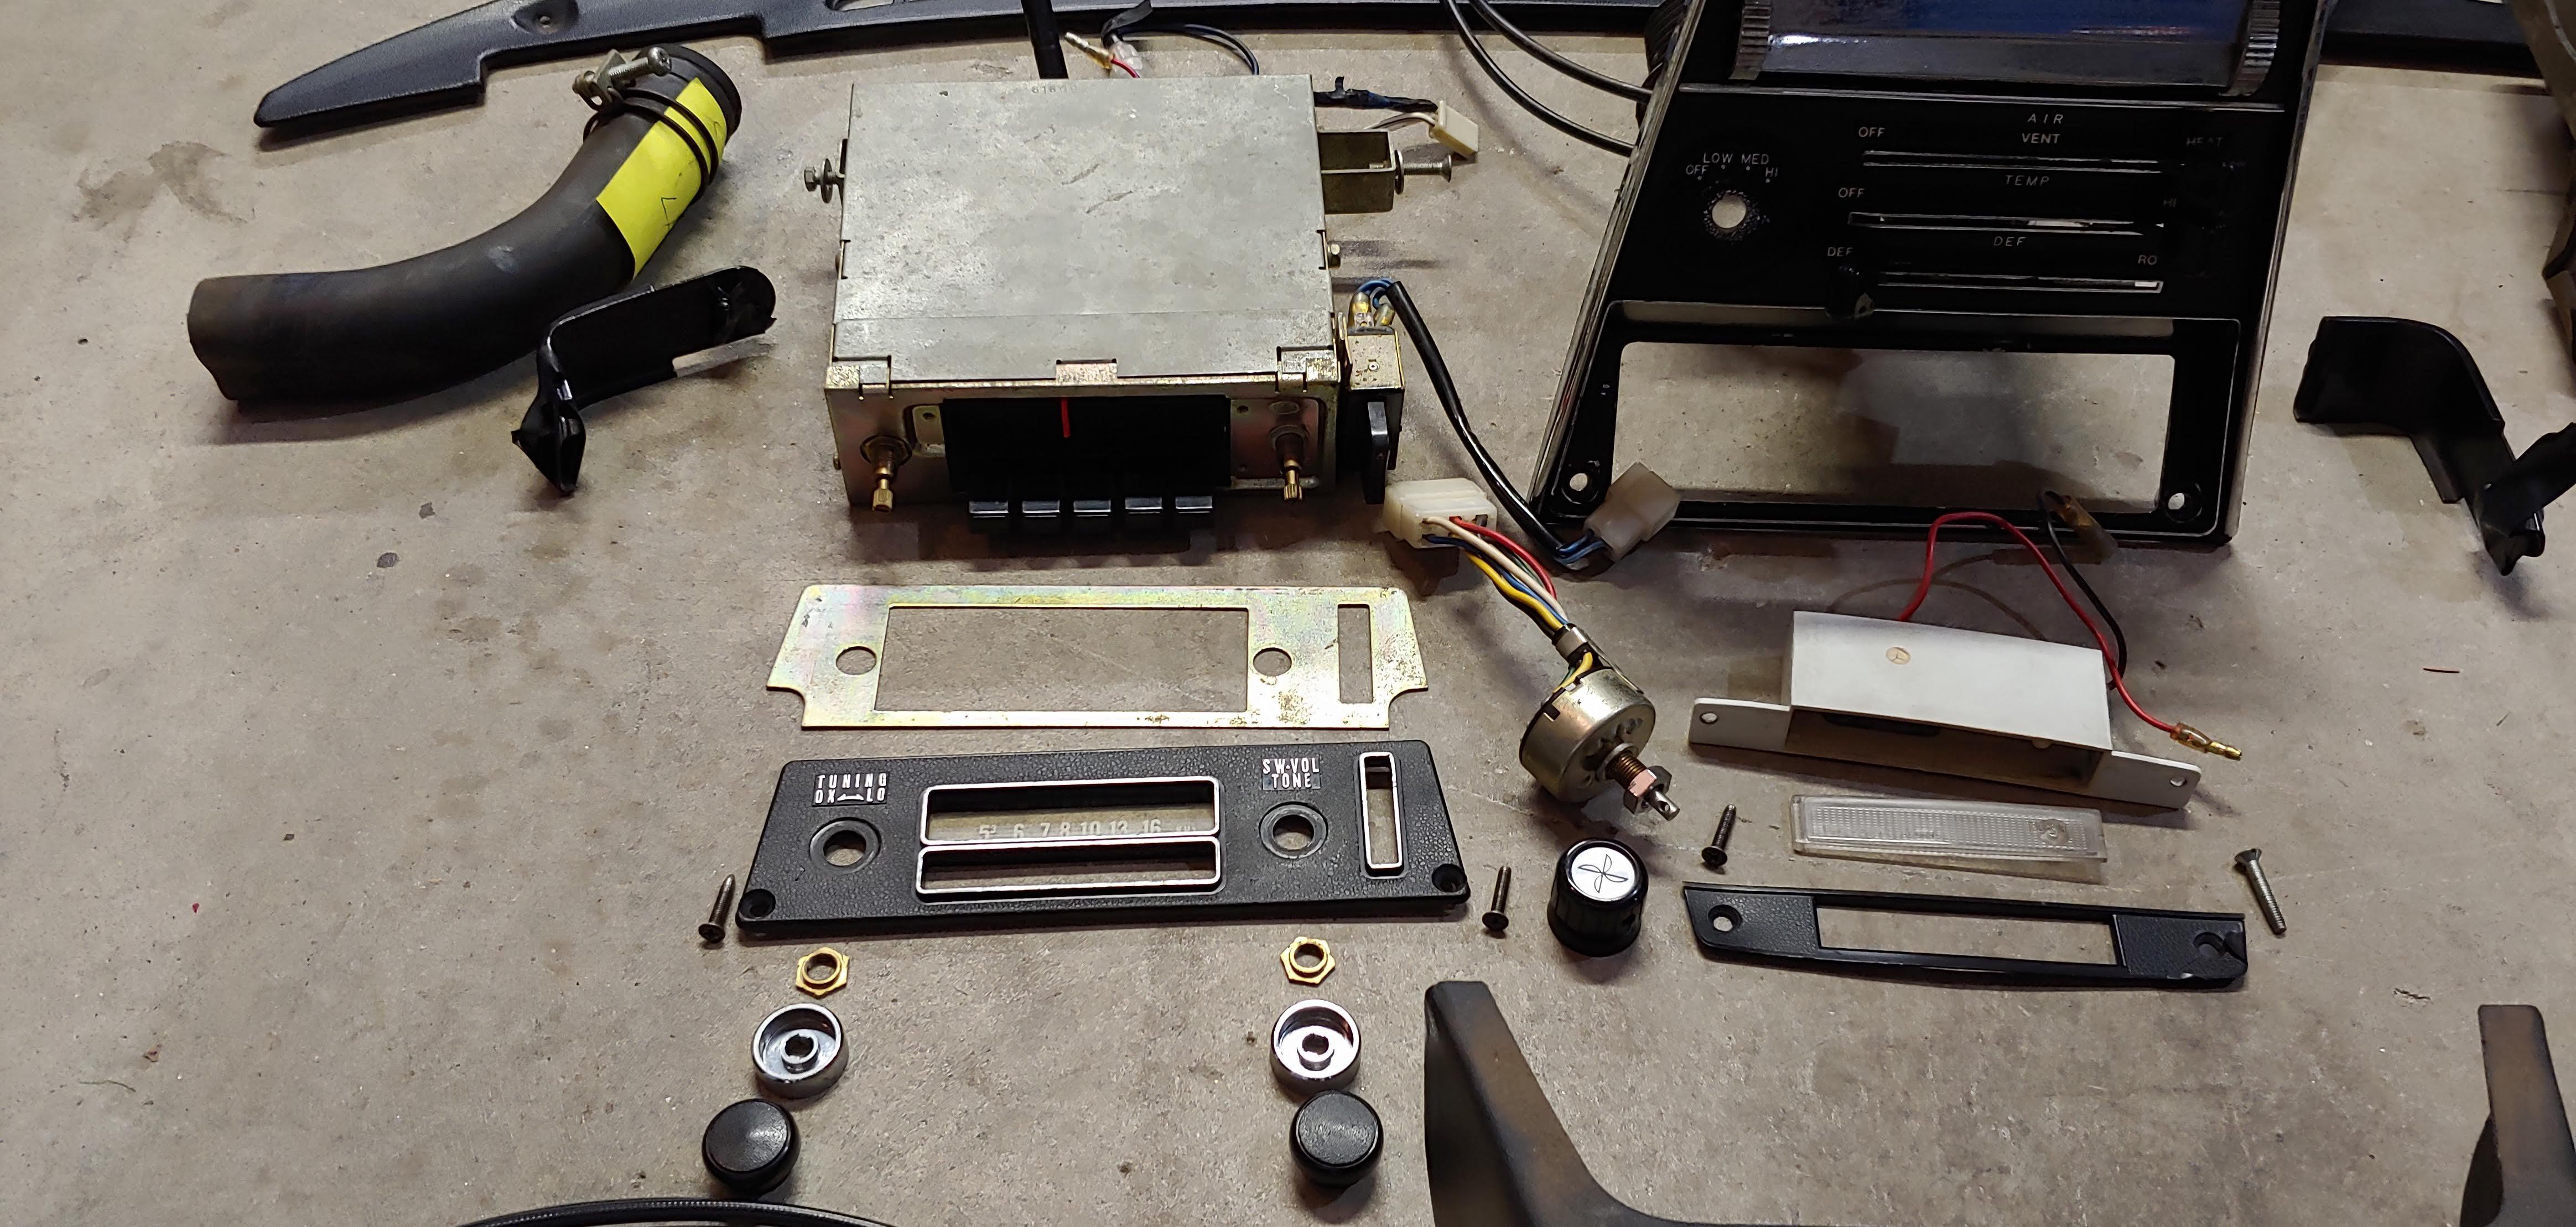
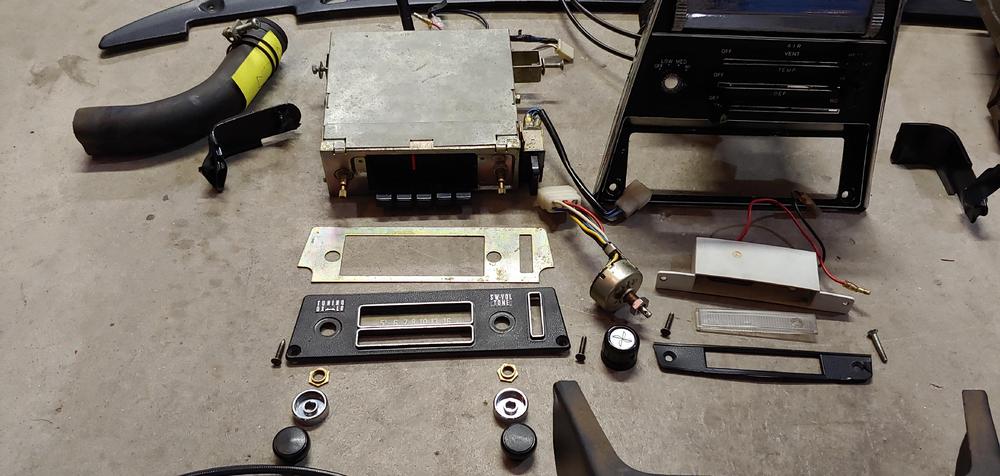
Another update on the ongoing disassembly, removed the heater and related parts, radio, center console, choke assembly, dash defrost cover and vents and glove box. It was much tougher to contort myself under the dash today than it was in my younger days but I got if done, LOL. I'm glad that 20 year old me didn't toss the original radio when I went thru an evolution of stereo systems.


-
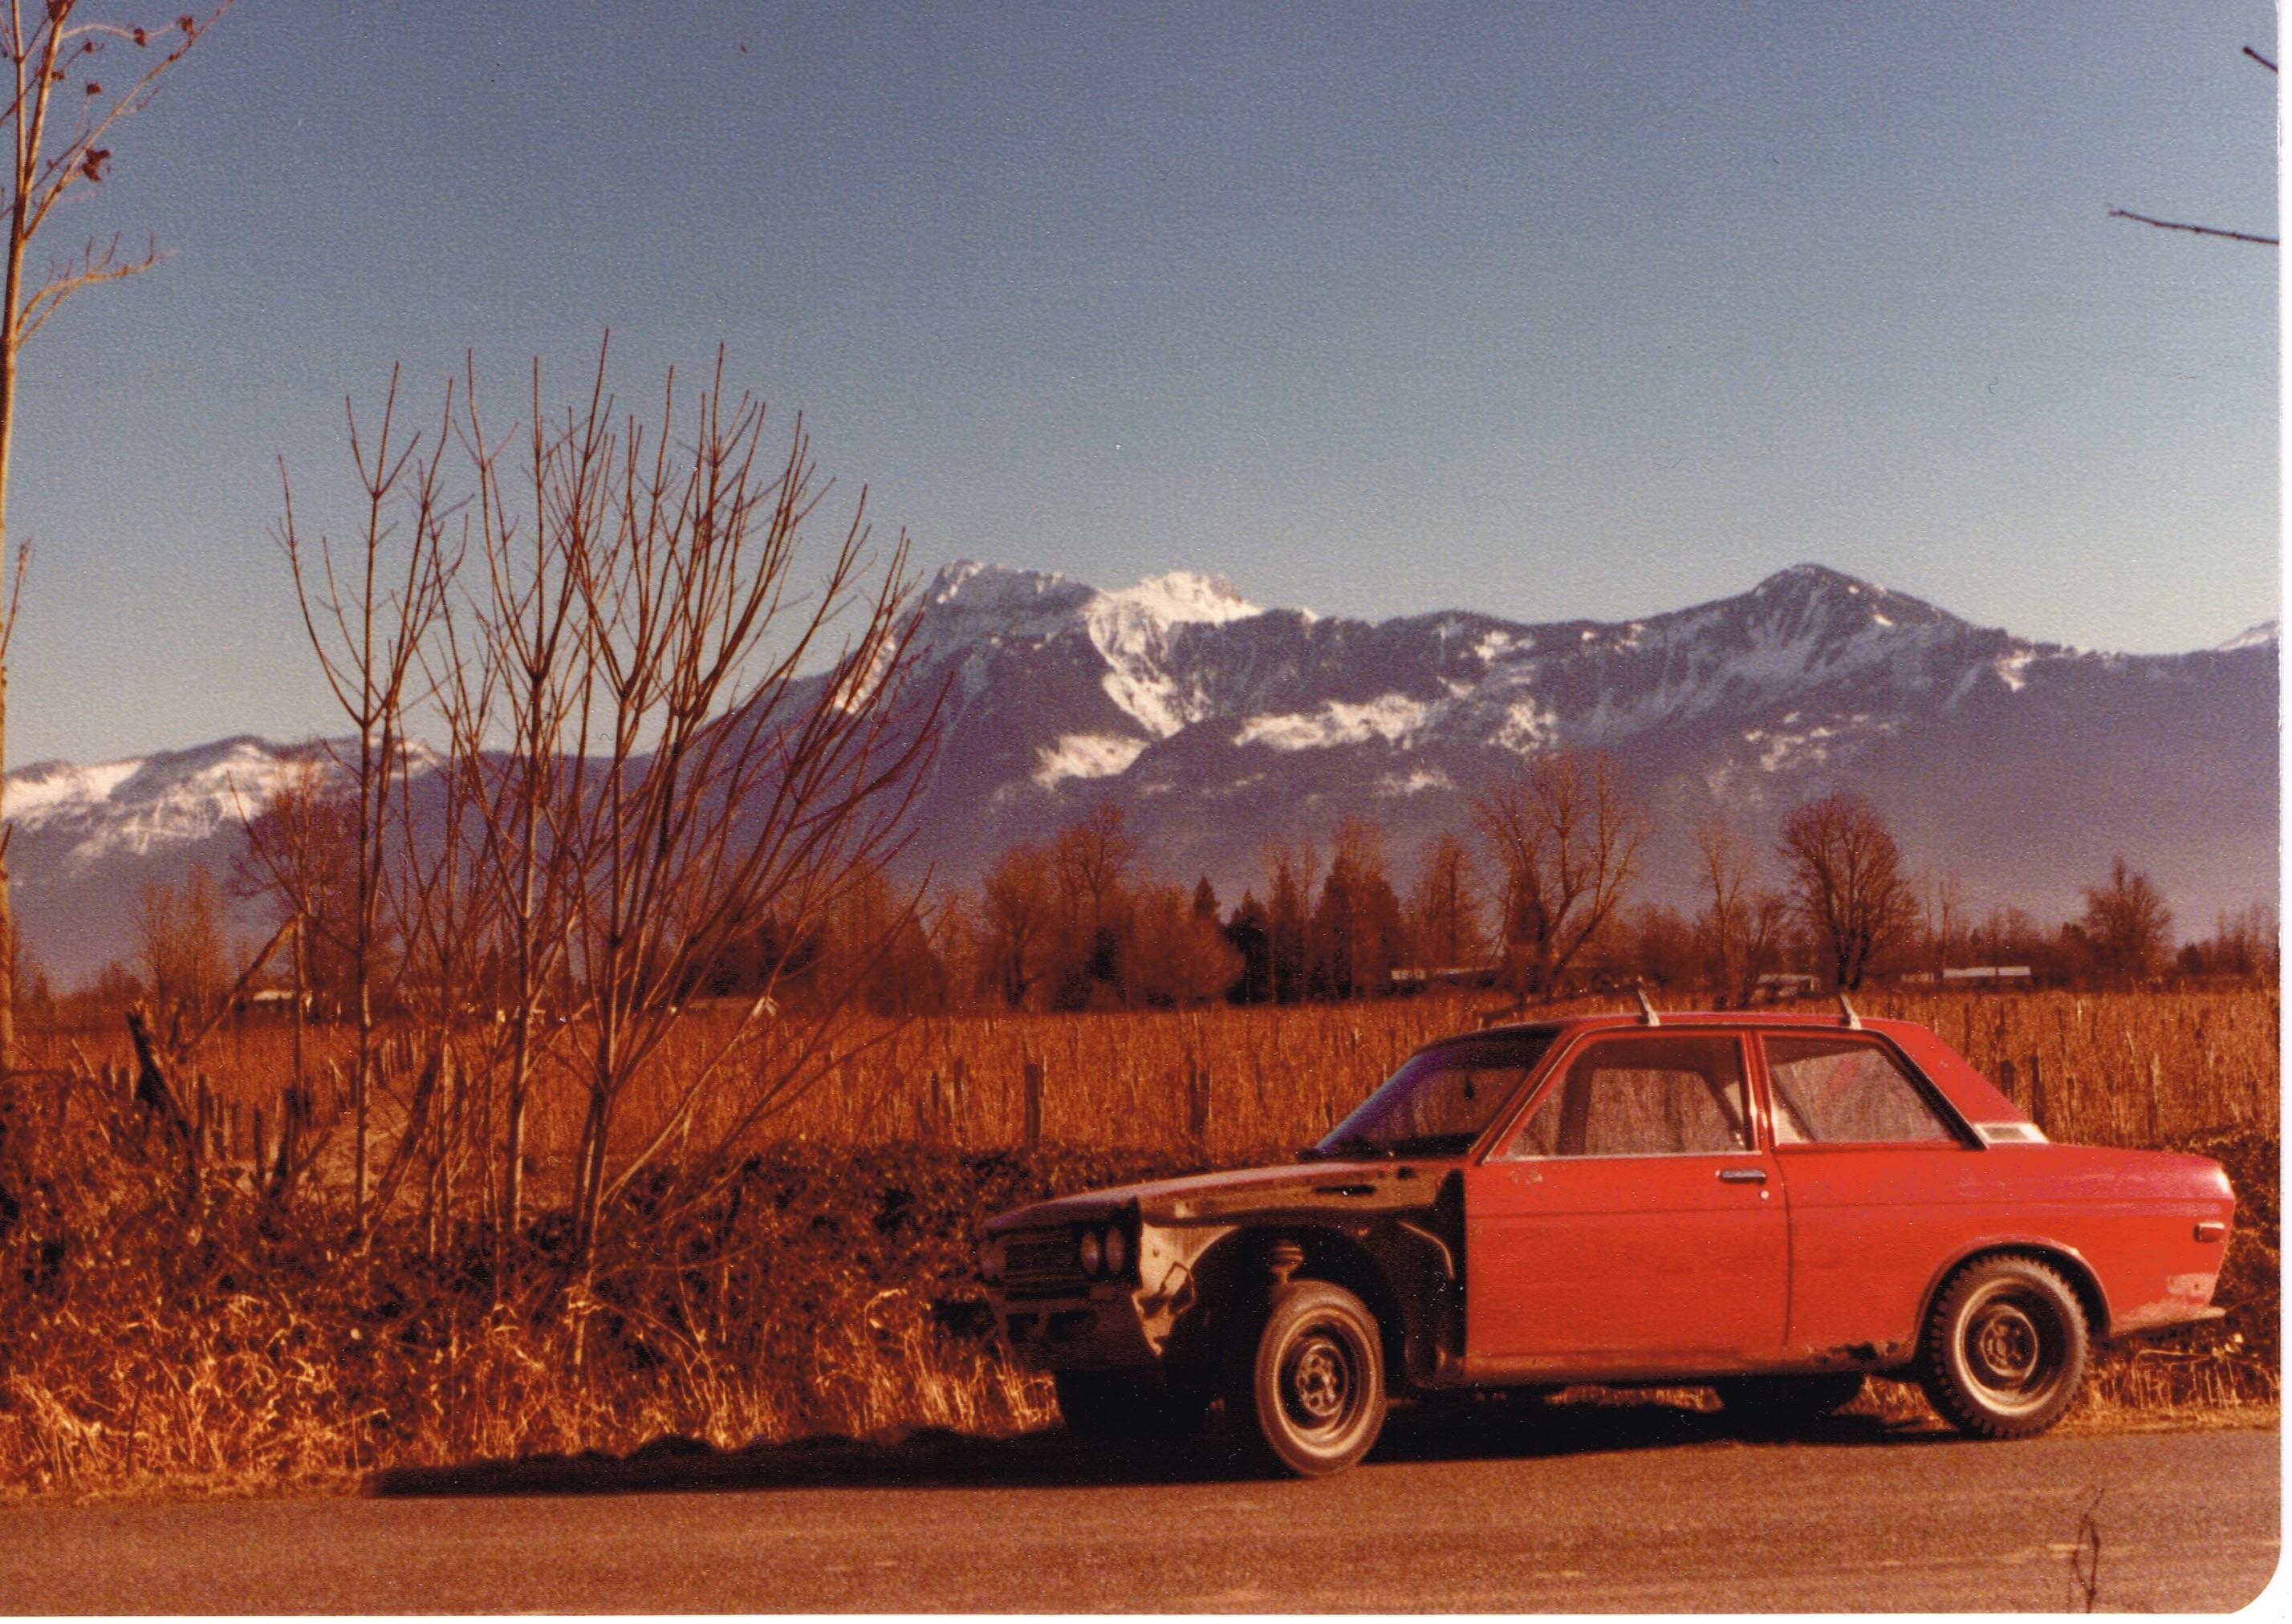
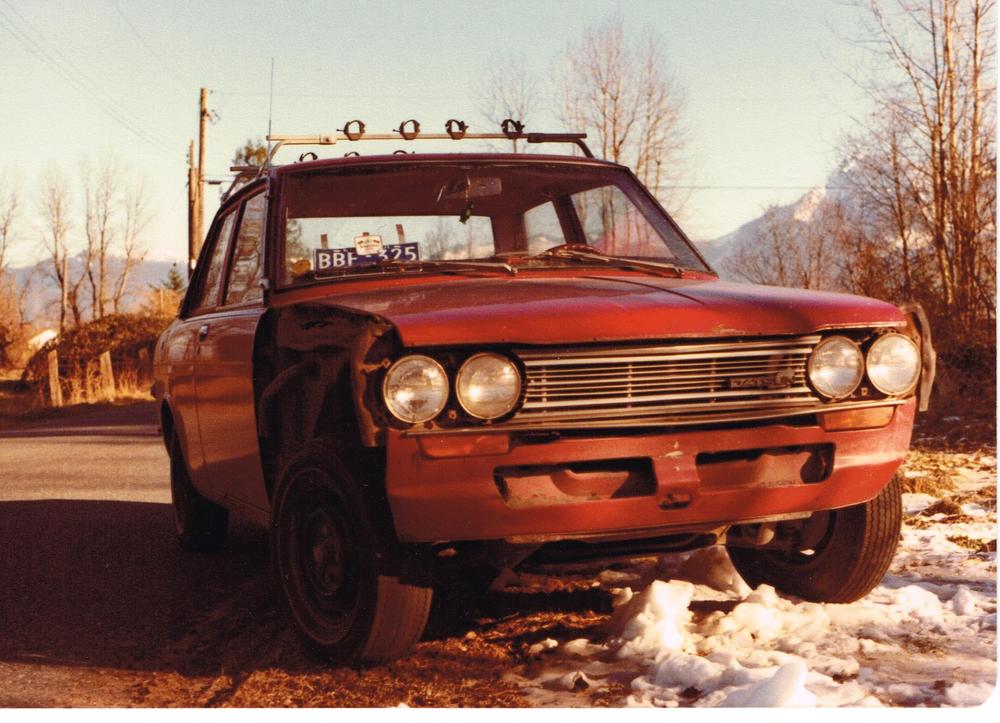
Happy 510 day to all. Here are a couple pics, from 1980, of one of my 510's. It was my winter beater ski car, that I drove while my Zed was hibernating.

-
Good to hear it came off easily. Sorry to hear about the paint issue. ?
-
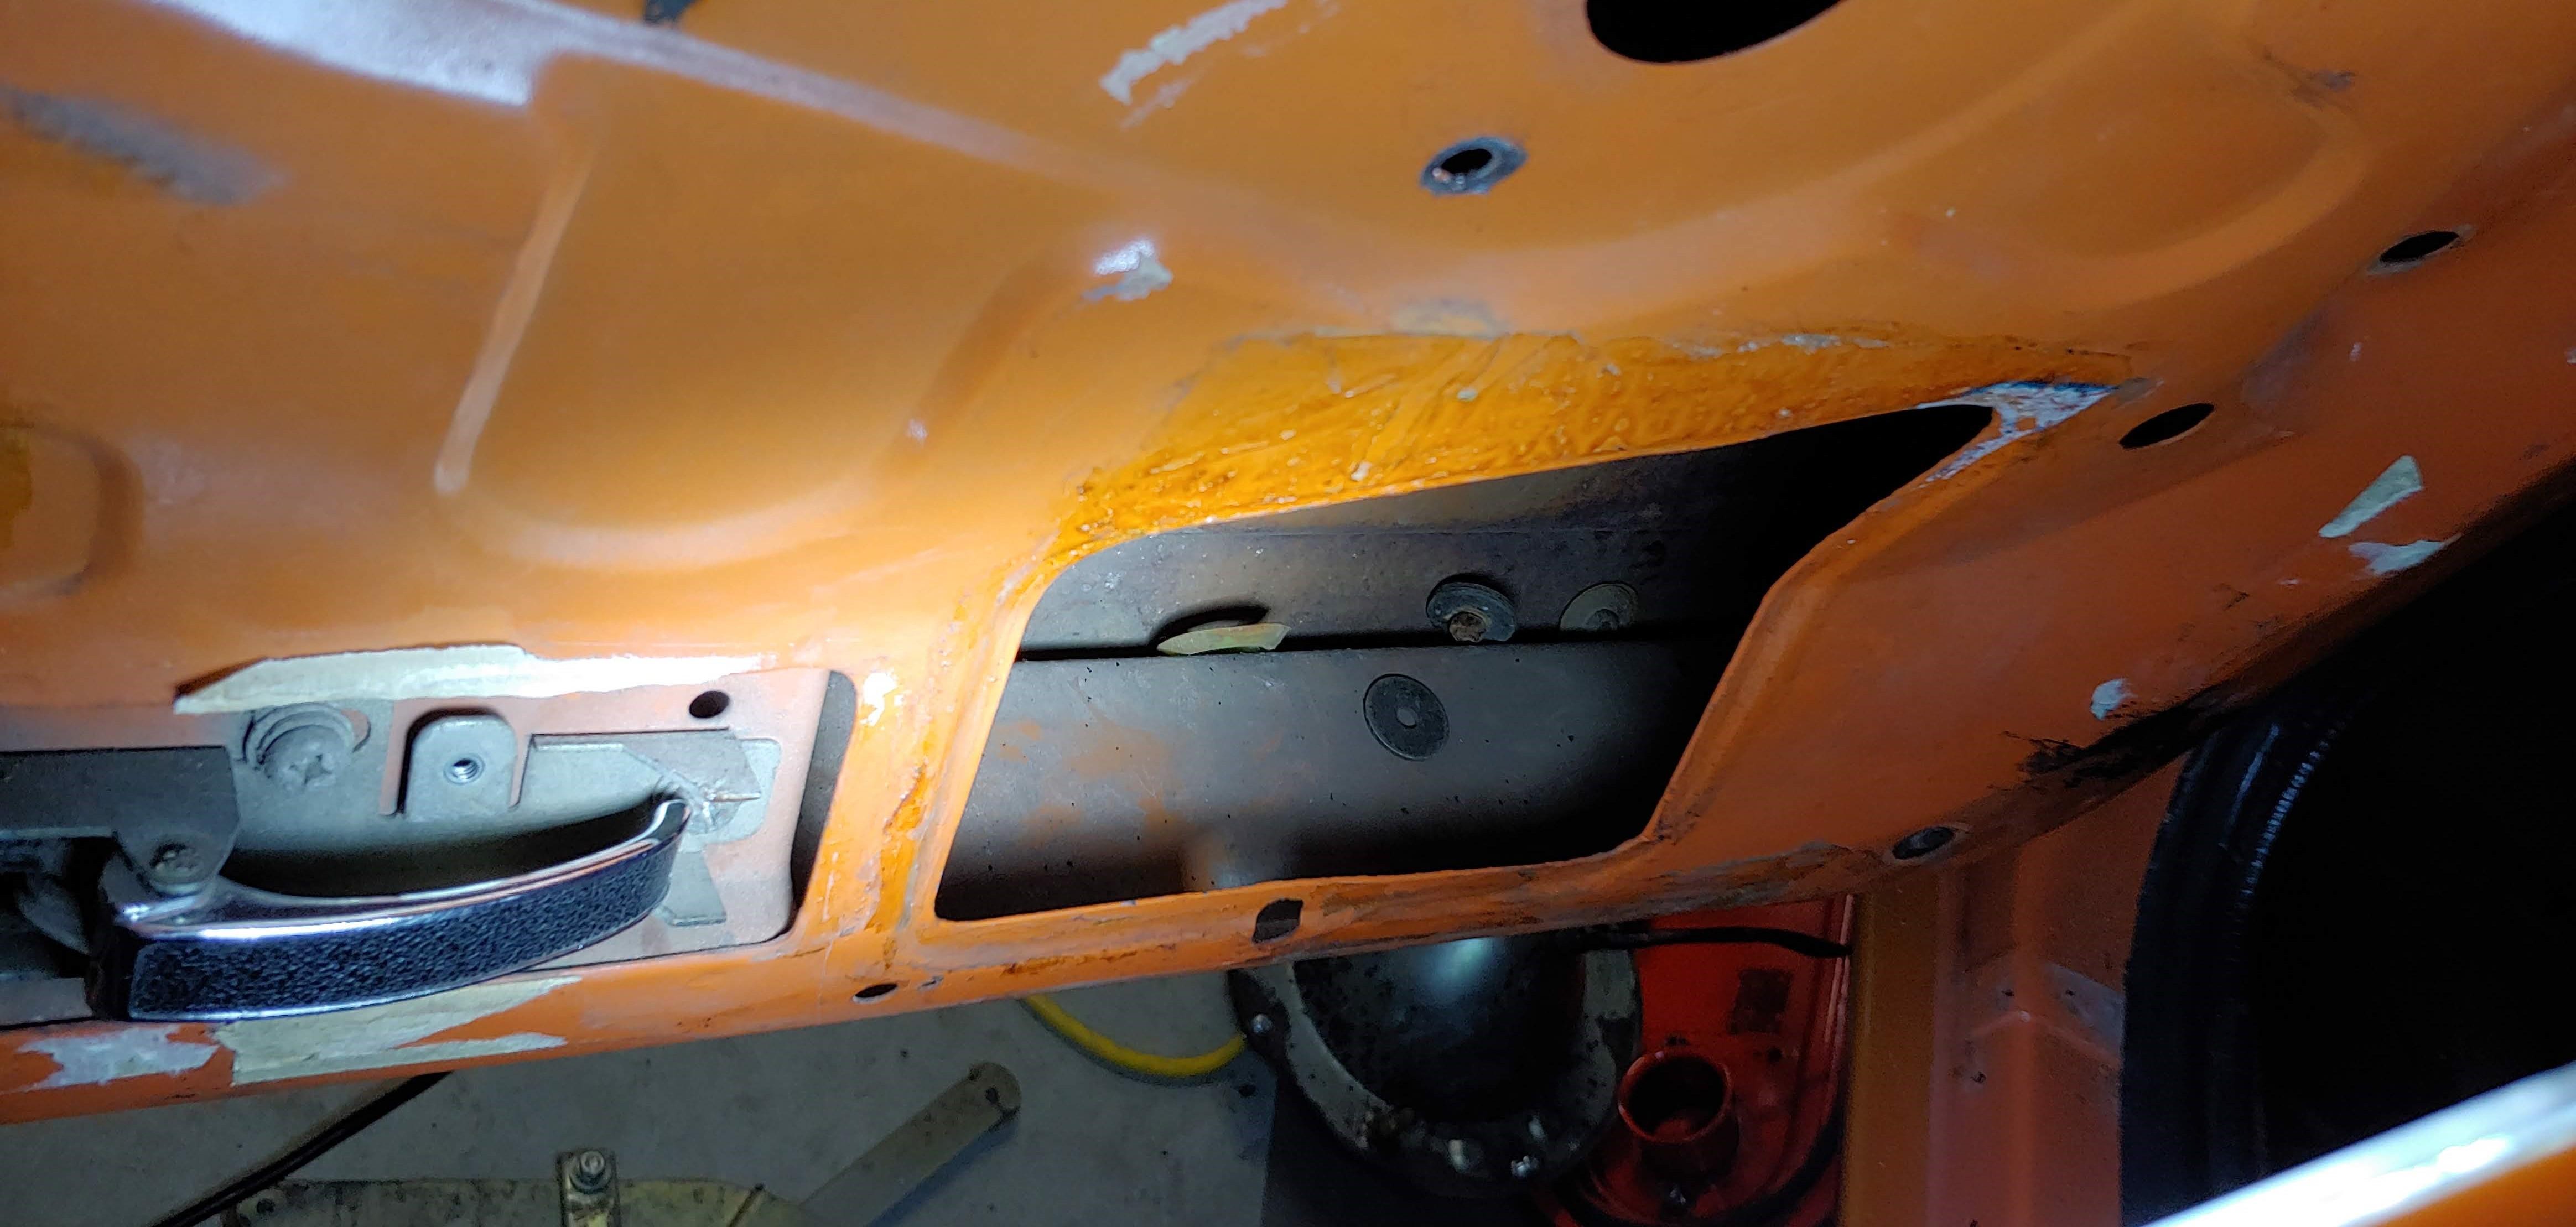
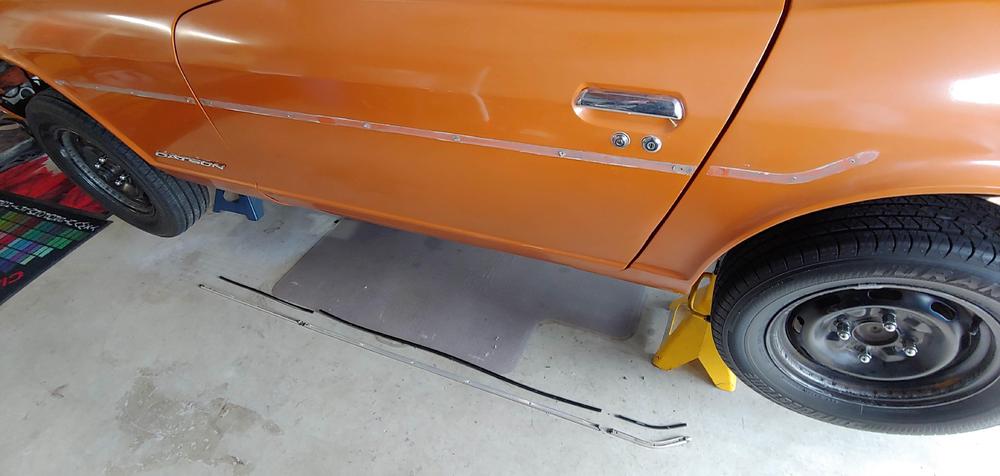
Yes, if there are screw/rivets you would see them on the inside, a bit difficult on the door but definitely with the panels out in the hatch area. Remember that those panels are very fragile if you go that route. Usually with the screw/rivet type there are bullet shaped caps ends of the side moldings that I didn't see In your pictures and the fasteners are usually quite close to the ends. You said there was adhesive at the ends and you pulled it away for about 6cm, it's a pretty safe bet that yours don't have screws or rivets. If this is the only reason you would be removing the inside panels I would not think it's necessary. If you zoom in real close on the picture of my moldings you will see the end caps.
-
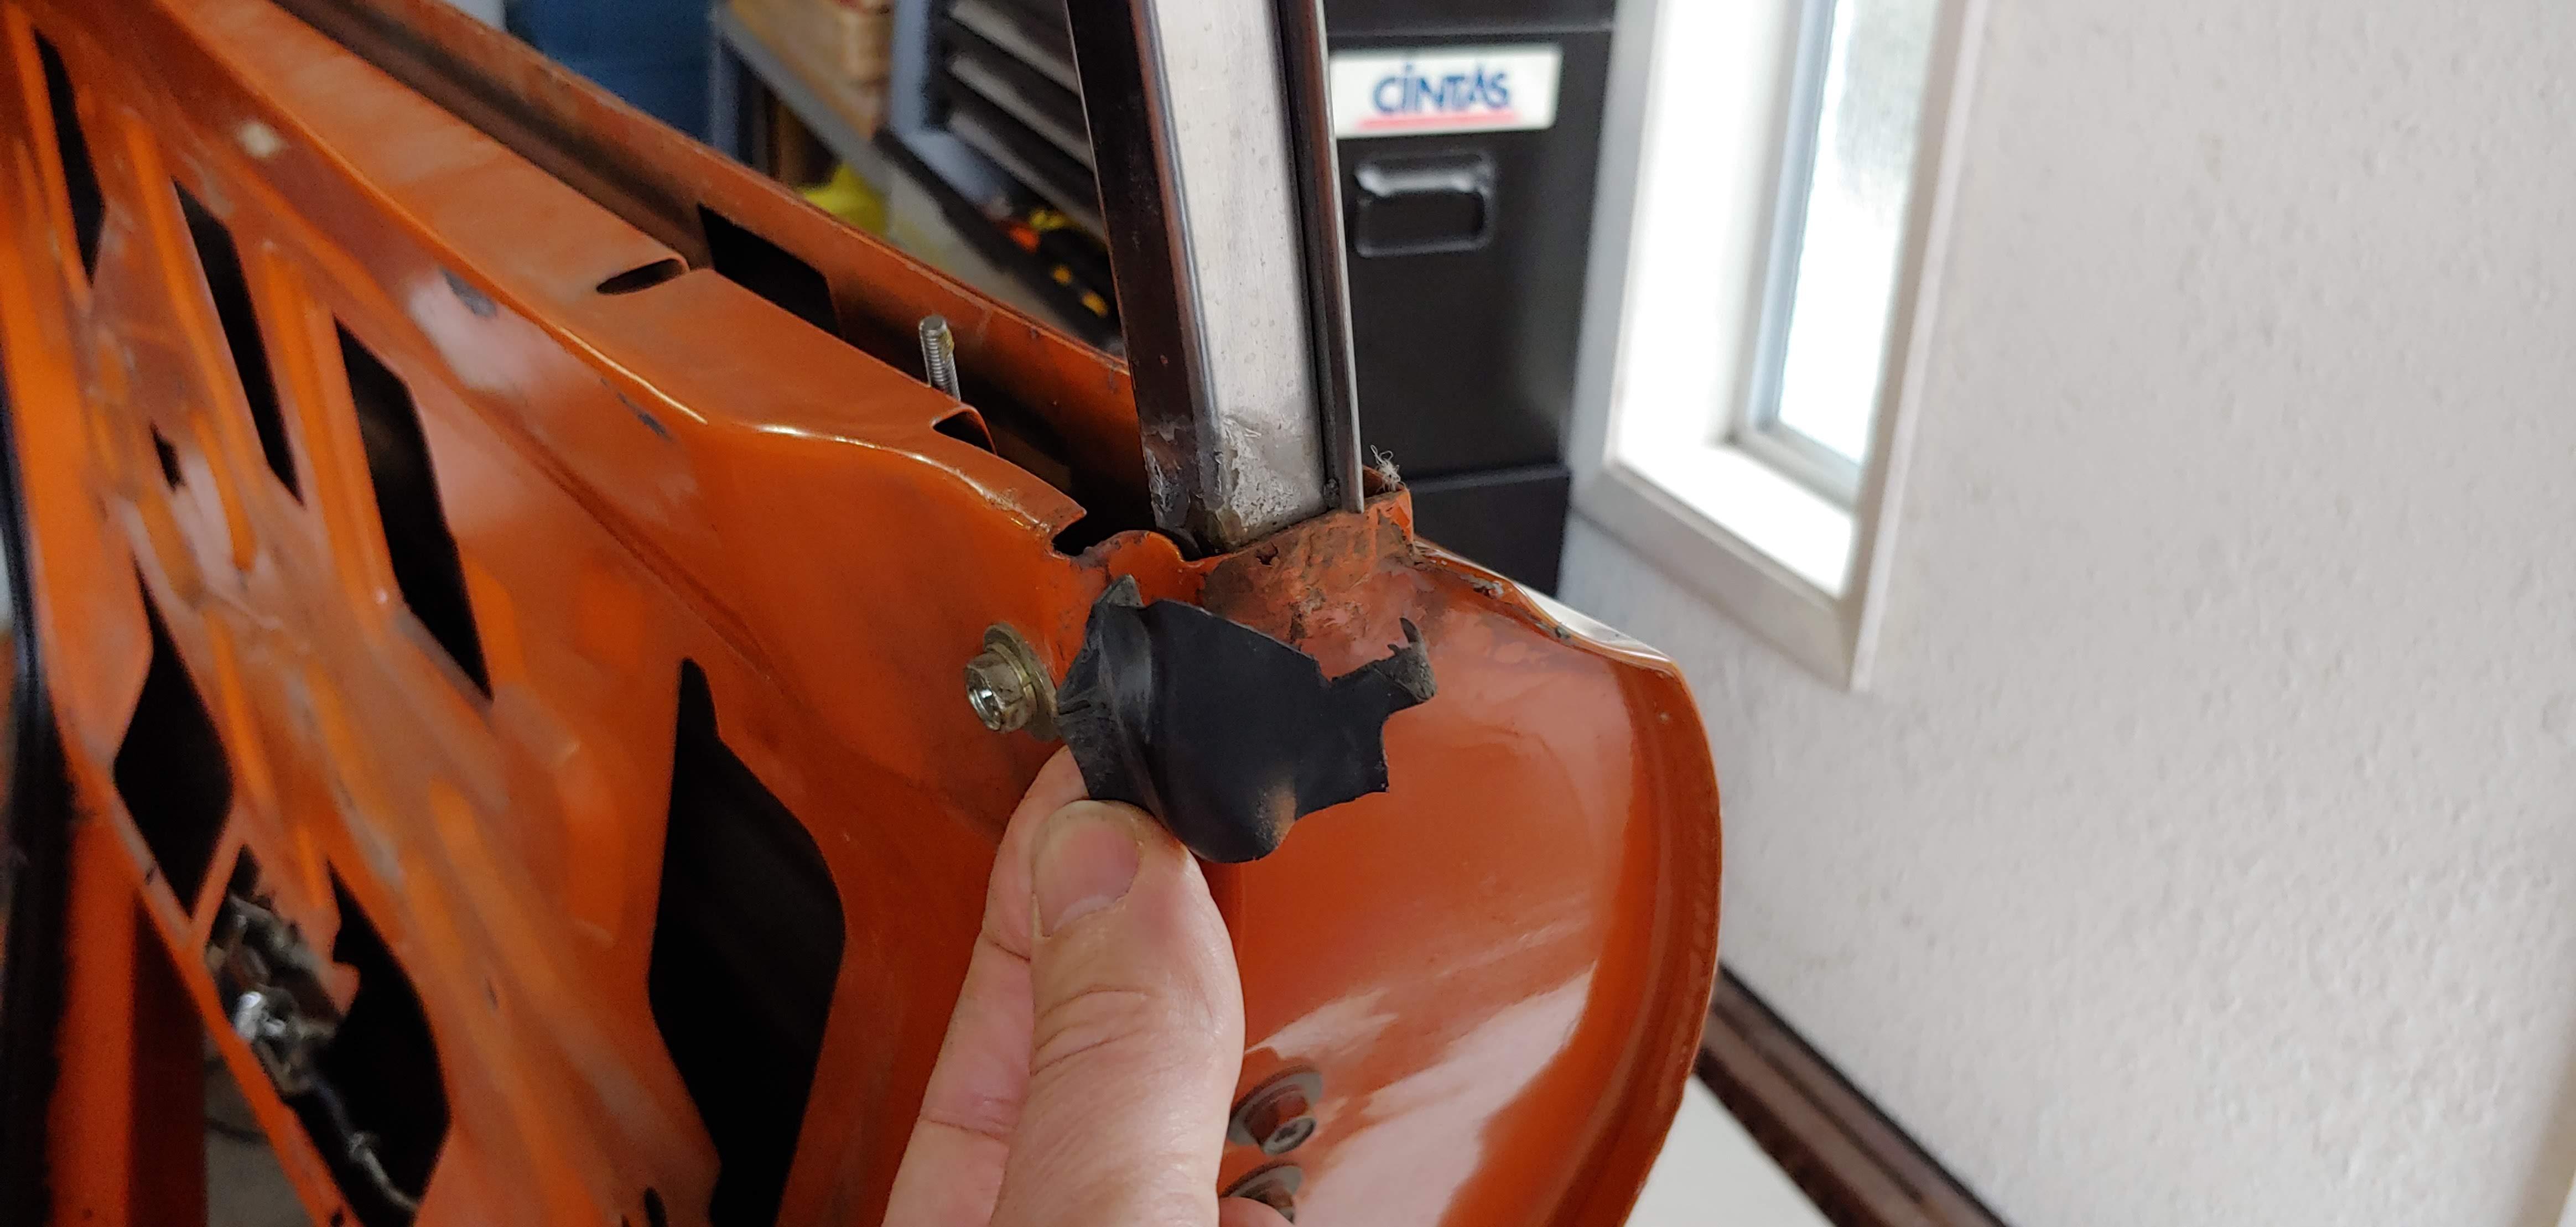
I think you have the adhesive type, not rivet on. If it's rivet on the black part can be pried out exposing screws or rivets that hold the silver channel part to the body. I had the screw on type. It looks like this...
-
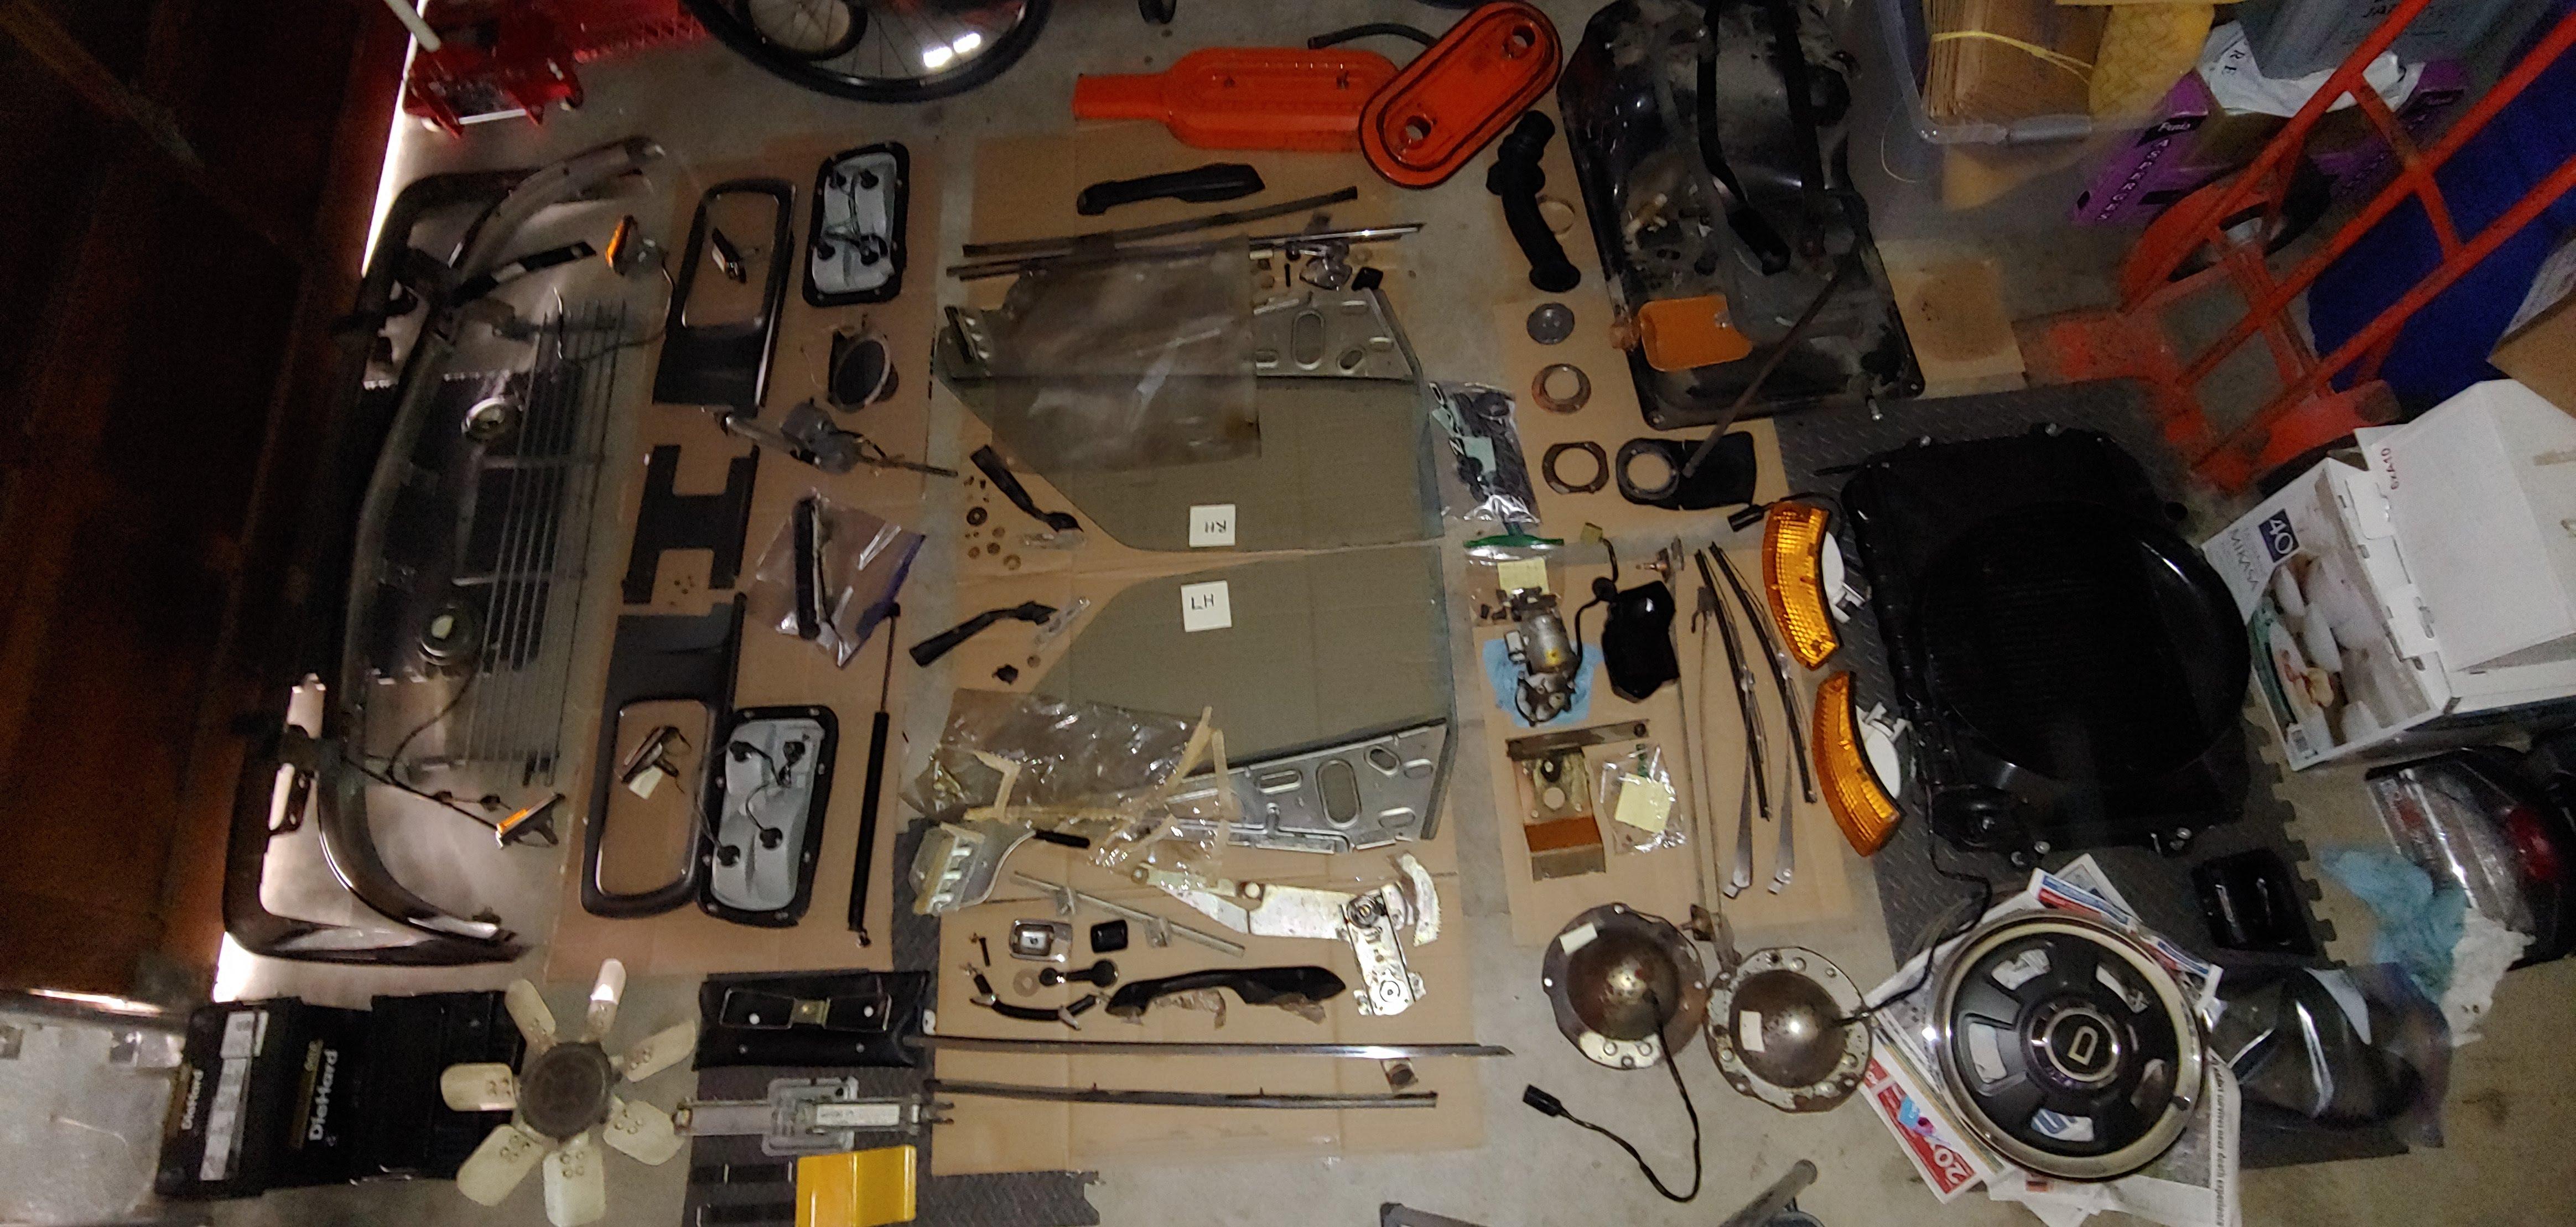
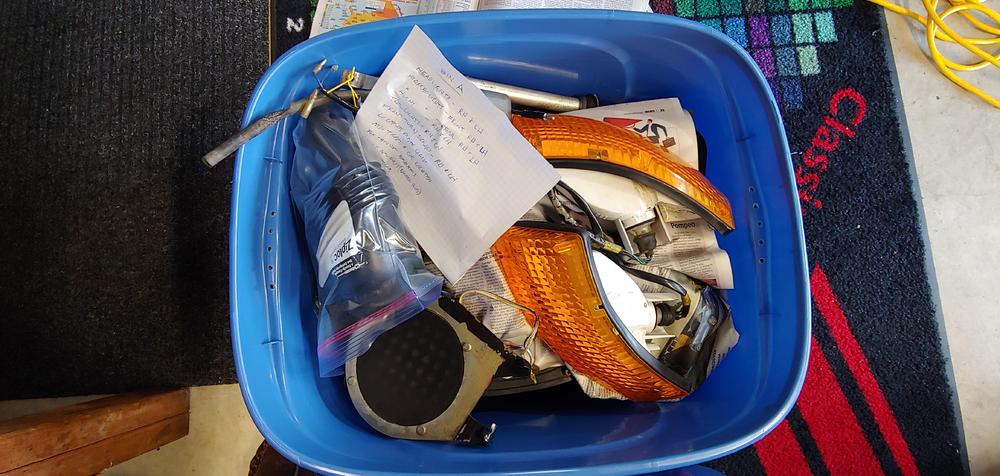
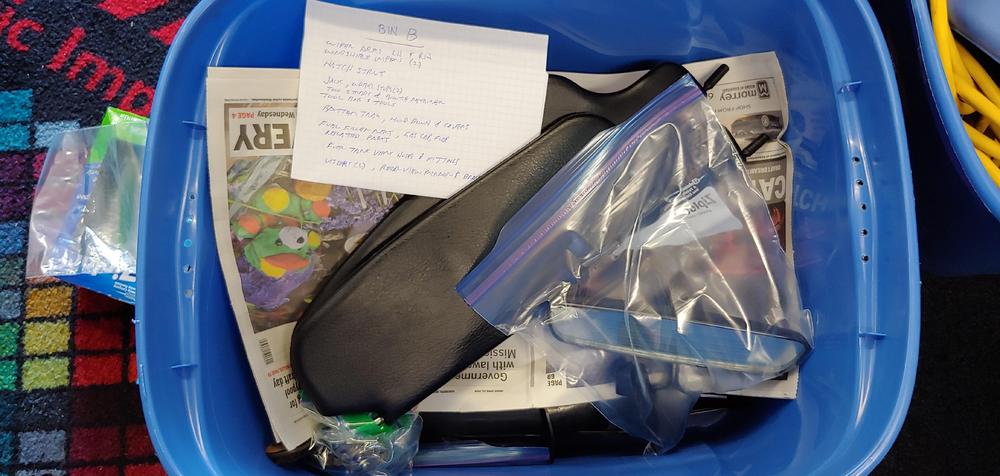
Wrapped up the week by doing some organizing. I sorted and binned most of the parts that I have removed recently. The bins also contain contents list that I have made copies of. Hopefully this along with lots of zip lock bags and pictures will make re-assembly a little easier, without relying only on memory.

-
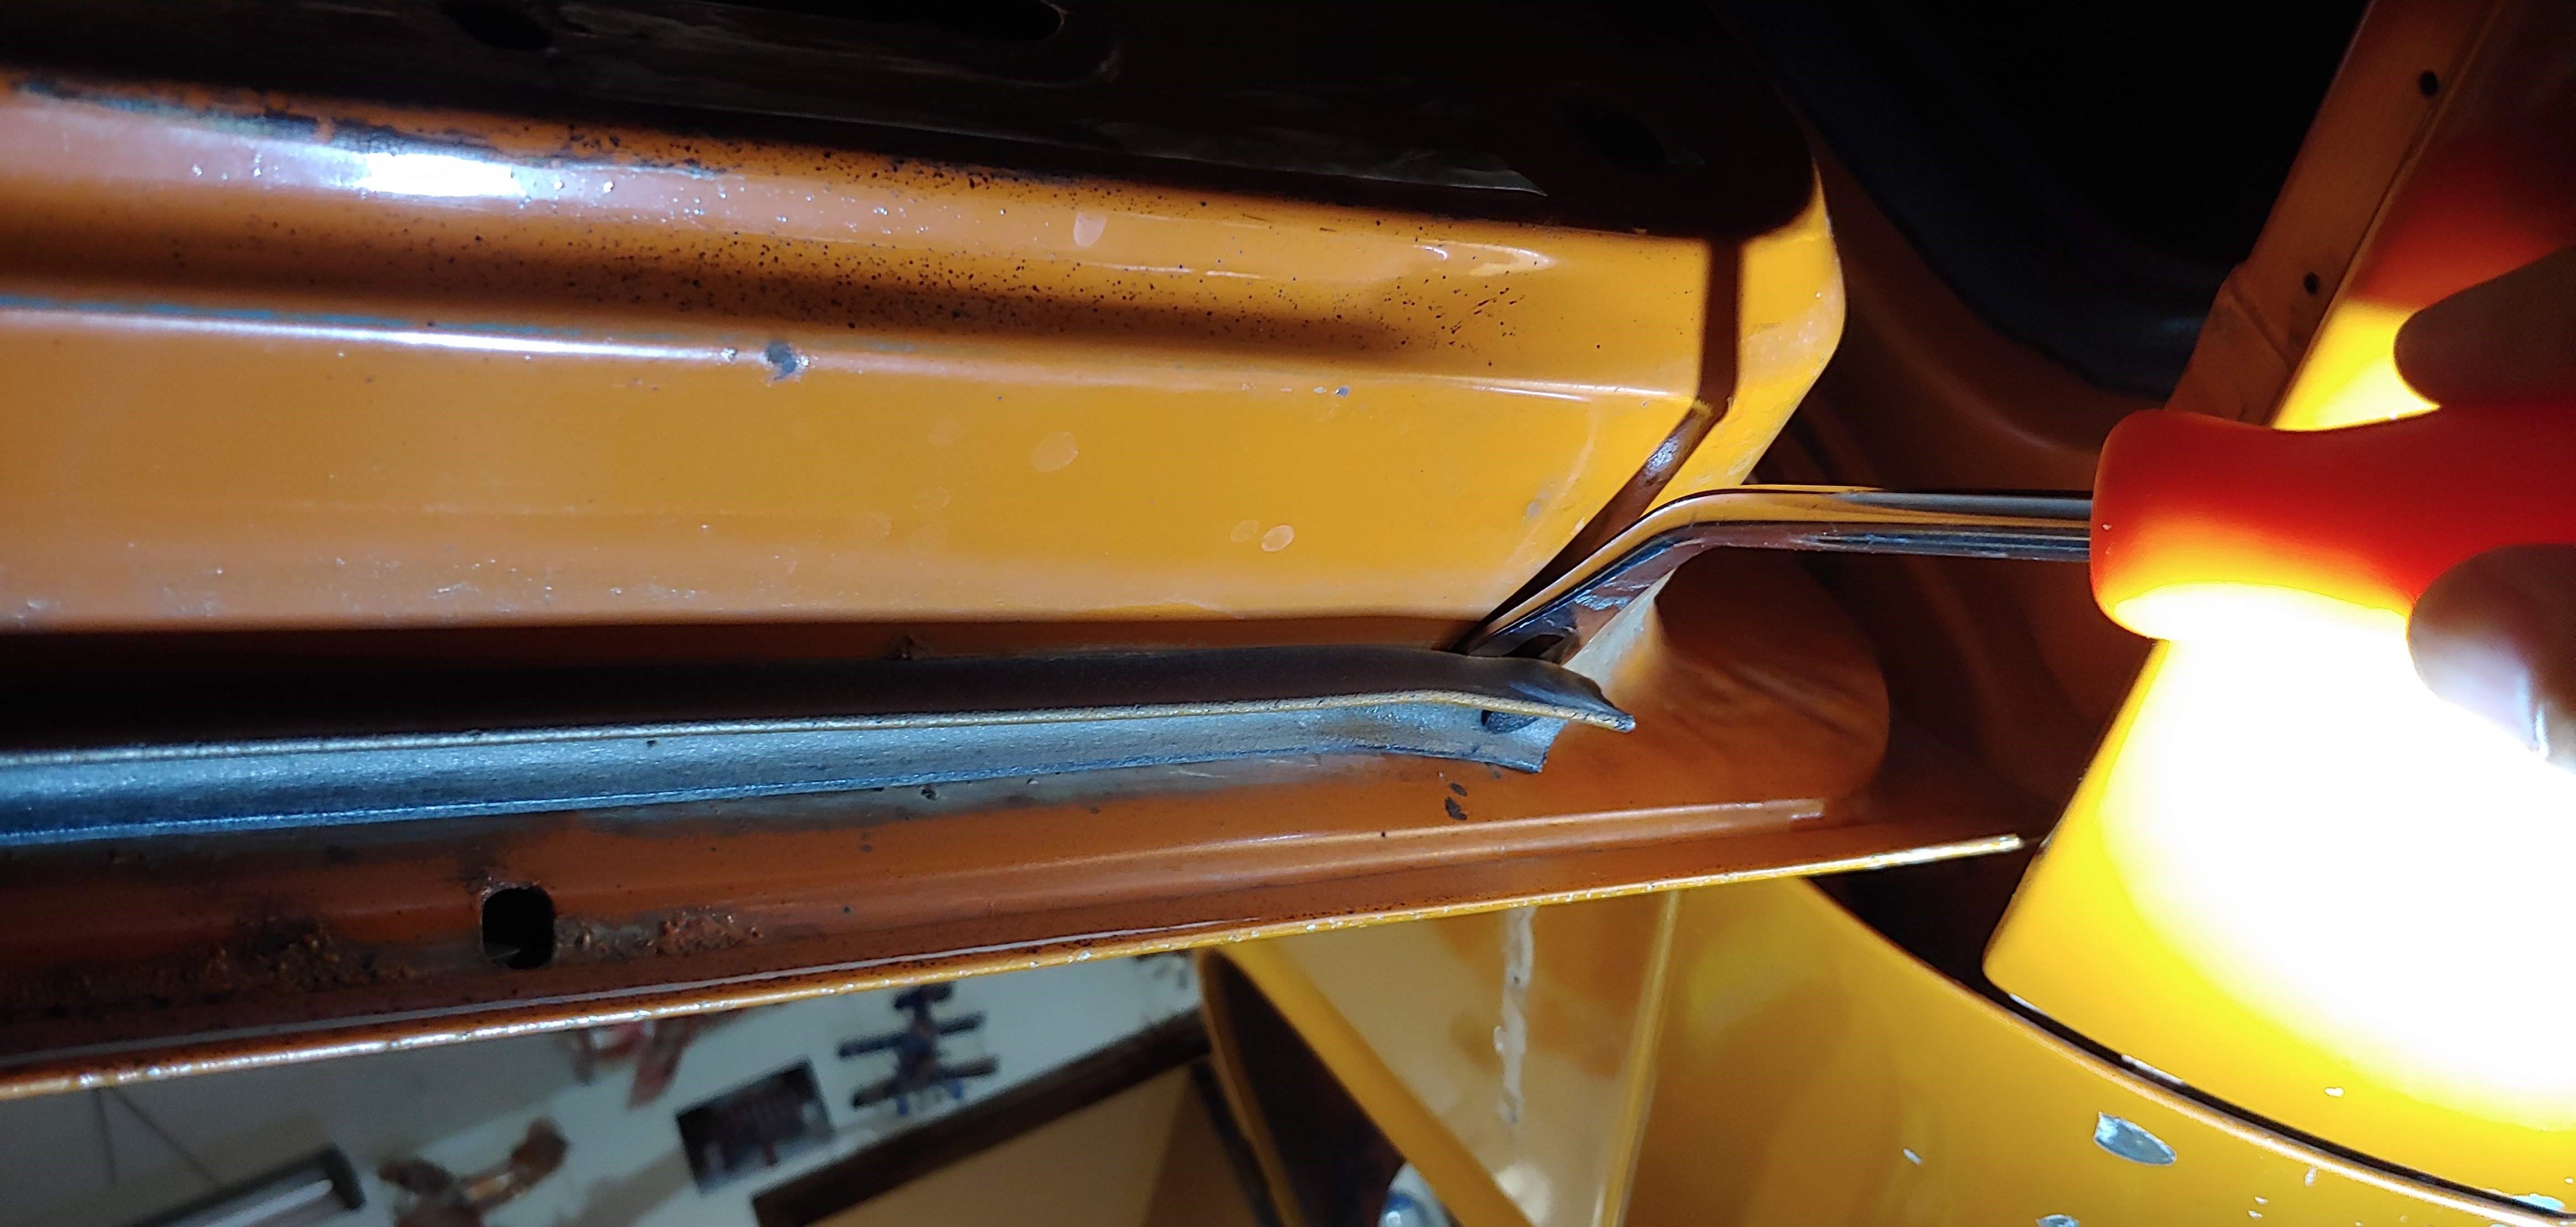
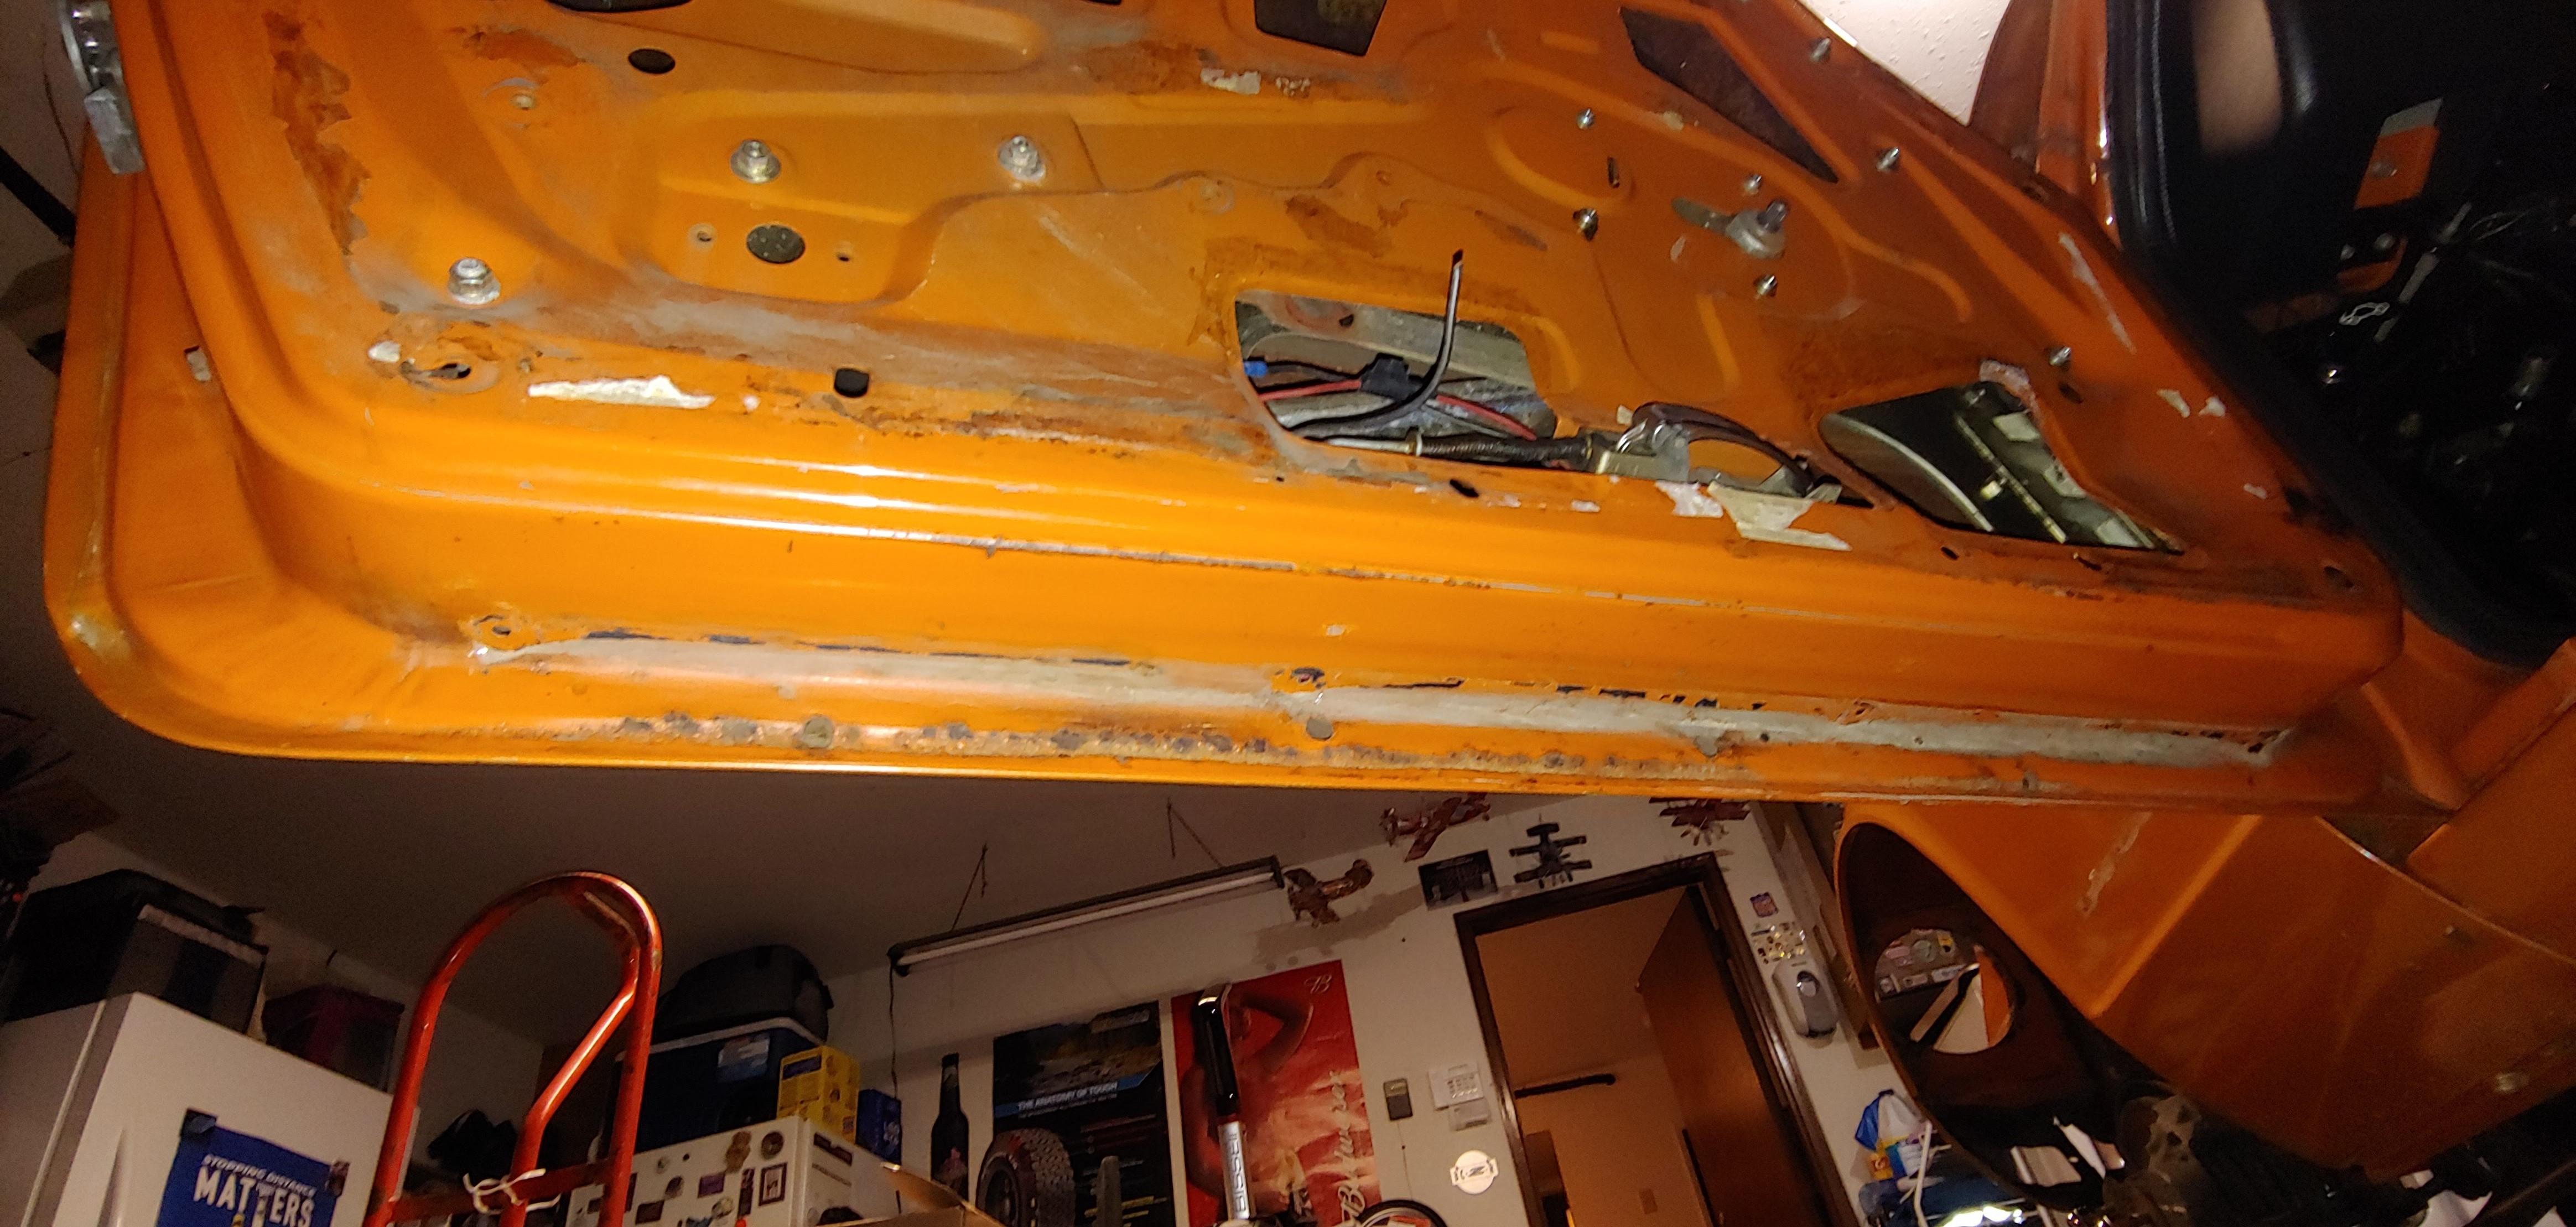
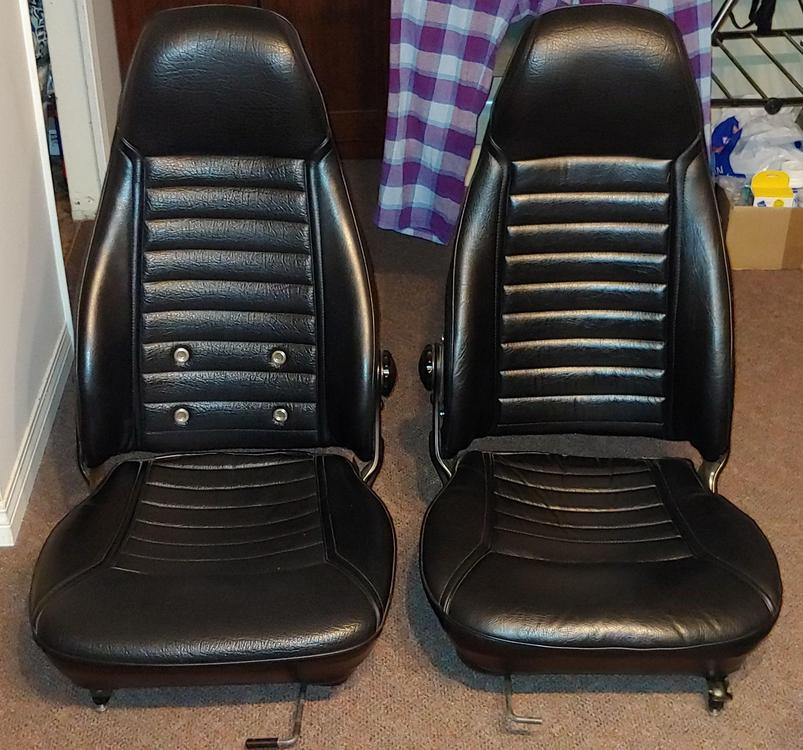
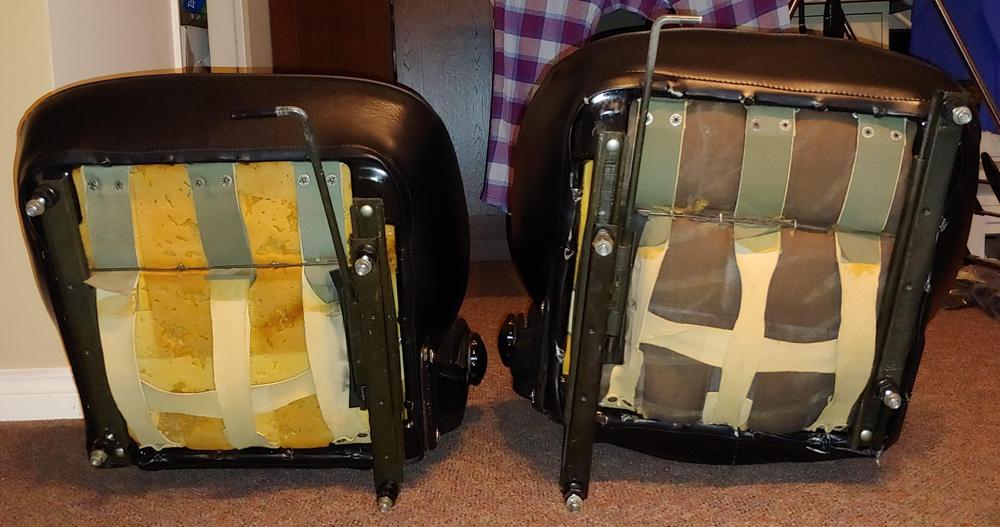
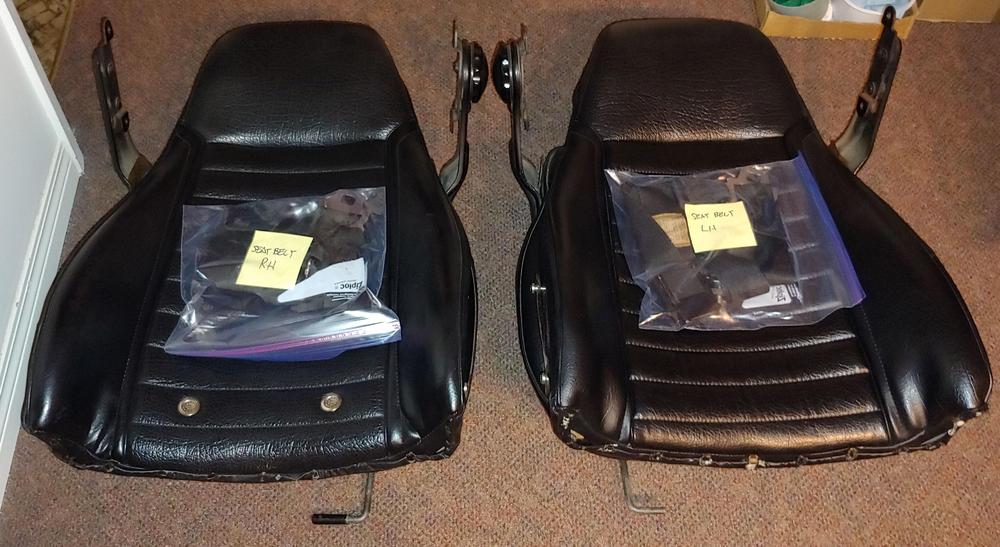
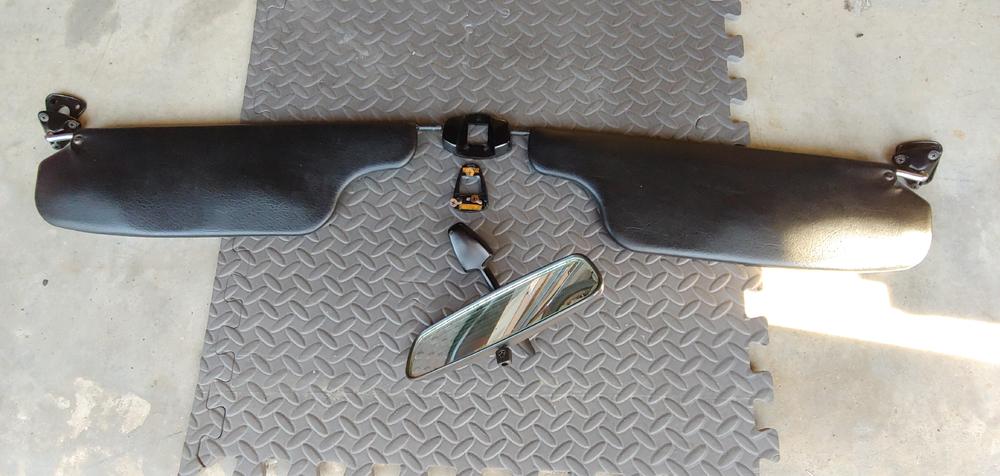
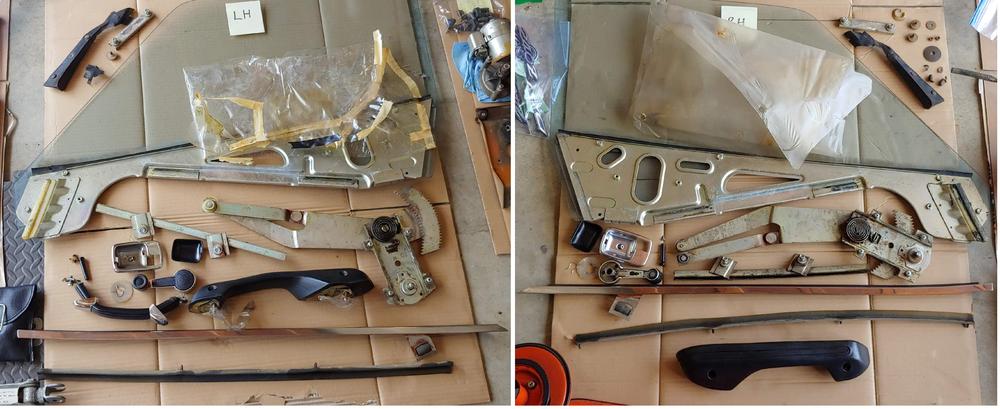
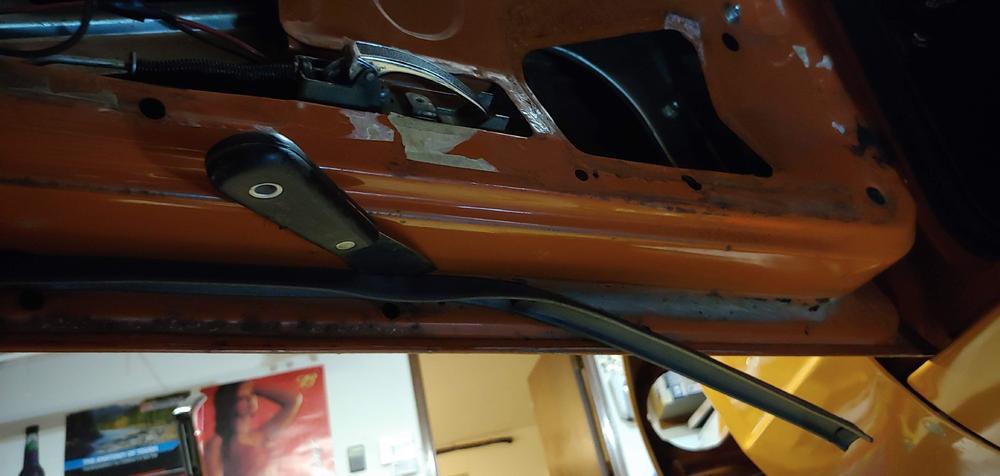
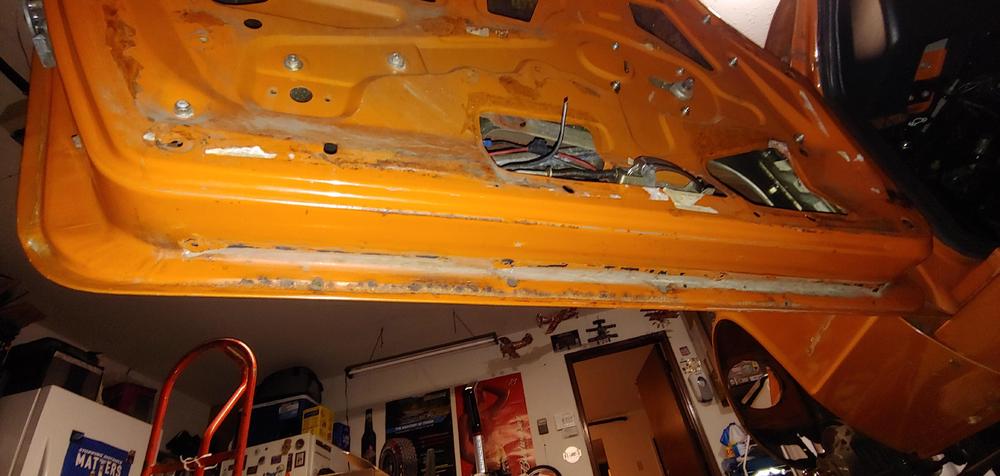
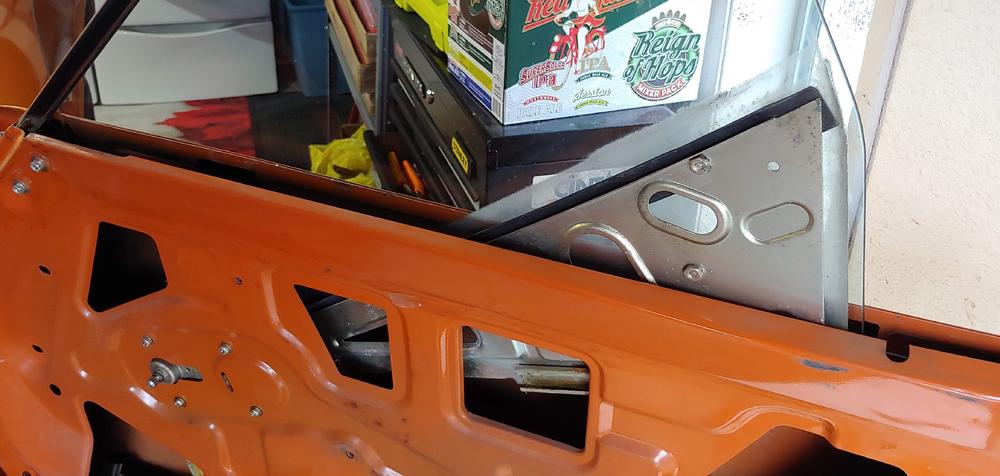
Here's an update with this week's progress. Removed the seats and prepared them for storage. The left seat was recovered in about 1980 with the closest matching vinyl that my upholstery guy could find. Unfortunately he was not able to re-use or source the four metal vents. Redoing the seat foam and supports is on my to do list. I removed the seat back so that they will be easier to store. All of the clear plastic protector shims were in good shape and have not yellowed all that much. I also removed the visors and rear mirror. Luckily the visors are in great shape, unfortunately the mirror is not, it will need to be re-silvered. Another item on my to do list. Also I continued with stripping the doors, I removed the door front, rear and lower seals. I managed to only break two of the plastic seal retaining pins. After some cleaning I think the seals will be reusable except the small rear seal on the left door was missing. Next I removed the windows and regulators. Following the instructions in my FSM, I first removed the front sash with window rolled up fully (not as shown in picture). Secondly I removed the window, starting with the glass in the halfway up position. I lifted it out of the regulator and tilted the rear end up to lift it out of the window frame. Lastly I removed the regulator thru the rear upper opening in the door and then removed the lower glass guide channel. I found a few screws washers and bits in the bottom of the doors... The screws with plastic washers are to hold the plated steel lower channel to the window glass. A total of three had come loose and dropped off, is this a common problem?


-
-
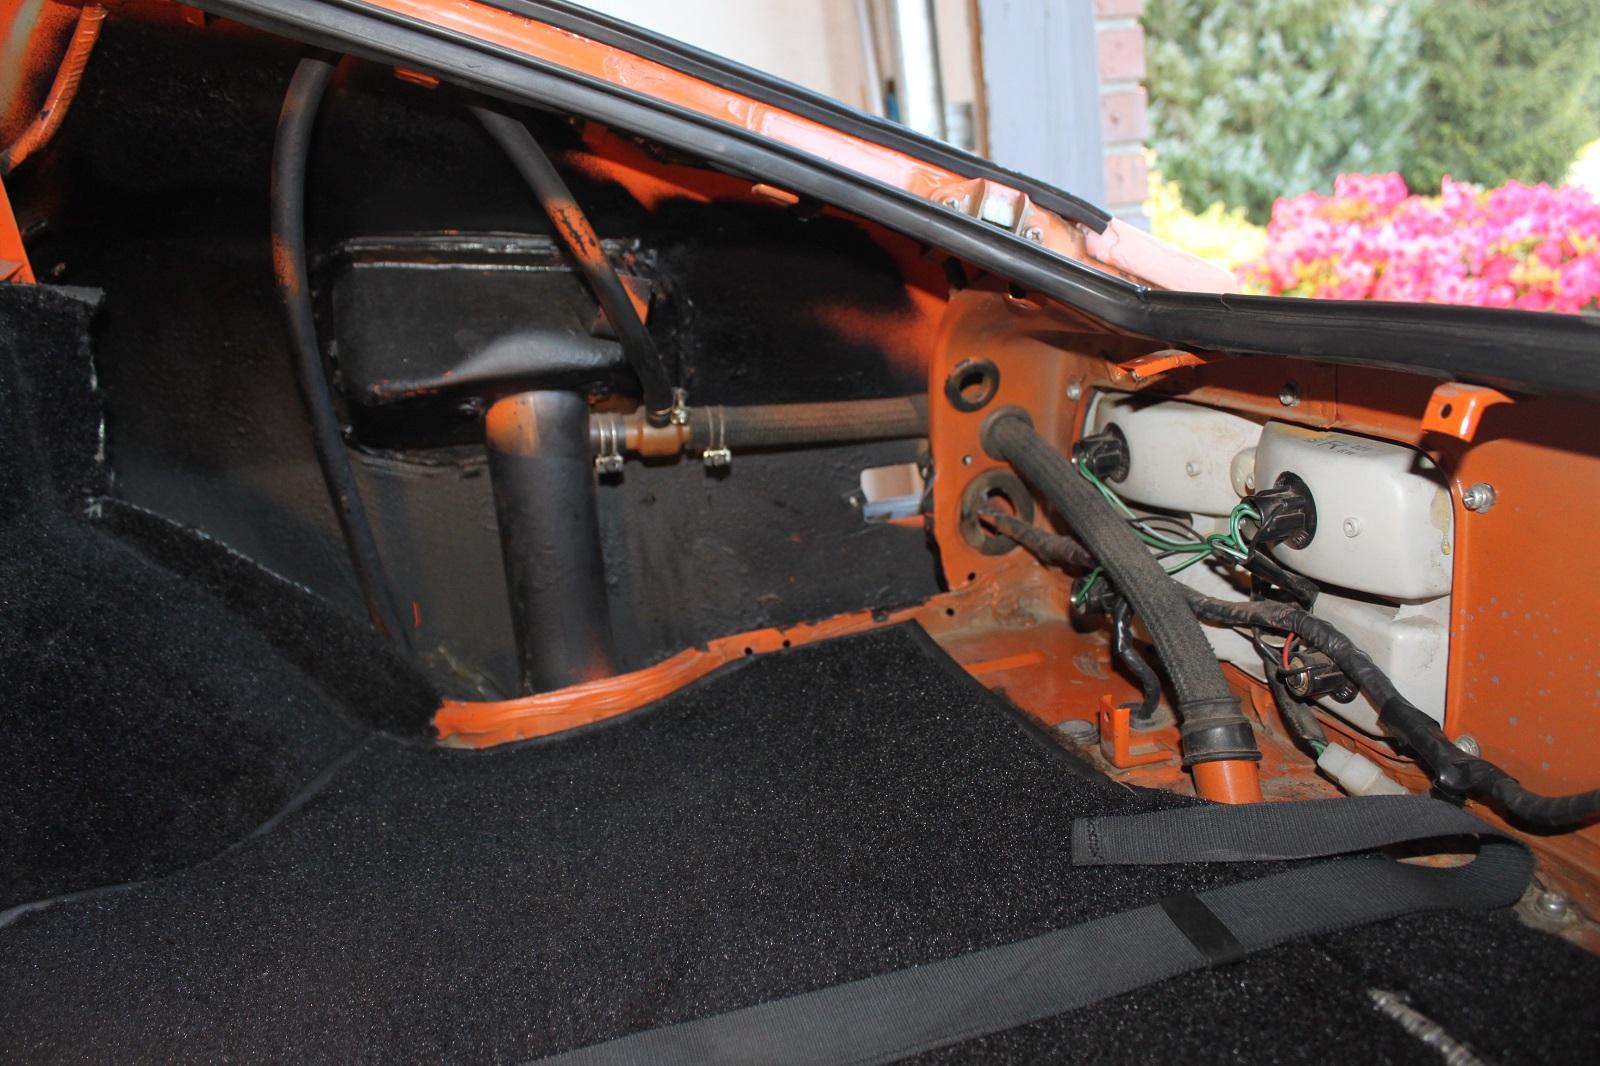
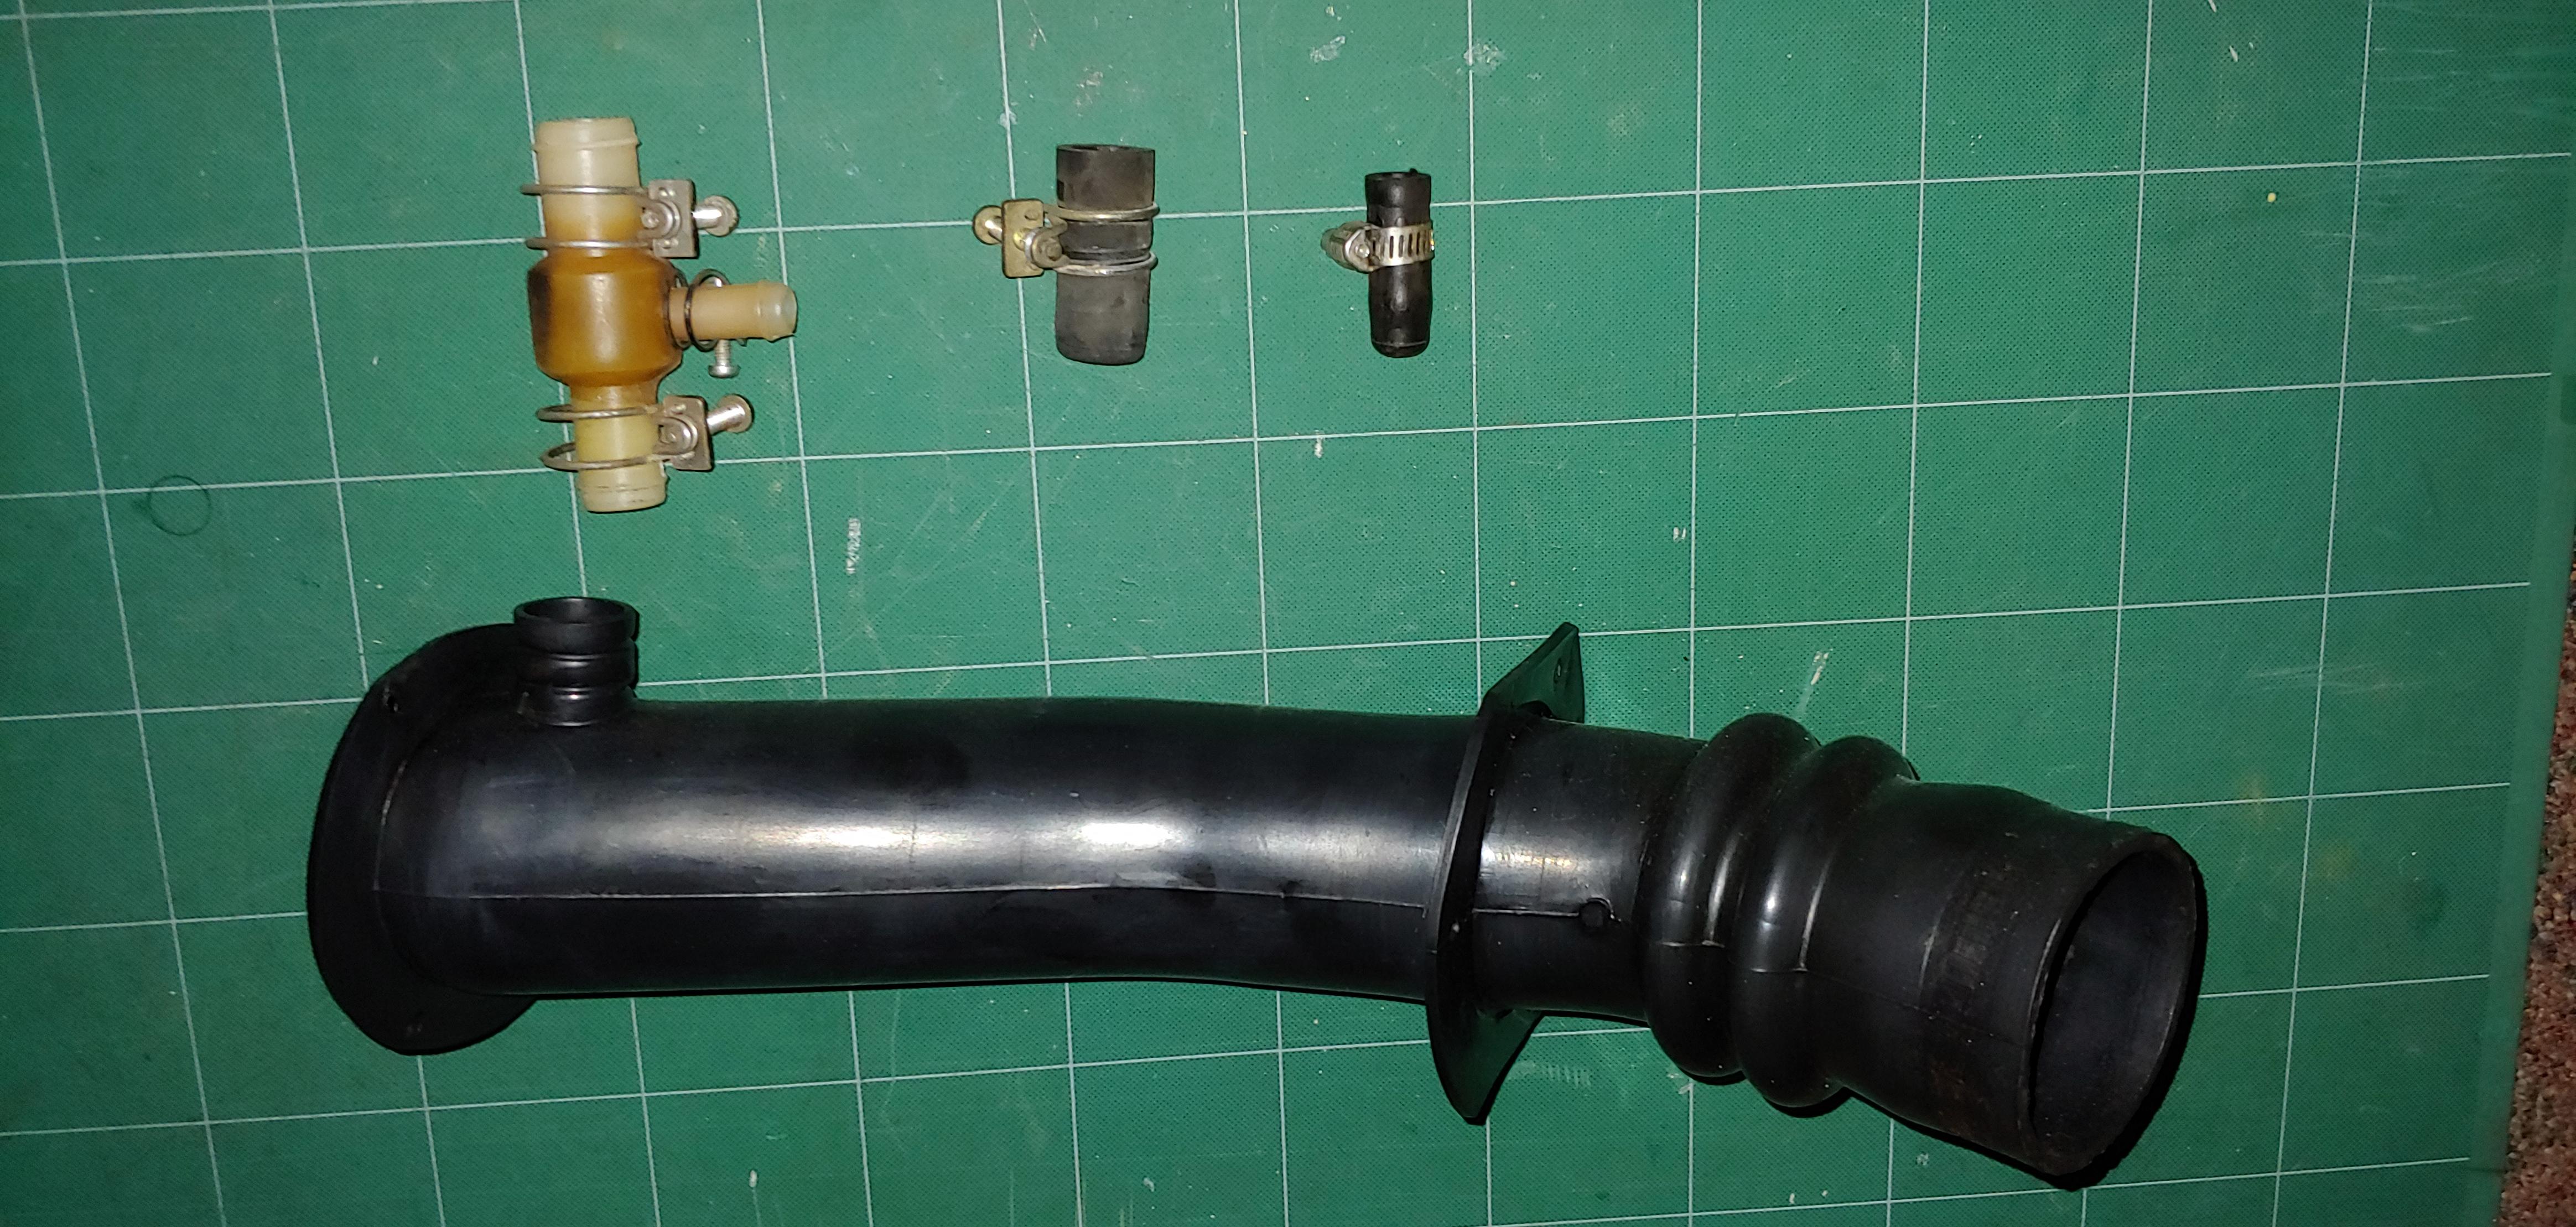
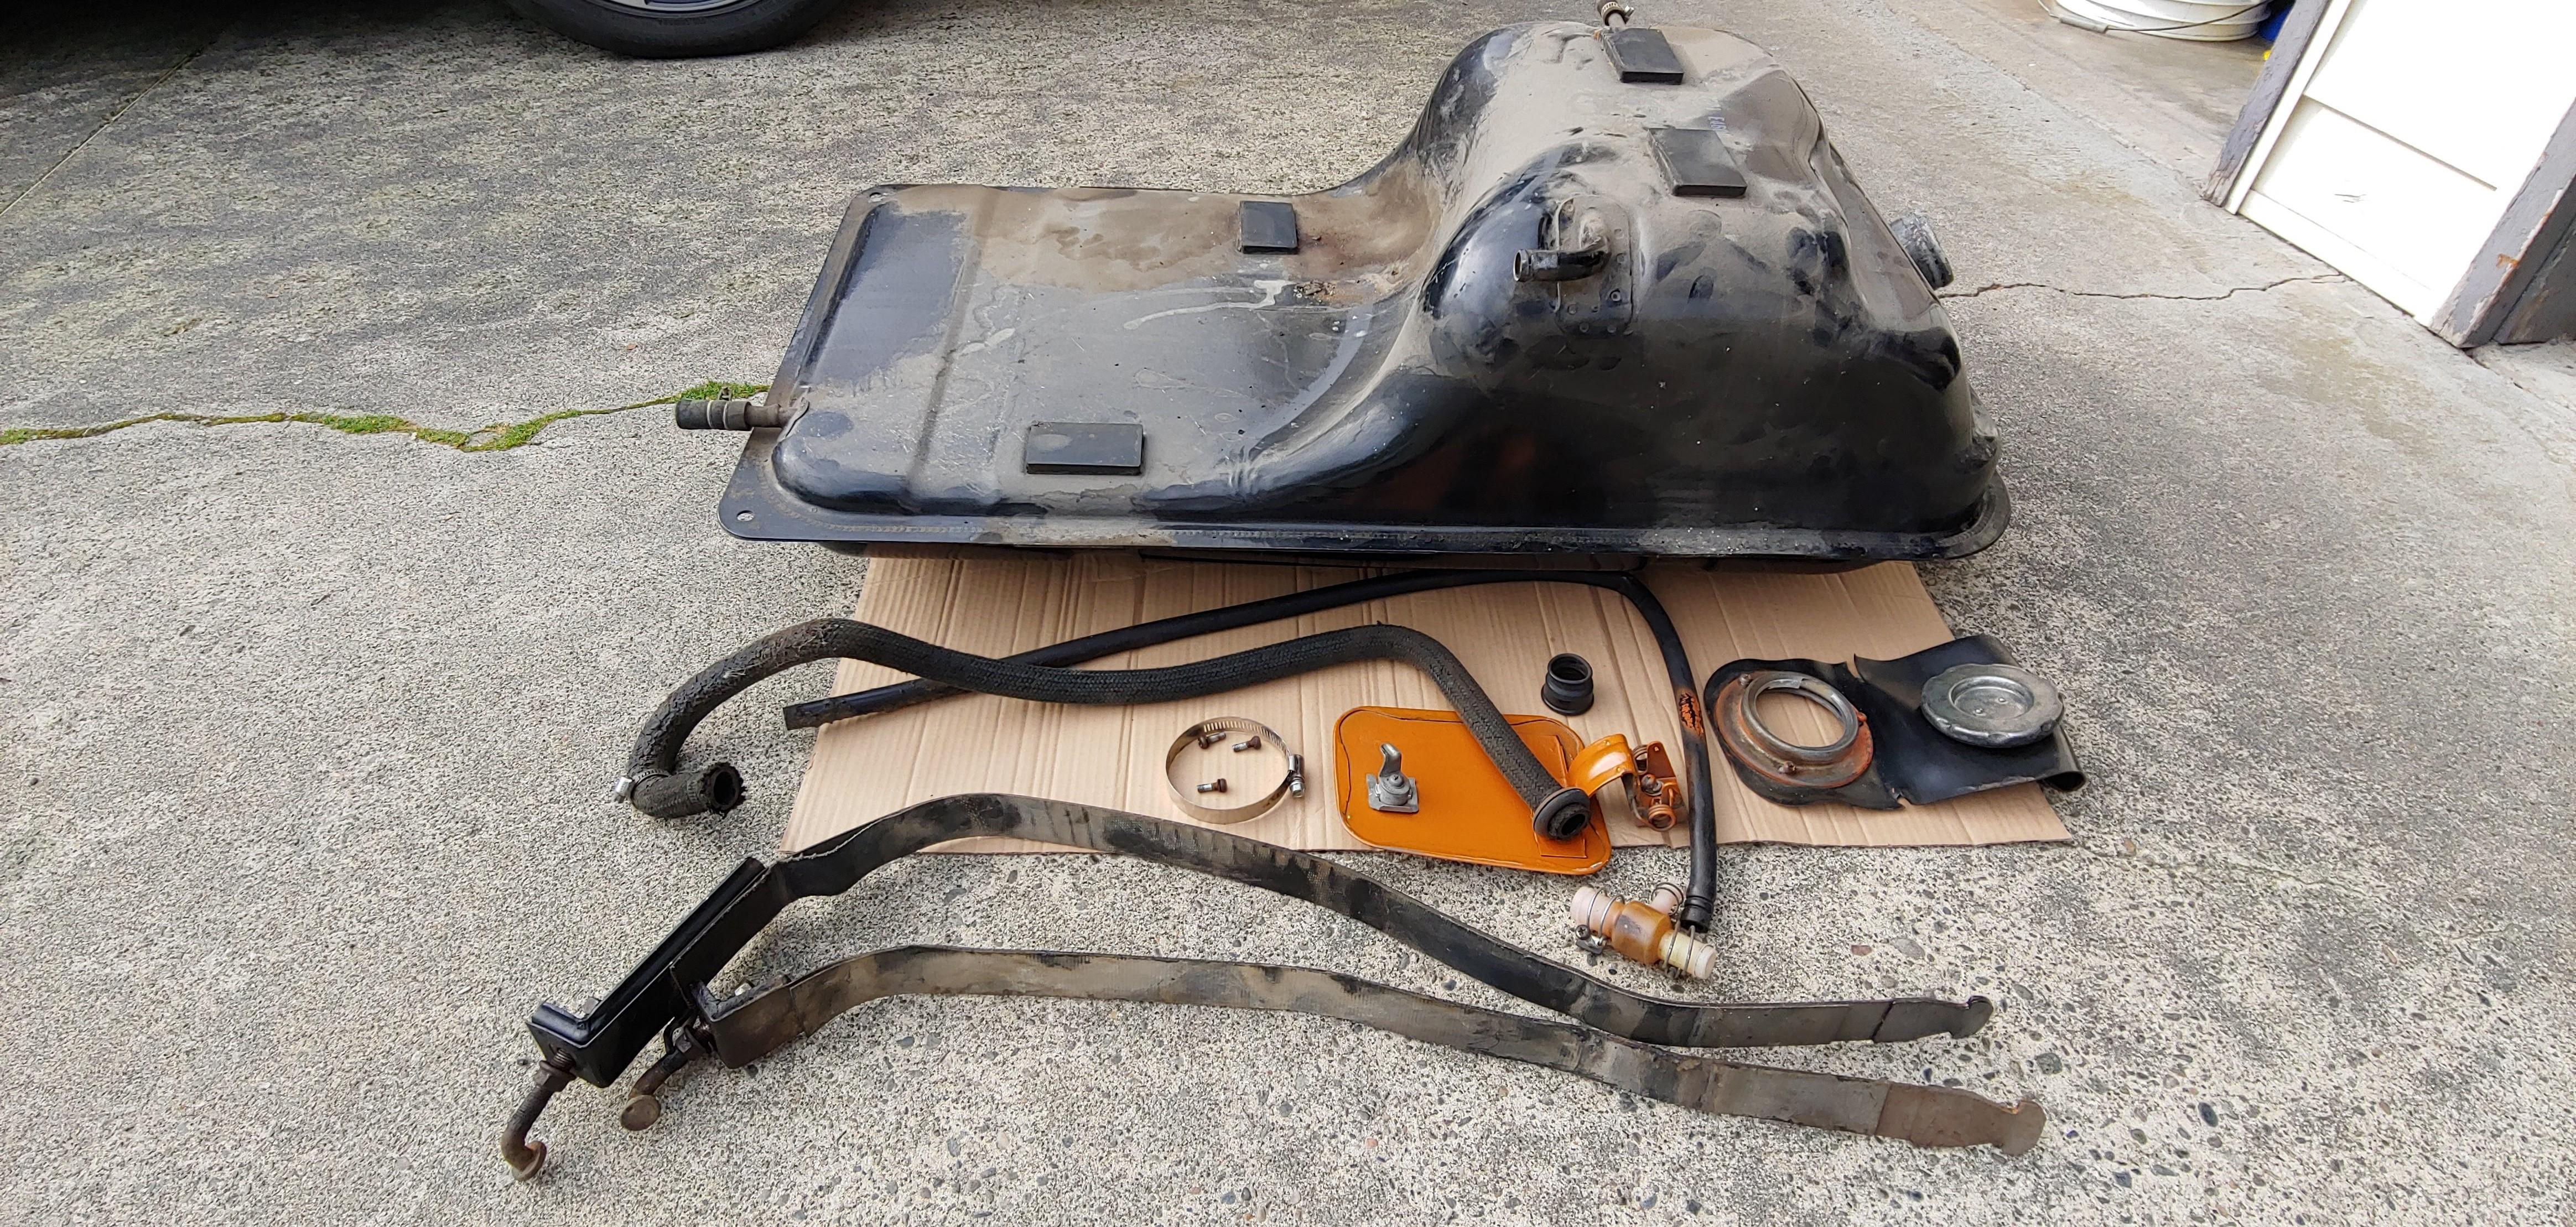
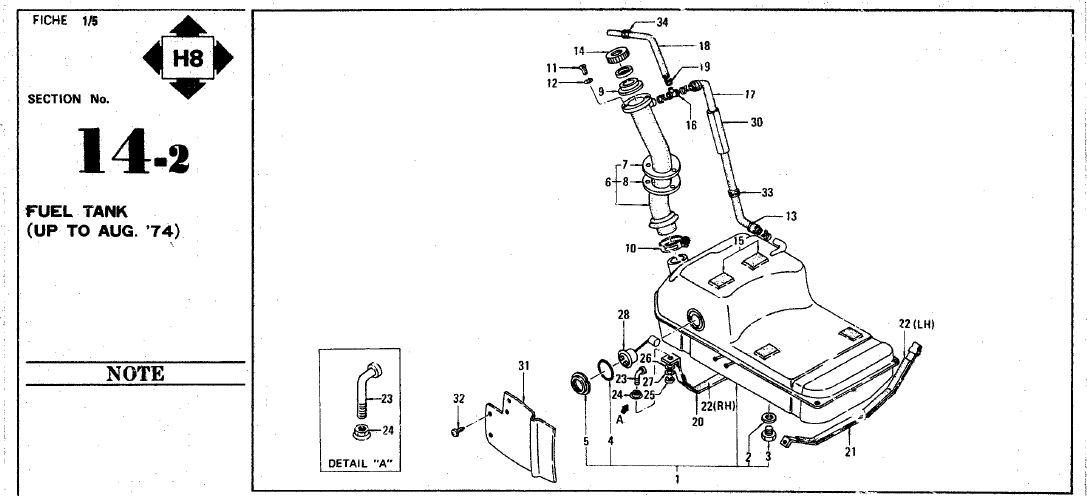
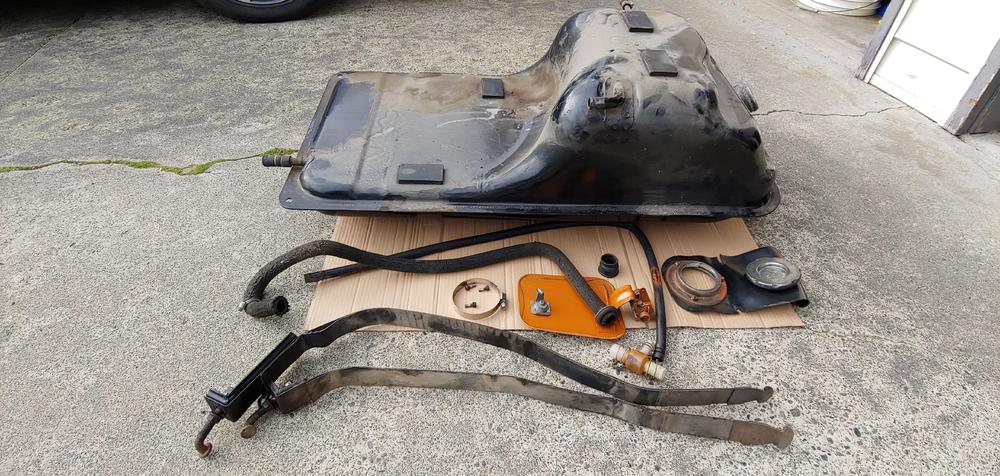
Your welcome. Interestingly the fuel tank on my car originally did not have the extra fittings but when I replaced it in 1988 the only tanks available had them. It was installed by my local Nissan dealership. The mechanic back then closed the extra ports with fuel compatible rubber caps, one is even retained with an OEM wire type clamp, after 32 years the caps are still relatively soft and pliable with no cracks. Here are a couple of pics...
-