CanTechZ
Member
-
Joined
-
Last visited
Everything posted by CanTechZ
-
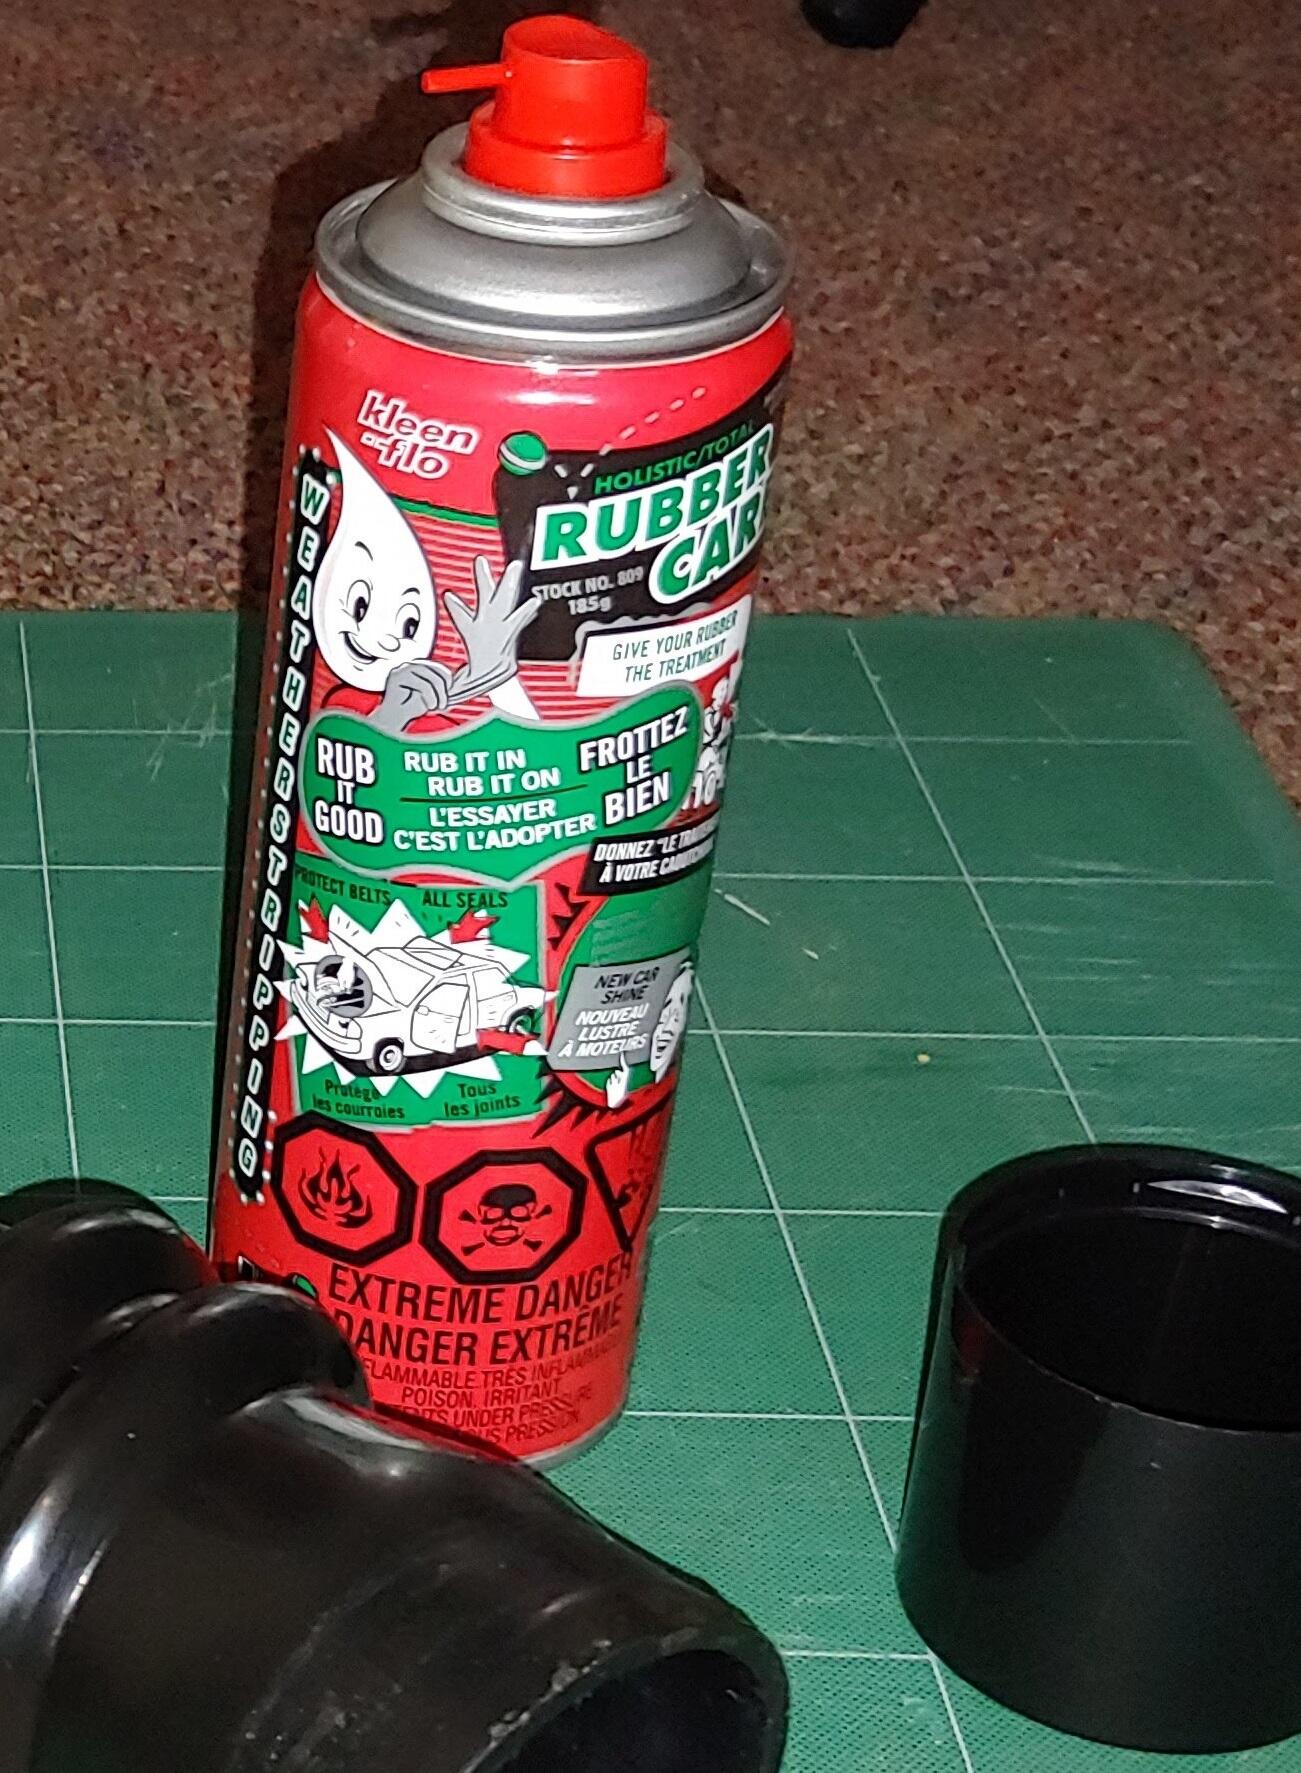
 This stuff work great on old rubber items and door seals, Honey Goo Holistic Rubber Care https://www.kleenflo.com/products/809.html Strangely the website say "NEW" but its been around for years. Hopefully is not a new formula that's not as good as the original.
-
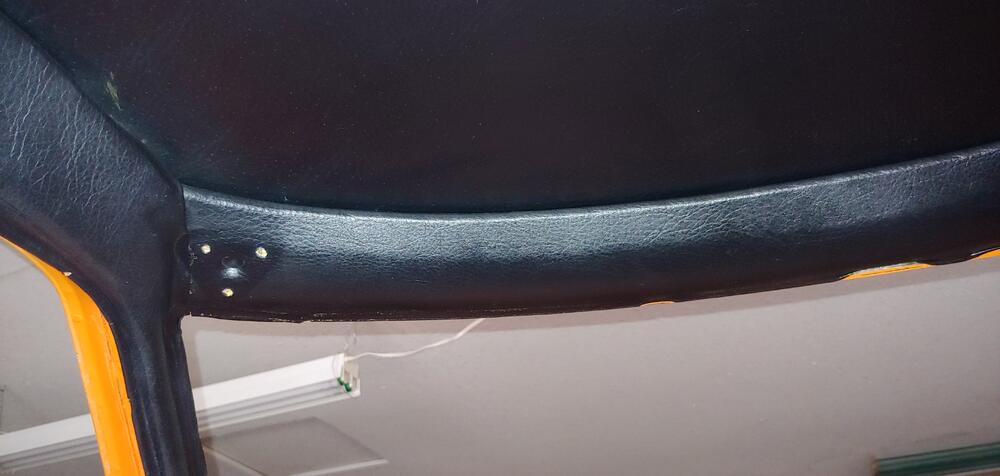
Interesting, they are down on my 7/70. Pic from before I pulled my interior.
-
-
-
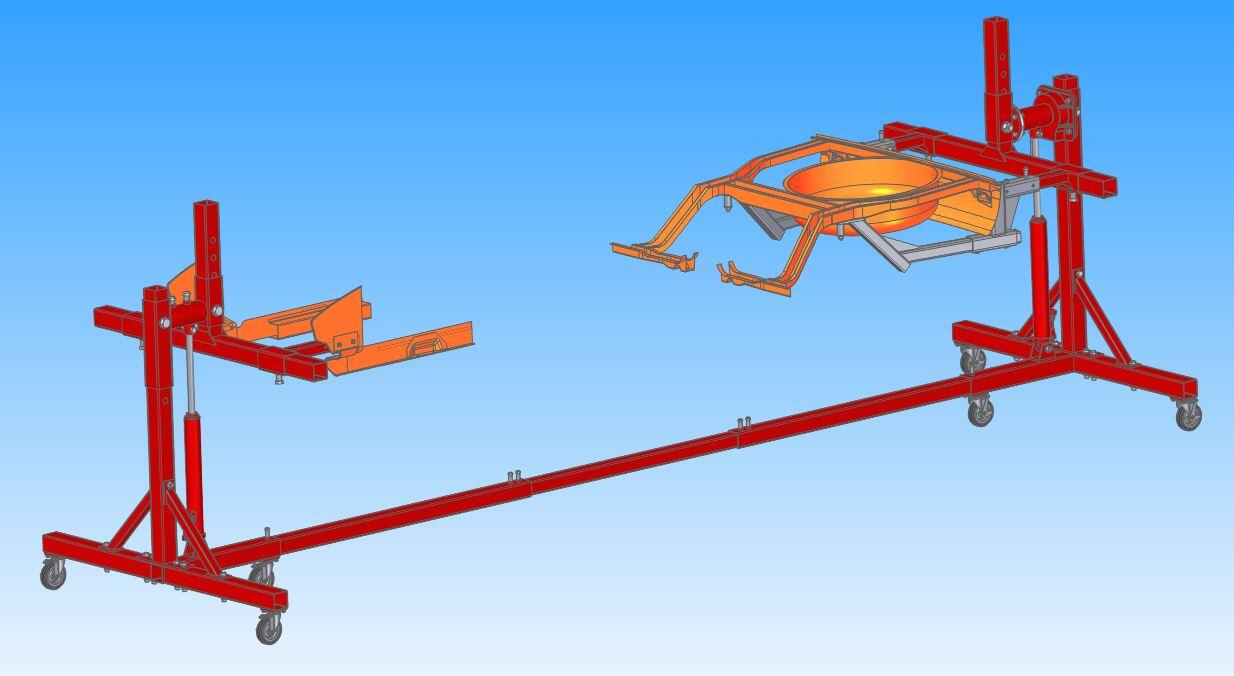
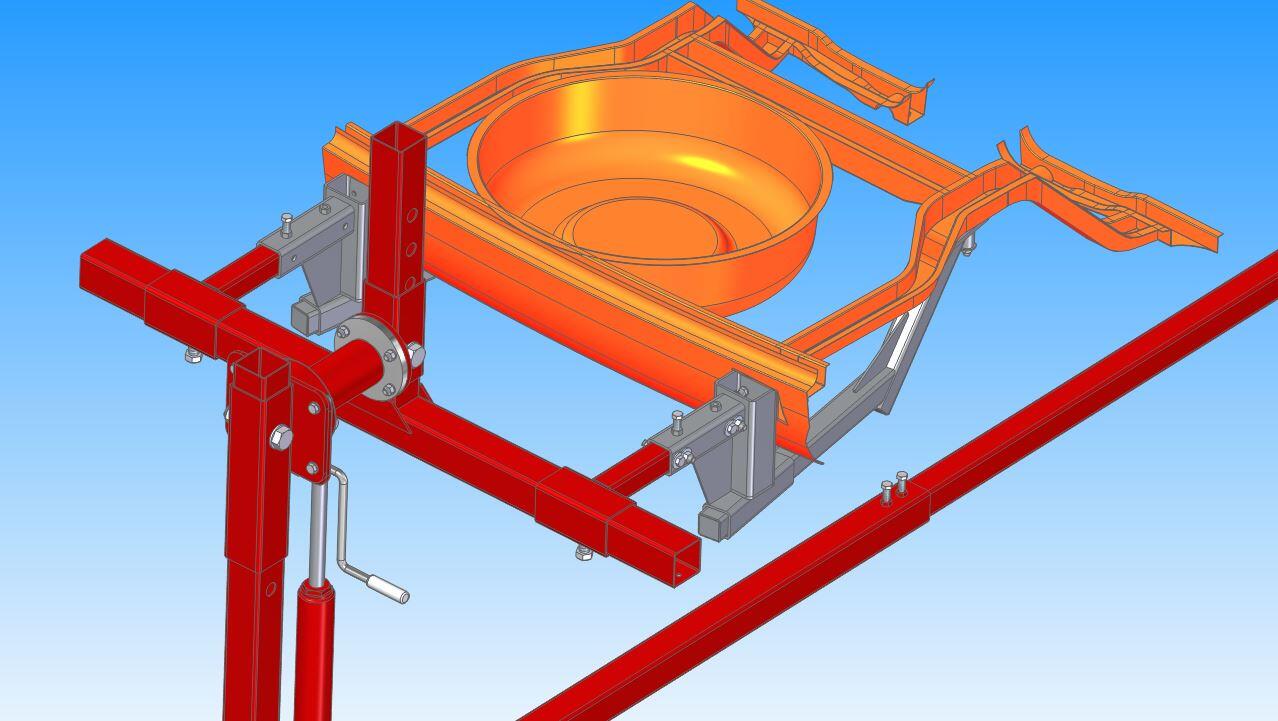
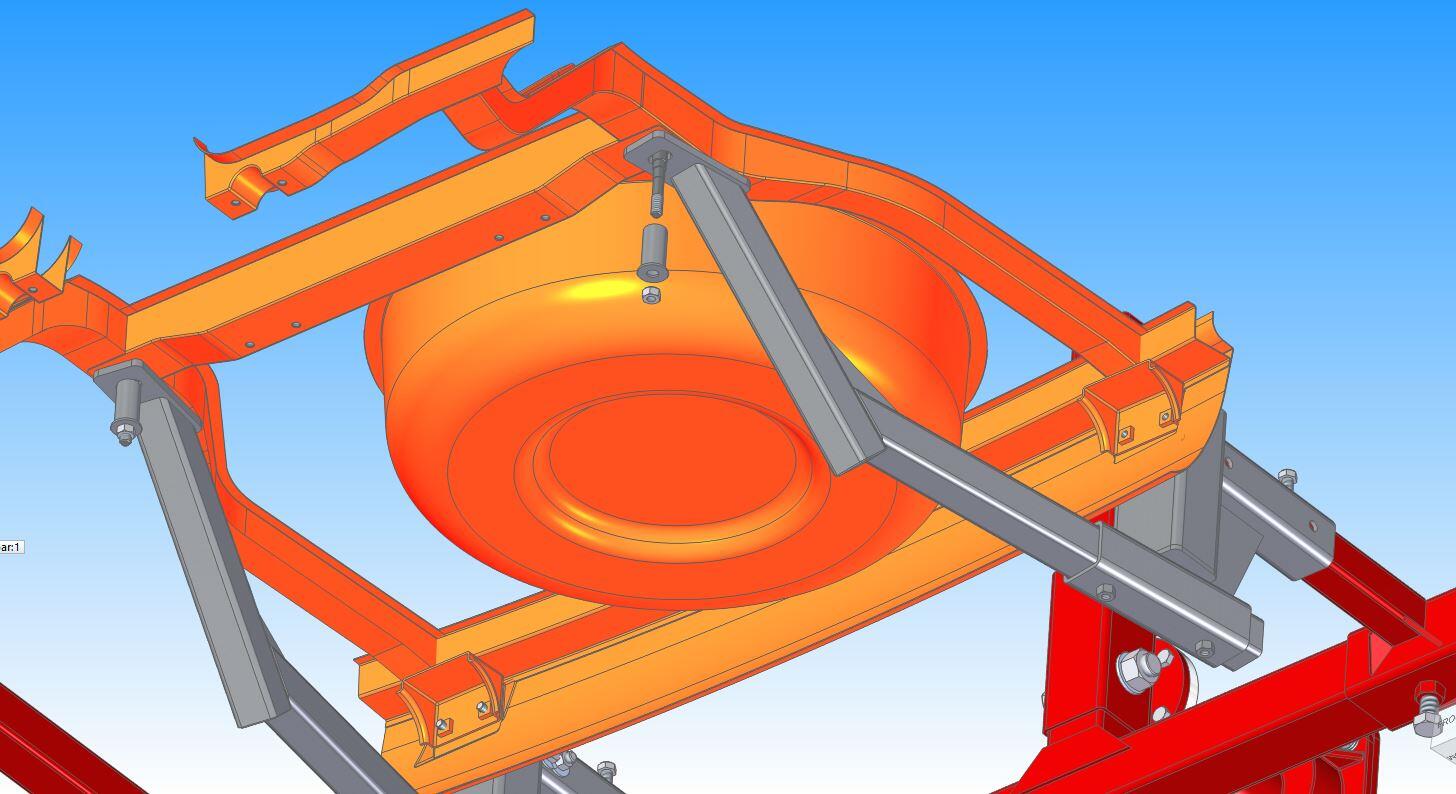
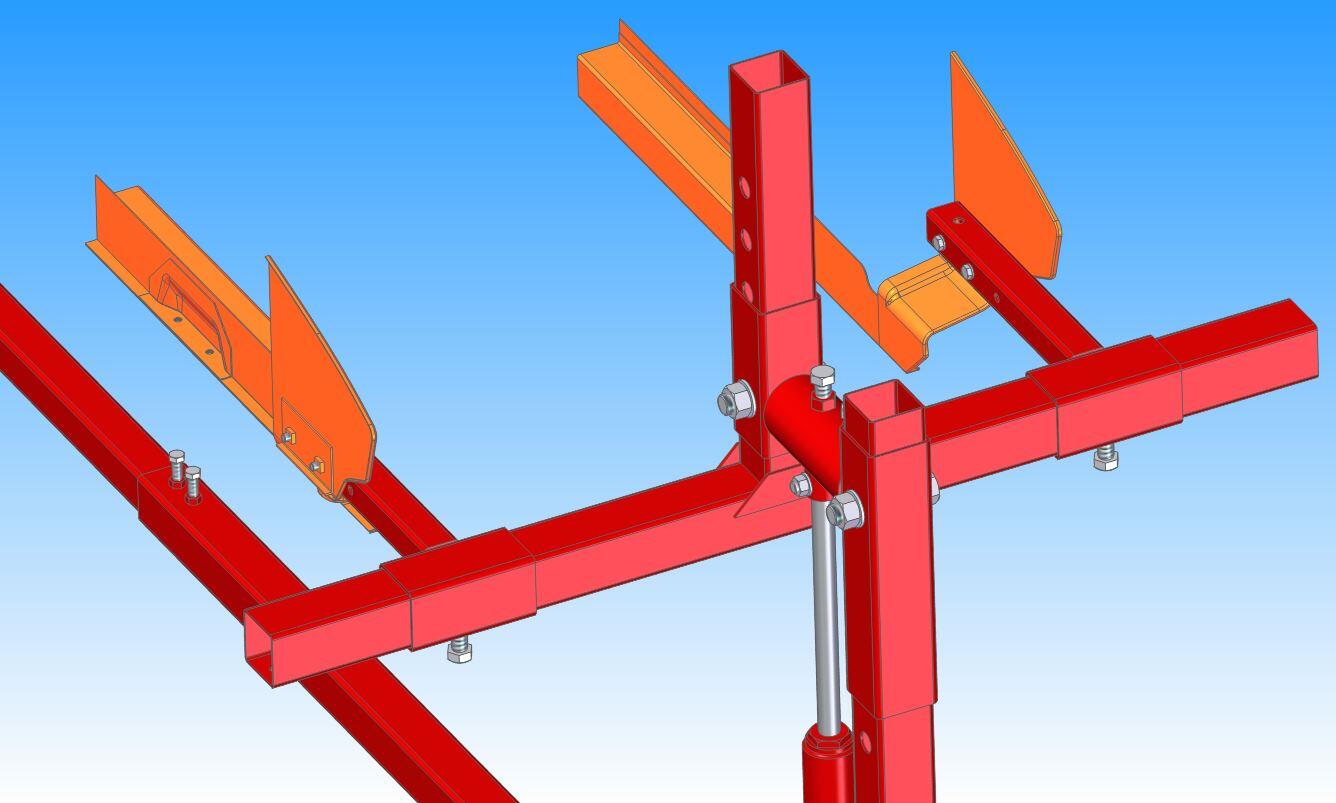
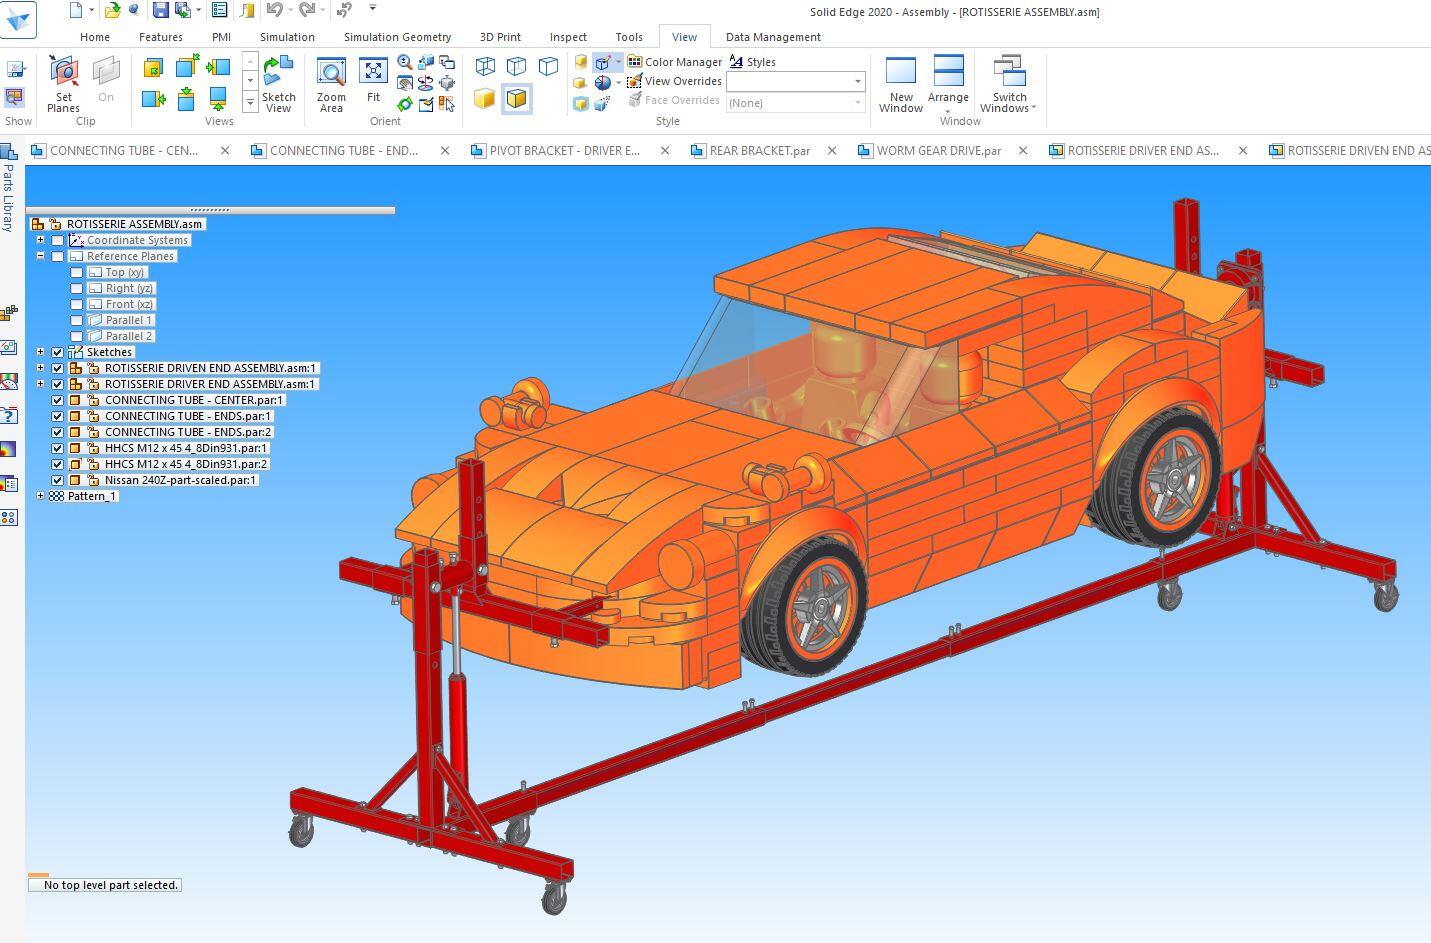
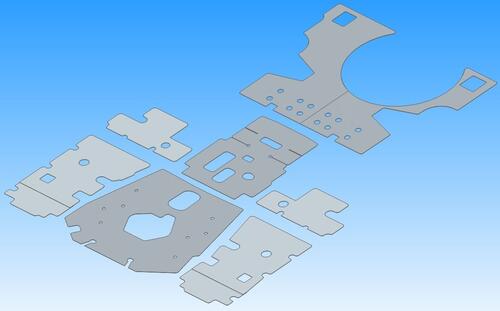
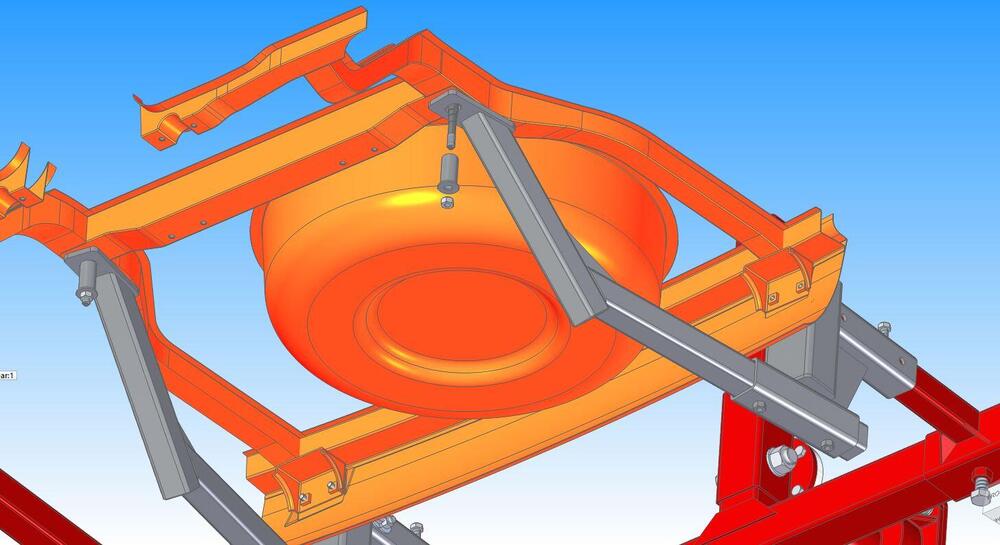
I have decided to add extension to the brackets I am having fabricated for the rear rotisserie mounts. I will be picking up the ends of the diff mount x-member in addition to the bumper mounts. I added to my 3D partial chassis model to check fit on the x-member and verify clearance around the spare tire tub. The parts should be ready to do a test fit on the car near the end of next week. They will only be tacked together for the test, and if all goes well they will be welded up the following week. Here are a few images showing the concept.


-
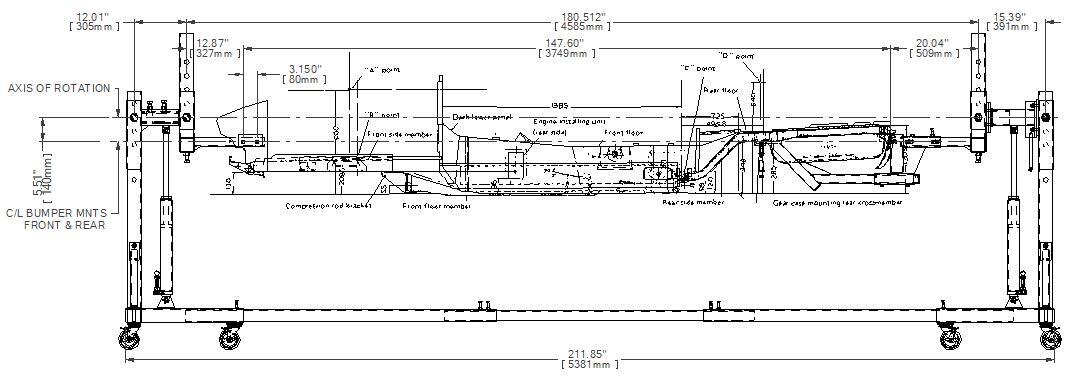
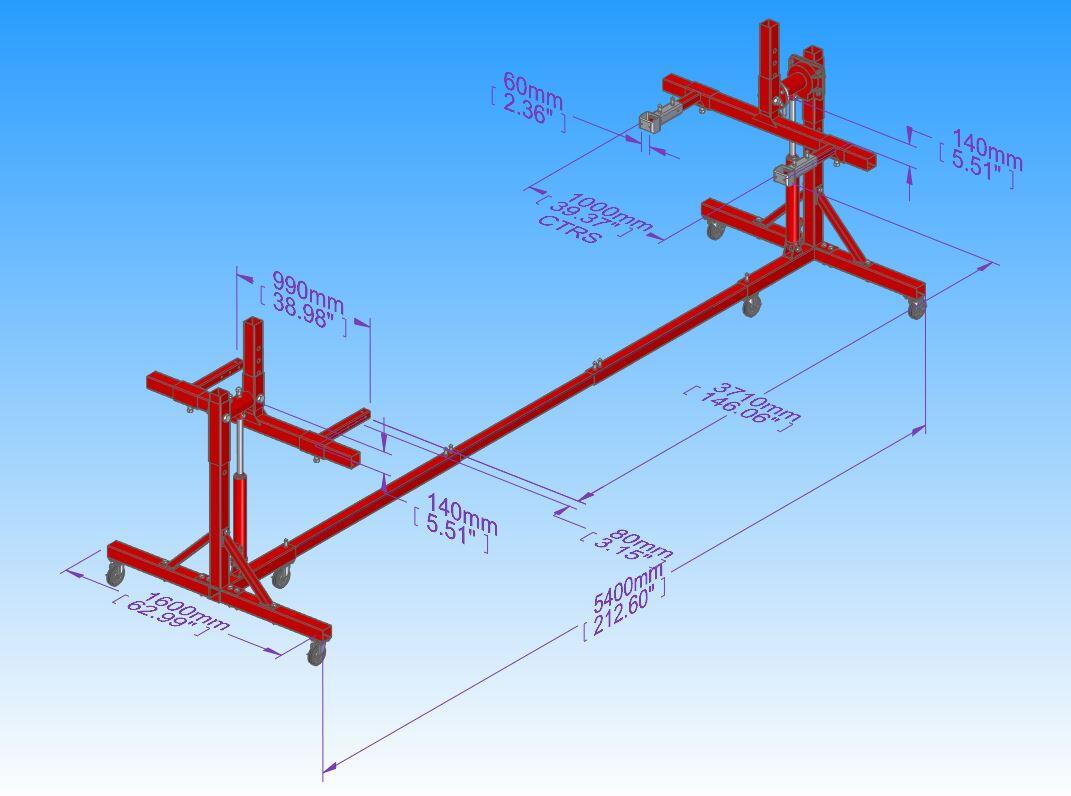
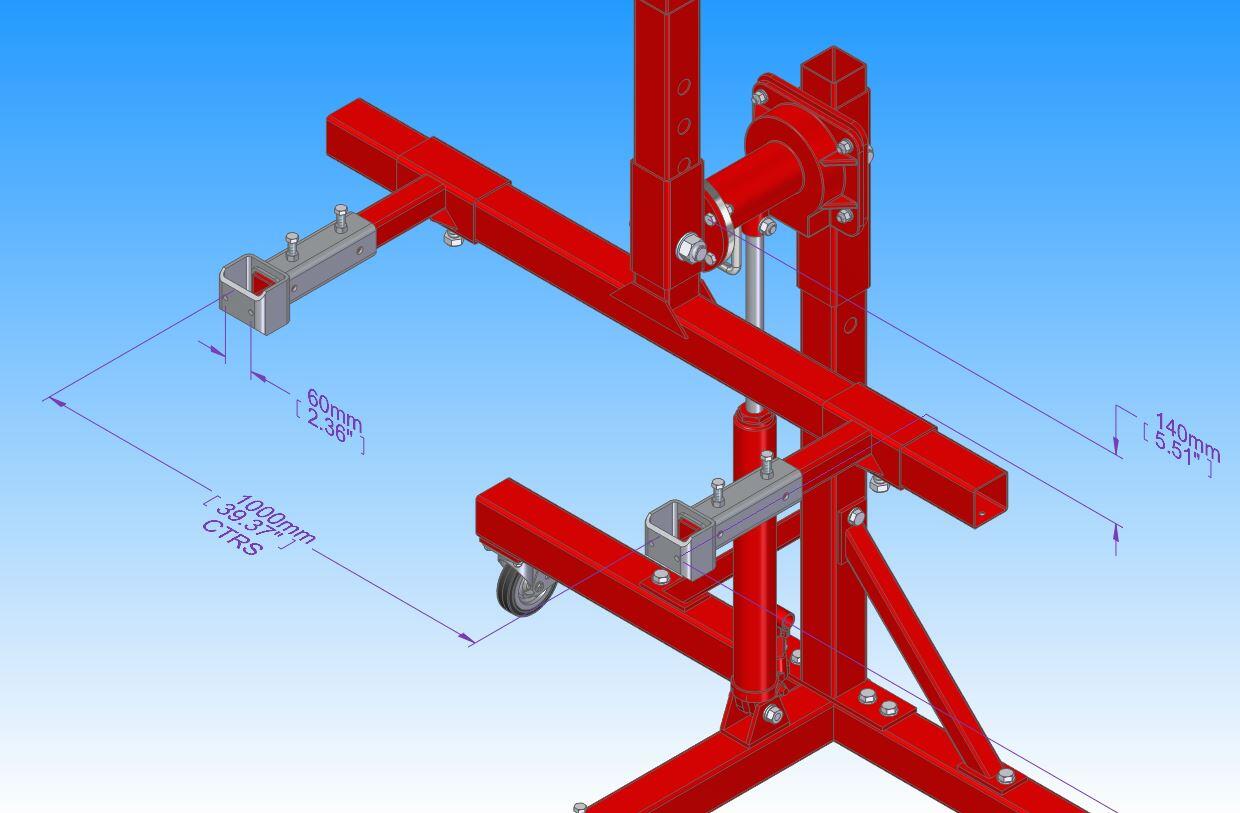
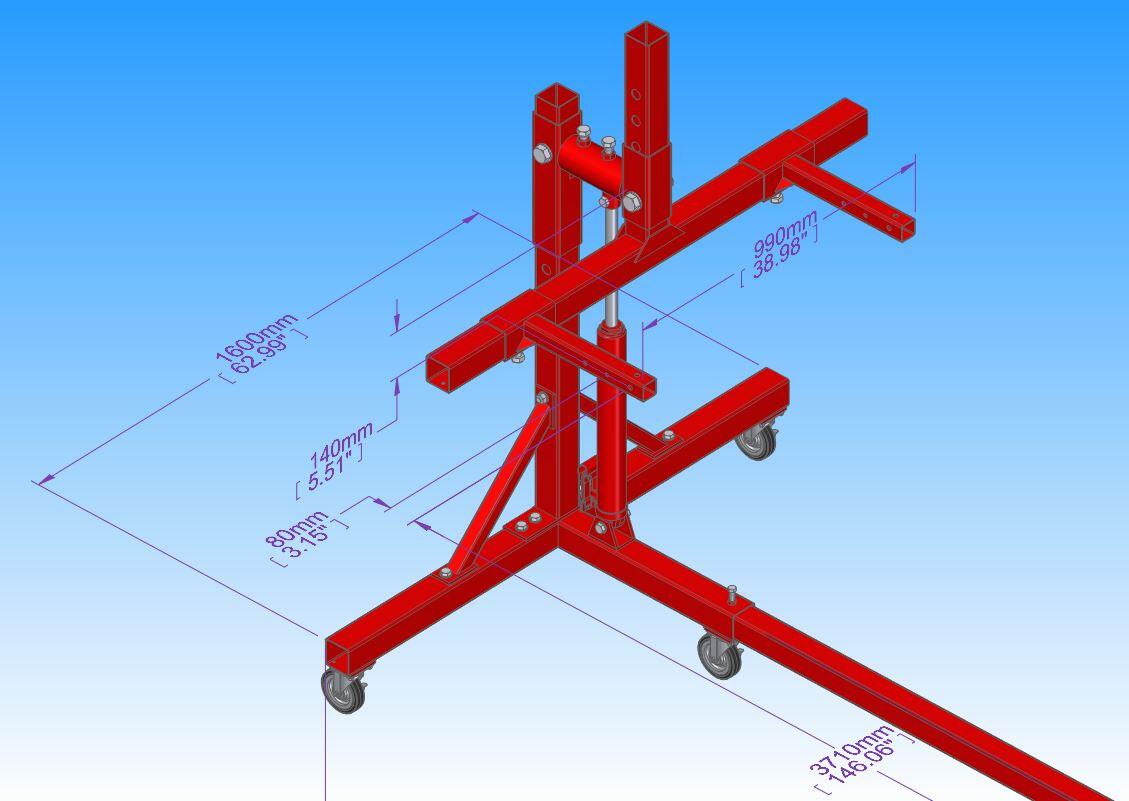
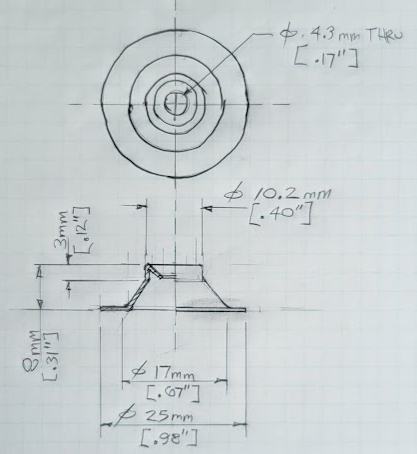
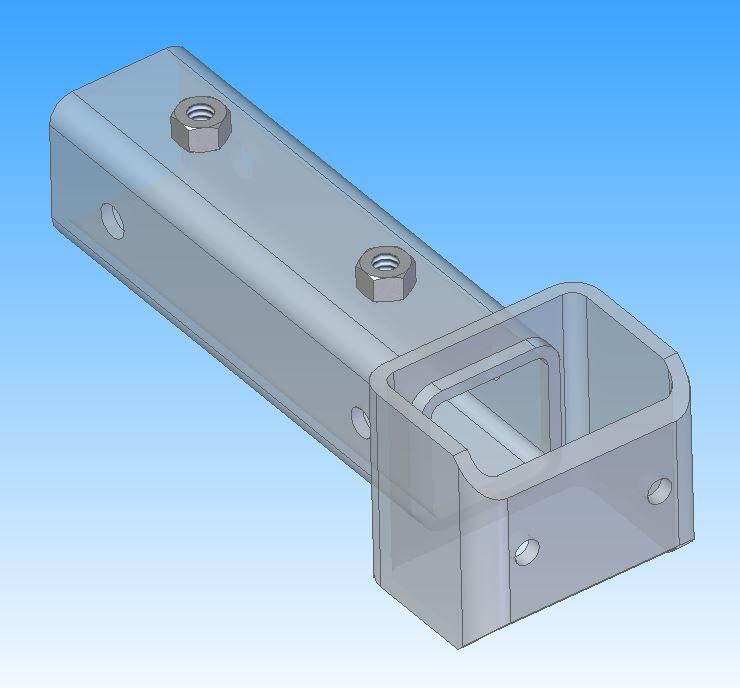
Over the weekend I measured up the rotisserie and created a 3D cad model of it, so that I could design the brackets for attaching the rear bumper mounts on the shell to the rotisserie arms. Here are a few images with the major mounting dimensions and an image of the rear brackets that I will need to fabricate. I will be chatting with my body guy soon to look at repairing the left side rear mount first. I looked for a 3D cad model of a 240Z shell but all I could find was a Lego one on GrabCad. I couldn't resist scaling it up to 1:1 and putting it on the rotisserie model.


-
Thanks, that is sound advice. I will have a chat with my body guy before I mount it. I haven't discuss the details yet about what will be done on and off of the rotisserie, but as there is front frame rail and floor pan work to be done, I believe it will be on a frame fixture for that.
-
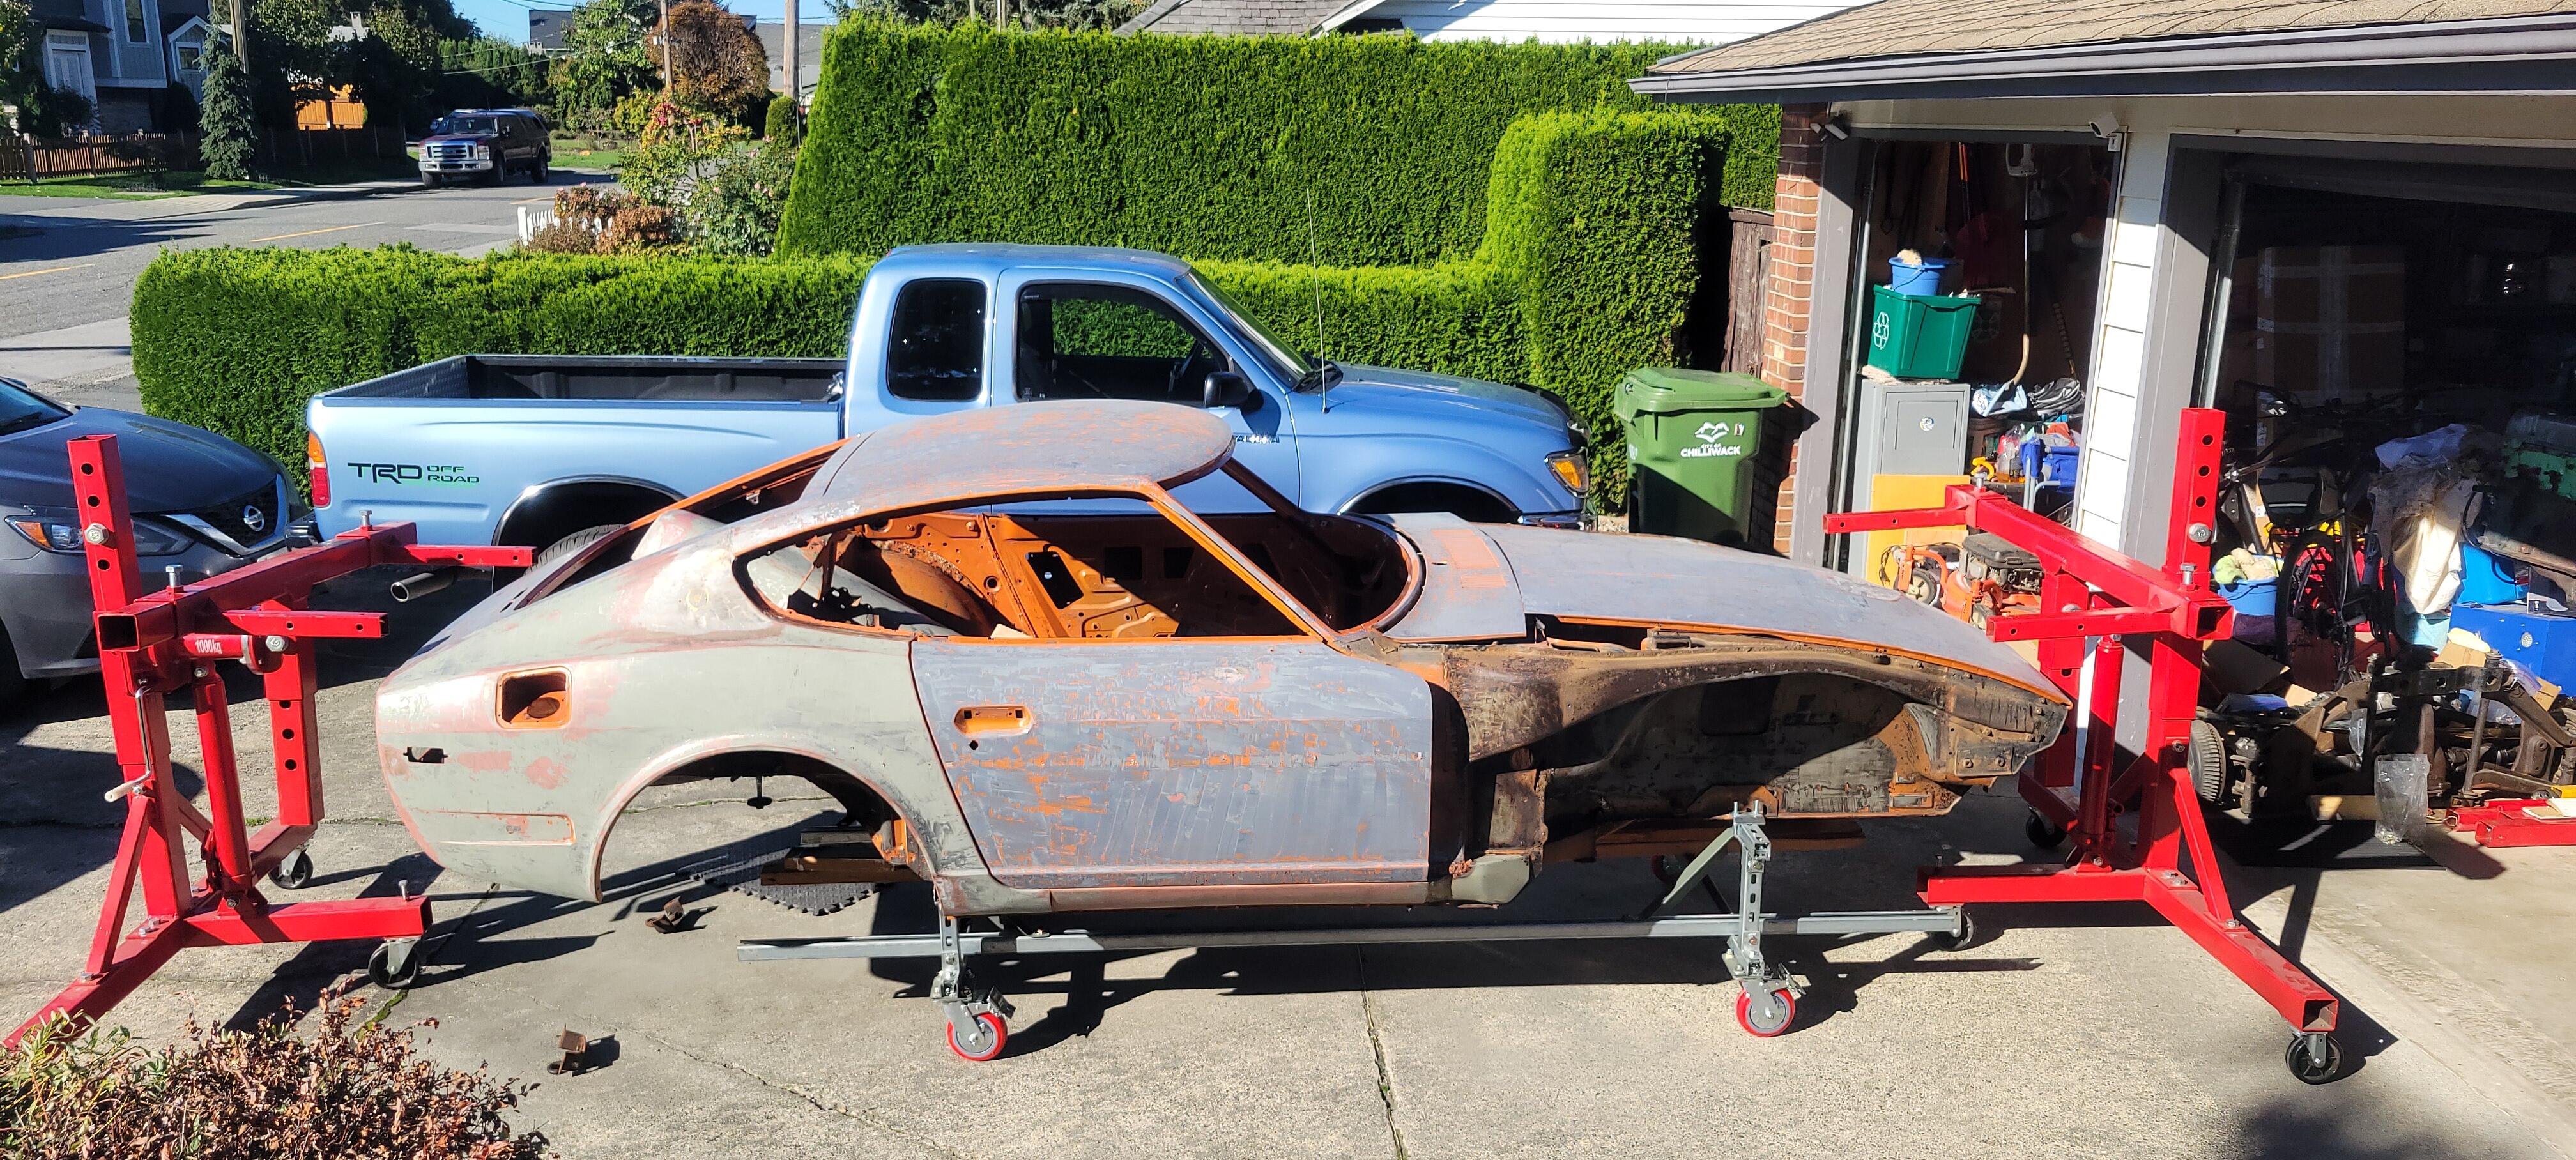
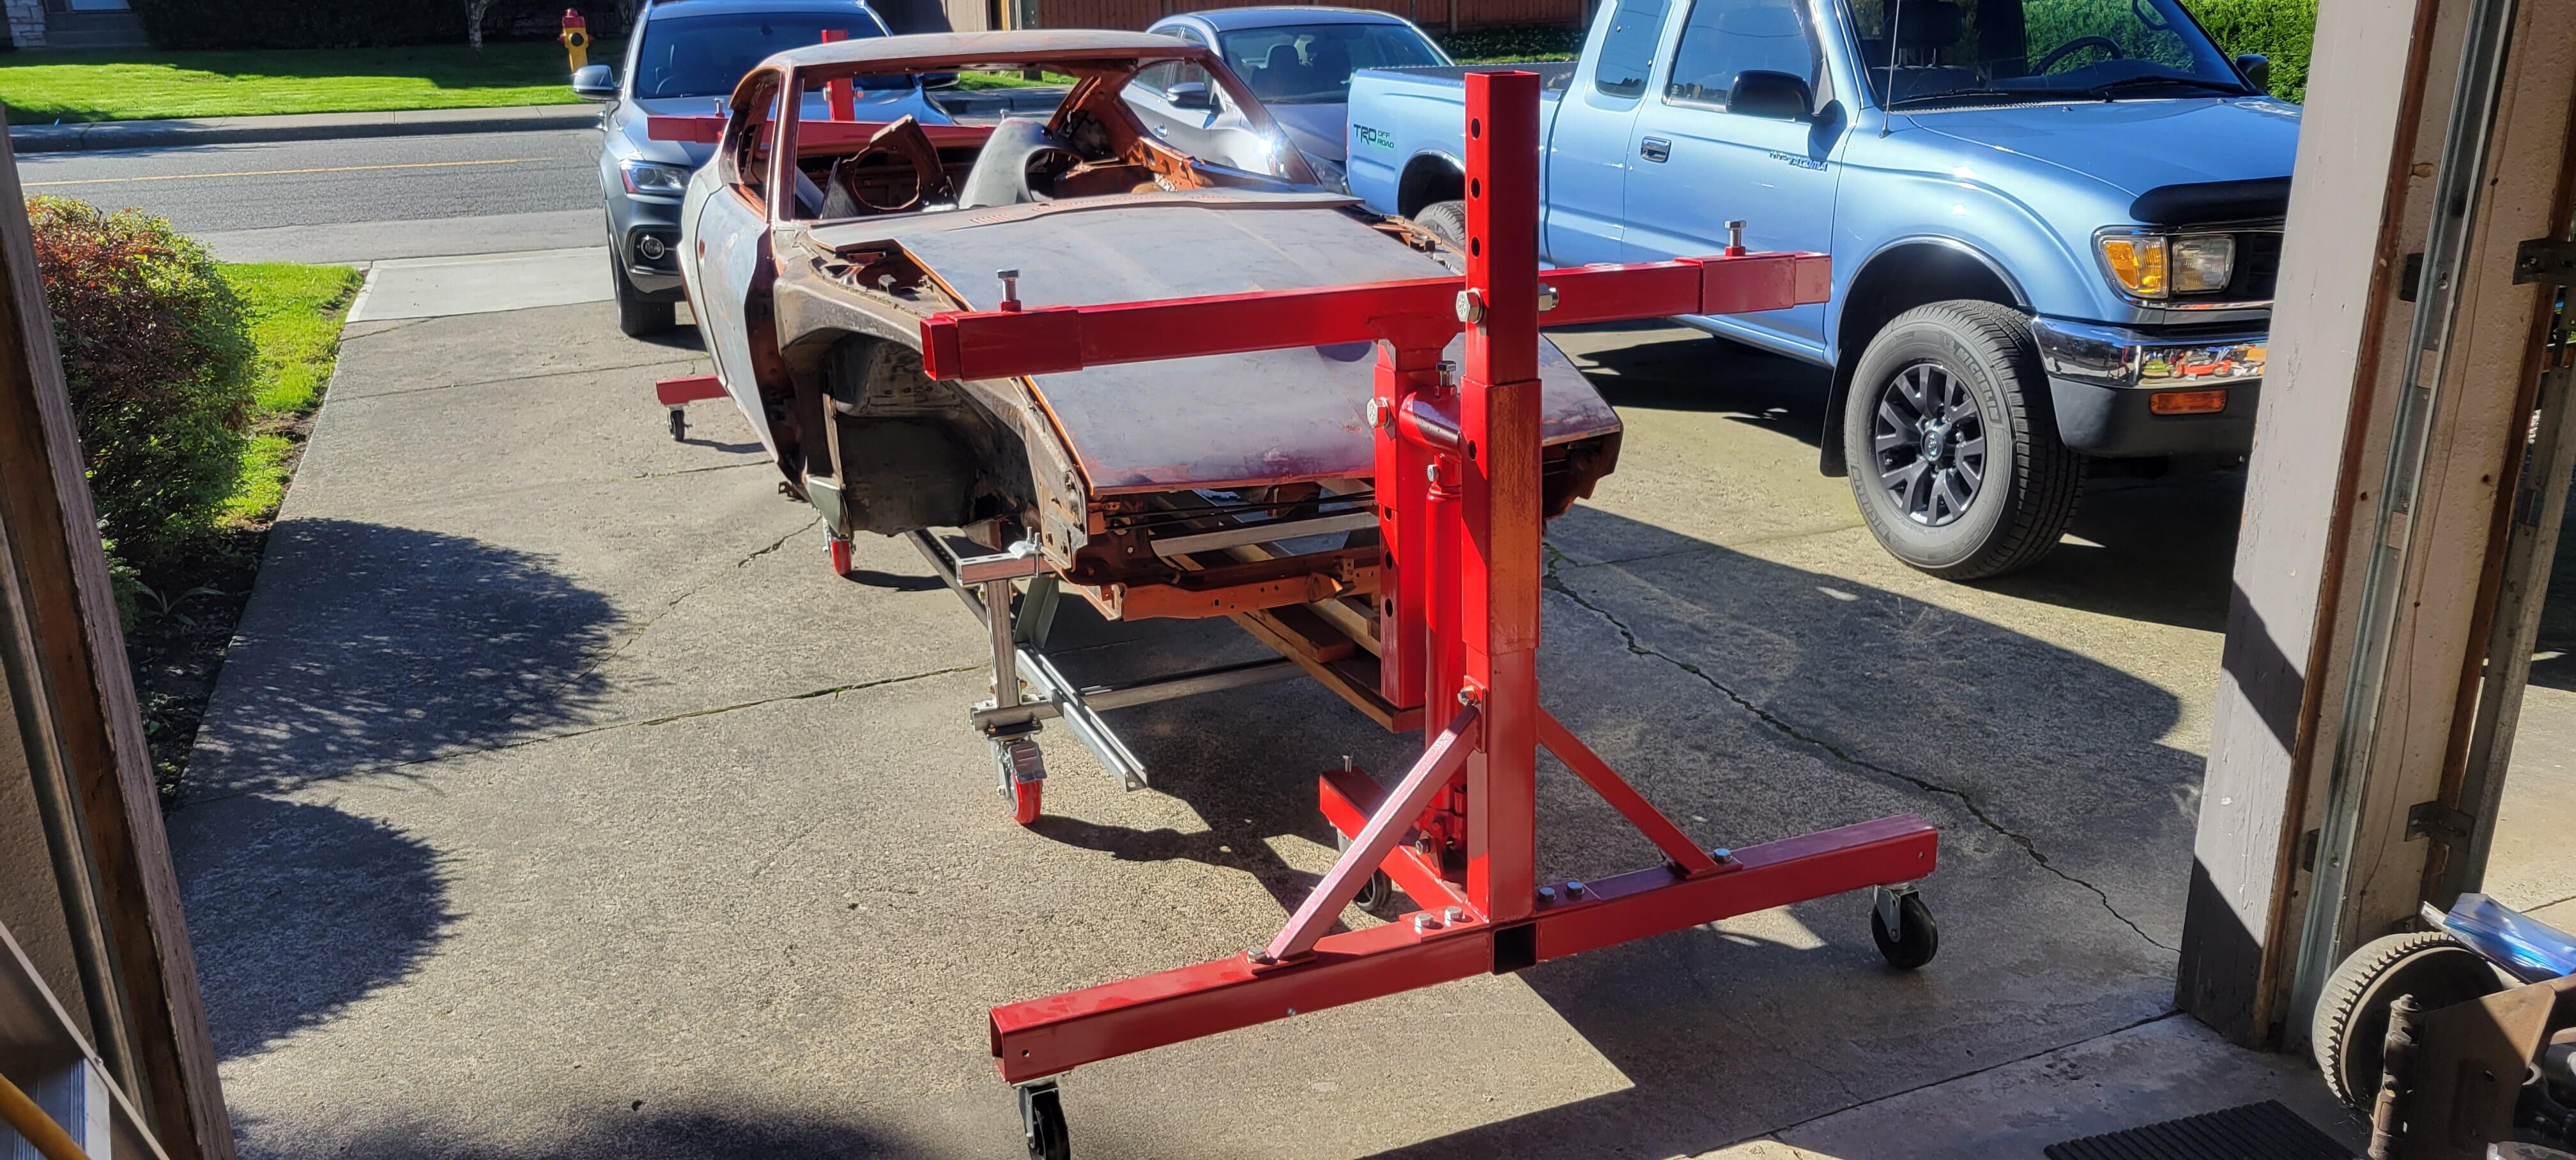
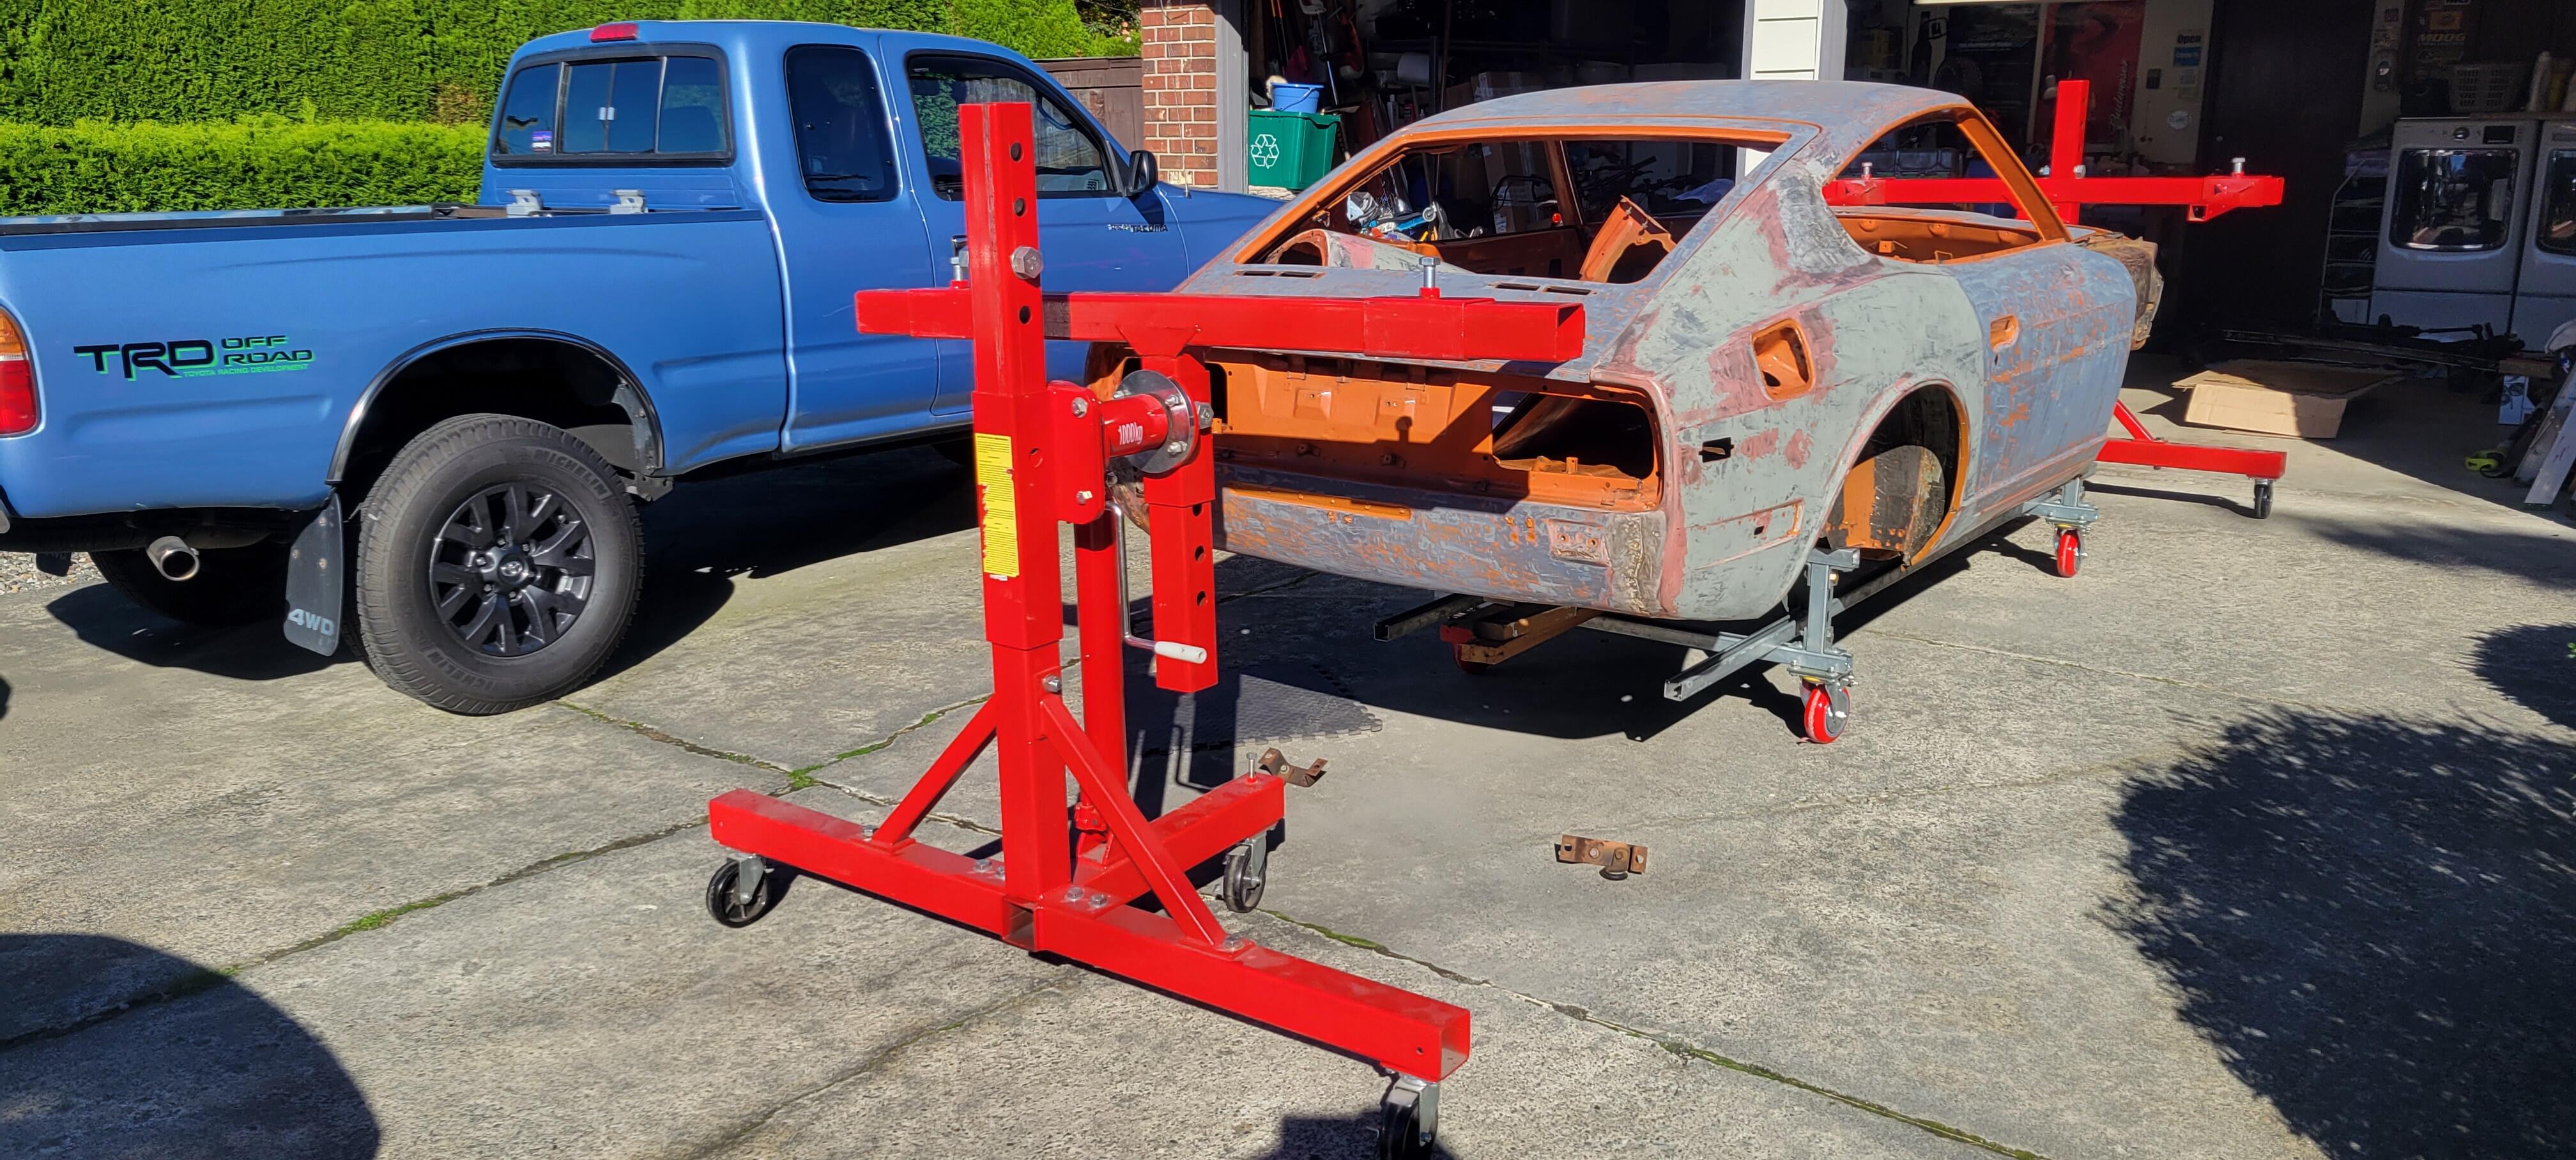
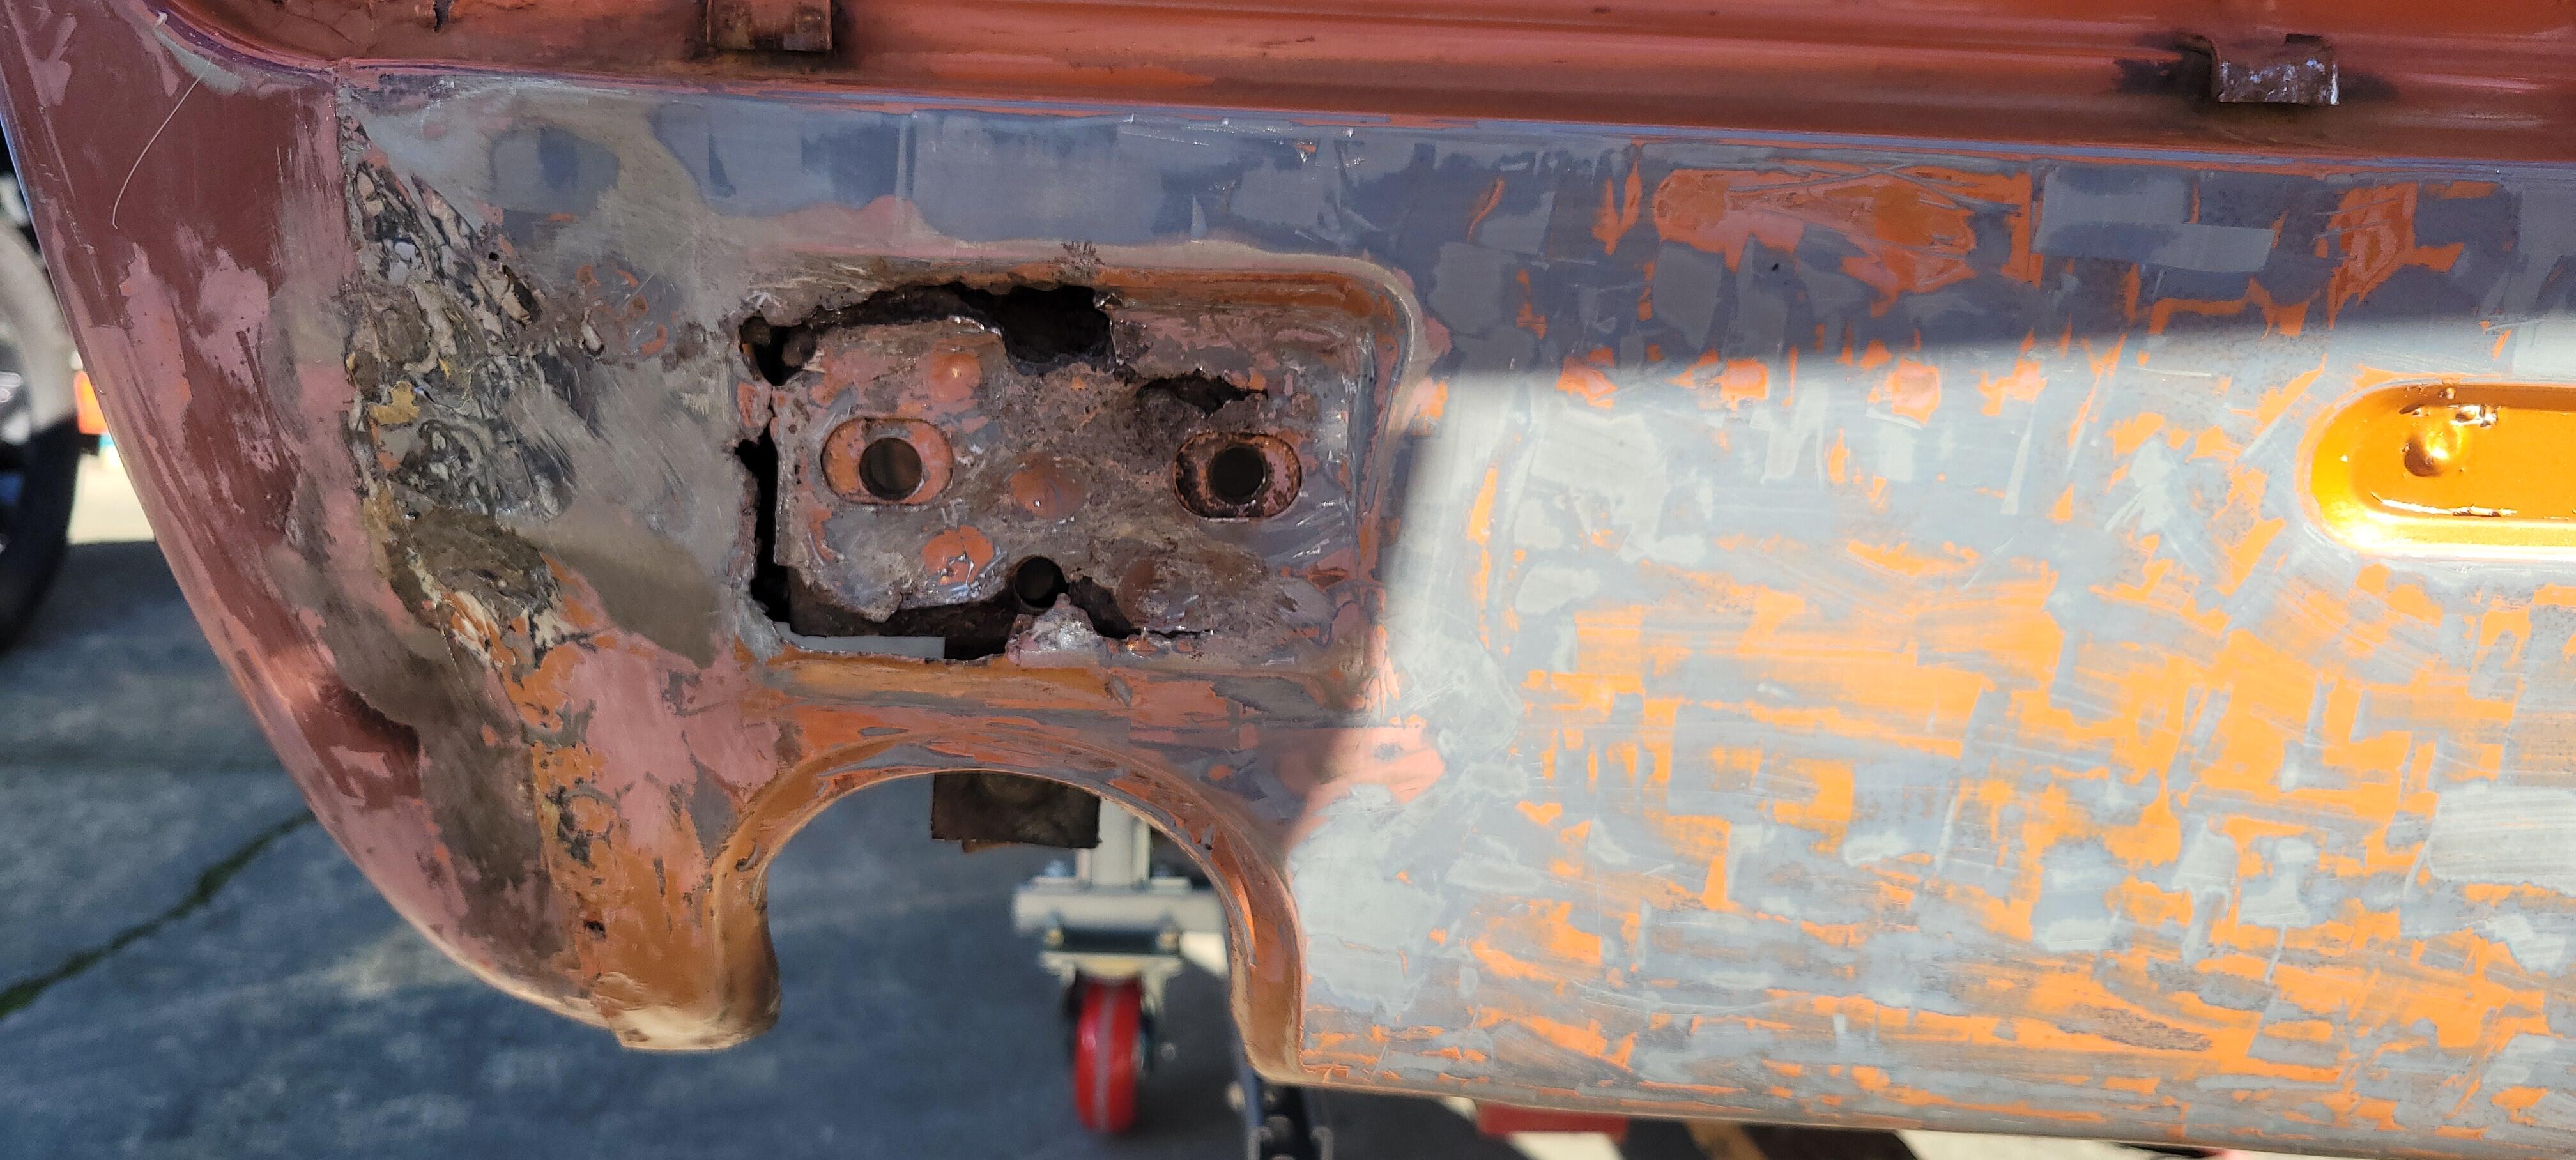
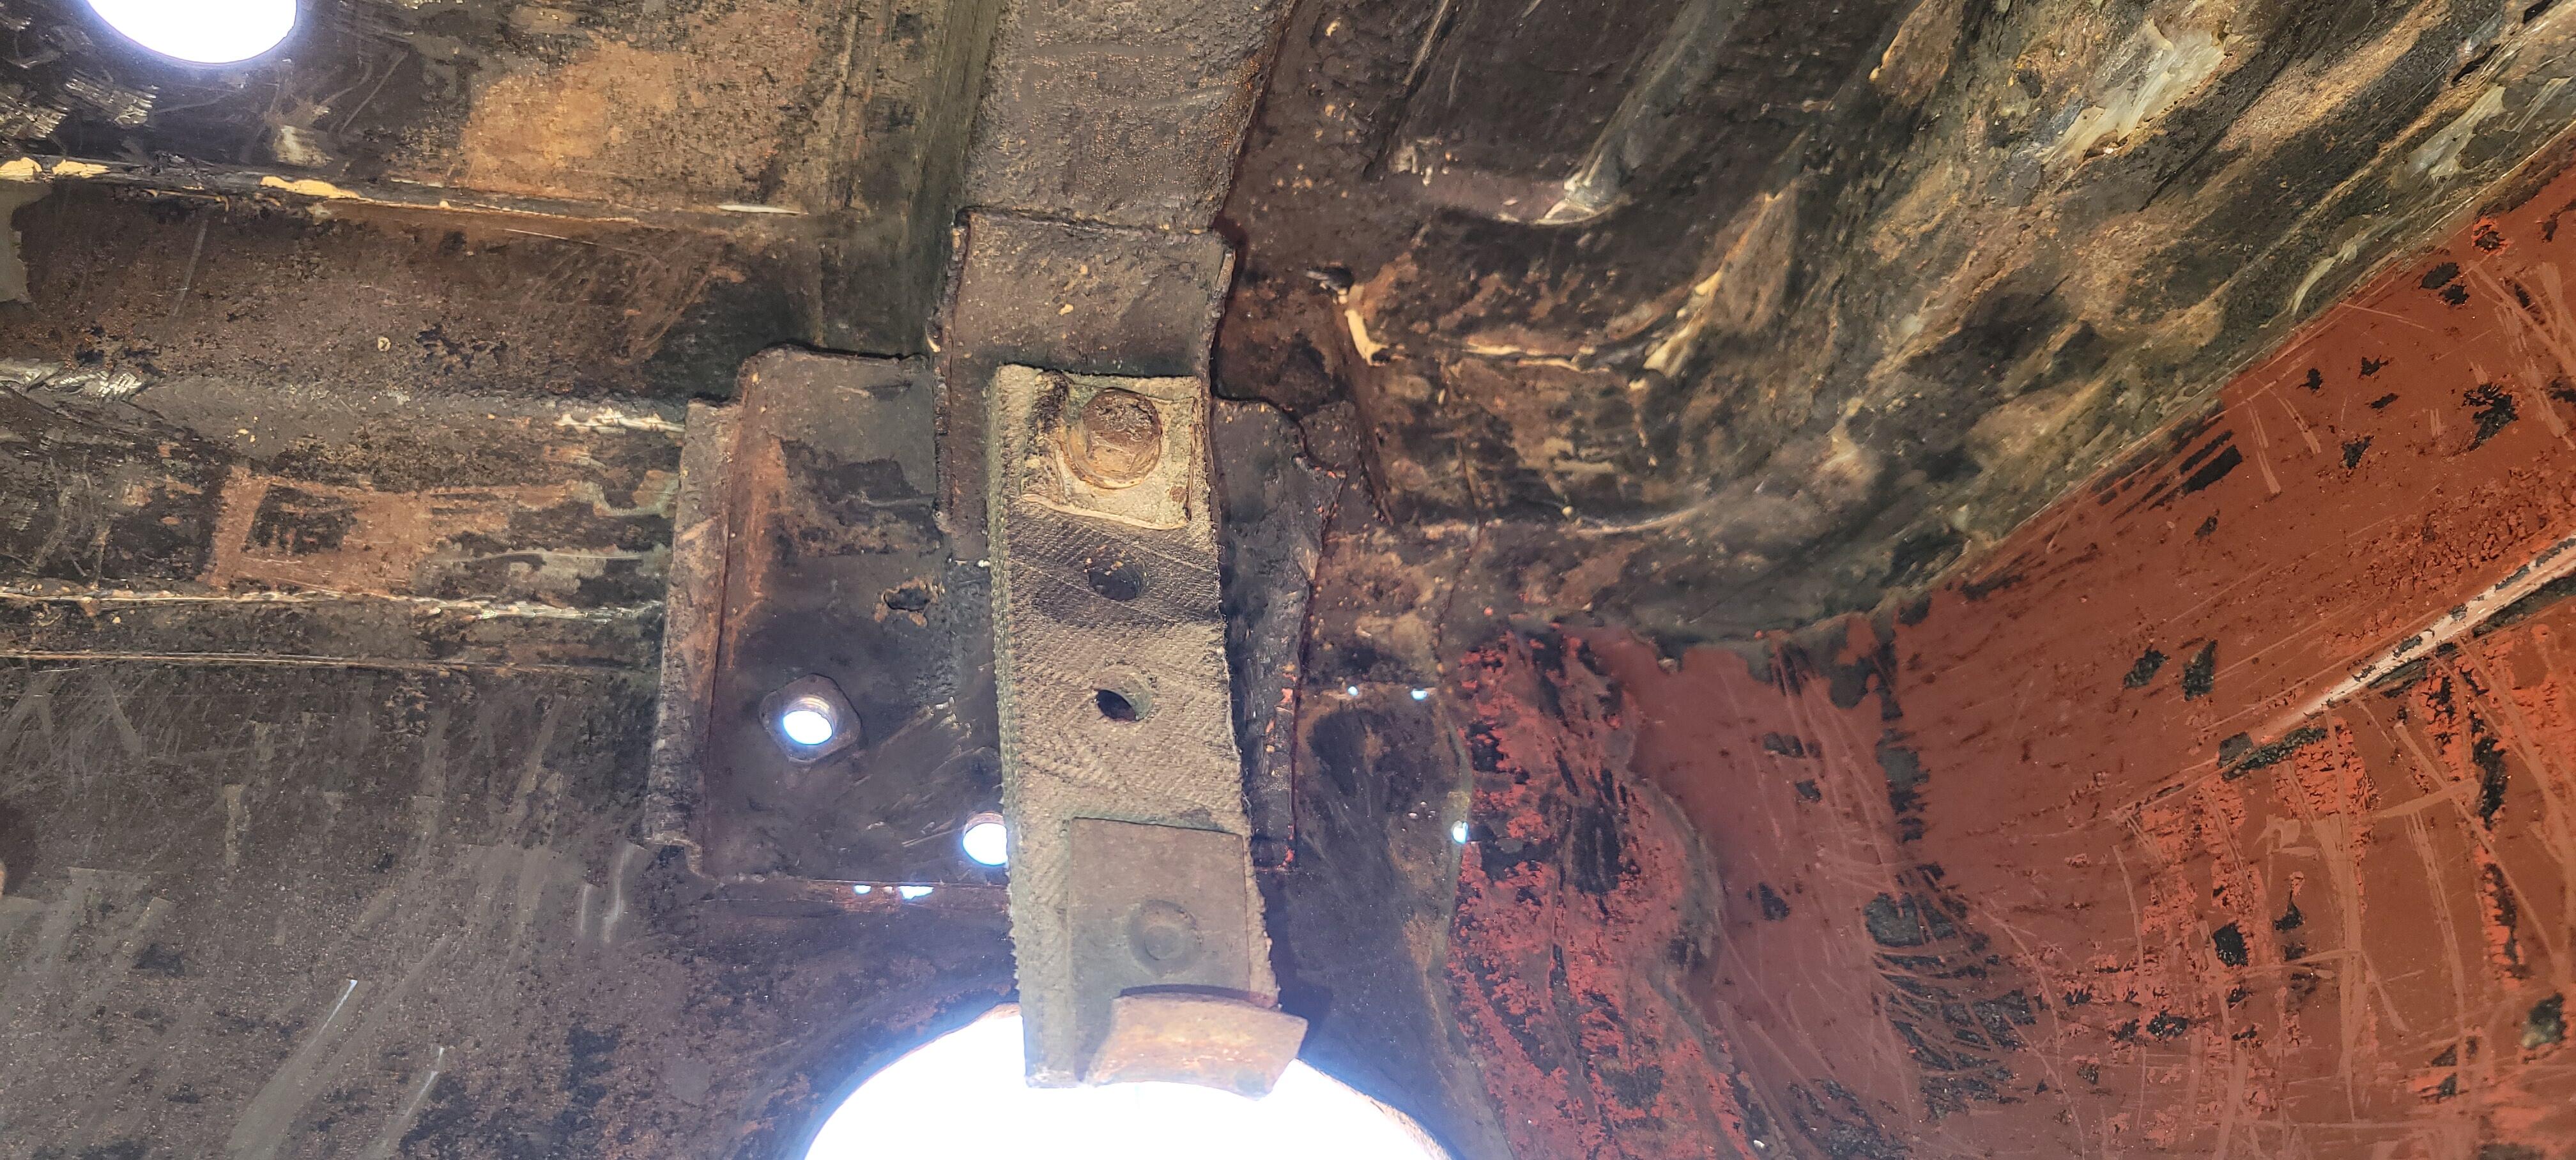
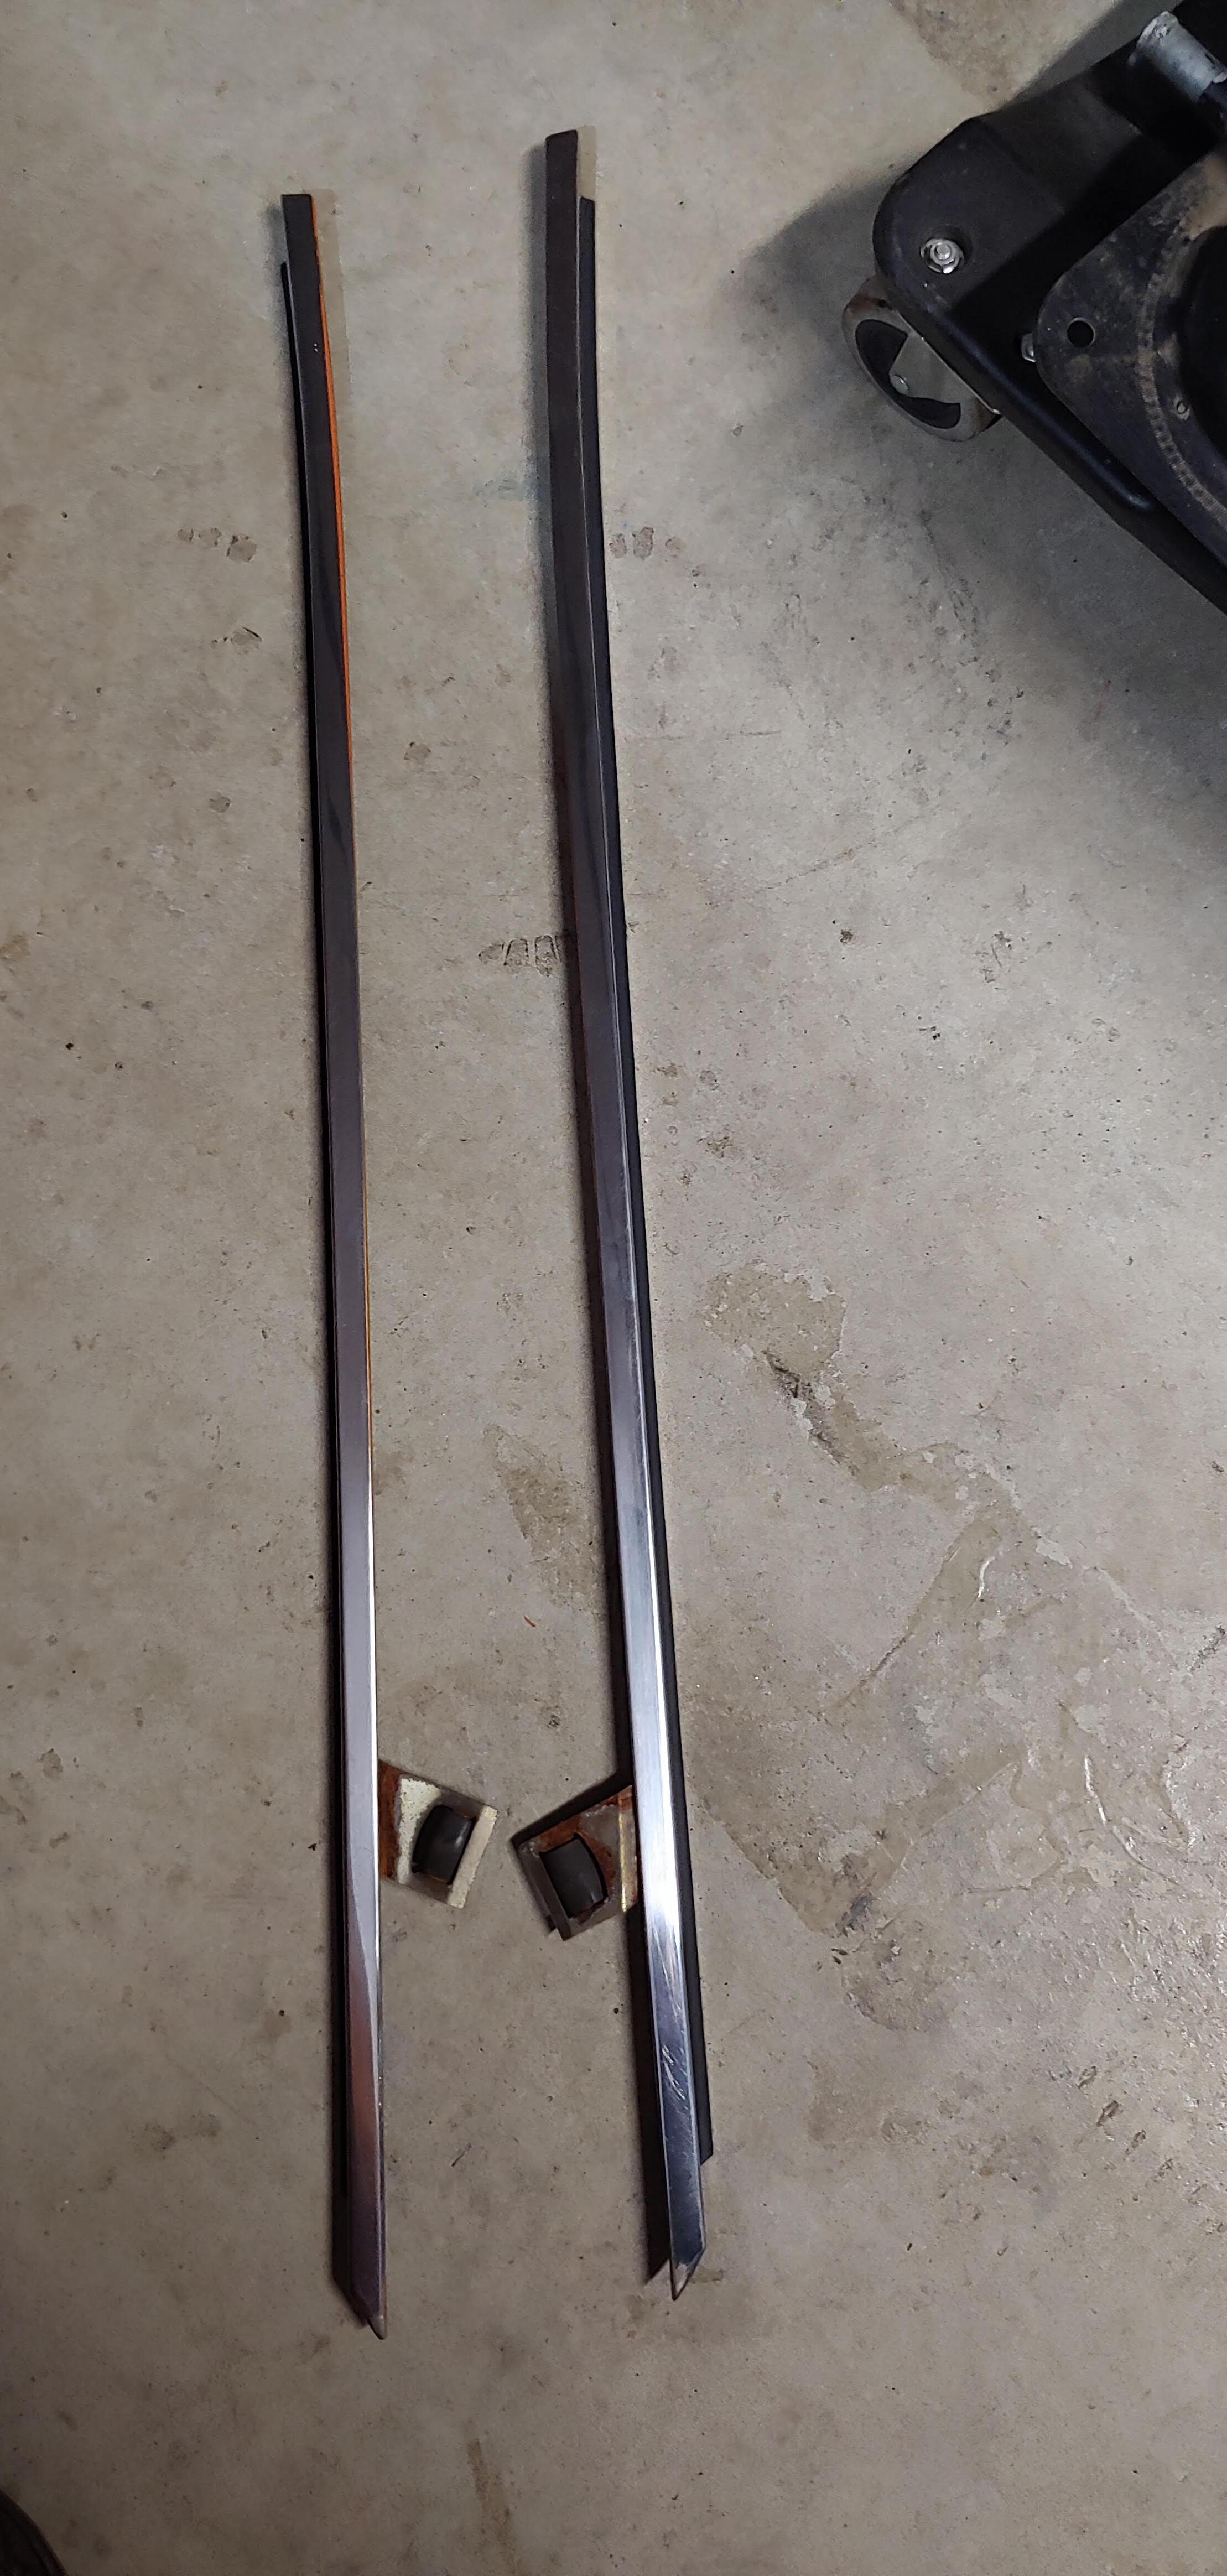
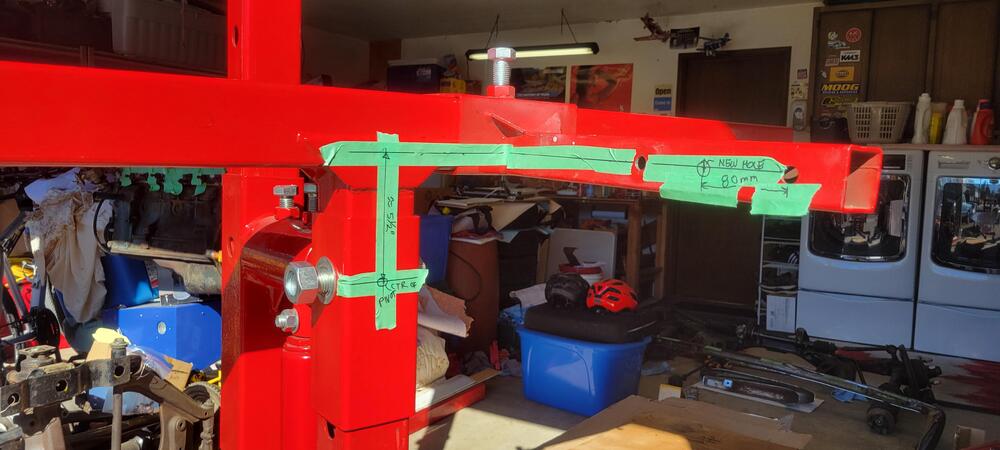
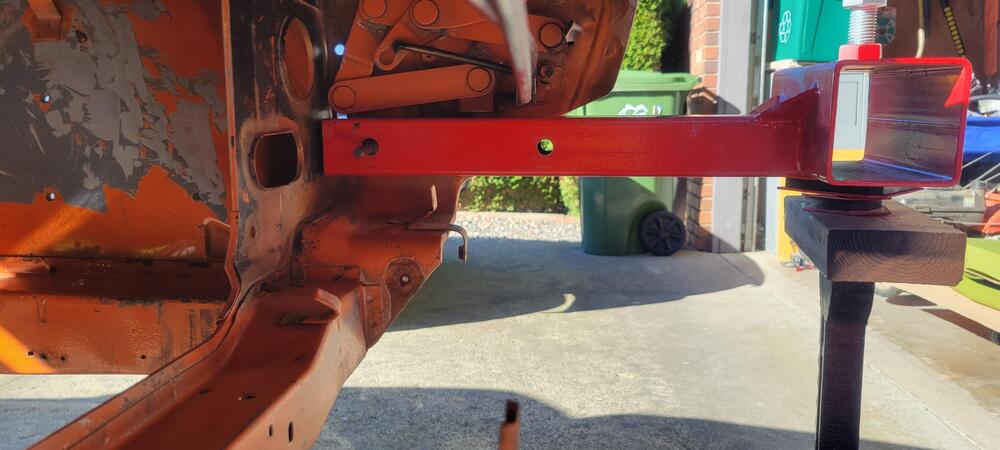
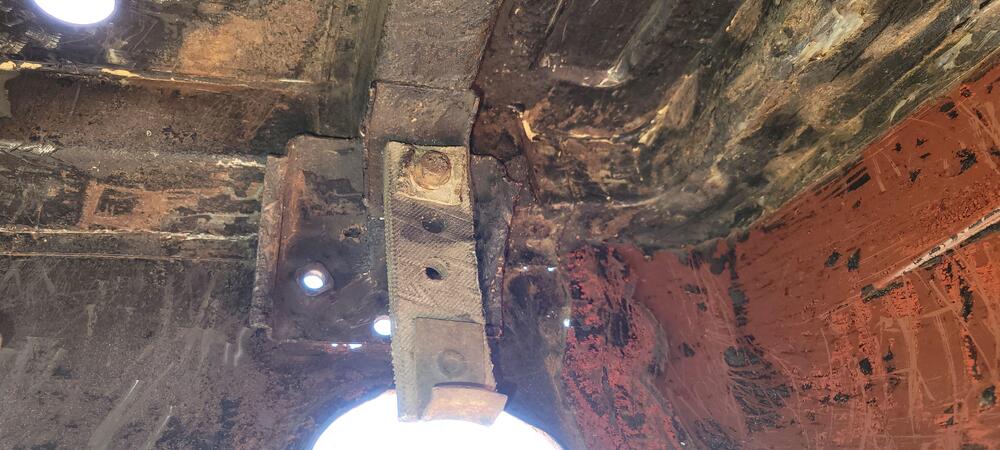
This week my body guy asked if I would like to save a few bucks and mount the shell on his rotisserie myself. I agreed and picked it up. Here are a few pics of the major components positioned, so that I can figure out what additional brackets I will need to complete the installation. First I reviewed this great thread, Then I started by checking the height of the bumper mounting holes in relation to the pivot point. When I set up the rotisserie ends with the lowest possible pivot offset I measured about 5-1/2 inches, which is right in the middle of the range suggested by @grannyknot in the thread above. The front stand looks very easy to do. I will just need to ask for permission to drill a couple of holes in the arms that will be attached to the front bumper mounting holes. It would look like this installed, The rear attachment might be an issue if I only use the bumper mounting holes as the outer rear valence is compromised but the actual structural bracket behind the sheet metal that ties in unibody frame elements is solid. Here is what the bad side looks like, outside and inside, What do you think, should I add some additional support besides mounting to the rear bumper holes?


-
When i removed mine the only issued I had was that the window glass stabilizers were stuck to the molding making it difficult to remove them. I had to roll the window up and down a bit to get the roller out as a unit with the molding. I did have my door panels off allowing more "wiggle room" as the glass was still in. In Wick Humble's book for re assembly he recommends installing the stabilizer rollers first to the lip on the top of the door and then installing the trim molding last.

-
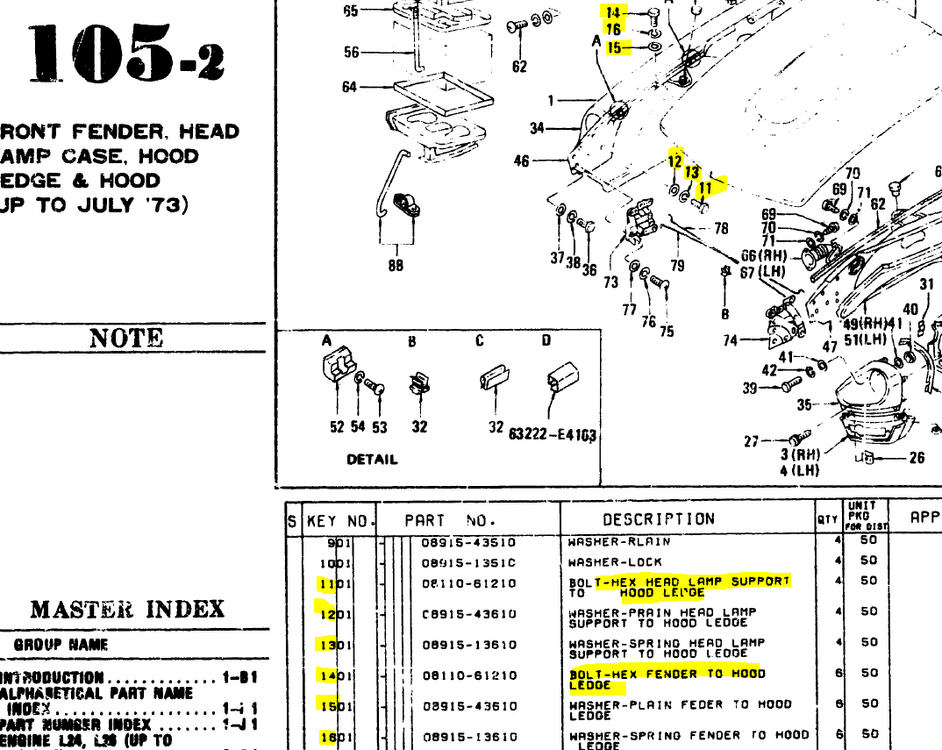
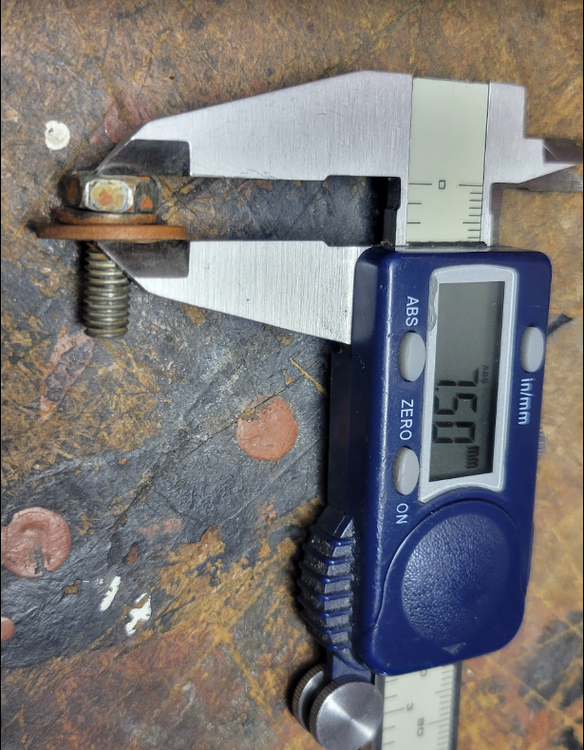
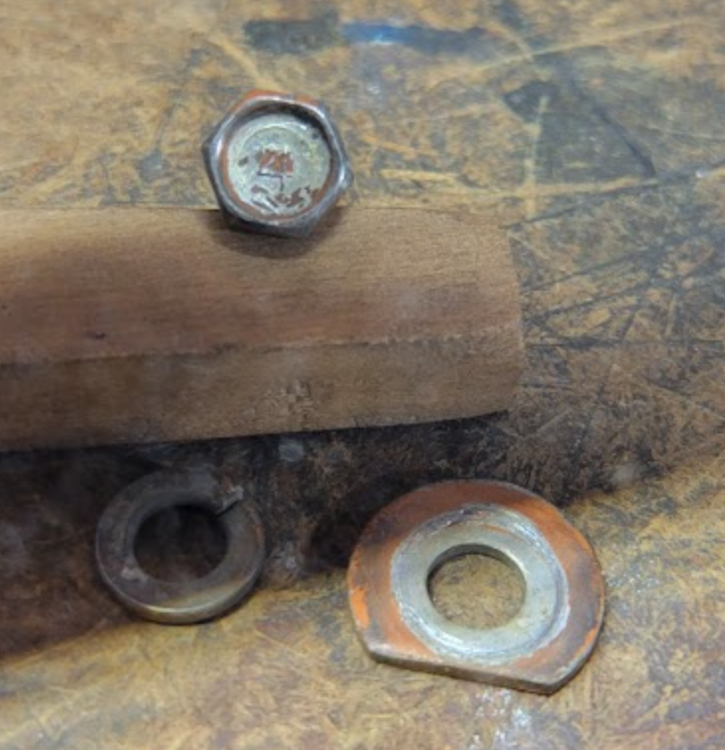
Hey Mark, had a look at some of the OE fender fastening screws and washers I have and the head thickness is standard for a JIS hex head capscrew. They are M6 and the head is 4mm thick. I did a check and current DIN M6 capscrews also have a head thickness of 4mm. The total height with a lock and flat fender washer is 7.5mm. Here us snippet from the parts book showing the original fasteners: For interest, I decoded the Nissan part number (08110-61210) for these screws to see if the specs match the screws from my 7/70. 08110-61210 BOLT 08 = standardize hardware prefix 11 = Hexagon bolt, low carbon steel 06 = 6mm diameter (M6) 12 = 12mm length 1 = Zinc cadmium coated 0 = filler to complete ten digits Decoding source: http://datsun1200.com/modules/mediawiki/index.php?title=NES_Part_Numbers#Strength Mine were the same as above except the length under the head is 16mm. They do have the number "4" marking on the head indicating low carbon.
-
-
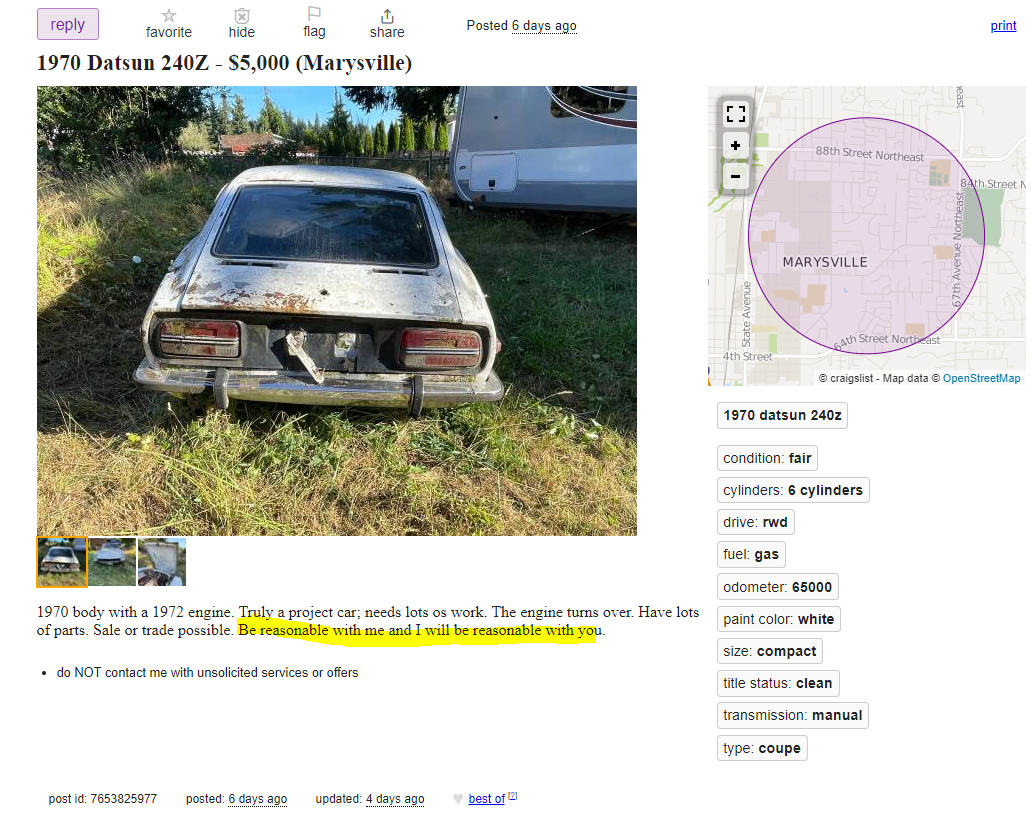
Funny you mentioned Craigslist, I was literally just on there just before reading your post and found this, https://seattle.craigslist.org/sno/cto/d/marysville-1970-datsun-240z/7653825977.html

-
Here is a link to a post from my resto thread showing removal of the interior vinyl. On mine these items came out with the vinyl still attached to the foam, I think the foam should be attached to the vinyl first but I could be wrong. The vinyl over the windshield definitely goes in before the A-pillar/over the door vinyl. Basically the reverse of what I describe in the link. And here is a pic that might help with the corner joint. Also if you have Wick Humble's book, check that as well. A lot of good info starting on page 127.
-
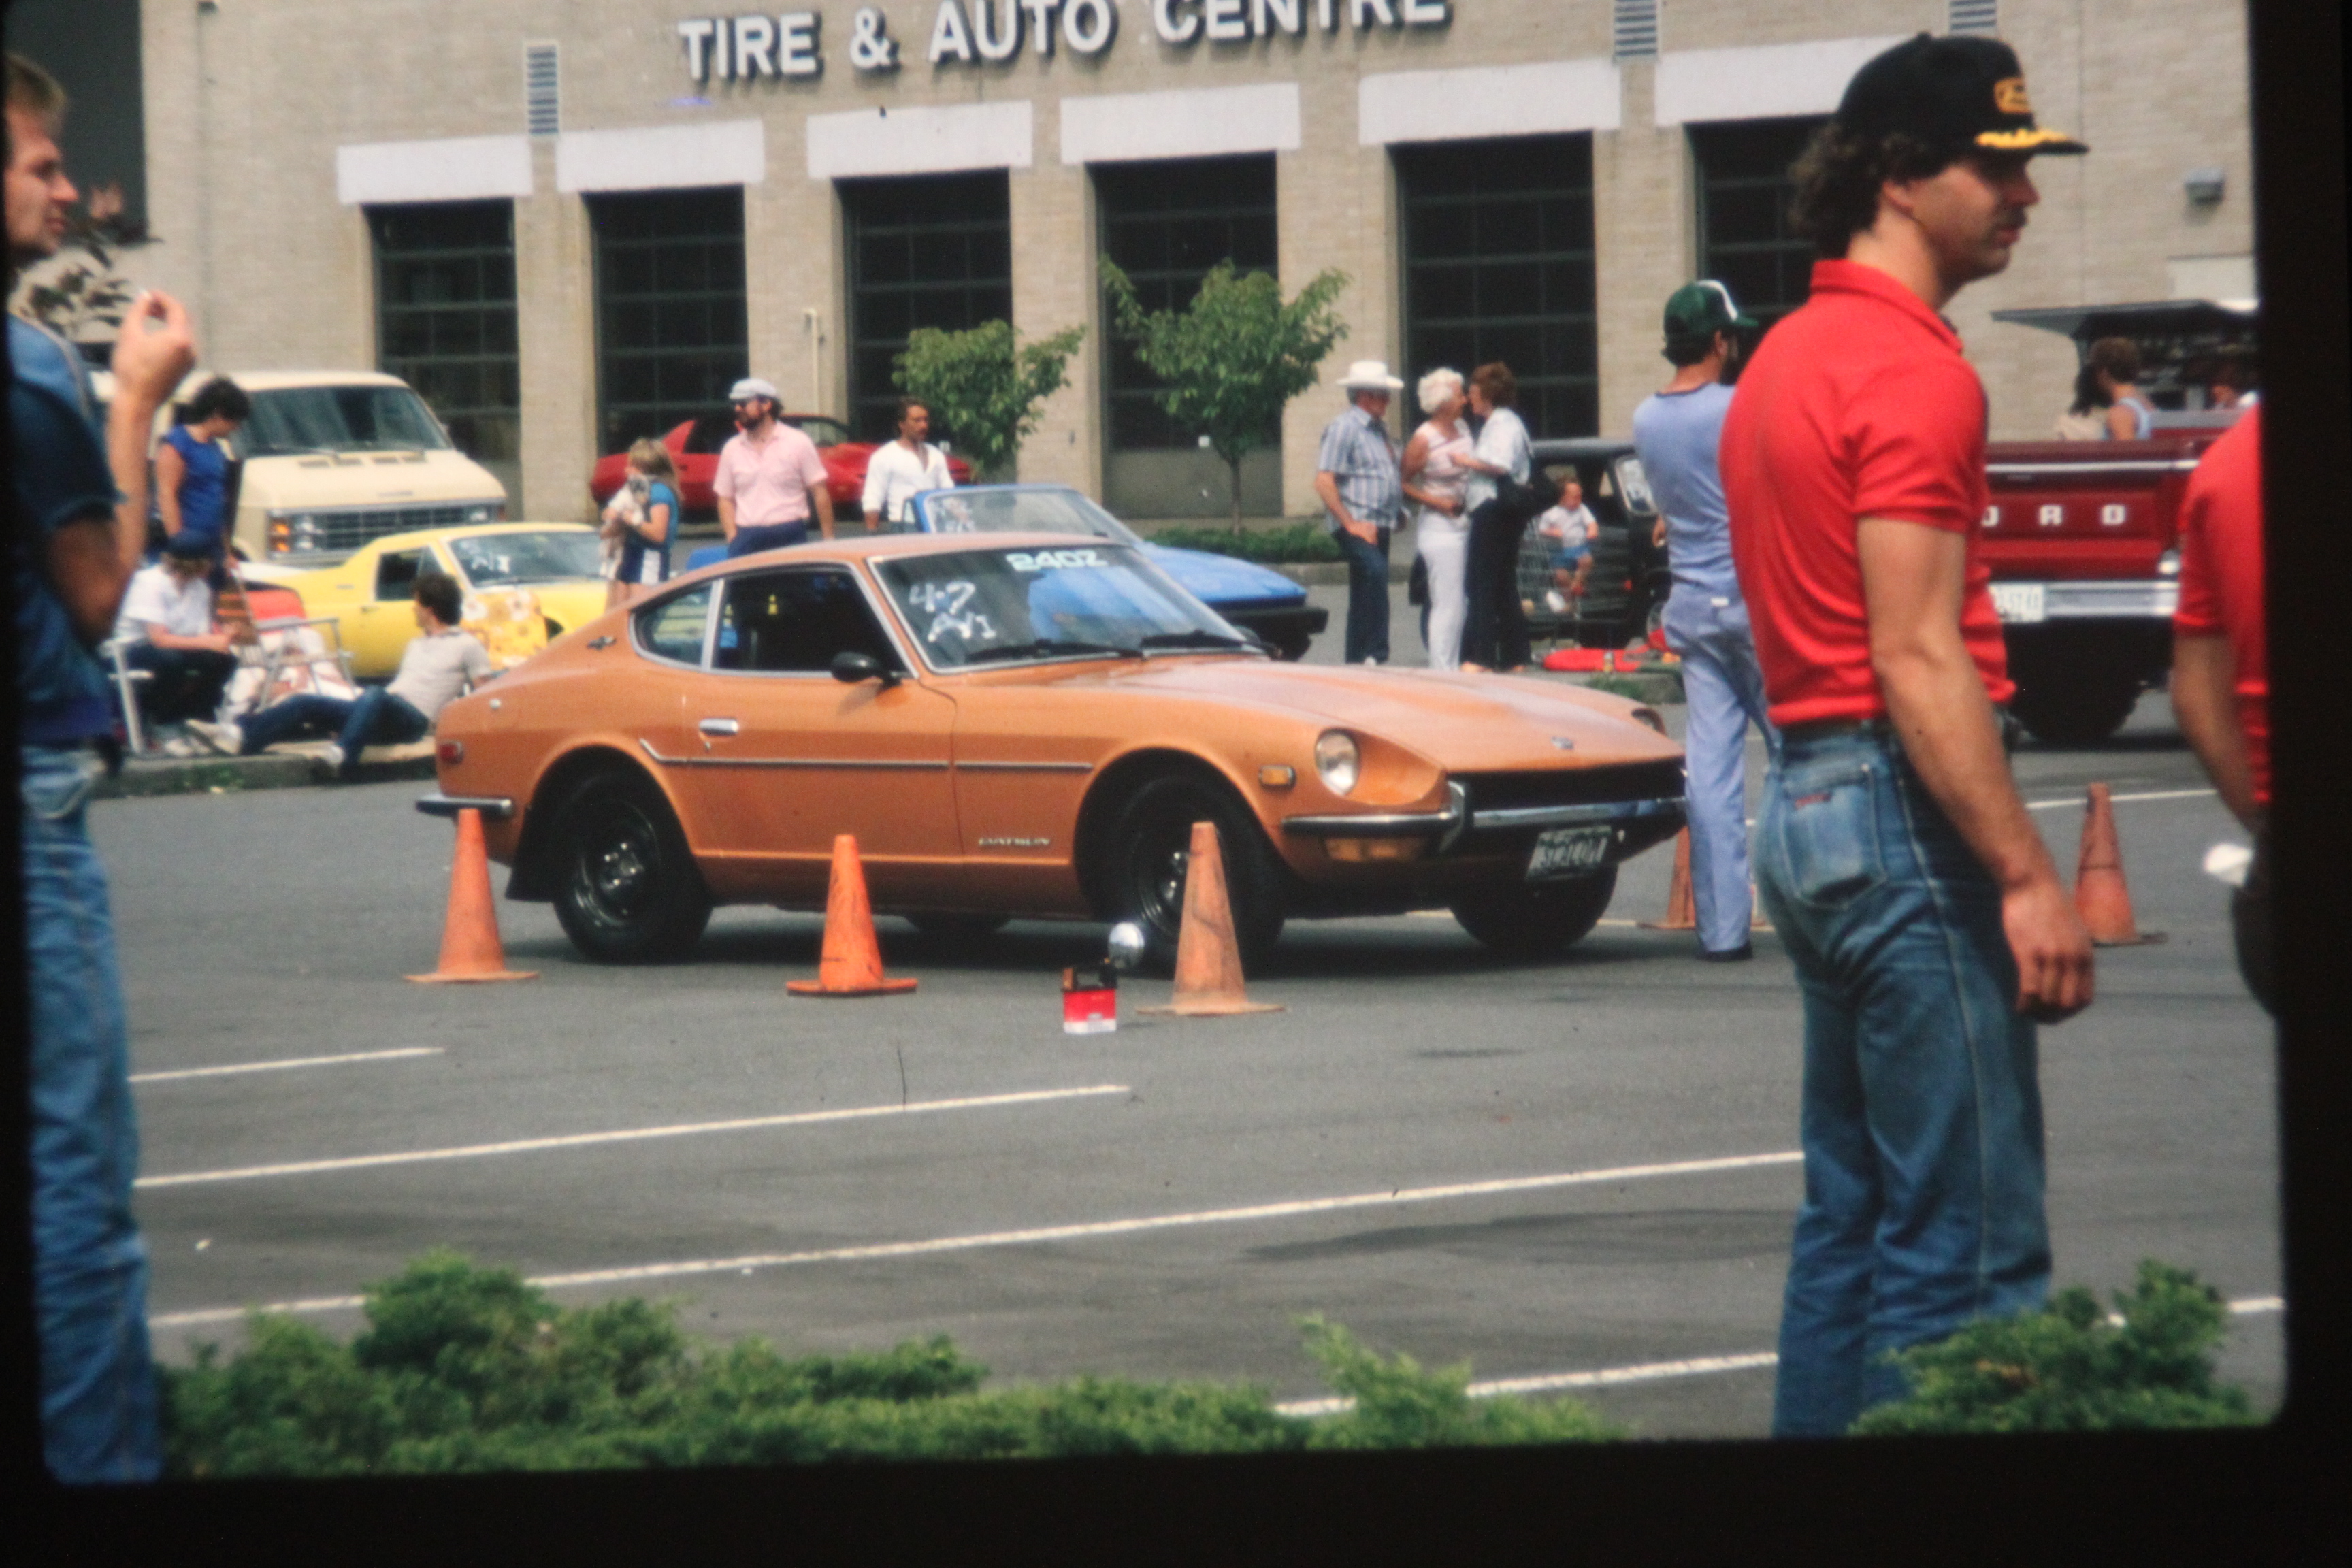
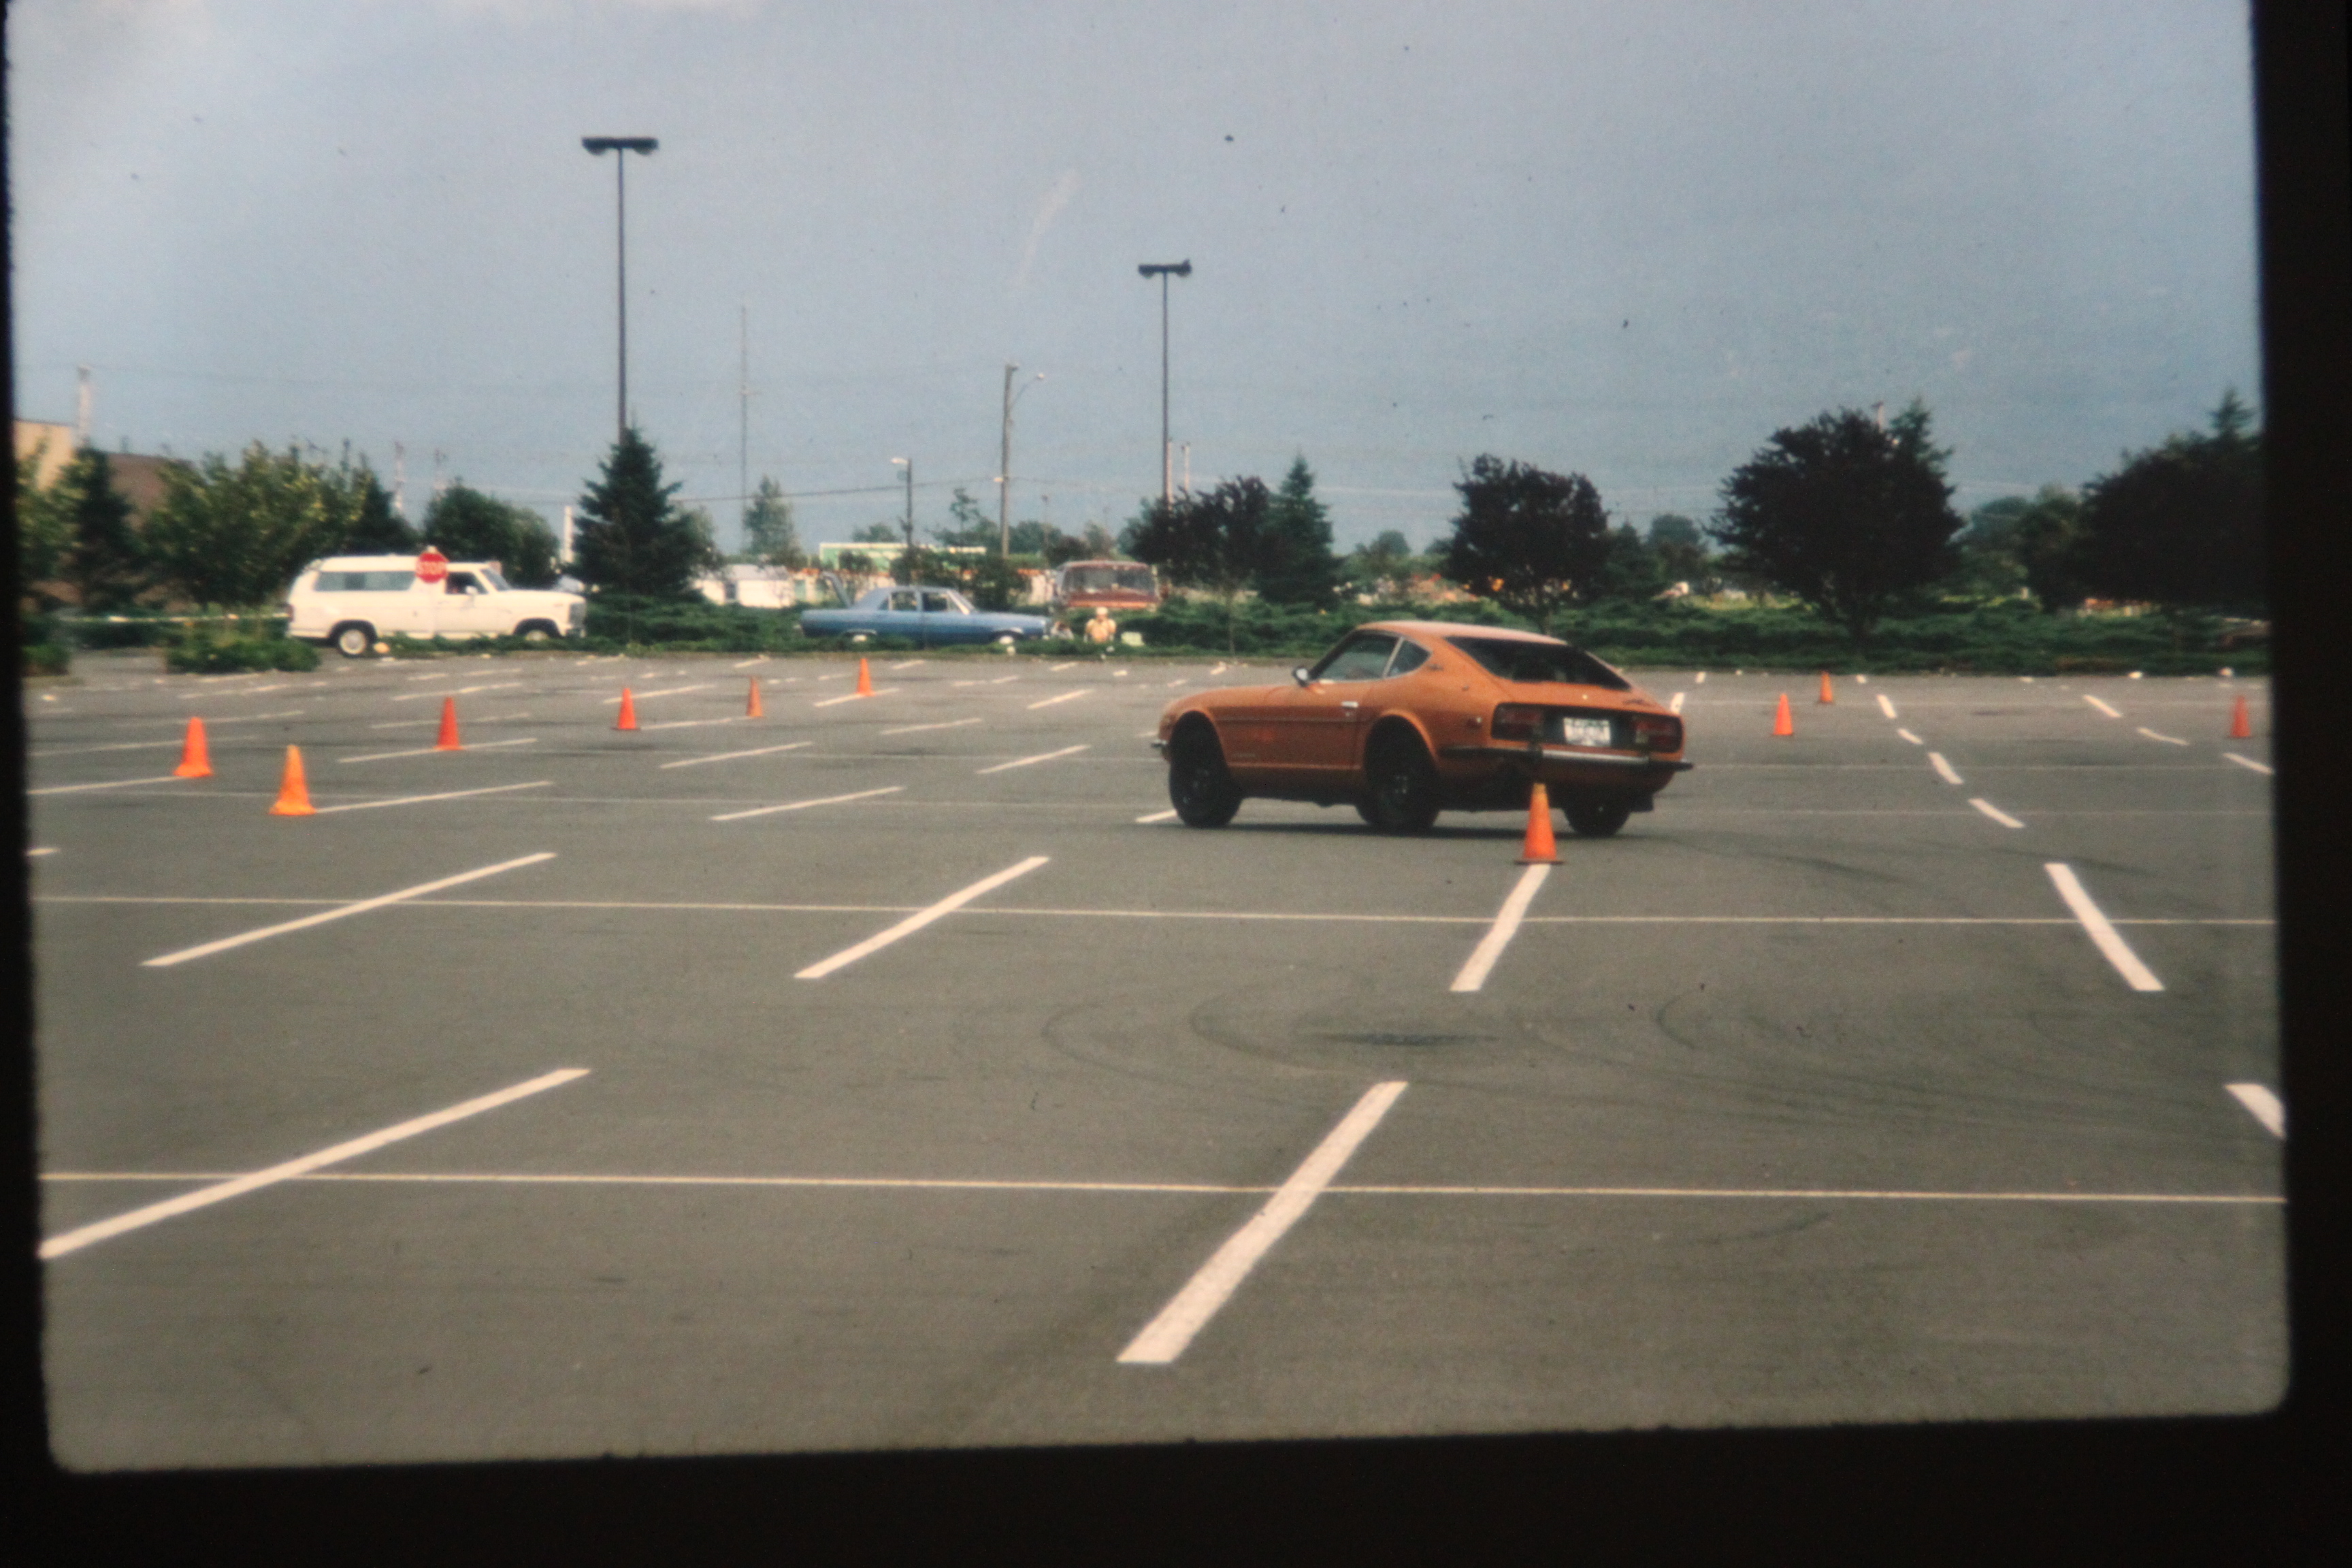
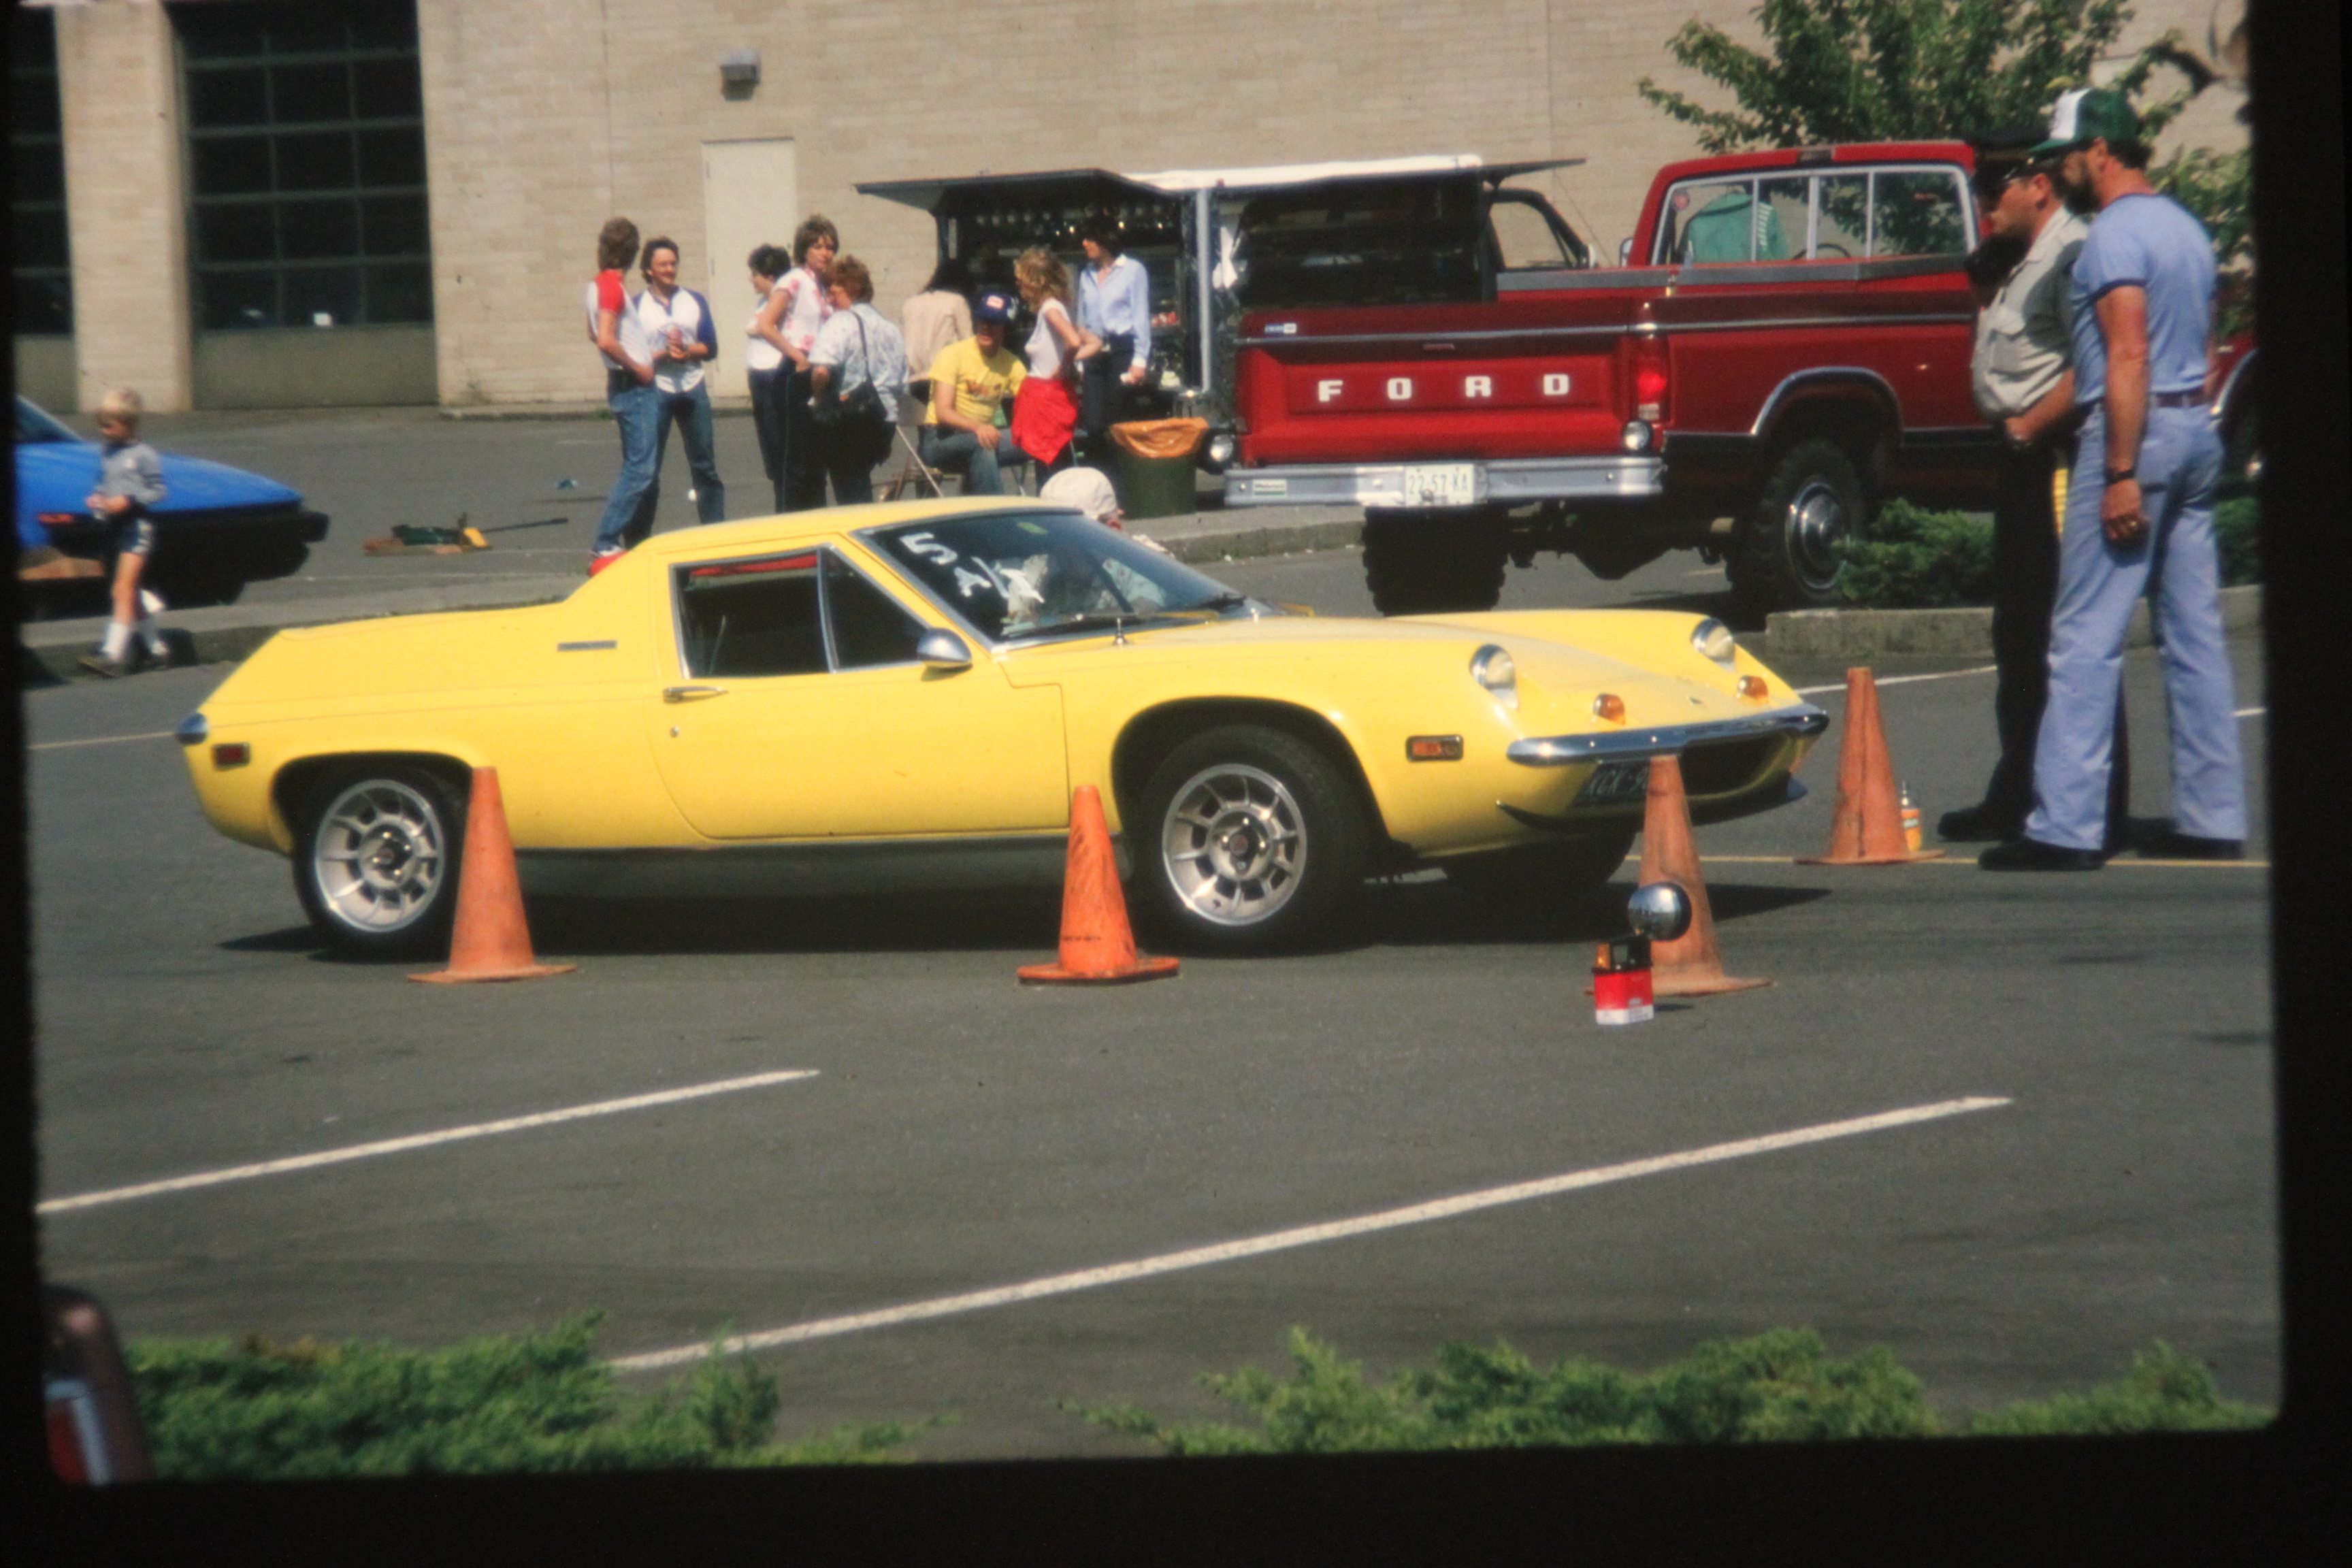
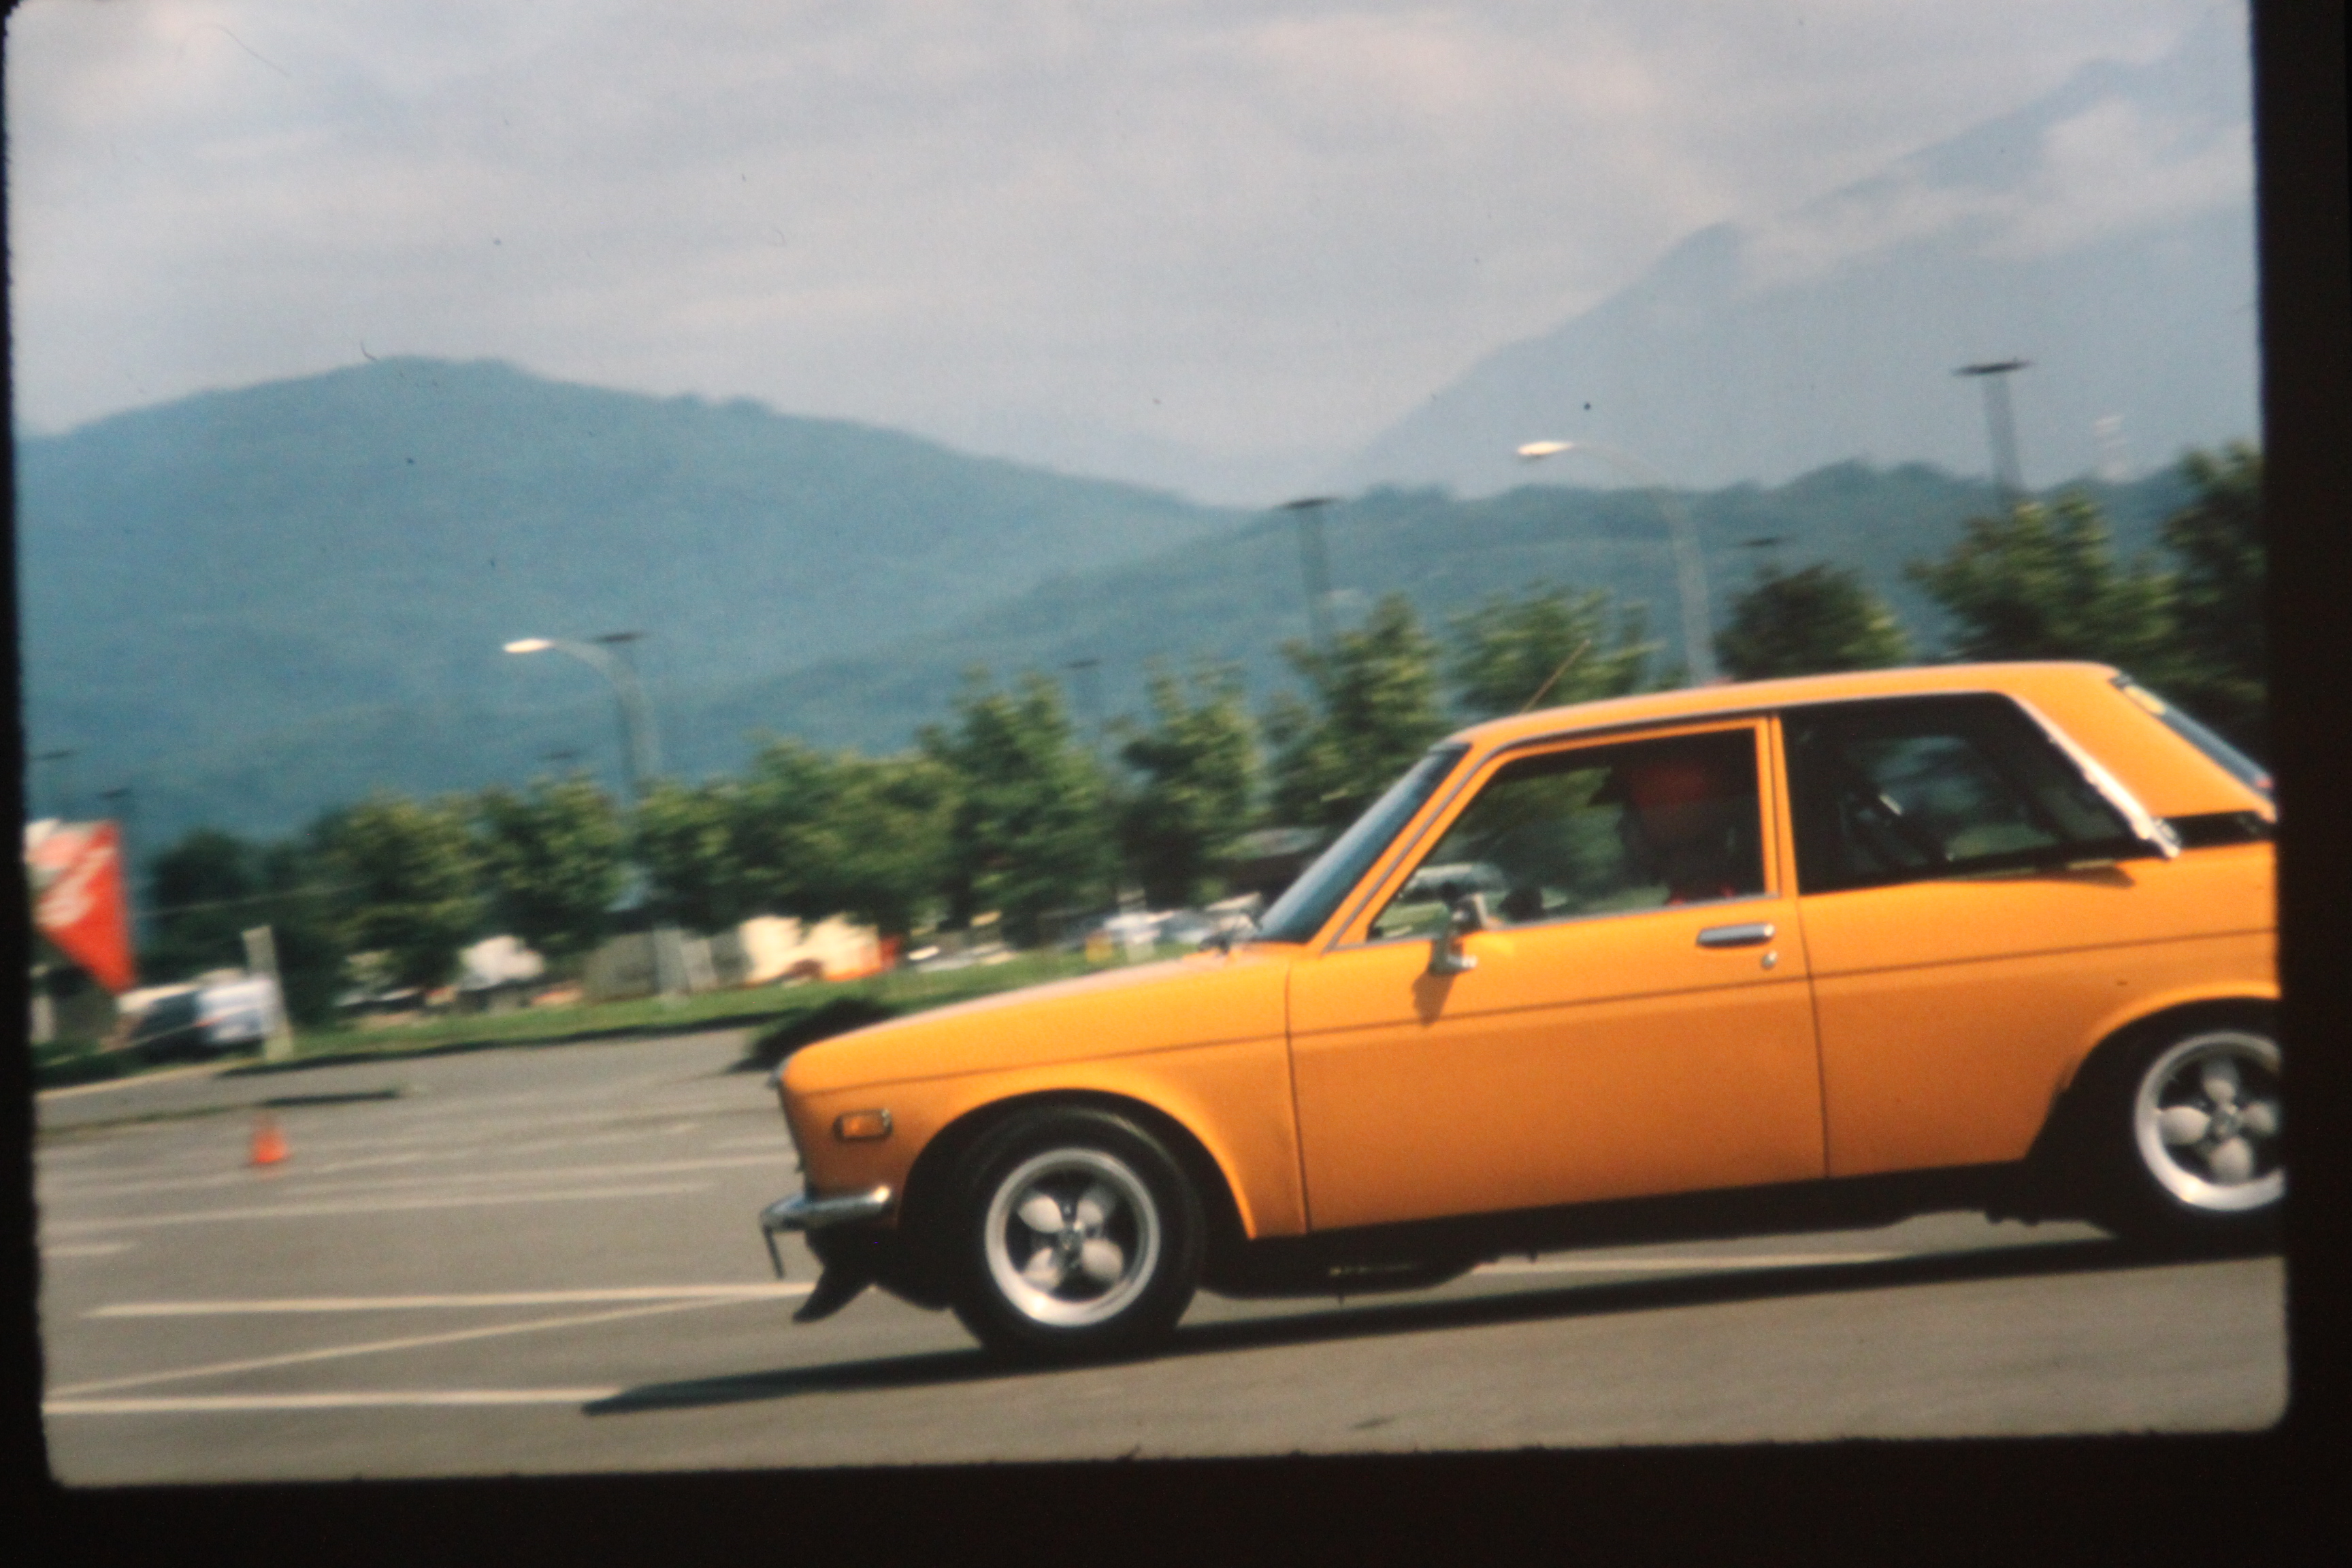
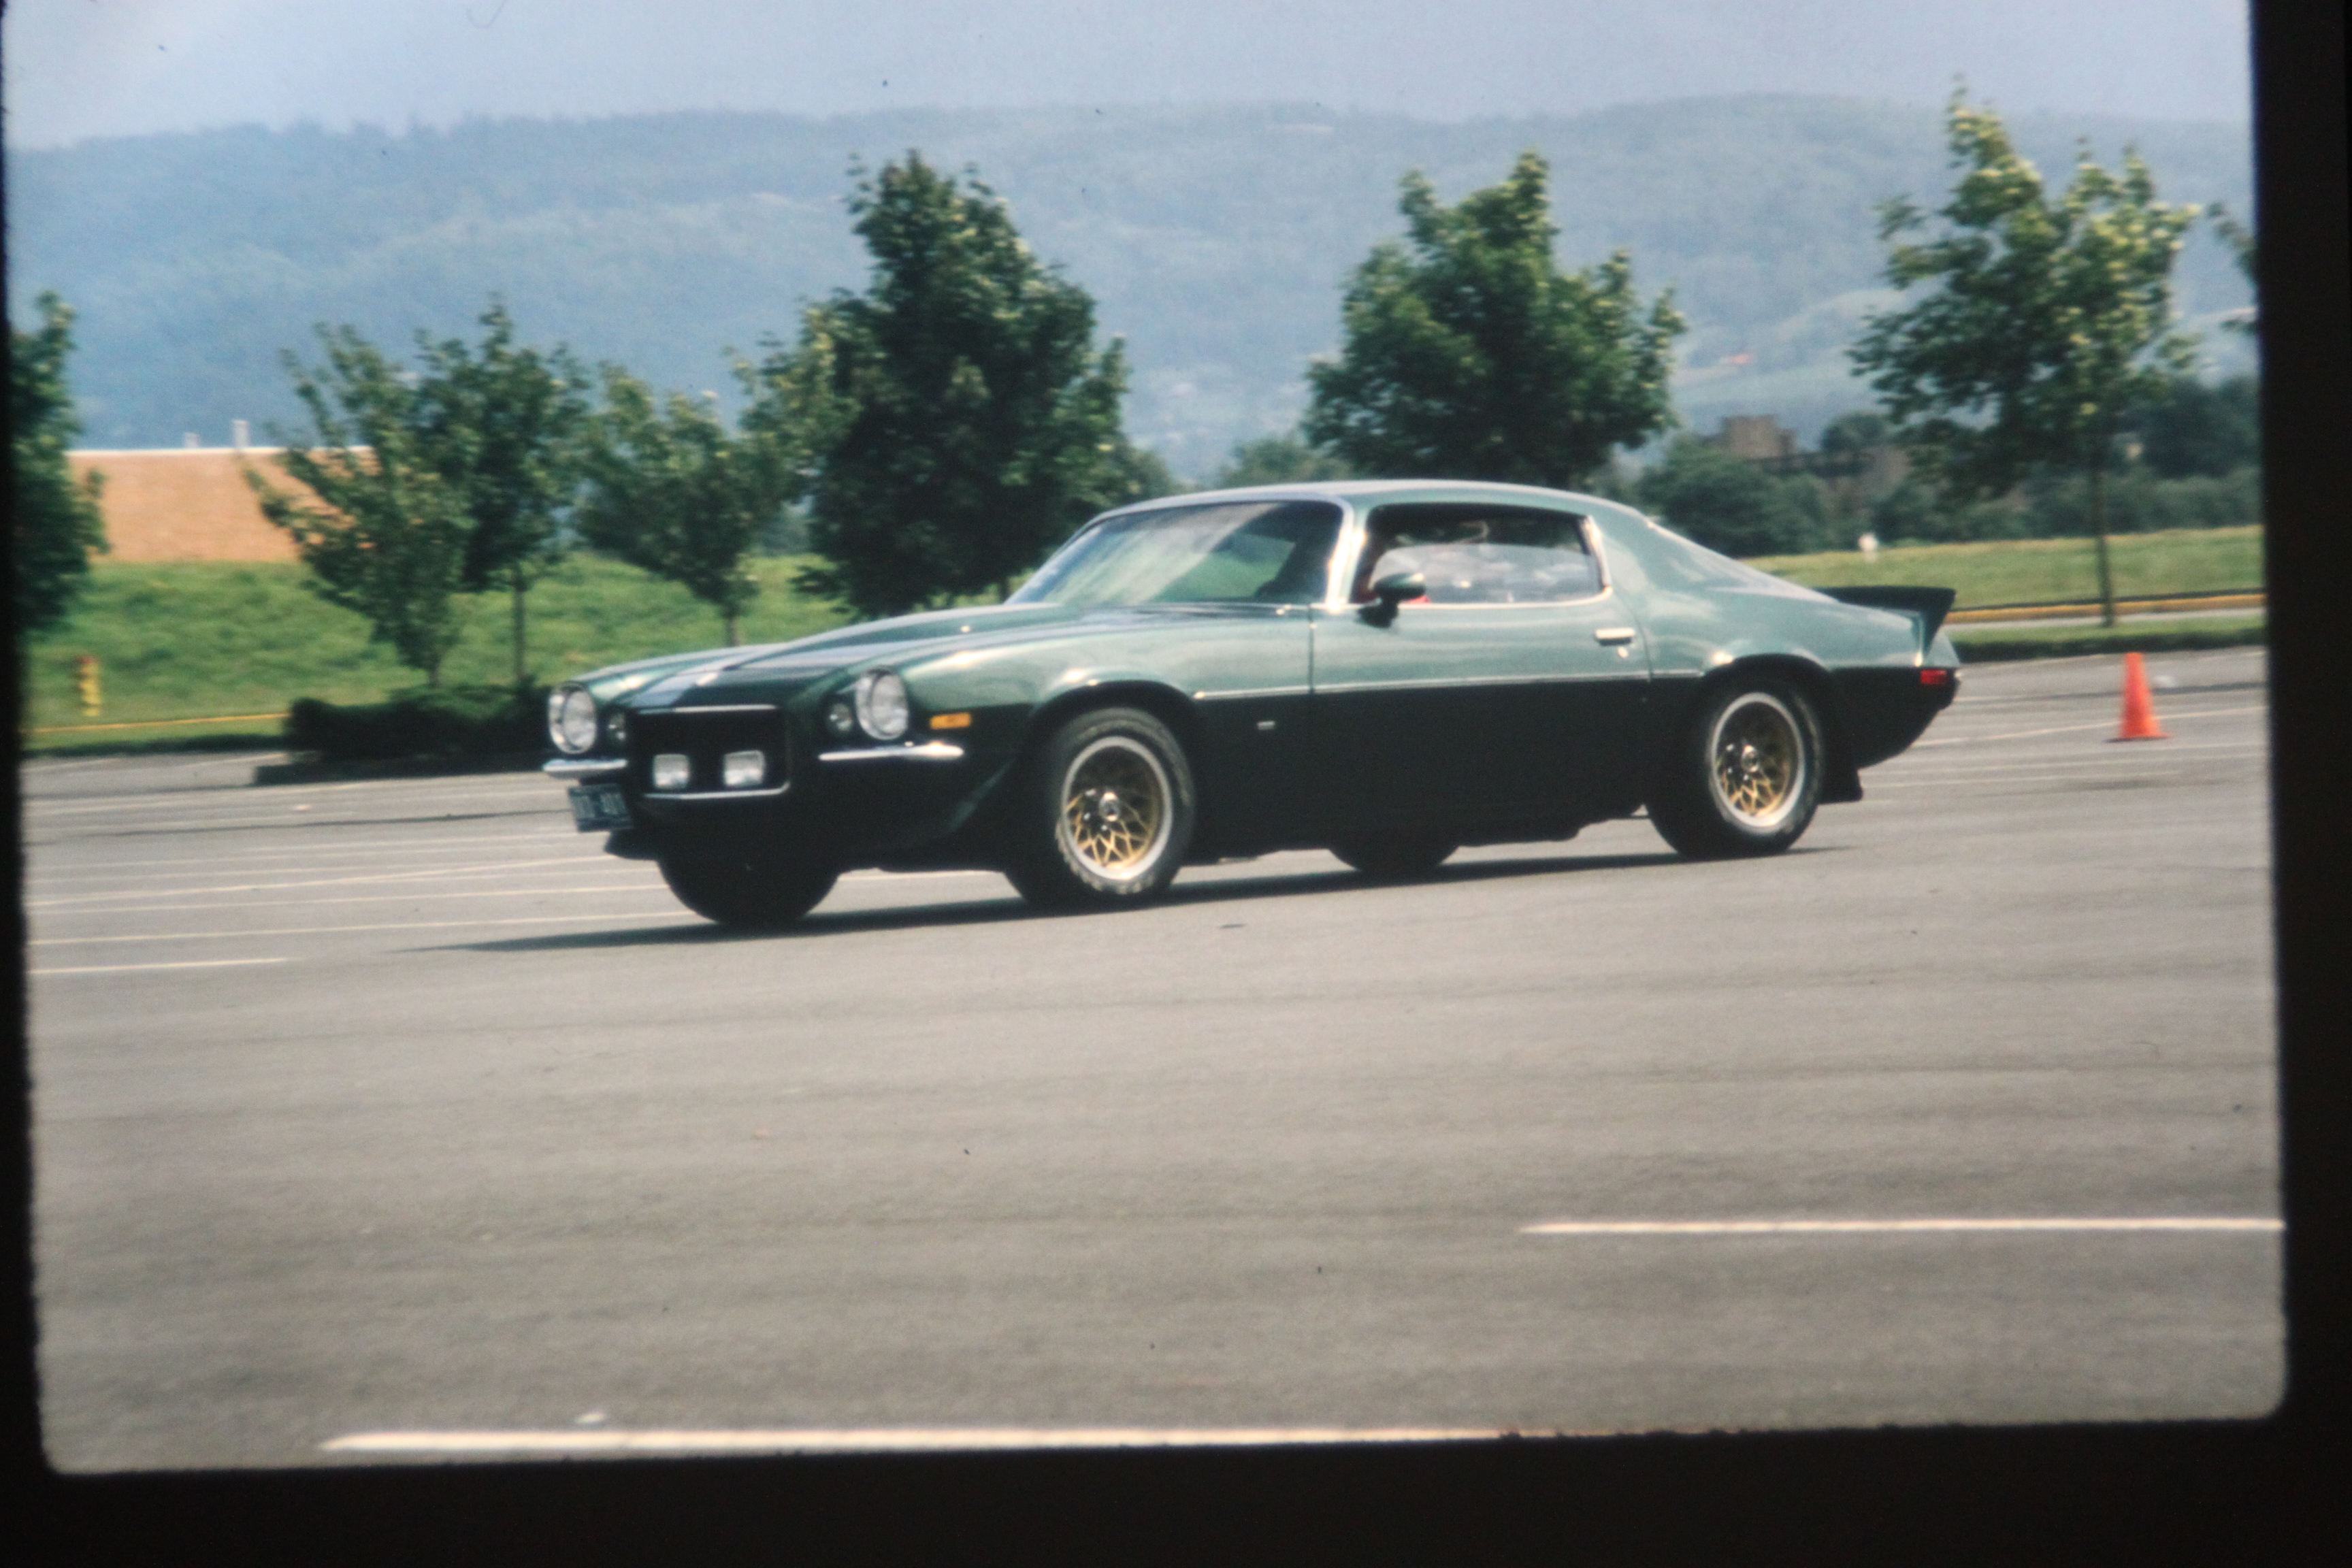
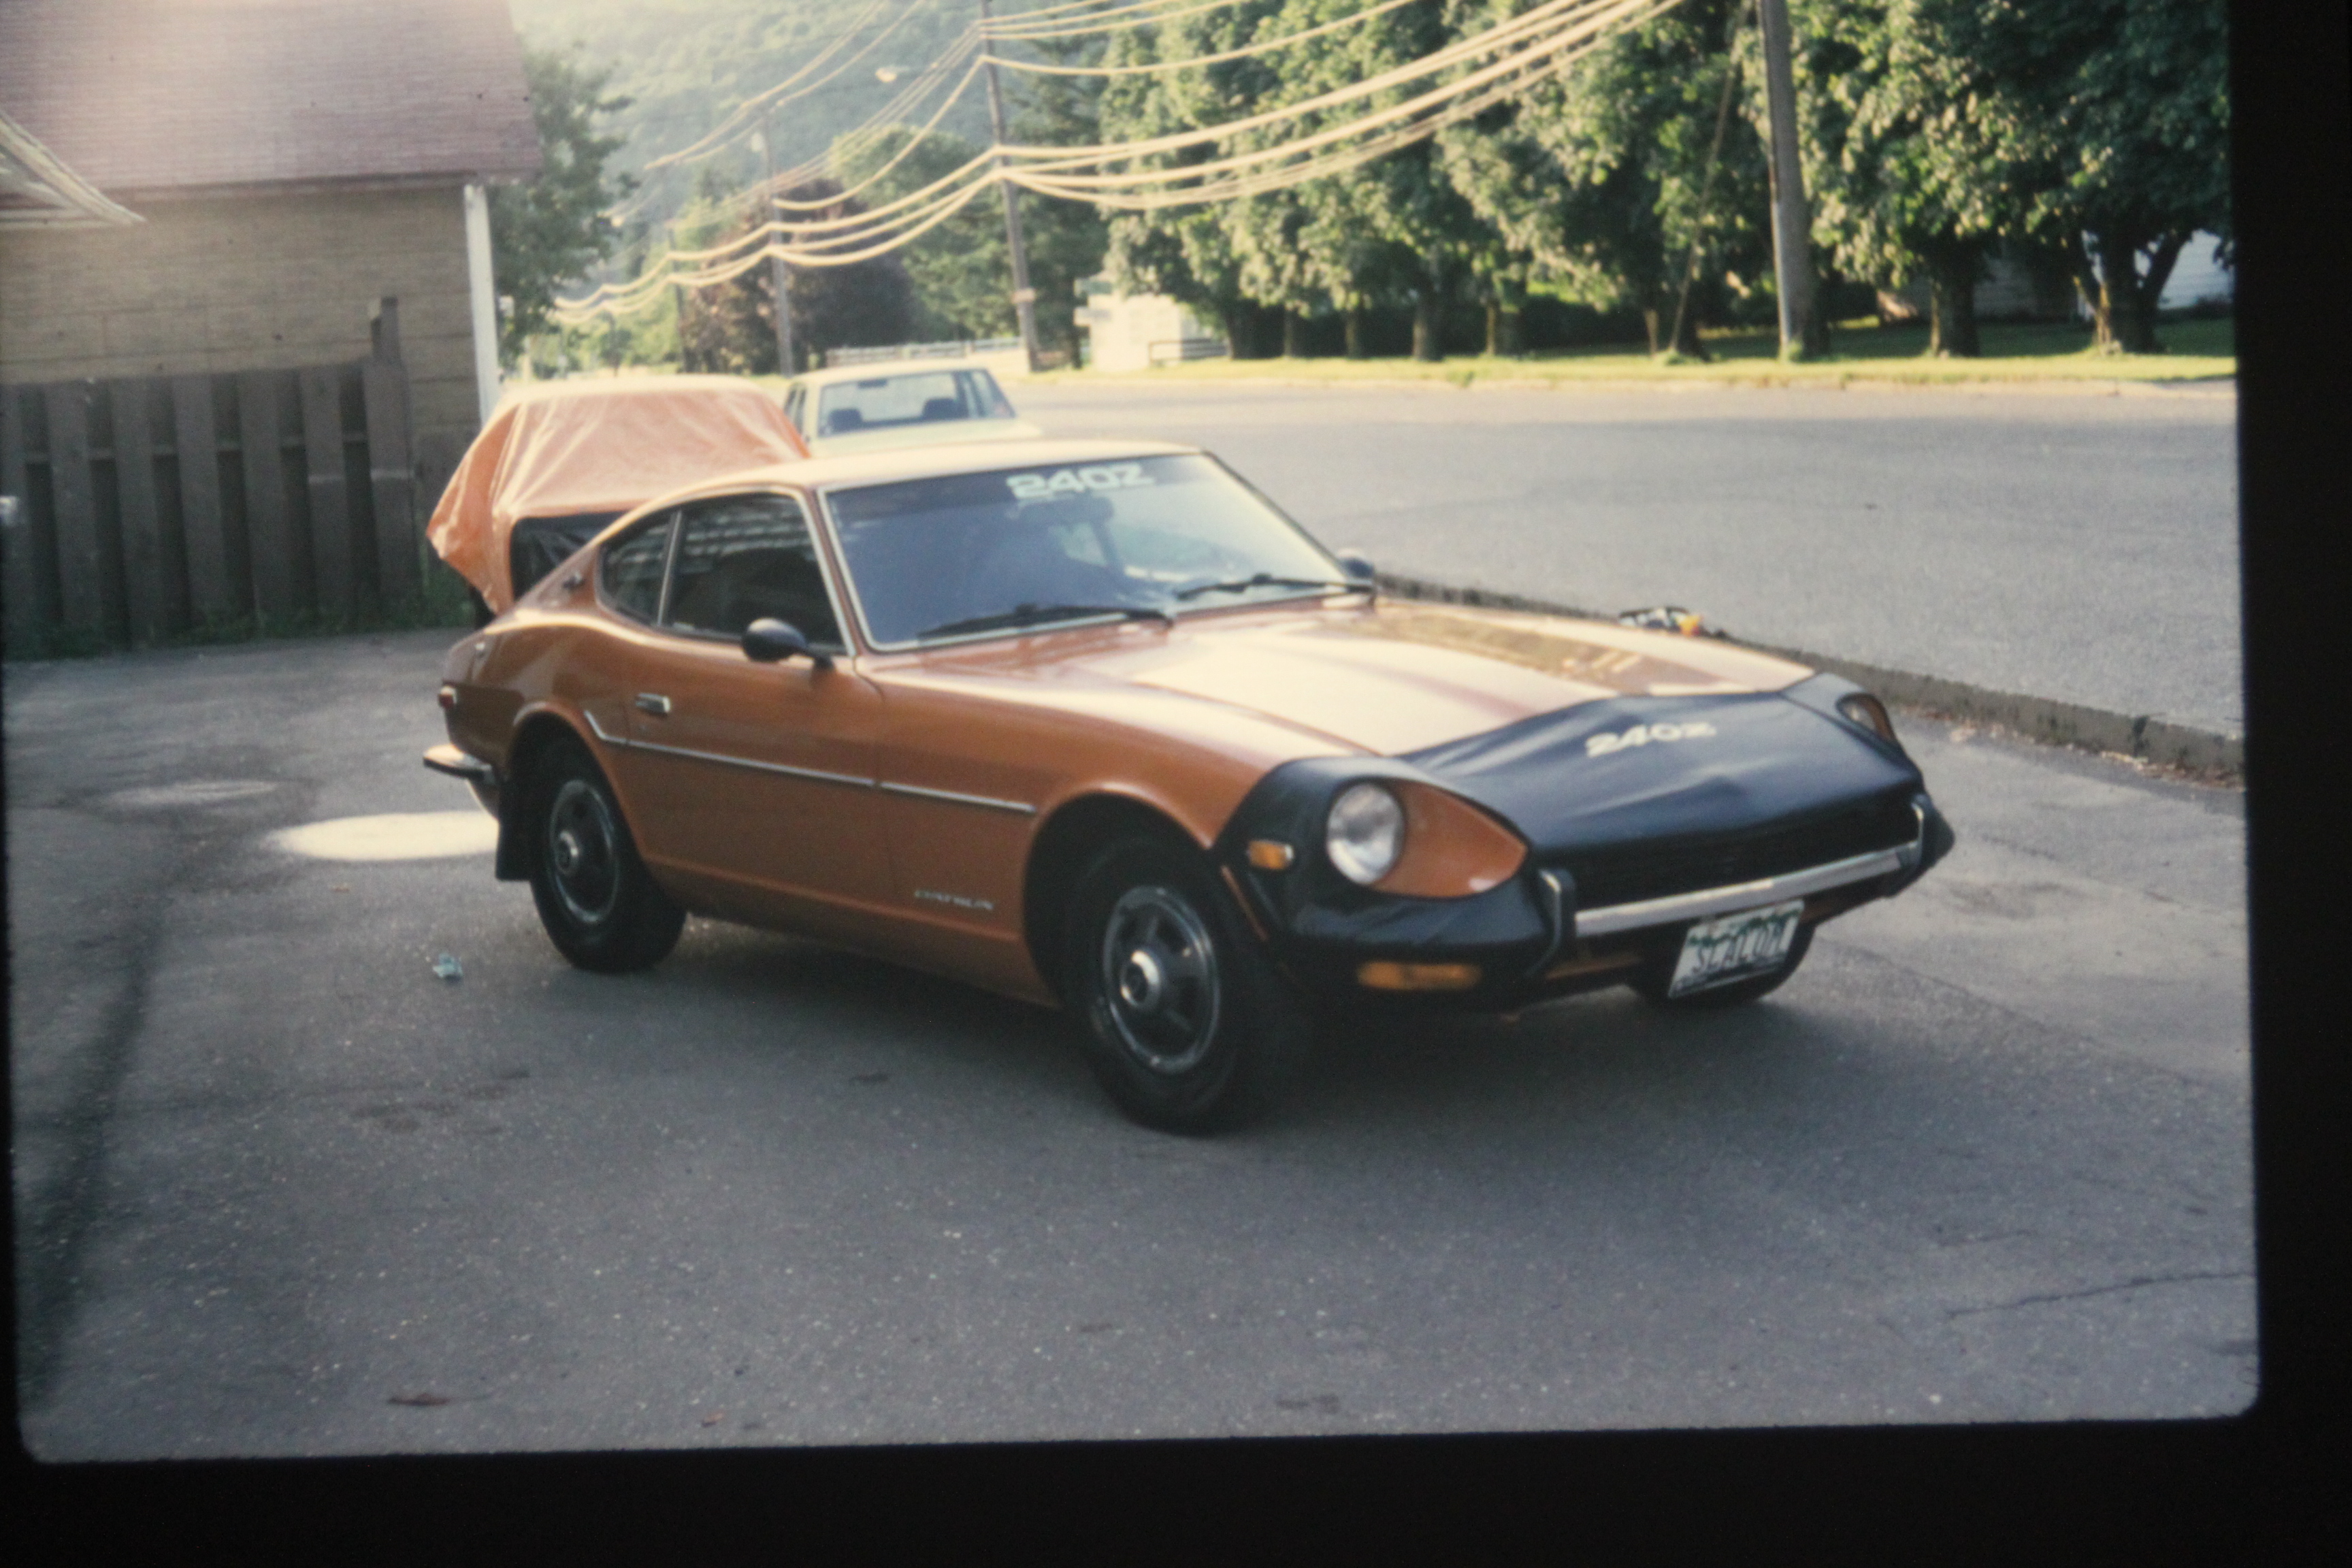
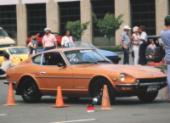
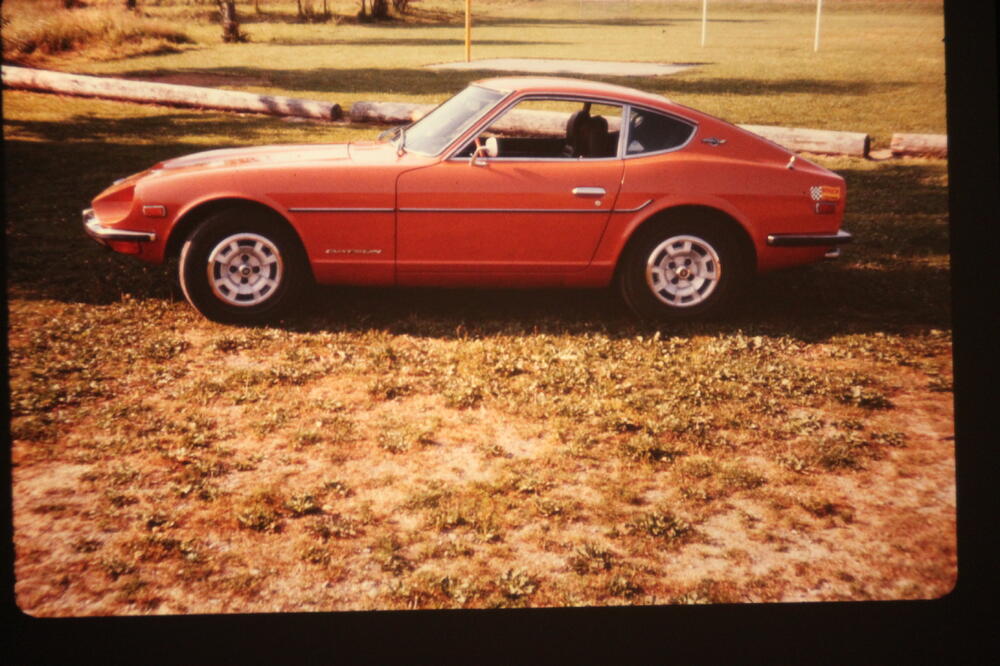
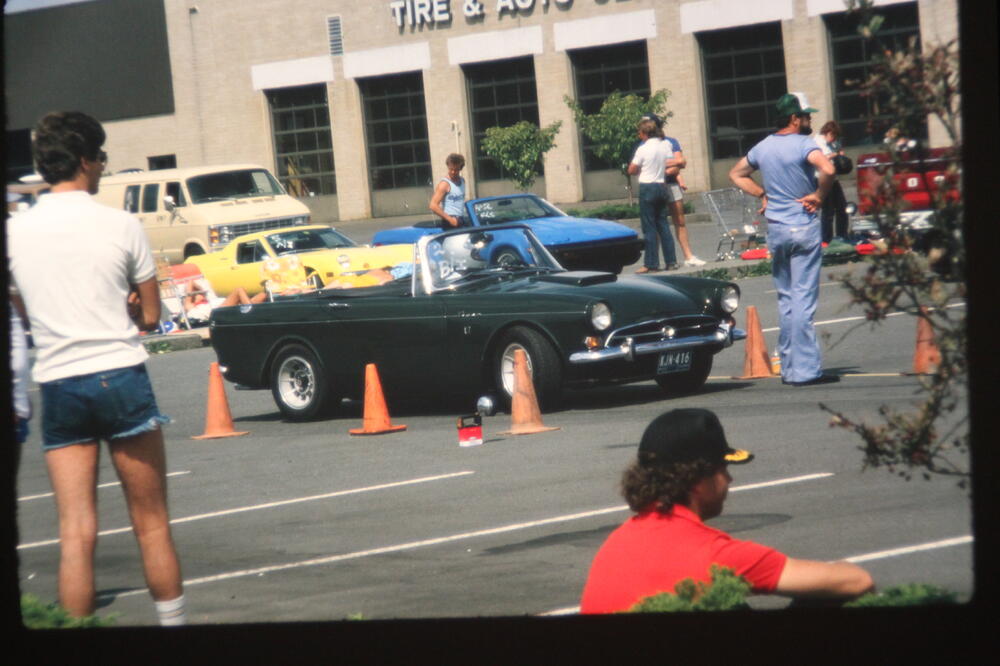
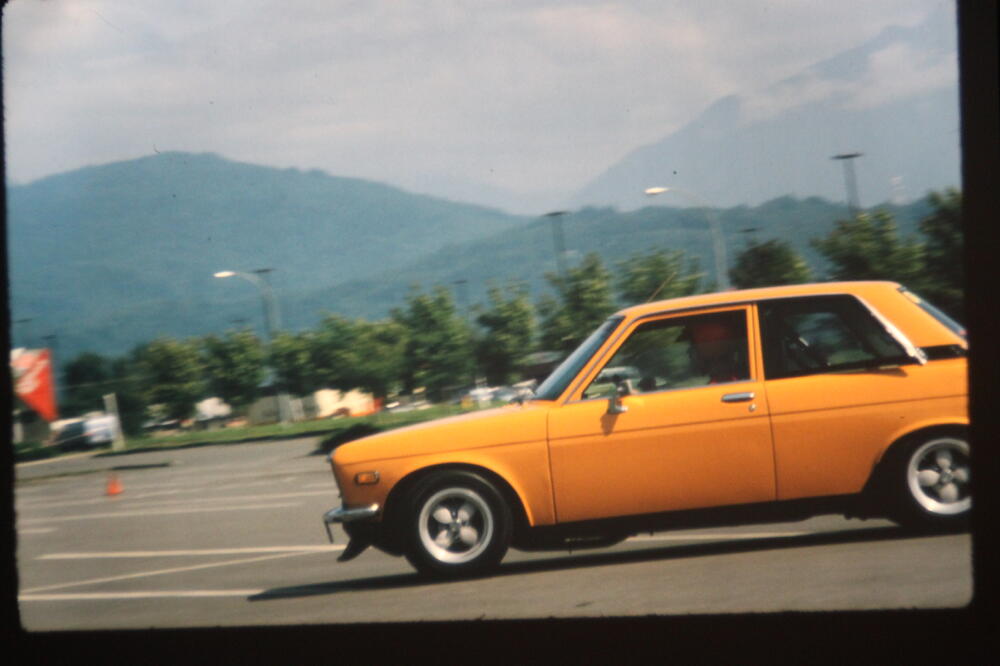
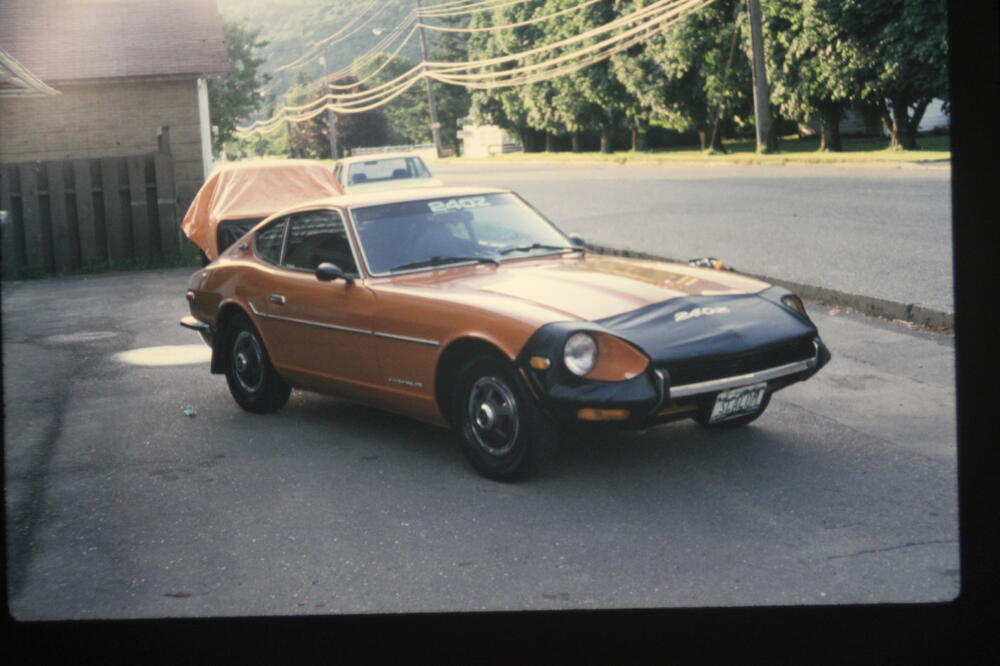
Well it's been over a year since my last post. During this time we did a major reno on our house so the car project was on the back burner, all good. I just had a chat with my body guy and looks like he will be able to get me scheduled in the fall so I'm looking forward to that. In the meantime I started sorting thru some old pictures and slides that I am scanning to do a photo timeline of my history with the car since 1978. Hard for me to believe that it has been 45 years. Here is a preview of some early pictures (scans of slides). July, 1978 as it was when I purchased it well used. Lol A few slalom pics, early eighties. Sears parking lot, before Sunday shopping was a thing. Lol Same slalom event, there was a good selection of cars, Here's one from 1984? shortly after I finished the first restoration. If you look close there are two of my 510's in the background.


-
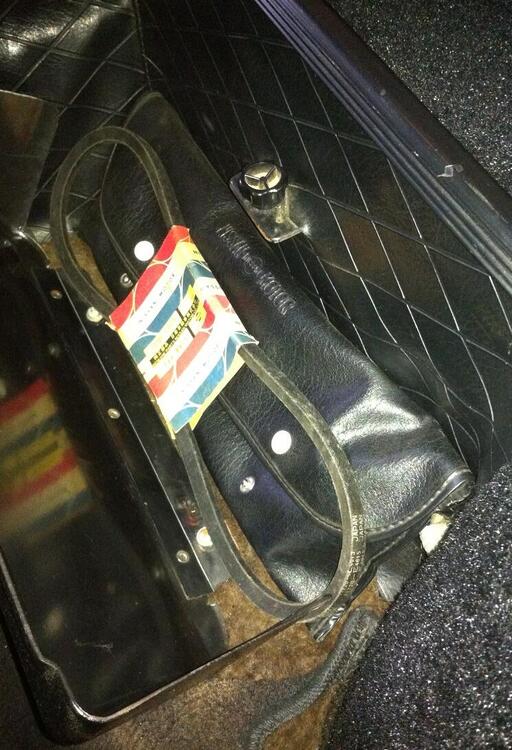
I did a double take when I saw this pic, I've always kept a spare belt in the same spot in my 7/70, #6521, owned since 1978. Here's a pic of mine from about 10 years ago....
-
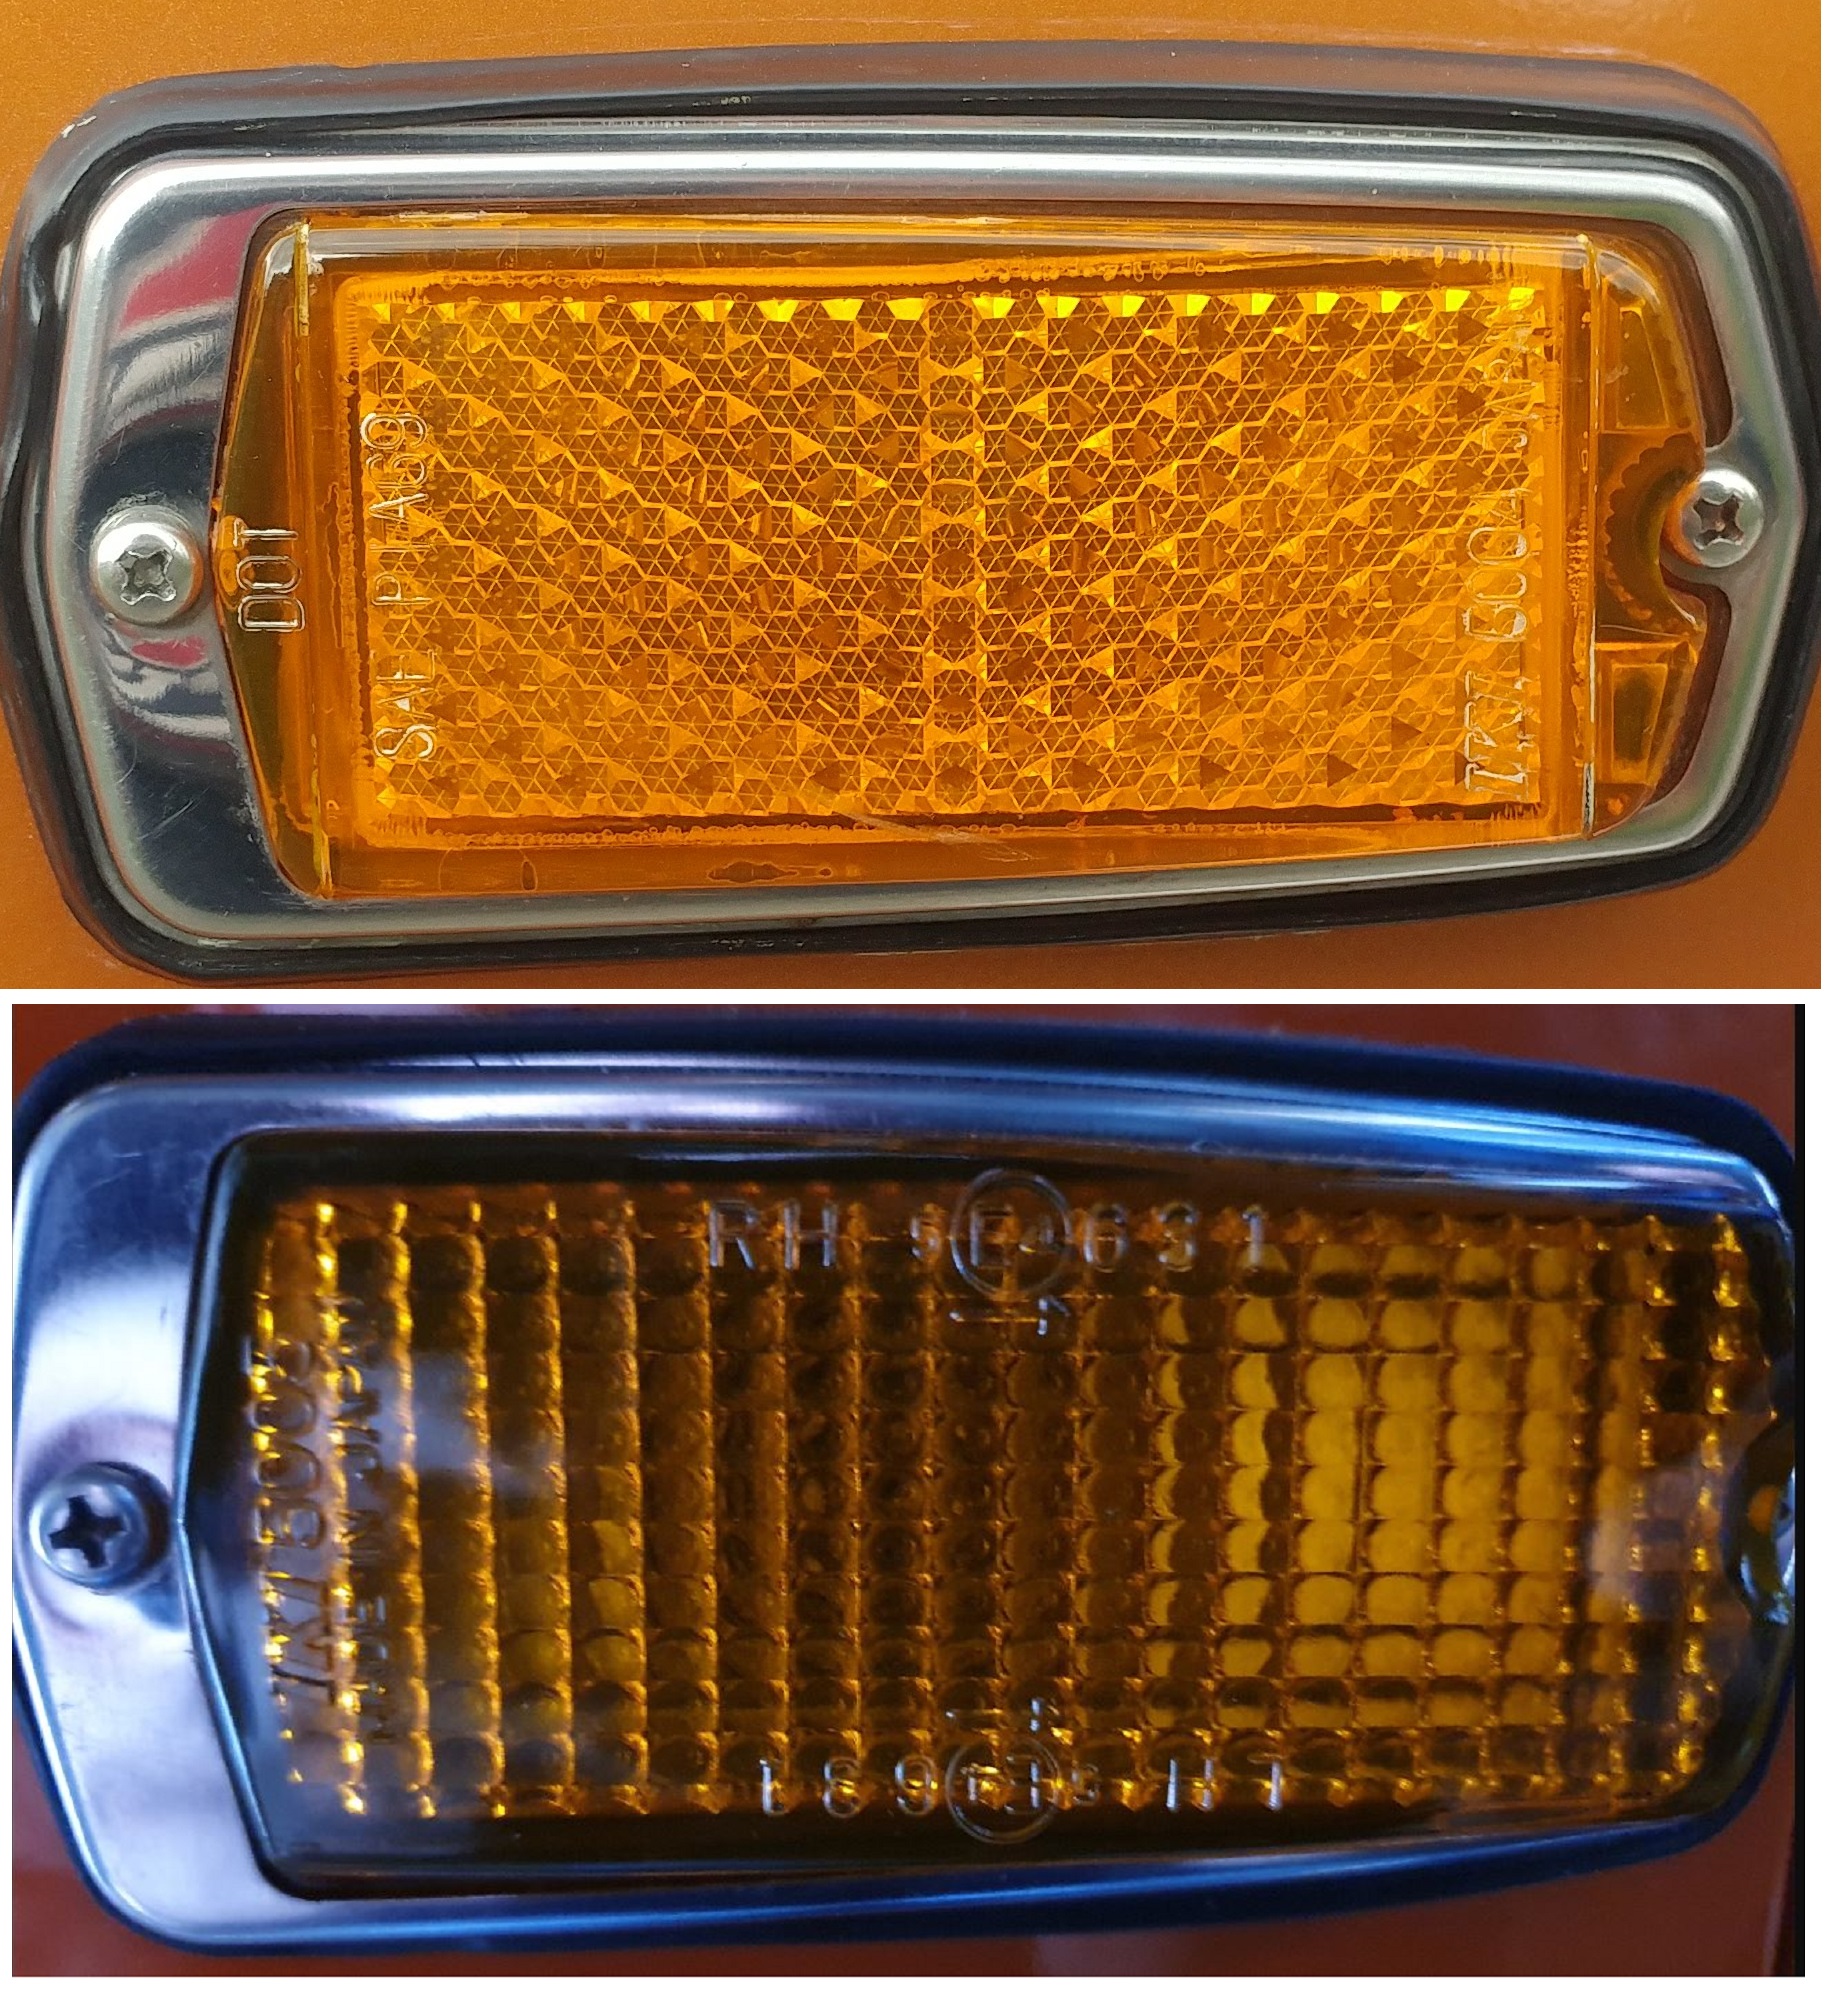
@HS30-Hand @jfa.series1thanks for sharing this interesting info about the side marker lights. I had a quick look at the pictures I have of my 7/70 (originally delivered to Canada) and they have the IKI 5004 DOT lenses, as Jim found. It also is interesting that the IKI 5004 lenses have a different pattern for the reflective feature. IKI 5004 has a pattern that is prismatic and IKI 5005 seems to be more like a pattern of circular, possibly parabolic shapes.

-
-
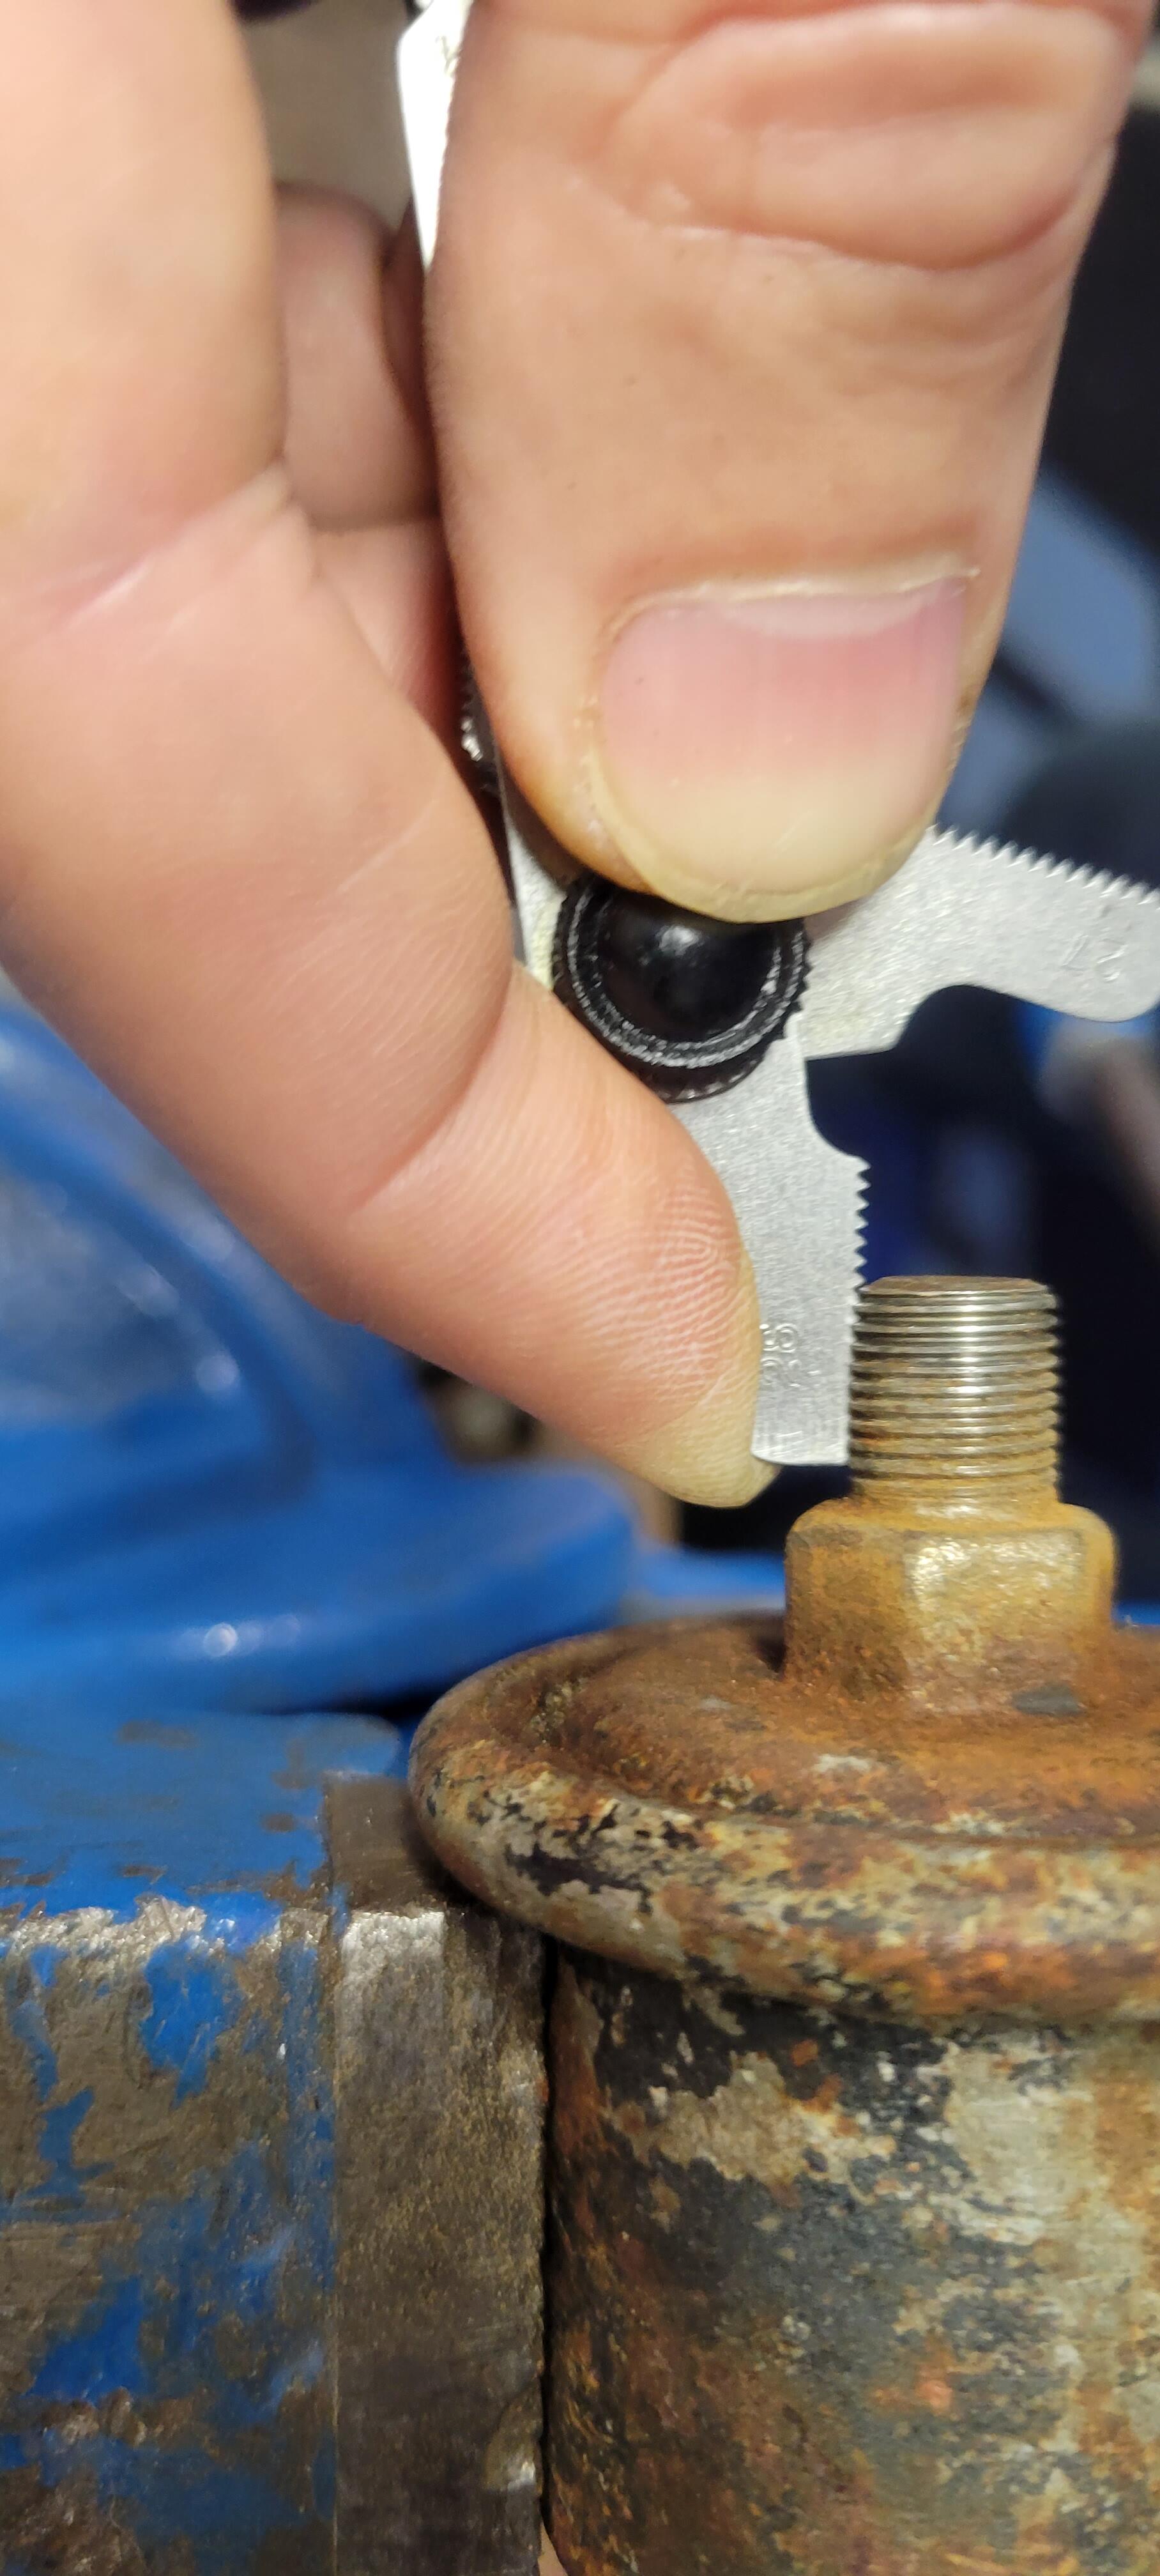
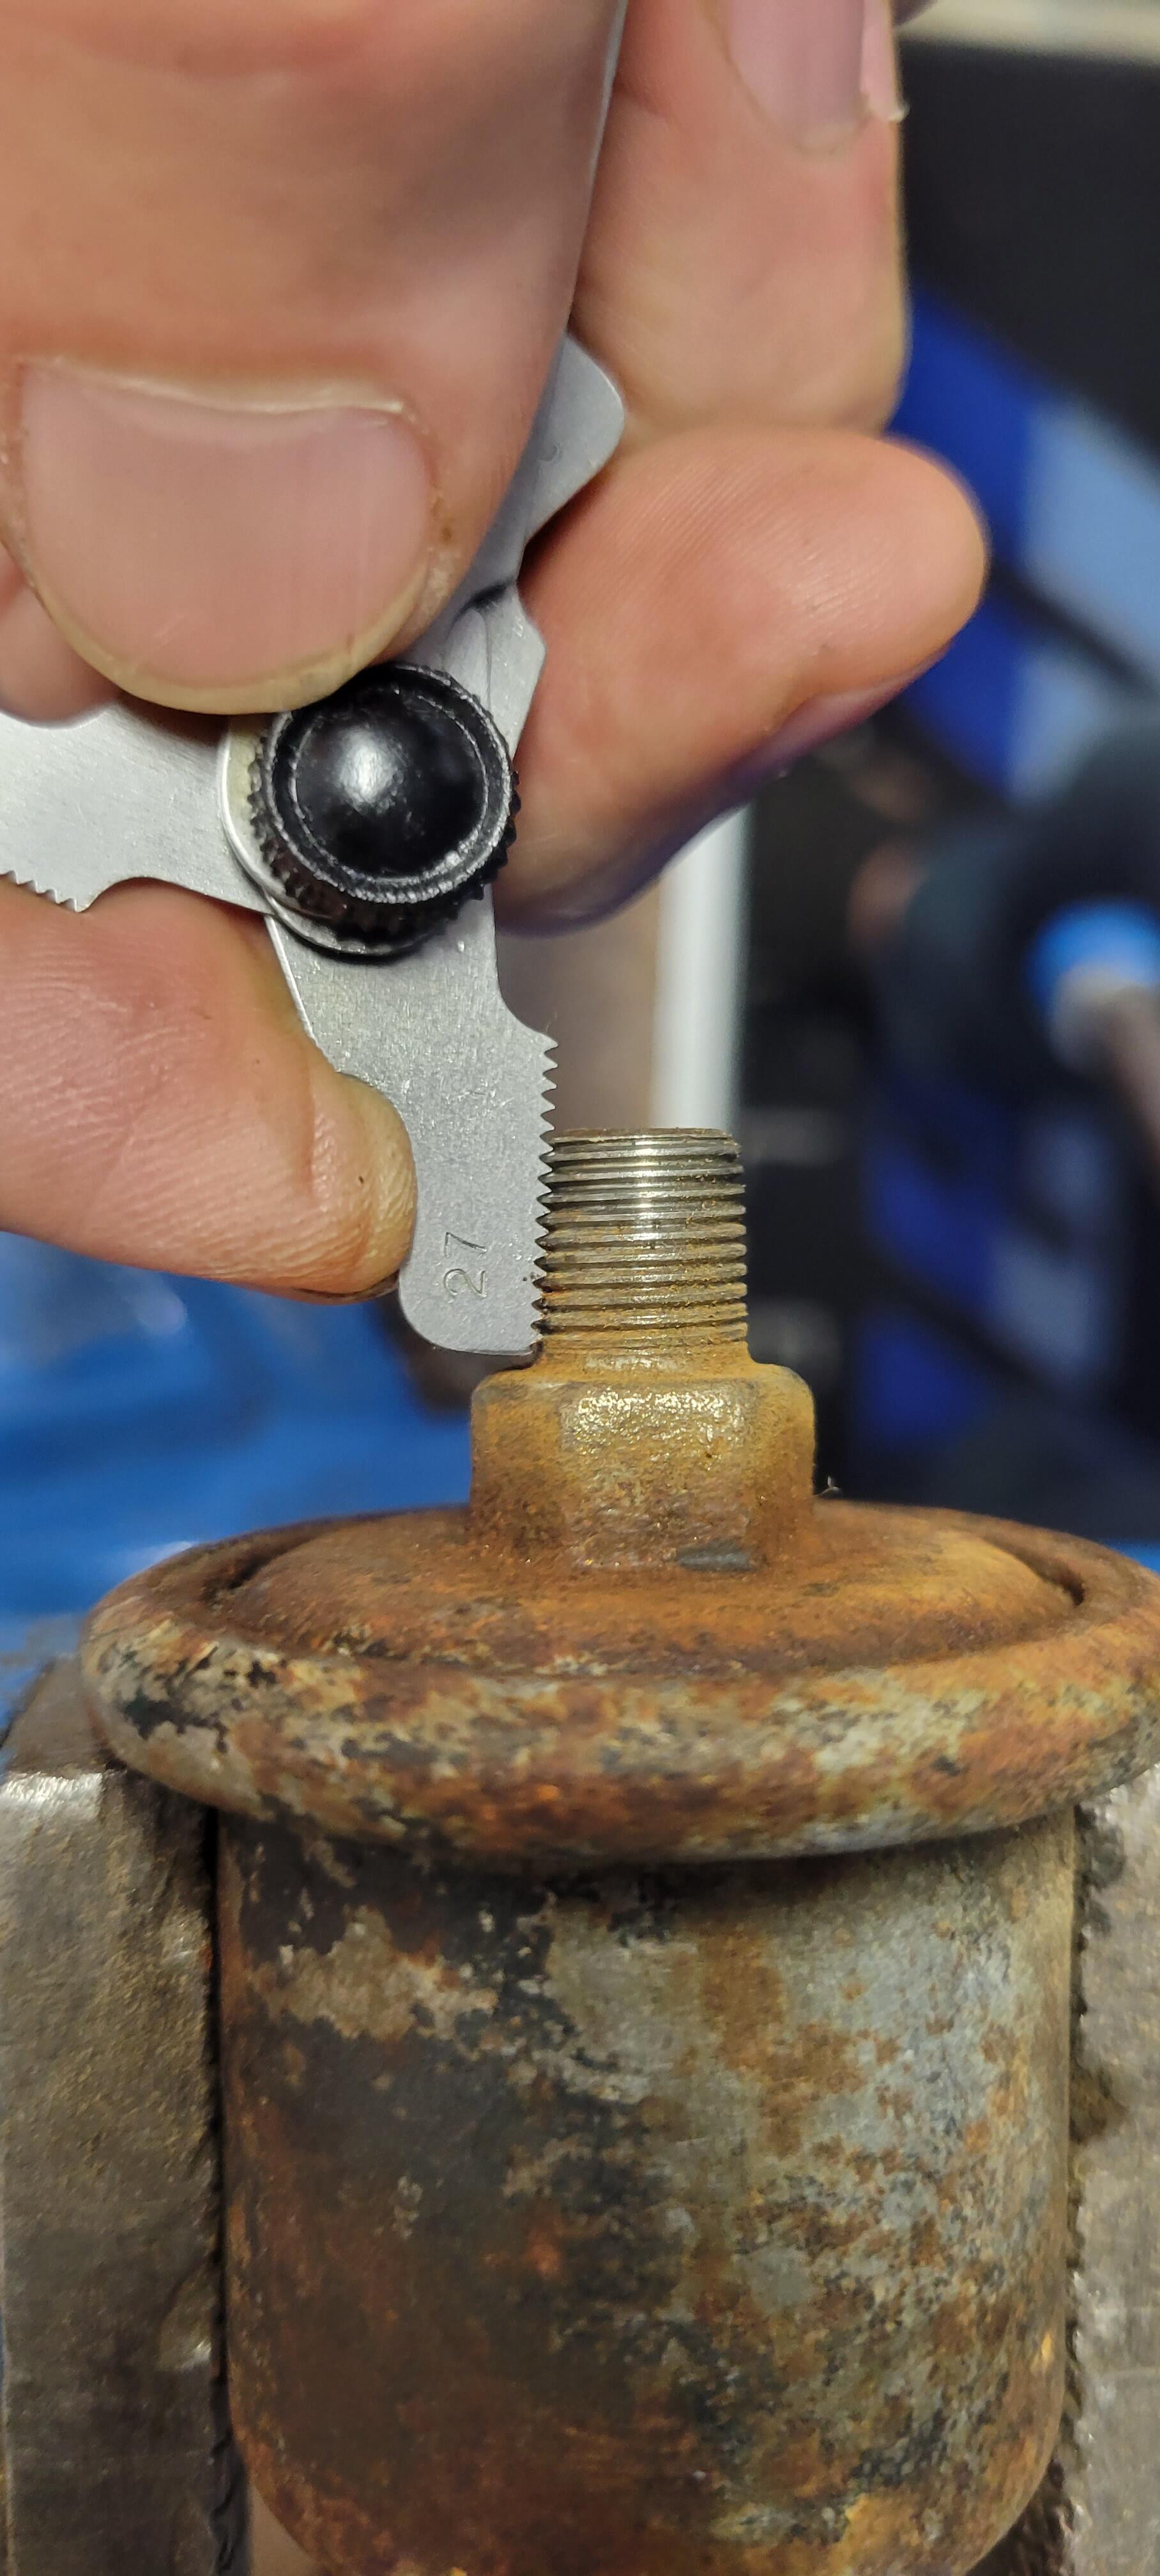
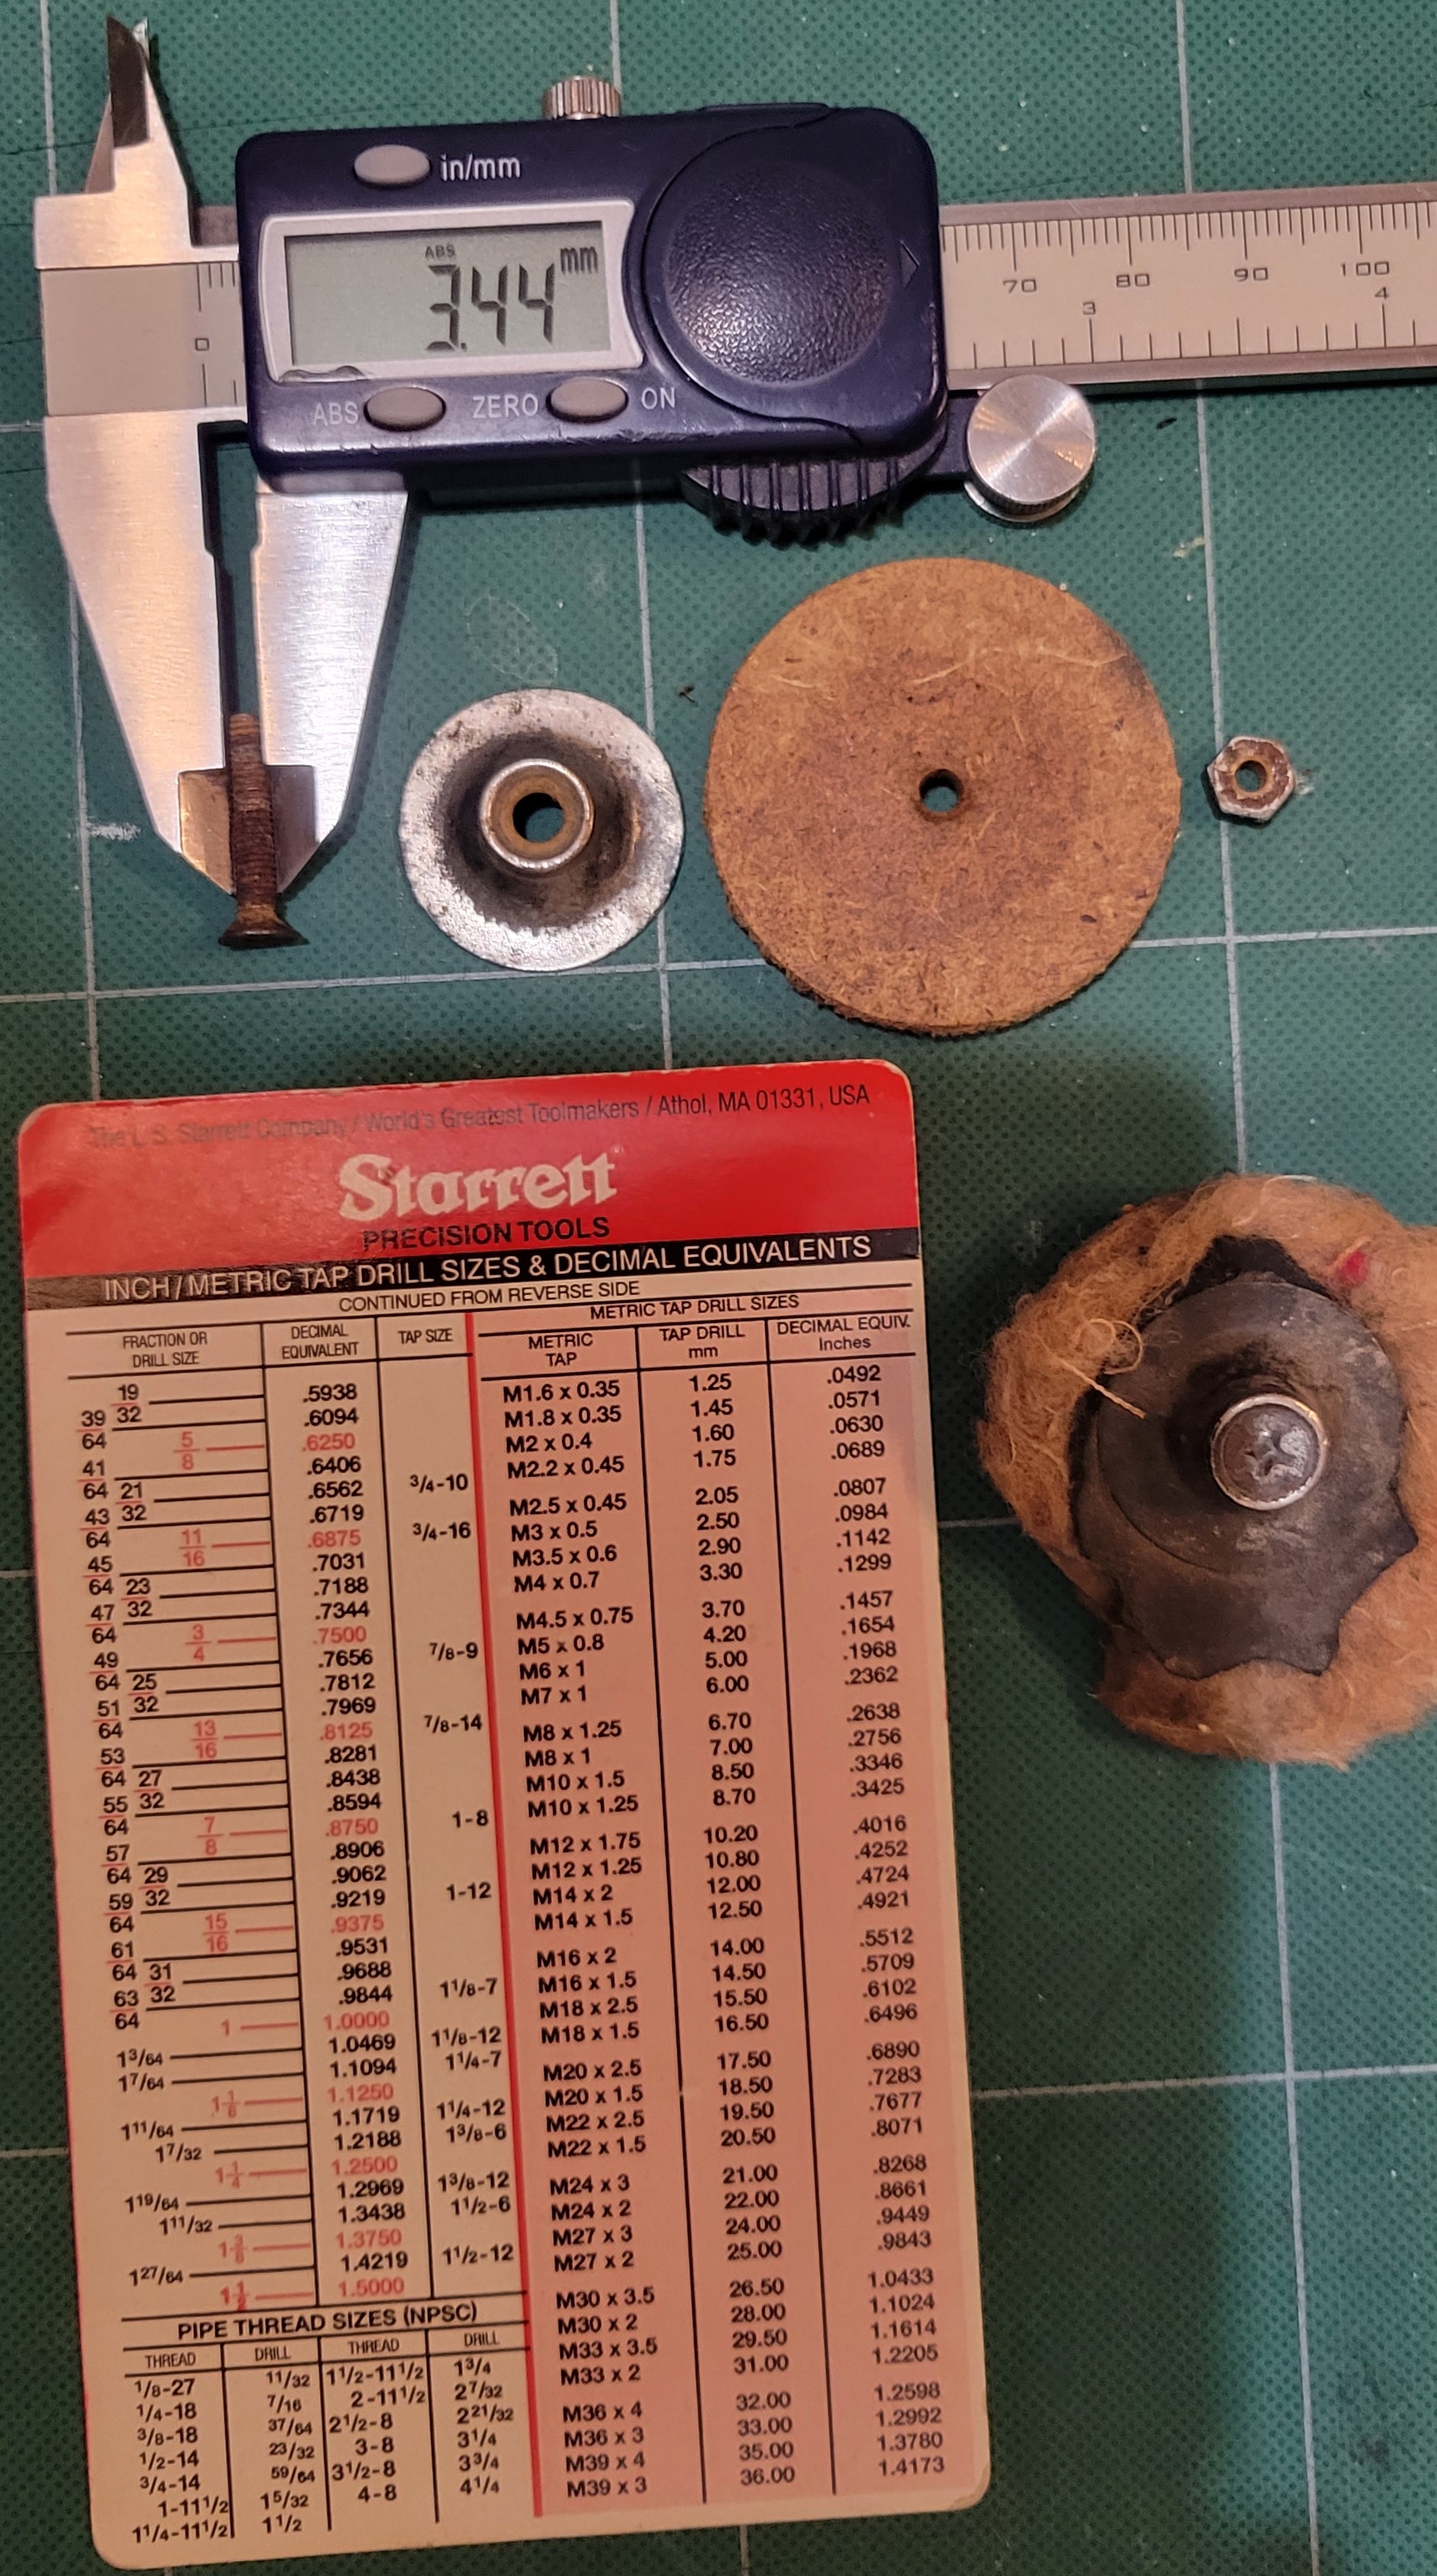
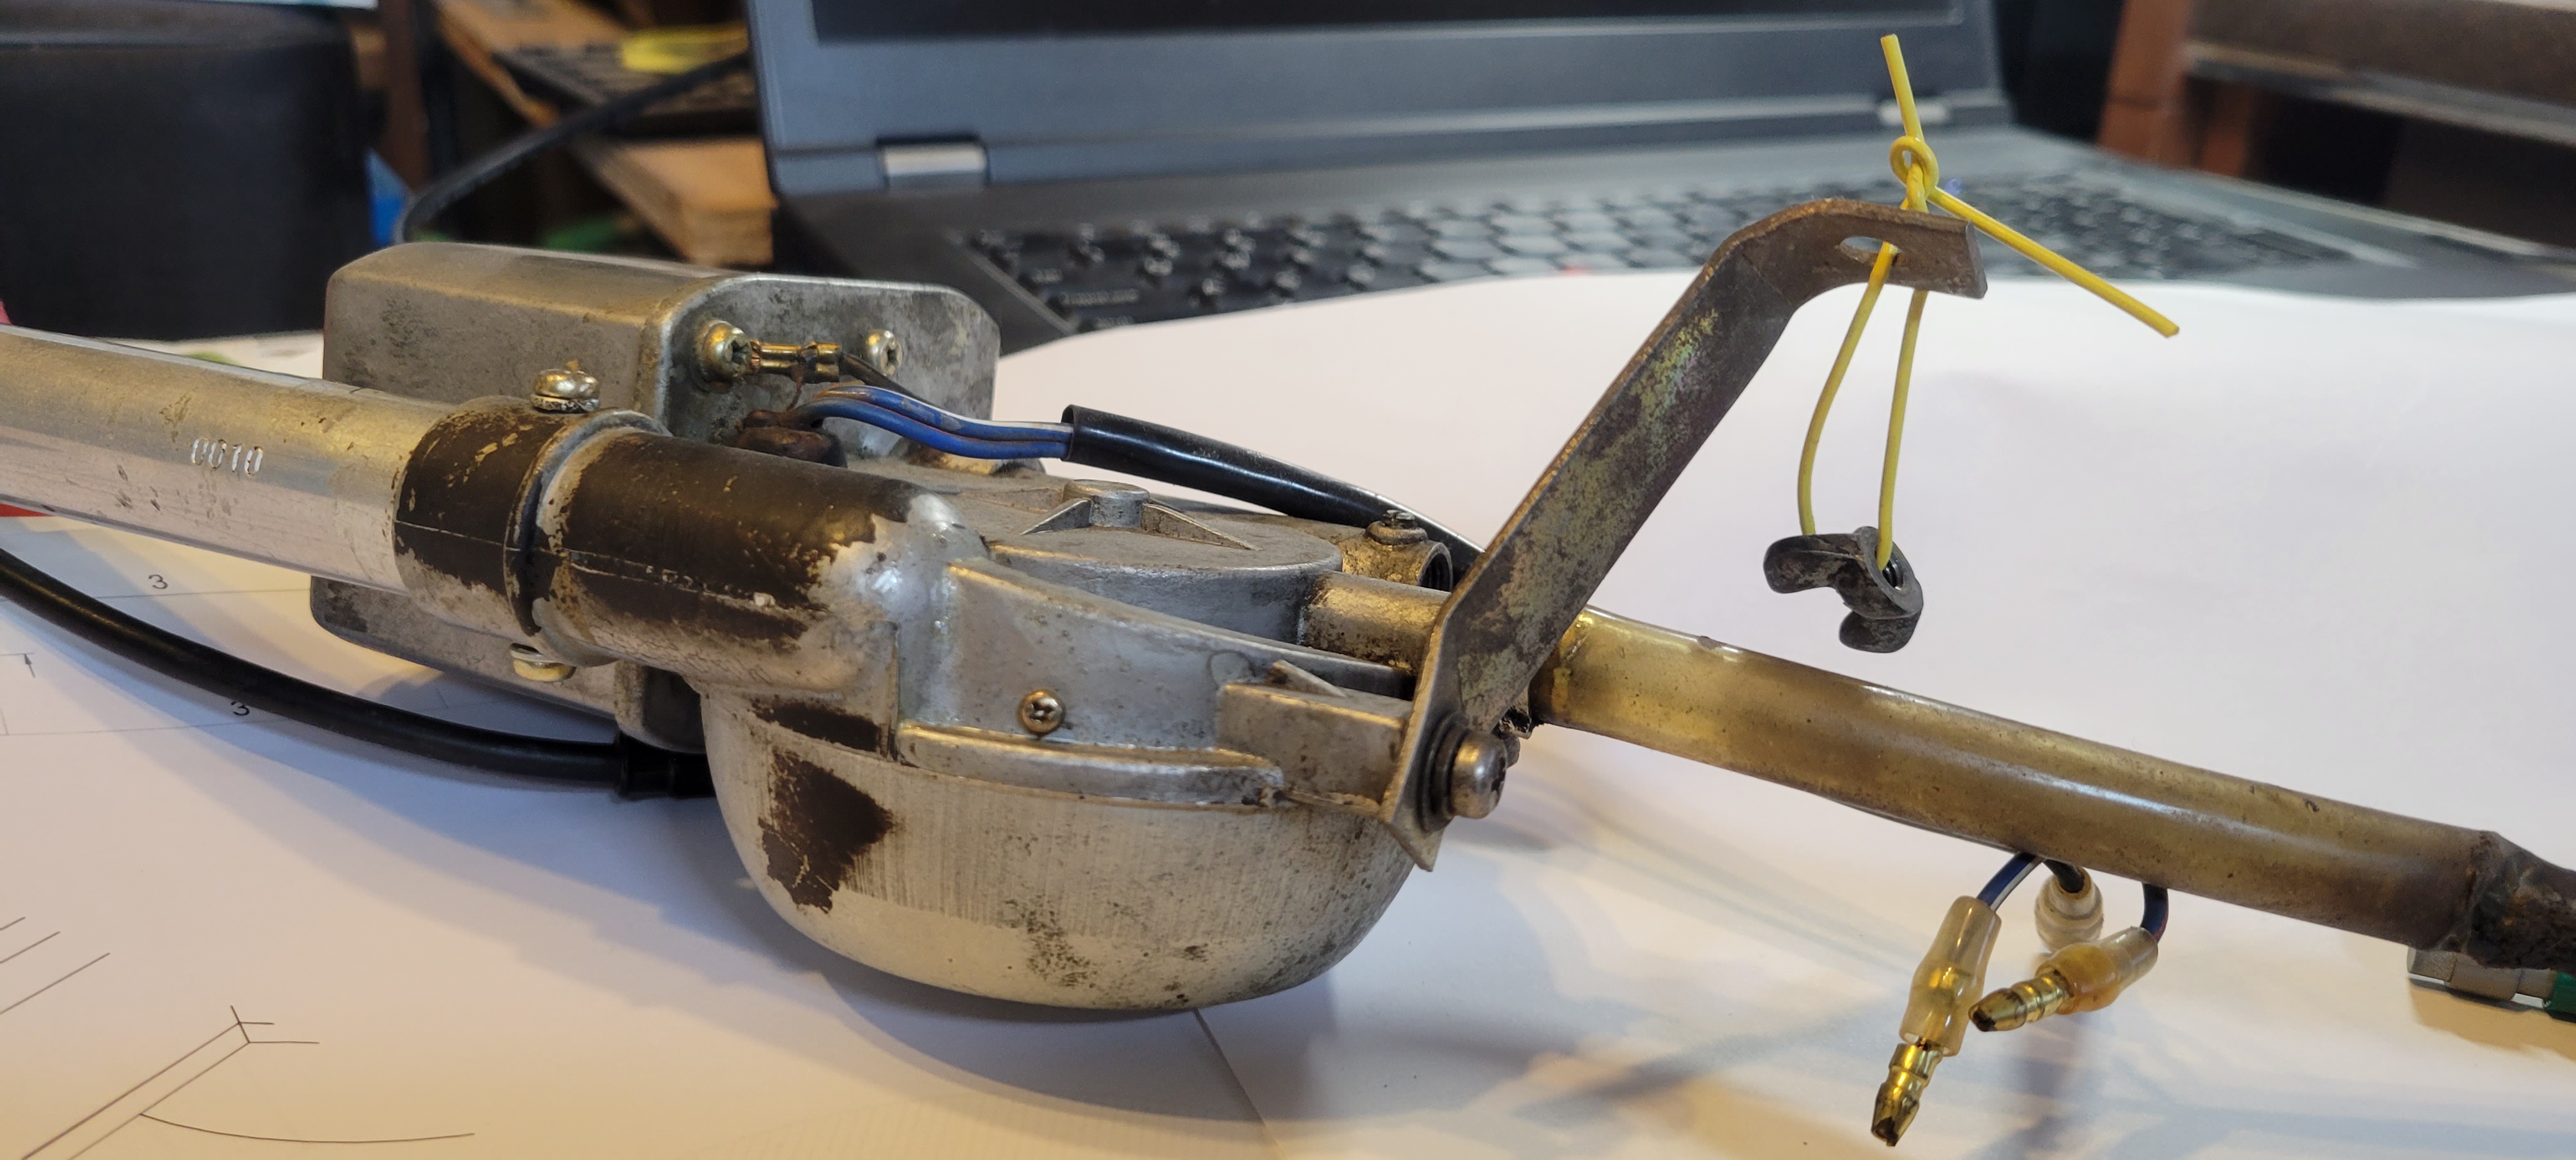
Actually the OEM oil pressure sending units used by Nissan are 1/8"-28 BSPT, not 1/8"-27 NPT. If your Beck-Arnley was 1/8"-27 NPT that would explain why it would not screw in easily. Here are pictures fitting my thread pitch gage into an old OE sending unit I have, The 28 threads per inch gage fits well (first pic) and the 27 did not. In addition to thread pitch differences, the NPT thread also has a slightly larger nominal male thread diameter. the chart below is from Swagelok, BSPT is also known as ISO 7/1


-
-
You're welcome. It is interesting to see the small chassis differences as the design evolved over the months and years.
-
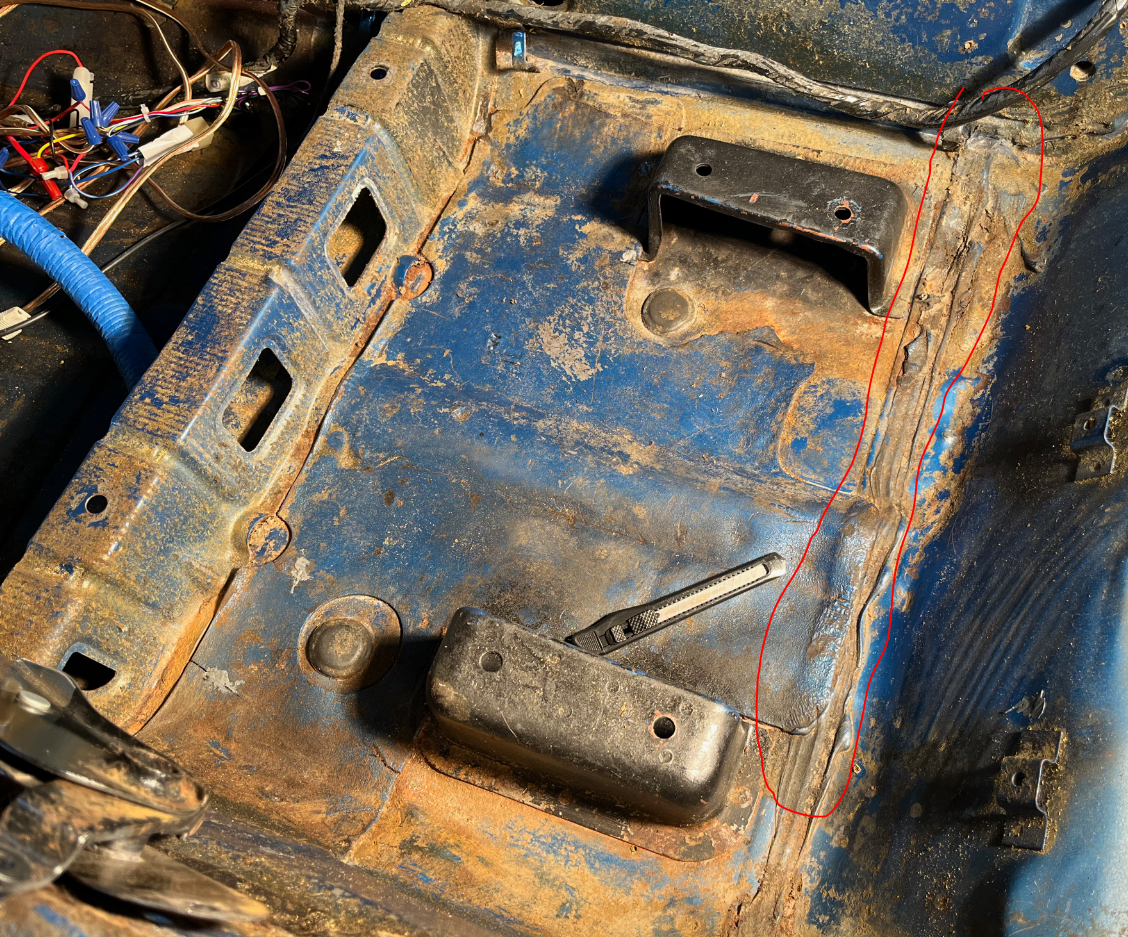
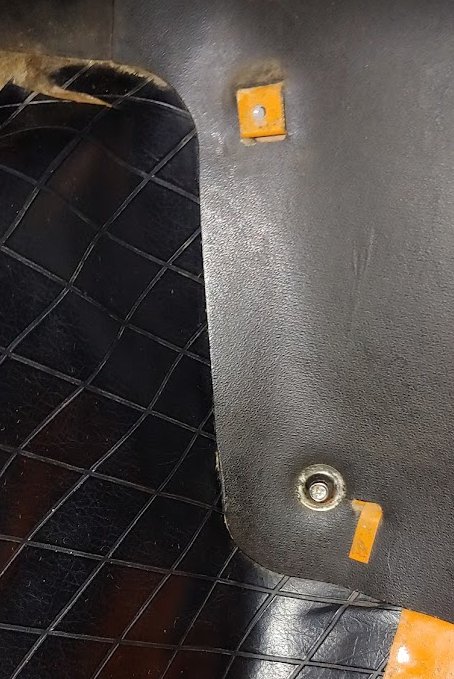
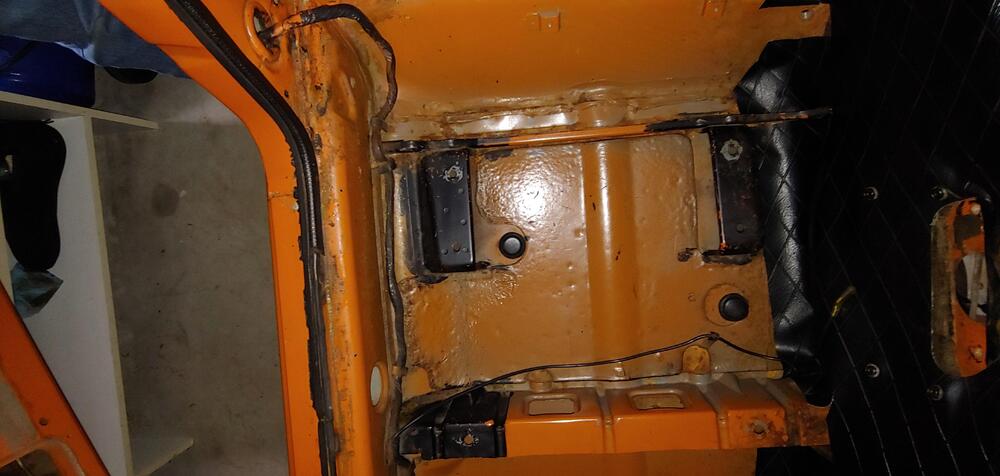
I just noticed that your car being a 1/70 does not have the extra crosswise stiffener aft of the seat mounts, that could explain why the the tar mats under the seats are different. Compare the area I have circled in a picture of your car that I found in one of your recent posts with same area in the pics of my 7/70 posted above.

-
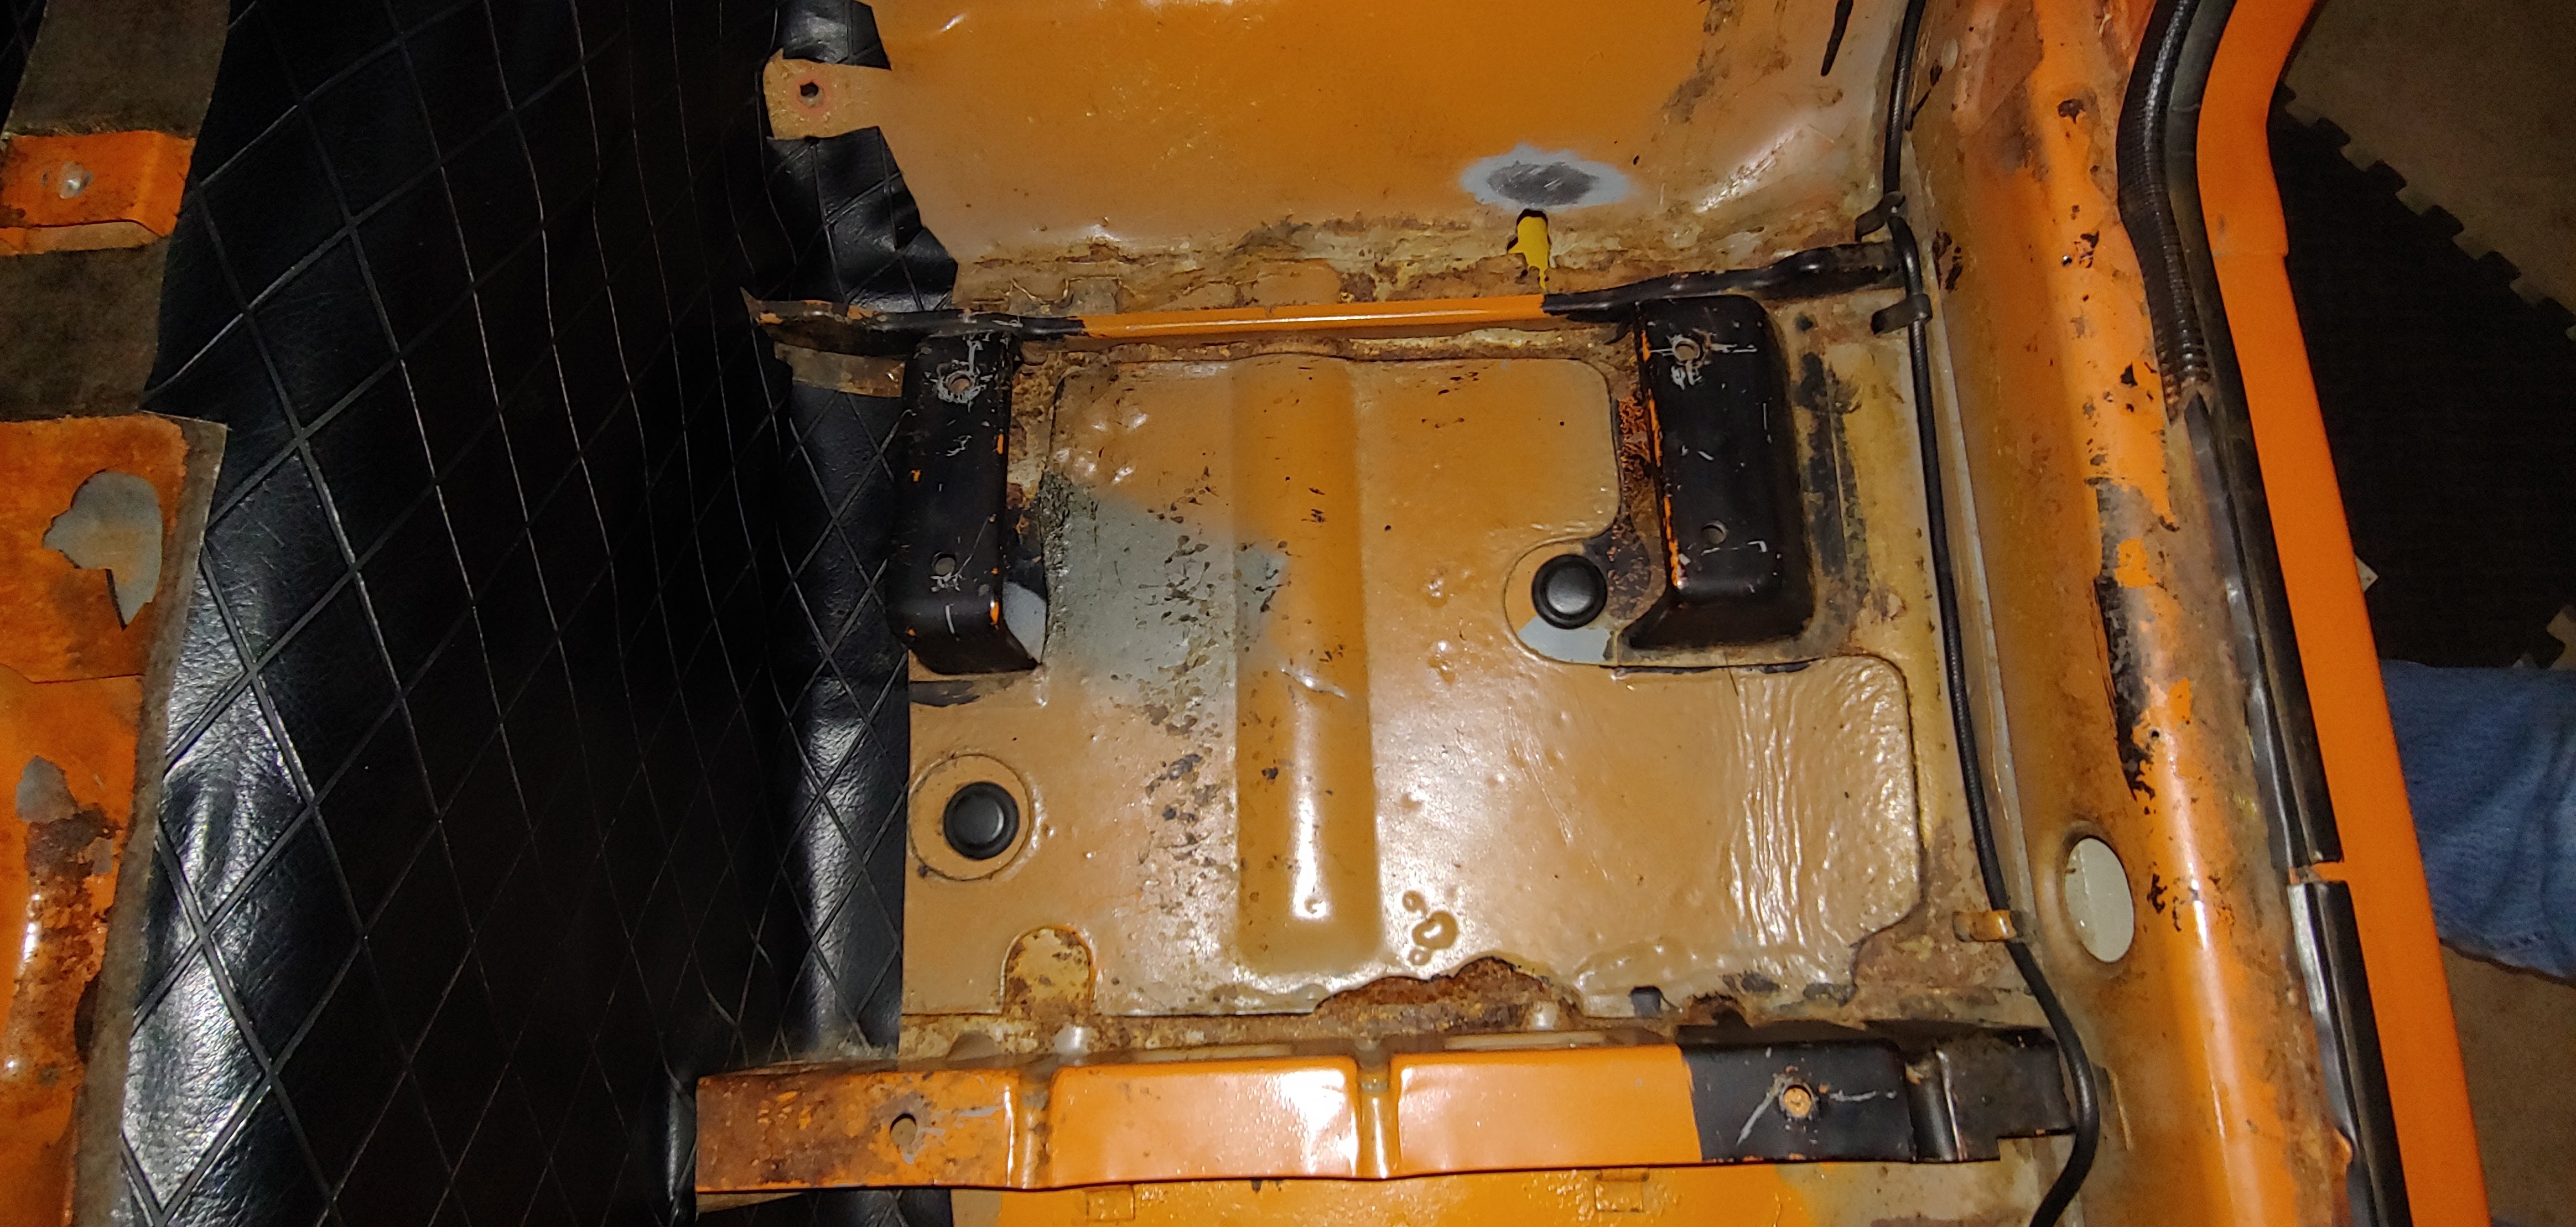
Hey Warty, are you using the templates from our downloads section. I'm the guy that created them, when I did a test of the templates before I removed my tar mats they matched my 7/70 car quite well. Here is a link to mine in case you did not find them and some pics of the under seat area before I removed that tar mats. Hope this helps, Mike

-
A little late, but I am sending a couple of pics for reference anyway. Nice work on your solution.

-
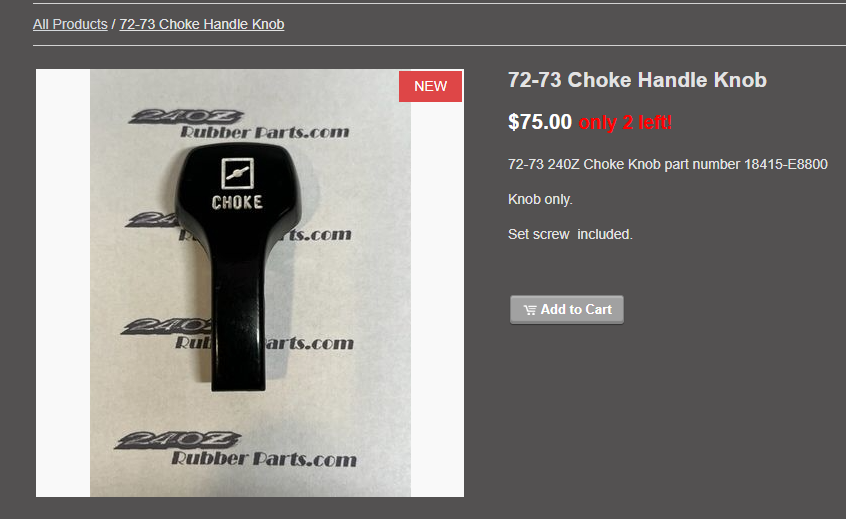
Try here, https://www.240zrubberparts.com/apps/webstore/products/show/8267499
-
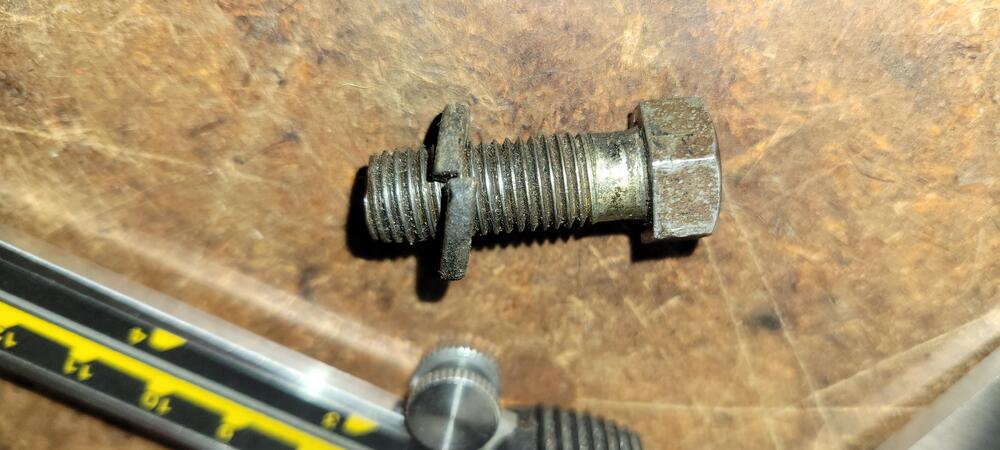
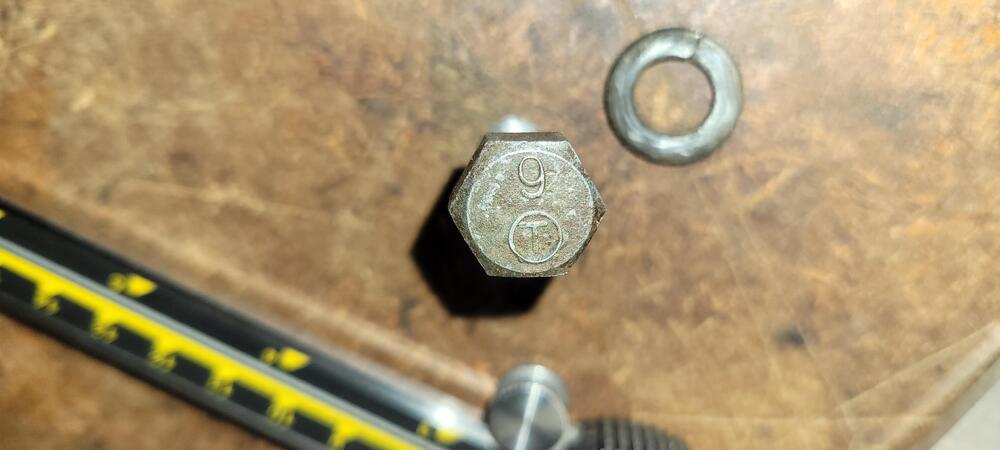
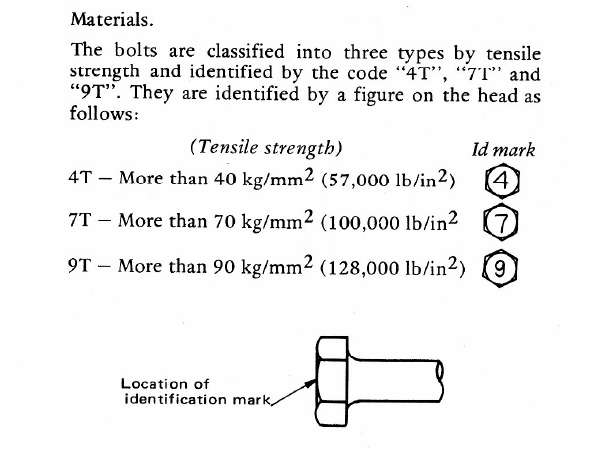
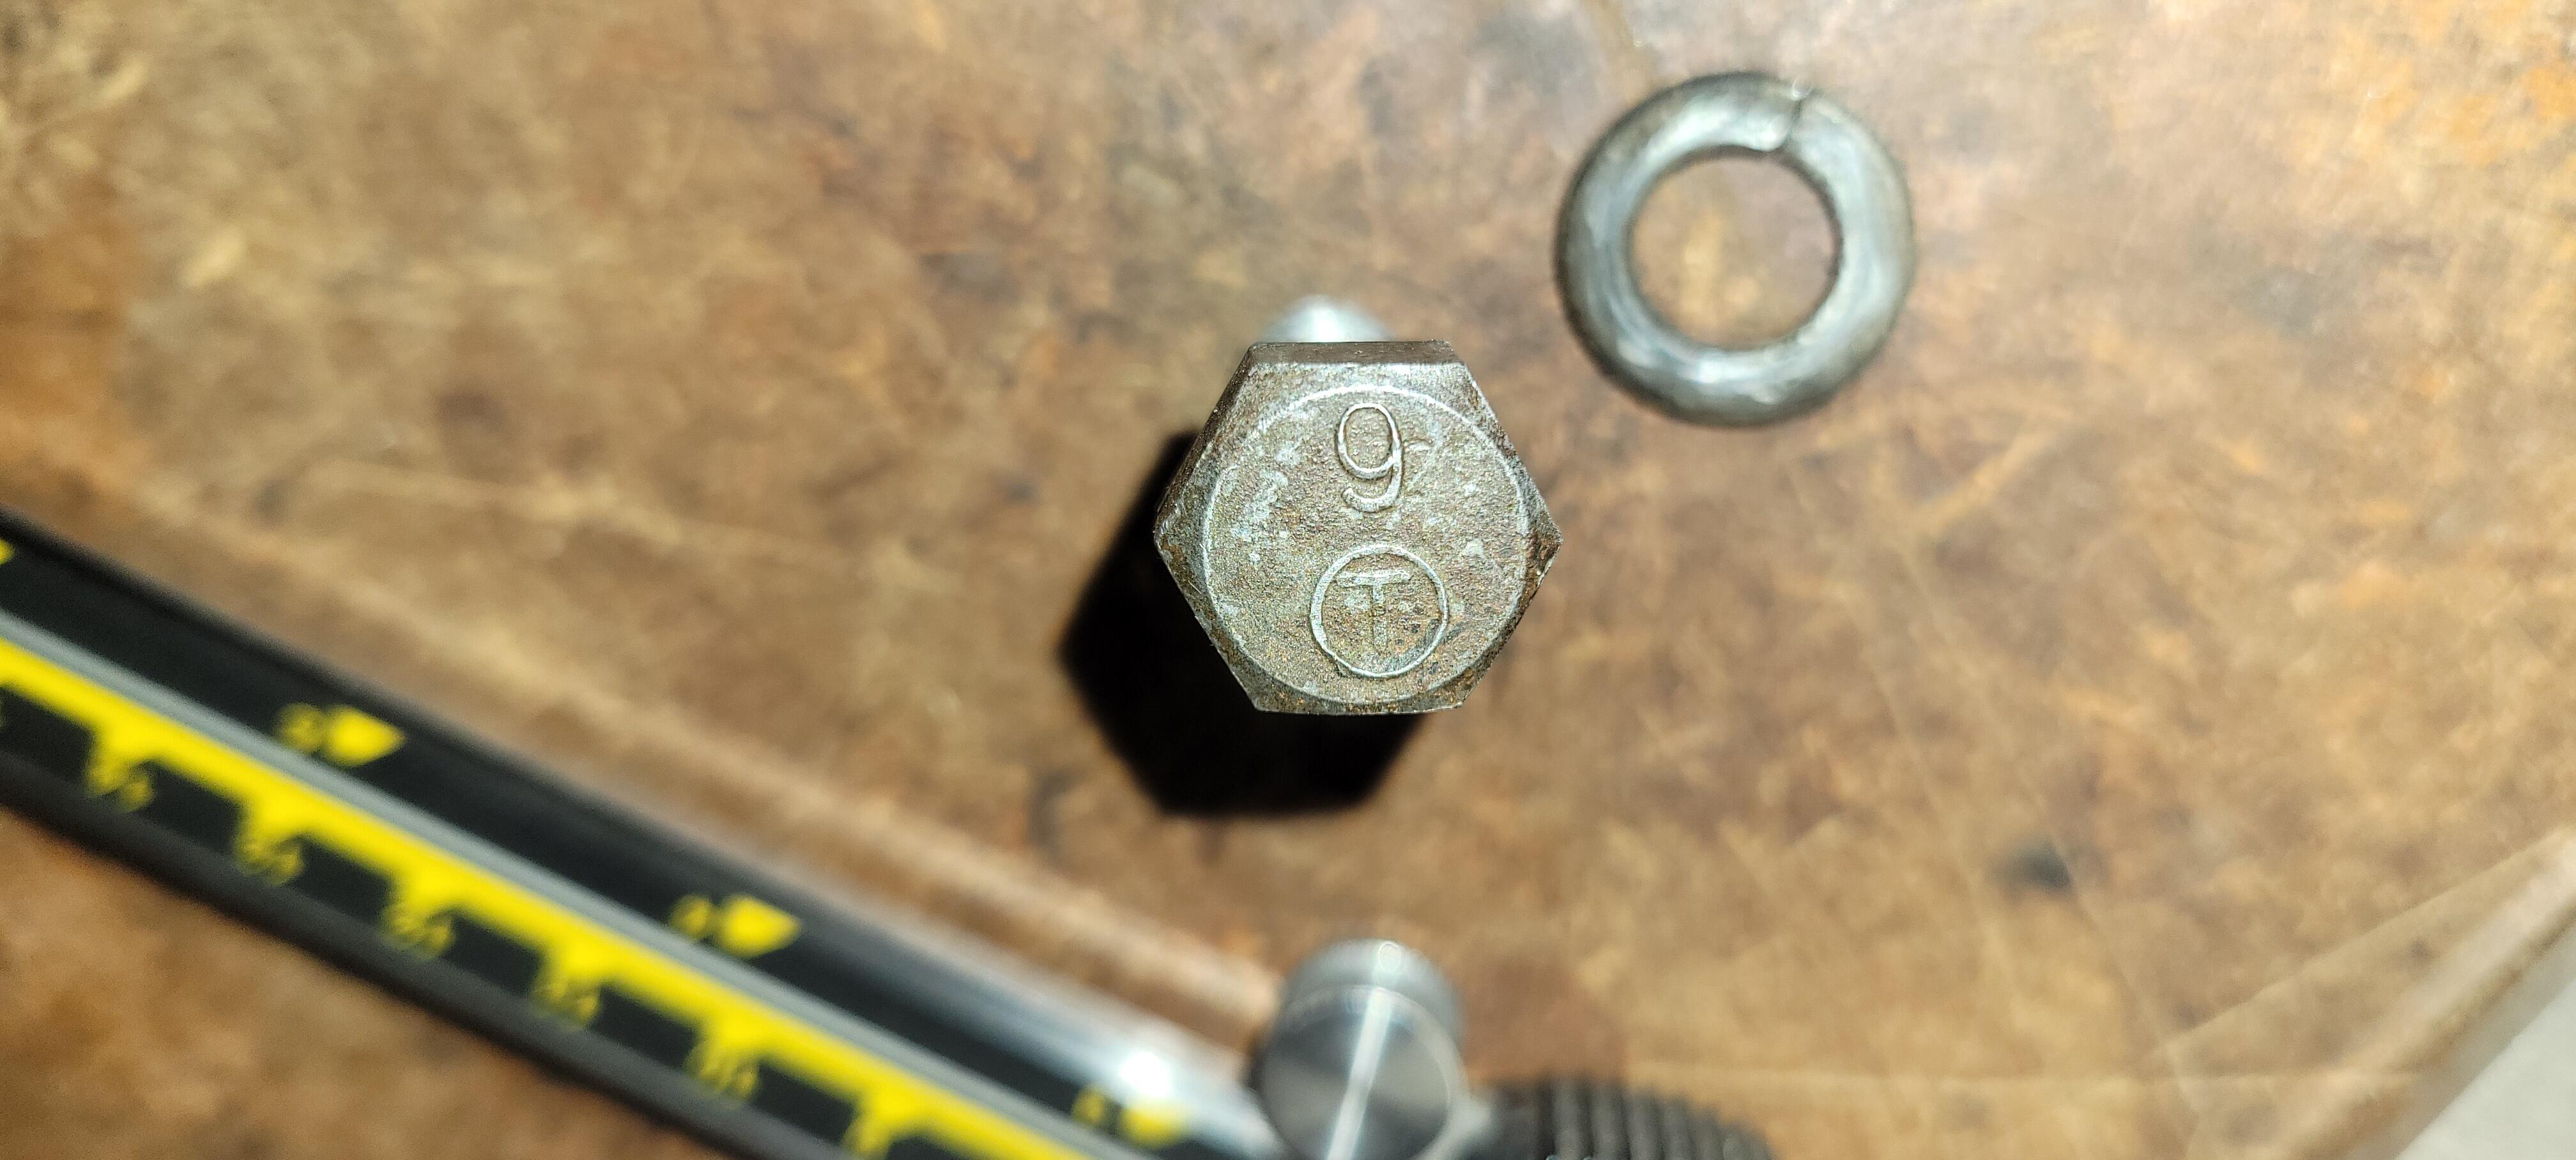
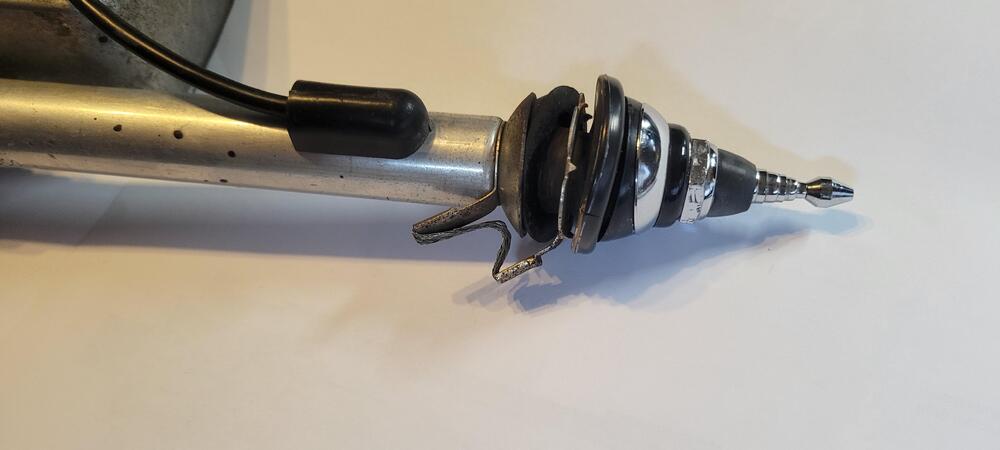
I thought my steering shaft was stored away but it was still under my car, here are a couple of pics. It is a M10x1.25 partially threaded, under head length is 28mm with 22mm thread length and has a number 9 marking on the JIS head, I believe that would cross over to metric DIN class 10. Here is some info about the grade markings on the head of the JIS bolts of that era from the Datsun/Nissan torque spec booklet. General-Datsun Torque Specifications.pdf