71_240Z
Free Member
-
Joined
-
Last visited
Everything posted by 71_240Z
-
-
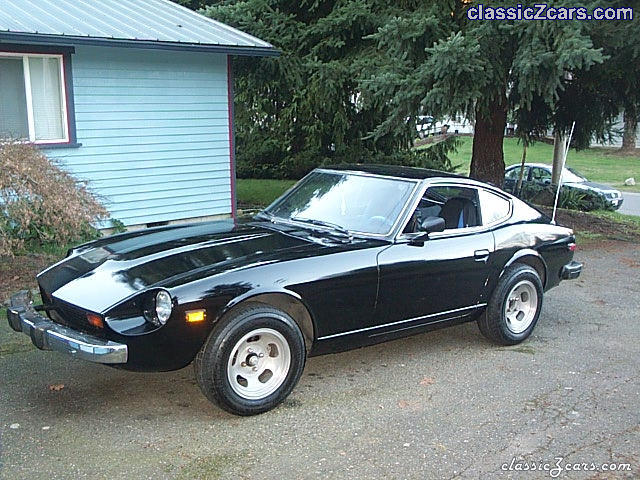 did you paint the chrome around the windows? I cant tell. I'm thinking of de-chroming mine. Nice looking z
 -
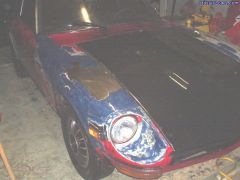
THANK YOU THANK YOU THANK YOU FINALLY. The Z is back on the road! After sitting in my driveway/woods/garage for 8 years, I drove it to work today. I noticed that it took about 1/2 tank of gas to go 10 miles. Not very good mileage. I spotted a hole one of the fule lines attached to the tank. I think its the hose to the reserve tank. Its not spewing so I guess I can drive home. Nice. I guess I will get a hose on the way home. The carb adjustment really had me for a few days. I couldn't find a flow meter so I tried listening to the pitch of a hose placed next to the air intakes. I figured I can tune a guitar by ear - I can tune a dual carb by ear. Didn't work. What finally worked is really kind of dumb. I took one of my kid's watercolor masterpieces (it was in the garage. it was fair game) and used it to measure flow. The paper was regular laser printer paper and I just held it in front of the air intake and let the carb suck a dimple in the paper. You have to take it off right away or the engine dies. Note the dimple depth and test the other carb. Keep adjusting throttle until dimples are equal depth. This works at all RPMs. At lower RPM, there is not much of a dimple, so you have to judge by feeling the pressure required to remove the paper from the intake. Once the airflow was the same, I adjusted mixture according to the directions in a link I found on this site. I adjusted the flow again and like magic, my Z is running great. It has been SO hard to start and VERY cold natured. All that has passed. I did the toyota front break job with 300zx vented rotors, a complete back brake job, rebuilt front suspension, new struts, completely tuned the engine. The brakes a pain because the idea of a spacer on the hub really bothered me. I finally had a machine shop make me a spacer that was machined to exactly fit my hub. If there is a gap between the hub and the spacer, a lot of shearing force is applied to the bolts everytime you stop. If there is no gap, the shearing force is applied to the big fat hub and not a tiny little bolt. ANYWAY, Thank you all for your posts and for making it possible for me to drive my Z again. The brake posts (#$&* bleeding) and carb posts were especially helpful. It still looks like crap, but it runs GREAT. It is originally blue. PO changed it to red (on the outside). I replaced a damaged door with an orange door. The hood rusted and got sandblasted primed black. The red paint is chipping (A LOT) revealing a nice grey. I have sanded and chemical stripped part of the car revealing a nice (factory?) primer brown and the original blue. Its a piece of art. I got a license tag last week and the tag lady looked at it and asked me what color I wanted to pick for my registration. I picked red. I will probably paint it black with some metalic flake. Thanks again. Your posts are not in vain.
-
ok.. I've got my front suspension all over the garage. It started off as a brake job, you know, the old toyota, 350z conversion thing. I didn't like the way it turned out so I had some parts machined... long story.. I'll post pictures one day of my brake mod. Anyway... Since the struts are currently sitting in a pickle bucket, I figured this may be as good of a time as any to replace them. They REALLY need it. I too am struggling with whether to buy the Autozone replacement struts or to go with something more exotic. My goal is to have a good daily (maybe weekly) driver. I dont have racing ambitions until the kids get old enough to where we can all do it together. THE SPRINGS!? what about the springs? I can't get my brain around why I need to replace my springs other than the fact that they are 34 years old. Do springs quit working? Someone please enlighten me on the need to replace springs. THANKS! :lick:
-
Miles, did you do a rotor conversion too?
-
Do the spacers that come in these kits have a lip on them so that the rotor touches the hub? If there is air between the rotor and the hub, a lot of sheering force is on the bolts. Kind of dangerous if you ask me. I did this conversion last week, but I got a machinist to make me a "collar" to take up the space between the rotor and my axle hub. That takes all the pressure off the bolts.
-
Does anyone know how thick the reaction disk in a 71 240 should be? I pulled out the push rod and the disk fell down into the power booster. Instead of taking the boster out and fishing around for the disk, I thought I would just replace it. I have some 1" rubber washers that I am using. The washers are about 1/16th each and I am stacking them where the reaction disk goes until I get the proper thickness. The haynes manual drawing does not seem to be to scale.
-
If the bolts shear, I guess the wheels would still be attached to the hub.:stupid: The rotor would just be free wheeling. Thats a scary scenario too.
-
I'm in the middle of the toyota/300zx brake upgrade on my 71 240z and I need a wheel spacer. No one in town has one. My spacer needs to be about 11/16" to make my 300zx vented rotors line up with the caliper. When everything is aligned correctly, there is a very low clearance for both the caliper diameter (1/8") and the width (1/32 each side). There is plenty of room for pads, but that area above and below the pads where the rotors pass through the calipers is very tight. Its not rubbing. I wonder if its too tight. Since I can't find spacers locally, I put 10 washers on each bolt to create the space that I need between the hub and the rotor. This setup doesn't seem safe to me. ]!!!!!!!!!![ ] = hub [ = rotor ! = washer The washers and bolts are hardened steel, but something about this setup makes me uncomfortable. It looks ok and it works, but I have visions of bolts shearing and my Z skididng to a stop as the rotors dig into the pavement. :eek: What is wrong with using washers as spacers? Any comments? How much clearance do I need between rotors and the calipers? Do I need to have the rotors turned a 1/16th or so?
-
my spacer needs to be about 5/8" to make my 300zx vented rotors line up with the caliper. I put 6 washers on each bolt to create the space between the hub and the rotor. This setup doesn't seem safe to me. ]!!!!!![ ] = hub [ = rotor ! = washer the washers are hardened steel and the bolts are #8's, but something about this setup makes me uncomfortable. What is wrong with using washers as spacers? I have visions of bolts shearing and my rotors free wheeling while I wrap my car around a tree. I talked to a machine shop today that can make the spacer that I need, but I am still uncomfortable with this set up. The rotor does not touch the hub axle when the spacer is in place. There is about 1/8" gap. When the rotor is not very snug against the hub axle, the four bolts that hold the rotor to the hub are subject to intense sheering forces. Normally when you apply the brakes, all the forward force is applied to the hub due to the fact that the big hole in the rotor is machined to fit exactly on the hub. When the spacer is in place and the rotor hole is bigger than the hub axle, all braking force is borne by the four little bolts. That scares me to death. These bolts can only withstand a few thousand pounds of sheering force. I don't know how much a 240z weighs, but the force = mass X decelleration. The faster you slow down, the more force is applied to those bolts. Even at 1g, I'll bet you exceed the sheering force ratings of these bolts. I haven't seen anyone mention it before, but has anyone had any bolts break with this set up? My solution is to machine a thin ring to put around the hub axle so that the inside diameter of my rotor contacts the hub. This takes all the force off the bolts and transfers it to the hub axle as the engineers originally intended. Without that ring, it is my humble opinion, that you are driving a death trap.
-
AARG.. just when I thought I had everything... I opened the 300zx rotors and they don't fit...too many bolt holes. Mis-labled box from parts store. Maybe I'll have brakes tomorrow! Rob... just being honest... I cant do everything I want to do because I dont have all the cool tools - like an air compressor or an engine stand. I have a slab of concrete and basic hand tools. I even got kicked out of the garage because the kids (five under 7yrs) needed a play room. I splurged and got some jack stands last week. I need some spacers for this brake job but I don't know where to put them. I hope it will be obvious once I get the correct rotors.
-
These forums are awesome. I pulled my 71-Z out of the woods (it was covered) and into the garage a few weeks ago after my daily driver burned to a crisp. Bad fire - long story for the Mazda forum. The engine has strong compression. I throughly cleaned the stock carbs and tuned them according to my Haynes manual. The car runs great now! However, stopping is another matter. After finding brake fluid on the rear tires, I did a complete rear brake job. Still no brakes. Pedal to the floor - barely stopping. Brake shop wants $1,000 for calipers, roters, master, and "set up". NO WAY. I found out about the Toyota caliper conversion from this site and I decided to go that route. After I got the brake system disassembled, I discovered the brake shop was credible. The left caliper WAS sticking and the rotor DID need replacing. I replaced my master cylinder, but I still do not think that was the problem. I found a post about a "reaction disk". I checked my power booster and sure enough... no reaction disk. I can't find one, so I am making one out of rubber washers. I hope it works. I suspect that was the main problem all along. I do seem to remember taking the master cylinder off a few years ago.... :stupid: Anyway... I have my 300z rotors and toyota calipers. I have my back plate cut and everything is ready to install. I doubt it will work with my stock wheels, but we will see. I need new struts all around... maybe this is a good time to replace. I have a rust hole in the dogleg(?) under the battery, in the passanger floor pan, and under the rear hatch lid (weird place) right beside the latch on the horizontal surface. I'll probably find more rust as I start repairing. The car used to be blue, but it was red when I got it. Now its two colors of primer, red and blue. nice. the engine compartment is bubbly black.. like an undercoating.. wonder if I can remove that without removing the engine...I want to completely disassemble, paint, and rebuild, but I dont think I have the patience to do that. For me to finish this project, I need to keep it simple. A good looking daily driver is my goal... yet part of me wants that show car! My fuel pump may not work.. Im not sure. I was suspect when I couldn't get the car cranked so I bypassed it with an electric. I like the electric because it gets gas to the carbs before I turn the starter. Maybe this wouldn't be an issue if I would drive it regularly. I am debating whether to keep the original look, or to add air dams, better seats, etc. Any thoughts on value of originals? I am inclined to fix the car up like I like it rather than to keep it original. Let me know if you think this is a bad idea. I think I have all matching serial numbers. I used to be an engineer (Im a business professor now) so I like to tinker with things and I'm pretty good at it. I have a pretty good tool set, but I'm not hard core. I depend heavily on Haynes and forums like this. Here is my project list: Brakes Body Paint Interior