Phred
Free Member
-
Joined
-
Last visited
Everything posted by Phred
-
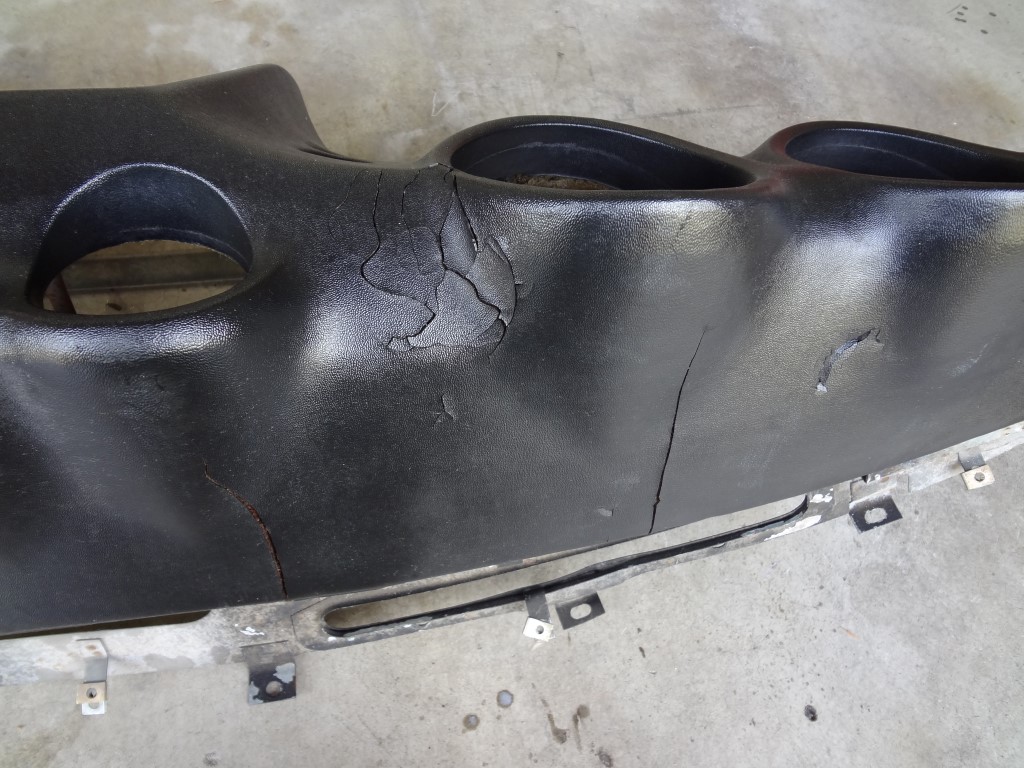
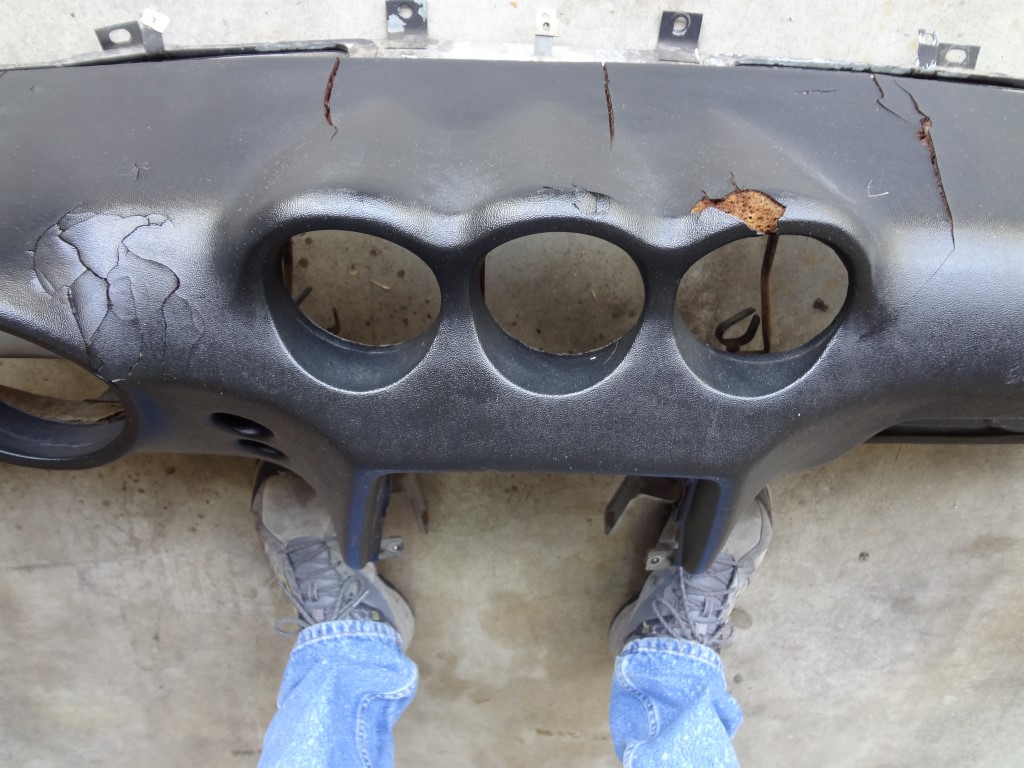
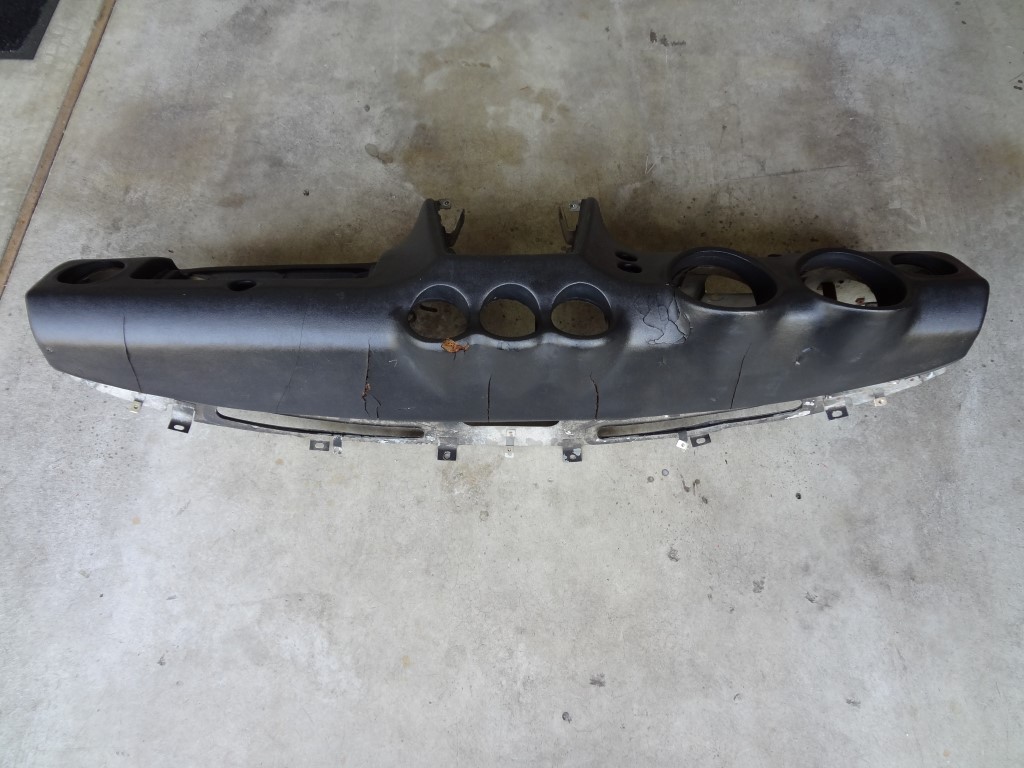
 '71 Z dash free to the first person to come and pick it up. Gresham, Oregon.

-
I live in Gresham Ore. I have a dash free for U-Haul. fly.phred@frontier.com Phred
-
Hi Blue, I'm in the same boat. The silver billet ones look good. The red billet ones look good too, but look more complicated than they need to be. Of the fabricated steel ones, the black, gusseted ones would do the job. Buget considerations have to be reasonable though too. Do you have prices, and manufacture of these? My race car project and budget took a hit, as I had a heart attack this summer, but I intend to finish the car. Thanks Phred
-
I have repaired several broken/ stripped out cam tower bolts in the past. The stripped ones are easy as you just have to drill and install a Heli-Coil. The broken ones are harder because you have to accurately drill out the old bolt without reloacating the centerline, and then install a Heli-Coil. To do a proper job on that bolt will requir removal of the cam and towers. I have repaired the shorter outer bolt hole without removing any parts, but never could do the long bolt without removal. Phred
-
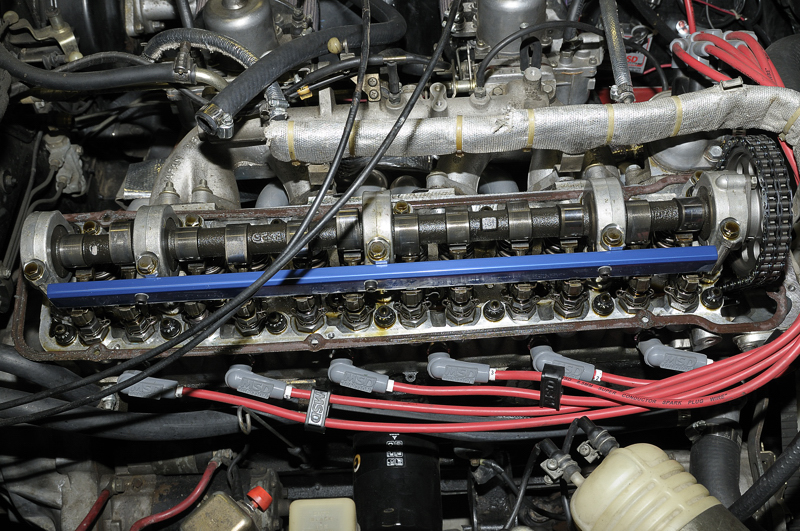
As seen on HybridZ: Larry Hassler and Chris Cox ( 626-485-1556 ) are selling billet aluminum spray bars. Unknown price, and I have not seen one in person. Just passing on info. Phred

-
As a machinist and engine builder, I applaud your effort. Phred
-
Chris Your online mechanic should stay online and away from engines. Replacement bearings are available for both rod and mains in sizes that will match a ground crank. Cranks are ground when the journals are worn beyond the factory specified size range. Datsun cranks are made from very good material and hardend at the factory. Even if your engine has 200K on it, it may still be good if it has been treated to nice clean oil all its life. there is only one way to determin if it needs ground. That is to have the crank in hand and measure it with a micrometer. Not something your average home mechanic has in his box. Thats what engine shops are for. Oversized bearings are sized specifically for cranks that have been ground undersize to a standard undersize. Undersized bearings are commonly offered in .010 ( or .25 in the metric world ) or .020/.5mm. Some companys offer bearings for .010, .020, .030, or .040 undersized cranks. It is common for rod bearings to need replacement befor the mains need replacement. This is because the rod bearings are the last in line to see oil pressure from the oil system. It is sometims possible to tell if there are worn main journals (or bearings) by watching oil pressure closely. As oil heats up, it looses viscosity as the oil thins, oil pressure will then drop excesivly as it bleeds away between the main journal and bearings. When this happens, less oil is available to be transfered through the crank oil passages to the rod bearings, sometimes leading to damaged rod bearings. This can sometimes fool people into believing their rod bearing were at fault, when it was actually the extra clearance in the main bearing which caused the failure. As you can see, there is no easy answer. Only diligent inspection by an engine machinist can determin the actual bearing clearance, and weather it is within factory specs. Phred
-
Agreed! No gasket needed. However, I always make sure there are no burrs on the tensioner face. A piece of 400 wet sand paper on a hunk of glass, and work the the contact area lightly. A nice smooth surface will seal up great. And if it does leak a bit?!!! OMG, some oil will get inside your timing cover! Cheers! Phred
-
Is the 2K with or without supplying a core.? If you consider the cost of a core engine, and subtract that off the 2K, it would be hard to beat. Get more details on what is supplied as far as new parts, and what machine work is done. Phred
-
Crank polishing has been done many ways, probably 90% of which are wrong. All due respect to blue, scotch brite is only a cleaner and does not polish a hard crank journal in the technical sense. The idea in polishing is to smooth down any micro (or bigger ) scopic peaks on the journal, to obtain a flat, smooth surface finish. Quality crank grinders will polish after grinding to remove any grinding marks, even if the journal looks smooth. Polishing is usually done with a machine about the size of a chain saw. It spins a continuous belt about an inch wide. This can also be done manually, with inch wide polishing paper, swinging your hands back and forth. Polishing, or sanding paper in bulk, called a shop roll is used. If the finish is poor, start with 320, work through 400 and then to 600. The crank should be spun in the direction the crank turns in service. This will microscopically "flatten" the grain in the proper direction. Think of running your hand through your hair. It lays the hair down in the direction your hand travels. Polishing the journals lays the grain down in the same way. A good micrometer that reads in tenths is used as the polishing proceeds. It's all too common to polish a journal till its not flat, but smaller in the center of the journal than towards the sides of the journal. So a good crank polish tecnician will mic as he goes, adjusting the areas being polished to maintain a flat surface. This is the most common way small shops polish a crank. Many custom crank repair shops, and racing crank builders, use a very expensive machine which clamps the journal in a flat polishing attachment, that is designed to put a very fine "micro polish" on the journal and maintain the all important flat journal. The meaning of flat, being that when checking the journal with a micrometer across its full width, from the radius of one side to the other, it should be the same size to within .0002. This is just one paragraph to give you a general idea of how cranks are polished. It is an area often put aside as not "that important". That all depends on your point of view, and what you are expecting out of your engine as far as performance, and life expectancy. If you're really interested, there is some good info on the web. Just do a search on crank polishing. With 30 + years as a racing engine builder, I have my preferences. With few exceptions, the engines I build will have polished crank in it. Phred
-
Glass will be the most aggressive, changing the surface texture to that of a cast look. For small detailed parts like carbs, plastic media will best retain the stock finish. Soda will clean good, and not harm any metal, but it will leave the smooth luster of carbs a dull flat aluminum apperance. Whatever you do, the carbs would REQIRE a complete disassembly, blast, and then a full detail cleaning and reassembly. My 2 cents, FWIW. Phred
-
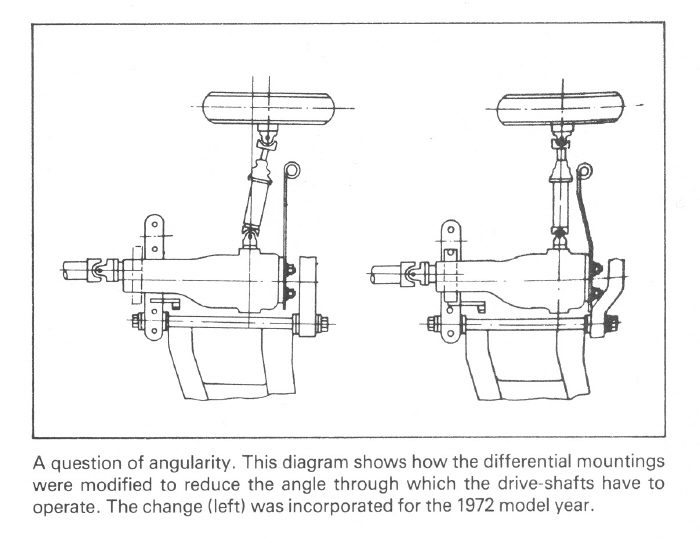
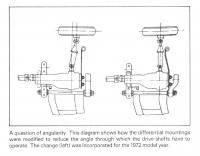
Maybe this will help. Phred
-
It would probably be enlightening to give them a call, to see if they used any gasket sealing compound on the head gasket. There is a sealing ring around the cylinders, so it's not unusual to find good compression, and water leaking at the same time. The cut outs in the gasket where the water flows can only be sealed with a really good flat surface, or gasket sealer. Even with a freshly surfaced head and block, I still will use a sealer on the gasket, a little extra insurance goes a long way to keeping your sanity. So, you have nothing to loose, and everything to gain with a retorque. From experience, if you have replaced the head bolts with the stronger turbo bolts, torque them to 60 ft.lbs. If they are the old bolts torque to 55 lbs. Sometimes the bolt torque can fool you. The bolt can take a set, so one at a time working from the center out, release about 10 lbs. (slacken the torque) and then torque up with one smooth movement. Zig-zag back and forth from the center out, put it back together and give it another go. Good luck. Phred
-
Probably a bit late for this, but... You should NEVER let a new/rebuilt engine sit and idle. The two most important issues of an engine are at stake. #1 is the cam/rockers. At Idle there is low oil pressure, with a weak stream hitting the lobes which are crying for lube during breakin. #2 the rings need to be under load to seat against the cyl wall. This is done by putting the engine under load. This will build more cyl pressure which forces the top ring against the cyl wall, encouraging the ring to seal. If this not allowed to happen, the cyl can gloss over and sometimes the the rings will never properly seal. After intial fire up, all you have to do check for leaks, set timing, and drive. During the drive, stay on unused roads that allow you to accelerate then coast down. Keep accelerating, and coastin down, not allowing the engine to stay at a constante speed. Keep the engine under load as much as possible. This is how a dyno works. The engine is put under partial load say 20% of max, for about 20 min. frequently running the throttle through a lsow/med. acceleration mode. Some engines will be ring sealed within a half hour. Depending on the ring type, and cyl. hone job ( grit of stone, cross hatch style) it may take an hour. Also, during this time, you also have max oil pressure running through the engine giving the cam it's best chance of breaking in. Phred
-
I use soda to blast/clean engine parts on a daily basis, both internal and external. We have a fairly expensive machine ($12K), which has been trouble free for five years. You learn how much pressure is required, and the grade of soda needed to aquire a desired finish. Afer soda, pressure wash, or just soap and water, and paint has never been an issue. And just for the record, I had a complete Z (prior disassembled) walnut shell stripped for $700, top bottom, inside & out. I really liked the resulting finish, and would never use aggresive media like sand or garnet, as I have seen too many panels warped, or the surface finish way too coarse for my taste. My 2 cents. Phred
-
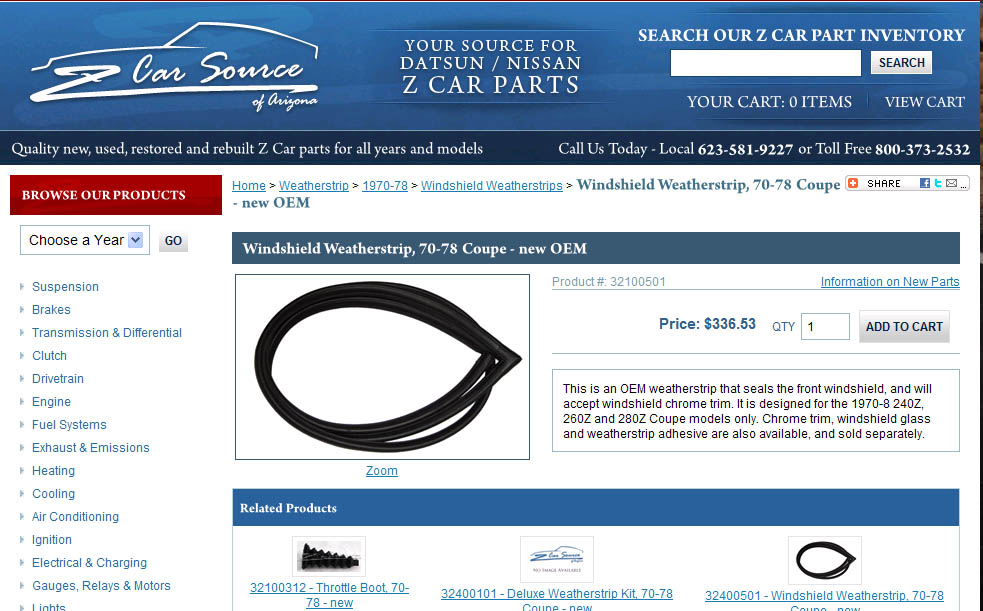
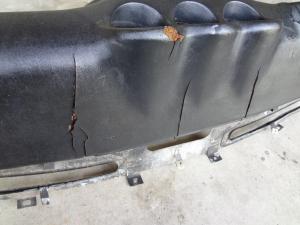
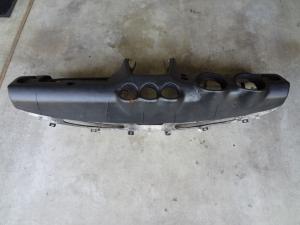
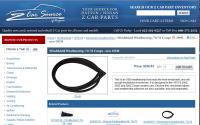
Thanks for all your thoughts. I have decided to go for an aftermarket seal based on the rather silly price of a NOS seal which can be seen in the pic below. I will follow up on this post when I recieve the seal and give it a good look. Phred
-
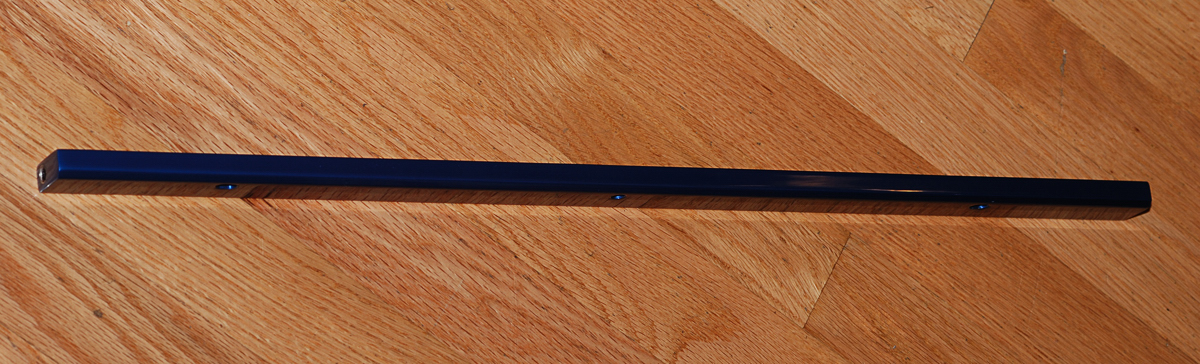
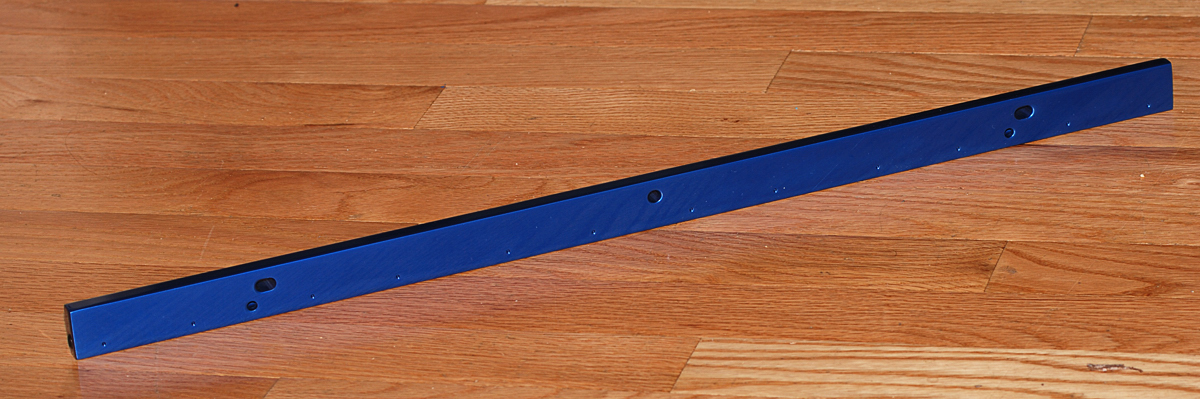
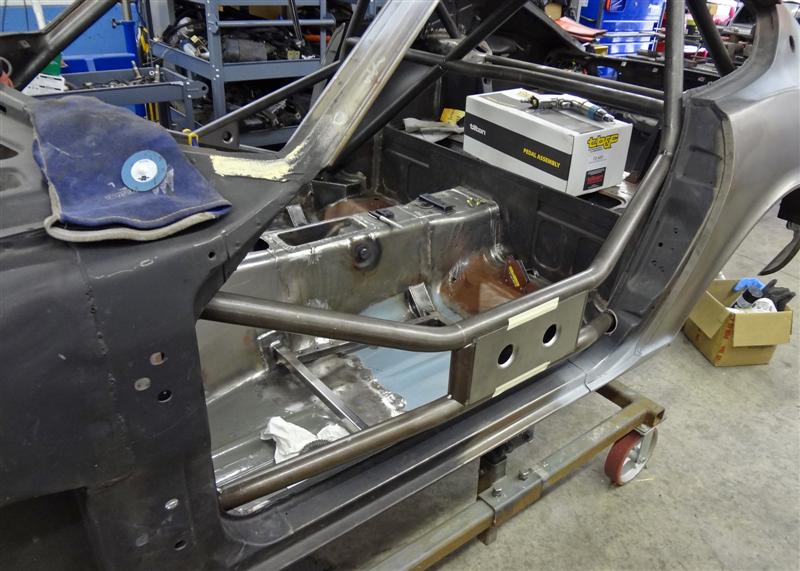
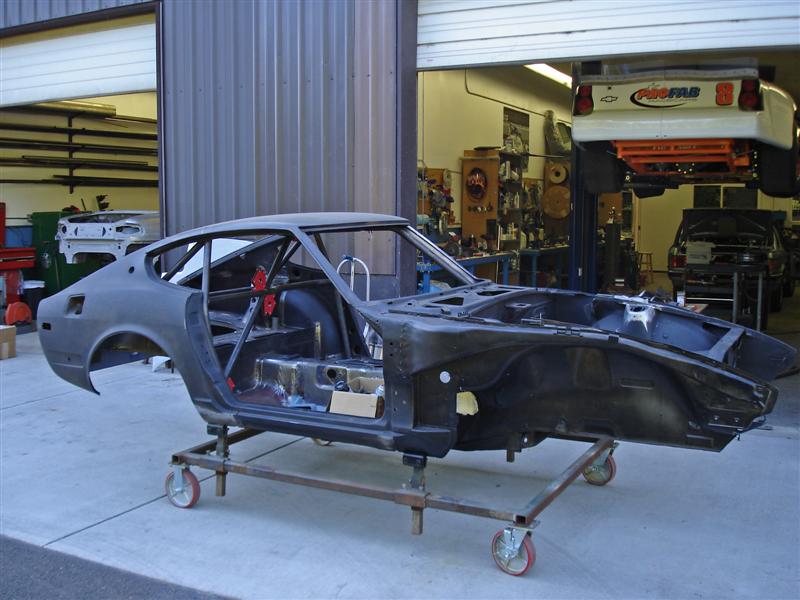
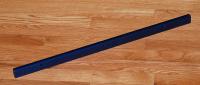
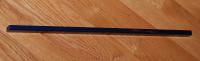
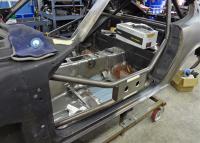
I'm going to need a windshield rubber seal soon, and would like to get some reports from anyone who has used different suppliers products. The # 1 question is who should I buy from. My car is completly stripped at this time getting the cage installed. I spent the day fitting a fiberglass dash to the car, fitting it around the cage bars. As you can see, a lot of work is still to be done. I need to temporarily install the seal, to make sure the dash will fit up nice and snug to it. Any and all comments are welcome. Thanks. Phred

-
I work in the racing industry, and everyone I've talked with, has been critical of the IRL. This was an accident just waiting to happen. It could have taken place at any number of tracks. We've all seen the mayhem take place befor, only difference is nobody died when somebody ran out of talent. How ironic that one of the guy's with the most talent drew the short straw. I've been involved with racing since the late sixties, and it seems nothing gets done untill someone dies. So now something will be done to slow the cars down on the fast tracks like nascar does with their restrictor plates. Or, find a way to keep chain link fencing from ripping a car, or driver, into shreads. Or require drivers to have a certain experience level to compete. Or... (insert your own fix.) I'm a bit surprised that the IRL drivers havn't formed a group of their most experenced divers, like F1, to recommend ( require ? ) safety changes to tracks, cars, or driver experience level. It's going to be up to them to insure that Dan's death will save another driver's life by making positive safety changes. Remember, F1 drivers died on a regular basis till Senna's death. It shook people up enough that such sweeping changes were made, that no other F1 driver has died since. Let's remember Dan, and encourage positve changes, so racing can be racing, not death race 2012. With respect, Phred
-
Arne: I have been building Porsche race engines for Rothsport in Tualatin for quite a few years now. If you decide to build a kraut car, stop in and look me up. Other than sticking the engine in back, the biggest difference between Datsun and Porsche, is Porsche parts cost more. Phred http://rothsport-racing.com/
-
I have some numbers from a SCCA legal ITS 240Z. BSFC is not a hard fast number, and will/can vary depending on the state of tune. Other variables which can effect BSFC are the mechanical efficiency, or internal frictional loss of rings, bearings, etc. Also note, max torque@RPM varies with cam timing and length of intake tract, and size of header tubes/length. These are an average of two ITS 240 engines: 4750 RPM - .59 BSFC ( 169 lb/ft. @ 153 hp ) 5000 RPM - .55 BSFC ( 166 lb/ft. @ 158 hp ) 5250 RPM - .56 BSFC ( 163 lb/ft. @ 163 hp ) 5500 RPM - .56 BSFC ( 157 lb/ft. @ 164 hp ) 5750 RPM - .55 BSFC ( 151 lb/ft. @ 165 hp ) Have fun! Phred
-
Blue, Your head looks like electrolosis erosion to me. The main reason I reply, is to try to convince you not to weld a piston dome. The piston dome is not that thick, and the welding will likely distort the top ring groove. The top ring groove is probabbly worn out anyway. To check, lightly glass bead the piston top groove, install a new ring and check the ring land clearence with a feeler gauge. New pistons will have a land clr. of .001 - .0015. At around .004 clr. the groove will not support the ring properly and it will lead to compression loss. My 2cents, and FWIW, and I've been there many times. Phred
-
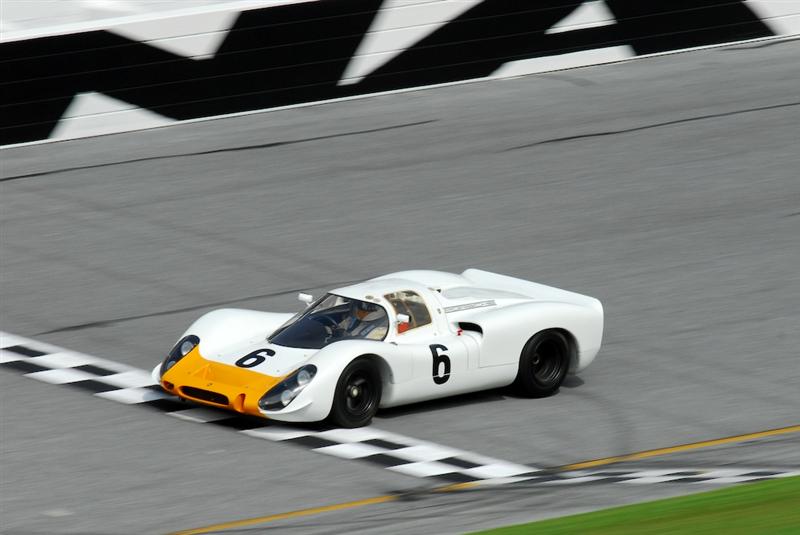
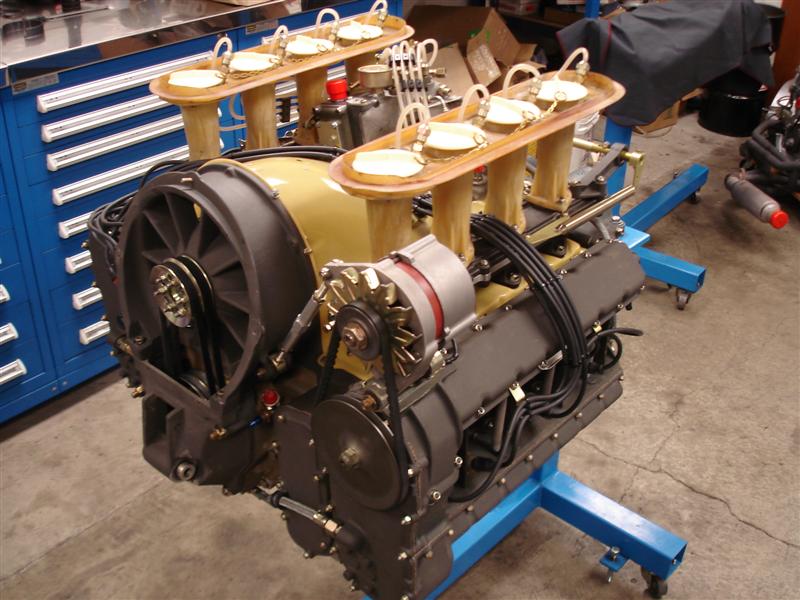
I too, have have scared myself several times going too fast for the road I was on. All those were surpassed by these two cars. The Corvette at Thunder Hill was ( only ) around 150 or so. Would love to see the banks at Daytona in it. The Porsche 908 was the most thrilling, don't know how fast we went, as I was a passenger, and could only think of how frail that car is, and how soft my body is. It was most rewarding, as I was the enging builder of this 1968 LeMans car. Phred


-
Thank you all for adding to my post, as I indeed left a bit out. I tend to forget that a quick and simple job for me, may put someone else in an unknown area. I look at it this way, if something breaks while you are trying to fix a simple problem, then you get to learn how to fix a complex problem! Phred
-
Brian, I have not heard of head bolts referred to as stage I, or II. More commonly they are referred to as early, and late, late ones also known as tubo bolts. Unless your bolts were replaced, they will be early bolts. Get you magnifying glass out and look closly at the top, or head of the bolt. The Late, stronger bolts, will have a very small "13" on the outside edge of the hex. These will hold 60 lbs. of torque. I have frequently encountered early bolts that will start to feel a little stretchy at 60, but will usually hold up to 55 lbs. Before you replace the head gasket, try a retorque, and see if that will fix your leakage. Many people do not use a lube on the threads of the bolts, and this will give a false torque reading. Torque is a method of gauging bolt stretch, which is the mechanical means by which the head is held down. If there is friction between the threads, the torque wrench will click early, and the correct amount of bolt stretch, and therefore clamping force, will not be acheived. Use regular motor oil on the threads and under the head of the bolt. Remember, there are two different lengths of bolts. The shorter ones go through only the head, and will feel good when you torque them. The longer bolts go through the cam towers too, and they will sometimes feel a little stretchy as you torque them. This is normal, as a longer bolt will tend to stretch a bit more than a short one. If it were me, I would remove one bolt at a time, clean and lube the threads, and under the head of the bolt, and then replace and retorque it to 55 lbs for early bolts. Continue in a circular pattern working from the center of the head , finishing up with the bolts on the ends of the head. If this doesn't cure your problem, you will have to replace the head gasket. But at least by then you will know how to properly torque a head. also, make sure each head bolt has its required hard washer under the head of the bolt. Also, and again if it were me, I would relace the head bolts with the later style, stronger bolt. They are Part# 11056-P7600 for the short bolts, and part# 11059-P7600 for the longer ones. Good luck! Phred
-
A few years back, I had some brackets and hardware tested. The results were zink. The gold stuff was called zink/yellow ( I don't know what product is used for the yellow ) and the few silver bits were zink/clear. Phred