240znz
Free Member
-
Joined
-
Last visited
Everything posted by 240znz
-
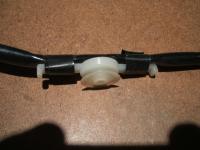
 The springy thingy attaches to the latch keeper via the two machines screws. The dove tail attaches to the door and strikes against the springy thingy to align the latch and striker. That's what you are missing.
 -
Good man...another zed saved. Welcome back to the wonder world of zeds. Plenty of great help about.
-
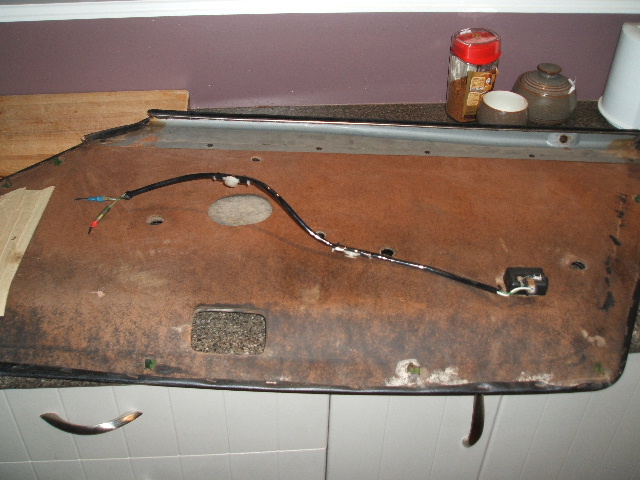
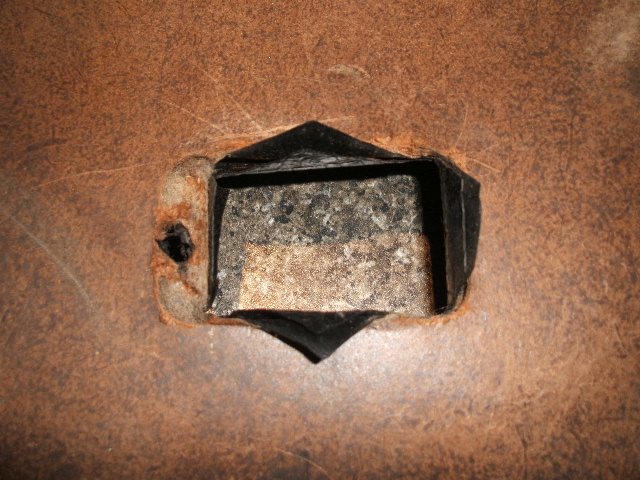
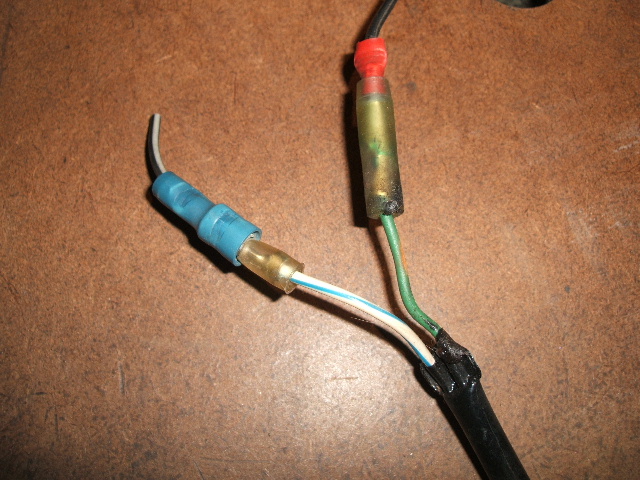
Here are a few pics of the step lamps on HS30-00352 Not Nissan by the looks of them. If you look close you will see that there were two mounting studs that have been cut off with a hacksaw. They are too small for the cut out in the door card. But the cable looks very much like a Nissan product with the ends heat crimped. So sorry guys, I'm now not sure what the hell they are. They will not be going on the car until I know more. Not that the car is ready for them...sheesh.


-
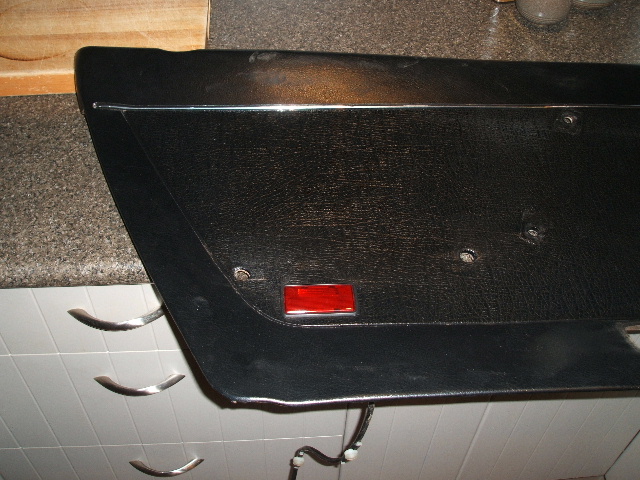
Oops, I put my new glasses on and now I see that the pic of the panel on the first page does have the cut outs. Sorry for the confusion chaps. The lenses I have are red. I'll take a pic tonight and post. It's a pretty shoddy installation. The hole drilled between the hinges for cable access wasn't deburred on the footwell side. I'll change the wiring from trurip to circular to ensure a tight fit through the grommet in an effort to keep it water and duct tight. Probably overkill but I won't ever need to worry about it. The more I think about it, there is no way to tell if my car was fitted with these at the factory or put on at some stage by a PO. My guess is that Nissan wouldn't have used speaker wire to connect from the assembly to the underdash wiring loom or at the very least they may have sleeved the cable. Maybe Kats can confirm what cable type is used or anyone else who has these fitted.
-
This cutout here
-
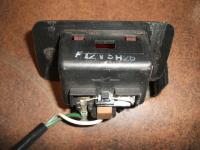
The rheostat is connected in series with all gauge illumination lamps. The rheostat is prone to falling apart which results in the illumination circuit being severed. A bit brittle they are. Just put your hand under there and feel about for the rheostat, if your fingers come back out with electrical bits, then it's a new one you'll be after. Good luck, they are hard to find in working order as most suffer the same fate. There must be an alternative replacement part that someone has found. If anyone knows of such a part, please post it here so we can all get new ones. My guess is that you couldn't replace it with a potentimeter as the POT's are rated for the load???? What is load anyone?
-
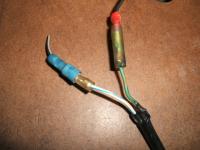
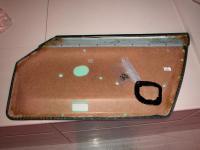
Heh Zak, Did you notice that the first door pic you posted shows that the panel has the cut out for the door courtesy light. The previous one didn't. Did HLS30 240z come out with door courtesy lights? Or Nissan is making generic reproductions? I've got them on my HS30. Not sure if standard though becasue the cable is a .75mm2 twin trurip (speaker wire) with a shoddy grommet and red lens.
-
Post up some pics first. Panel work can be very expensive depending on what is required. Full resto is something I would not do unless the car is either very rare or you will never sell. I think most of us would liek to think that we would do a full resto but really it will most probably be a full rebuild as parts are very hard to come by to get to "as it left the factory" condition. My advise would be to keep it on the road while you reseach the process, assess what you need to do and procure the parts. Take plenty of pics and bag everything .... everything ... and write on both sides of the plastic bags.
-
RHD in the states or a LHD in NZ are just plain dangerous in traffic. Unless you have a passenger, pulling out to pass is "hit and miss" in my book. Apart from the "novelity" factor, why on earth would you want a RHD in the states? Given that as you say, specific RHD parts are hard to find. Would people assume that a JDM FairladyZ or a export HS30 are worth the same?
-
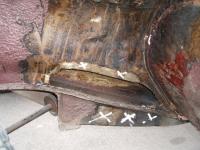
Can't help with the guage question but if you want to return it to original, then that section needs double thinkness. But to make sure of the guage, simply measure the existing sheet. The hardest part is to get that inner frame rail rust free. We have put in 19mm holes so we can get rust proofing in there in the future as the frame is prone to rust. Here are a couple of photos given to me by a club member when I replaced the same section plus pic's of mine. hls30dside.bmp measurements.bmp

-
You see...there is a Santa after all. Wonder what happened to the dip stick? What is the decal on the firewall, close to the heater hoses?
-
It is more likely full of dust and dirt that have collected over the past 35 years. Remove the latching assembly and soak is in a parts cleaner or your favourite solvent. Dry it well and regrease it. The return spring on mine was stretched so I replaced it with a similar unit. There is a small rubber cap (looks like a 5mm squid ring) that fits over the locking selector. This stops the clunking sound when you unlock the door. If if hasn't perished, vanished or disolved by the solvent, try and save it so you can find a new one.
-
Brilliant!!!!!!! Cheers Mike
-
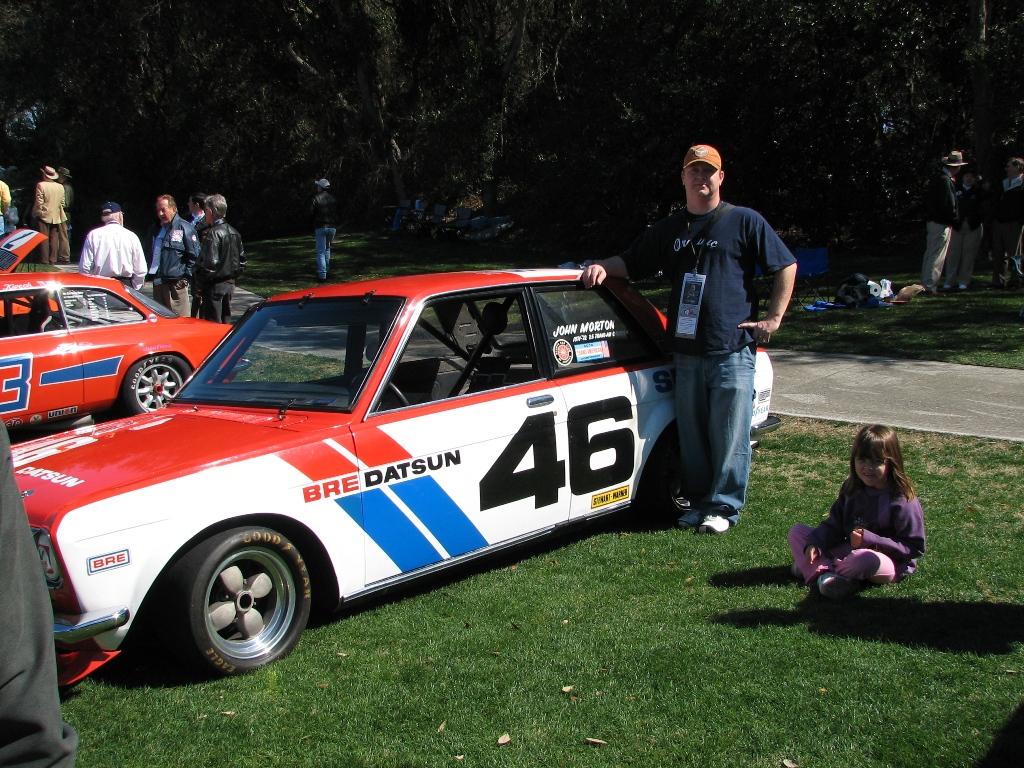
Hi all, A chap in our local club is building a John Morton 510 replica and is needing to obtain some close up images of both rear quarter window decals so he can get reproductions made. If you have a image which shows these in detail, please get in contact with me With thanks James
-
Shame on you for posting that pic without first warning us of "Z garage porn" Mine is in a coma under a cover in the garage which it currently shares with a soon to be banished catamaran.
-
I am in year 4 (hell could be 5) of the rebuild on my 240z. I have to admit that as time goes by, motivation becomes an issue. Things in your life change and priorties can shunt projects like these aside. I have done sod all on my car since it came back from the panel shop just over 12 months ago. What makes it worse is that I have completed all the suspension bebuild, engine, box. But sometimes you just need a break from these types of projects. So the advice I give in addition to the above is take digital photos of everything prior to disassembly (from many angles in as high a resolution as possible) then bag and tag everything. Keep a set of parts in a box and rebuild/freshen the contents then close it back up and store it for when it needs to go back on. That way you end up with lots of small acheiveable tasks instead of one huge task that could test your resolve.
-
I'm sure it would be easier to do the unthinkable and grind off the existing engine block number and re-stamp it with the number that matches the 'Shatai Bango' than it would be to track the old engine down. Not suggesting that you do this of course, but pointing out an option just in case it is a must do for you. ps...hope I used the correct terminology.
-
Hi Paul, I painted mine gloss black. Can't show you any pics sorry as the bits aren't back on the car yet...sheesh. Good luck James
-
Maybe the core is stuffed. It's a bit of a mission to remove it but well worth it.
-
What do you want to see Carl? Most of it remains either wrapped in plastic, in boxes/cupboards or about to put back on. But I have the panel shop due notice that the rolling shell will be back in their shop late Jan for final paint.
-
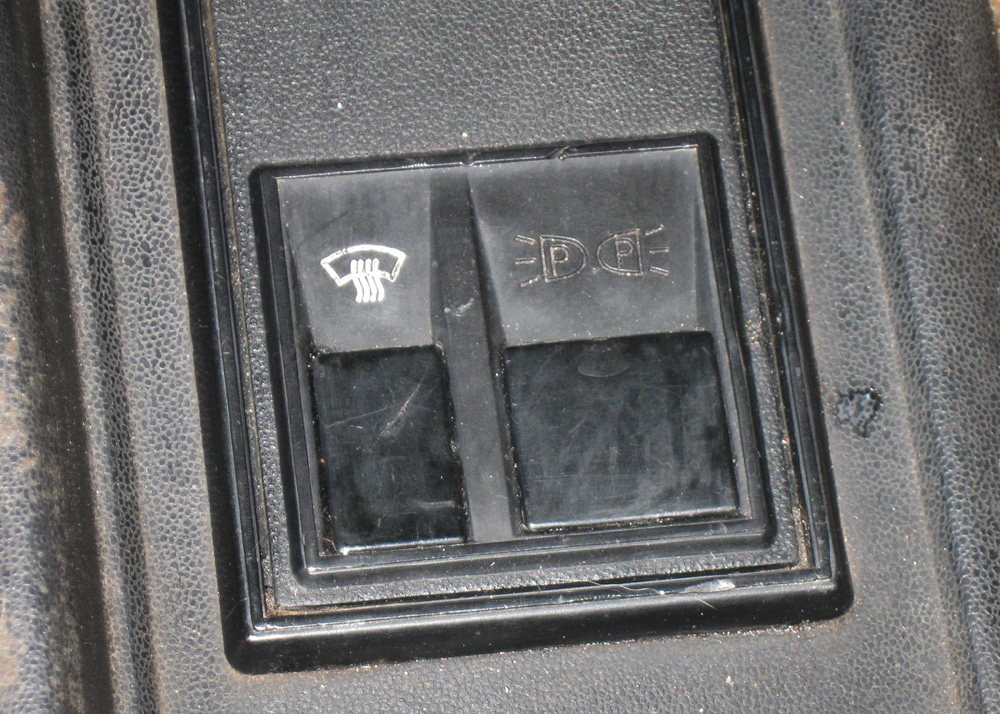
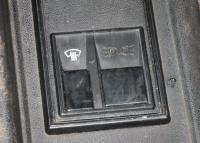
Hi all, I'm looking for the little plastic blank plate(grommet) for the defroster and the parking light on a early 240z console. See photo below (cheers Chris) The grommet for the defroster (86722-E4100) The grommet for the parking light(86721-E4600) Good home awaits. Cheers James
-
Chris, it looks like the factory rear sway bar that mounts forward of the diff. A few words on using a larger sway bar on the front. Make sure to reinforce the frame rail somehow. The PO of my car didn't and cracked the extra brace which is fitted within the internal cavity of the frame rail. He ended up welding a 3mm plate onto the frame rail to support the new mounts. When that seciton was rebuilt, I had the panel shop install some beefy extra brackets to handle the extra stresses. I have heard that some people just drill right through the frame rail into the engine bay and install a extra top plate and sandwich the whole assembly. Not sure that this is a good idea as it would just squash the frame rail and cause more stress. I think the best method would be to (if you have the time and money to make a good job) build in a new stronger internal bracing that spreads the load better. Do it once, do it right = good nights sleep
-
What else have you done in the way of "performance" mods. Simply putting headers on and making the pipe to the rear larger won't gain you much at all and I doubt if you will notice it. You'll hear a difference and think you are going faster. You will need to install a resonator between the header and the muffler to stop the drone.
-
Heh Mike, Just take your time when removing the door panel. The old particle board is prone to becoming soft over time and you could end up losing a few clips through the board. Use a putty knife and slip it between the panel and the door, twist and gently pull up on the knife to pop the clips out. You will need to peel back the plastic to get at the door cavity. Make sure you seal it back up well. Good luck.
-
MSA or Courtesy Nissan