BadDog
Free Member
-
Joined
-
Last visited
Everything posted by BadDog
-
 Thanks, but the slightest ignition bumping doesn't get those cam lobes pointing *straight* up. Guess I'll have to hand-crank the engine to get right where I need to be. Does anybody care to hazard a guess on my noisy fuel pump issue? -Ken P.
 -
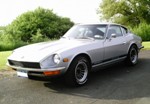
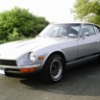
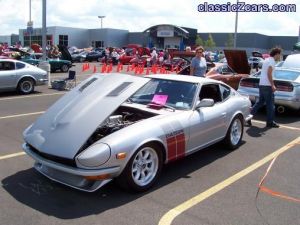 Yes a beauty, great paint with subtle changes in the mettalics transitioning to the hood... and thanks for taking at least of partial picture of my car (silver 240 at left edge of photo) :-)
 -
2 questions on my '73 240 w/72 SU's, Pertronix Ignitor and MSA header: 1) re: valve adjustment - I am unable to get cam lobe #1 to point *exactly straight up* by kicking the ignition bit by bit. Is *close* good enough to check/adjust the clearance? If not, I need to turn the crank manually but I can't see how I can do so easily without potentially damaging the water pump by hitting the fan with a ratchet handle over and over... 2) while getting my Z running again after painting it, I removed the mechanical fuel pump to check its suction by manually actuating its lever. During the course of this, the little spring in the base of the lever popped out, and I put it back in the way it appeared to go, but it still looks like only gravity is holding it in :-( This may be the source of the annoyingly loud ticking/whirring noise I've noticed that increases with engine RPM. I found that with the valve cover off and the fuel pump installed, if I manually lift the lever up slightly, it doesn't push itself back down after being raised. However, the car runs srong otherwise and doesn't run out of fuel even thought rear electric fuel pump is long since dead... What does that little spring do and how do I make sure its installed properly? -Ken P.
-
I bought a used one from Charlie Osborne (Zed Findings of Ontario, Canada) for my '73. I didn't notice 1) it was different from my original hinge and 2) the holes needed to be re-tapped but it worked anyway and wasn't too expensive. I went ahead and used because I had already re-painted it and my door jambs and wanted to hurry up and get my car back together to shoot th epaint on the body....
-
... but I only ended up using about 1/2 to 2/3 of what came in the kit that was applicable to my car. I bagged and tagged everything upon disassembly, and I found that sometimes the stainless kit just plain had the wrong bolt/screw. Sometimes I could substitute something from the 280Z pieces to work on my 240, but many times I had to use the original bolts or screws. I also had problems with the washers and/or lock washers being too small in diamater or too thick. For example, the washers for the front fenders were had a smaller diameter than the original washers, and tended to end up halfway in the fender's cutouts when I went to tighten them. I did the best I could with them, but sometimes I just had to swap in the old nasty washers. Another example: the screws and washers that attach the side valences to the sides of the front bumper. The pieces just wouldn't work for me, I used the original screw (slightly longer) and original washers (thinner, wider diameter). All in all, its definitely better than schlepping back and forth to the bolt/hardware supplier (for example nobody in my town has 9mm bolts!!!!) but I'm not sure if it was worth the price paid considering how often I *couldn't* use the fasters in the kit... not to mention the fact that it contained *none* of the nuts/nutserts you might need if your old ones were rusted out or had other issues! -Ken P.
-
Thanks much, Ed. I found that out about 5 minutes after I posted... I didn't realize the mounting locations was completely different. Partly because the MSA catalog's bumper parts diagram show the brackets in the reverse of their proper position I figured it out once I mounted the brackets to the bumper, then tried to put it in position. That's when I said to myself "hey, I've always wondered why those holes were there!" -Ken P.
-
I've got a 7-72 front bumper and brand new 70-72 mounting brackets. I've tried to figure out how the brackets "just bolt up" but I don't see it :-( I've searched the forums, but can't find specific information on how to mount these on my 73. Can anyone offer me some specifics or links to better info? Thanks! -Ken P.
-
absolutely nothing having to do with a PT cruiser should ever touch a Z :-) the spoiler's not a bad idea though. Small tasteful one... I guess I'll just keep searching :-)
-
Would a Nismo badge like this be too cheesy/ricey?
-
These are all excellent ideas. I thank you all! I'd prefer the Nissan badge as a first choice... maybe the spiked would do as in inside joke As for filling the holes, to do it properly would involve repainting the hatch, and she's already been off the road for over 18 months. I just want to DRIVE it at this point! Heck it was a thrill just driving it down the hill to the glass shop Thursday morning for the new windshield. As soon as the bumpers are on she'll be street-legal again and I can get her NY state inspection done :-)
-
I screwed up while refreshing my '73, and now I have holes from a dealer plaque/emblem on the driver's side of the hatch lid, and nothing to use for an emblem there. I tried locating an original dealer badge (a long-shot, I know) but Gregory Datsun Sales in Chattanooga, TN is long gone. Does anybody have an idea for what I can put there? I really don't want to fill the holes and repaint the hatch. All panels match because I painted the entire car in 1 session (original mettalic gray/silver).... -Ken :stupid:
-
Very interesting.... you don't even need to seal the gasket to the glass? Maybe I'll give this a shot soon... I'm a little wary because when I reinstalled my sunroof, I used weatherstrip adhesive when I should have used silicon sealant, and my new (1 month cured) paint started to lift in 1/8th inch spots where the adhesive oozed out from under the sunroof gasket :-( There's no way in hell I'm going to try and repaint just part of my sunroof at this stage :-( I touched it up with clear for now and will try to find a bigger sunroof/sunroof cassette to try and cover up those spots. anyway, I digress :-\ -Ken
-
I didn't see any mention of sealant or adhesive when installing windshield or hatch glass. What do you use and where do you apply it for hatch glass? K.P.
-
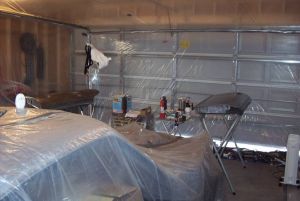
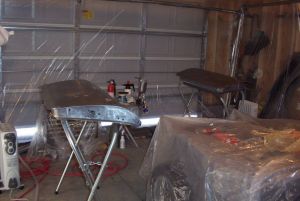
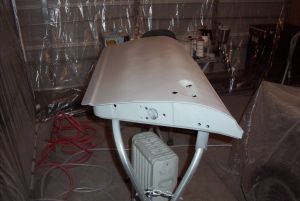
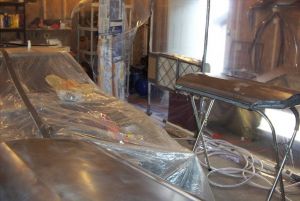
I shot the whole car during ~4.5 hours yesterday morning until the afternoon. It came out about as well as I dared hope The first coat looked like garbage, and I waited 20 minutes to sand off a few boogers and rough spots. The 2nd coat looked much much much better, and I evened things out even more with a 3rd, waiting 20 minutes between coats so I wouldn't have any problems tacking off each coat. The clear went on a little rougher than I would've liked for the first two coats. In the middle of the 2nd coat, I noticed a black streak on the rear vertical edge of the P/S quarter panel at the tail. My air hose must've nudged it somehow and left a 4" vertical mark. I should've stopped right there and waited then lightly sanded it off, but I panicked and tried wiping it off with reducer on a blue shop towel. It got rid of the streak all right, but took that edge down to the primer I kept clearing the 2nd coat, then did a 3rd around the back half of the car and then stopped for the day. This morning I went out and did my best to feather sand that problem I created. I adjusted my gun to a pretty small spray pattern and touched up the corner with 2 coats of base. I cleared it twice and put a 3rd coat on the front of the car, which went on pretty smoothly. I did create a minor run on the D/S door though Good thing I have a set of nib files and run blockers I'll have to try to do some cut & polishing tomorrow or this weekend after I smooth out that run and sand some orange-peel. Its been a fun process! I'll try to post some public pictures soon
-
Thanks for the tips, Ken, that was the kind of thing I was looking for. I needed a refresher to remind me spray the hard-to-reach areas first when doing the color (but not the clear because it has to flow). If all goes well I'll be doing it today :-) -Ken
-
Tom, In the PPG lines, DBU is an example of a basecoat that doesn't need clearing. But again, its for "non-UV" areas only. UV exposure will yellow the paint over time if its not cleared. I'm not sure what products you're using, but they probably have something similar. Or maybe you could try a low-gloss clear on those areas.... -Ken
-
Tom, Its not like you can save the weatherstrips anyway, so I just kept cutting 'em and cutting 'em with a box-cutter until enough was out of the way to remove the glass (preferrably in 1 piece) Then I used Naptha to get rid of the leftovers and adhesive before stripping the paint off.... This wasn't a ground-up, just a metal-up repaint (removable panels taken off, painted inside and out). Driveline, suspension and interior are intact. IMHO if you've stripped and primed the floor pan and rear deck, color them. Maybe use a low-gloss clear if you're doing BC/CC, but depending on the system you're using their may be an activated basecoat you can use that doesn't neet to get topcoated (for non-UV-exposed areas). Might save a few bucks that way. I wouldn't just leave it in primer though. Don't sweat the painting. paint some junkyard pieces and non-exterior panels (like underside of hood) first to get the feel of the paint system you're using. And if you do F*** up the final exterior shoot, you can probably just scuff it up and shoot another BC/CC over it if you don't go too thick. Decent paints with a decent HVLP gun are hard to screw up with proper prep. Just pretend you're a robot with your gun travel Metallics are the hardest to shoot, but I've found PPG and my Devilbiss gun are a little foregiving if I stripe or mottle the first coat of base (by not holding gun perependicular to the surface, uneven travel, etc.) by putting on a good 2nd coat an dmaybe dusting a 3rd. You'll only have to sand it all down to your bodywork again if you screw up 2 paintjobs and have too thick of a film build to apply a 3rd paint job I'm not going to repaint the engine bay until I have to pull the motor for something. Hopefully that'll be at least another couple of years -Ken P.
-
kenz240z, I'm about to finally color and clear my car this week. Everything's jambed. Any tips on making my way around the car? I'm concerned about a couple of areas: all the transitions around the rood, C-pillars and rear quarters, and the headlight buckets to name a few. -Ken P.
-
-
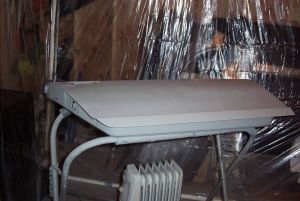
 I primed the doors and their jambs. My finishline III worked well, and the devilbiss cup liners keep the gun relatively clean. I need to improve my lighting situation: I thought I had plenty of light but found I couldn't see the 'wet edge' when laying down coats 2 and 3. Its hard to focus on my gun travel when I'm trying to make sure I'm overlapping properly. I need to remedy this before doing any color and clear...
 -
 I hadn't opened my gallon of primer since buying it 6 months ago. The NCP-271 was sepearated and took a half-hour to re-mix with a hand stirrer :-
 -
-
-
-