Search the Community
Showing results for 'headliner'.
Found 793 results
-
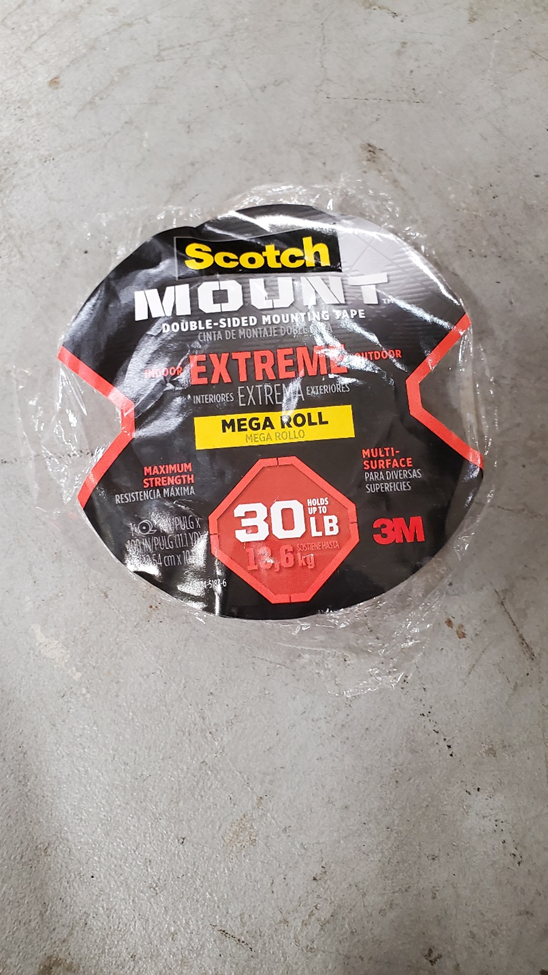
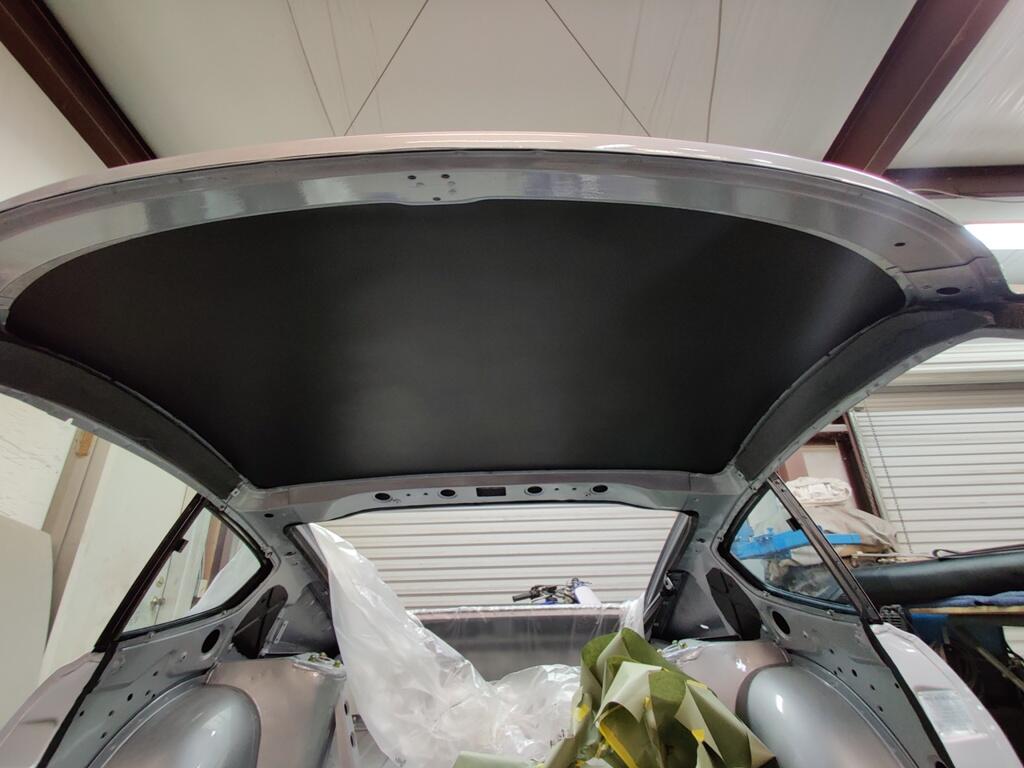
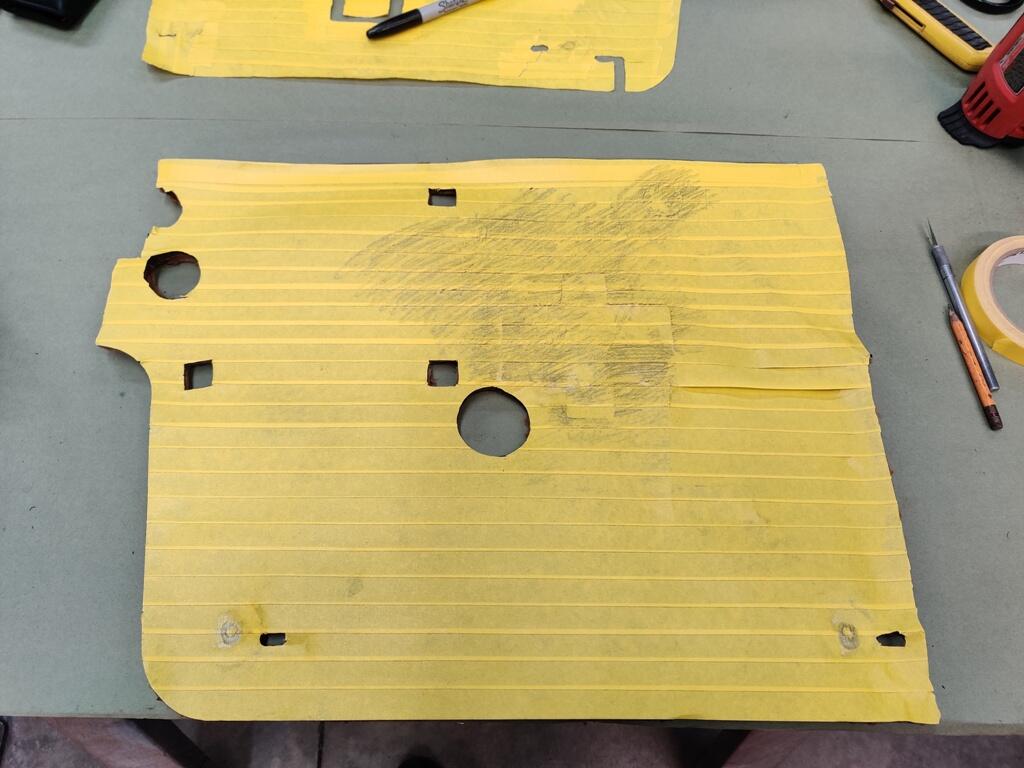
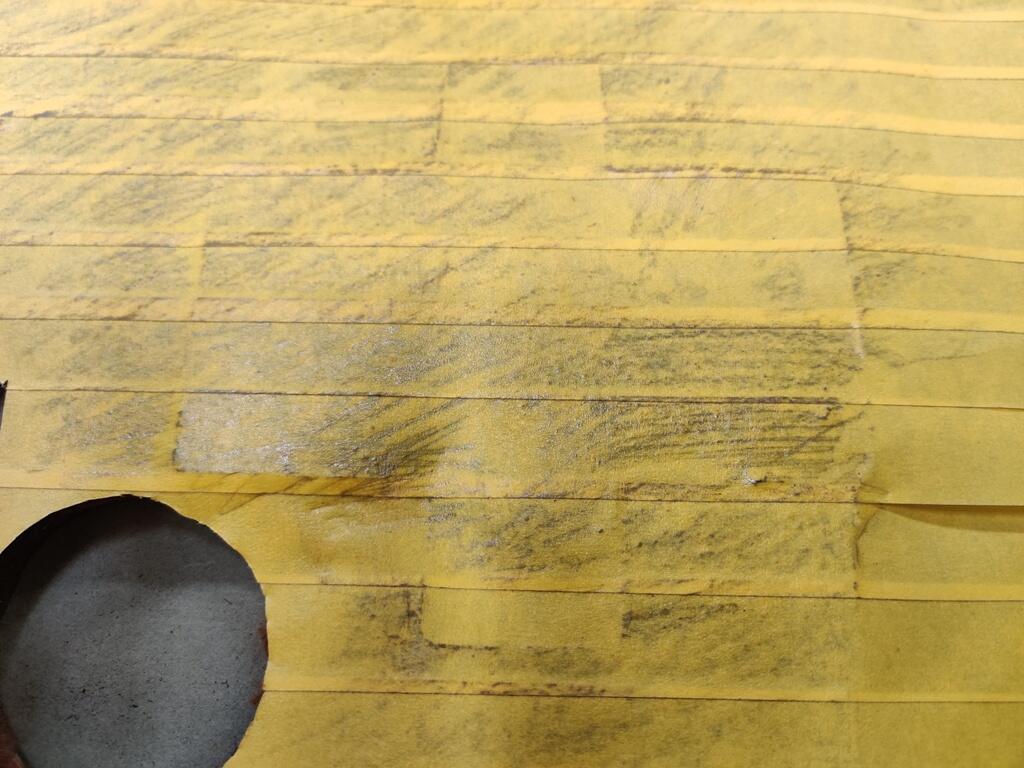
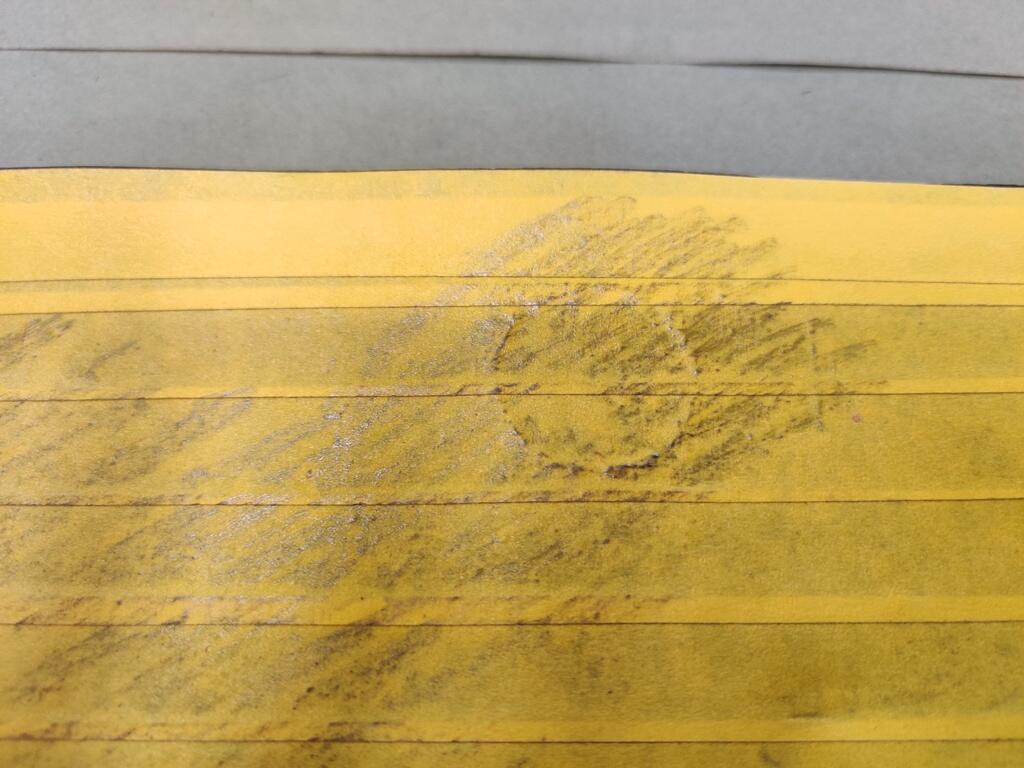
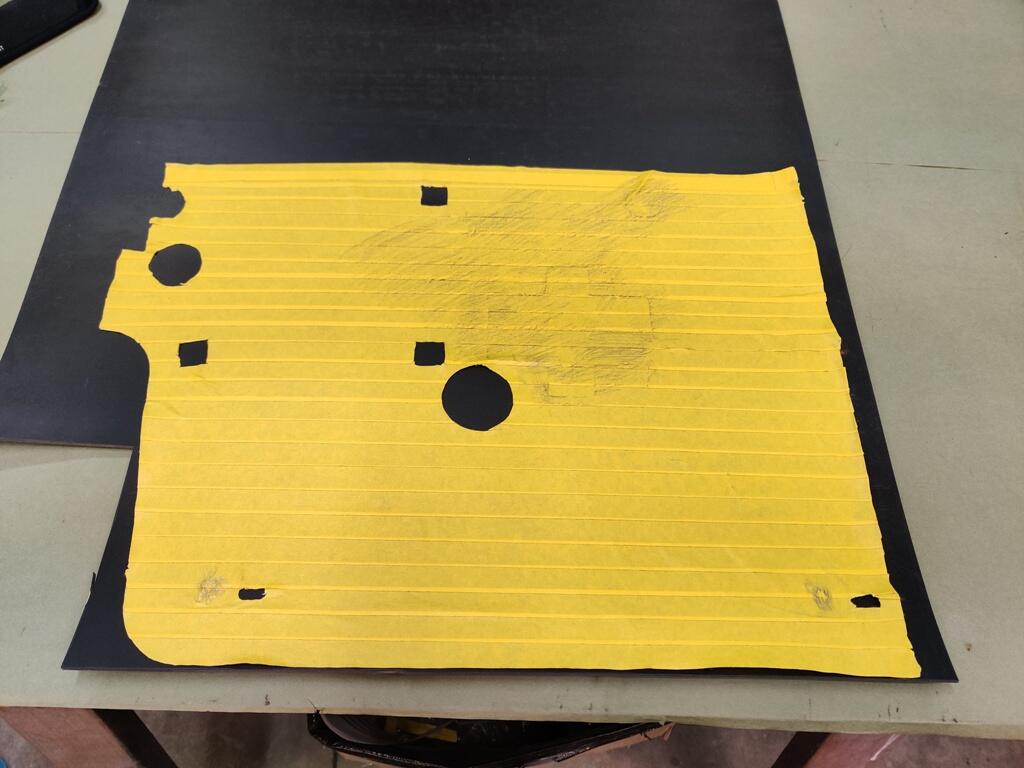
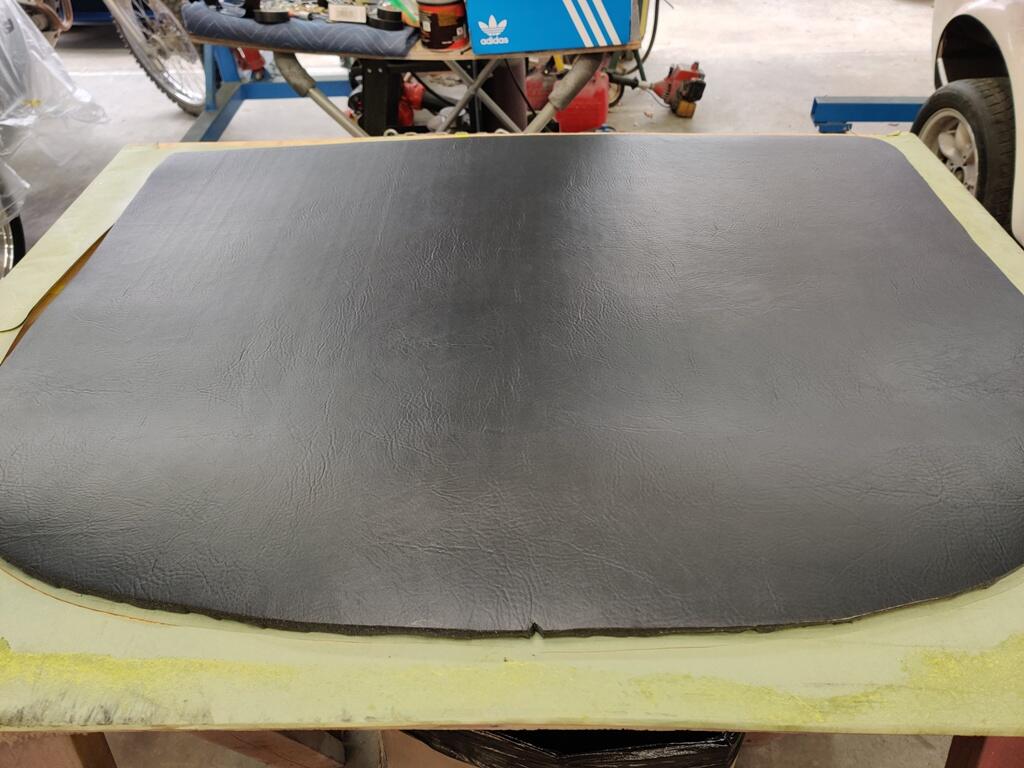
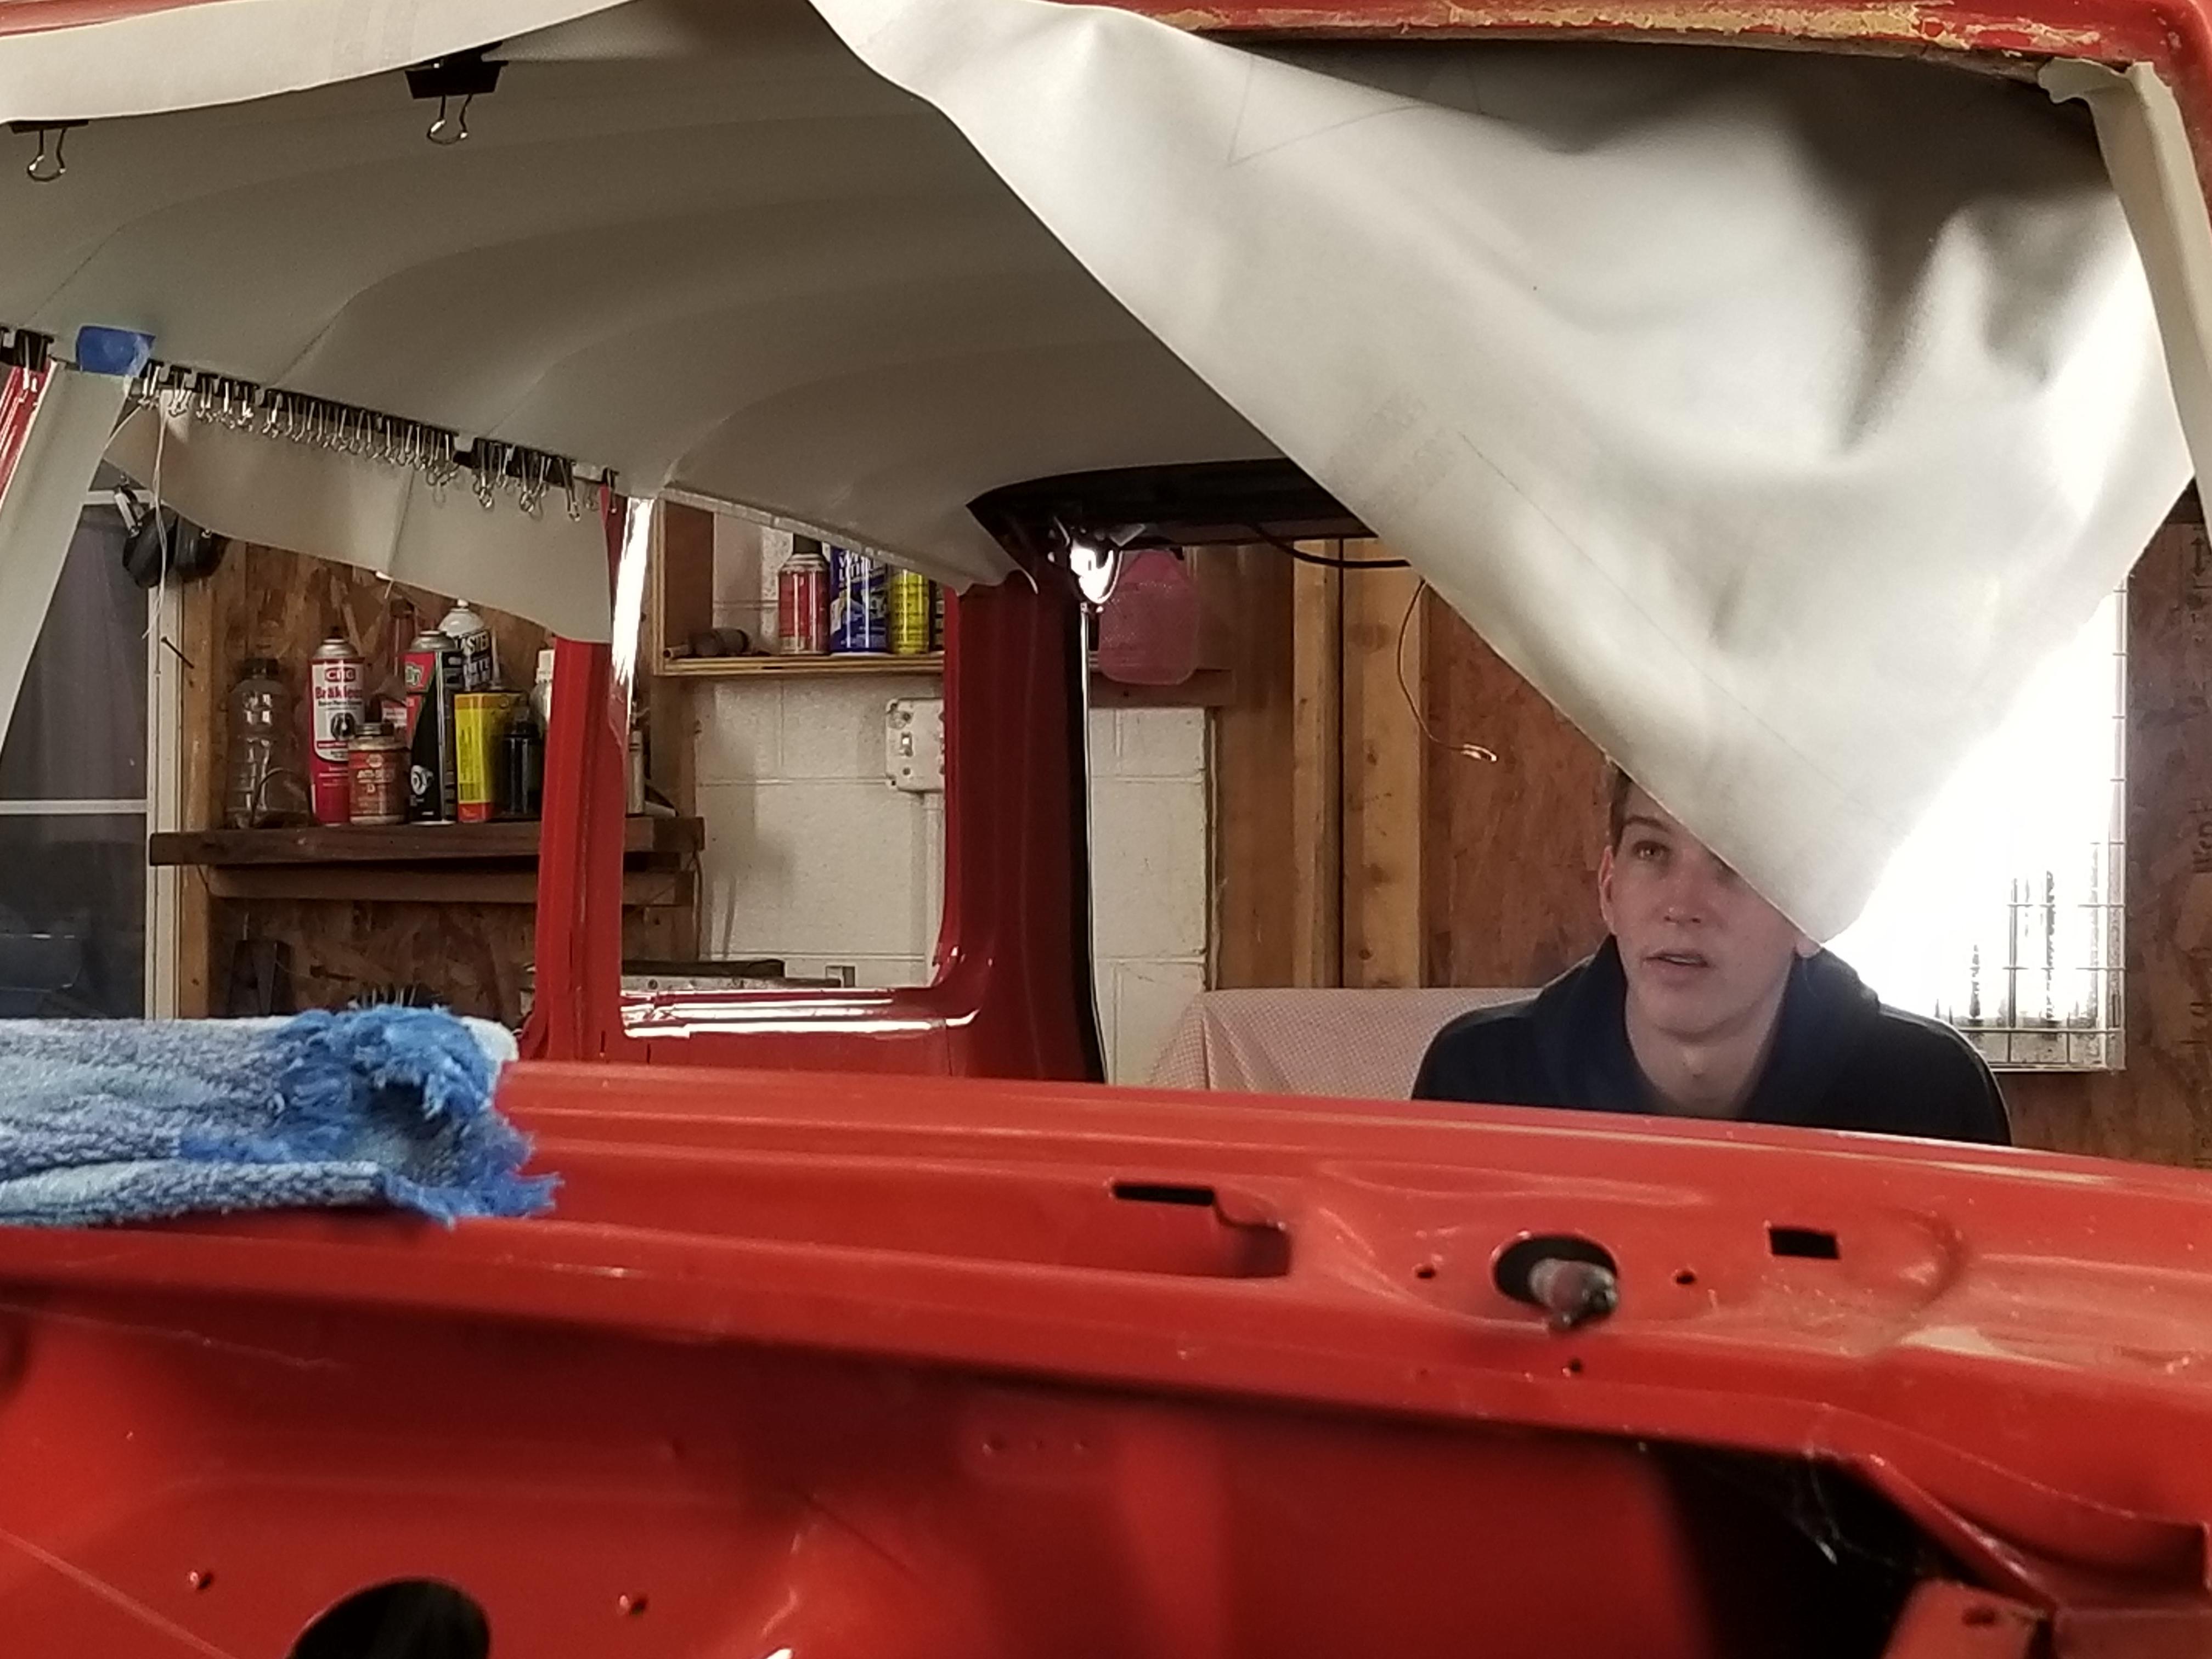
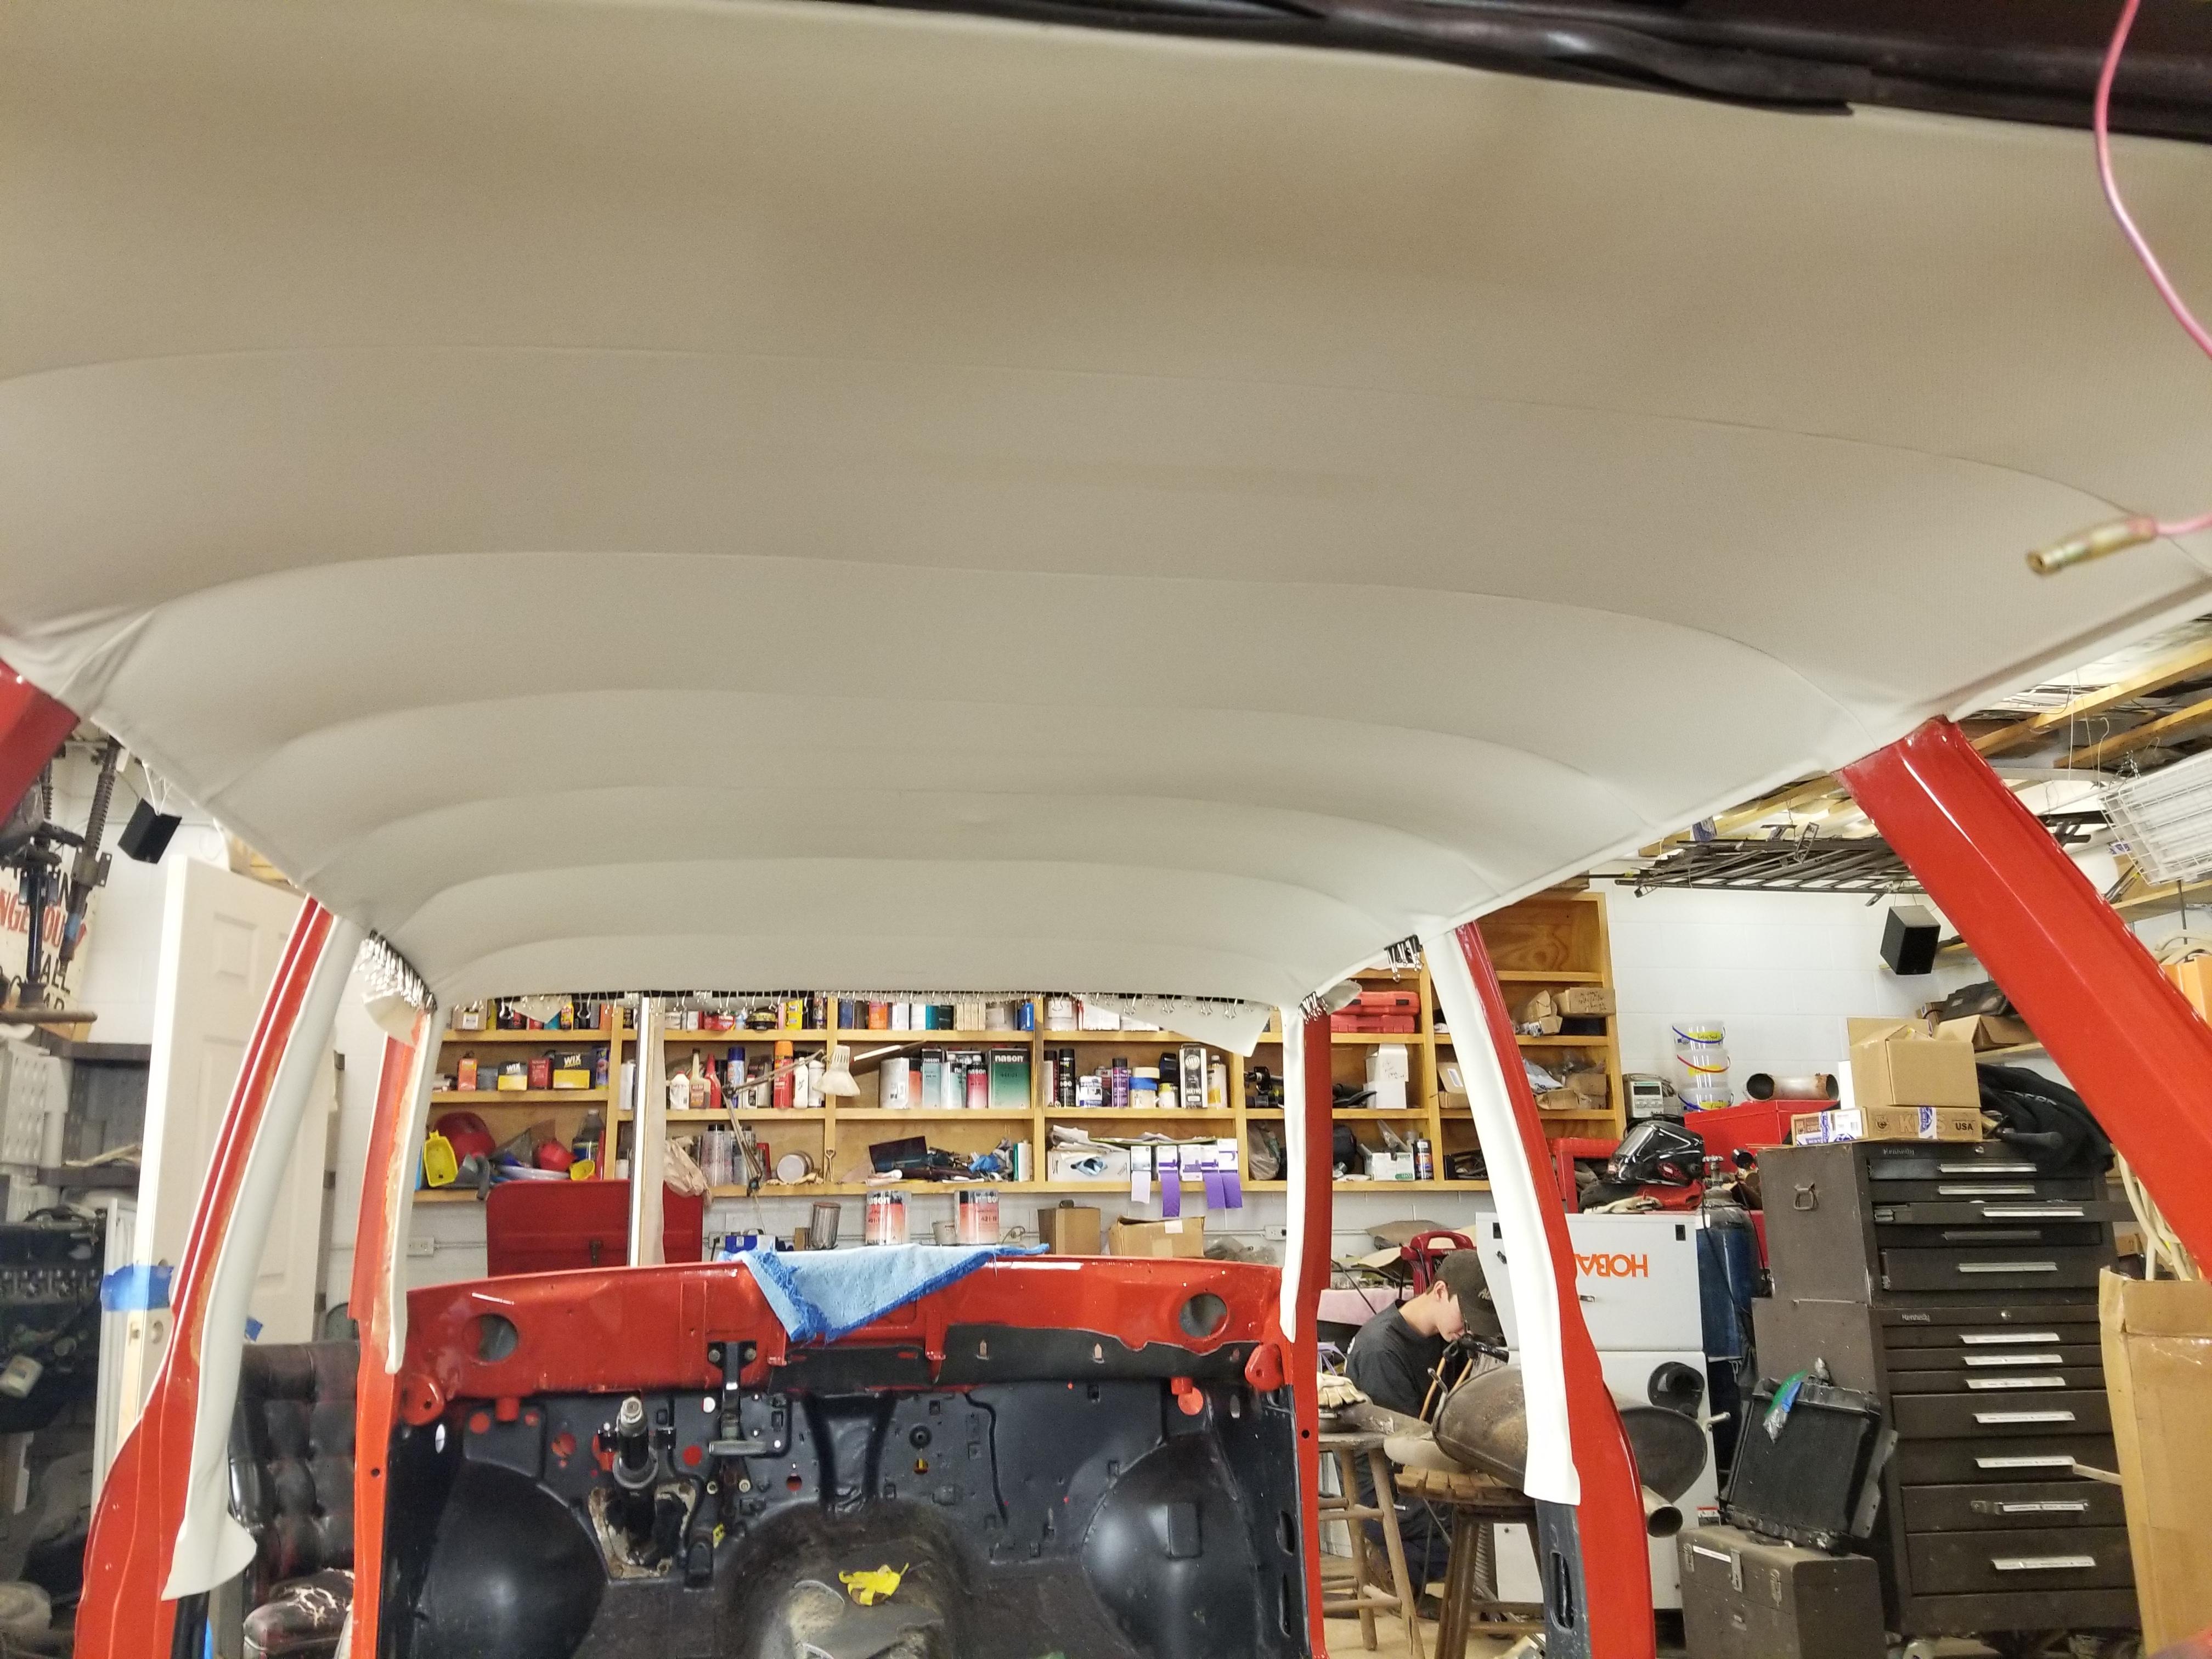
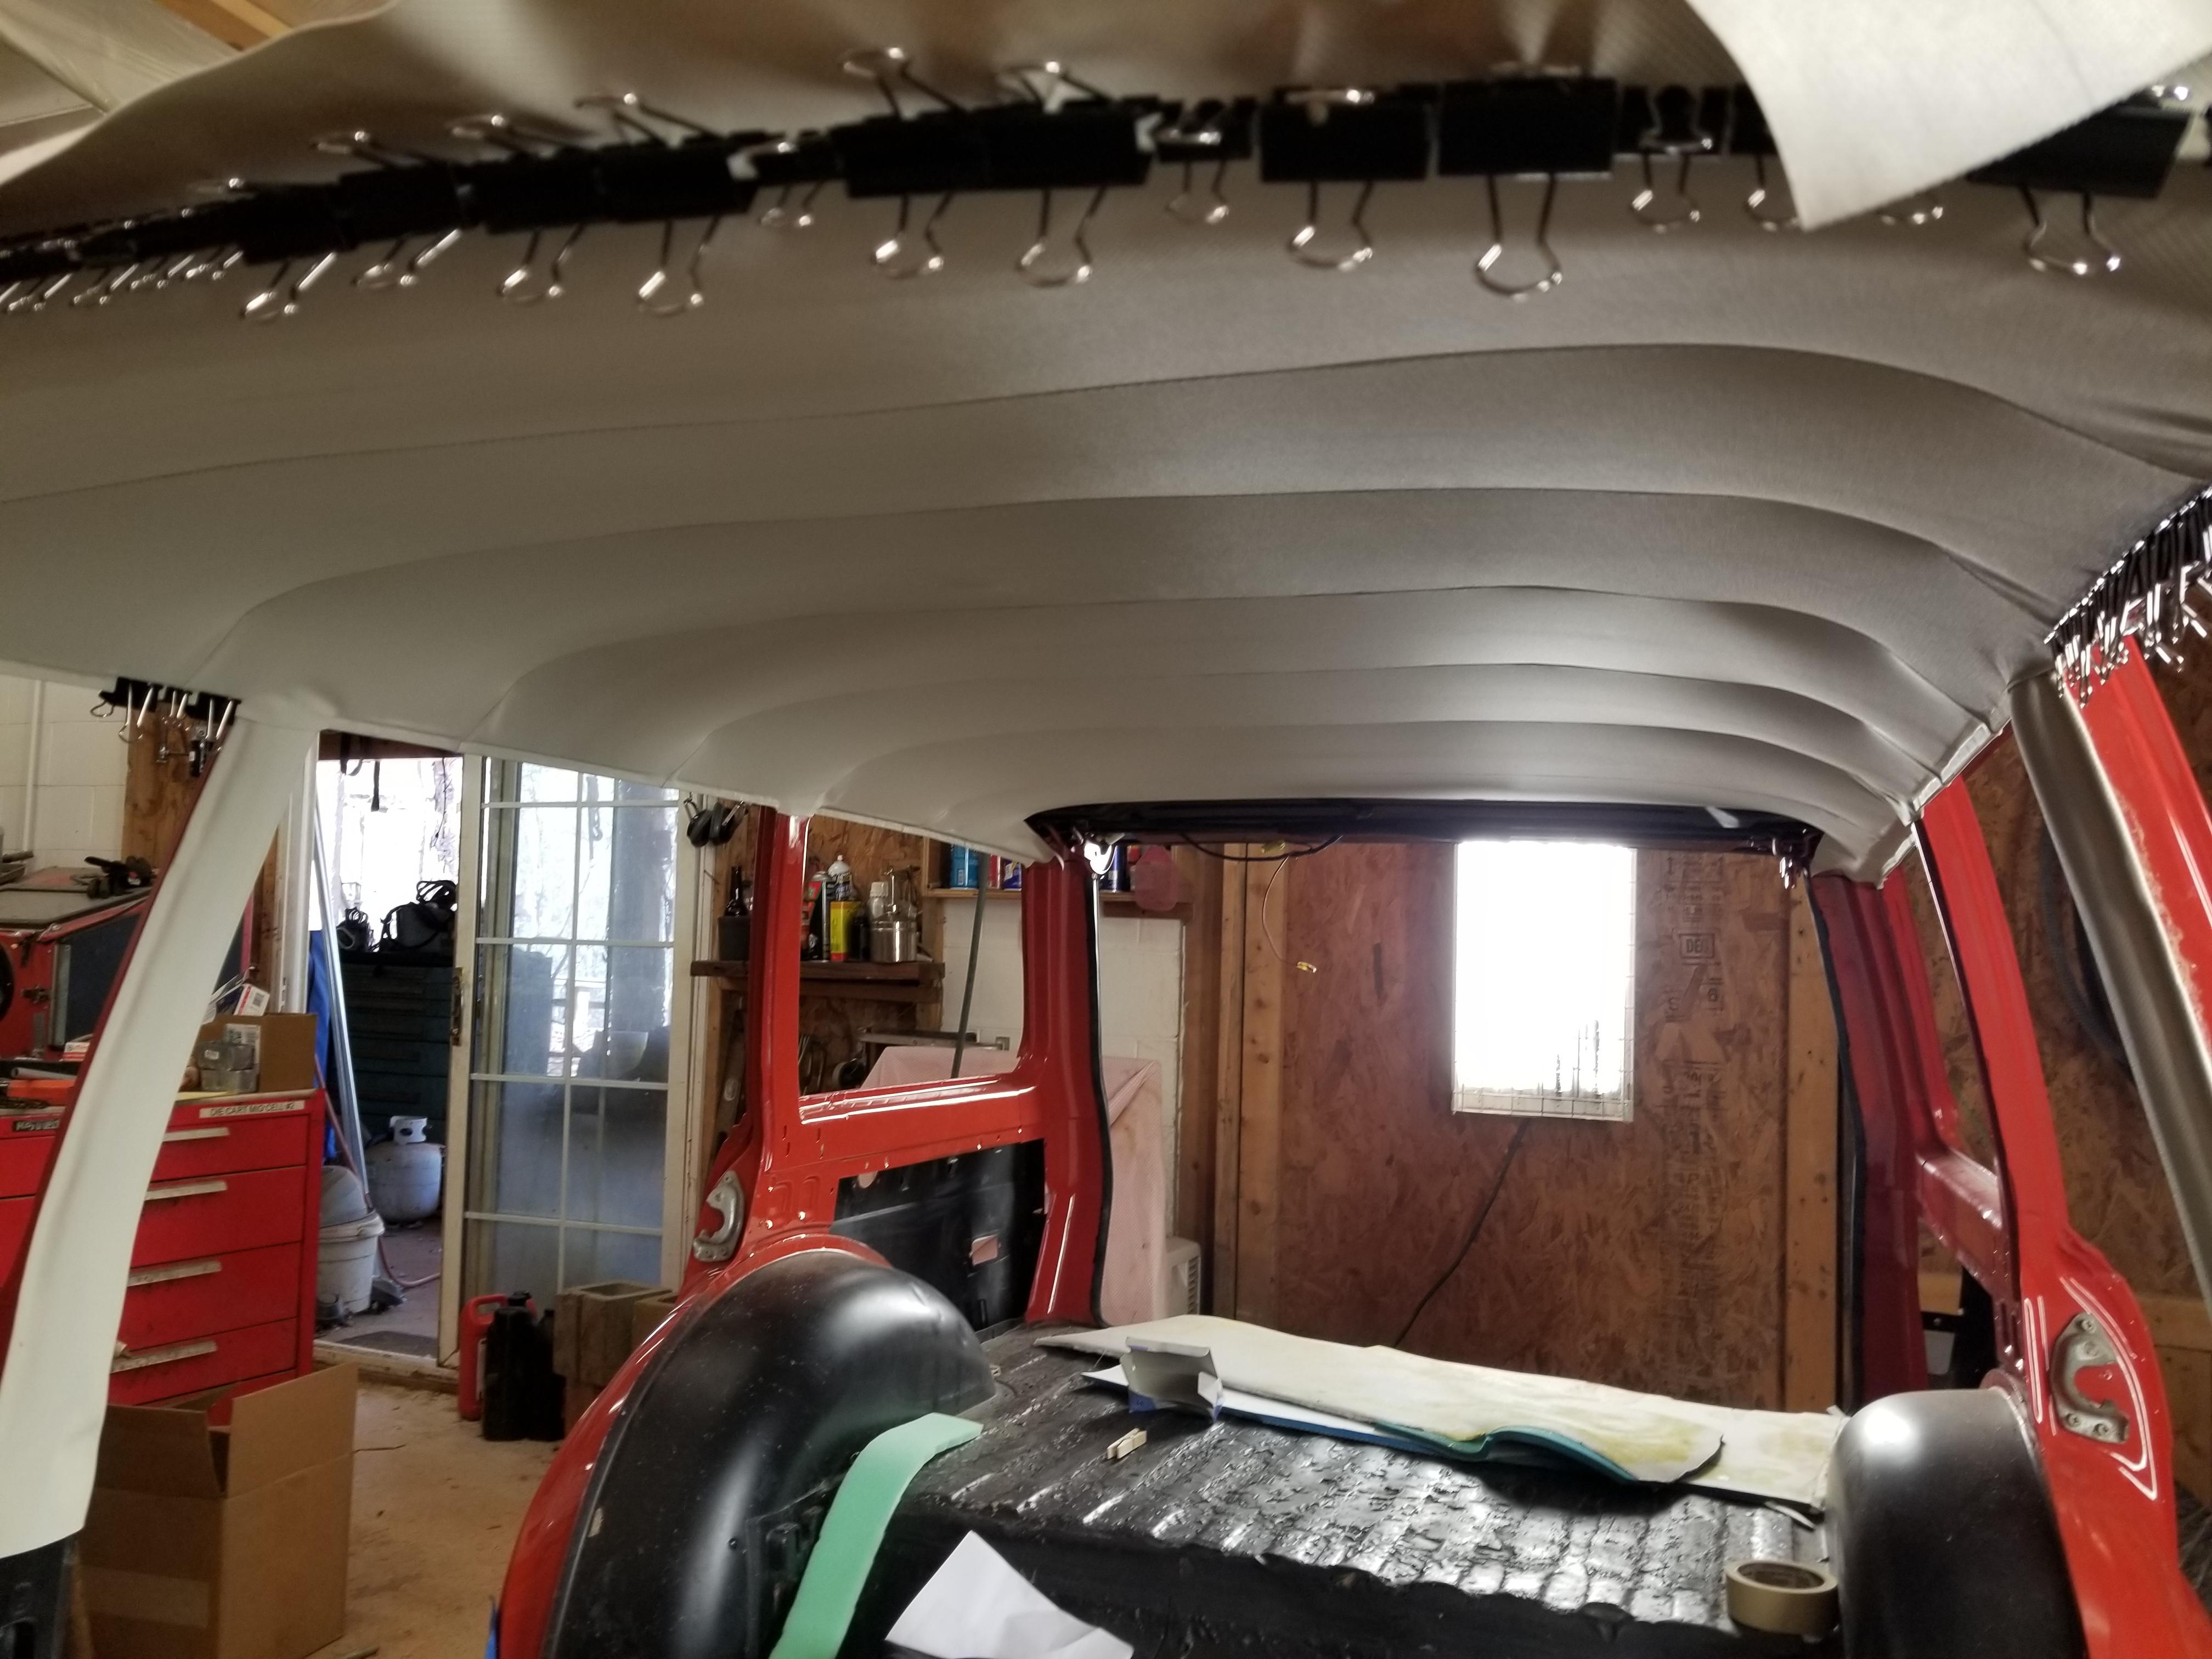
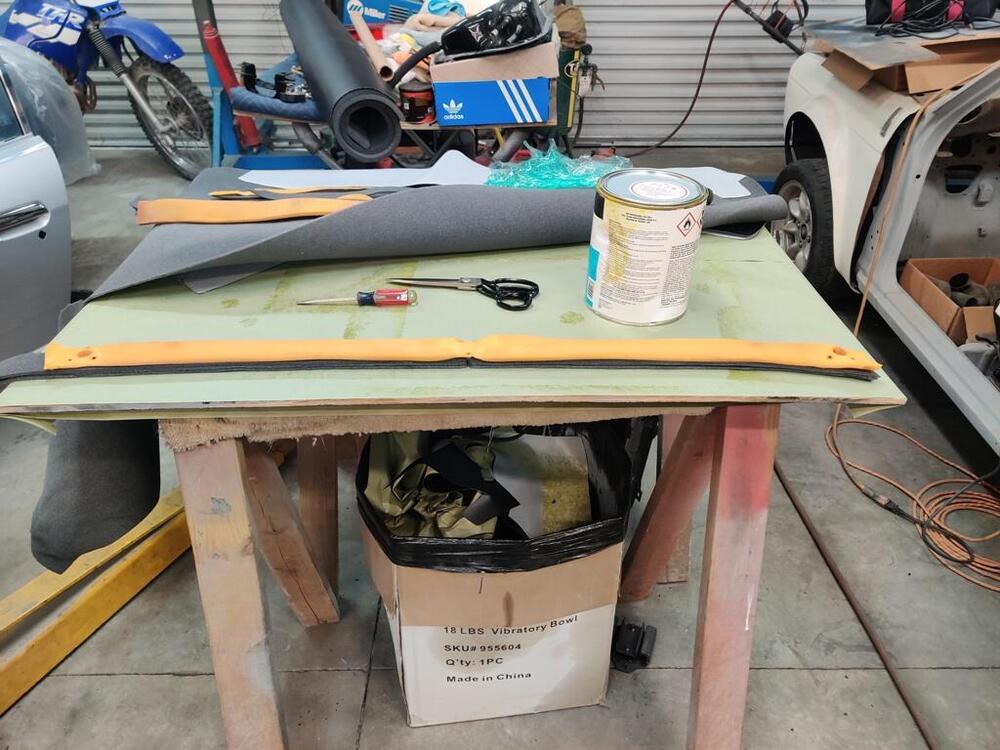
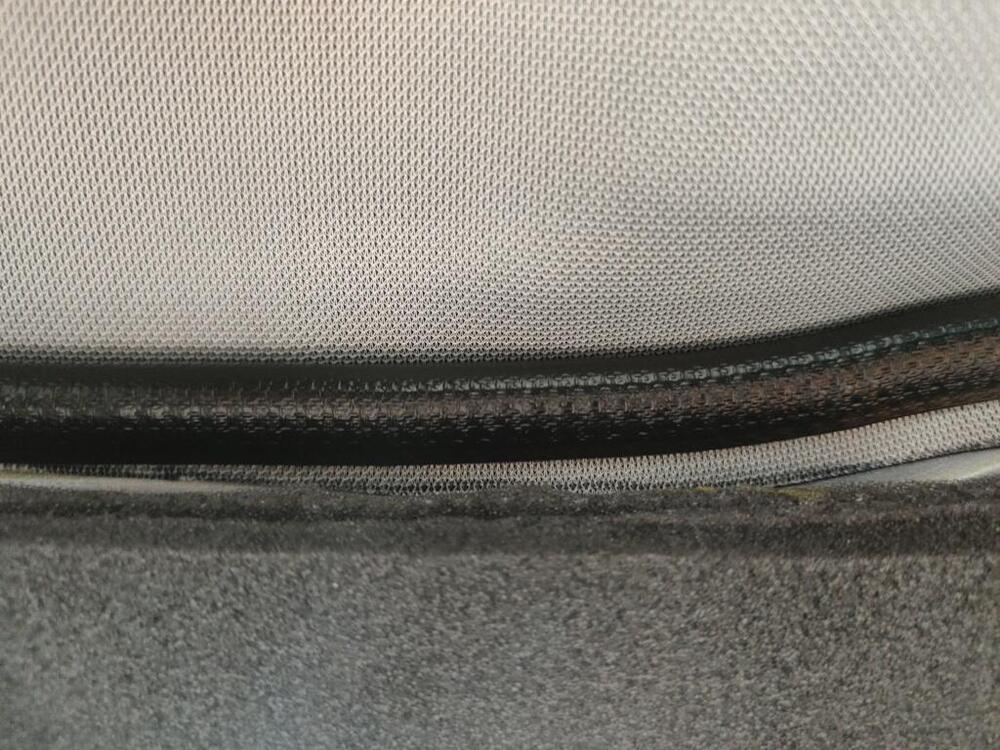
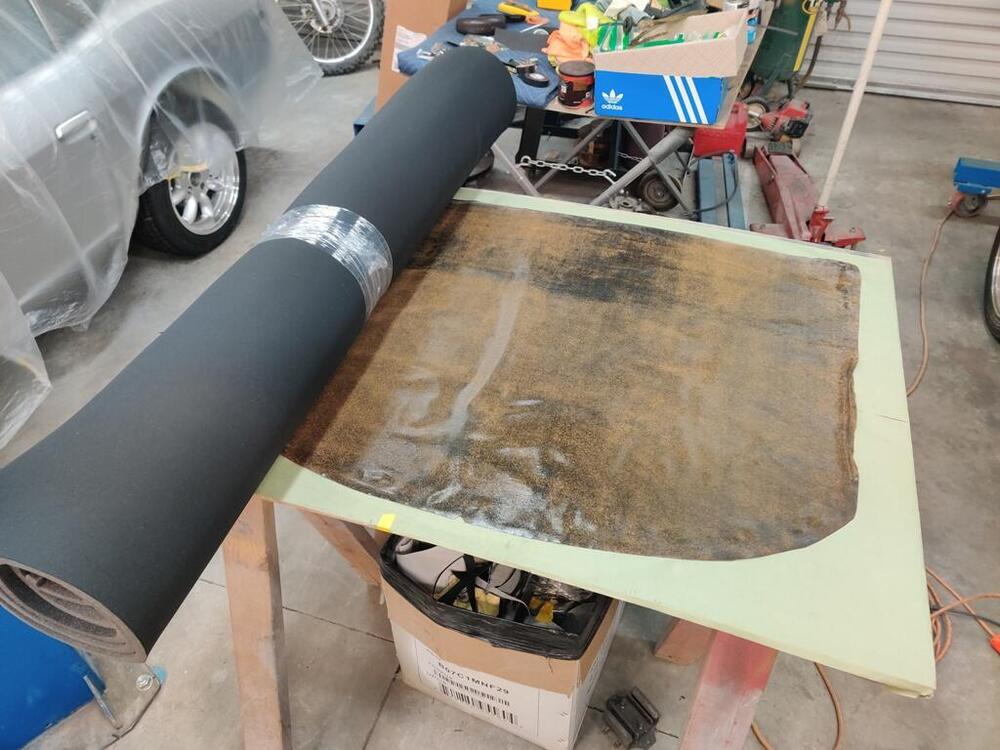
 Things are coming together quicker than expected and I got to the headliner today. I had purchased one from the z store almost two years ago but was severely delayed with the project. It came with the typical spray on glue but before IO went to tackle this i had a moment of hesitation. I still have the dash in the car and the thought of over spray and drippings of that glue (its 104 today in Roseville) really had me pause. I was thinking about the recent dynaliner experience with the peel off backing and thought why not do the same for the headliner. So I went to the home depot near me and after looking around decided on this since it was the stickiest, had a high temp resistance, and was relatively thin compared to others of the same strength a single roll ended up covering the entire liner in strips from front to back about 3 in apart. I made sure not to get too close to the ends on all 4 sides since I knew I had to tuck under the edges. TIP - Make sure to draw center lines in both directions and place some painters tape on the vinyl side to match so you can see the tape when attempting to stick to the ceiling. This allows for easy orientation with the center of the mirror mount and the lamp light cutout. I started with by doing the soundproof (highly recommend, the roof now is like a modern car After laying out the tape on the back of the pad I used the same 1 inch roller that I pressed down the soundproof to really press down the tape onto the back of the liner. I made sure it wouldn’t peel up without some real tugging. Once I was happy I pulled the red backing from the center line only and attached it to the roof right down the center line using the painters tape as guides I then worked on the passenger side first removing all red backing and carefully working from center towards door fram pressing the liner up onto the ceiling. Was very happy with how smooth and easy it was and did the driver to match. When I was done I had about 2 inch of material exposed on the doors frames and an inch or so on front and back. TIP – DO NOT BE TEMPTED TO TRIM, it will all fit with gentle tucking The front is the most visible so I decided to start dead center with a tool for scraping glue from windows I was surprised how easily it tucked under the front and went from center to edge in both directions in maybe 45 secs I then went down each side to the turn at the back and finally across the back. Finished product looks factory new! Time will tell if I took an easy way out and this droops from heat or deterioration of the pad but I feel it was the right thing to do considering my circumstances and doing the least amount of harm to the dash 😊 Total install was less than 20 mins, way faster and less messy than spray or roll on adhesive in my opinion.
-
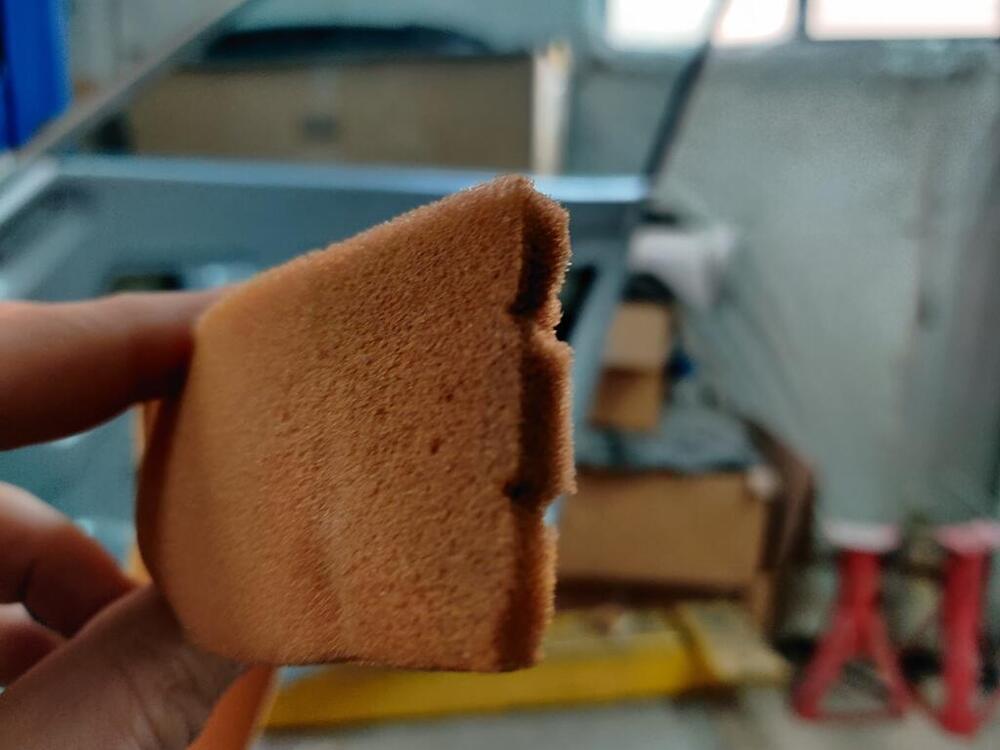
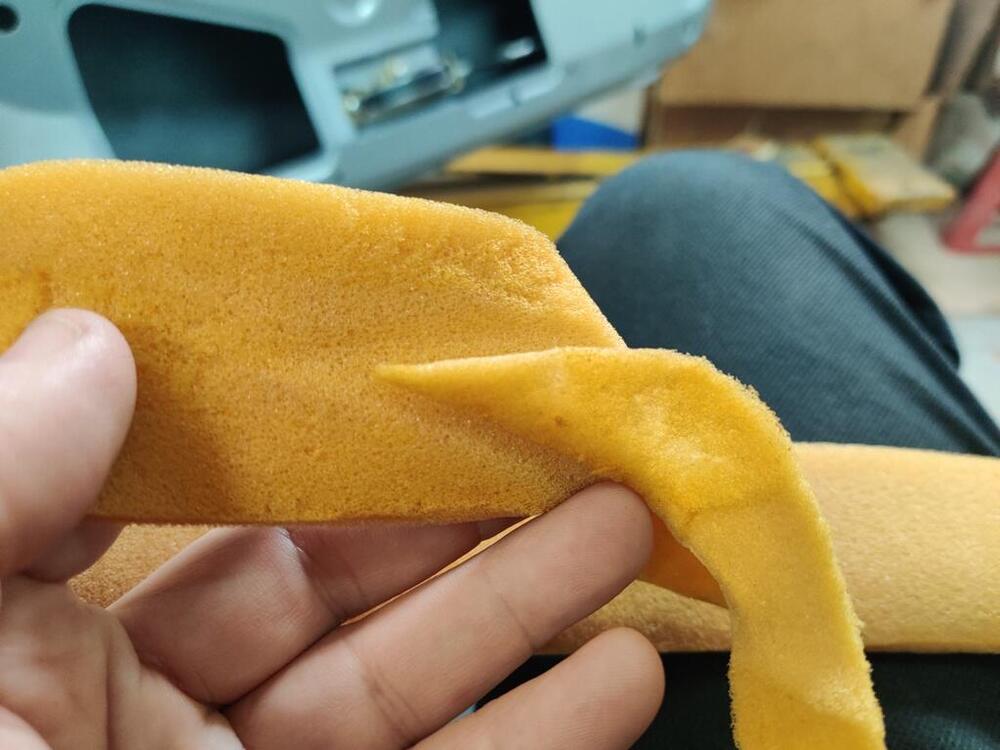
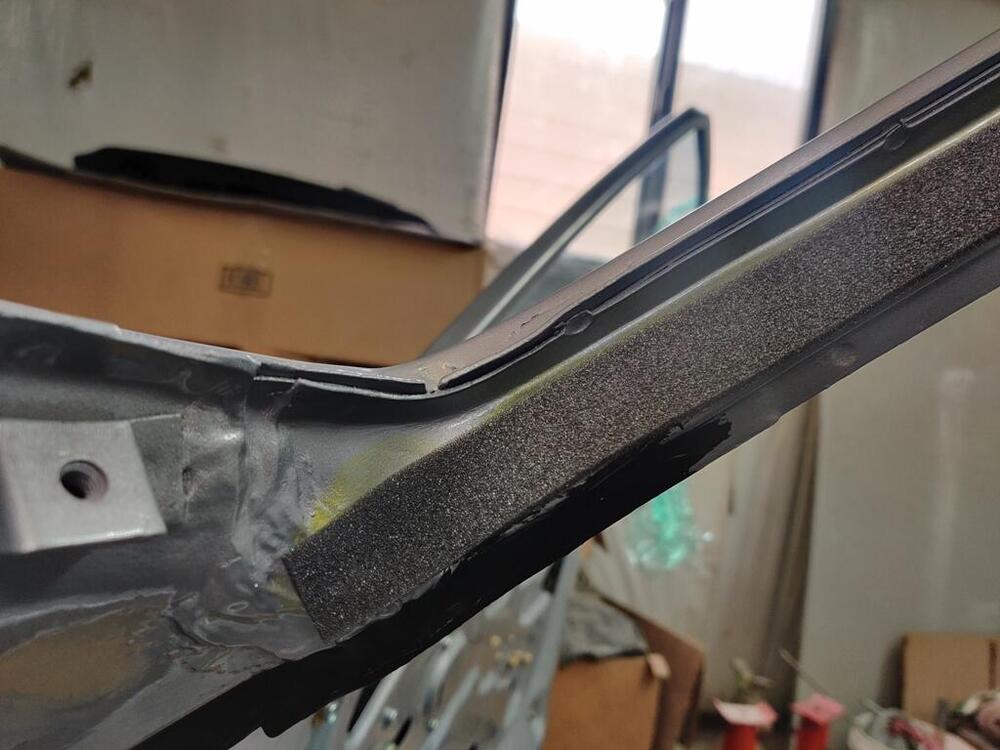
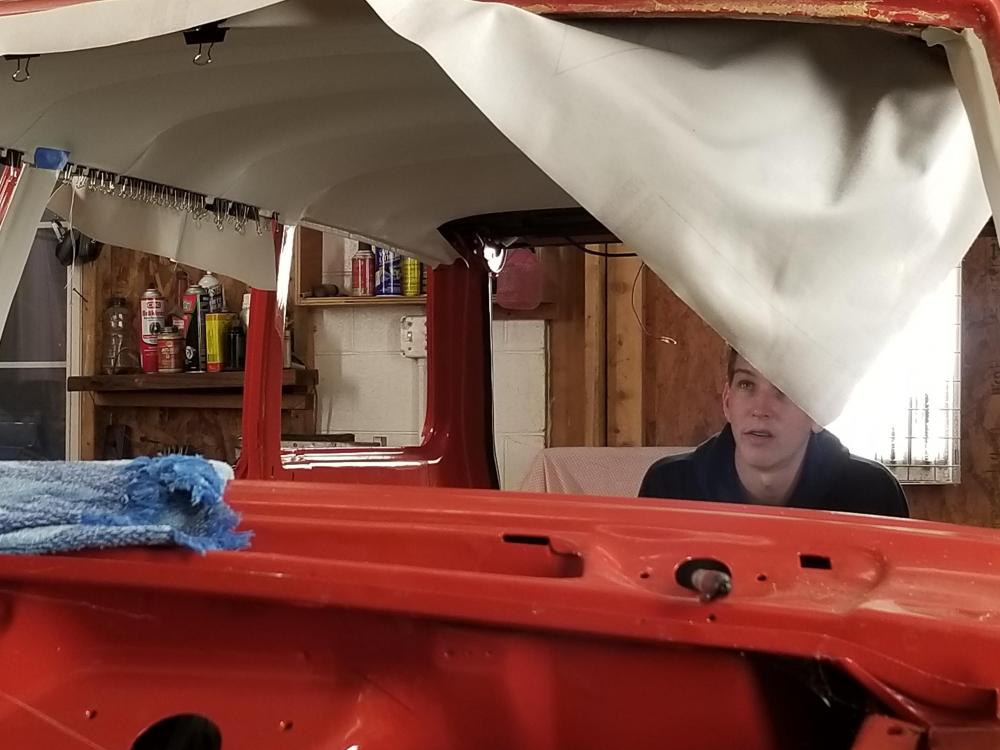
 Thank you - very kind of you to say! Today, I picked back up with gluing interior pieces. Spraying glue is not something I have much experience with. So, I was nervous about installing the new headliner in the car. For example, I don't really know the right amount of glue to apply. Too little, and it might stick for a while, but fail later. Also, there is an amount of drying time that is important. Depending on the size of the piece being installed, you may have to wait a length of time, as the adhesive doesn't stick well when it is too wet. Or, if the piece is very large, you don't have to wait long at all, as it took some of that waiting time to apply the glue to the large surface area. There is a window of time where the glue transitions from wet... and a "tackiness" develops. After more time, the adhesive feels dry to the touch. And yet, if you put two pieces with seeming dry adhesive together, they can stick immediately... and not allow for pulling apart for "re-alignment". Over the past two days, I have found that waiting is necessary, but the pieces should be assembled when the glue is still at the "tacky" stage. At this stage, you can pull it apart and reposition a bit. If you wait until it is dry to the touch, then when you put the pieces together, they stick pretty strongly, and it is not going to go well if you try to reposition things. With all that weighing on my mind, I worked on cutting foam and vinyl pieces for the windshield header and side panels. I carefully examined the old foam and made new pieces that matched the thickness, width and length. Because some of the original pieces were only about 1/8th" thick, I bought that thickness of replacement foam. To match the thickness of the other original pieces, I stacked new strips of 1/8" thick foam, using just small amount of glue brushed down the center of the strips so they would stick together. From the old pieces, you can learn things, so you should keep them until your new pieces have been installed. For example, by looking at these indentations in the end of the old foam, I was able to eliminate any question about the correct location of the foam on the inside frame. I was also able to determine where there was overlap of original foam pieces. And that helped me locate the a-pillar piece of foam on the car in the same place as it was done by the factory. This foam compresses with very little pressure. While stacking 3 pieces high was a bit thicker than the original, it compresses easily, and will compress to the proper thickness when the vinyl is pulled and stretched over the foam. After getting the grey foam in place on all three sides, I masked off the frame area as described in the how to Restore you Datsun Z car book. Then, I took a moment to organize things so I could spray the inside of the roof of the car, and the back of the new headliner, and install the headliner in the car. When masking the rails, I made sure not any part of the rail surface was exposed to catching any adhesive. Even a tiny portion of the edge of the frame, if exposed, will subsequently collect some of the spray on adhesive. And it will become a problem when you go to position the adhesive covered back surface of the headliner in place. A touch of cement on the frame, if present, will touch the cement on the back of the headliner and "bite", causing difficulty with getting the headliner, up and over... and subsequently tucked behind the frame edge. Speaking of tucking behind the frame, I used a large plastic body filler spreader, which turned out to be a great tool for the job. There was a fair amount of force necessary to get the headliner to go from outside the frame to squished... and then, using the edge of the spreader... pushed inside the gap between the outer panel and the roof structure. The "extra" headliner material has to flatten out (behind the frame, hidden from view). Again, I was very happy when, like the gluing operation to adhere the vinyl to the foam to make the headliner, the installation of the headliner also went well. There were a couple of nerve racking moments, and 3/4 of the way through getting the edges tucked behind the frame, I was feeling some fatigue in my arms and soreness in my back from getting poked by various "not soft" parts of the transmission tunnel. From there, I started the next project: to install new vinyl onto the windshield header (front portion of the roof frame) and the side panels (side portions of the roof frame). I found it best to do things here different than Wick Humble's guidance. I was able to use a small brush and only apply adhesive to the underside of the back weld flange of the header. I let that dry a bit, and then positioned the header vinyl directly on that adhesive. I didn't use the welting at all, initially. The vinyl was simply hanging down from the back edge of the header, across the header's full width. Then, I aligned the white dot on the welting with the center of the header. I pushed the unglued portion of the header vinyl upwards and pushed the welting onto the back edge of the header, forcing the vinyl to tuck between the new headliner and the frame. The glued part of the header vinyl did not move as I did this. Only the non-glued part squeezed between the new head and the frame. At this point, the header vinyl is held captive by the welting, and it is ready to be pulled forward, and out through the windshield opening. It will need to be pulled with a good amount of force so as to compress the foam that is on the header, and create a tight, wrinkle free finished appearance across the entire header panel. And that has got me thinking... I don't know how in the world they did that at the factory - keep a lot of tension on the vinyl covering the header panel. The way the windshield goes in, the windshield gasket tends to push the vinyl on the header backwards. If the glue holding the front of the header vinyl were to not hold firm, the vinyl would be pushed back somewhat, allowing the header vinyl to relax... and be loose. If that happens, the finish look is not going to be nice, and who wants to pull a windshield BACK OUT, just to fix a loosely fitting header vinyl? I am not sure how I will proceed. But, I am thinking about buying a whole bunch of these, which I have seen other people use on other car restorations. I think I will need to apply the glue, and wait for it to dry... more than I have been, so that it will have the most strength possible. And then, I will pull the vinyl a good bit to the get material tight, and wrap it around the windshield weld flange, and clamp it in place very tightly to keep it from slipping back and causing a loose fit. And the glue will need to dry for at least 24 hours before I attempt to install the windshield. So, that is what I am thinking. Anyone else have luck using a particular technique?


-
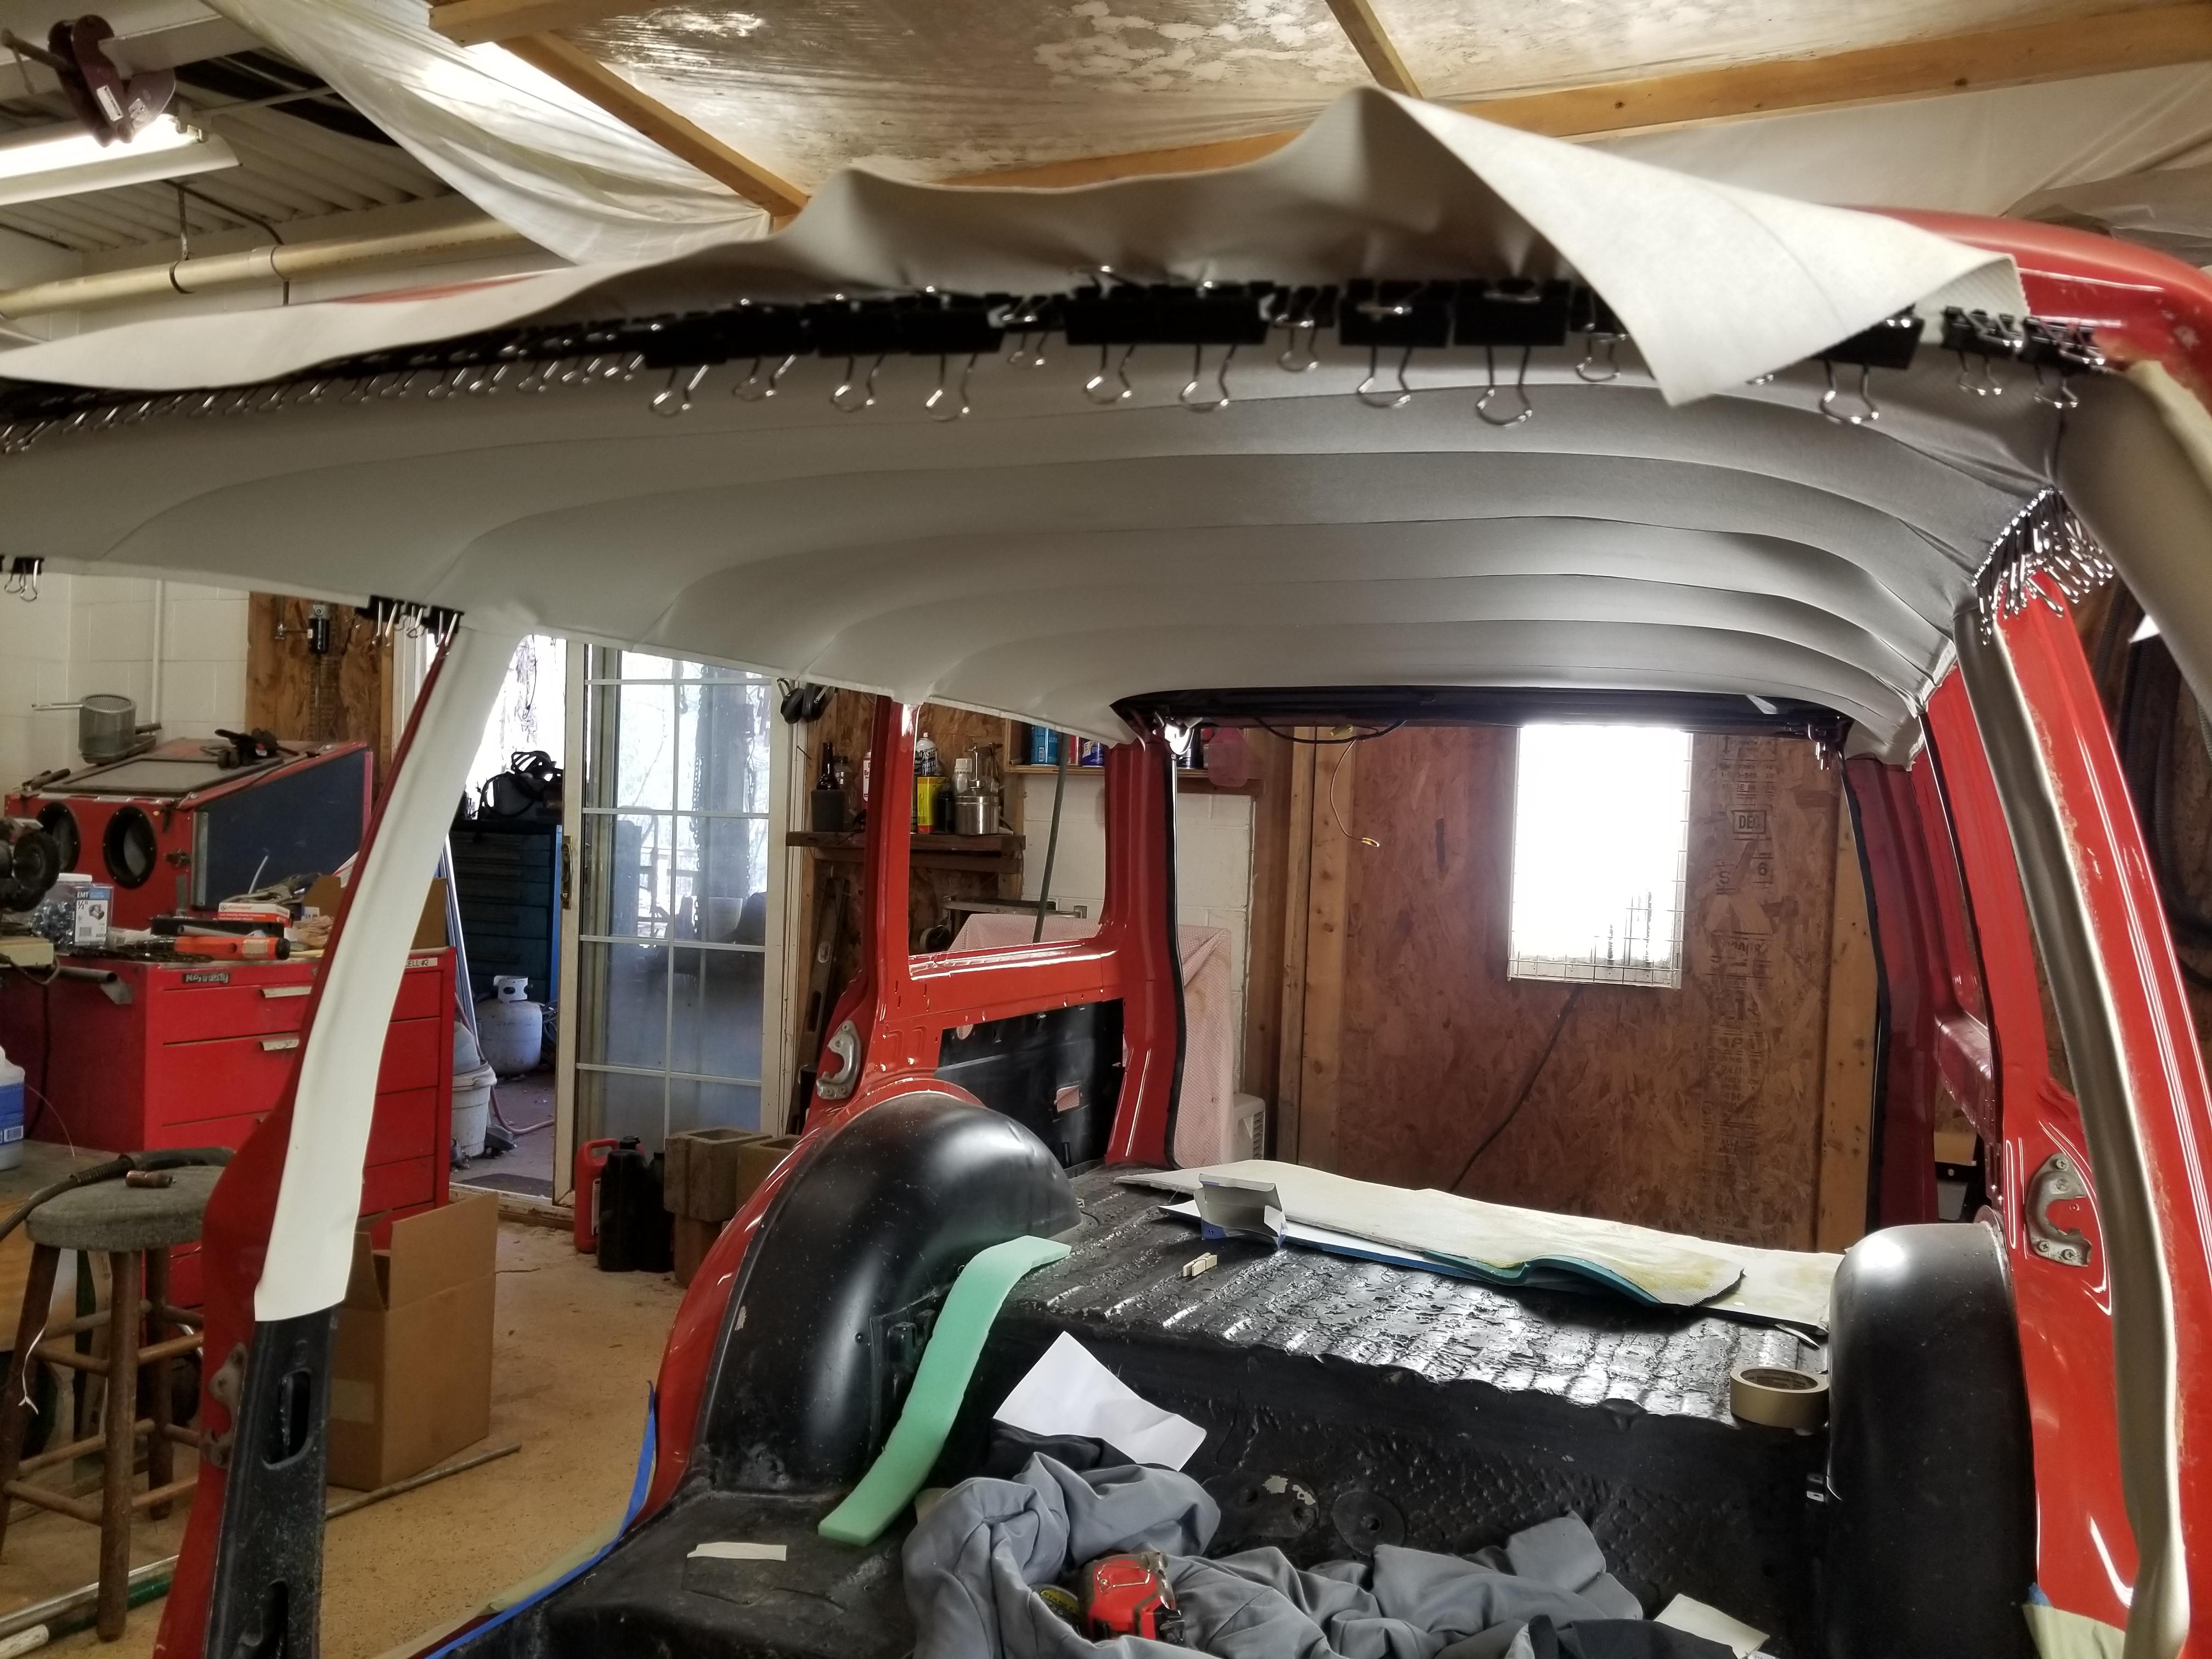
Update. I've started dry fitting the vinyl and noticed that the traditional cutouts for the seat rails and the typical pattern of slices near the firewall as it curves would expose some of the padding I just laid down. Didn't like that so took some of the old headliner I just replaced (so glad I kept the skin) and placed pieces to hide the grey padding once the vinyl is done. i used the same scotch tape from the headliner experiment and it works great. I'm using these pieces as a test run to see if this tape can be used for the actual vinyl itself rather than messy glue (just like i did the headliner). Here I did the entire under heater core box, looks great and the rails
-
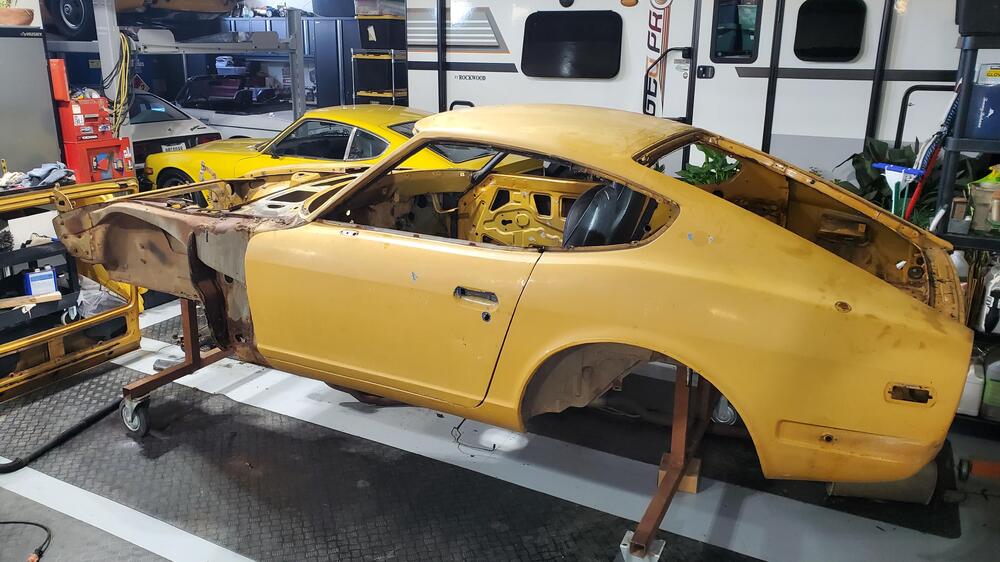
 The body is just about ready to send to the body shop. I removed the glass, all items on the underside, and all of the body panels. I scraped off the old weather stripping and am now just doing final cleanup. I still need to drill and tap a few of the rusted out bolts as well. I will make an assessment of which patch panels we will need so shop can weld those in. The nice surprise on the car was the good condition of some of the interior parts. The headliner and A pillar vinyl is perfect as were all of the rear plastic panels, except for the rear panel which a PO had modified for speakers. Also, the doorsill plastic was in good shape and just needs to be cleaned. This will make the interior much easier to restore as some of the aftermarket items for these items are not the best. Often, aftermarket panel holes don't align and I have had headliners where the manufacturer's glue is poor with the vinyl detaching from the foam in hot weather. So, having these items in good condition will be a nice help. Latest photos are below.

-
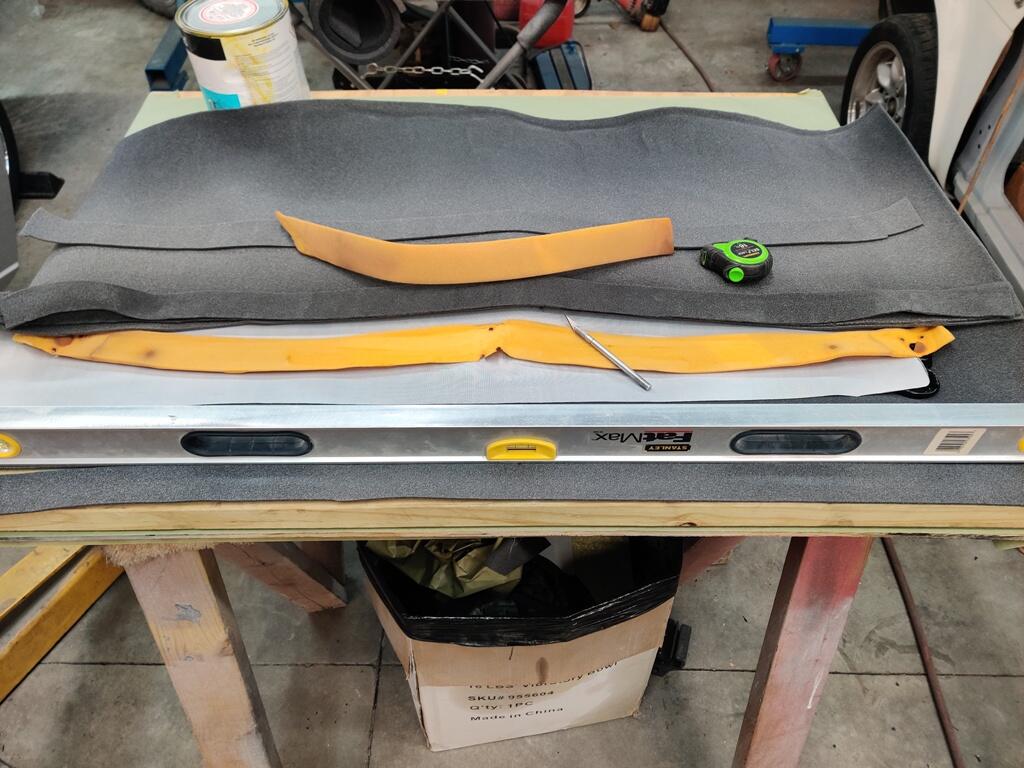
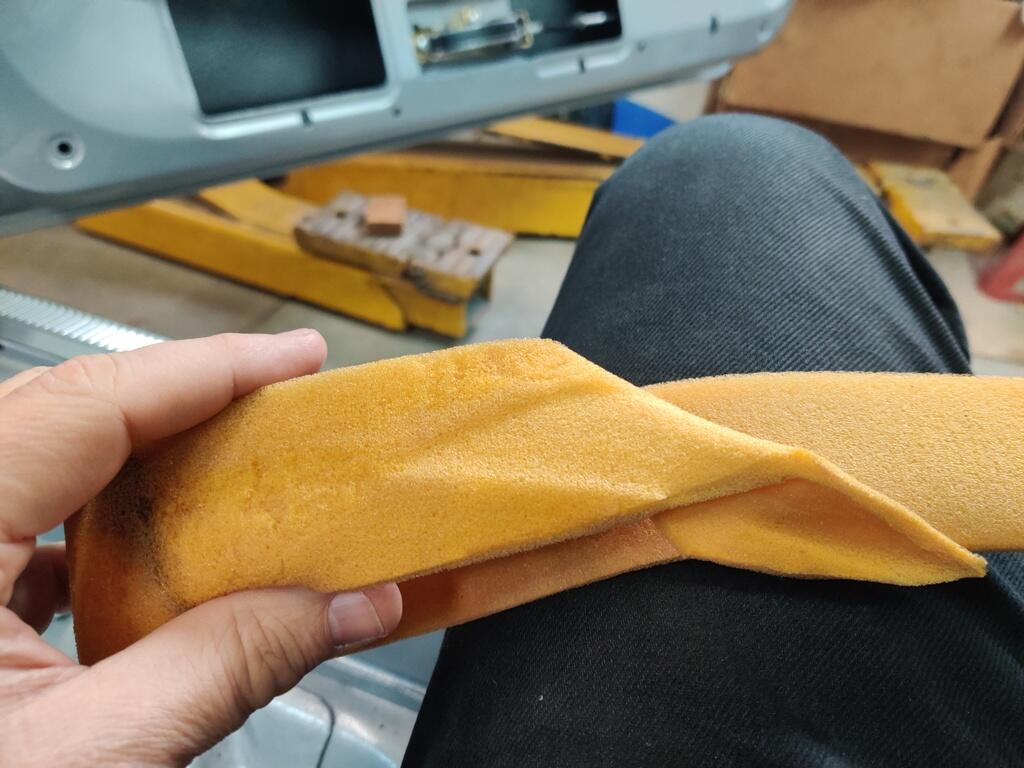
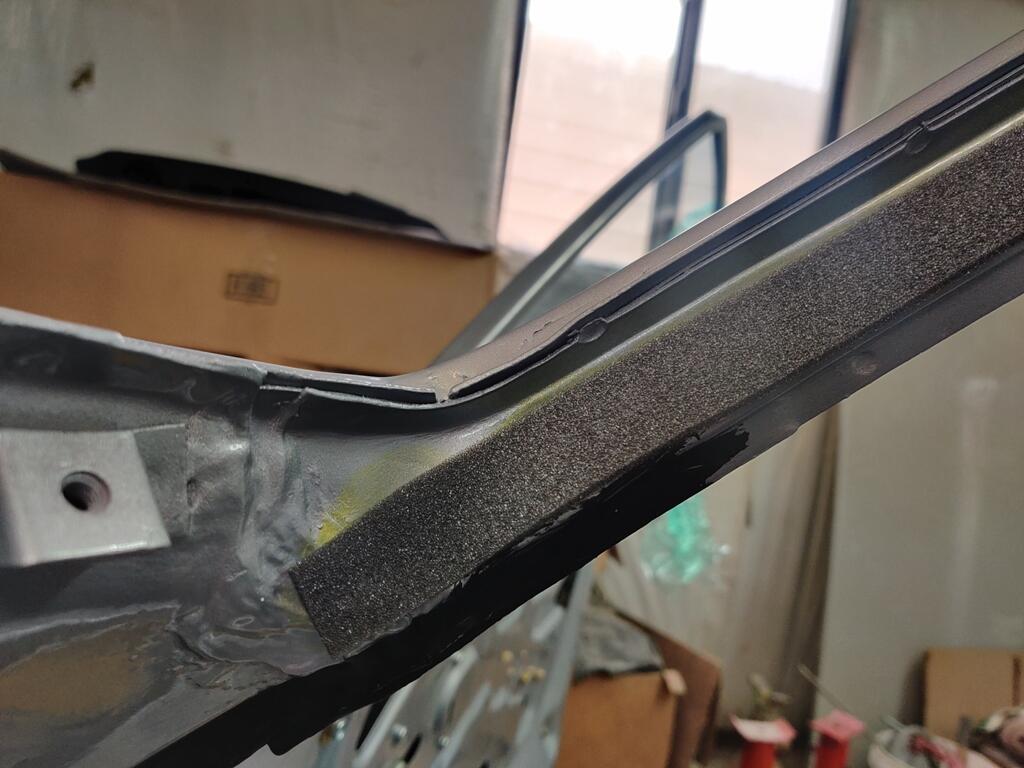
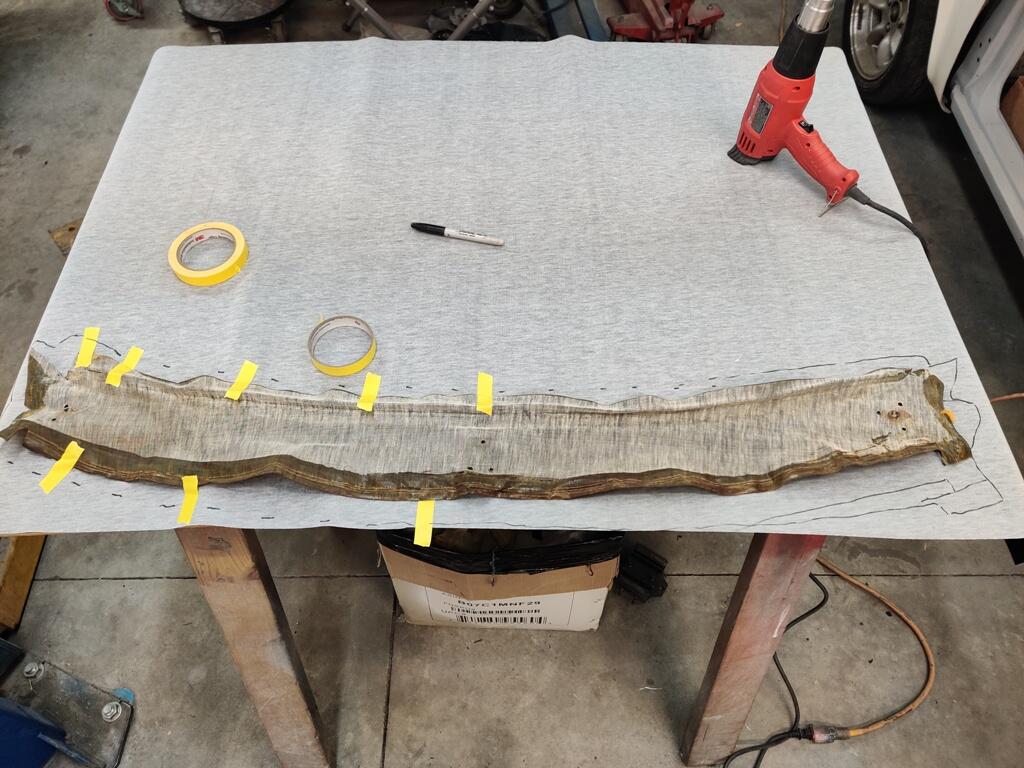
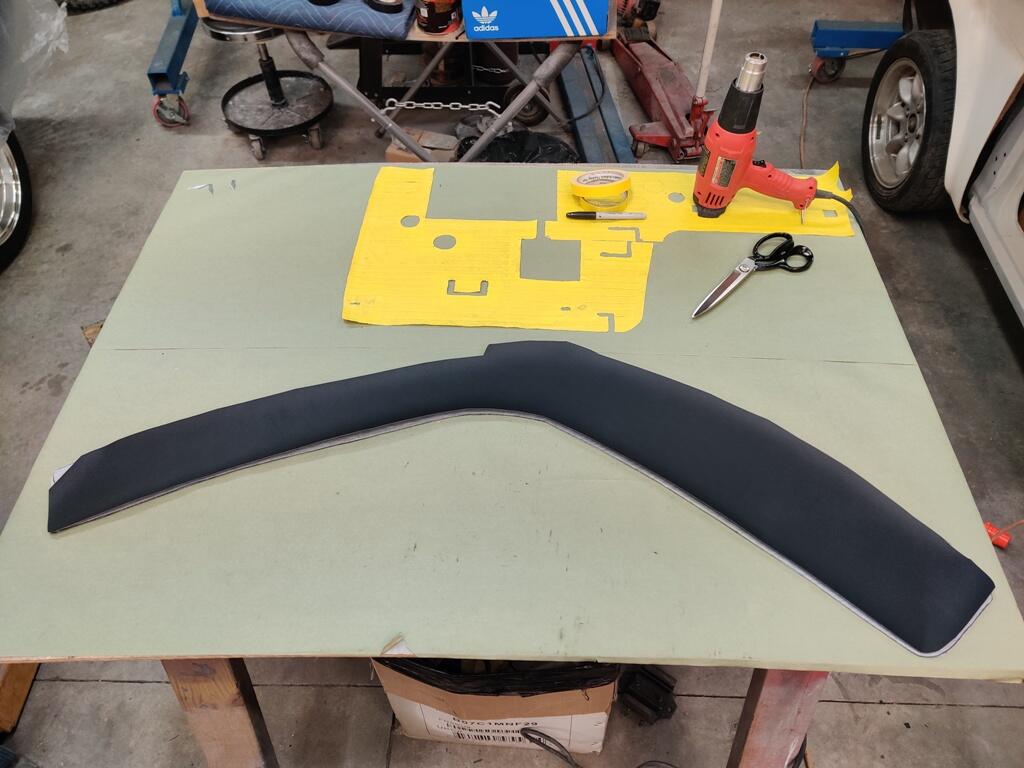
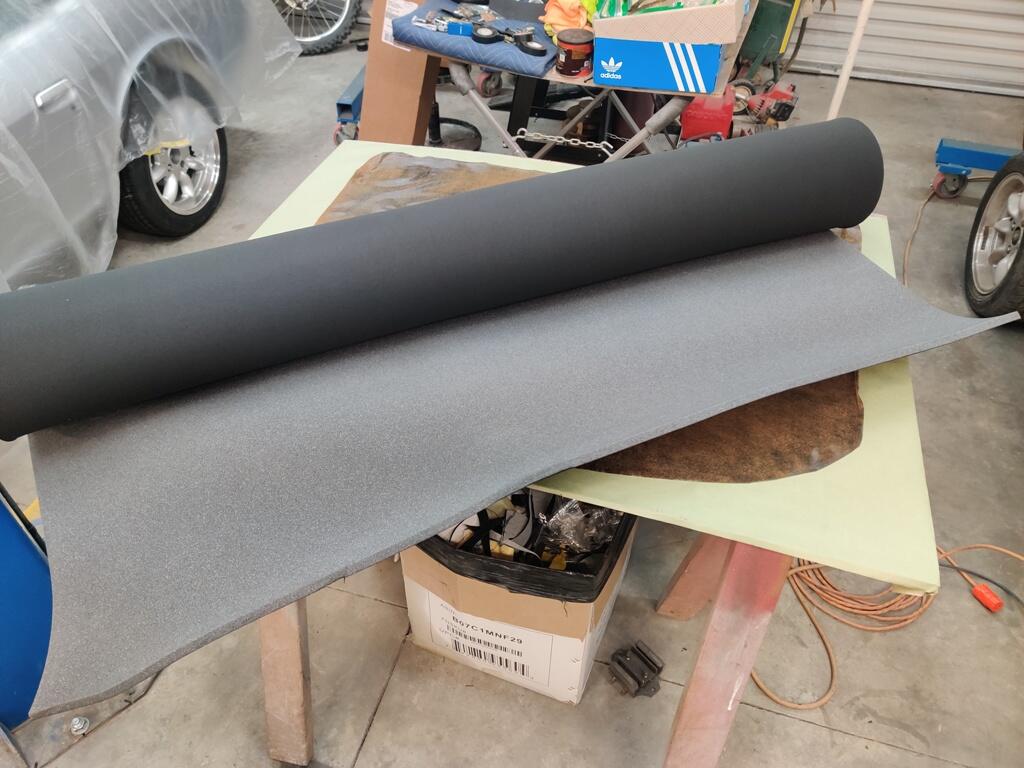
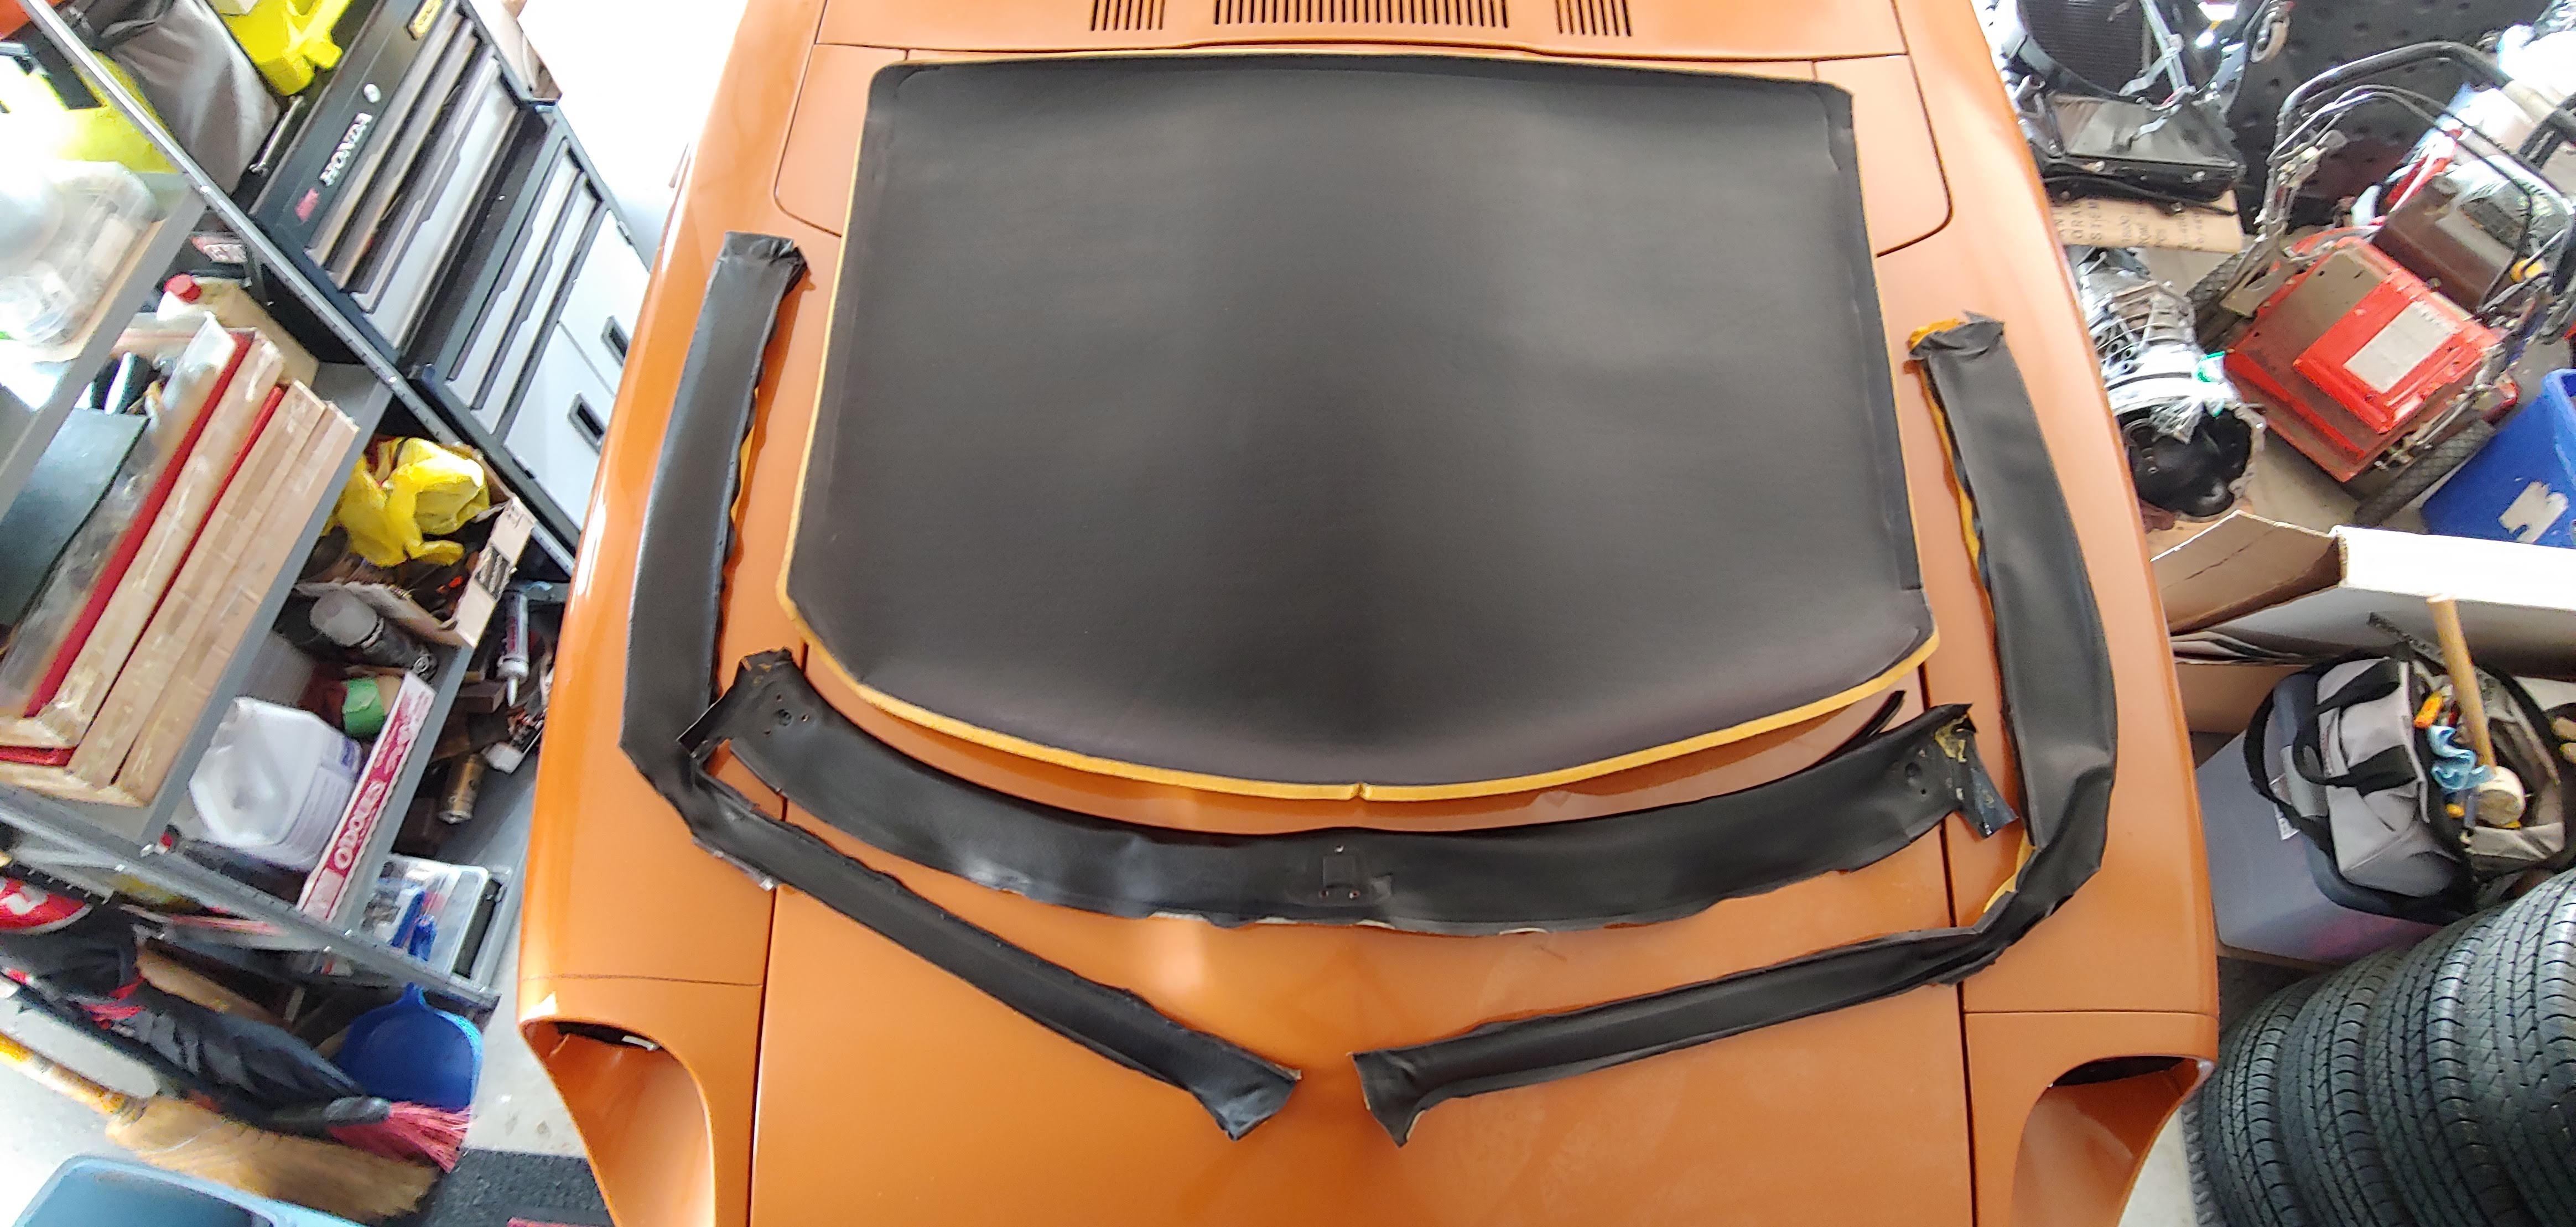
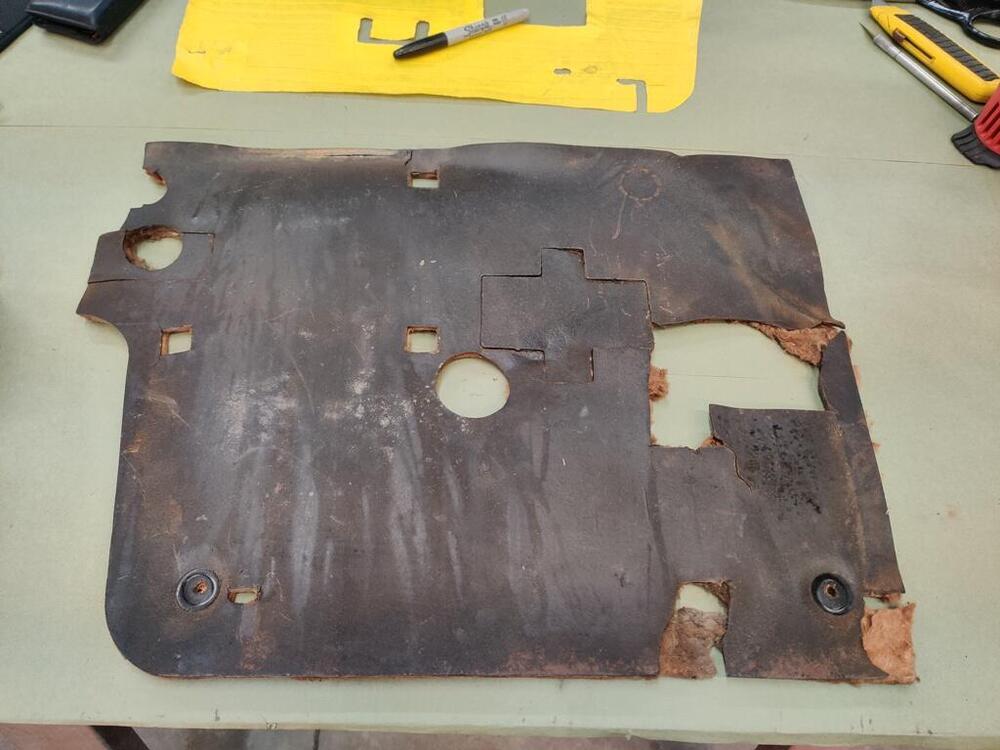
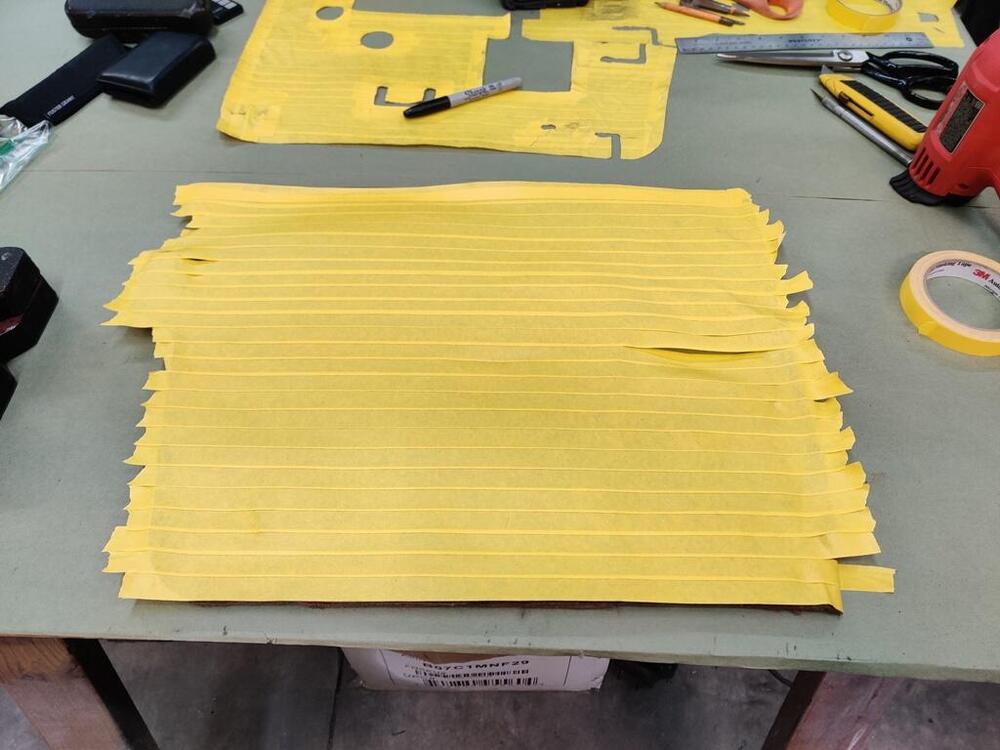
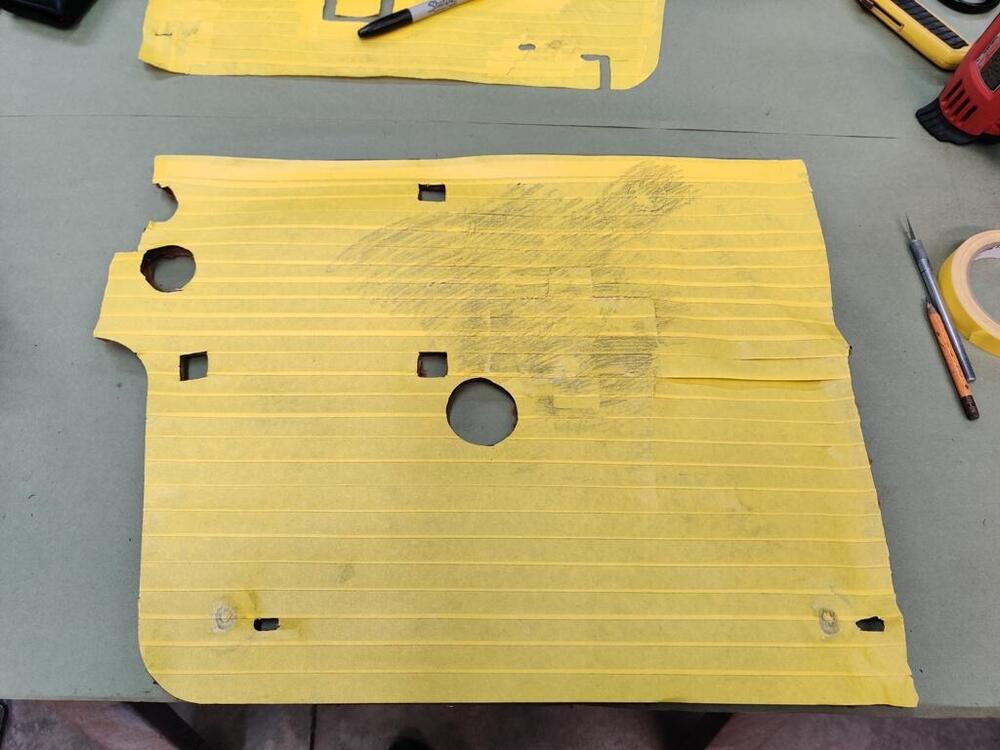
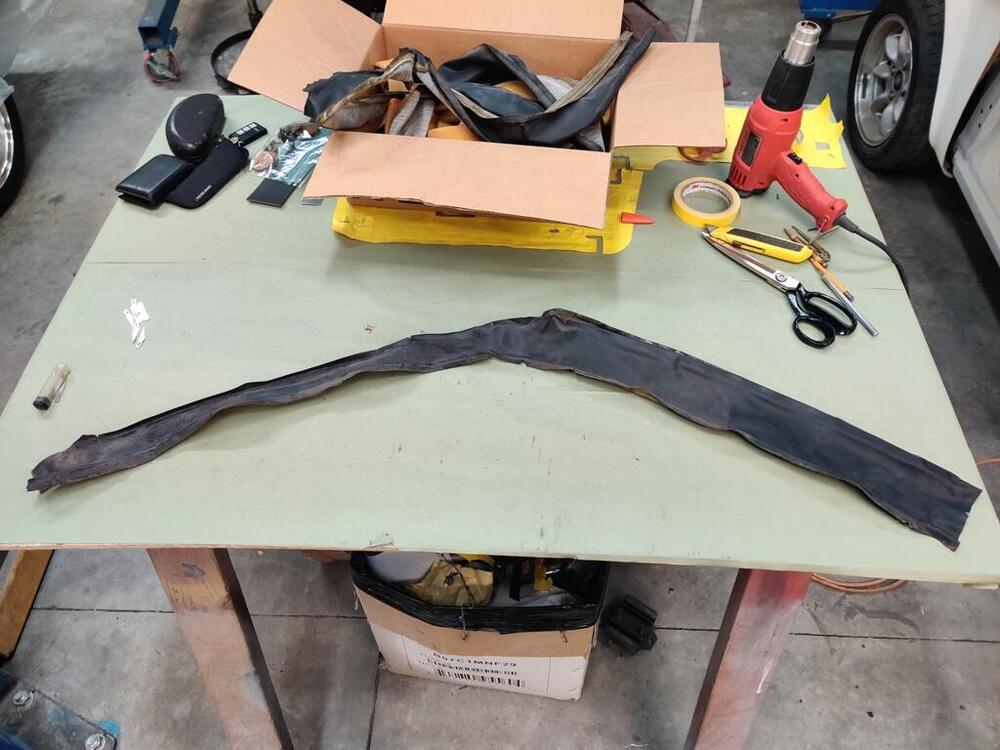
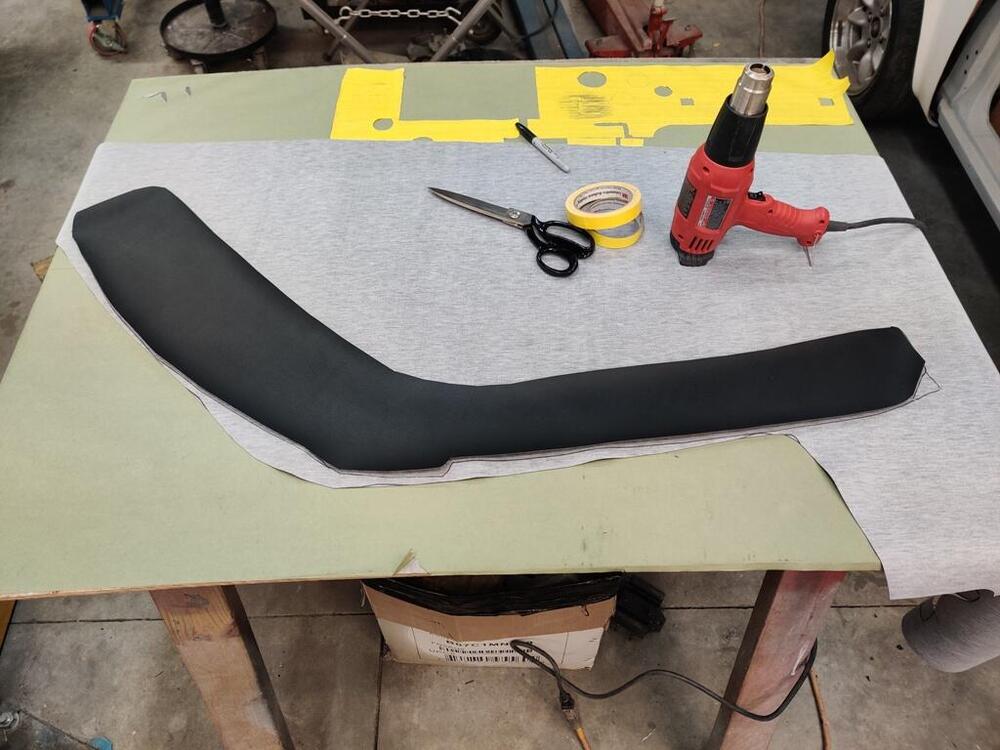
Today, I was able to finish cutting the materials for the left firewall pad, and complete fabrication of the parts to the right firewall pad as well. For the right pad, I started by heating it up with a heat gun to assist with flattening the bitumen - it had several wrinkles. I used my hydraulic press plates to flatten and cool the bitumen. They are heavy and also helped to cool the bitumen while holding it flat. After getting it reasonably flat, I applied tape and trimmed it so it could be used as a template. As before, I peeled it off of the old and stuck it to the new material. Then, I trimmed the new material to match the tape template. When the new pad was made out of butyl rubber, I laid it on top of the new insulation and marked the cutouts. I used a black Sharpie to mark the foil. I think it took about 3 and half hours to make this part. Then, I grabbed the old header and A-pillar vinyl. Unfortunately, it would be too difficult to reuse because of all the glue on it, and some tears on the left piece. I found some vinyl online that looks kind of similar. Before cutting the new piece, I used the heat gun again to get the old pieces as straight as reasonably possible. Then, I drew on the backside of the vinyl, providing a generous amount of extra on all sides. I cut the piece for the header out first, then one of the A-pillar pieces. Then I flipped over the new A-pillar piece and used it as a template for the other A-pillar piece. Lastly, I retrieved the old headliner vinyl (with foam stripped off of it) and the new foam piece I bought. I am going to attempt to glue the original headliner vinyl to a new piece of foam. I don't have high hopes that it will work well, but I will give it a try. I bought enough of the foam to make a second headliner. If I have to, I will attempt to find a new piece of vinyl that will be suitable for a headliner, and glue it to this foam.


-
 Back from my trip to India and got around to working on the car. Got all the fluids bled and topped off so I think it's ready for a rip... after that it's lining up all the panels, buffing, and doing some detail work like headliner, interior, hooking up lights, etc. Thanks for all of your help to get me this far!
-
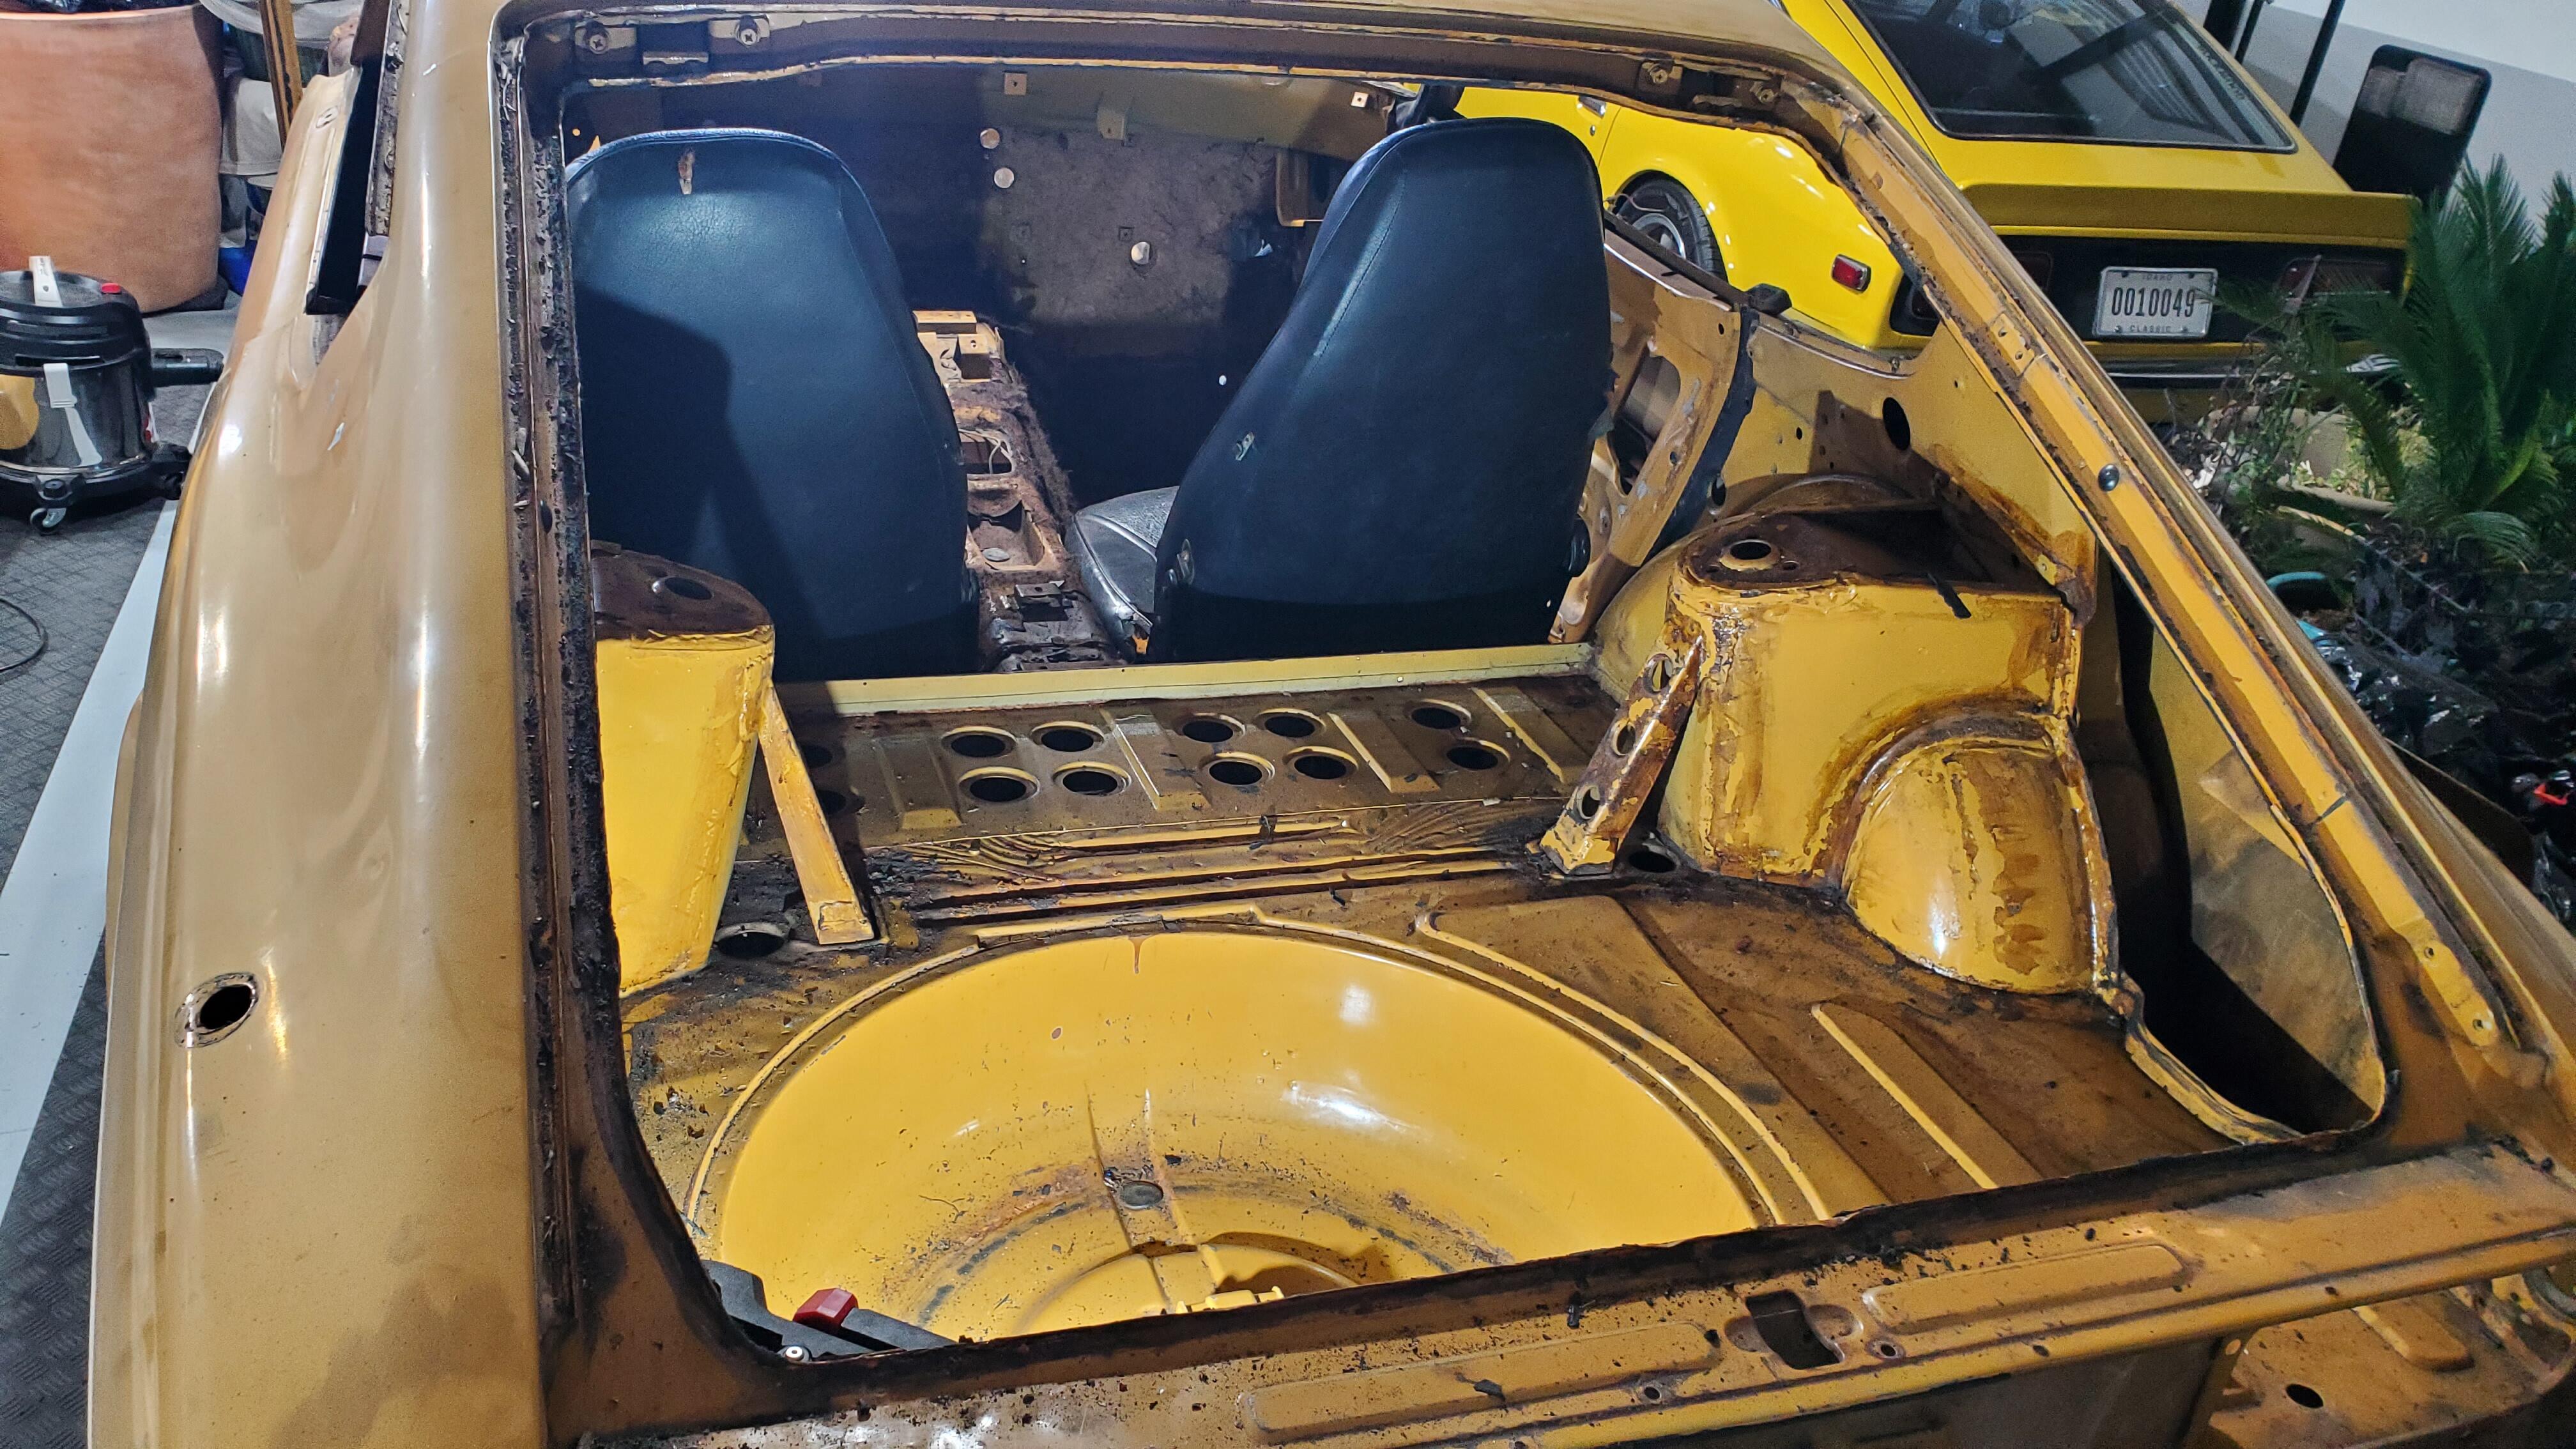
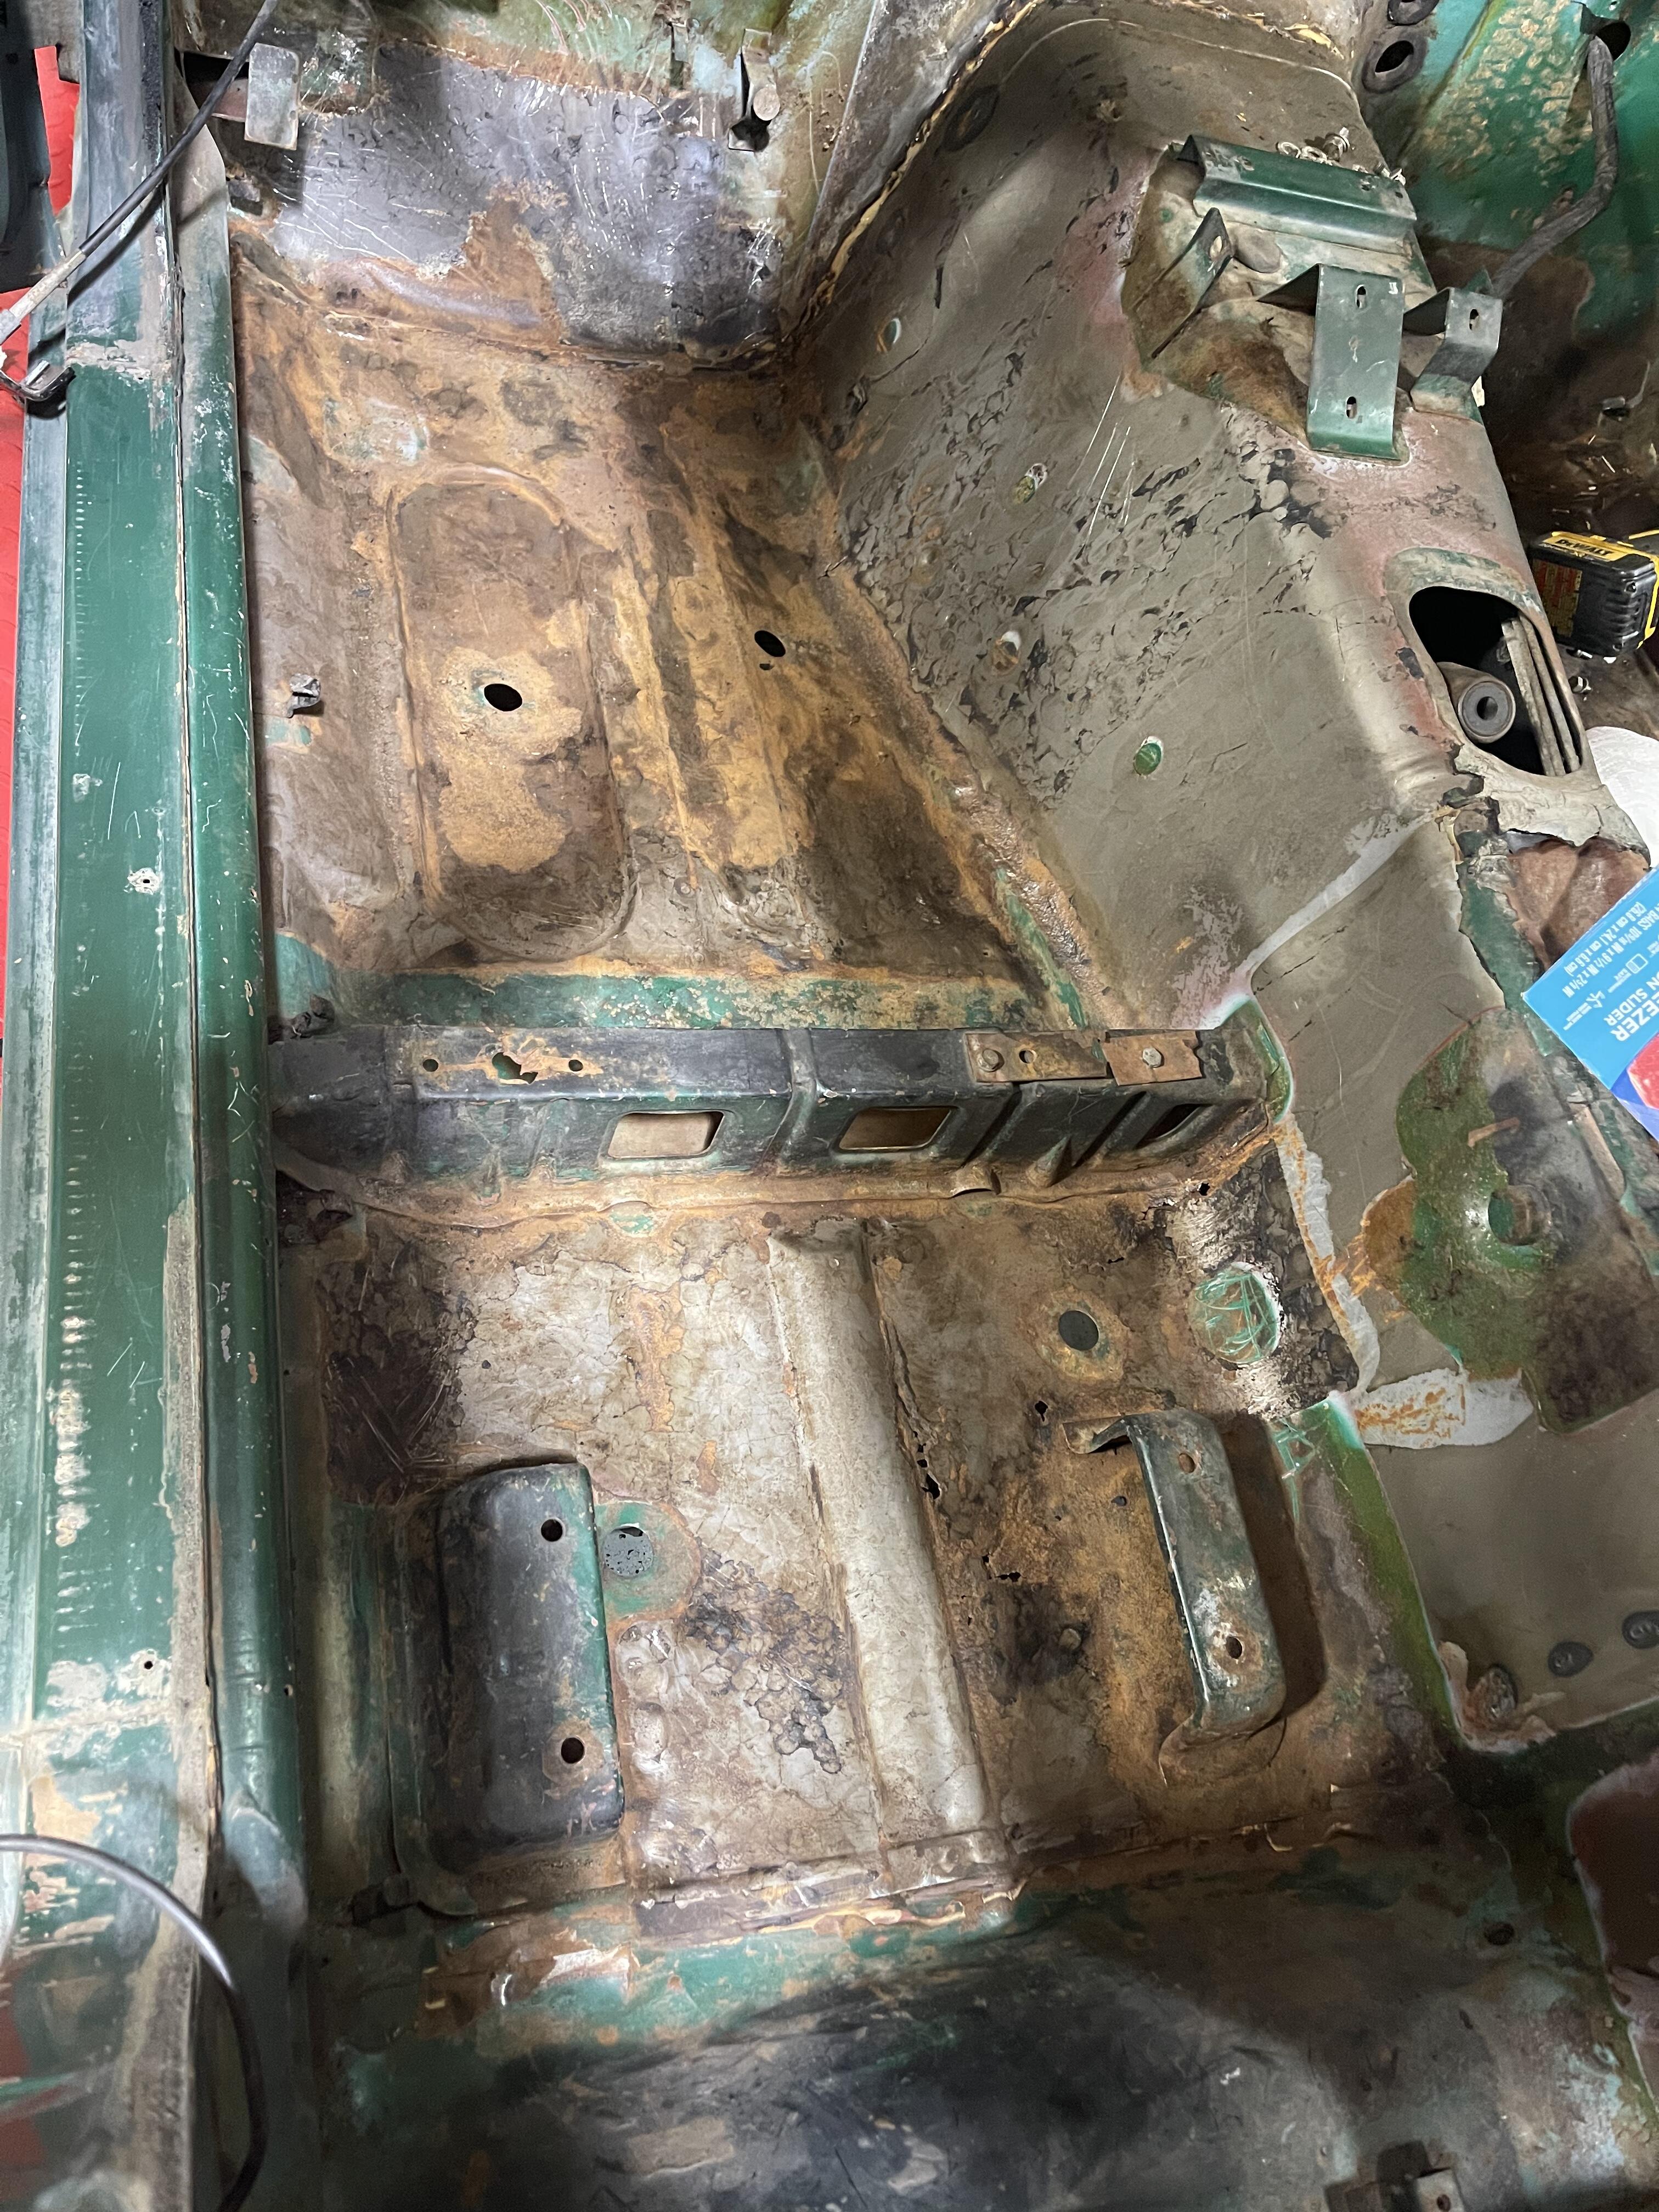
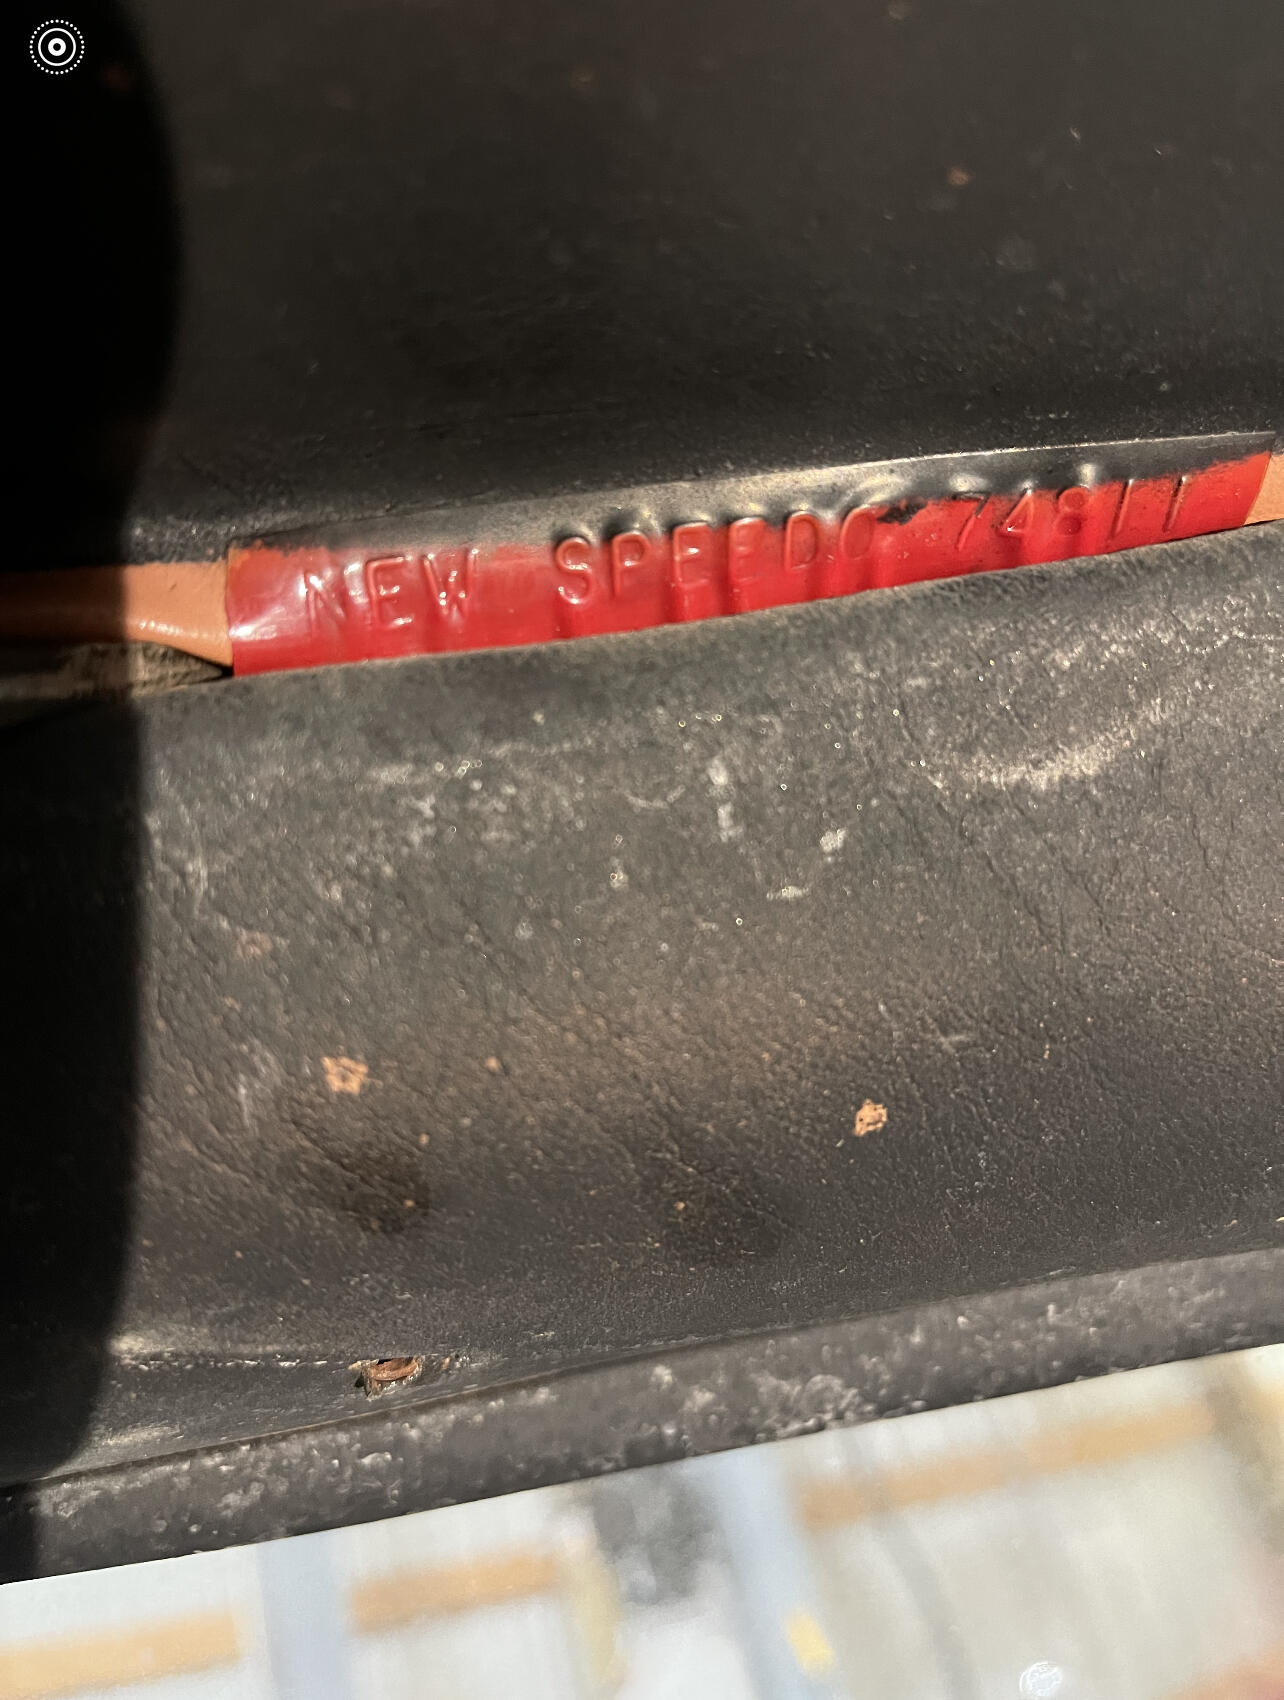
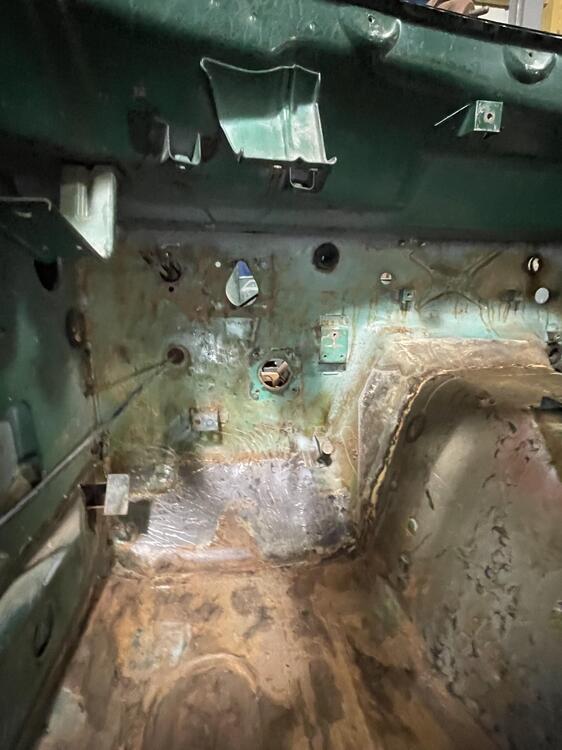
 Early hand throttle cable attachment under cowl spot weld pulled out. Drivers floor has a couple of rust areas, under seat as well…… more inspection needed from underneath to determine if new floors, or replacement of rotten areas. Firewall looks perfect Neat inscription/stamp “Speedo change” over passenger visor area on edge of headliner and proof that headliner had been dyed to black…. Originally a green/ tan car


-
I spent many hours searching the internet and looking at vinyls, and I am pleased to have found a vinyl that looks similar to the original one for the headliner. I wasn't able to salvage my original vinyl, however, I think the headliner I made today looks quite similar. Original: As I said before, unfortunately, I wasn't able to glue the old vinyl to new foam without getting a lot of wrinkles: Unlike the old vinyl, the new vinyl has a cloth backing which makes it lay flatter and makes it stronger. I sprayed the contact adhesive out of a gun similar to a paint gun. The gun was purchased for doing this and it worked very well. The new vinyl: The finished product: While I had adhesive in the gun, I installed the new fire wall pads. I will put up some pictures of those being installed tomorrow.


-
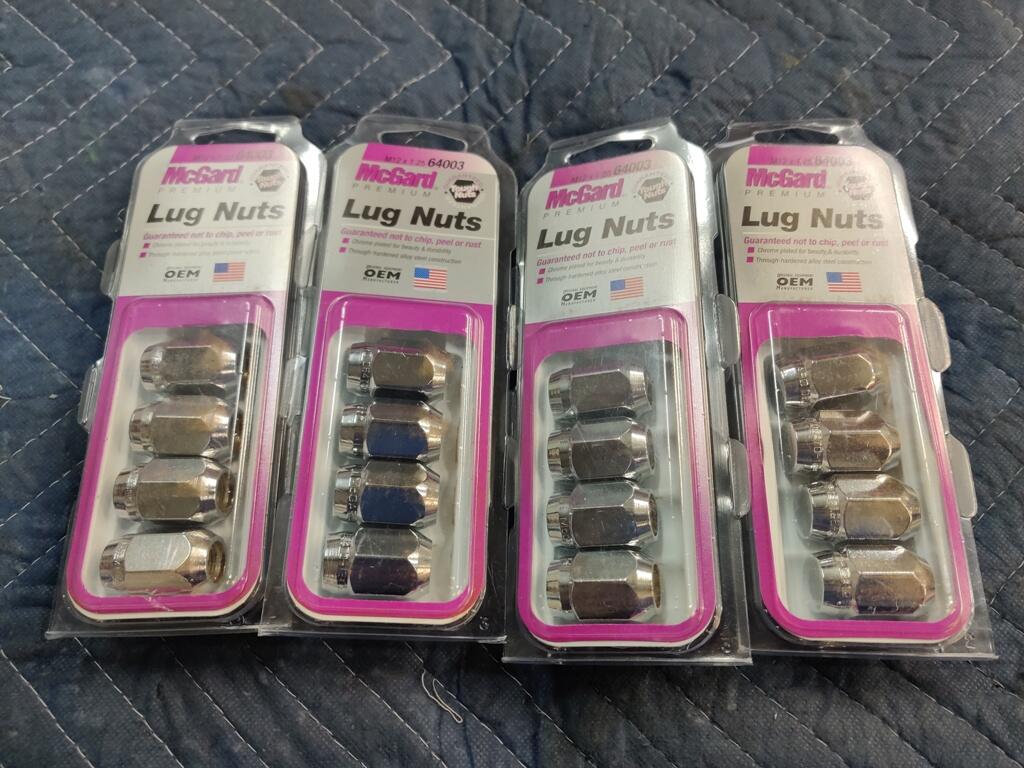
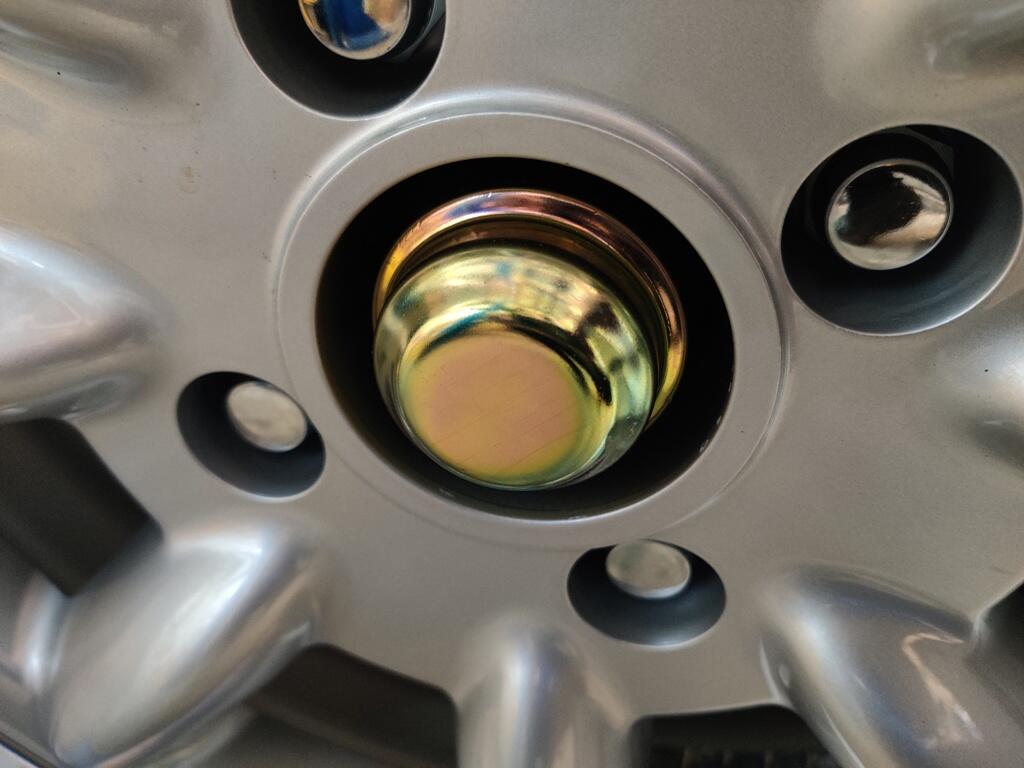
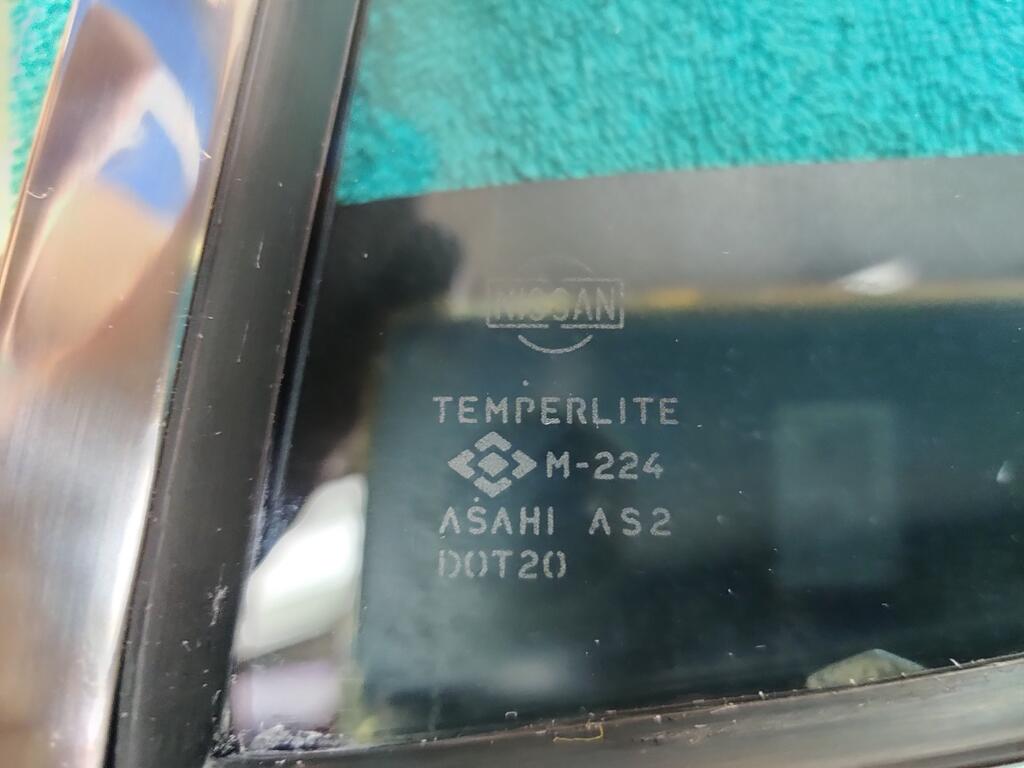
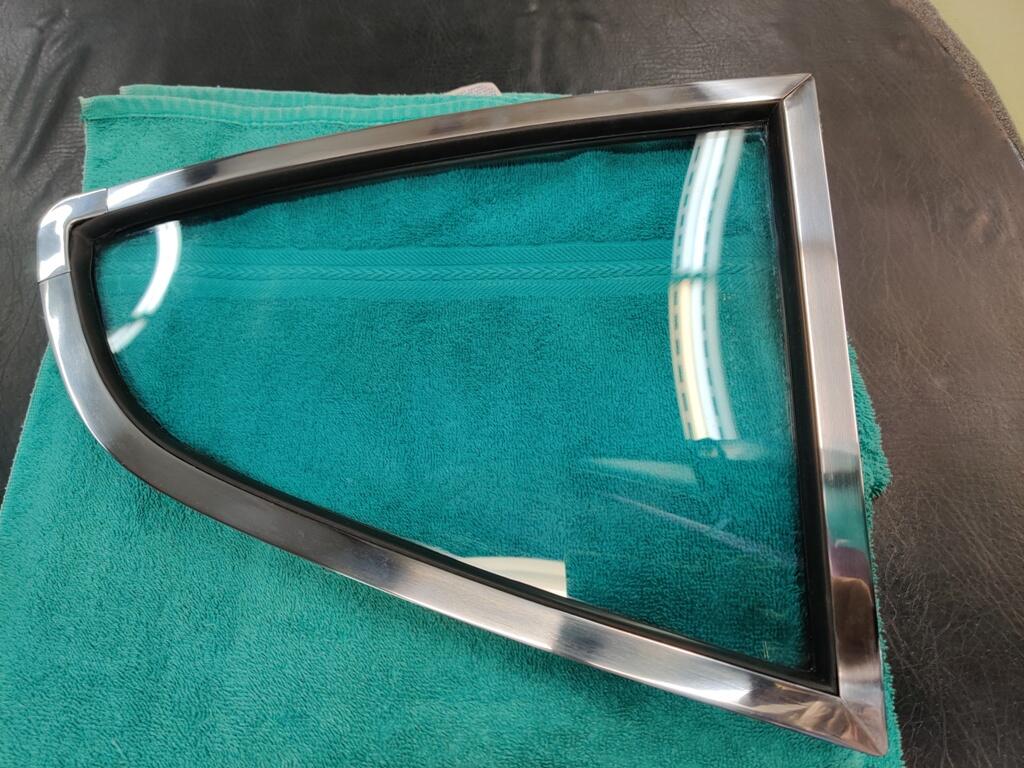
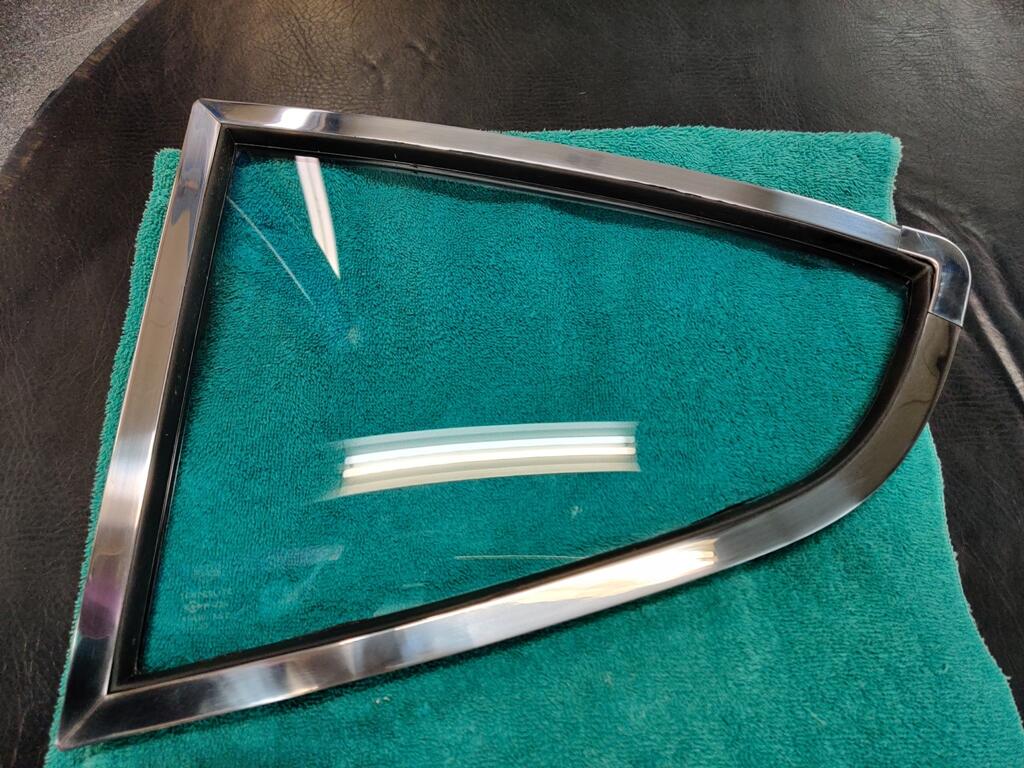
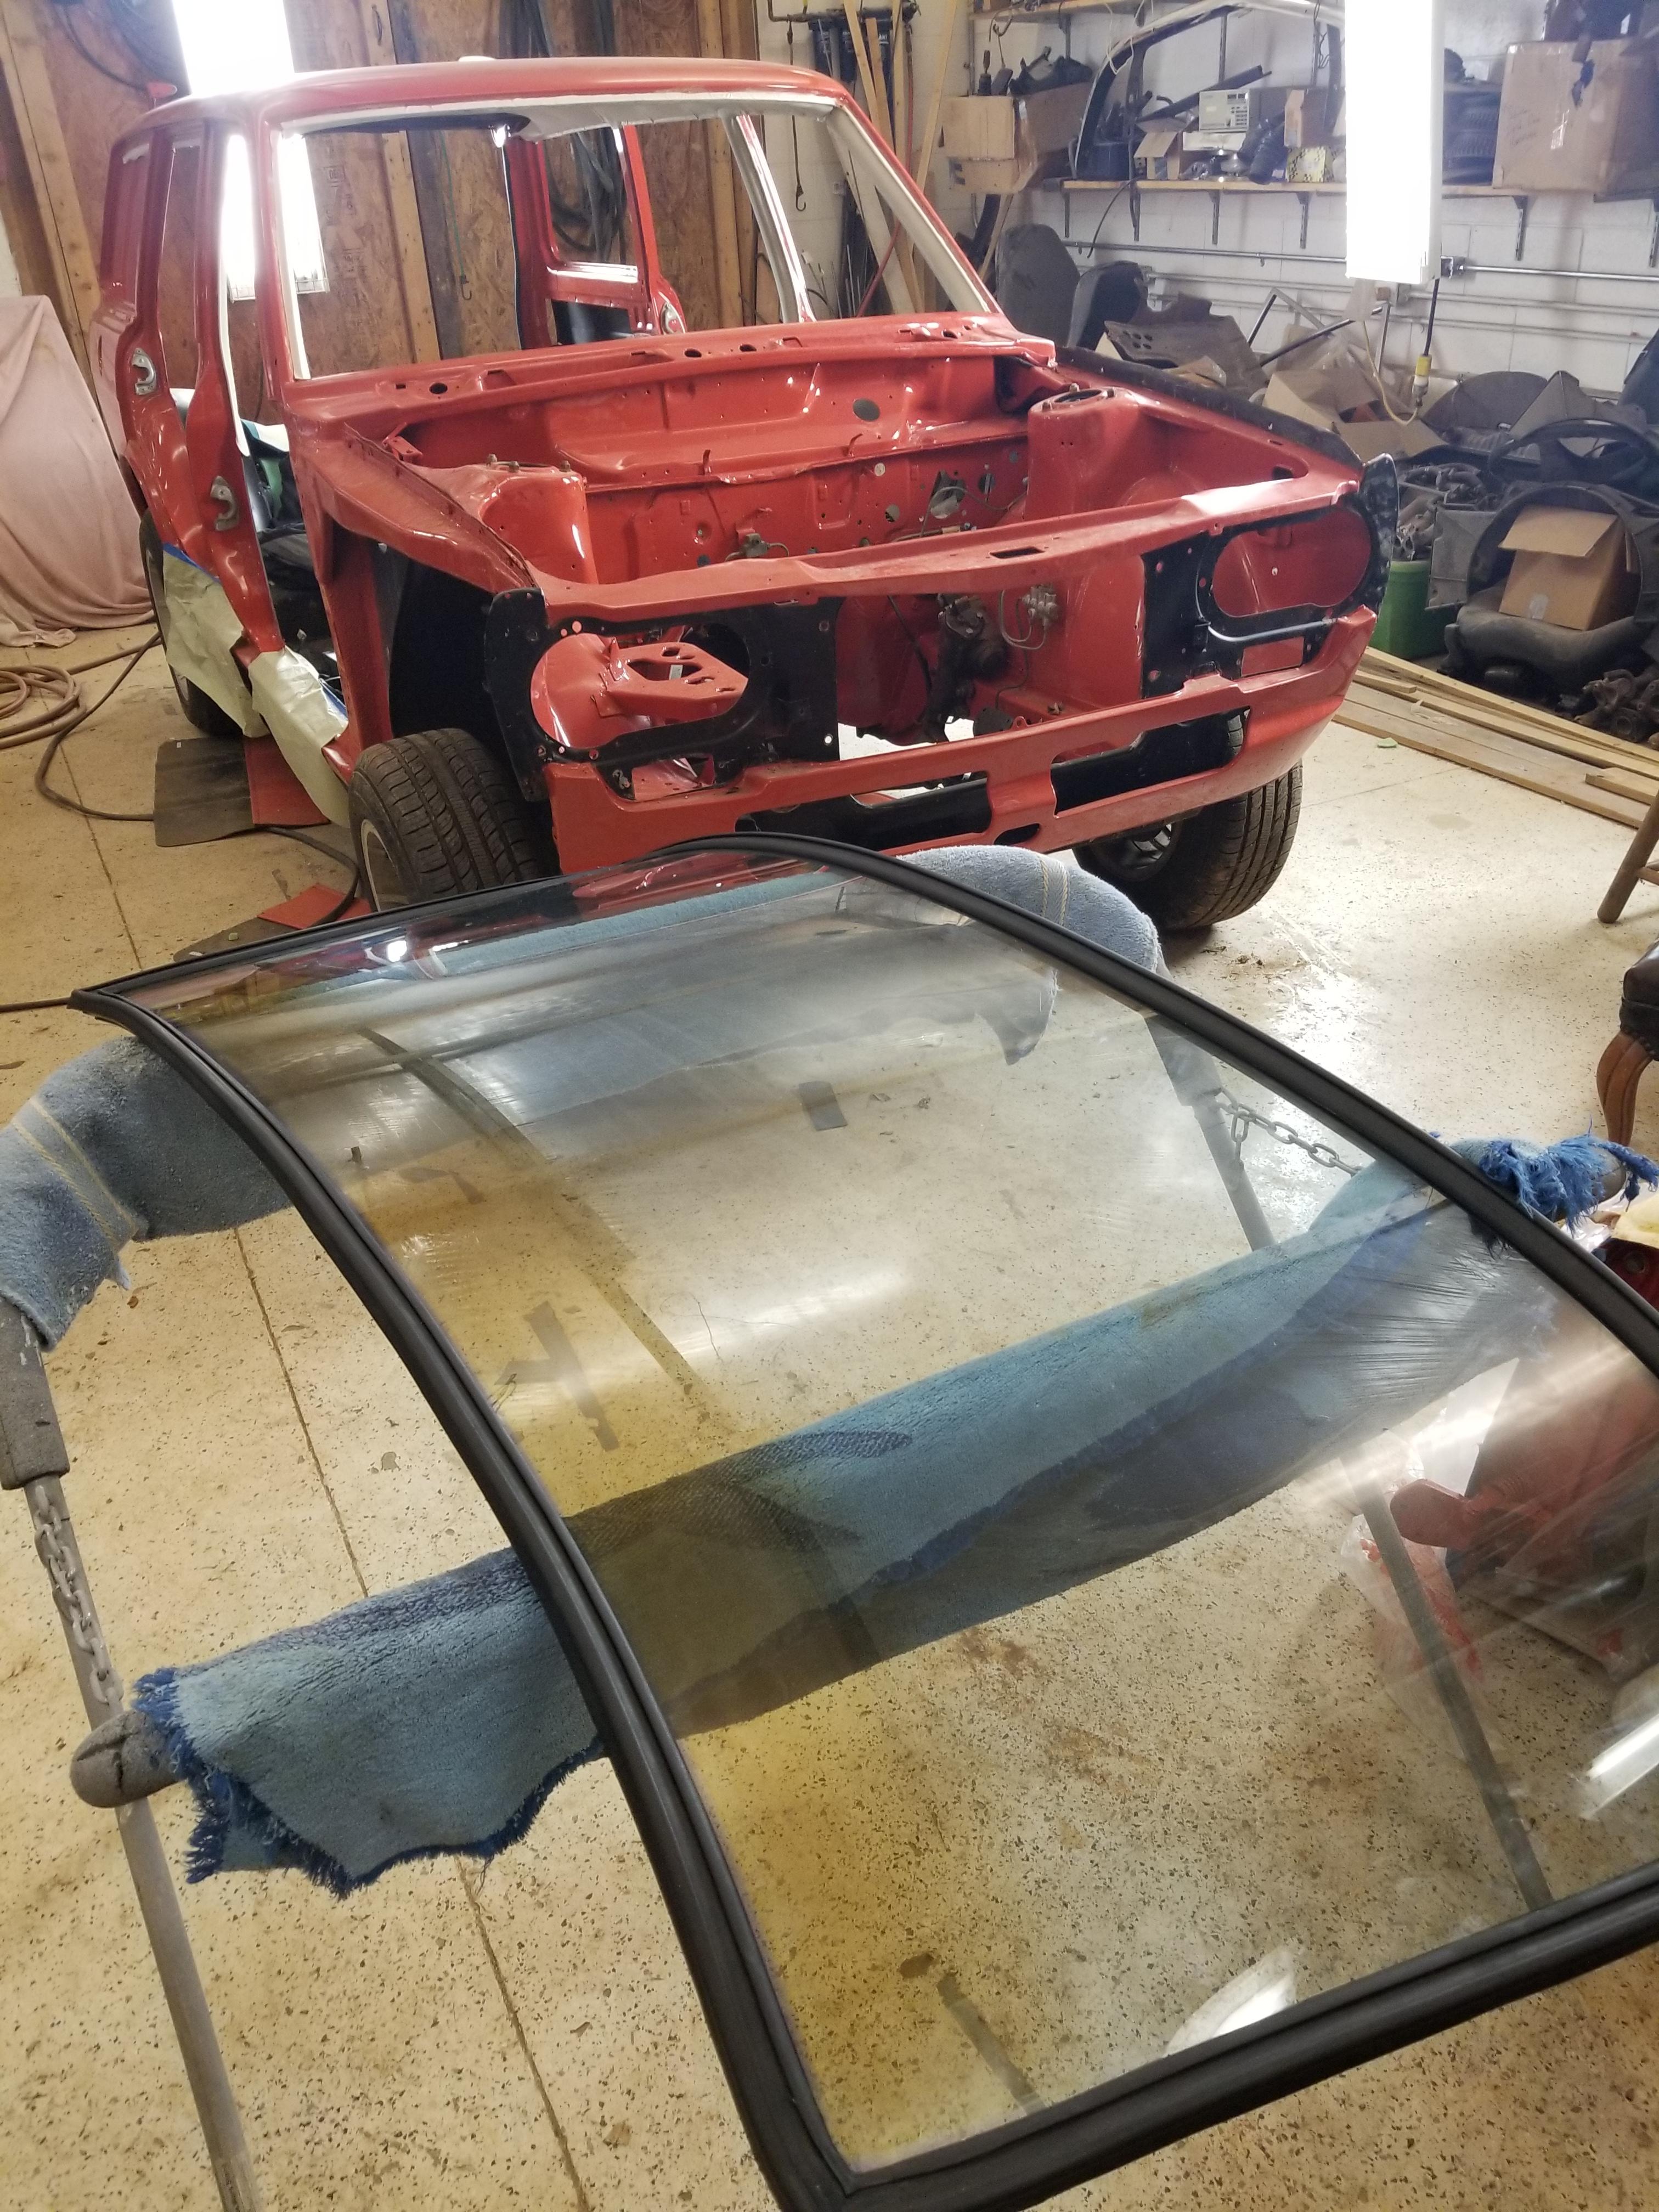
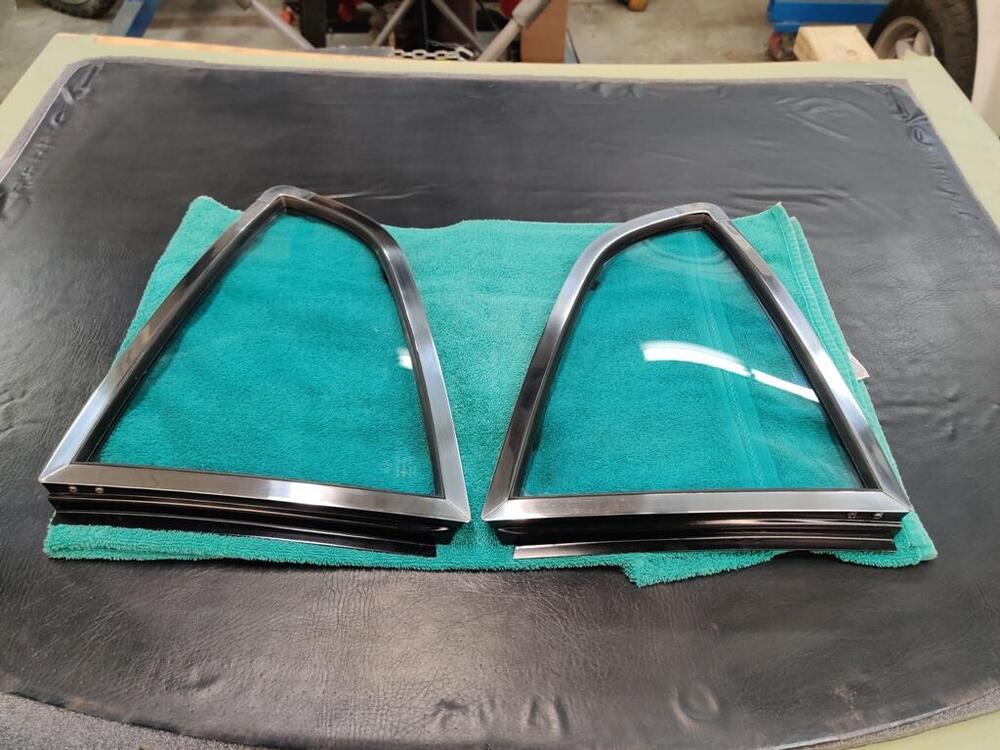
During the time I spent on the car this weekend, I assembled the quarter glass windows into Nissan NOS rubber and into the quarter window frames. It is a rather difficult job, especially when using urethane window adhesive. I set them aside after assembling to wait for the adhesive to dry. I think it is likely that I will install the quarter windows in the car this week. Interestingly, I see that the etchings on my quarter windows date them to May and June of 1971. Combined with the door glass, the car has glass which was manufactured from dates in April through June. New McGard lug nuts showed up on Saturday. They are very high quality. I have used them on my other 240z for 30 years and they still look pretty close to new. I put them on along with the Panasport center caps. While it finishes the look, I kind of like the look of the hub dust covers which I had specially plated in yellow chromate so they would look like those with the original finish. I also worked on the differential. I have a separate thread where I am reporting issues and progress. I think I am much closer to resolving the issue with excessive backlash, and am looking forward to installing it in the car. I also attempted to glue the old head liner vinyl to new foam. Unfortunately, I got a few wrinkles in it. I also discovered two very small slits in the original vinyl after gluing it to the foam. I suspect that when the headliner was manufactured, the vinyl was at a much higher temperature and was pressed against the foam while under some amount of tension. As such, wrinkles would not form like I experienced here. So, because of these issues, I will not be able to use it. At this point, I will need to source a piece of cloth backed vinyl and glue that to new foam. It won't be original, and that bothers me, but I really don't see that I have any other option. I have been looking for a new old stock headliner for years, but haven't found one to be available.


-
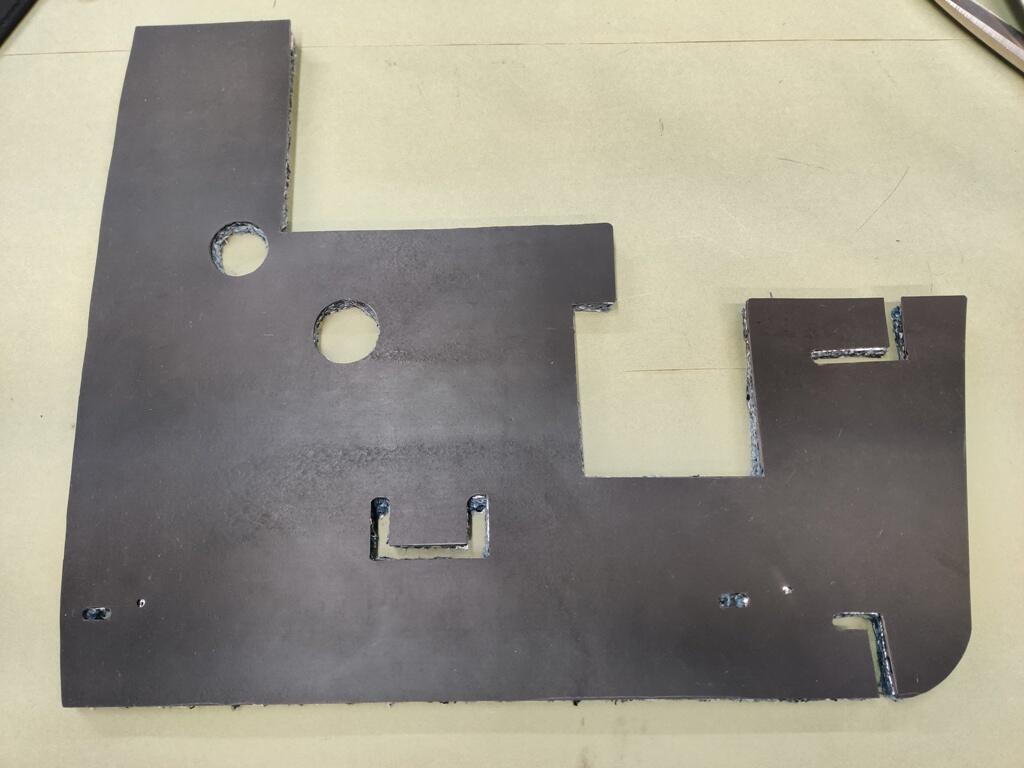
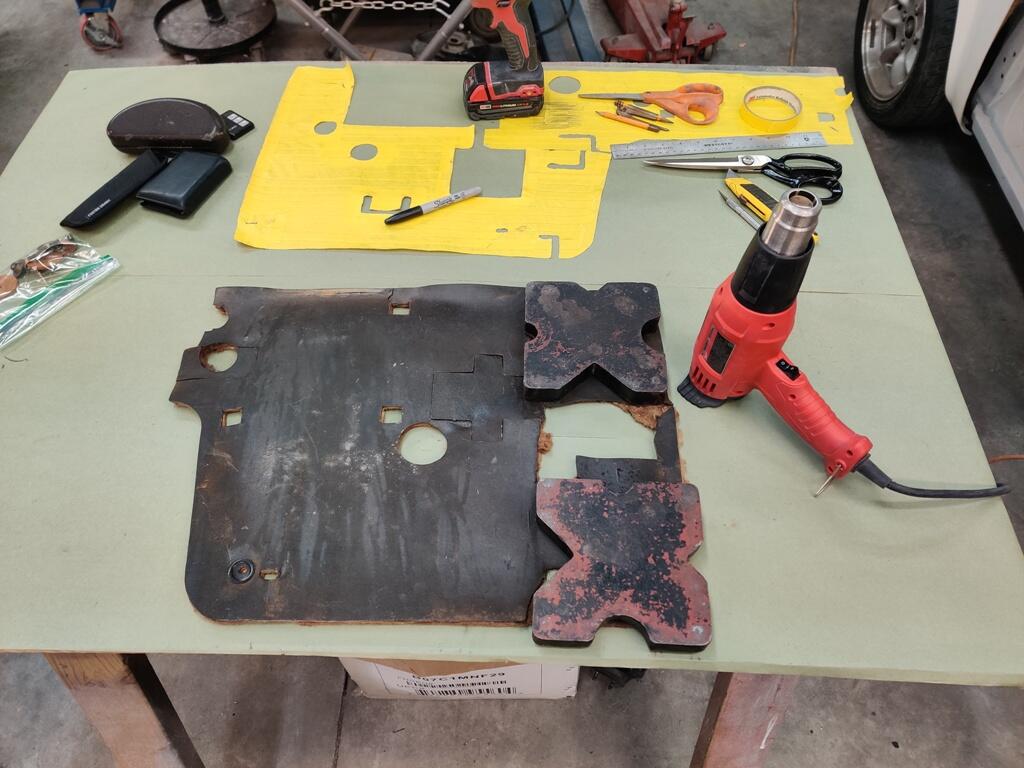
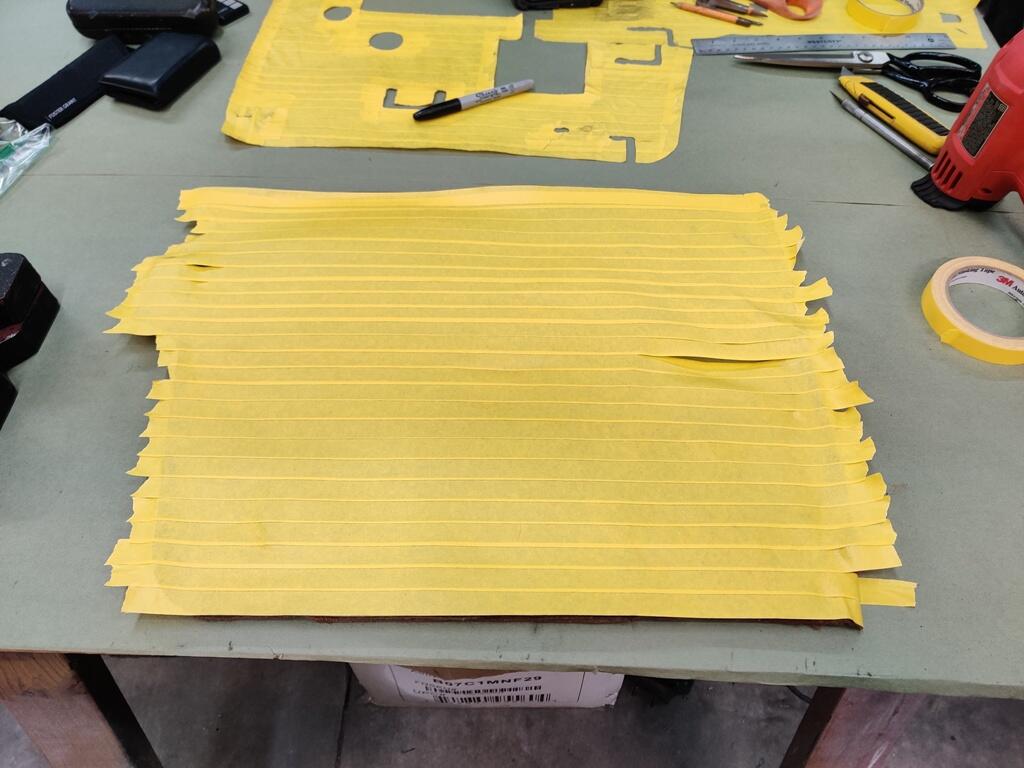
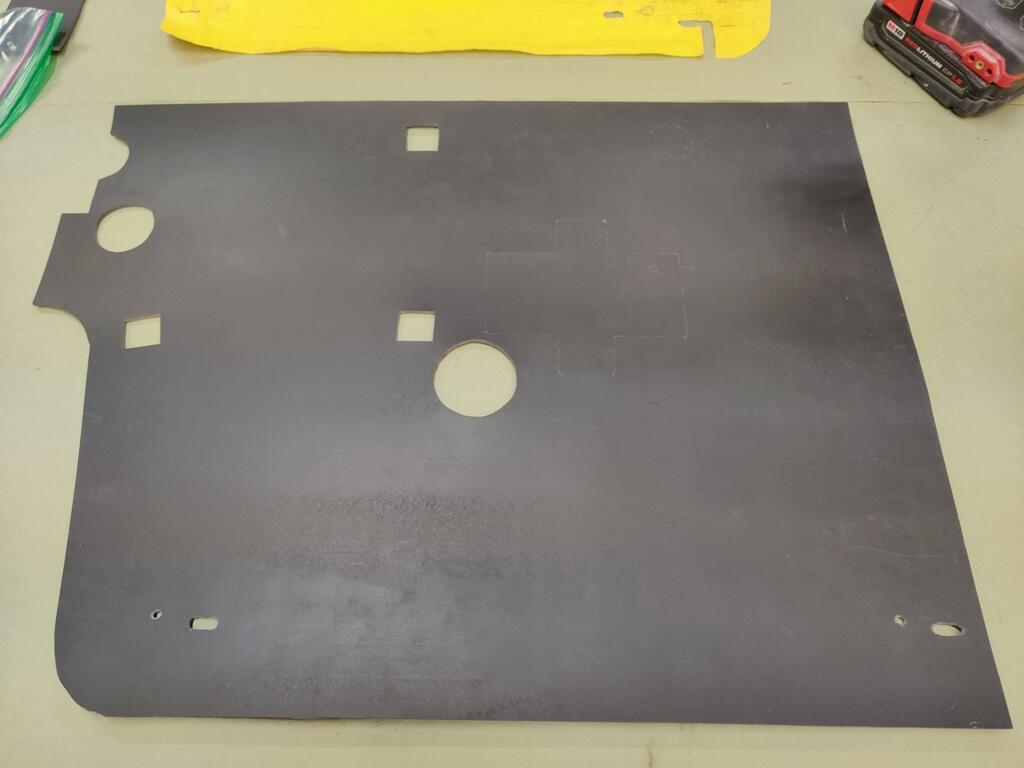
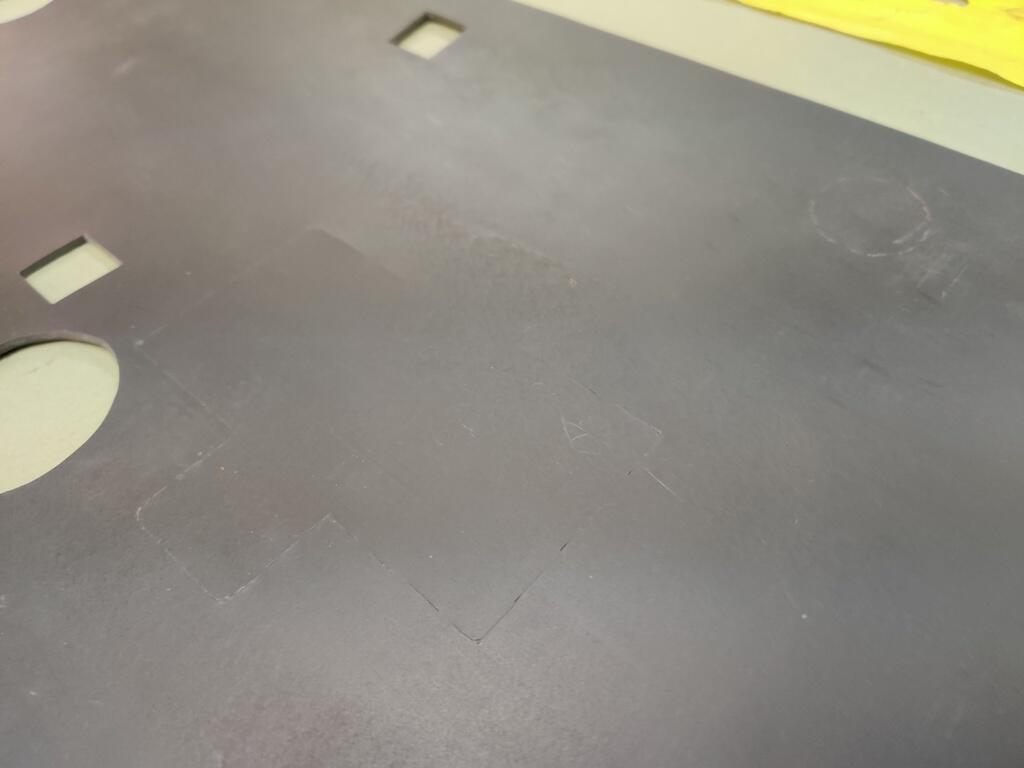
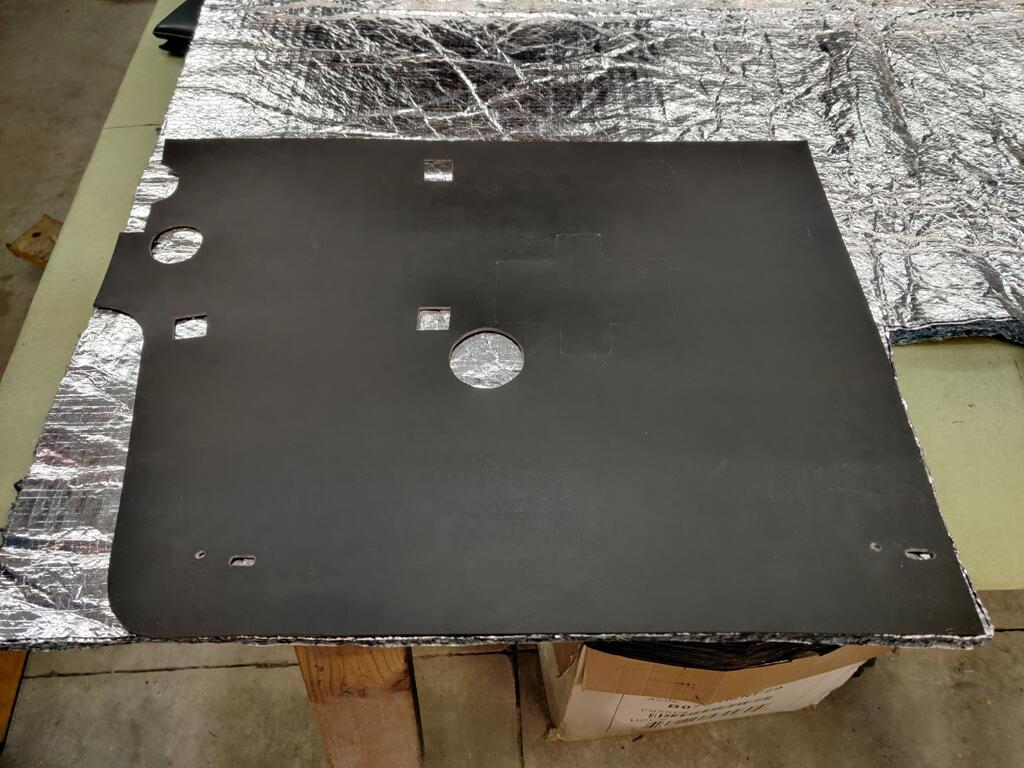
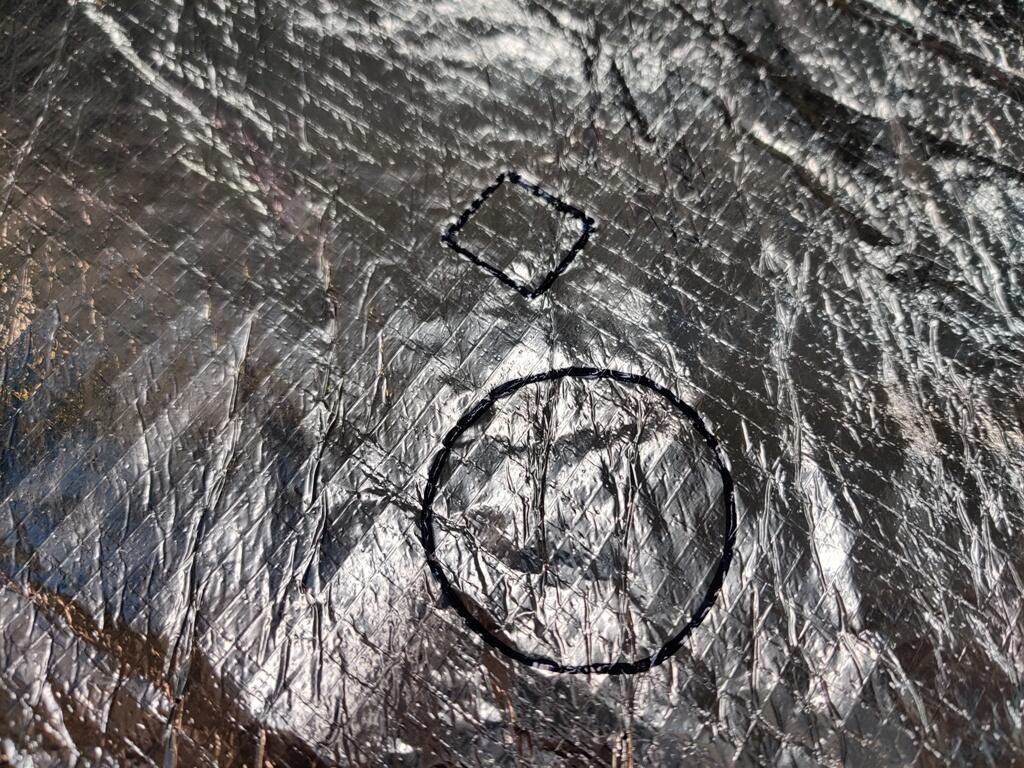
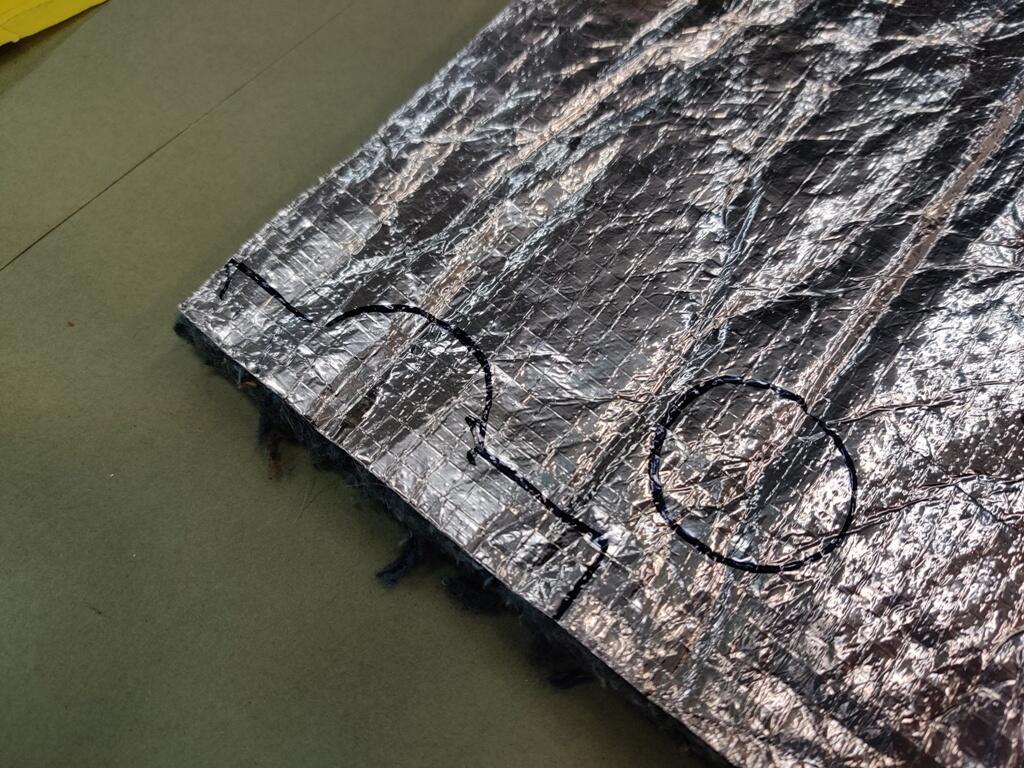
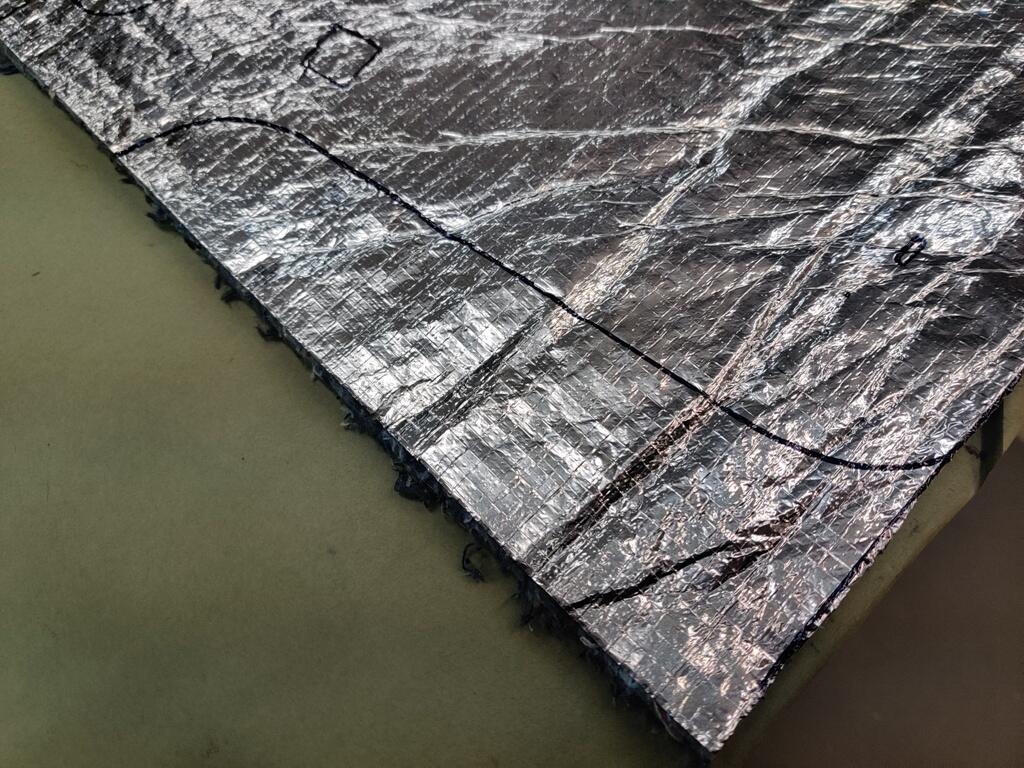
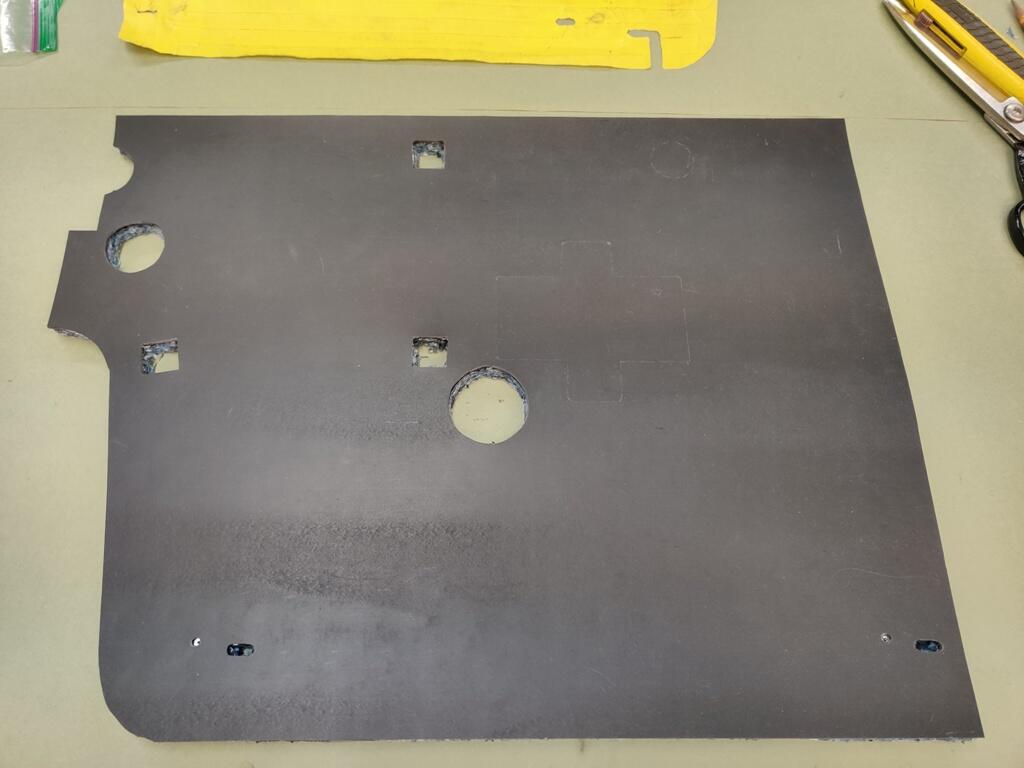
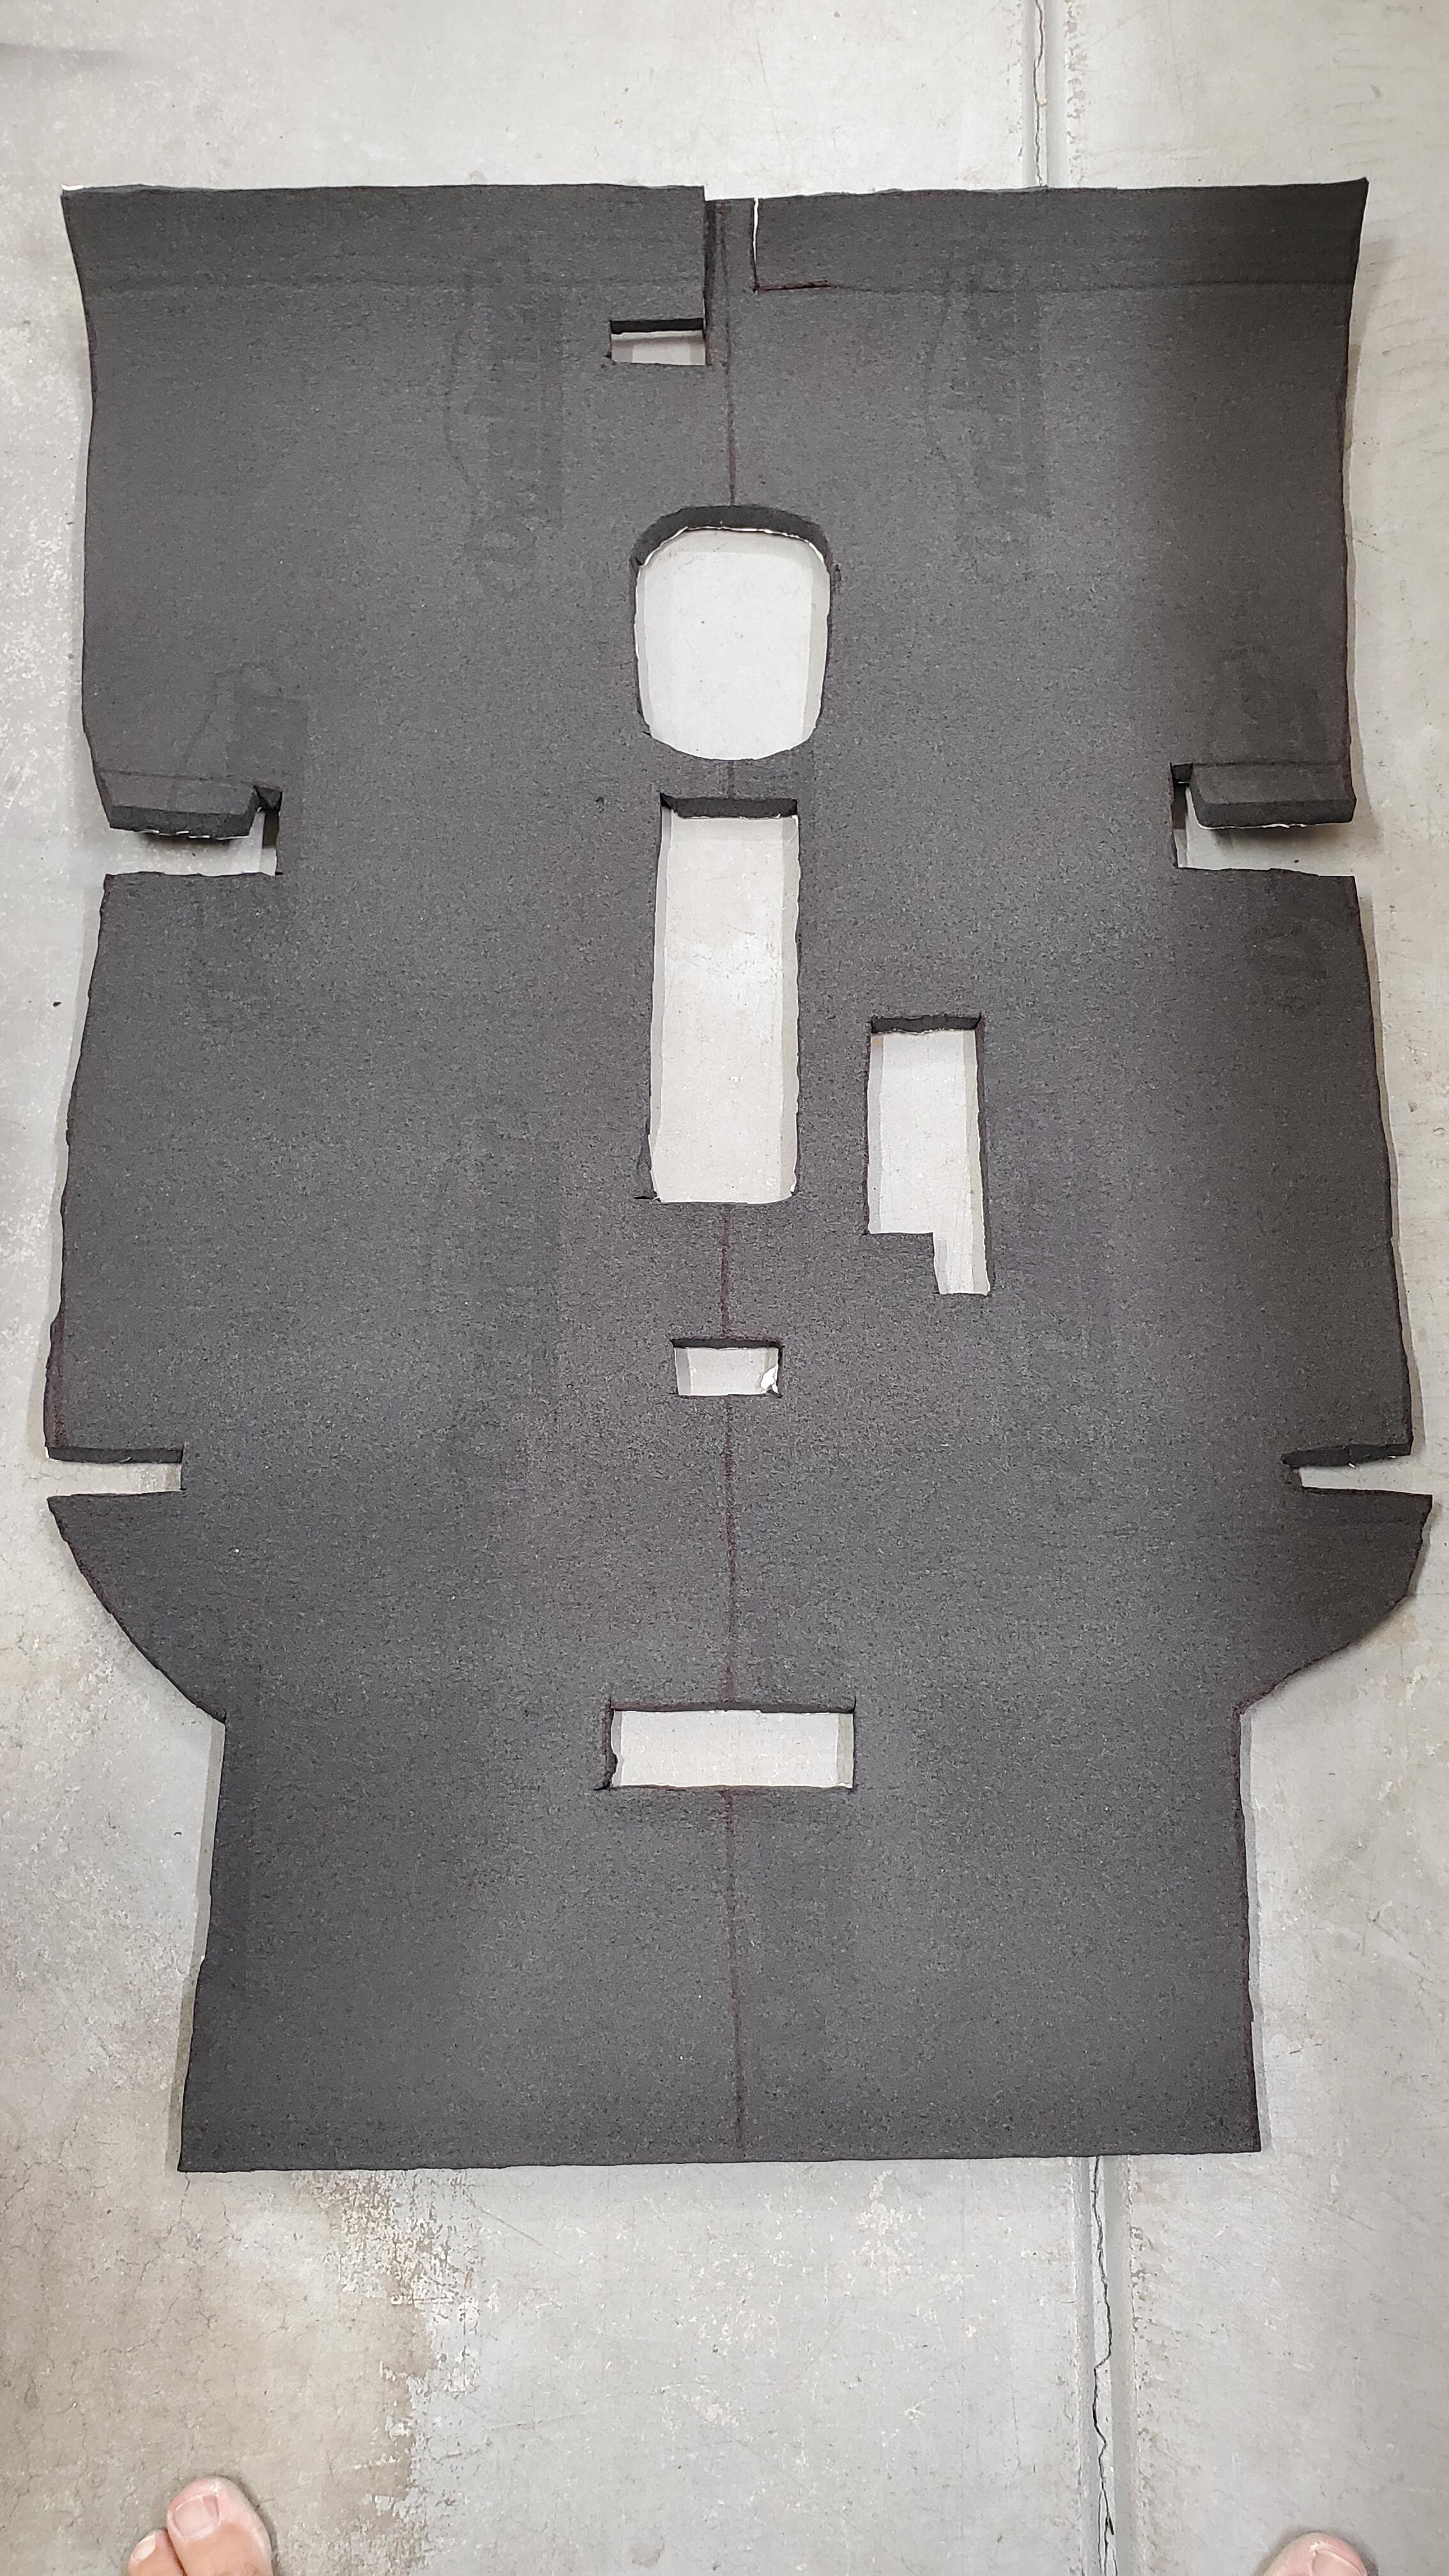
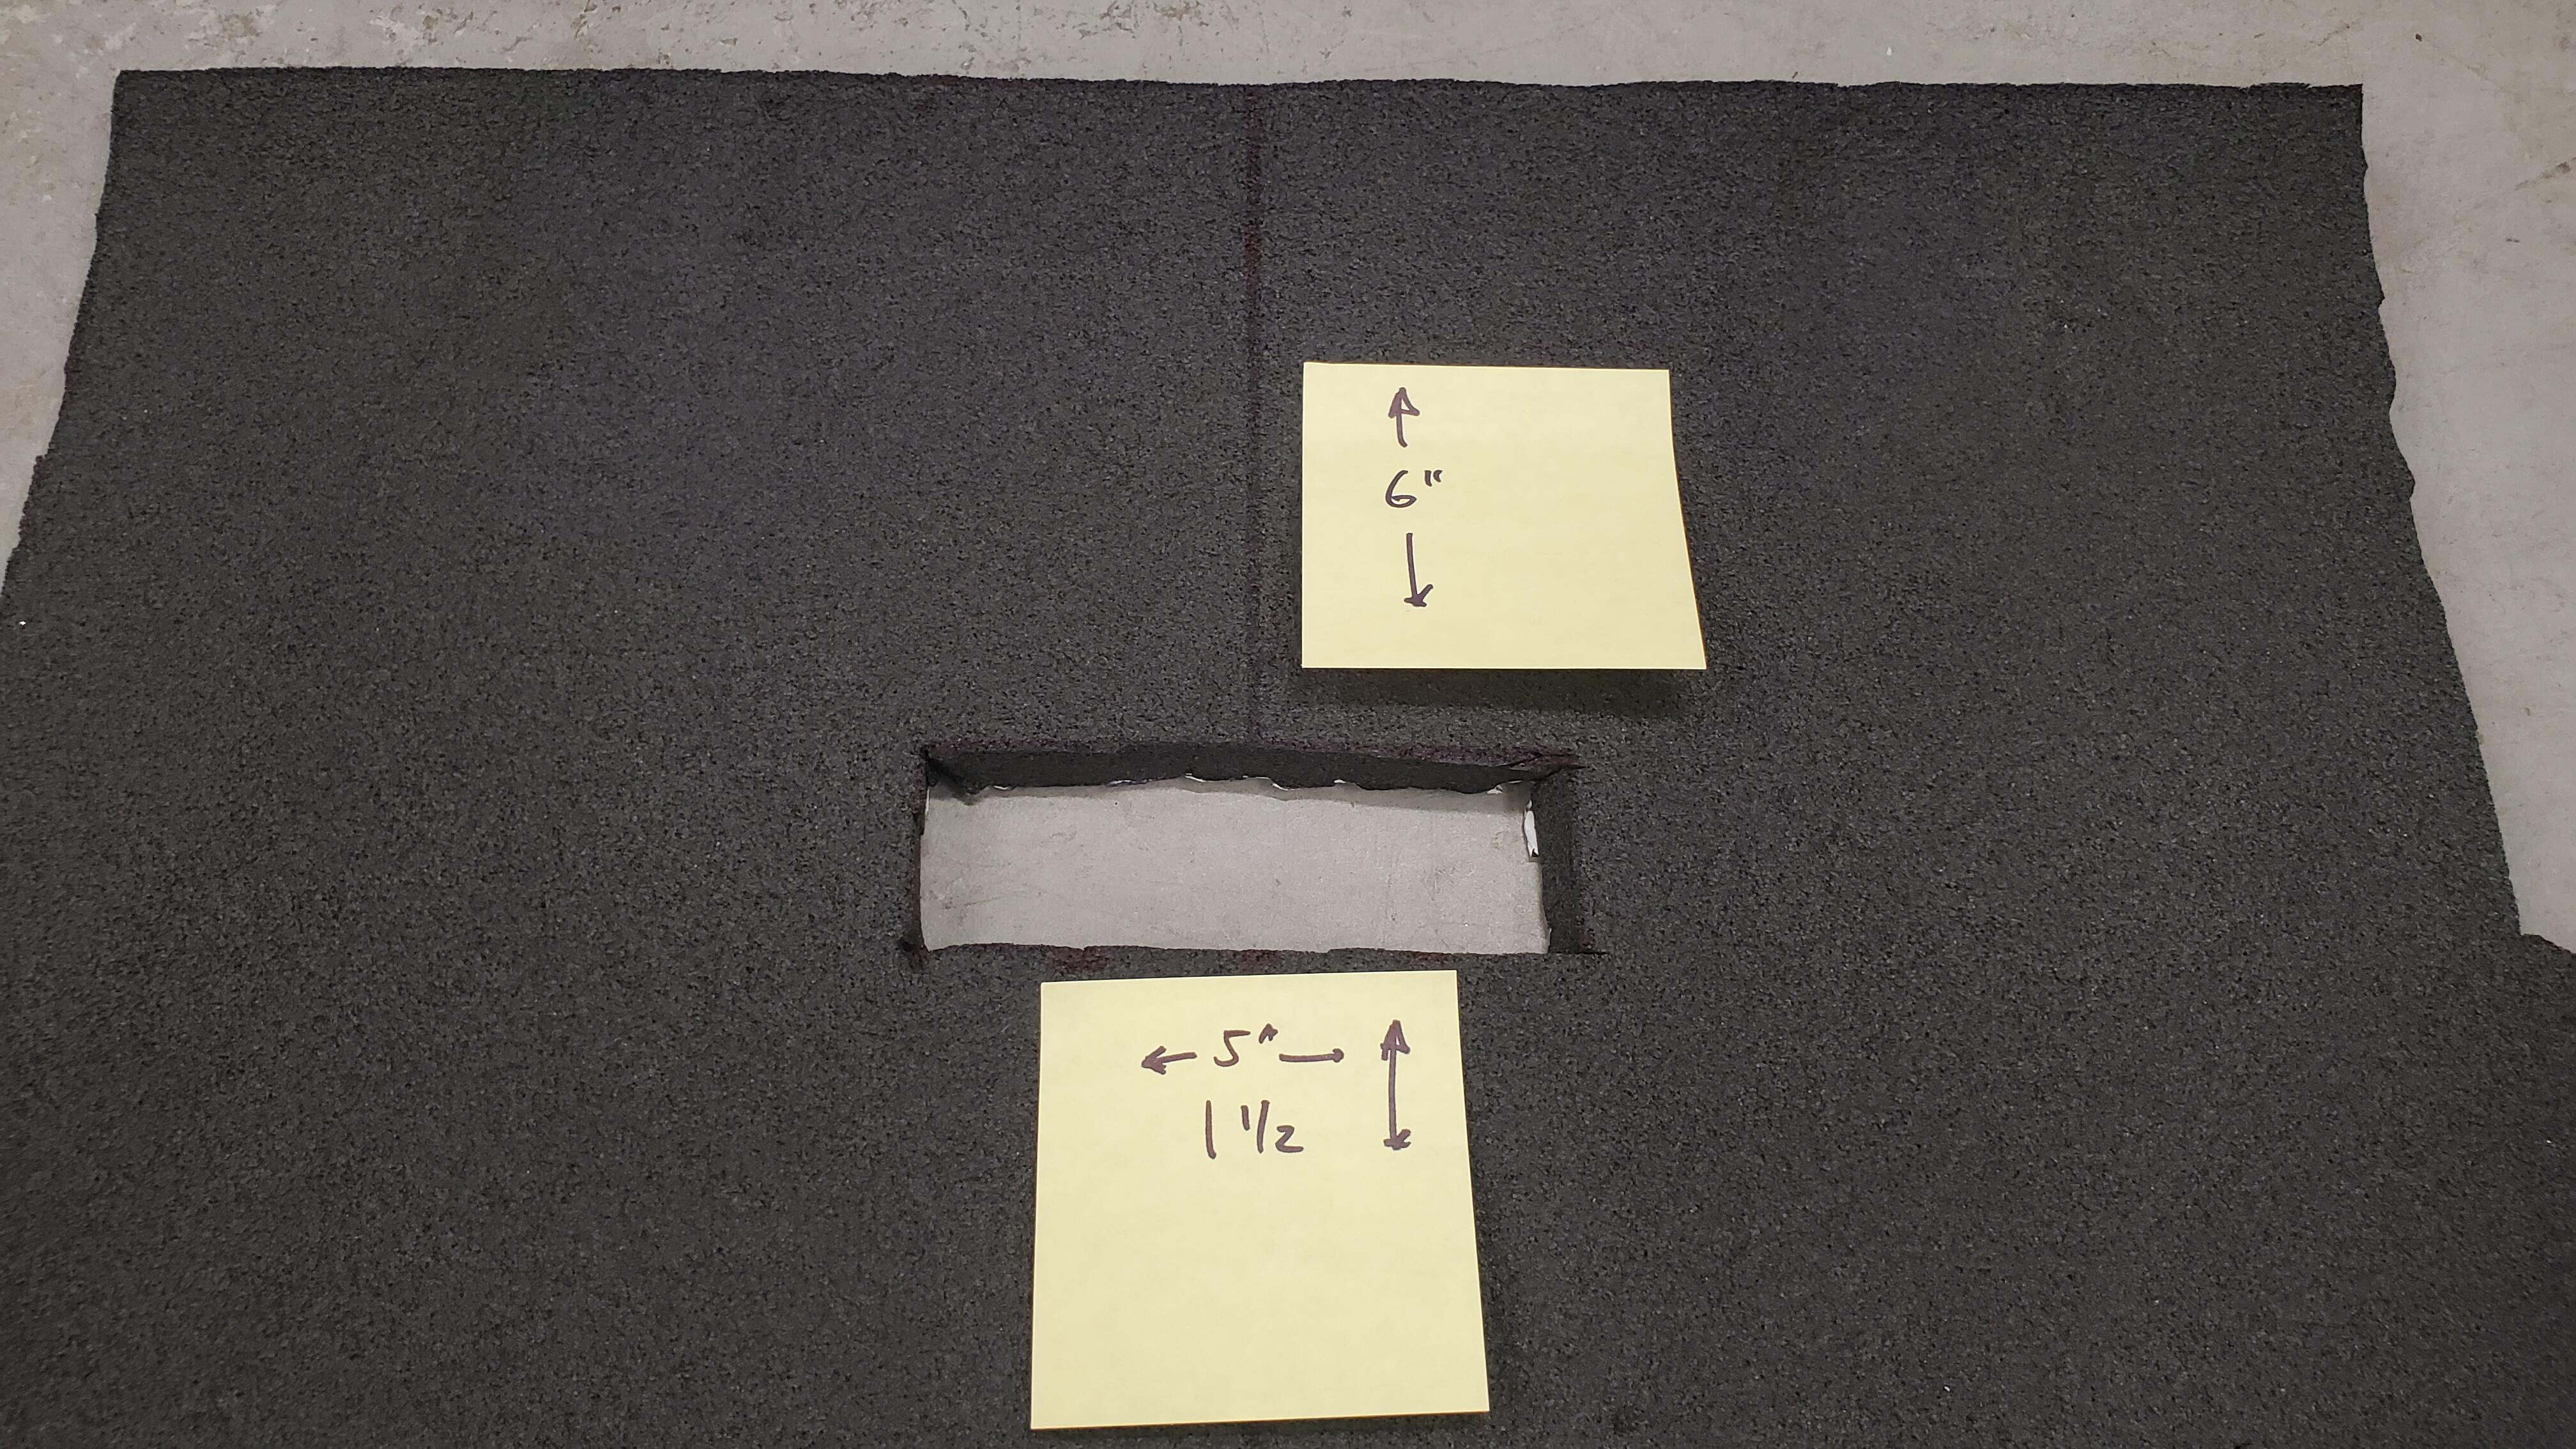
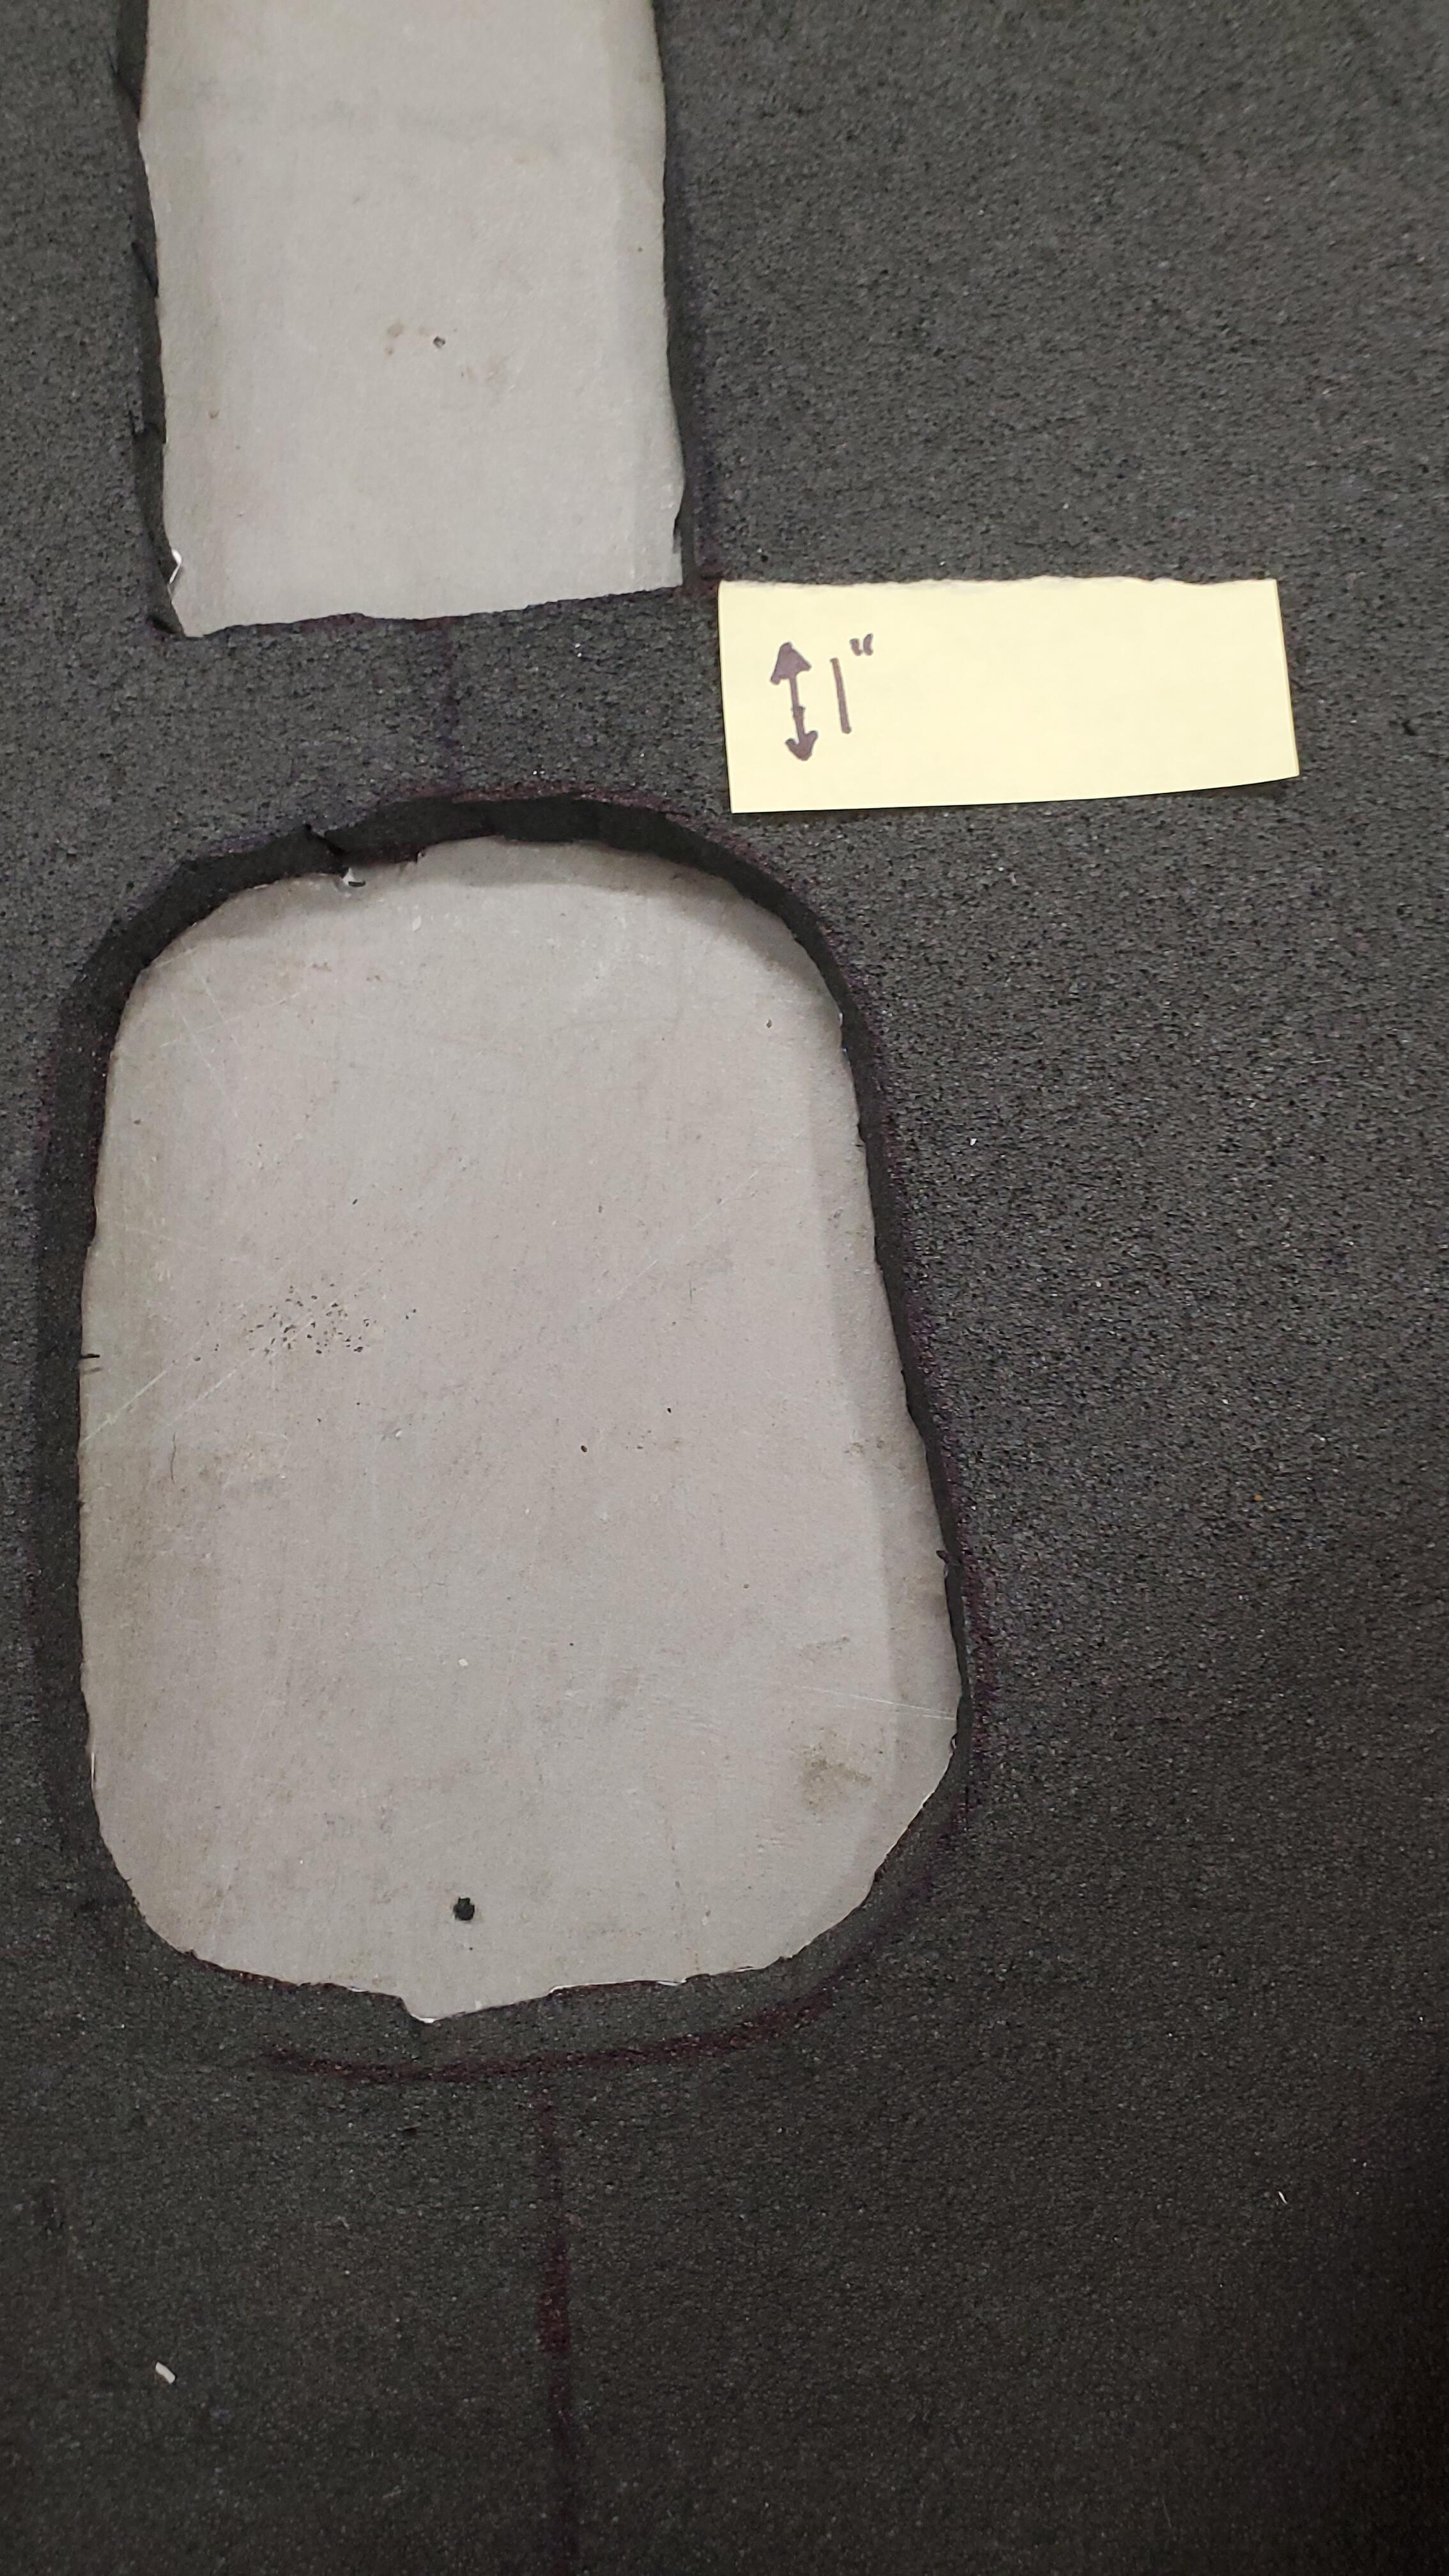
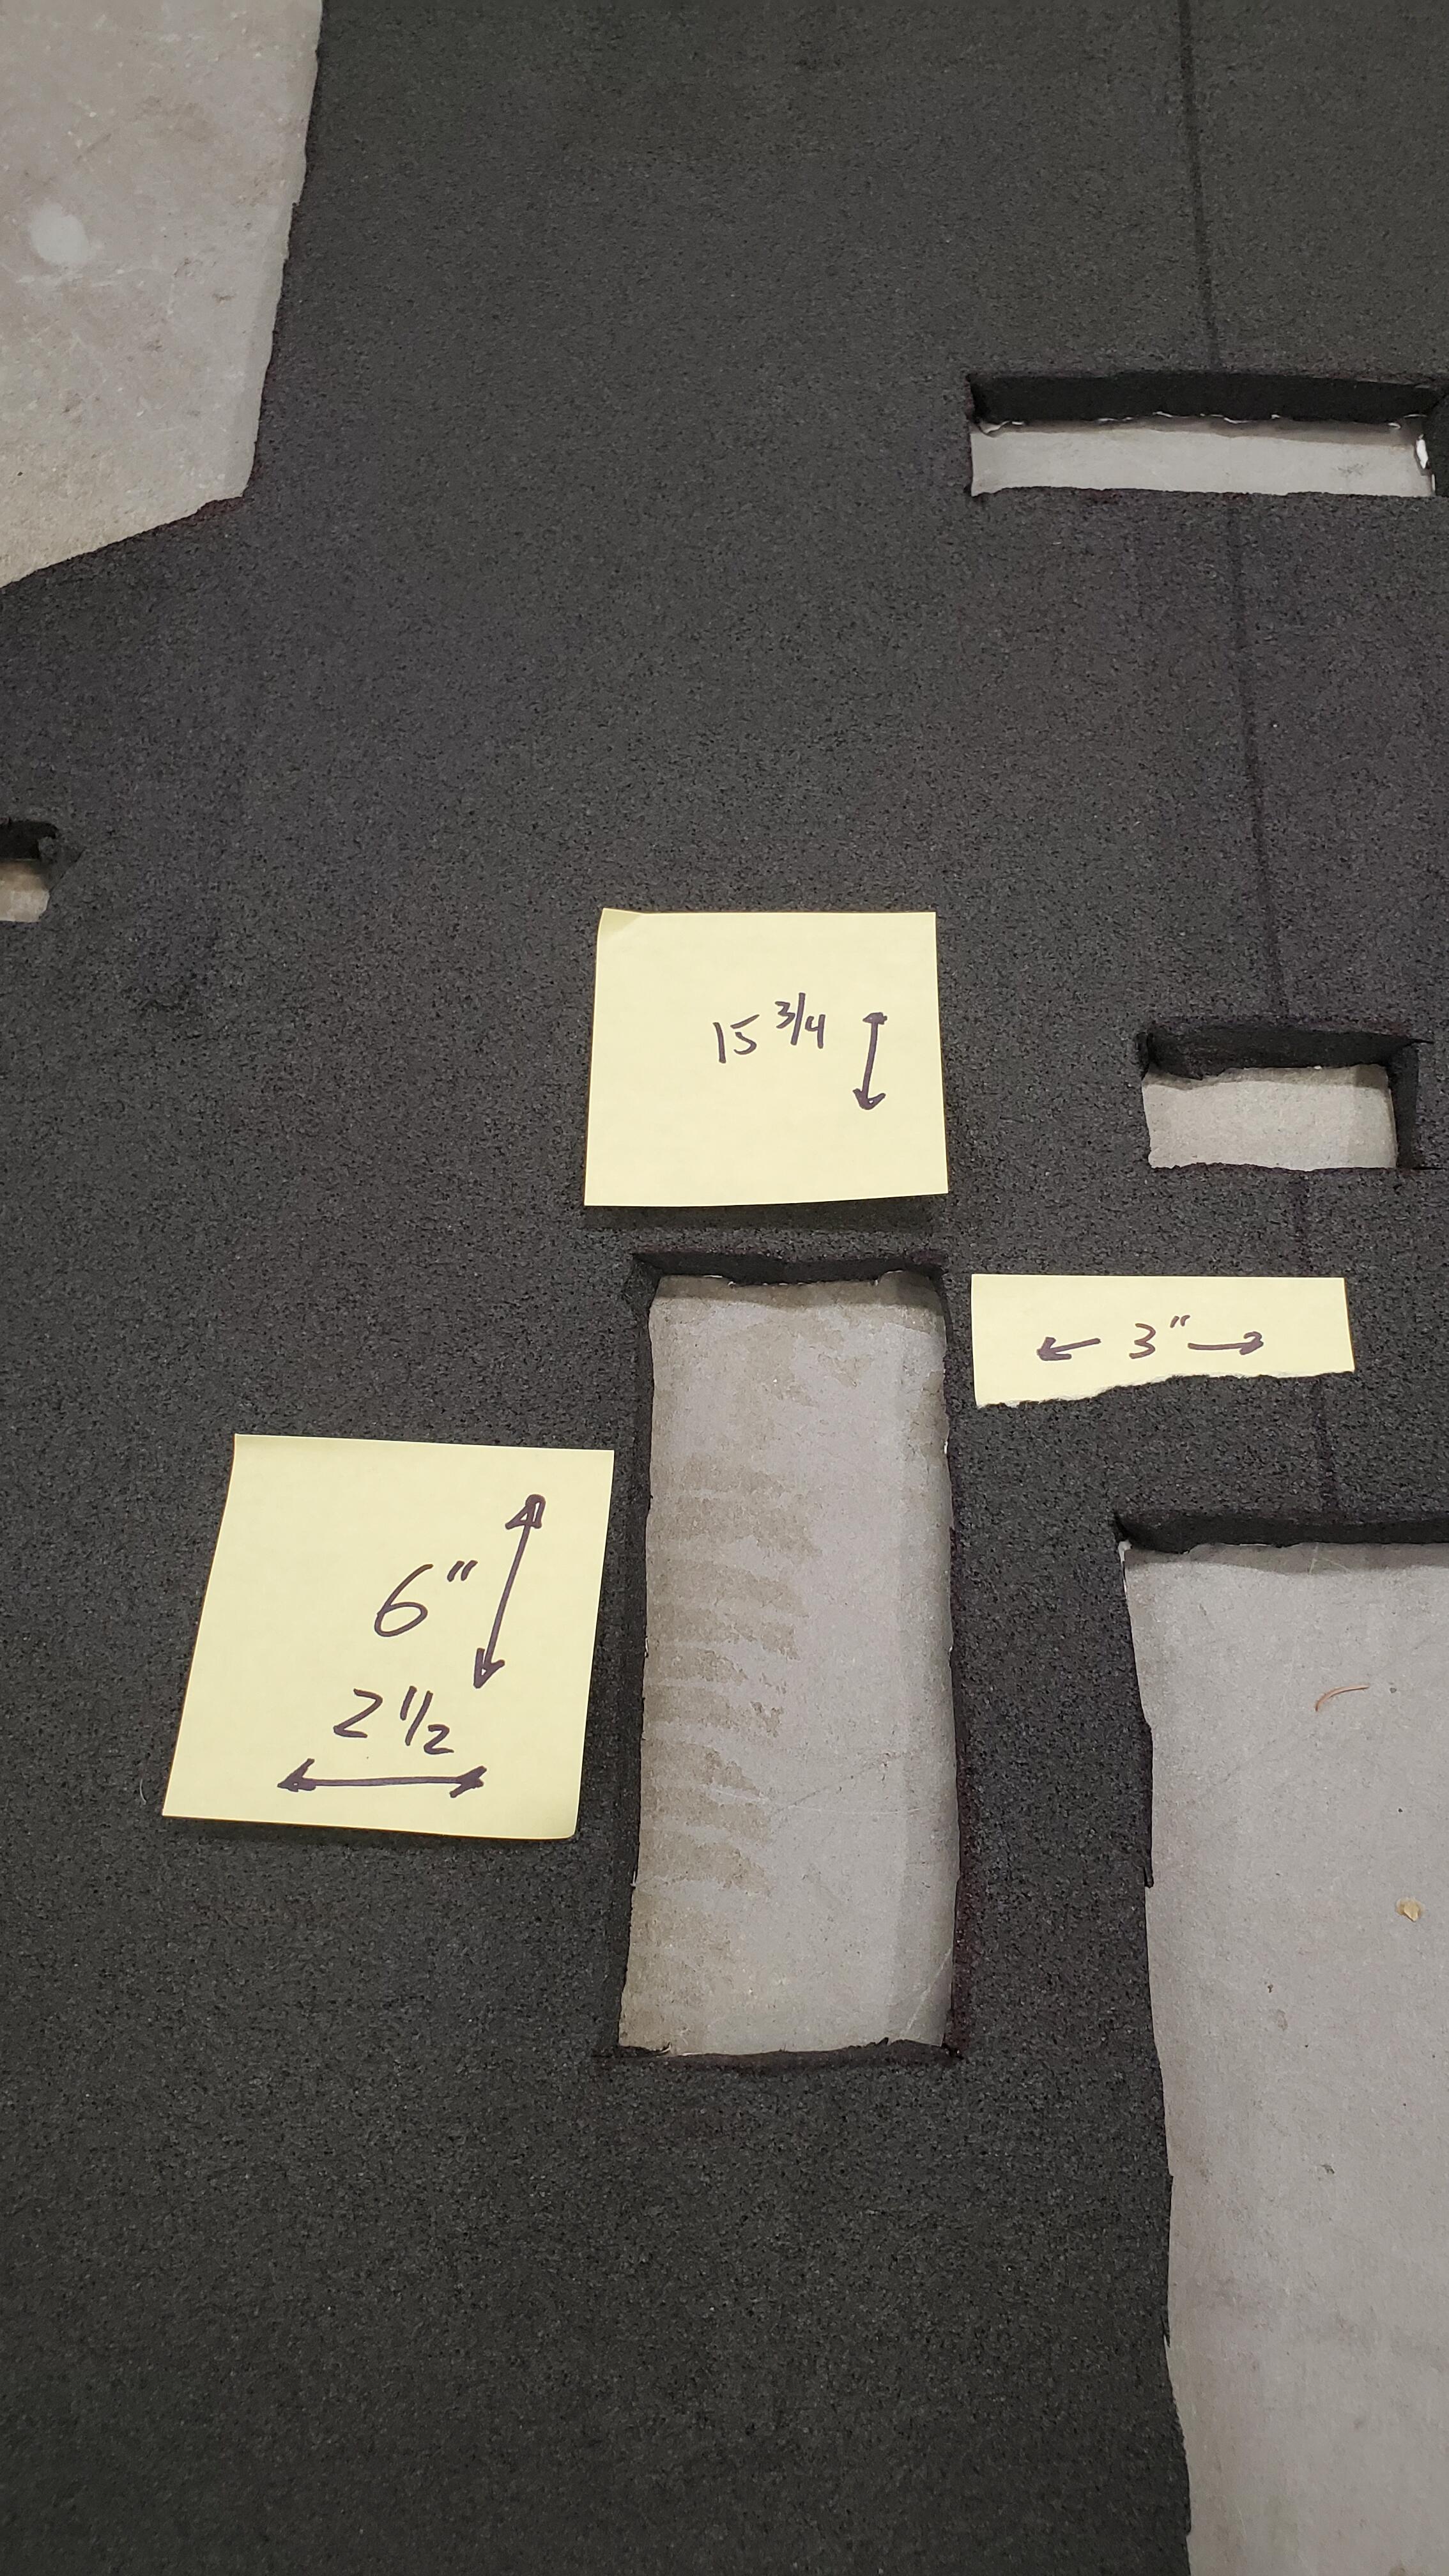
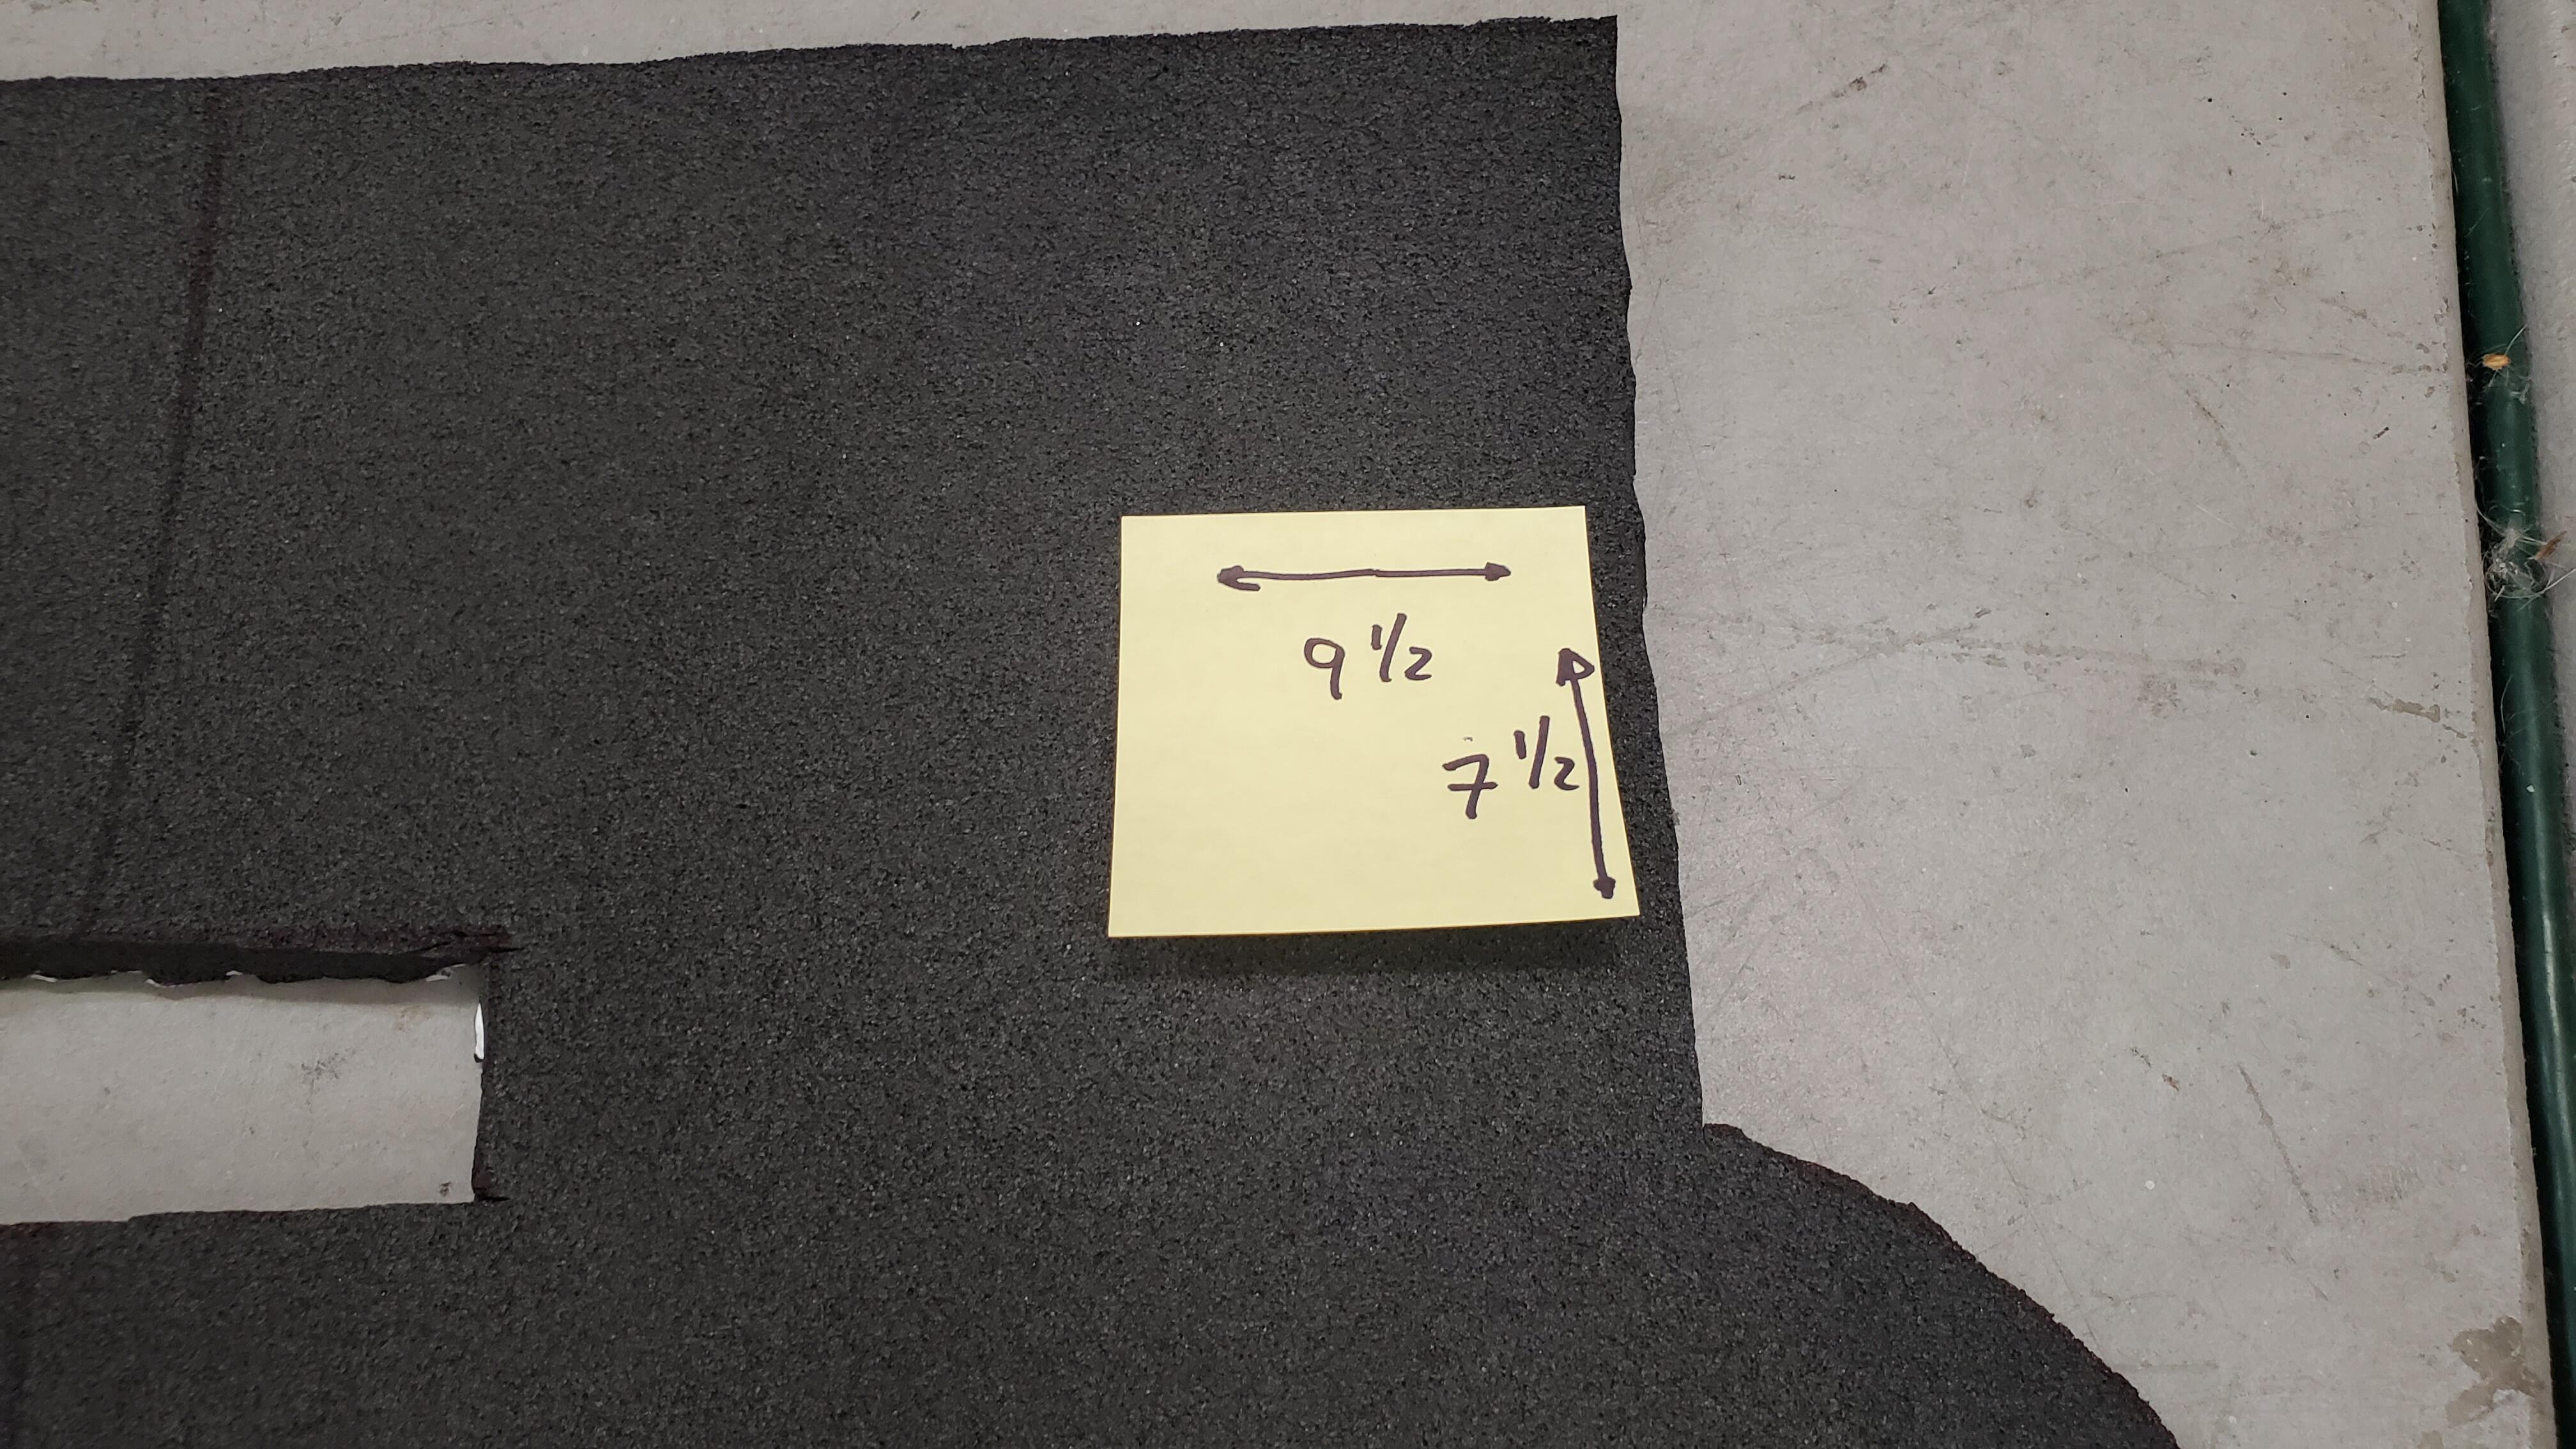
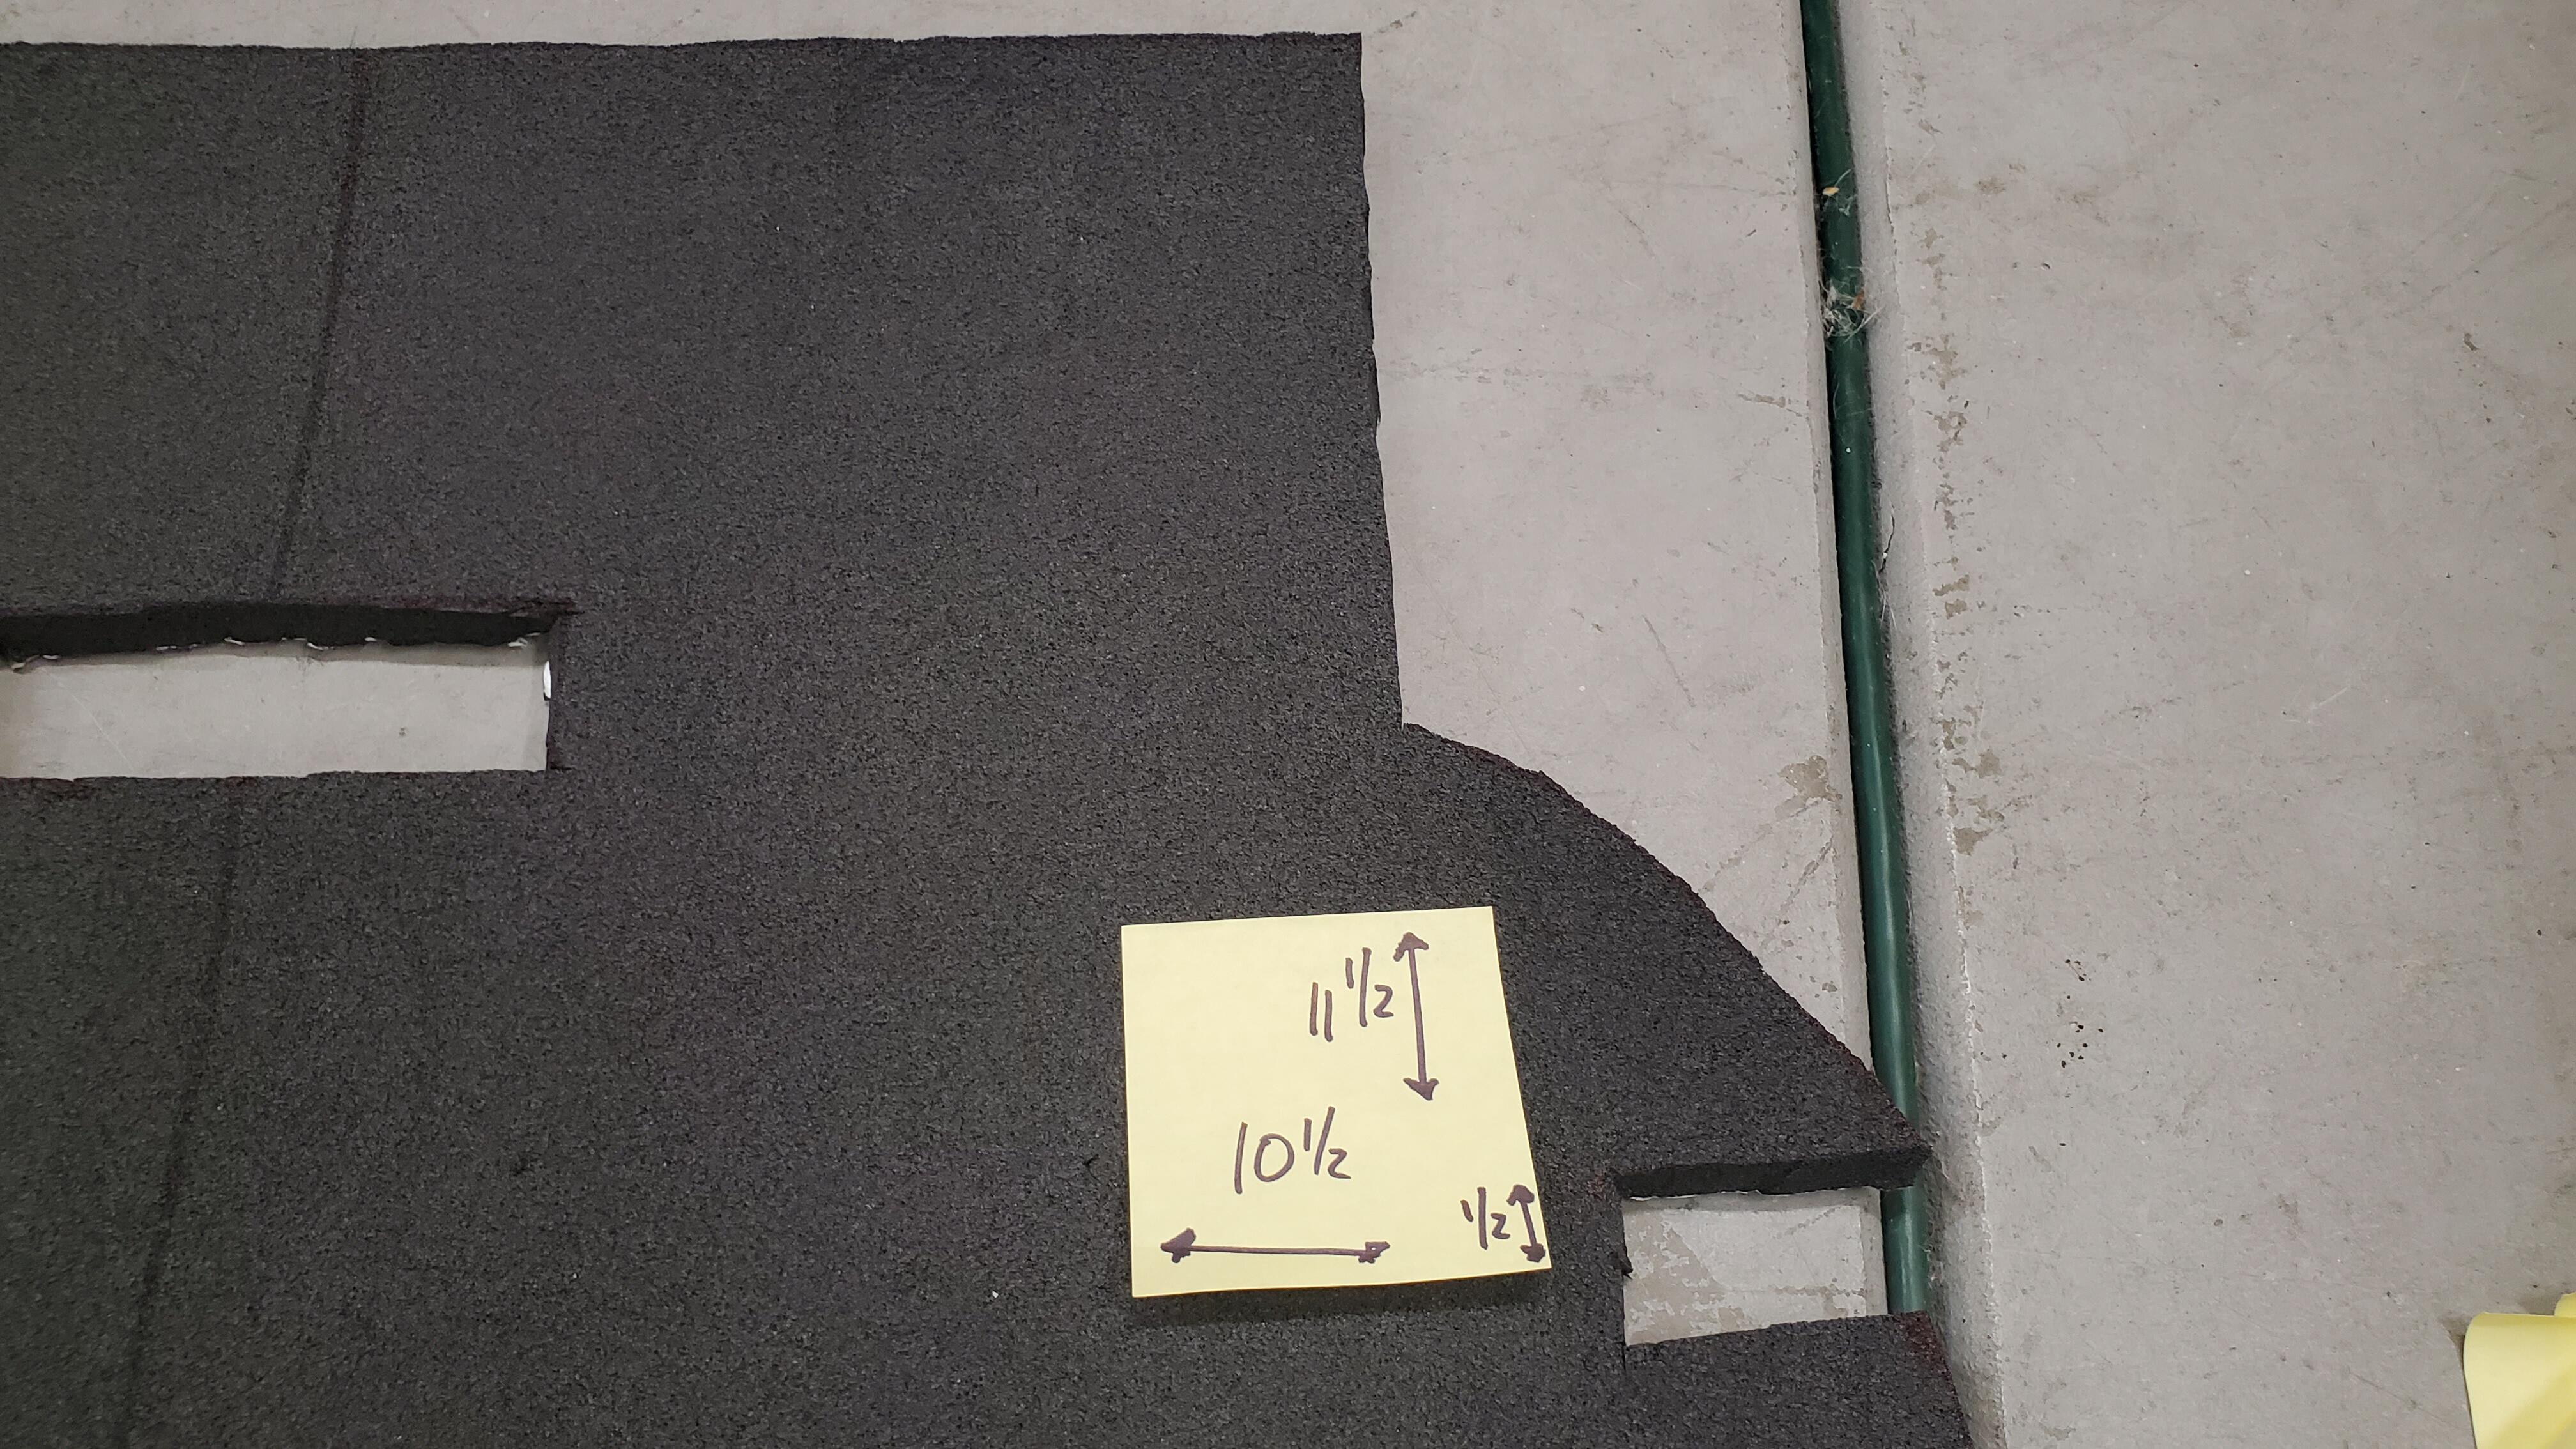
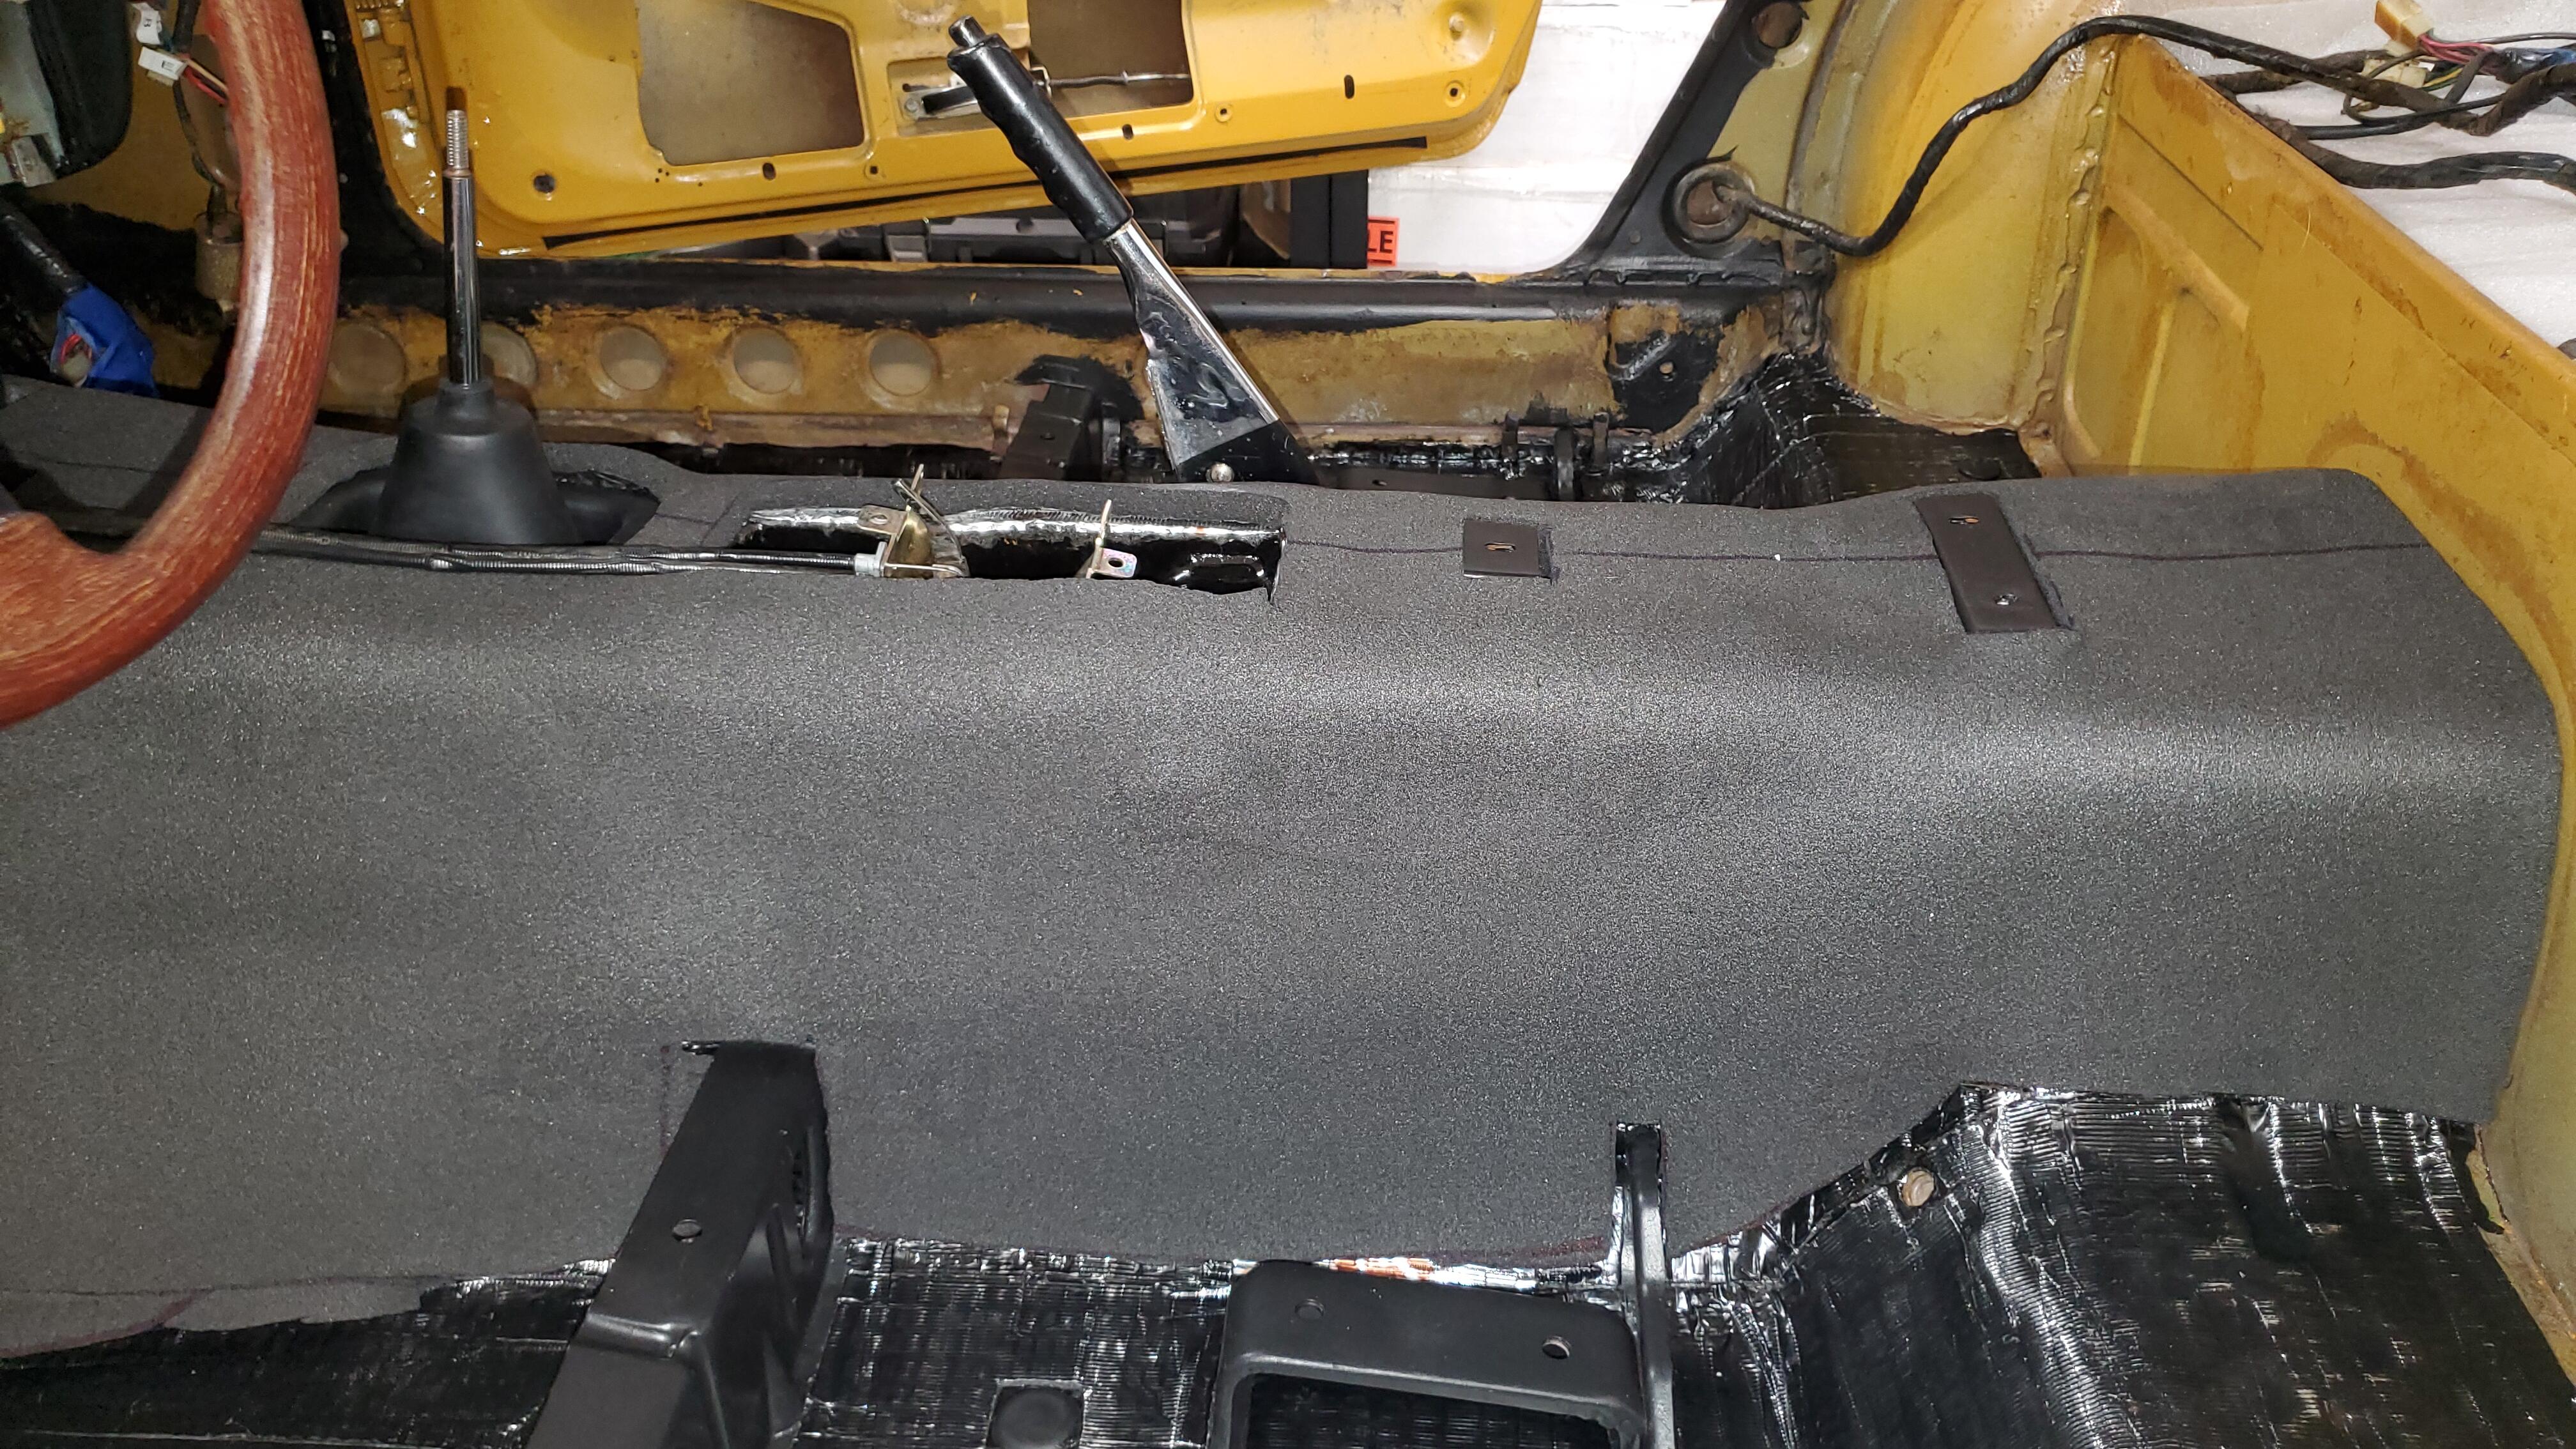
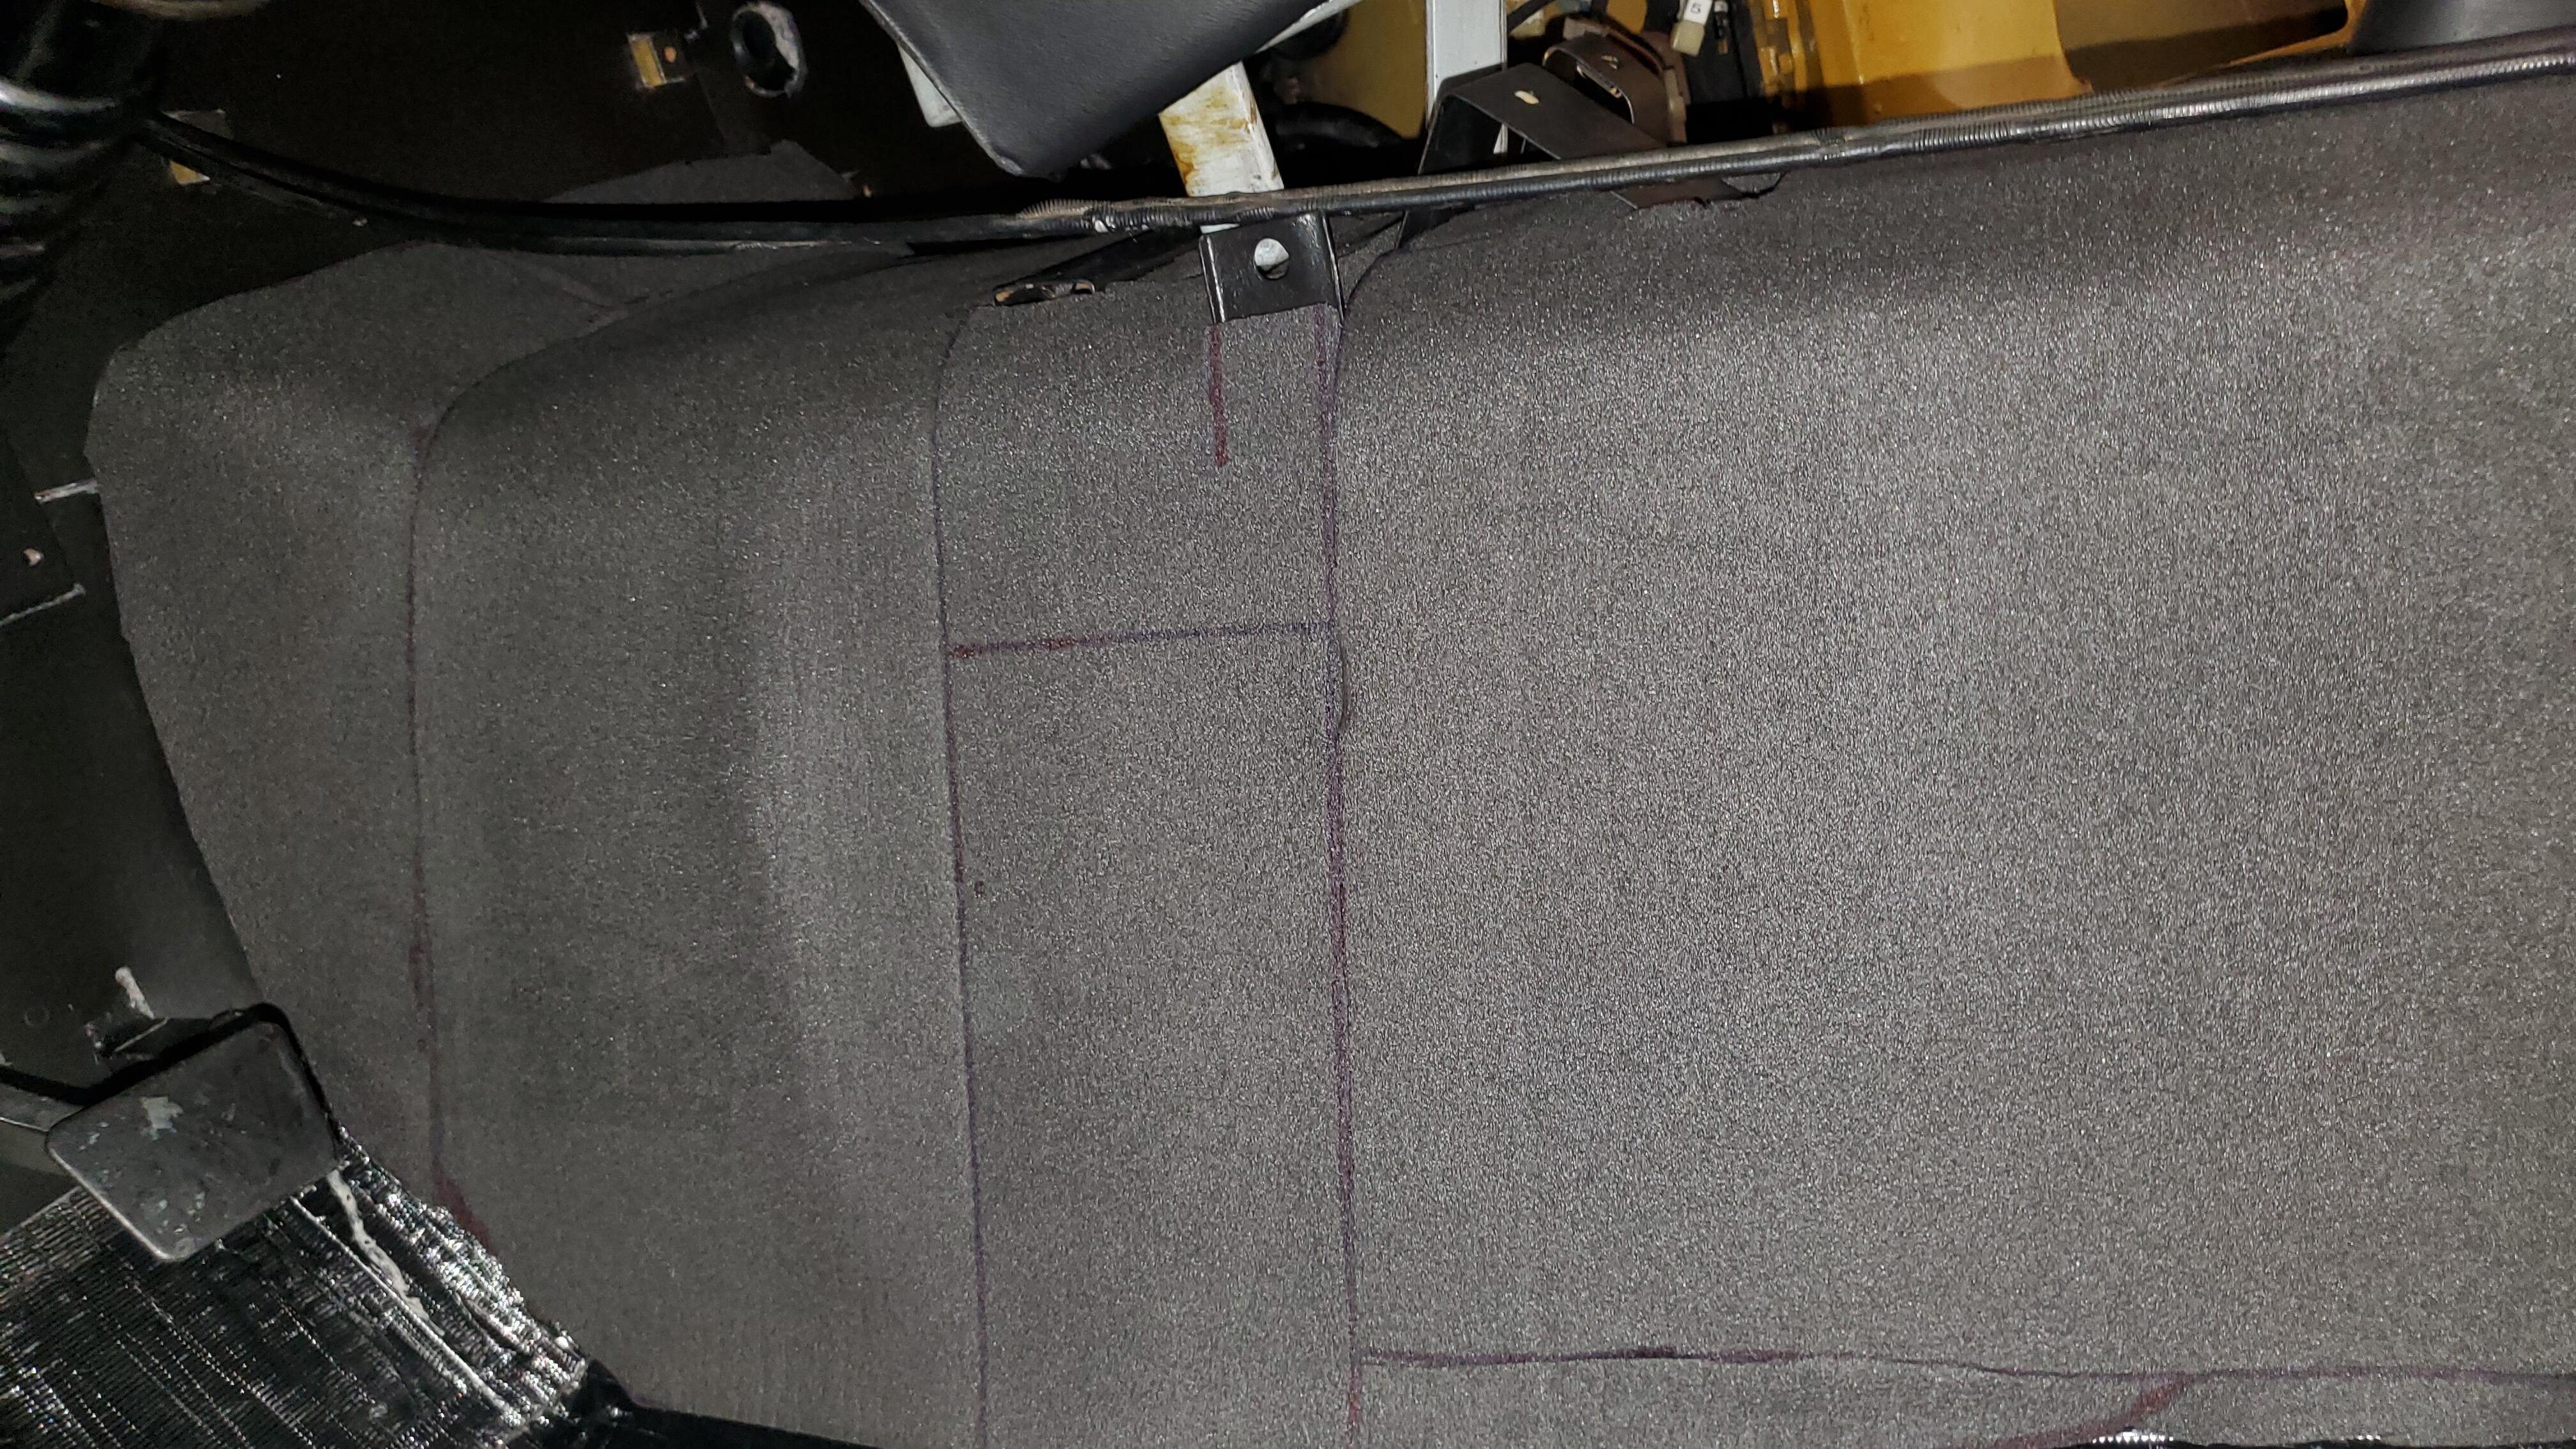
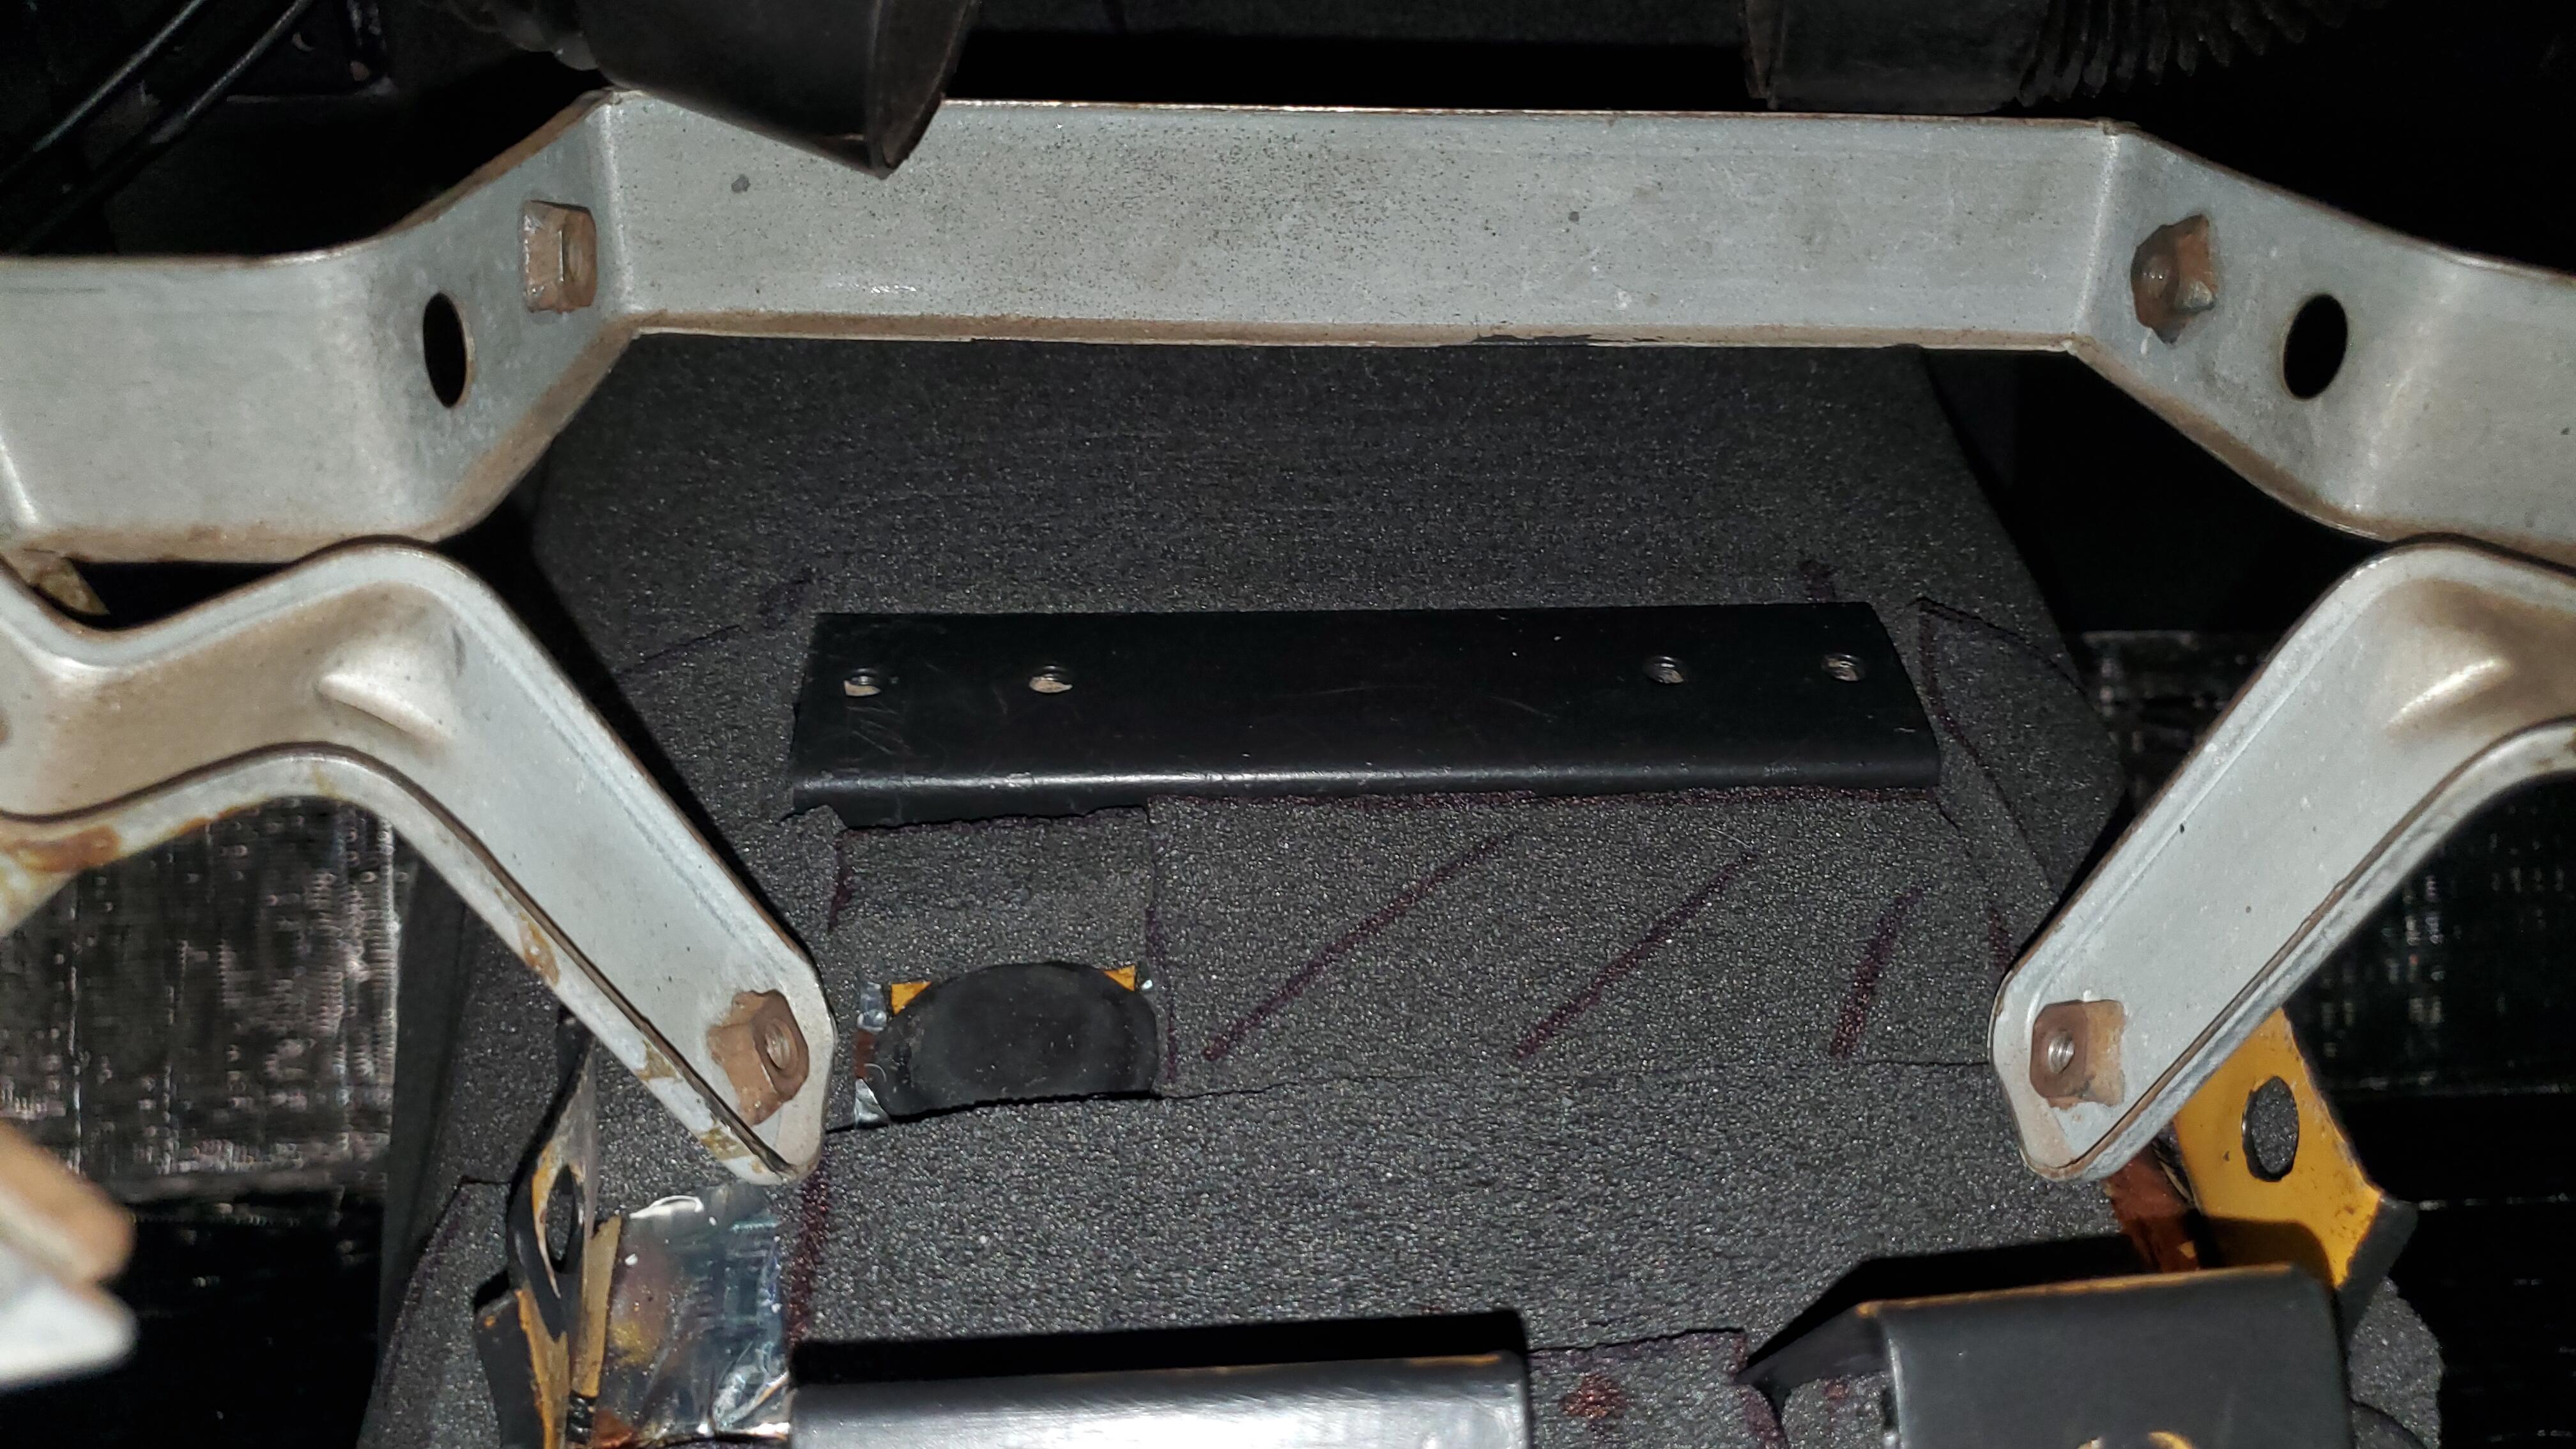
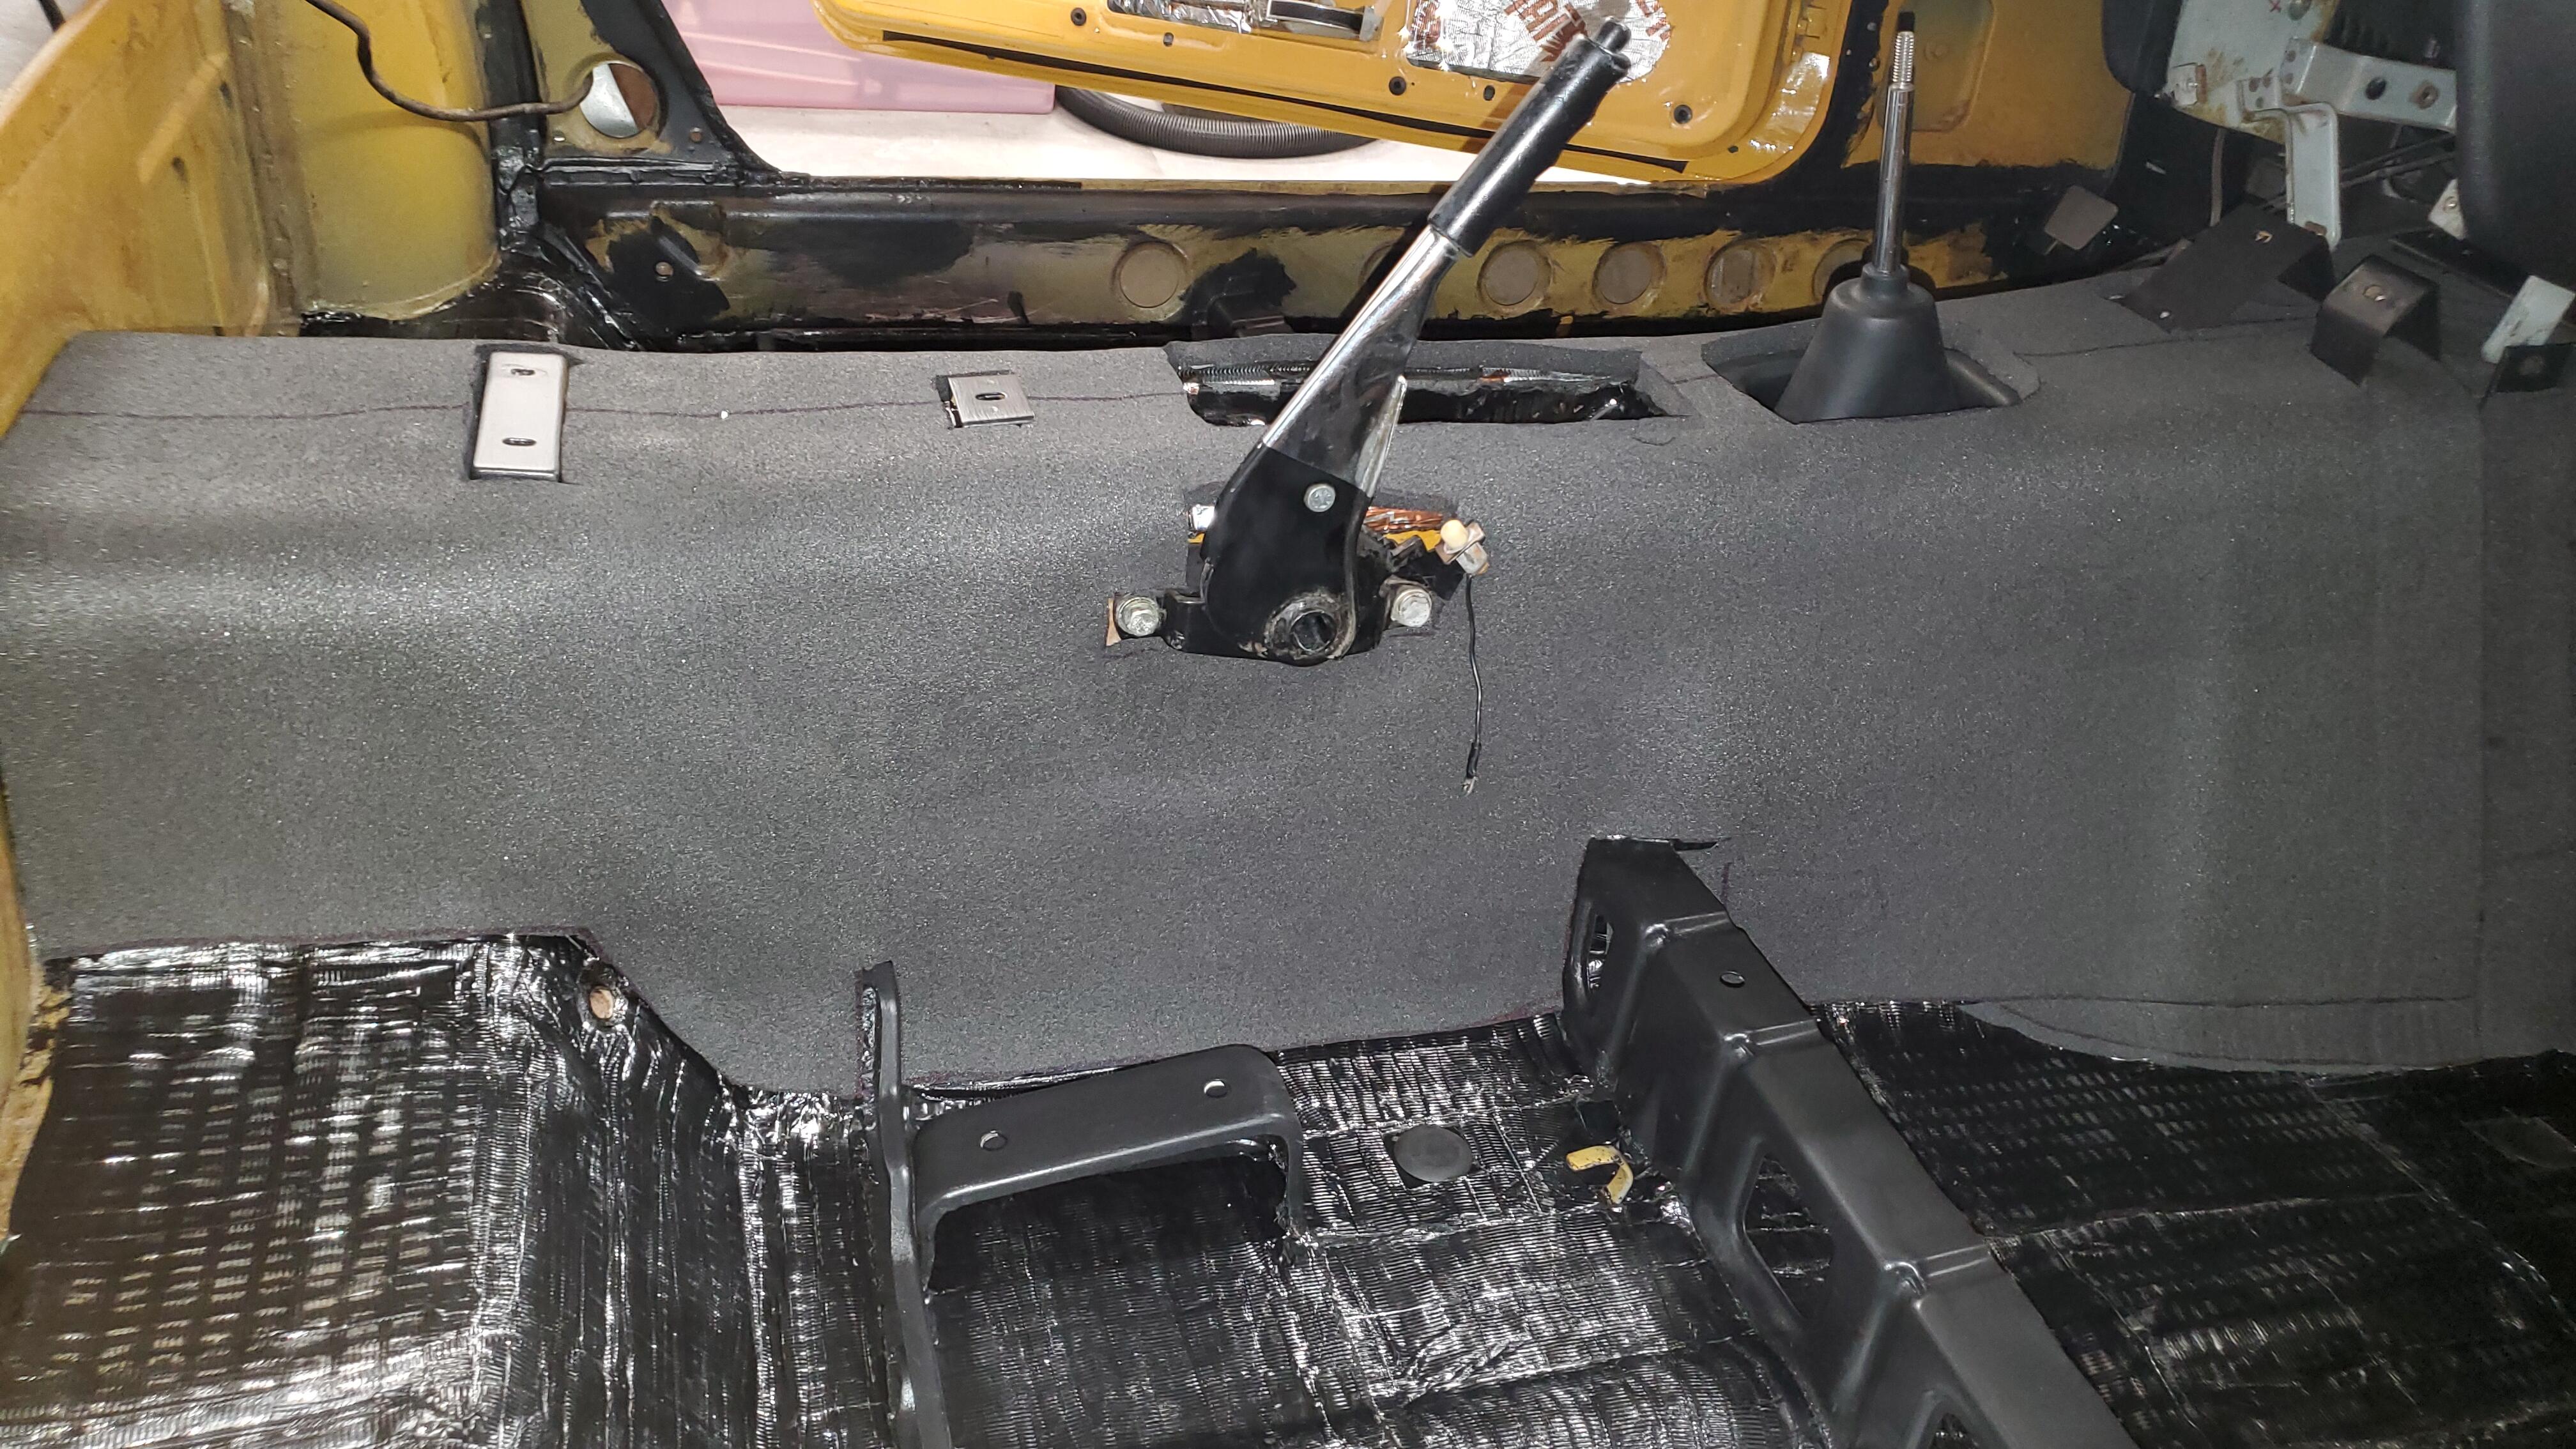
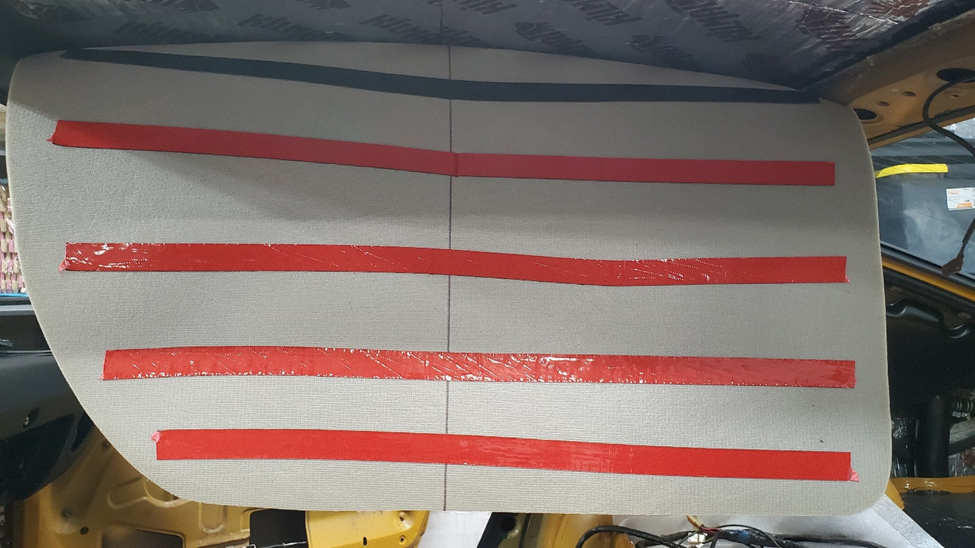
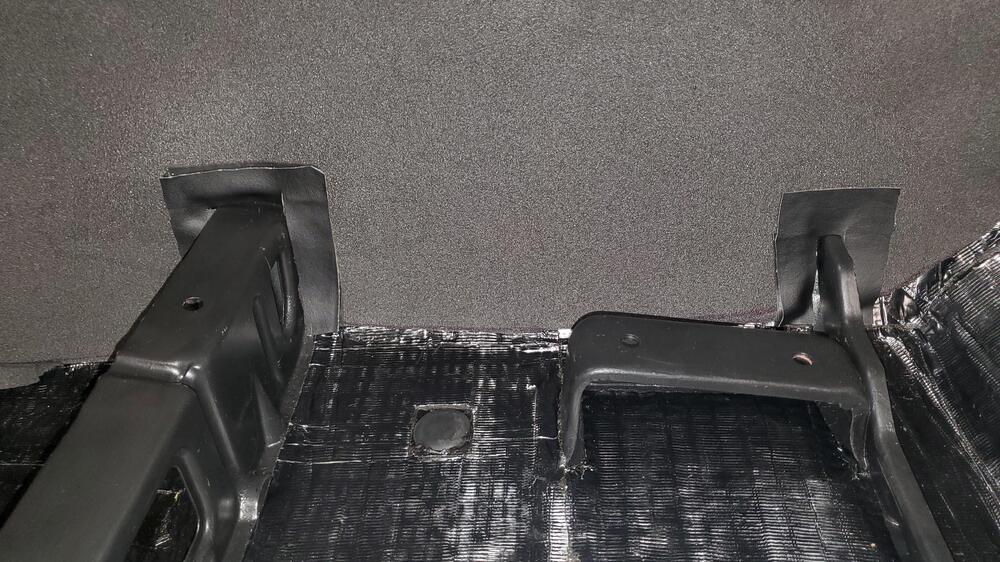
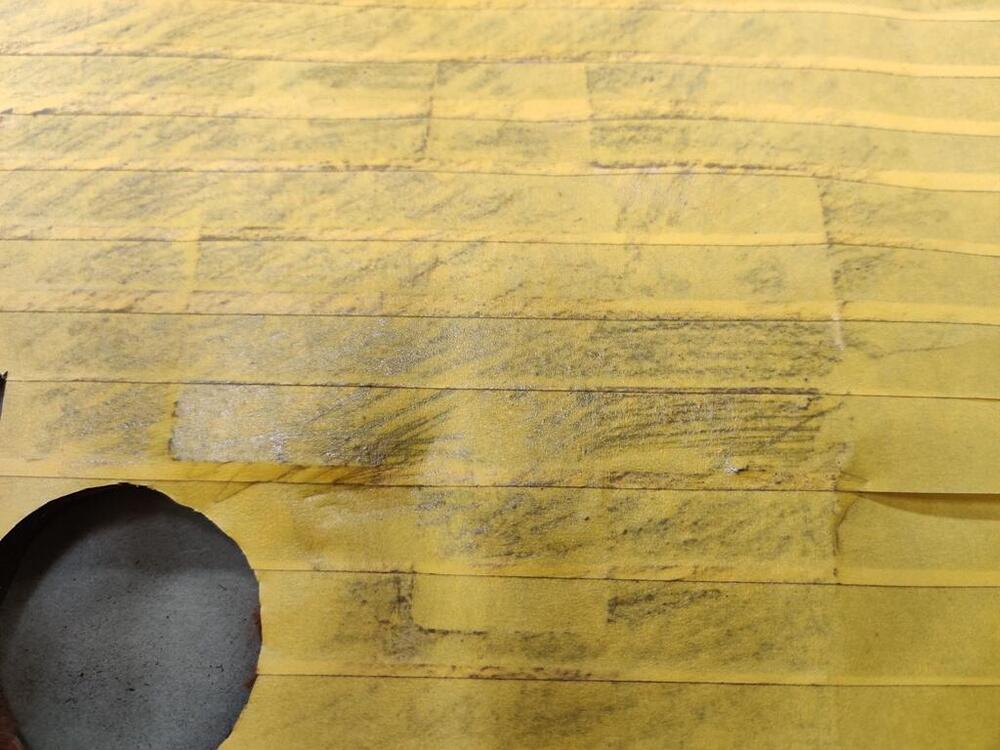
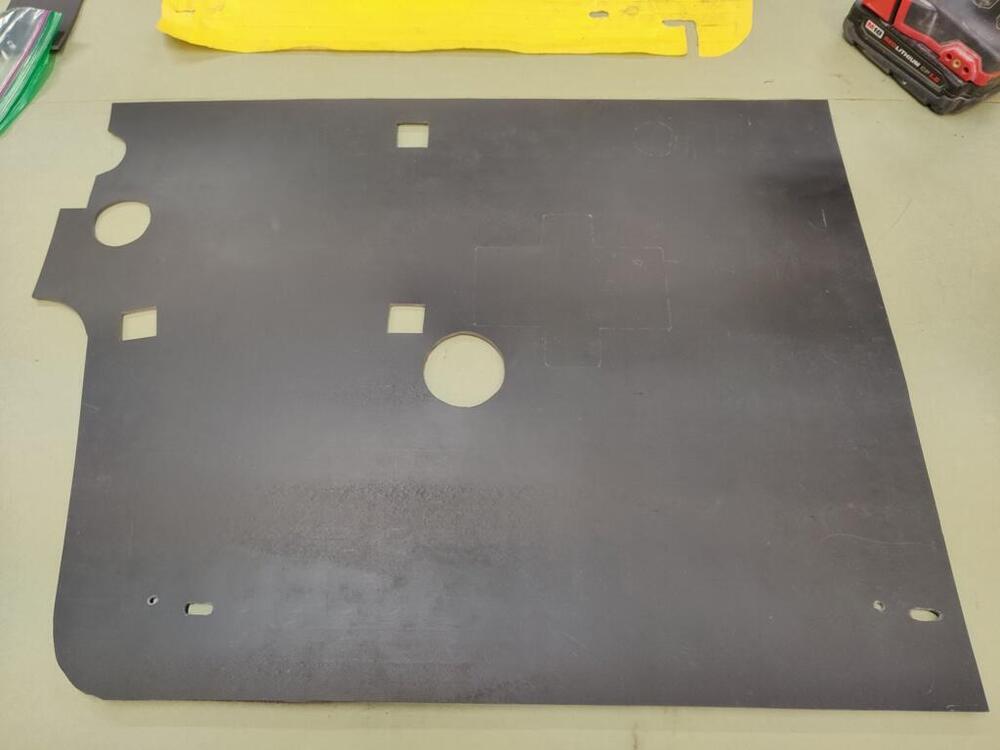
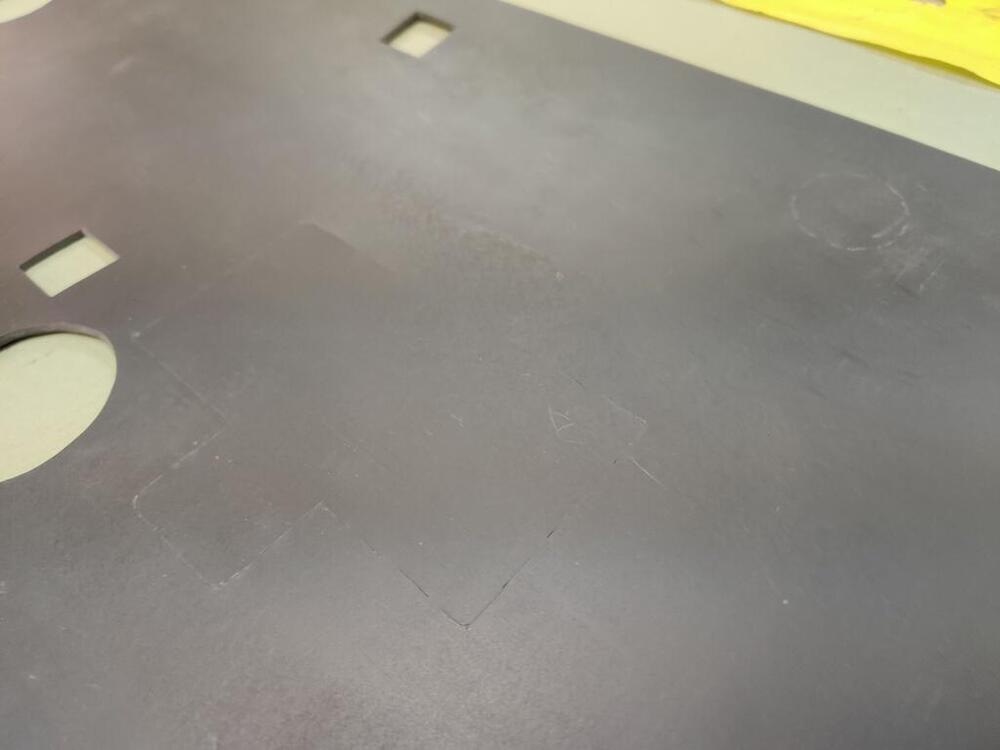
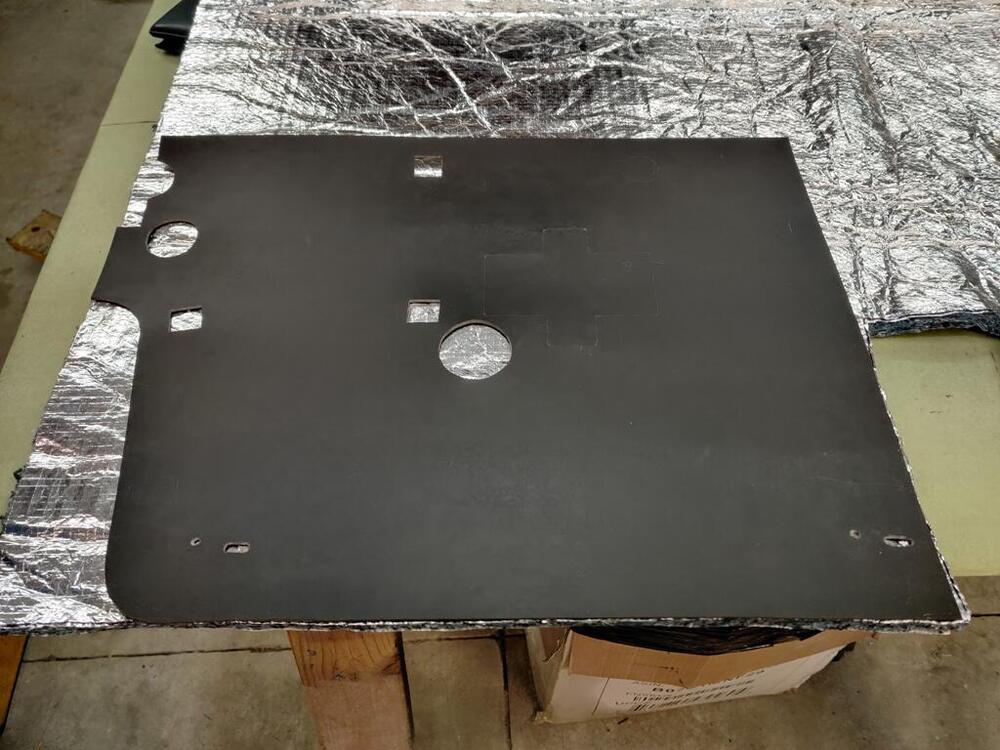
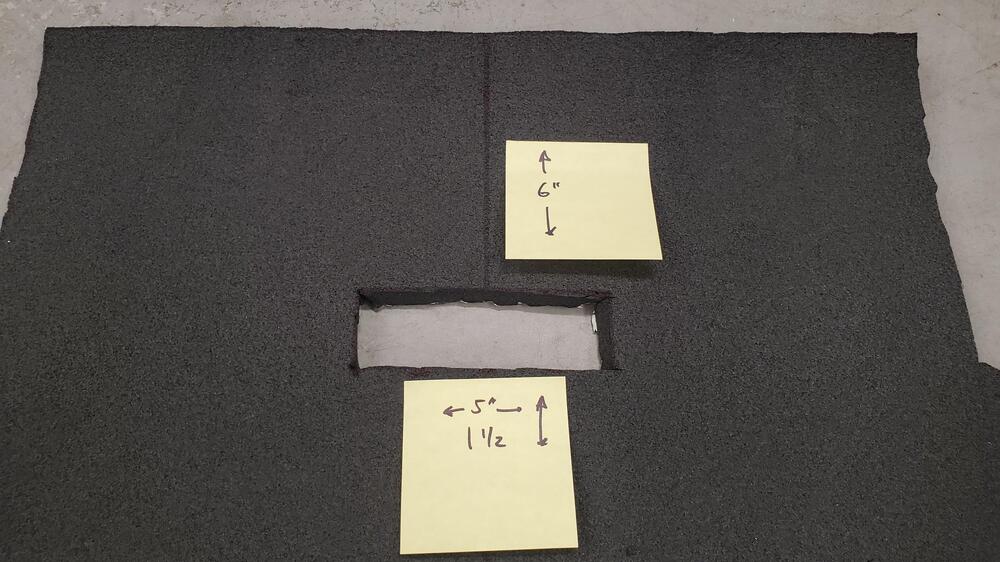
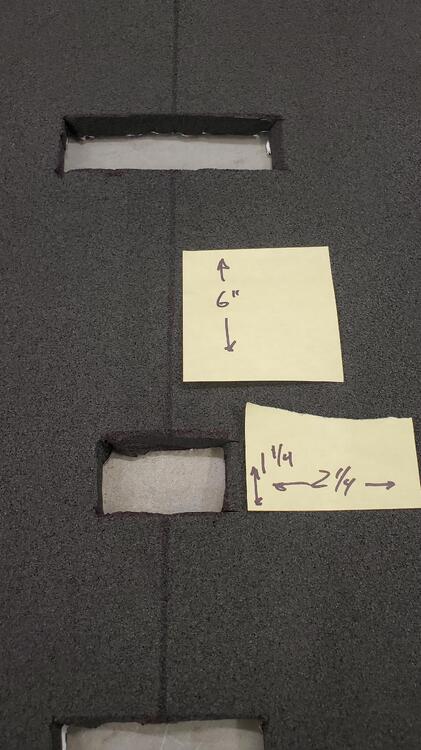
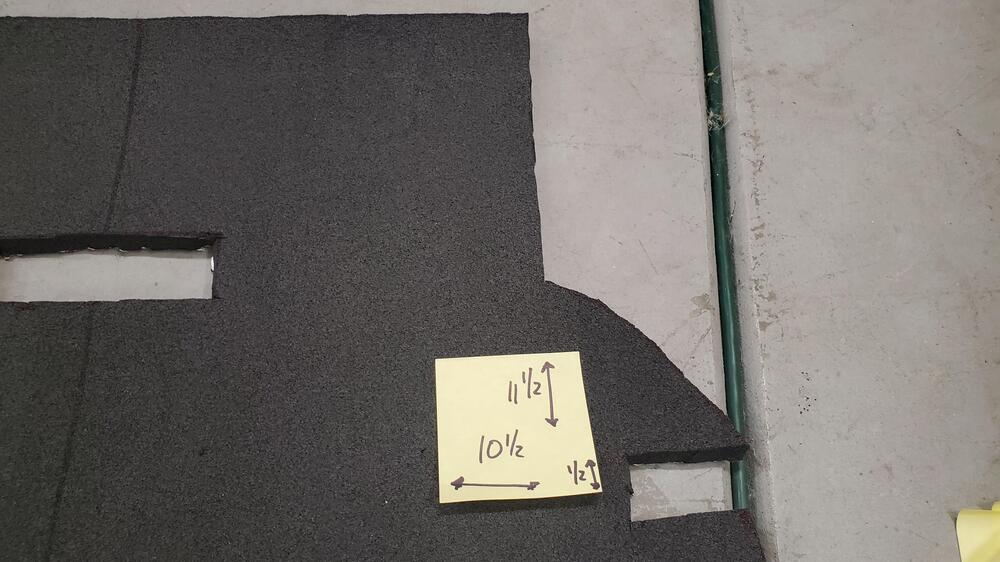
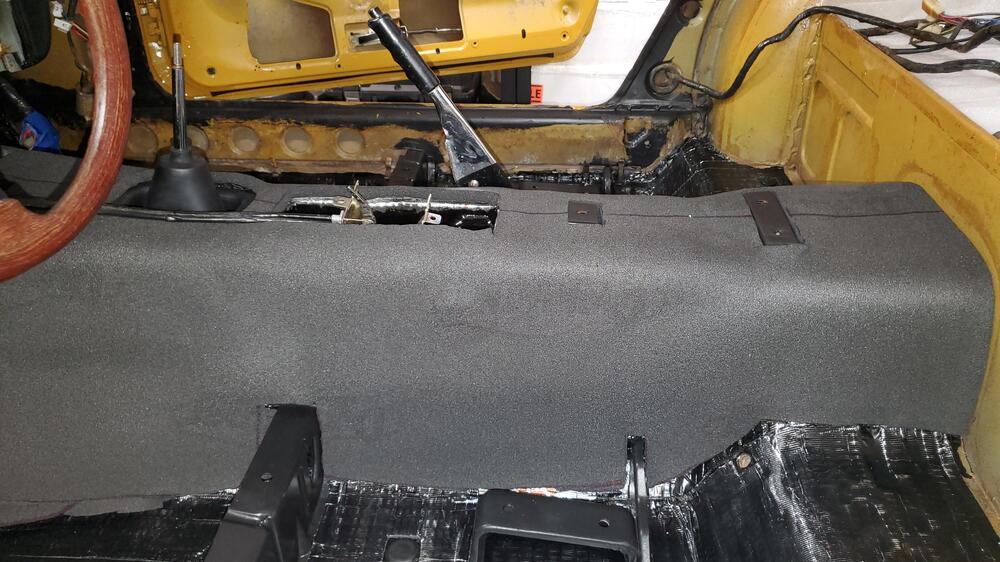
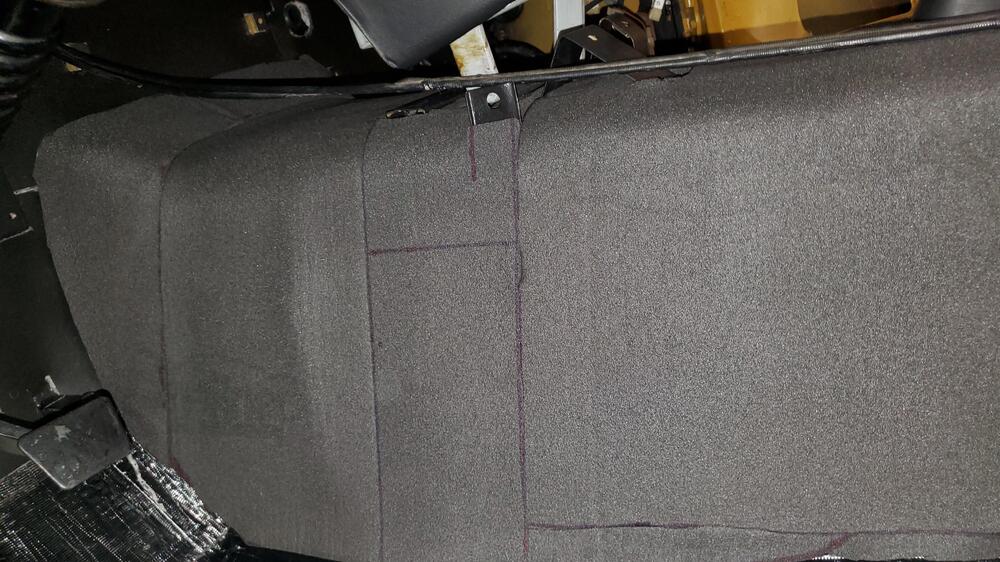
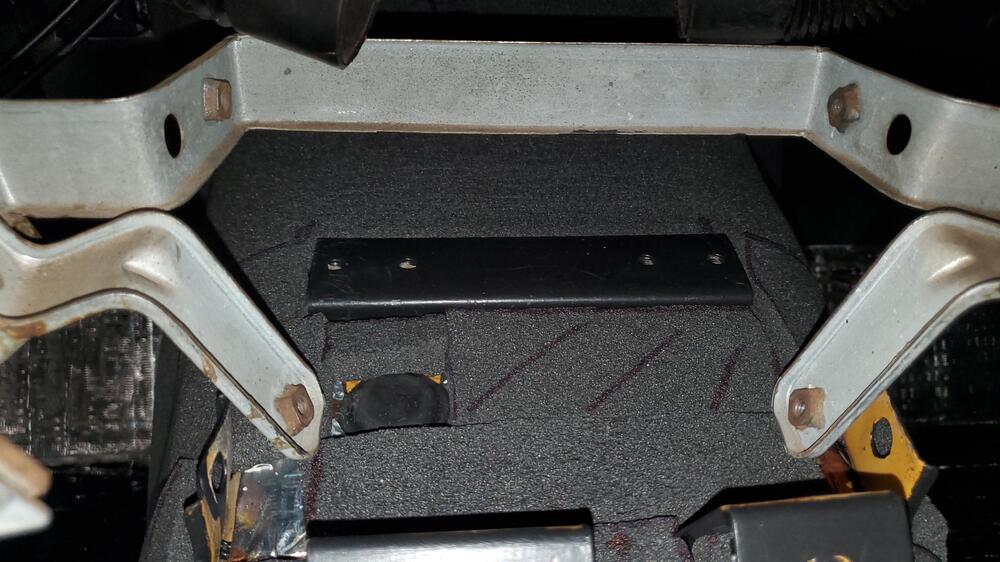
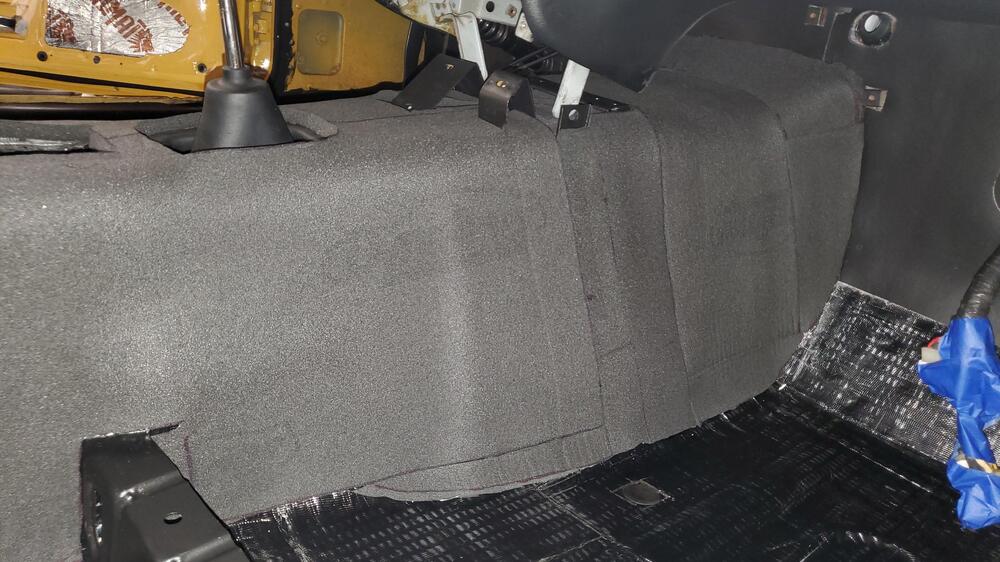
I'm at that point that i needed to put back the insulation after restoring floorboards and sound deadening. I had done my research on here and found excellent material with large printer format templates for the cutouts but I didn't have a printer to do it on. So I did it the old fashioned way with cutout by cutout tailor like approach. i made measurements along the way if its helpful for anyone without the ability to use autocad or a large printer. I decided to start with the dynaliner material i had seen on here a few years ago when I was ripping the old matted disgusting wool pad out. This stuff seemed easy with stick on backing and a great smooth surface for the eventual spray on headliner cement for the vinyl . Here it is if anyone hasn't seen it on amazon https://www.amazon.com/Dynamat-11103-Dynaliner-Self-Adhesive-Deadener/dp/B001JT5NIU/ref=asc_df_B001JT5NIU?tag=bingshoppinga-20&linkCode=df0&hvadid=79989522876749&hvnetw=o&hvqmt=e&hvbmt=be&hvdev=c&hvlocint=&hvlocphy=&hvtargid=pla-4583589102084678&psc=1 If you layout the piece you get its pretty close to the exact full length of the tunnel from firewall to rear tunnel at the hatch. (I have an early 71 btw, maybe a slightly different length for the series 1?). Now I do have to admit, this probably would have been easier if i took the dash out, but i decided to do it in a few smaller sections instead to avoid that. My first step was to do a full single piece from the hatch to the dash mounts on the tunnel. Like many others, i started with a center line to help orient things. My measurements ended up being 42 1/2 " from those mounts to the hatch so I cut that first section out of the full piece leaving the full width. Here's the final with cutouts and I'll get to the dimensions of each in a minute Oh and I see you get some bonus toes thrown in for good measure! I then laid the piece out with the center line down the tunnel and made my first cut for the console mounts by measuring from the back of the piece forward. it was 6 in exactly and the rectangle was 5x1.5 then to the other mount measured from the first cut to the next, again exactly 6" and 2.25/1.25 then to the choke location, same method from previous cut to new cut 3" and 3x9 the last easy center line cut was only an 1" and I used the inner shift boot as a template next cutout for the brake was a little different since it was off center. i took measurements from the rear as 15.75 and from centerline as 3" making a rectangular cut 6x2.5 that was all the difficult ones and the pad fit near perfectly which had me very pleased. What i did next was to start by measuring the back section of the tunnel which was the shortest and easiest to cut, again measuring from rear and centerline to the "curve" where the tuinnel meets the raised floor behind the seats. IMPORTANT TRICK, use painters tapoe when measuring curved surfaces then just layout the tape on the pad and slice. My measurements were 9.5 from center and 7.5 from rear to the point where the floor starts to curve. the other side was symmetrical so i did the same all that was left were seat rails, again measuring everything from the rear and center line on the pad rear rail was 11.5 from rear and 10.5 from center with a narrow .5 slit front rail again from rear of mat was 25 from rear and 9.5 from center with again .5" slit but in the shape of an L (sorry no pic) Again both sides symmetrical so did the same on the other side last step was to place it on the tunnel and then just follow the contour of the floor to trim as needed and to trim around the fuse and lighter mounts. IMPORTANT TIP Make sure to fit not once but twice everything dry wiothout removing the backing until you have it just right Once this piece is in you'll have the hang of this and all the tough parts are done, the rest is to use the scraps to fill in the easy parts under the dash. most of these are square and you can use the painter tap trick to get exact lengths. make sure to leave enough overlay at the bottom and just trim to what you need. Some shots of final product ready for vinyl I'll probably have to trim around the fuse box and lighter mounts, maybe even under the radio before i put it all back but i wanted to cover everything i could and work backwards as needed rather than try to add little pieces after those instalations. Not concourse, not perfect, nothing magical but hopefully helpful for someone. BTW, the single piece of dynaliner may run you a little short, I think i may have used some scraps from a previous piece i had for something else. I cant tell since all the scraps ended up in one pile where they were coming from but its real darn close if you are economical with your cuts.


-
 Why would you need to remove these items if they are perfect? Cover them in plastic and paint the car!. you won’t find an original or good facsimile of the headliner or diamond vinyl that would pass as a good reproduction, but I could be wrong. The foam on the back of the headliner will tear.
 -
 Sorry man, I'm sure you can understand that I've been a little distracted! I got the muffler on the car last Friday, and spent a couple more hours driving around on the way home. For the benefit of everyone else, there were a few outstanding items when I picked the car up (none of them were Chris's problems - they were almost all parts that I hadn't ordered or that we were waiting for). The missing muffler was the most notable item, so it was good to get that completed. I had to remove all the spacers from under the driver's seat. That tells you how much the original seat cushions had collapsed, because I never had any trouble fitting in the car back in the day. Even with all the spacers removed I'm brushing against the headliner with the seat back and reclined. The rear sway bar links that I'd ordered months ago were the wrong ones, so the sway bar was in place, but not connected to the suspension, which was the suspected cause of a clunk happening when hitting bumps. I got the correct links (unfortunately I mistakenly ordered only one first and had to order a second) and installed the second one this morning. Unfortunately, the clunk is still happening, and I'm starting to think it might be coming from inside the passenger door. The other suspect is the gland nut on the passenger side strut. I might not have tightened it down properly when I re-assembled them a couple of years ago. The tach isn't working consistently, so I need to order and install a TechMatch device to sort it out (I believe it's the TachMatch TM-03 I-Drive that I need? Current-driven tach?). I'm not confident that my ear is good enough to recognize redline, so I probably haven't gone past 5000 RPM yet. The engine sounds and feels absolutely great up there, though, so I'm looking forward to really trying it out. The throttle's a little sticky, which made driving without a muffler quite interesting. It's either getting better or I'm getting used to it. The linkage all looks fine and all the pivot points are properly lubricated, so I'm going to keep driving to see what happens. The gas gauge isn't working, which is mysterious, because Chris and I both had the sending unit working properly, and I think I tested it once when connected to the gauge in the dash. It's probably something simple, but I haven't got to that yet. Mostly I've been driving the car, which has been fantastic! It's starting to come back to me. As I mentioned somewhere a while back, the engine somehow feels much larger than it really is when you first start driving it. That long hood has something to do with it. The car's already starting to feel smaller and more nimble to me after only a few hours of driving. I'll keep driving and knocking these items off, and I'll keep this thread updated!
 -
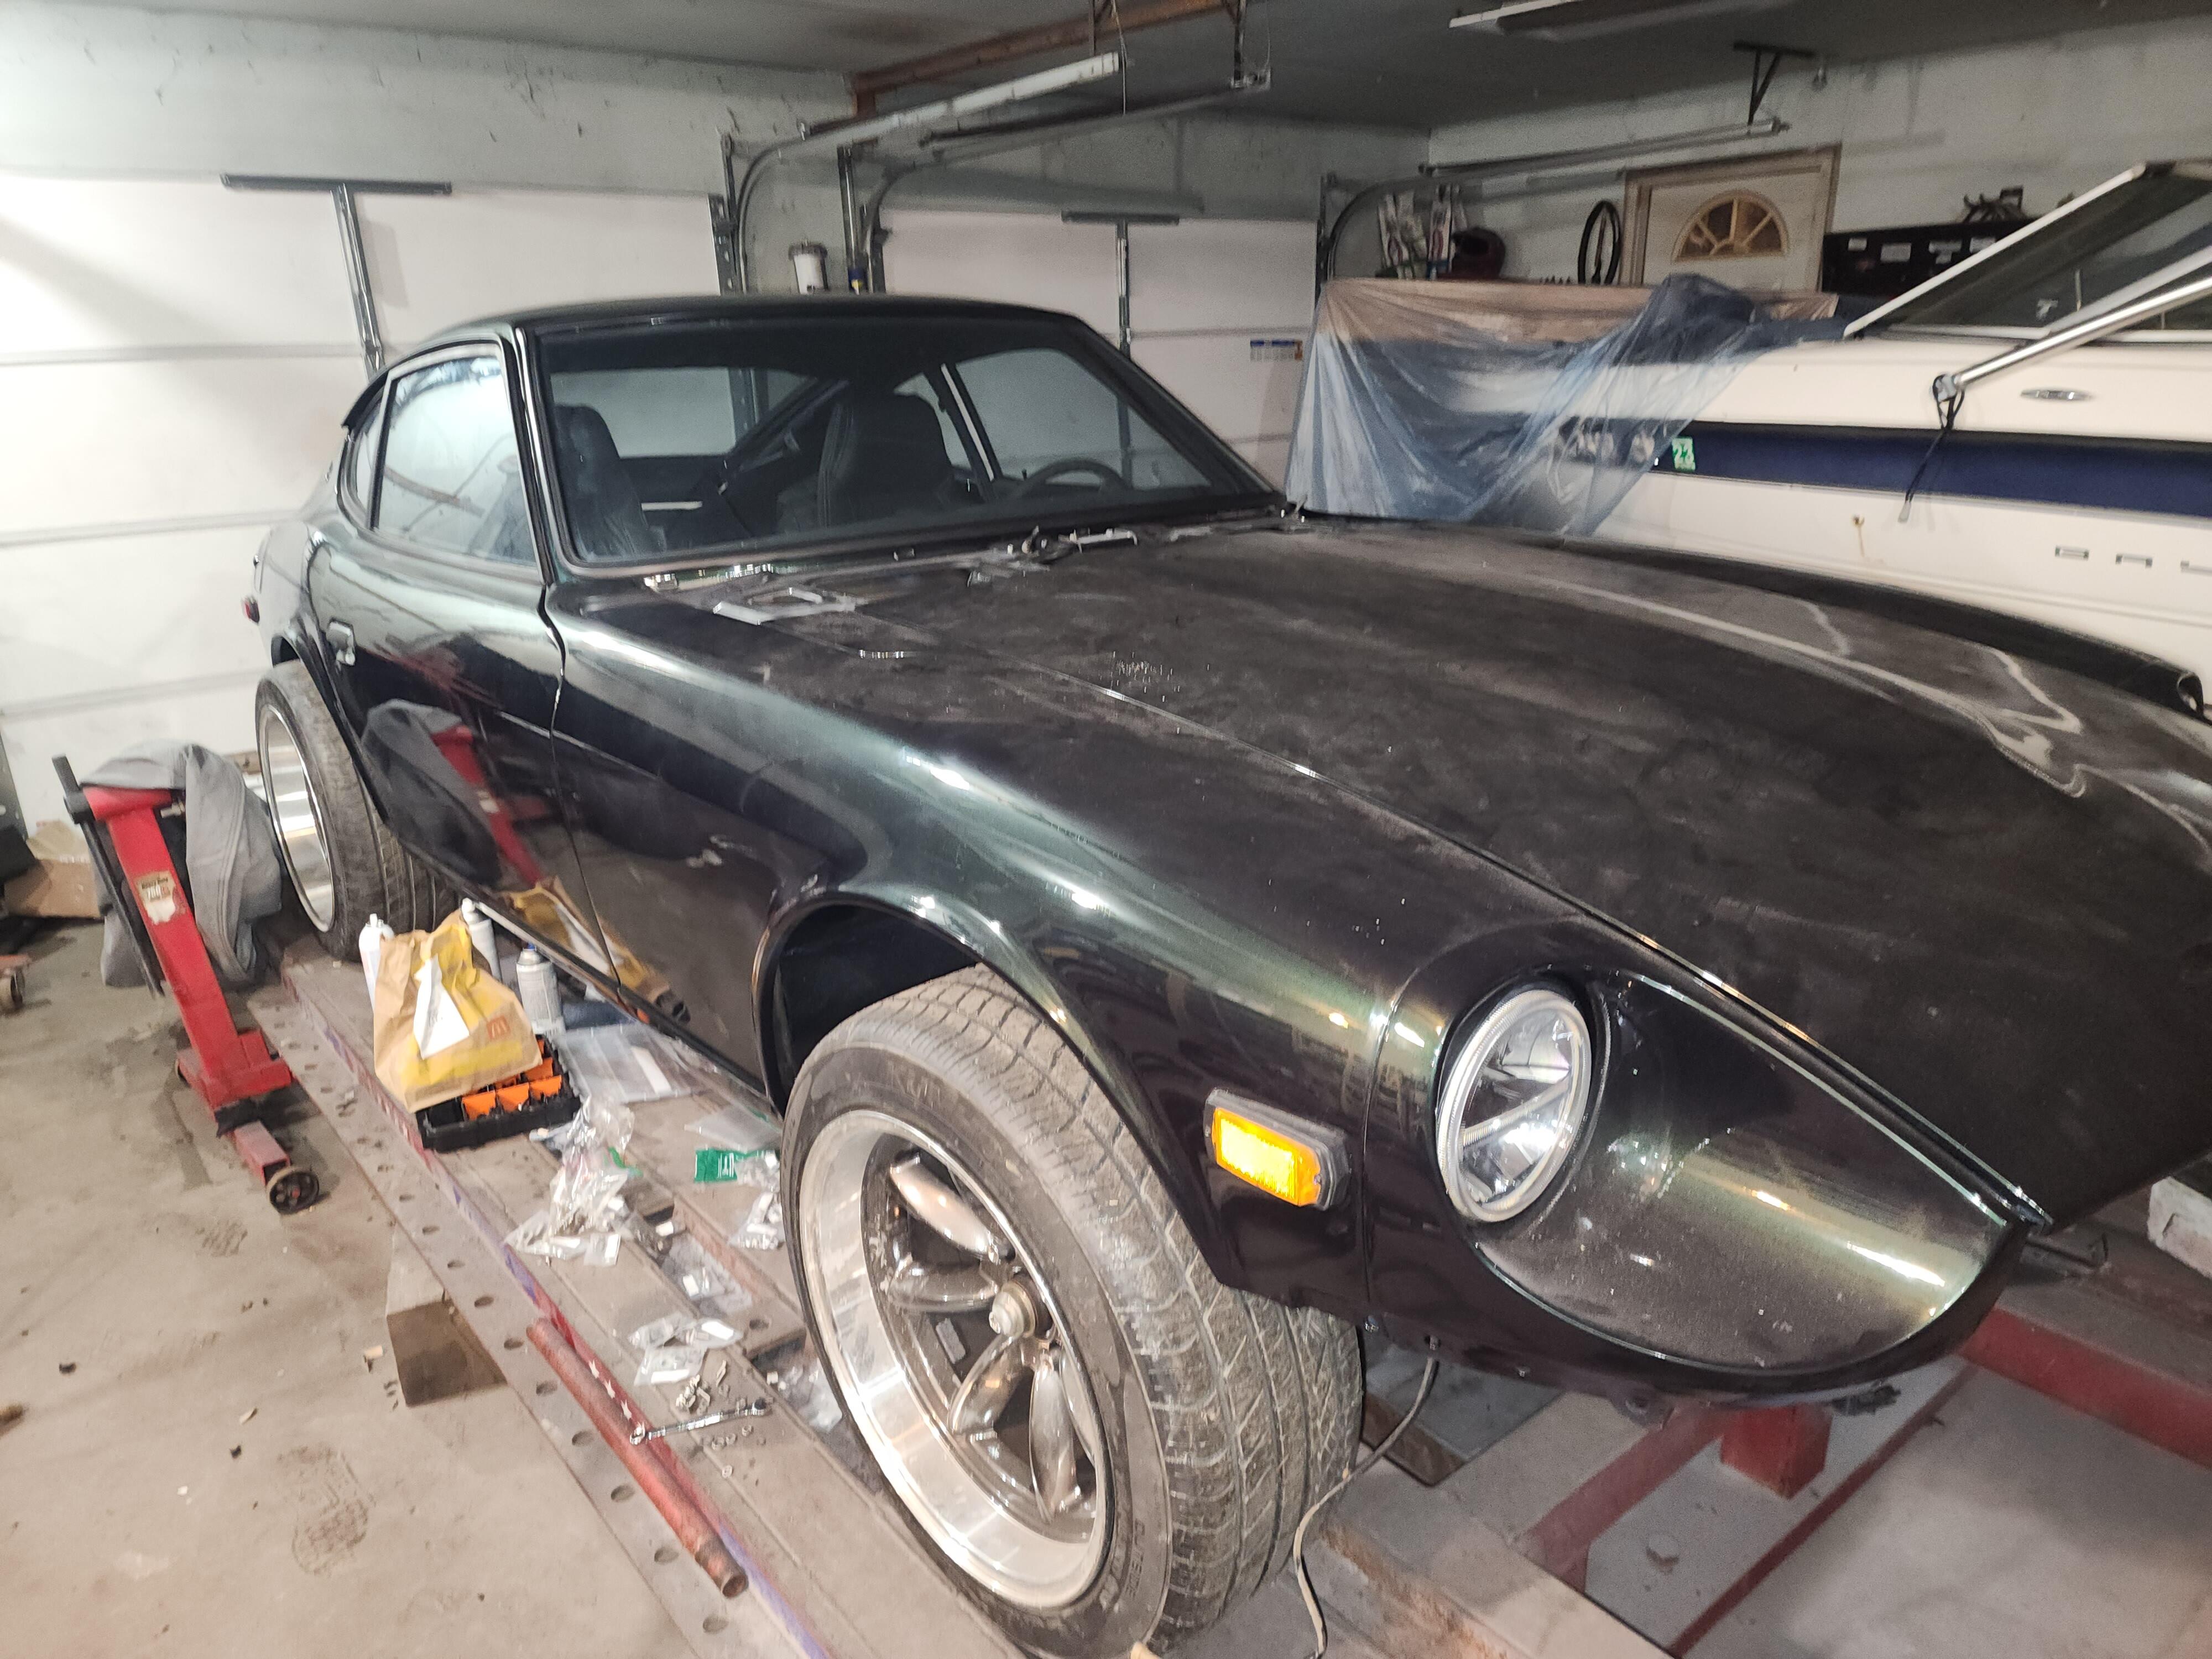
 Getting ready to paint my 1971 240z and am dreading pulling the headliner and diamond vinyl as they are original and in fantastic condition. Is there any chance they will be able to be re-used or should I plan on purchasing new ones? If I have to buy new ones, can someone kindly point me to the most authentic pieces that are currently available? Thanks in advance!
 -
 There's no need to remove those items if the cabin is properly sealed off. My car had the headliner, header vinyl, and some of the diamond cloth in place while the car was being painted, all well protected by the paint shop.
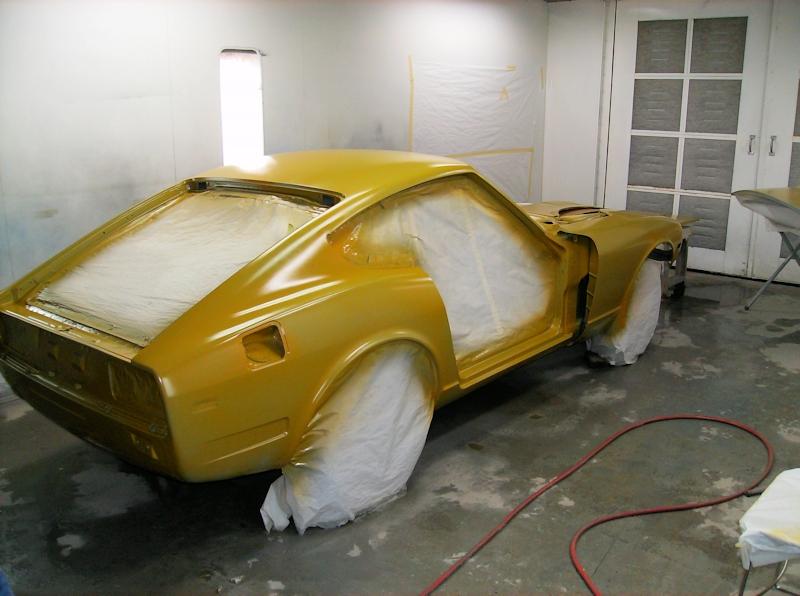
-
 I’ve pulled the diamond vinyl off and reapplied it, I used 3m spray adhesive to get it to stick. If I was to redo it I might use a combo of spray adhesive, and contact cement around the edges to get a better hold. no idea with the headliner, I’m trying to get someone to come over and help me install it into the car. made you planning on respraying the inside too?
 -
 So let me tell you a little story... Some time last summer, maybe June, we had a professional uphostery shop do Cody's headliner. They did a wizz poor job! Headliner made from scratch. Fabric was too thick, seams weren't great, sloppy install. It took forever for them to do it. Then we took it back to have them work on some problem areas. A few weeks later the glue was all letting loose. Panels all starting come loose around the window frames. We just cut our loses... So I ordered a headliner off Ebay. It came in. We strung it up but it was too small. So I sent it back. I bought one from Goliners on ebay. Jim is good to deal with but again it was too small. He told me these were made off of the factory template. Instead of sending it back again, I found a source for the same fabric and Shelley reworked it for me. Now the problem with this is, we don't have a commercial sewing machine. That makes it hard to feed through the machine and prevent slippage and such. Overall though it came out good. The problem we ran into was two fold. The wagon has a piece of metal at the rear of the roof and I'm pretty sure the headliner is supposed to wrap up and over this piece of metal. When I did that with the Ebay headliners, I would lose about 5/8". Then each panel of the headliner should be 11"s but the ones I purchased had random panel sizes 10 7/8, 10 5/8, 10 1/2. All these errors compound and when you get to the front of the car, you're an 1 1/2 too short. So we remade the panels we had too and Cody and I started the install maybe 3 weeks ago. We would have to do it in short sections and it takes a while for the glue to tack up, especially when it's cold outside. I used the Weldwood contact cement. The yellow 272 stuff I believe. I will run you out if your work space isn't ventilated, but it holds really good. We started with the A & B pillars. I wrapped them over a little foam. Then when the headliner crosses them we folded a hem. We started at the back with the headliner at the metal flange glued it and stretch it to the side to tension it. Then we put all the meatl bows in and got them vertical. Lots of metal clips along the edges. We worked out way up the sides of the car. The front was also clipped and stretched. I had problems when I got to the front. I had wrinkles I couldn't get out. So I had to pull the drivers side above the front door loose and rework it to pull the excess out. To be my first headliner with bows, I think we did ok... Now that the headliners in we have started working on glass, to make it water tight. Then I can kick his car back out of my shop and move "Lily" back in We had a Datsun guy tell us one time, if we bought a headliner off Ebay we would mess with it for days, mess it up and then buy another one and take it to a professional... Pfffftt!! Nope, you can do it if you take your time and don't get in a rush and it might even be better than the professionals!!!


-
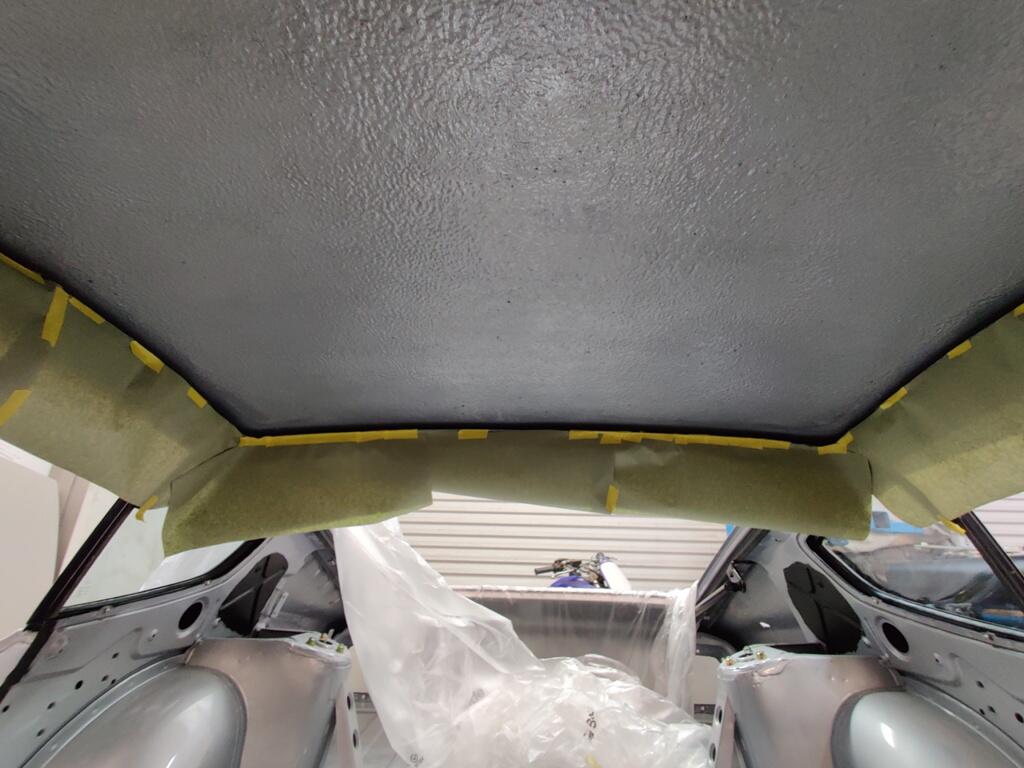
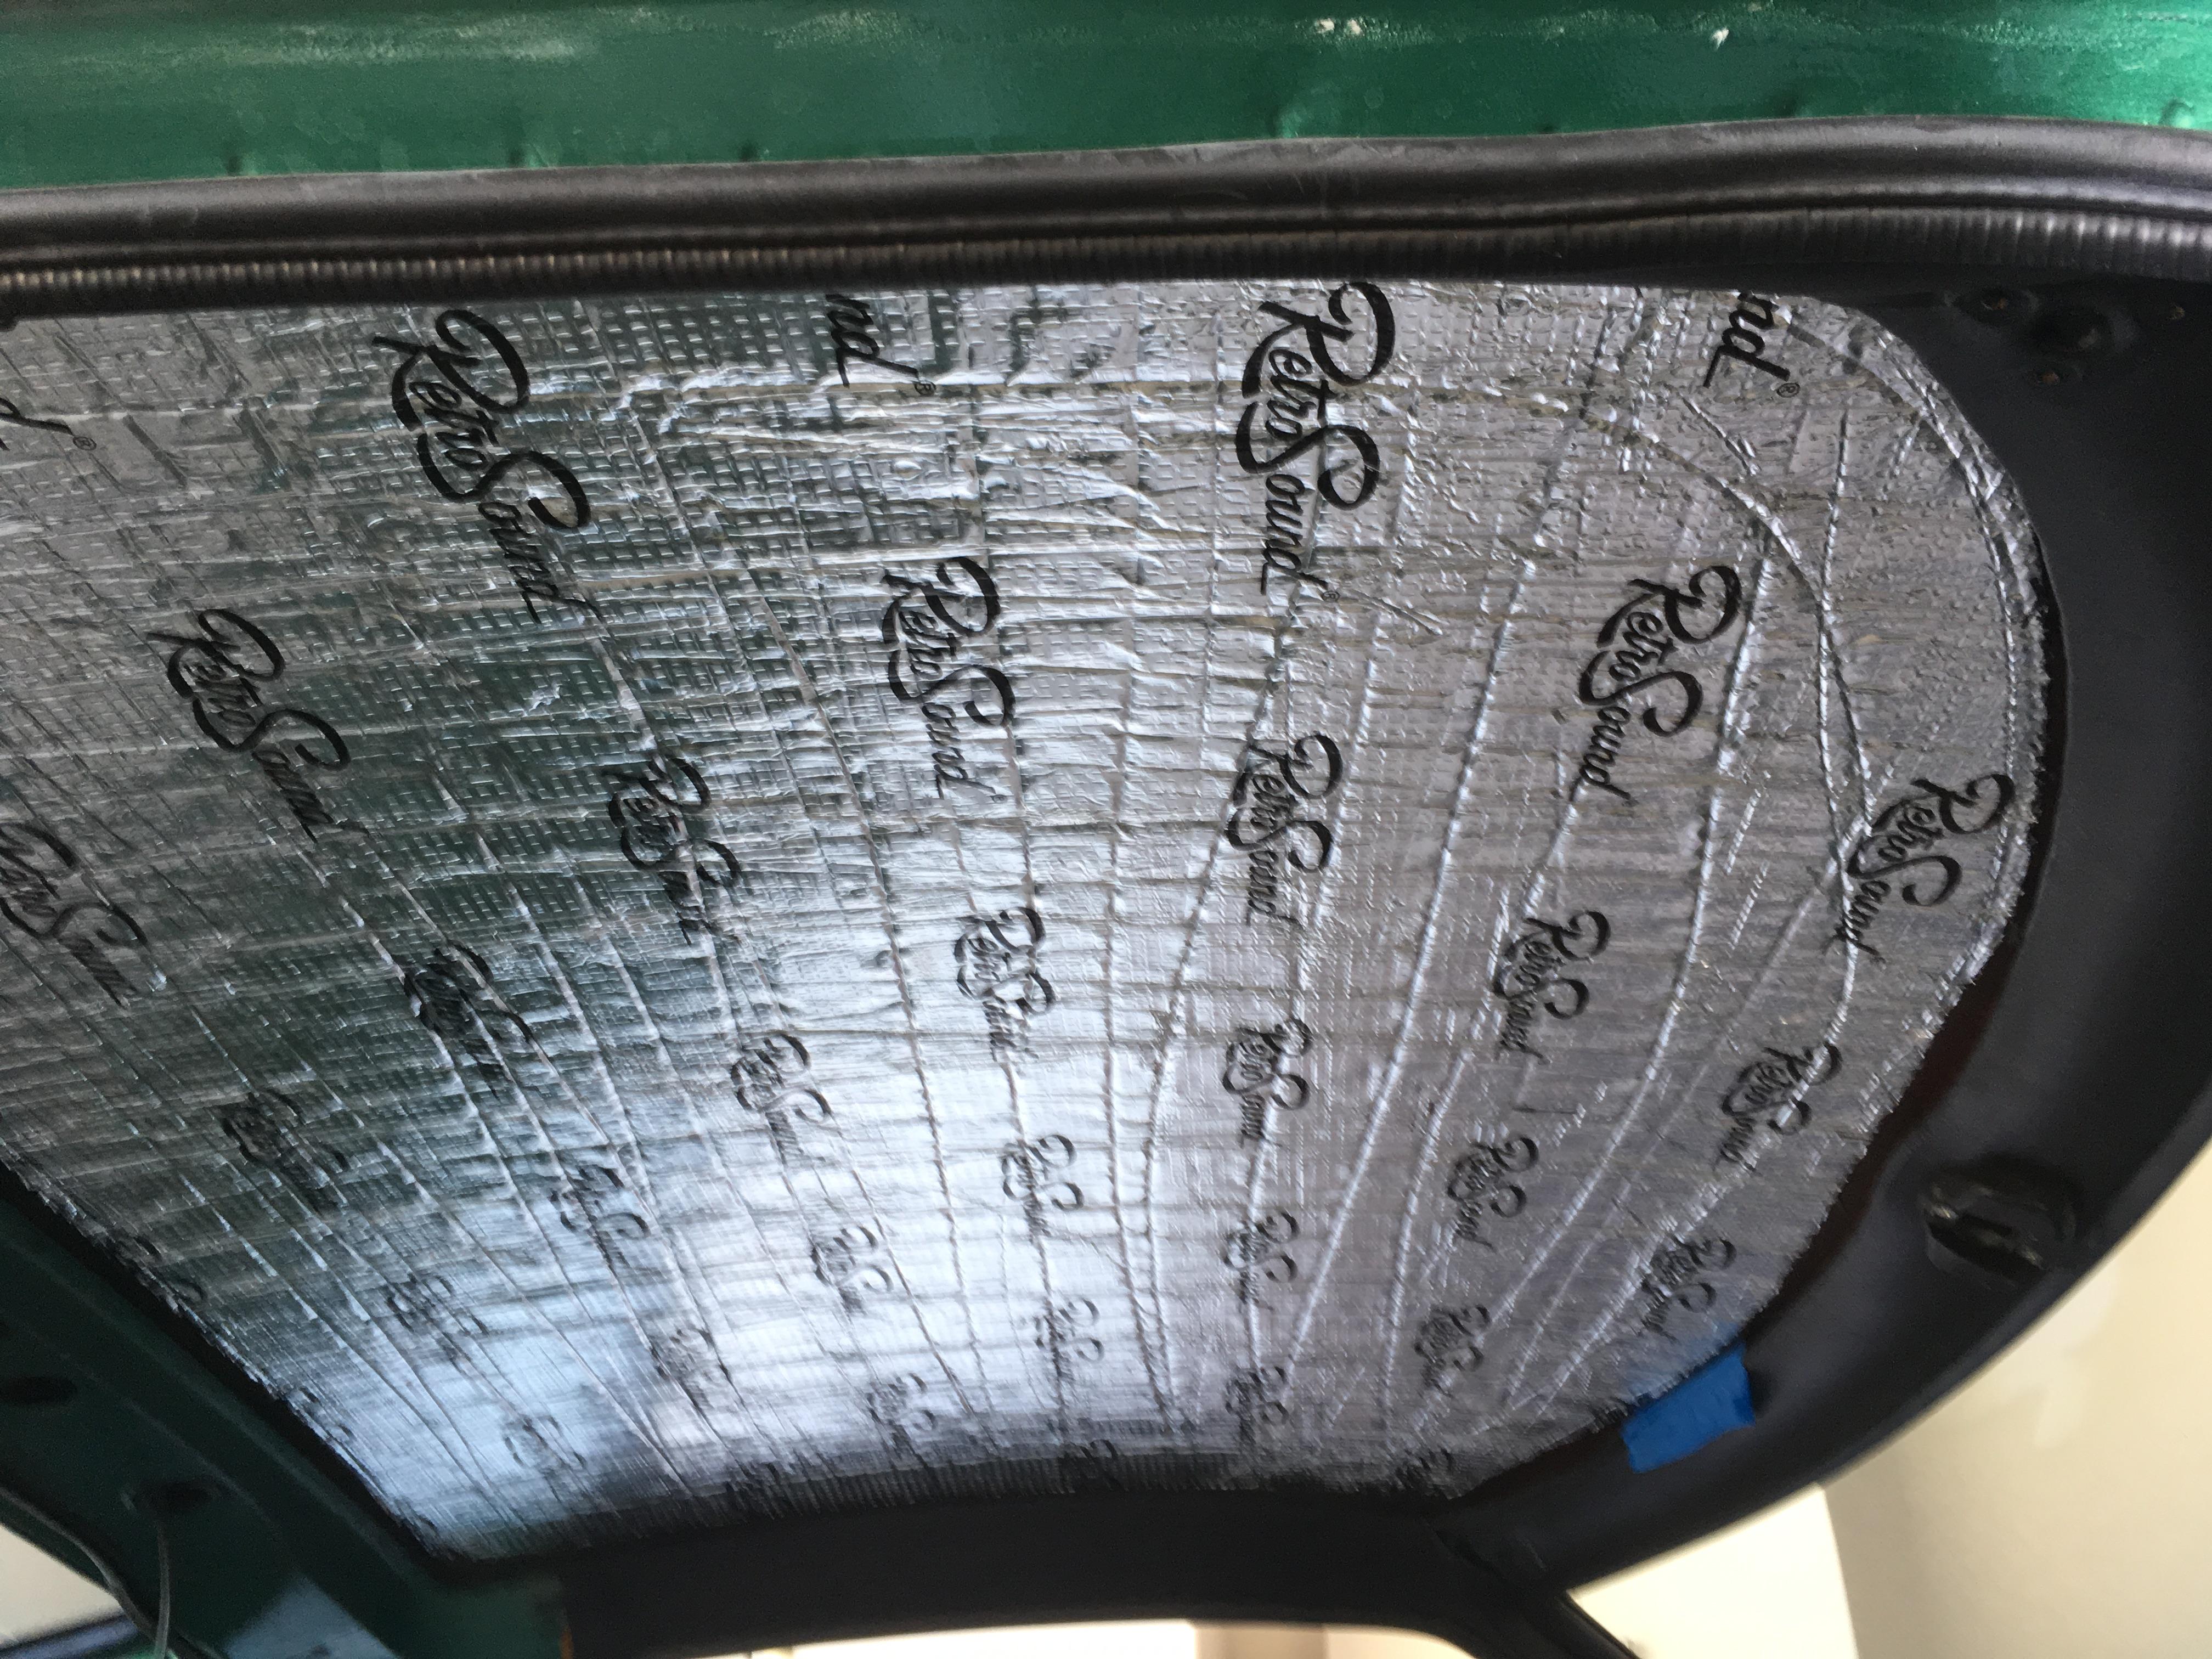
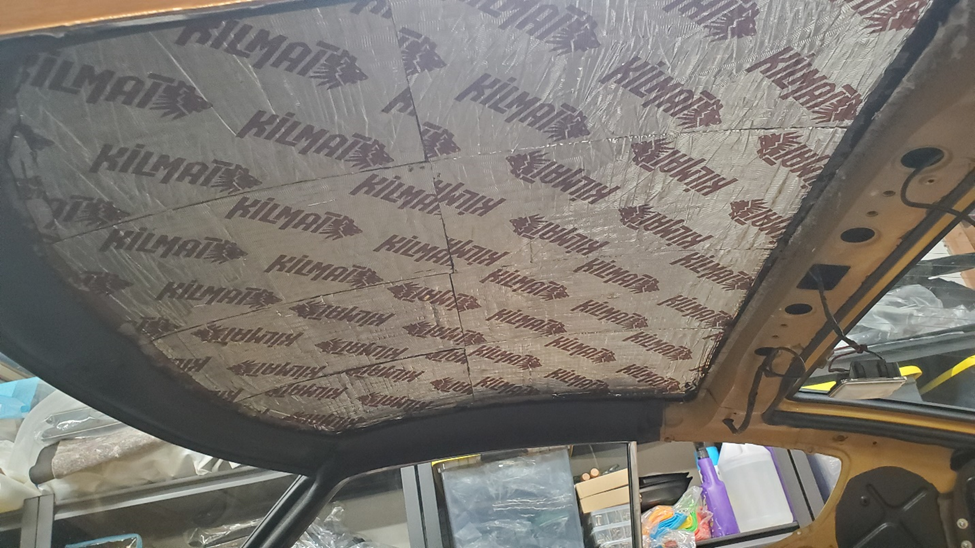
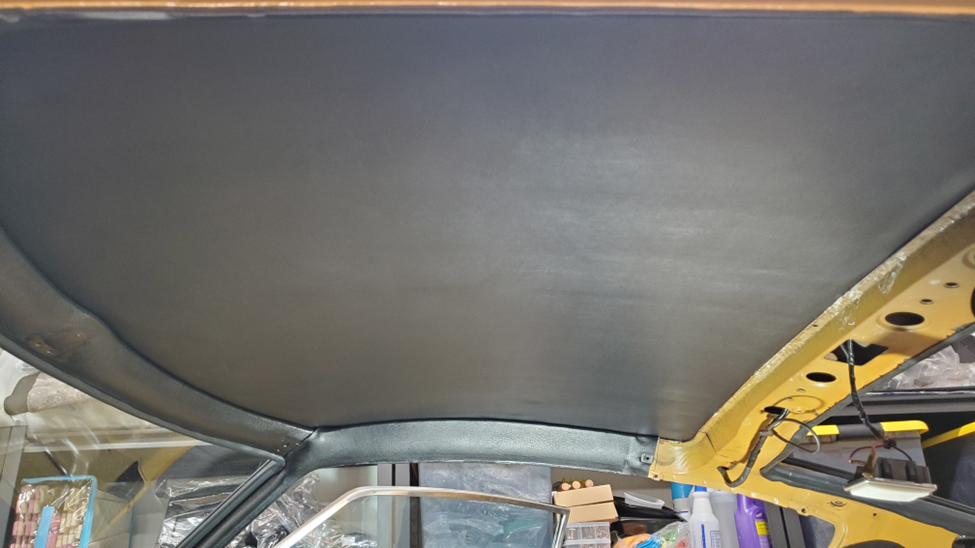
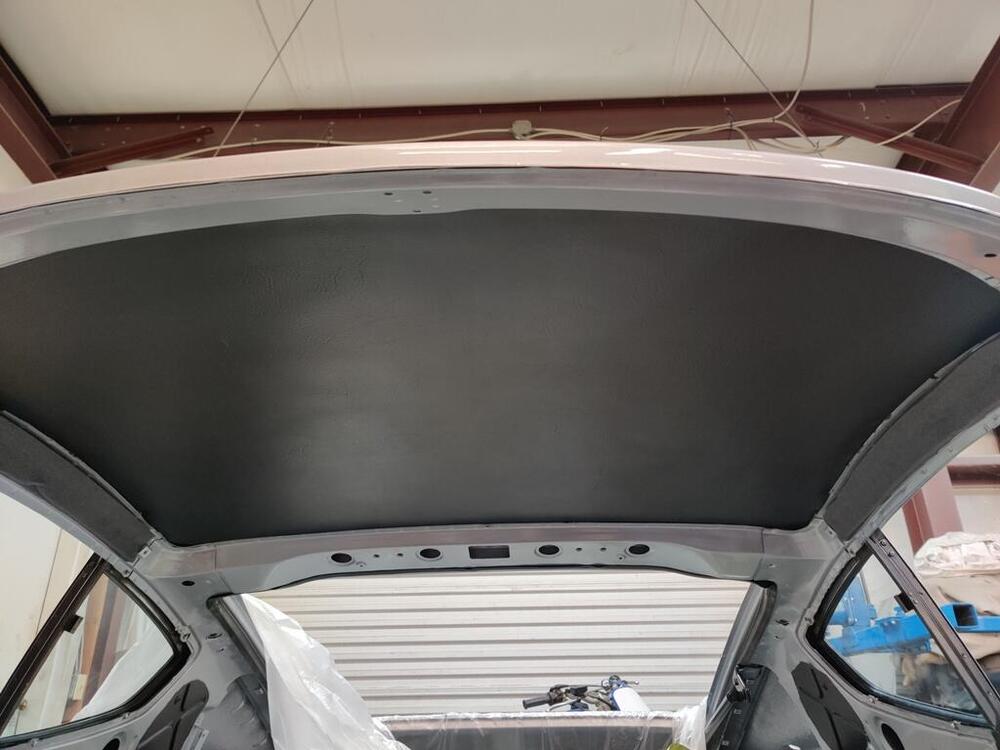
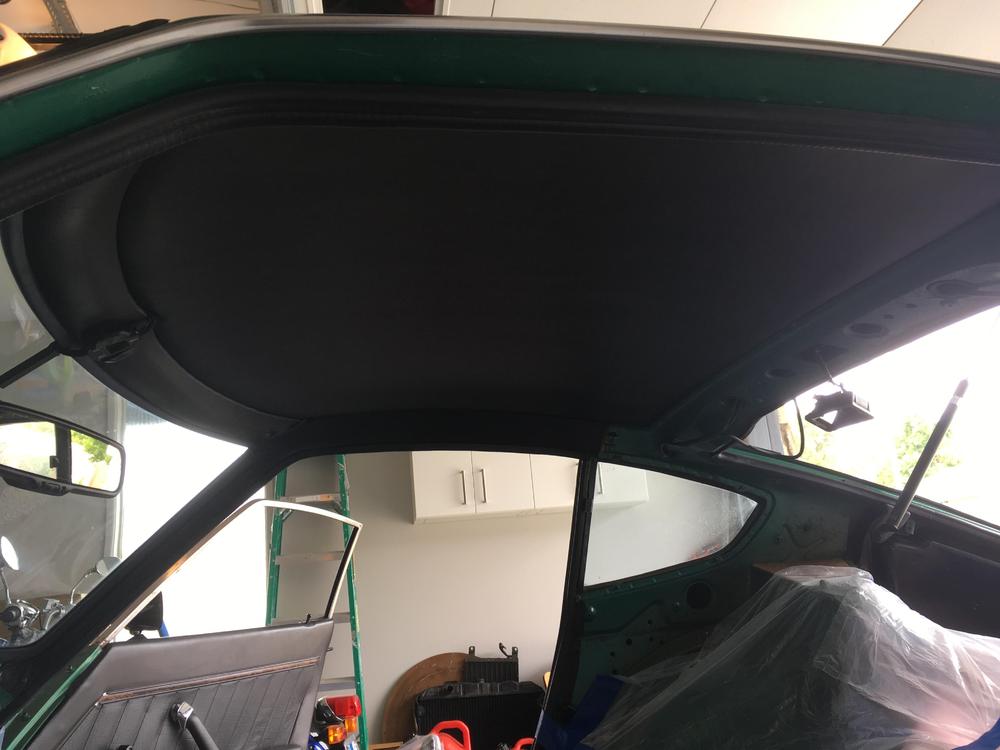
 My wife & I installed a new Z Car Source headliner in our ‘75 Z this afternoon. It went pretty smoothly. Previously, I installed a RetroSound sound deadening mat on the inside of the roof. This mat isn’t a tar-type mat, so I hope it holds up well. It has an open cell foam inner layer between the silver outer layer and the adhesive backing. It’s 1/4” thick, which made me a bit nervous, as the headliner was 1/2” thick and I didn’t know how it would fit between the ceiling and the rails. To address my concerns, I cut the RetroSound mat so that it wouldn’t quite reach the rails. I wanted to make sure the mat didn’t take away from the room needed by the headliner edges to tuck in. I masked off the rails to protect the vinyl and about 2” of the ceiling (sound mat) all around. I masked off 2” of the mating surface of the headliner, too. I used tape to mark the front-to-back centerline of the headliner, and I also marked the front and back centerline of the roof rails. I drew a line down the middle of the sound mat with a sharpie. Then, I sprayed one side of the ceiling and one side of the headliner with the adhesive provided by Z Car Source. Next, I removed the tape used to mask the edges (the tape caught the adhesive overspray) as the edges were not to be covered with adhesive. Not sure is my description makes sense. After giving both surfaces time to get tacky, we carefully centered the headliner to the ceiling using the previously taped/marks, then my wife held the non-glued side of the headliner in place while I carefully pressed and smoothed the glued side to the ceiling. I left the edges out of the rail-ceiling gaps at this time. After pressing (not too hard) and smoothing this side of the headliner for a while, so that the headliner would stay in place on its own, my wife & I switched sides. I applied the adhesive in the same manner as the first side, and attached the second side. After both sides had more than 30 minutes to set up, I used a paint stick with the edges sanded/rounded to work the headliner edges into the gap between the roof and the rails. It looks pretty good, especially since I’ve never done this before! Here are some pictures.
-
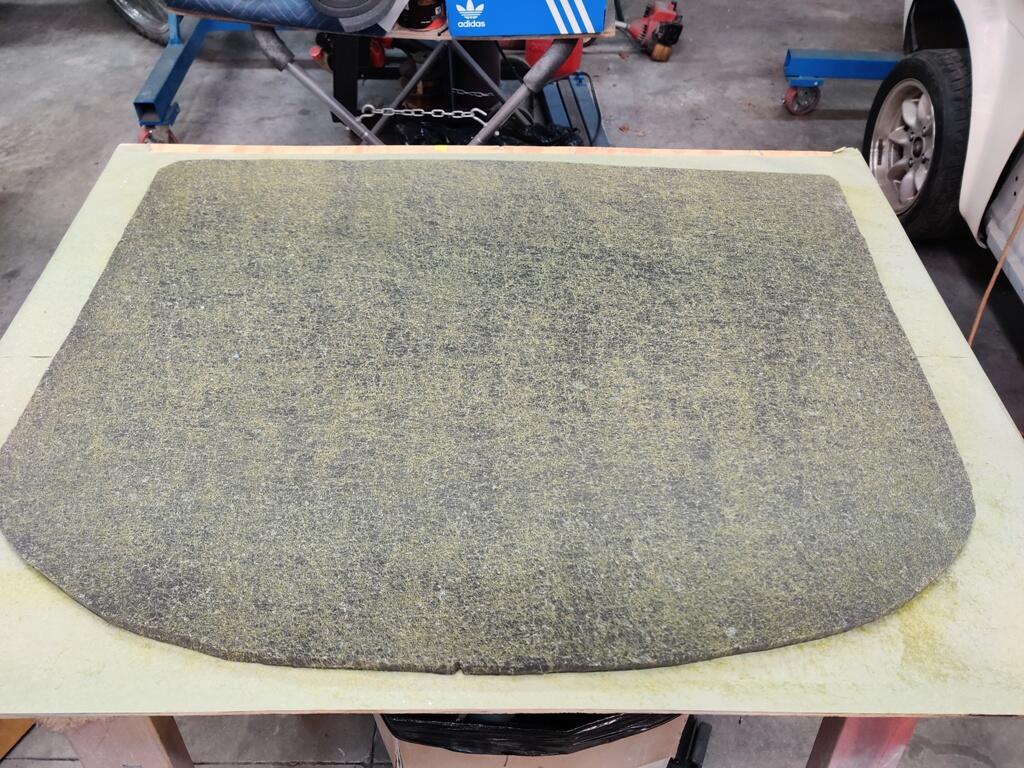
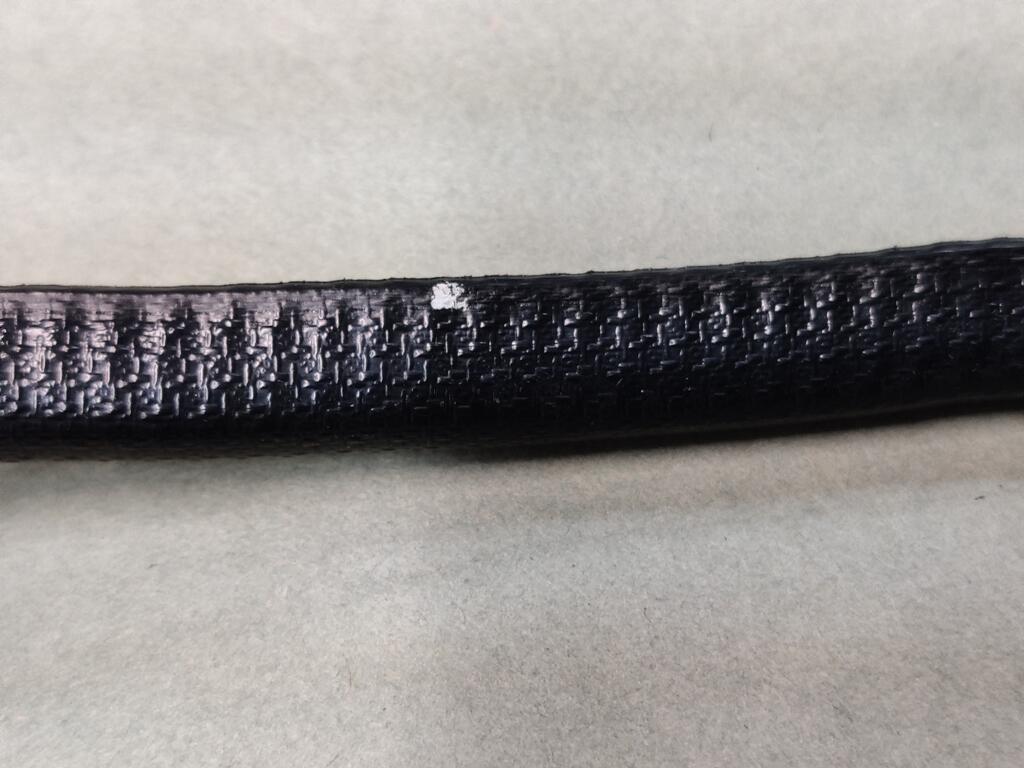
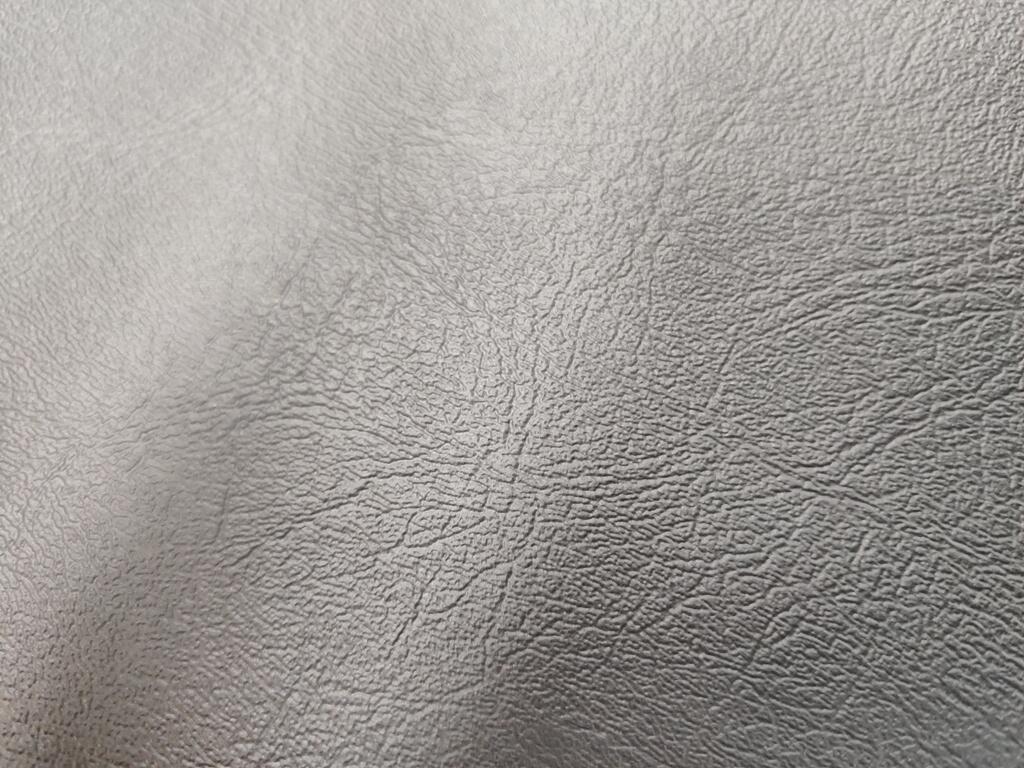
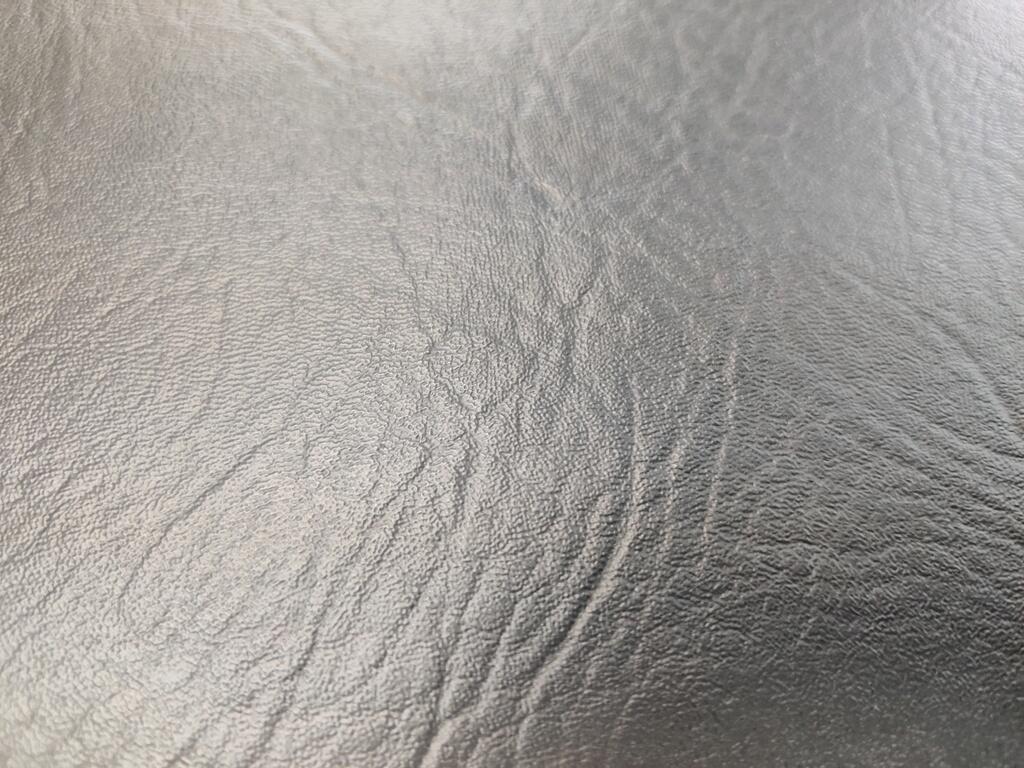
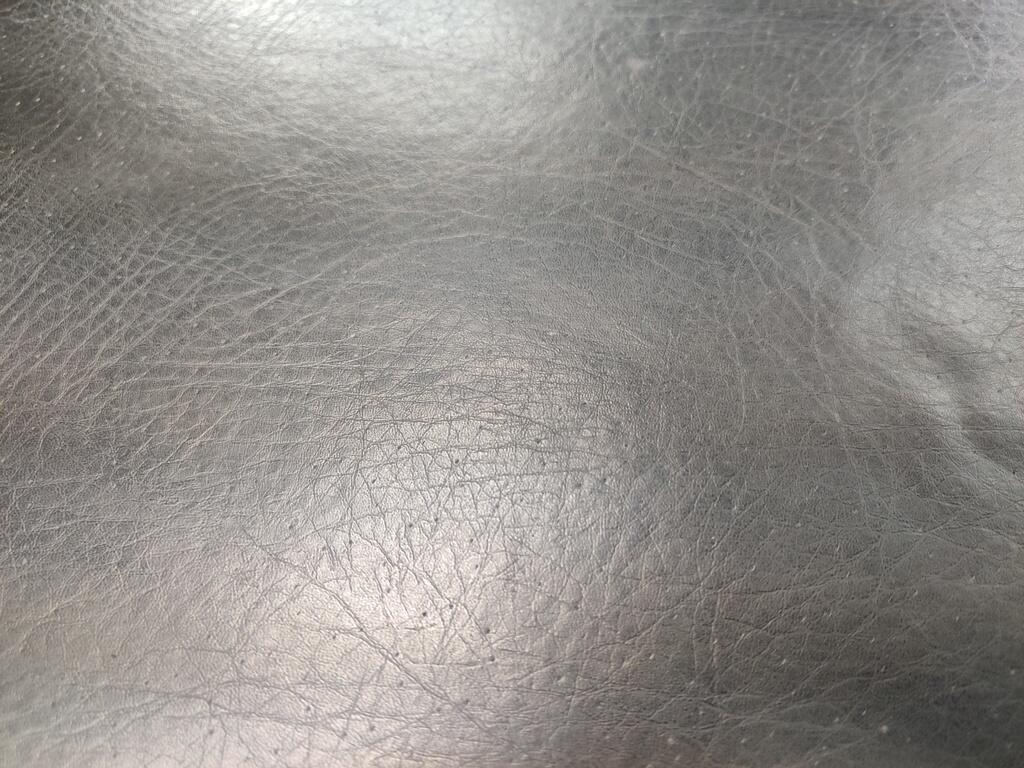
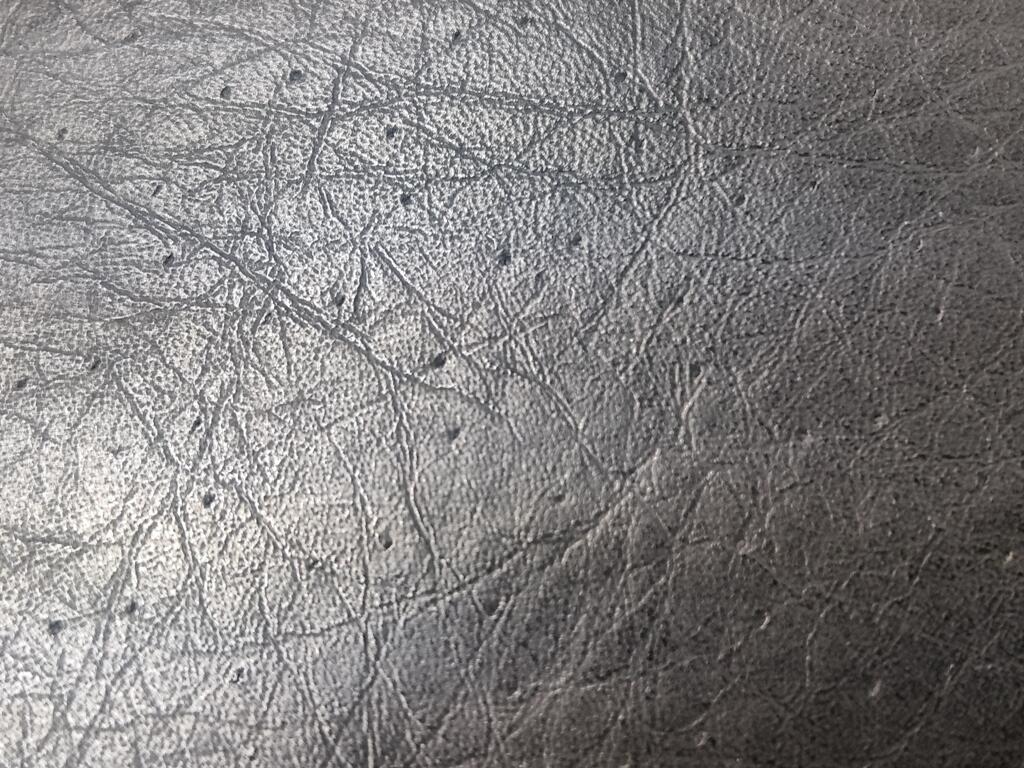
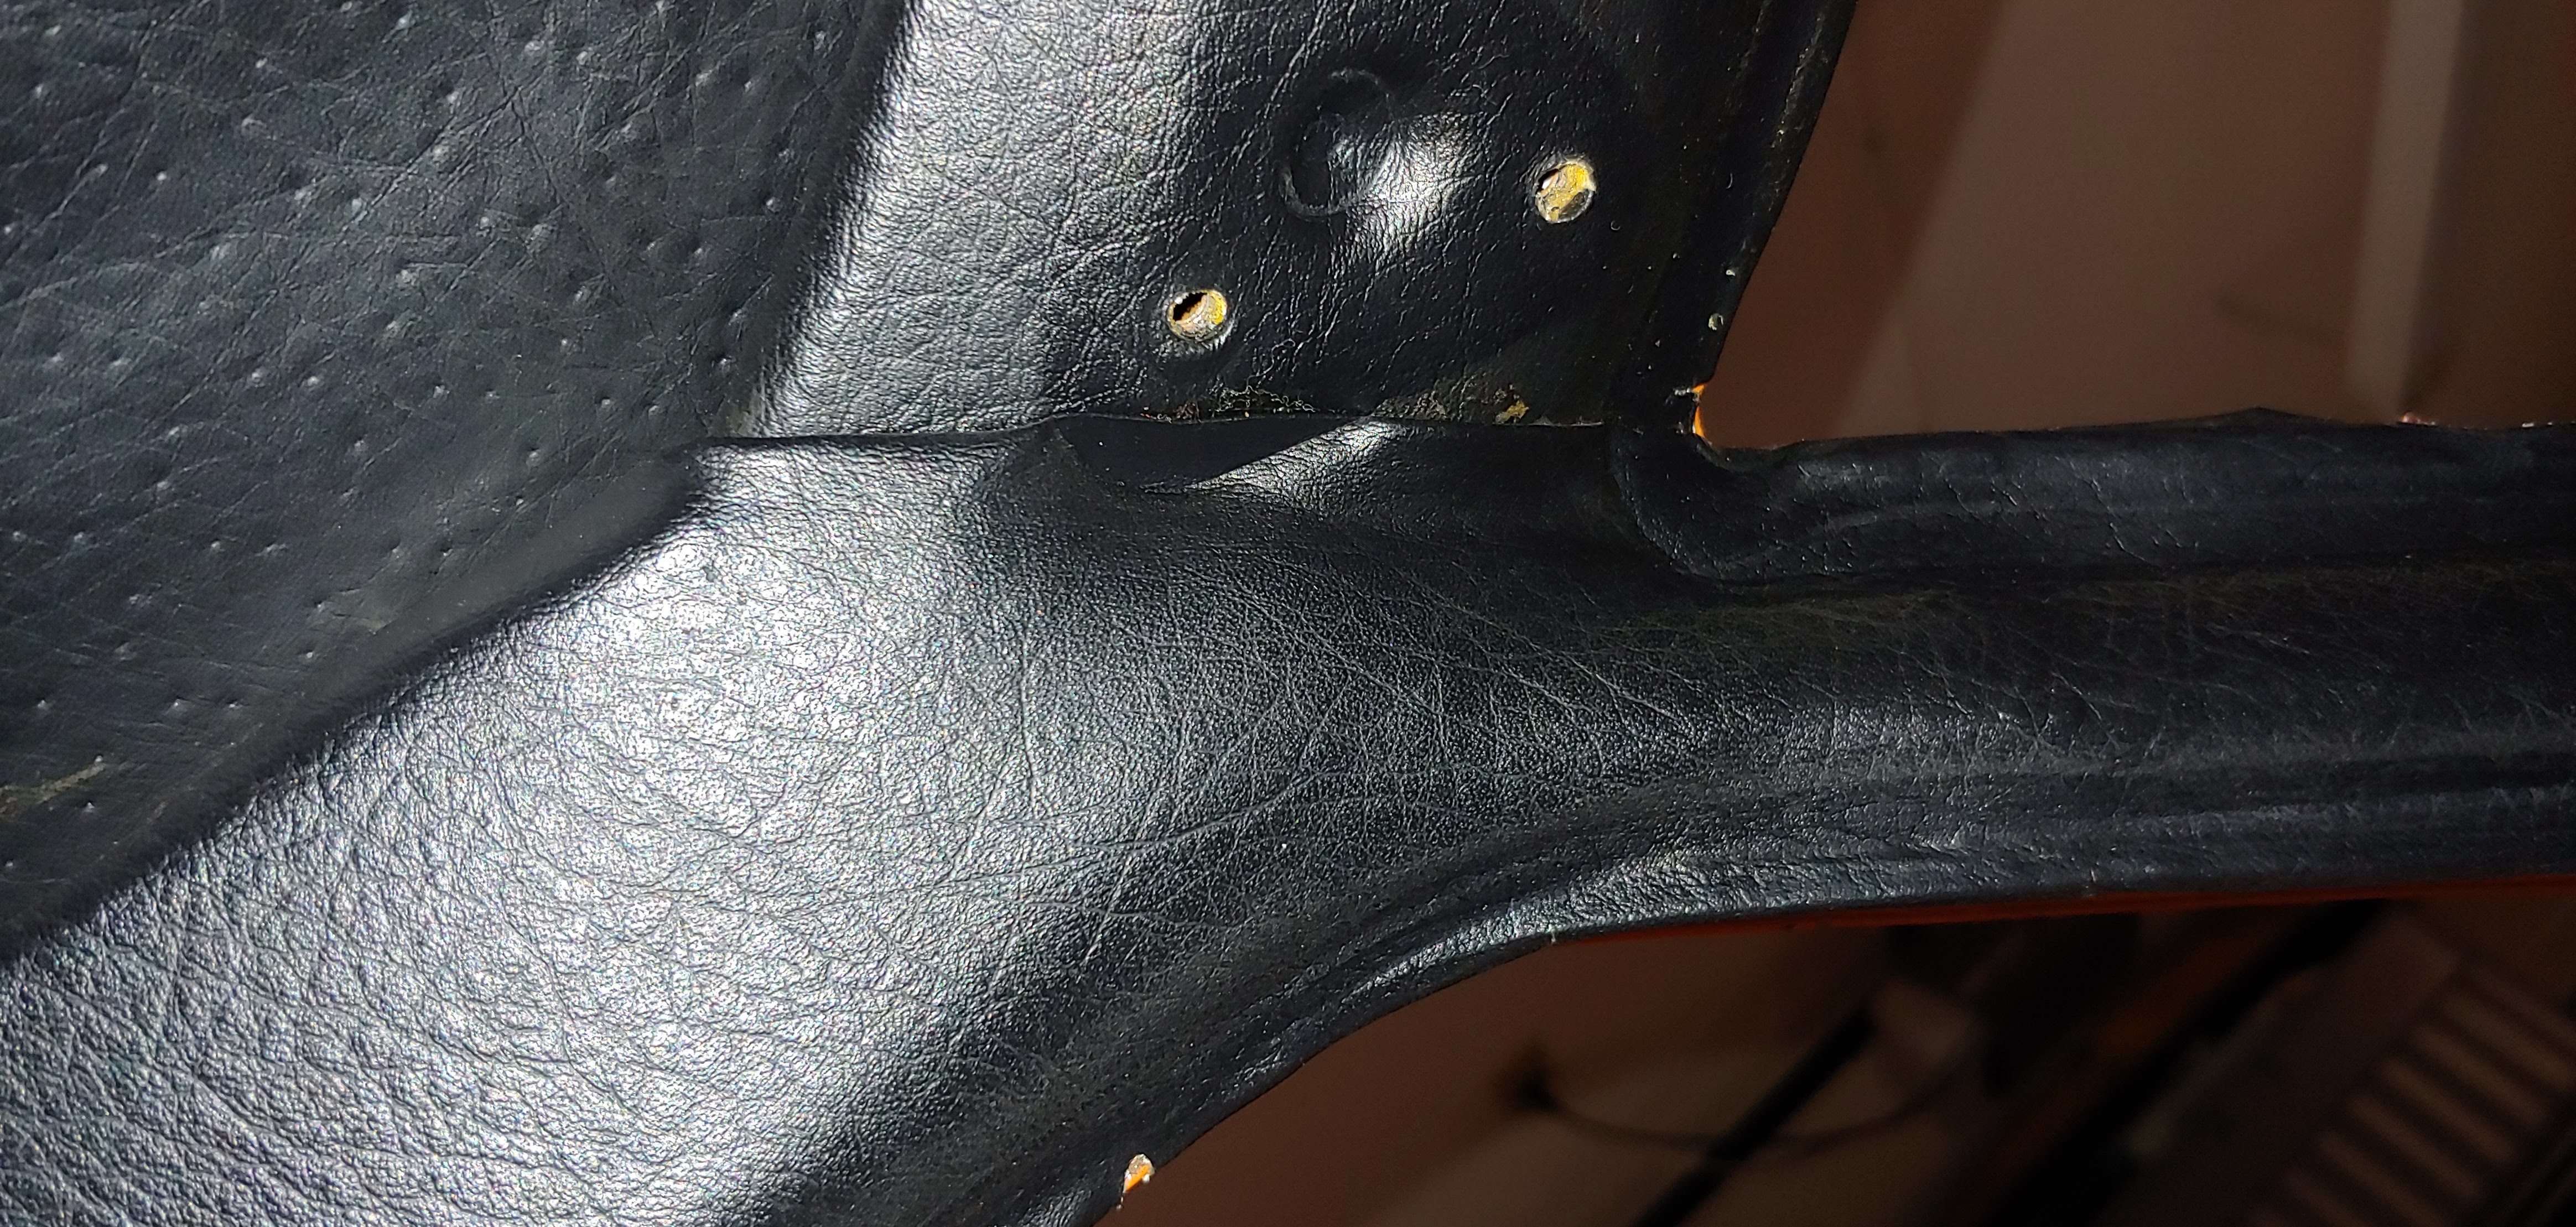
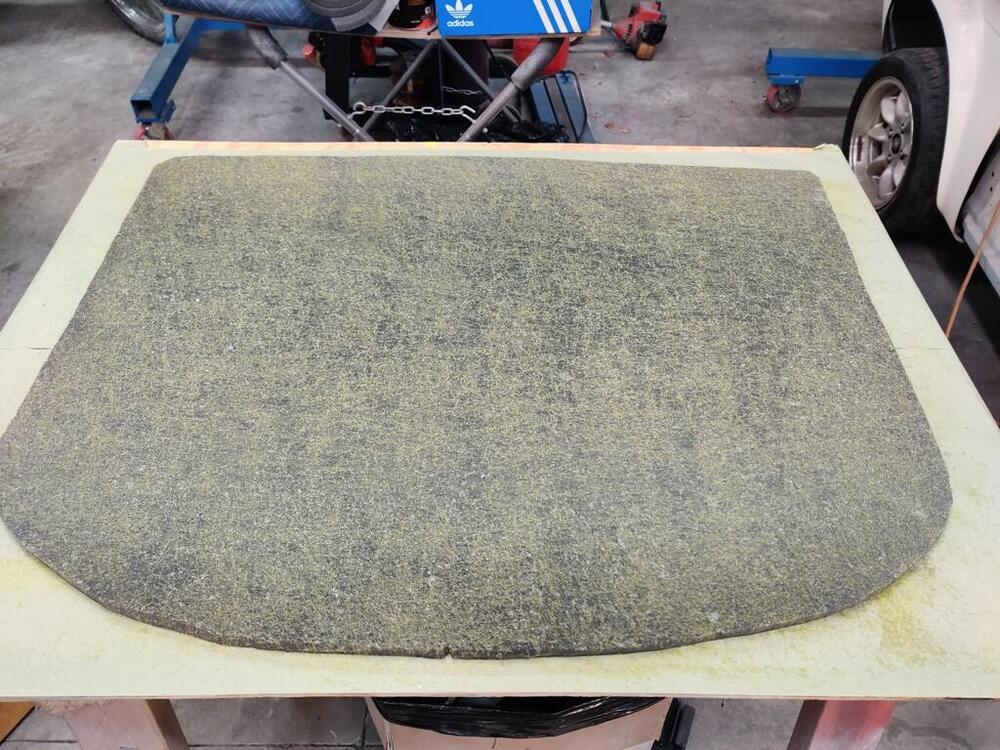
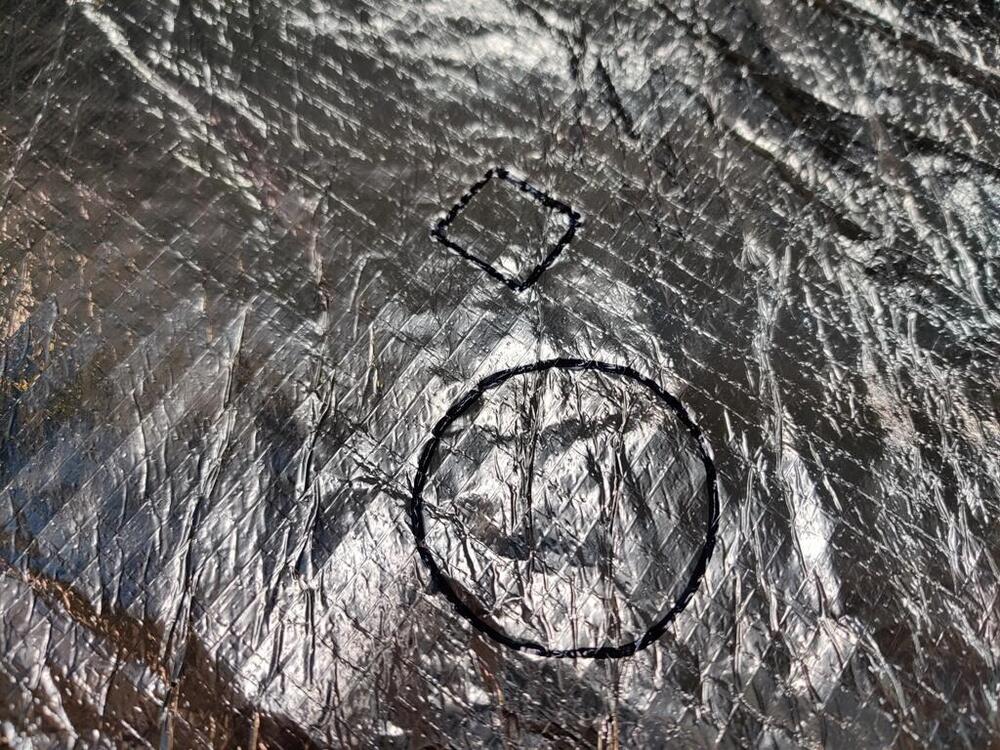
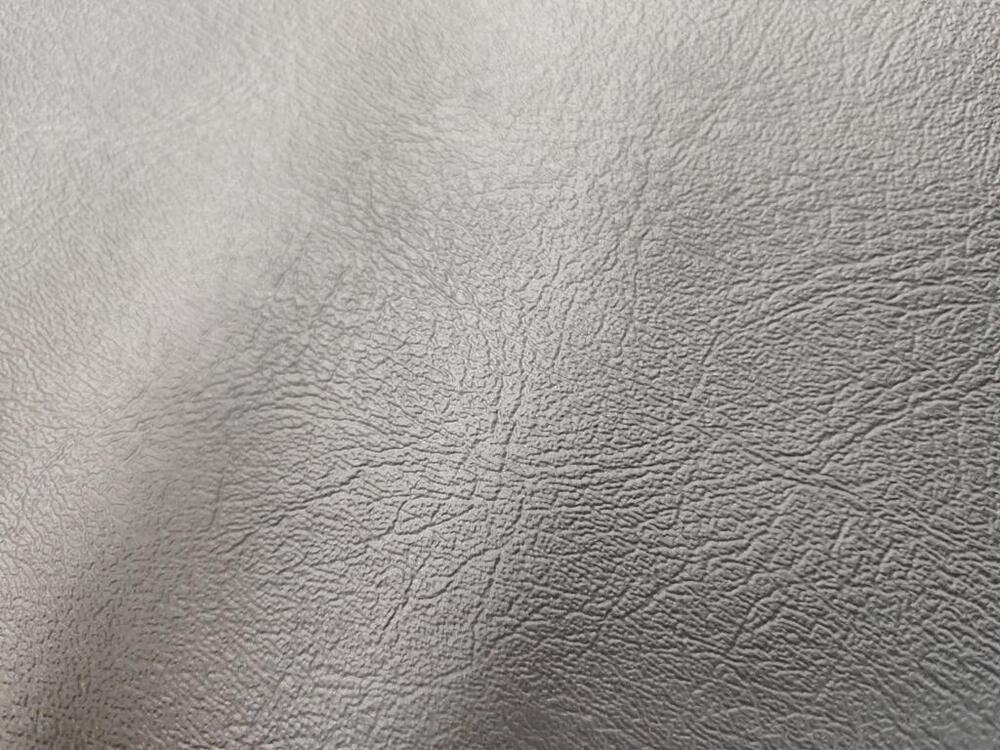
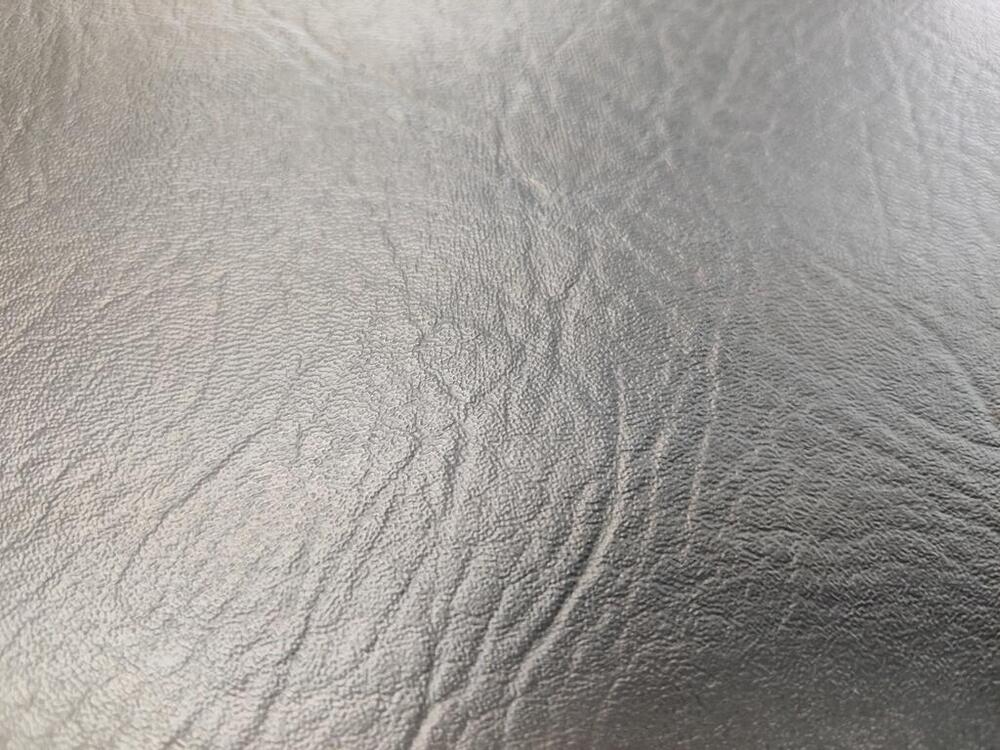
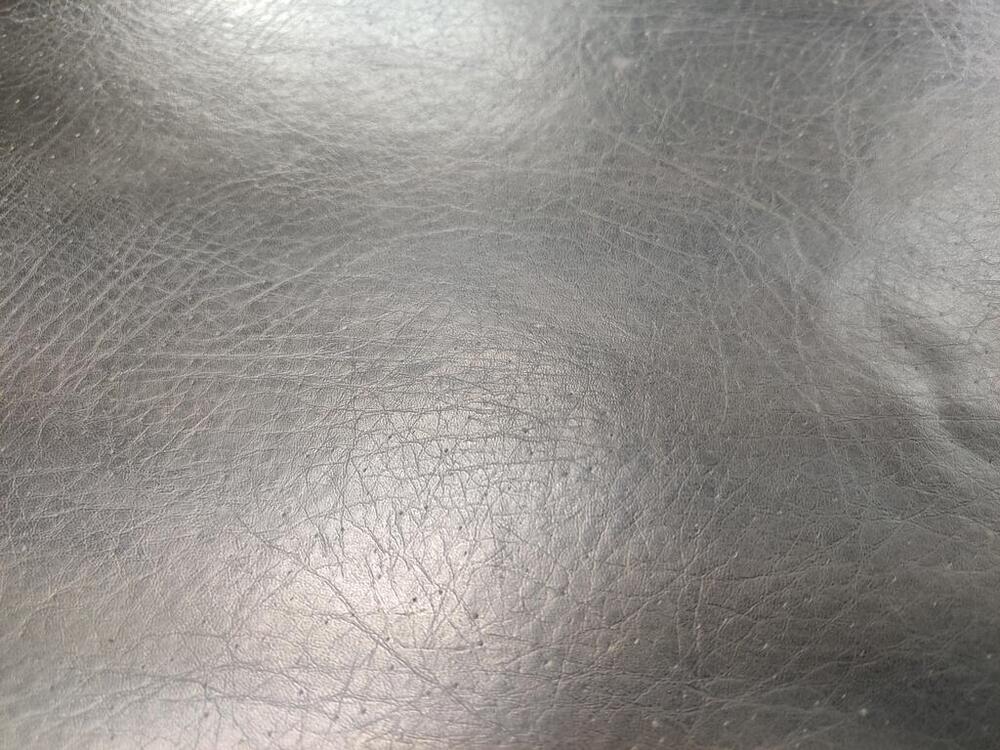
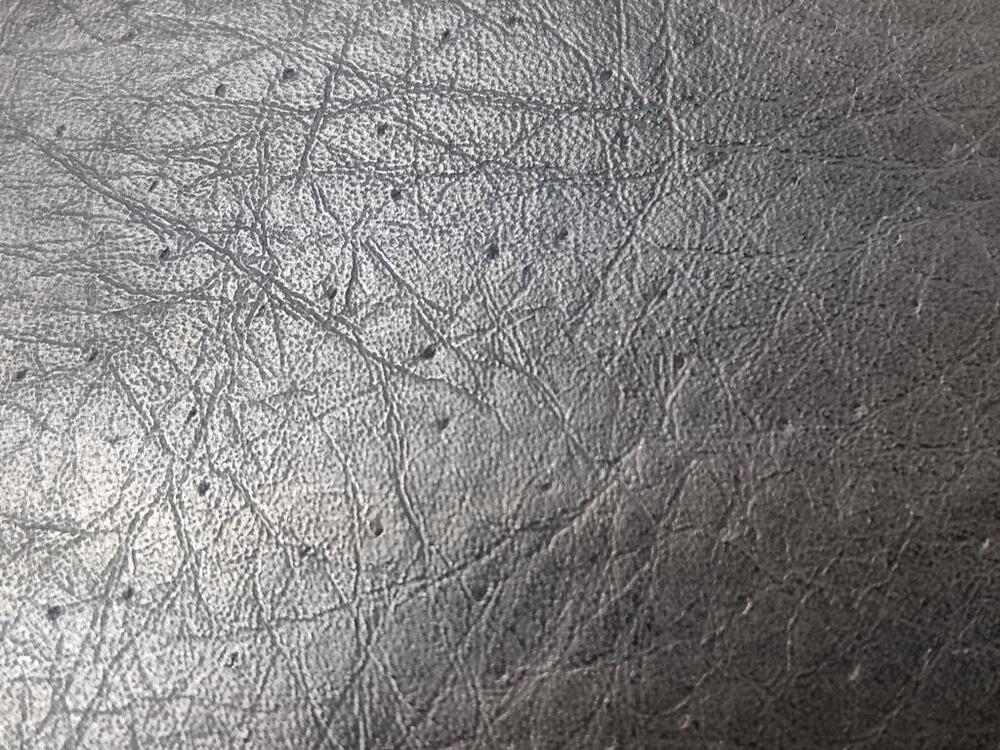
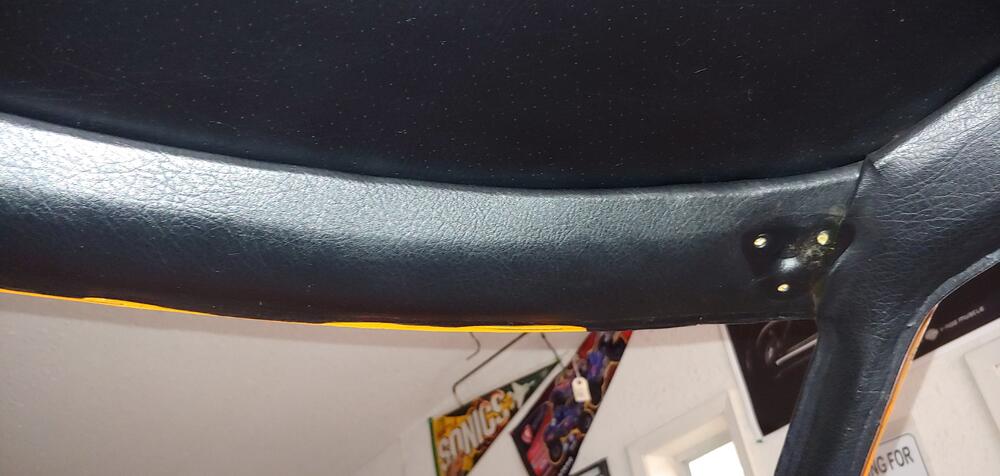
 In my case the headliner, both the vinyl and foam backing are in excellent shape. No damage to the vinyl and the foam (polyurethane?) is still fully intact and still has excellent flexibility, memory. The original headliner has a very unique fine grain and light "stippling" effect that I have yet to see on reproductions. Repos I've seen have almost no graining or to much with what looks like perforations. If someone makes one that is very close to OEM I may possibly go that route but for my restoration I am trying to use/re-use as many original parts and materials as I can. Here a few pics of my OE headliner showing the texture at different angles, it's hard to capture in pics.

-
 Between the decal and the sunroof, there was no way I could salvage this headliner! You may want to check a store like hobby lobby for foam. I bought a near perfect match for a bmw headliner there. I have had good luck with 3M headliner spray on adhesive.
-
If you are planning to paint inside the cabin, then removal of the items would seem to be a must.
-
Why would you strip to bare metal? I am not sure it's always the best course of action...
-
maybe I should clarify; I'm stripping the car to bare metal and re-painting.
-
I can't think of a need to remove it. If you need to peel it slightly at the glass edges for masking, so be it. If it tears some there it will be unnoticeable under the weatherstripping
-
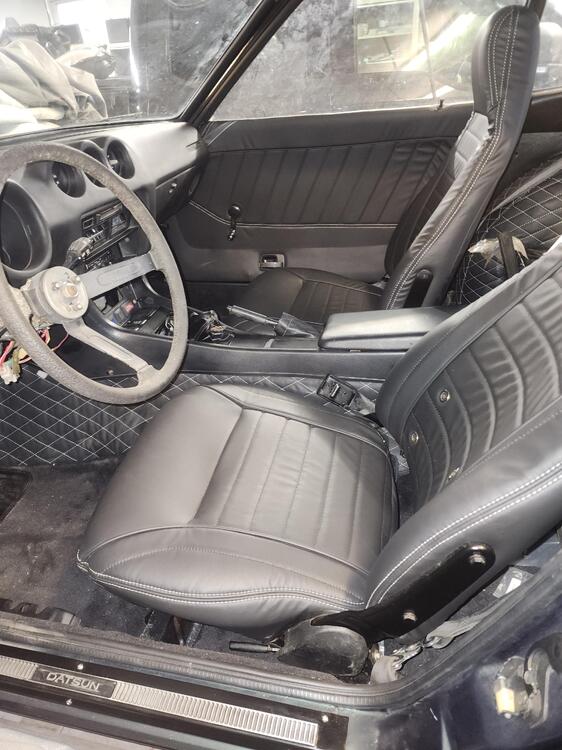
I went with everyone's recommendation and had the glass installed with the original rubber seals. I'm just going to leave the chrome inserts out. If any needs them, reach out. I know I have the entire rear glass section and a bunch of random corner pieces. Other than that, interior is basically done with the exception of a one or two trim pieces and the headliner. Next things to tackle is the motor refresh....

-
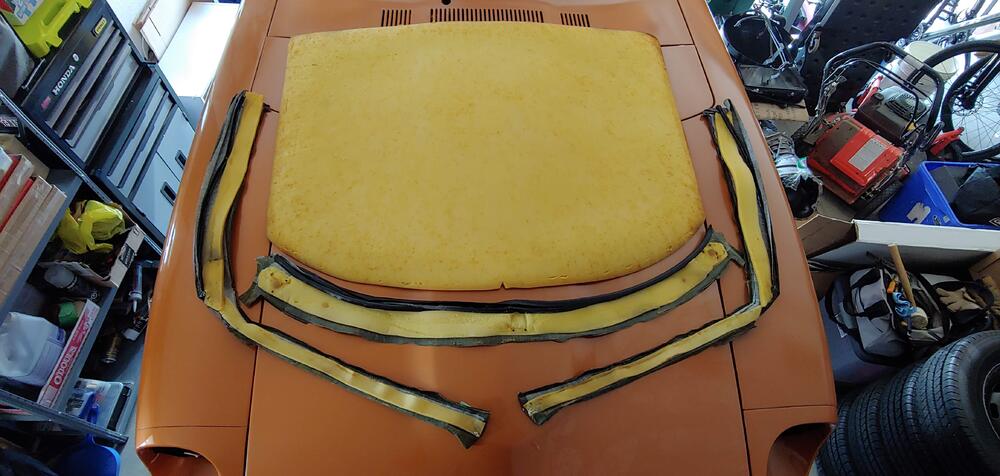
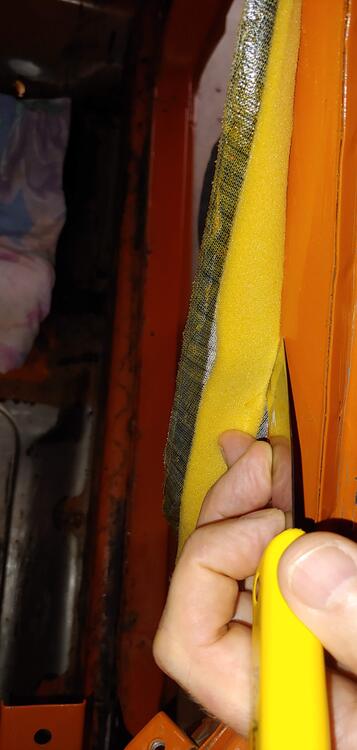
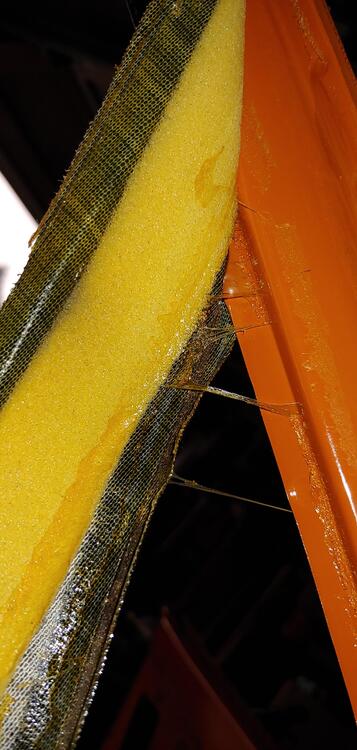
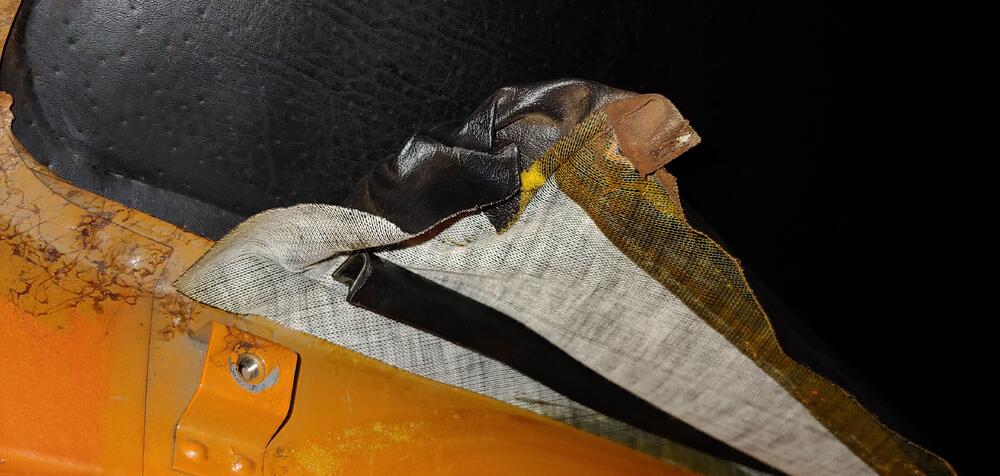
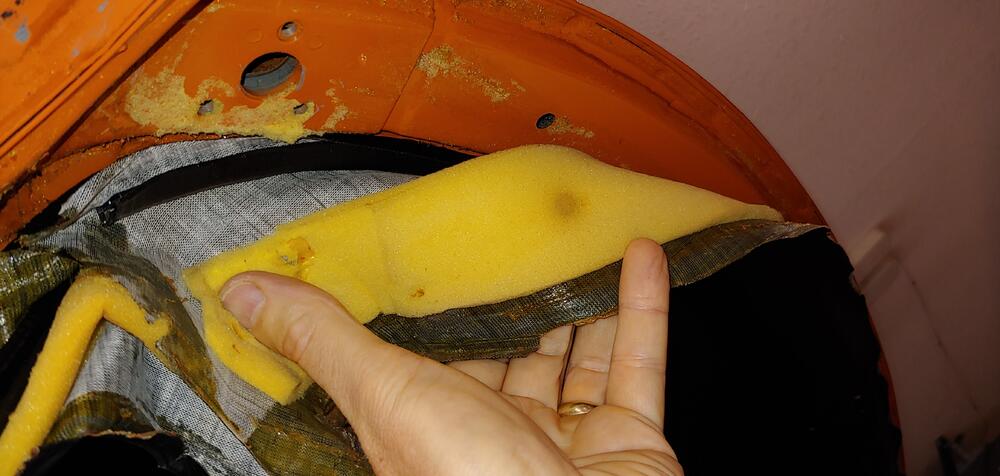
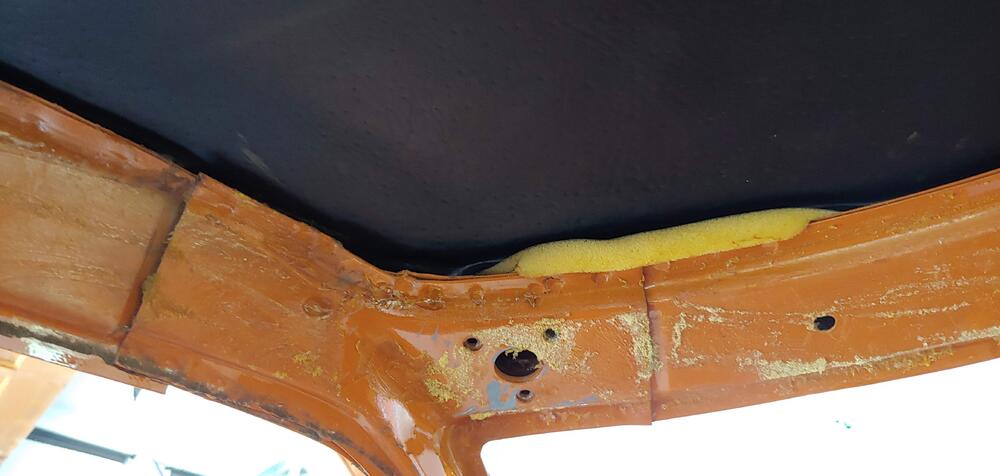
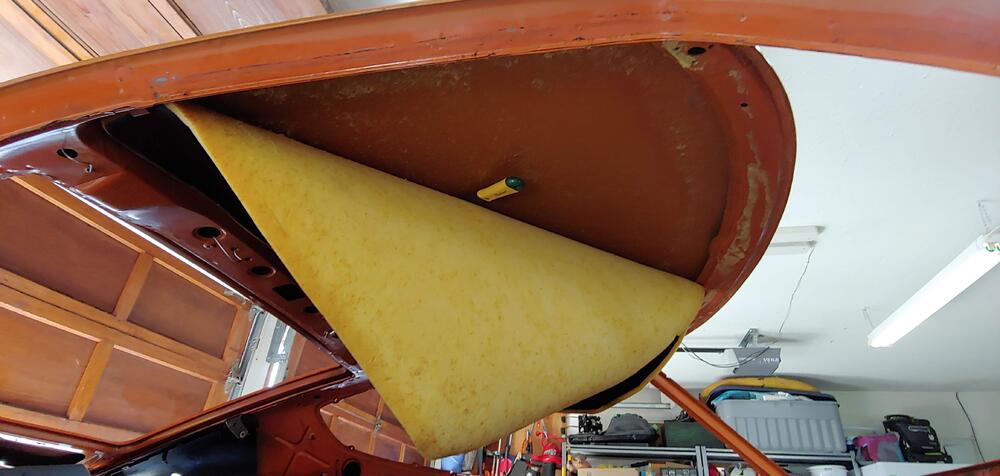
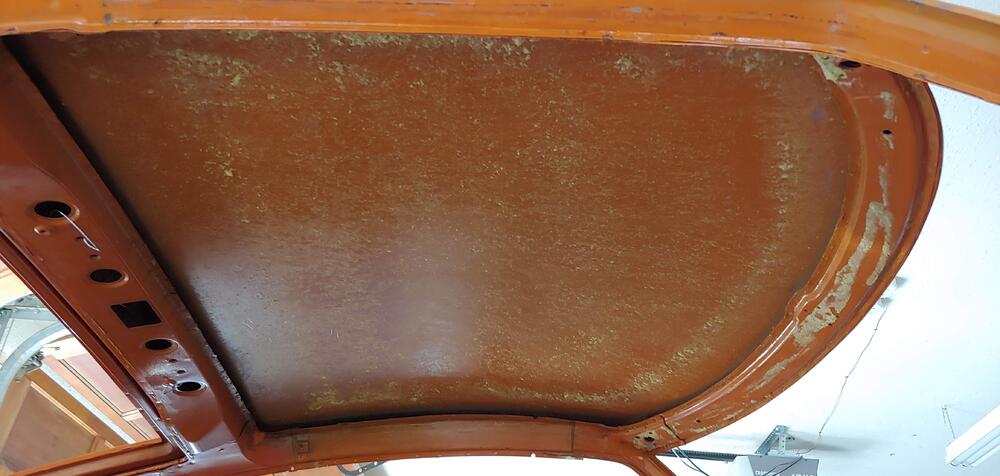
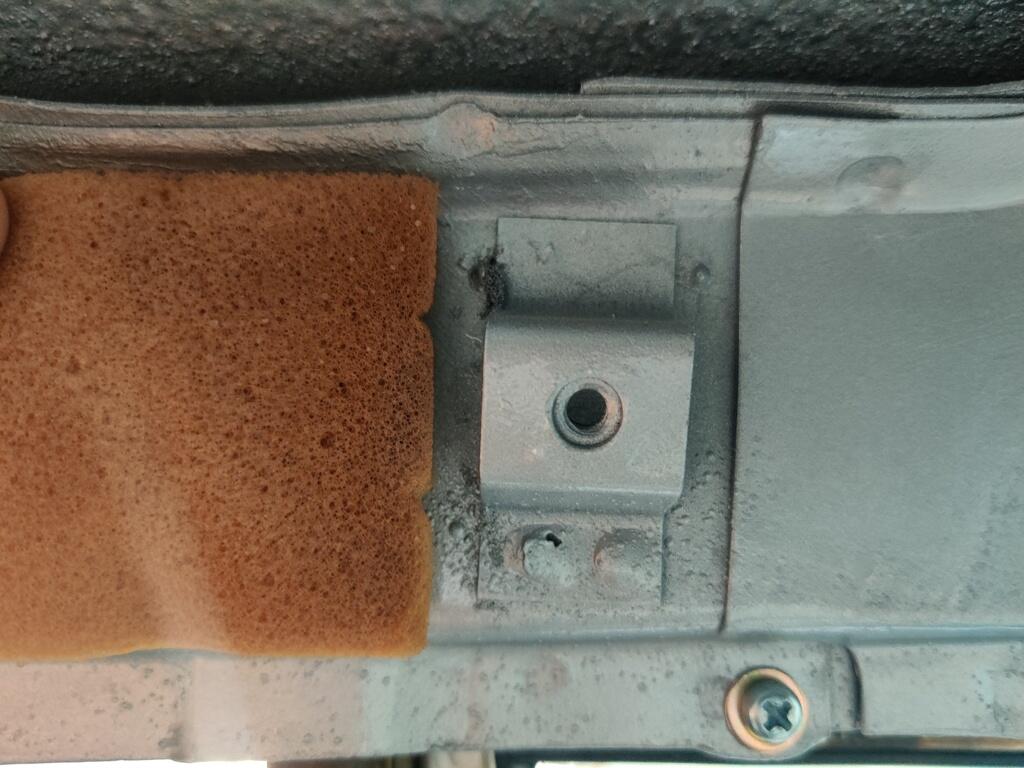
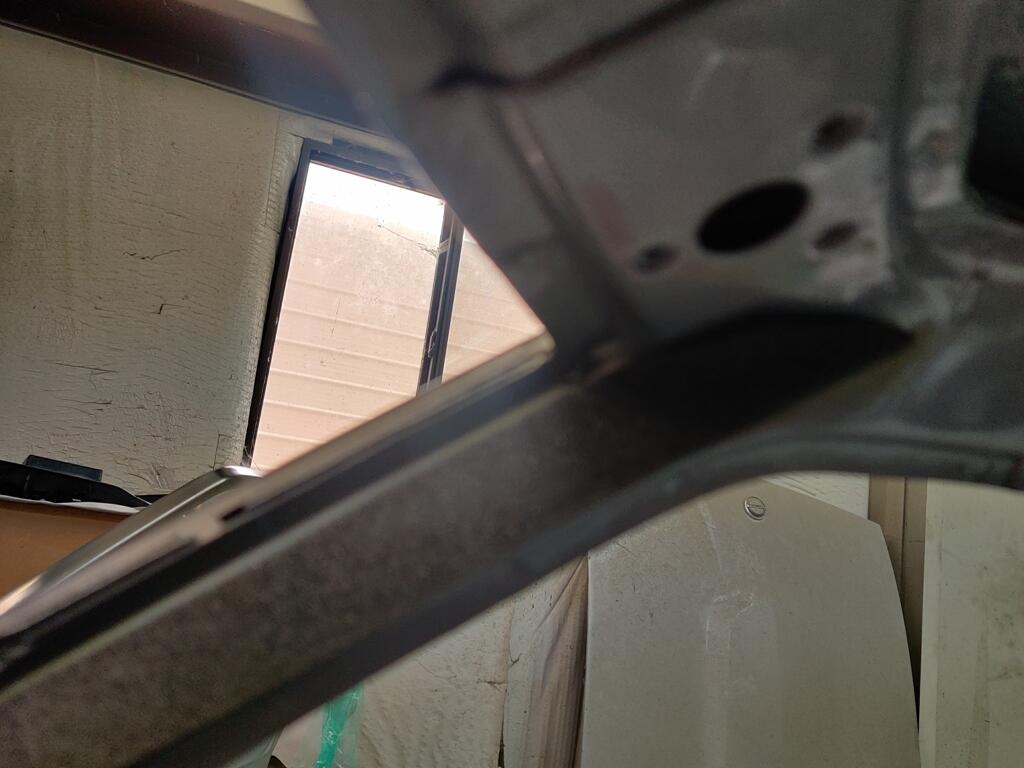
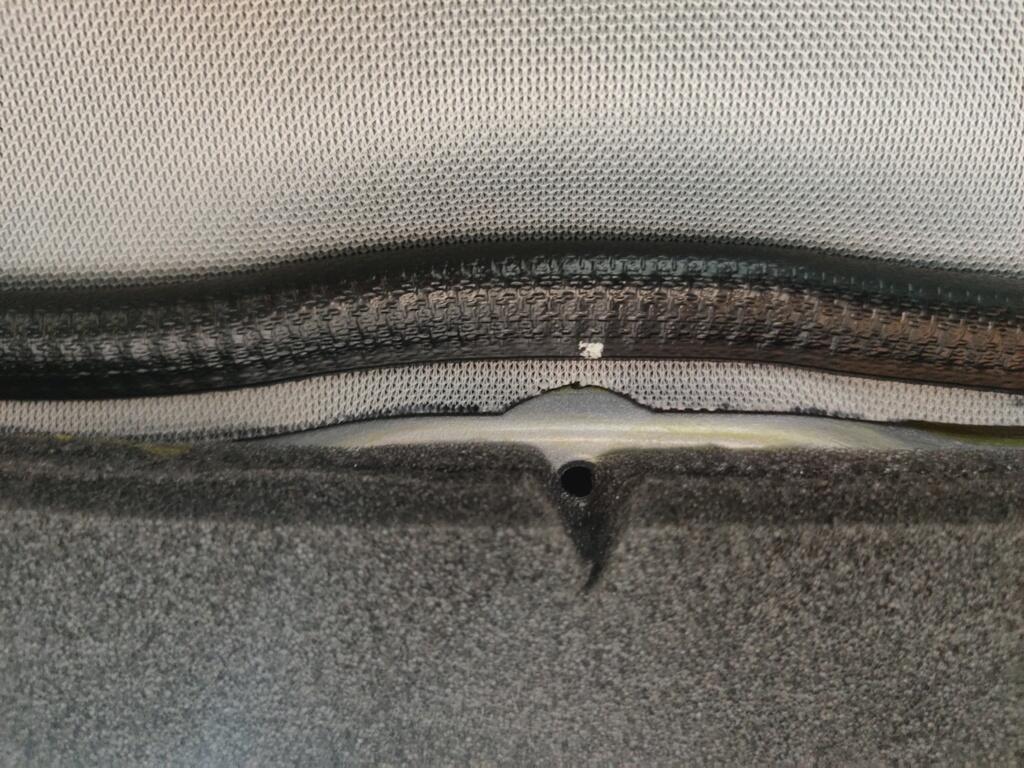
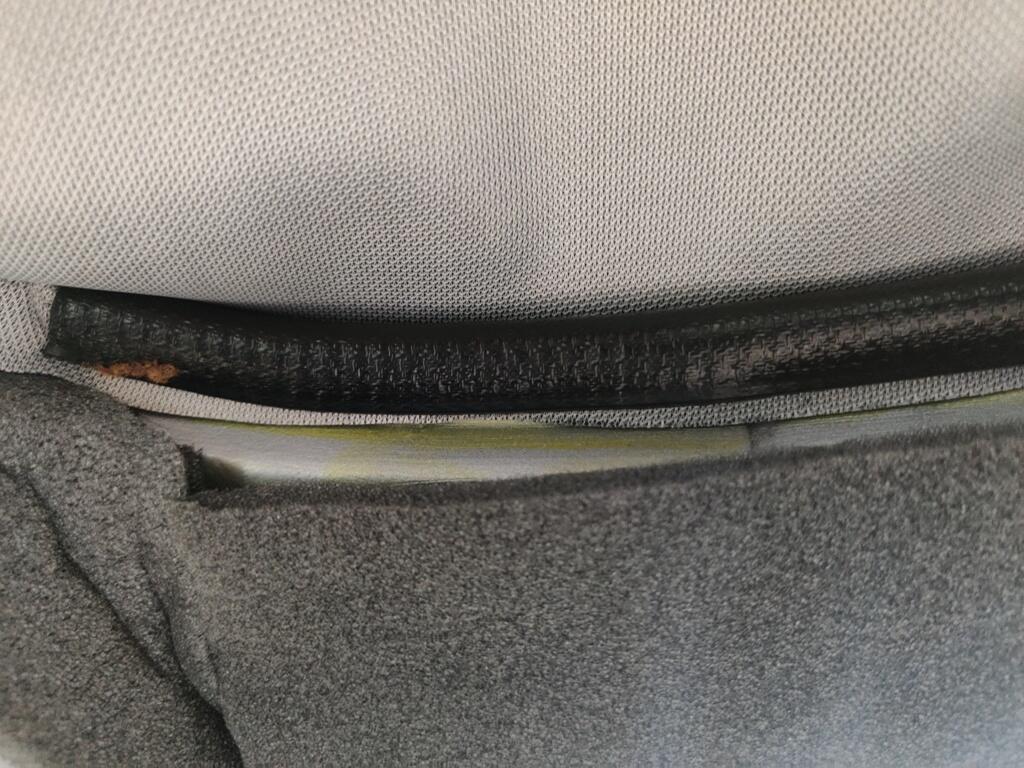
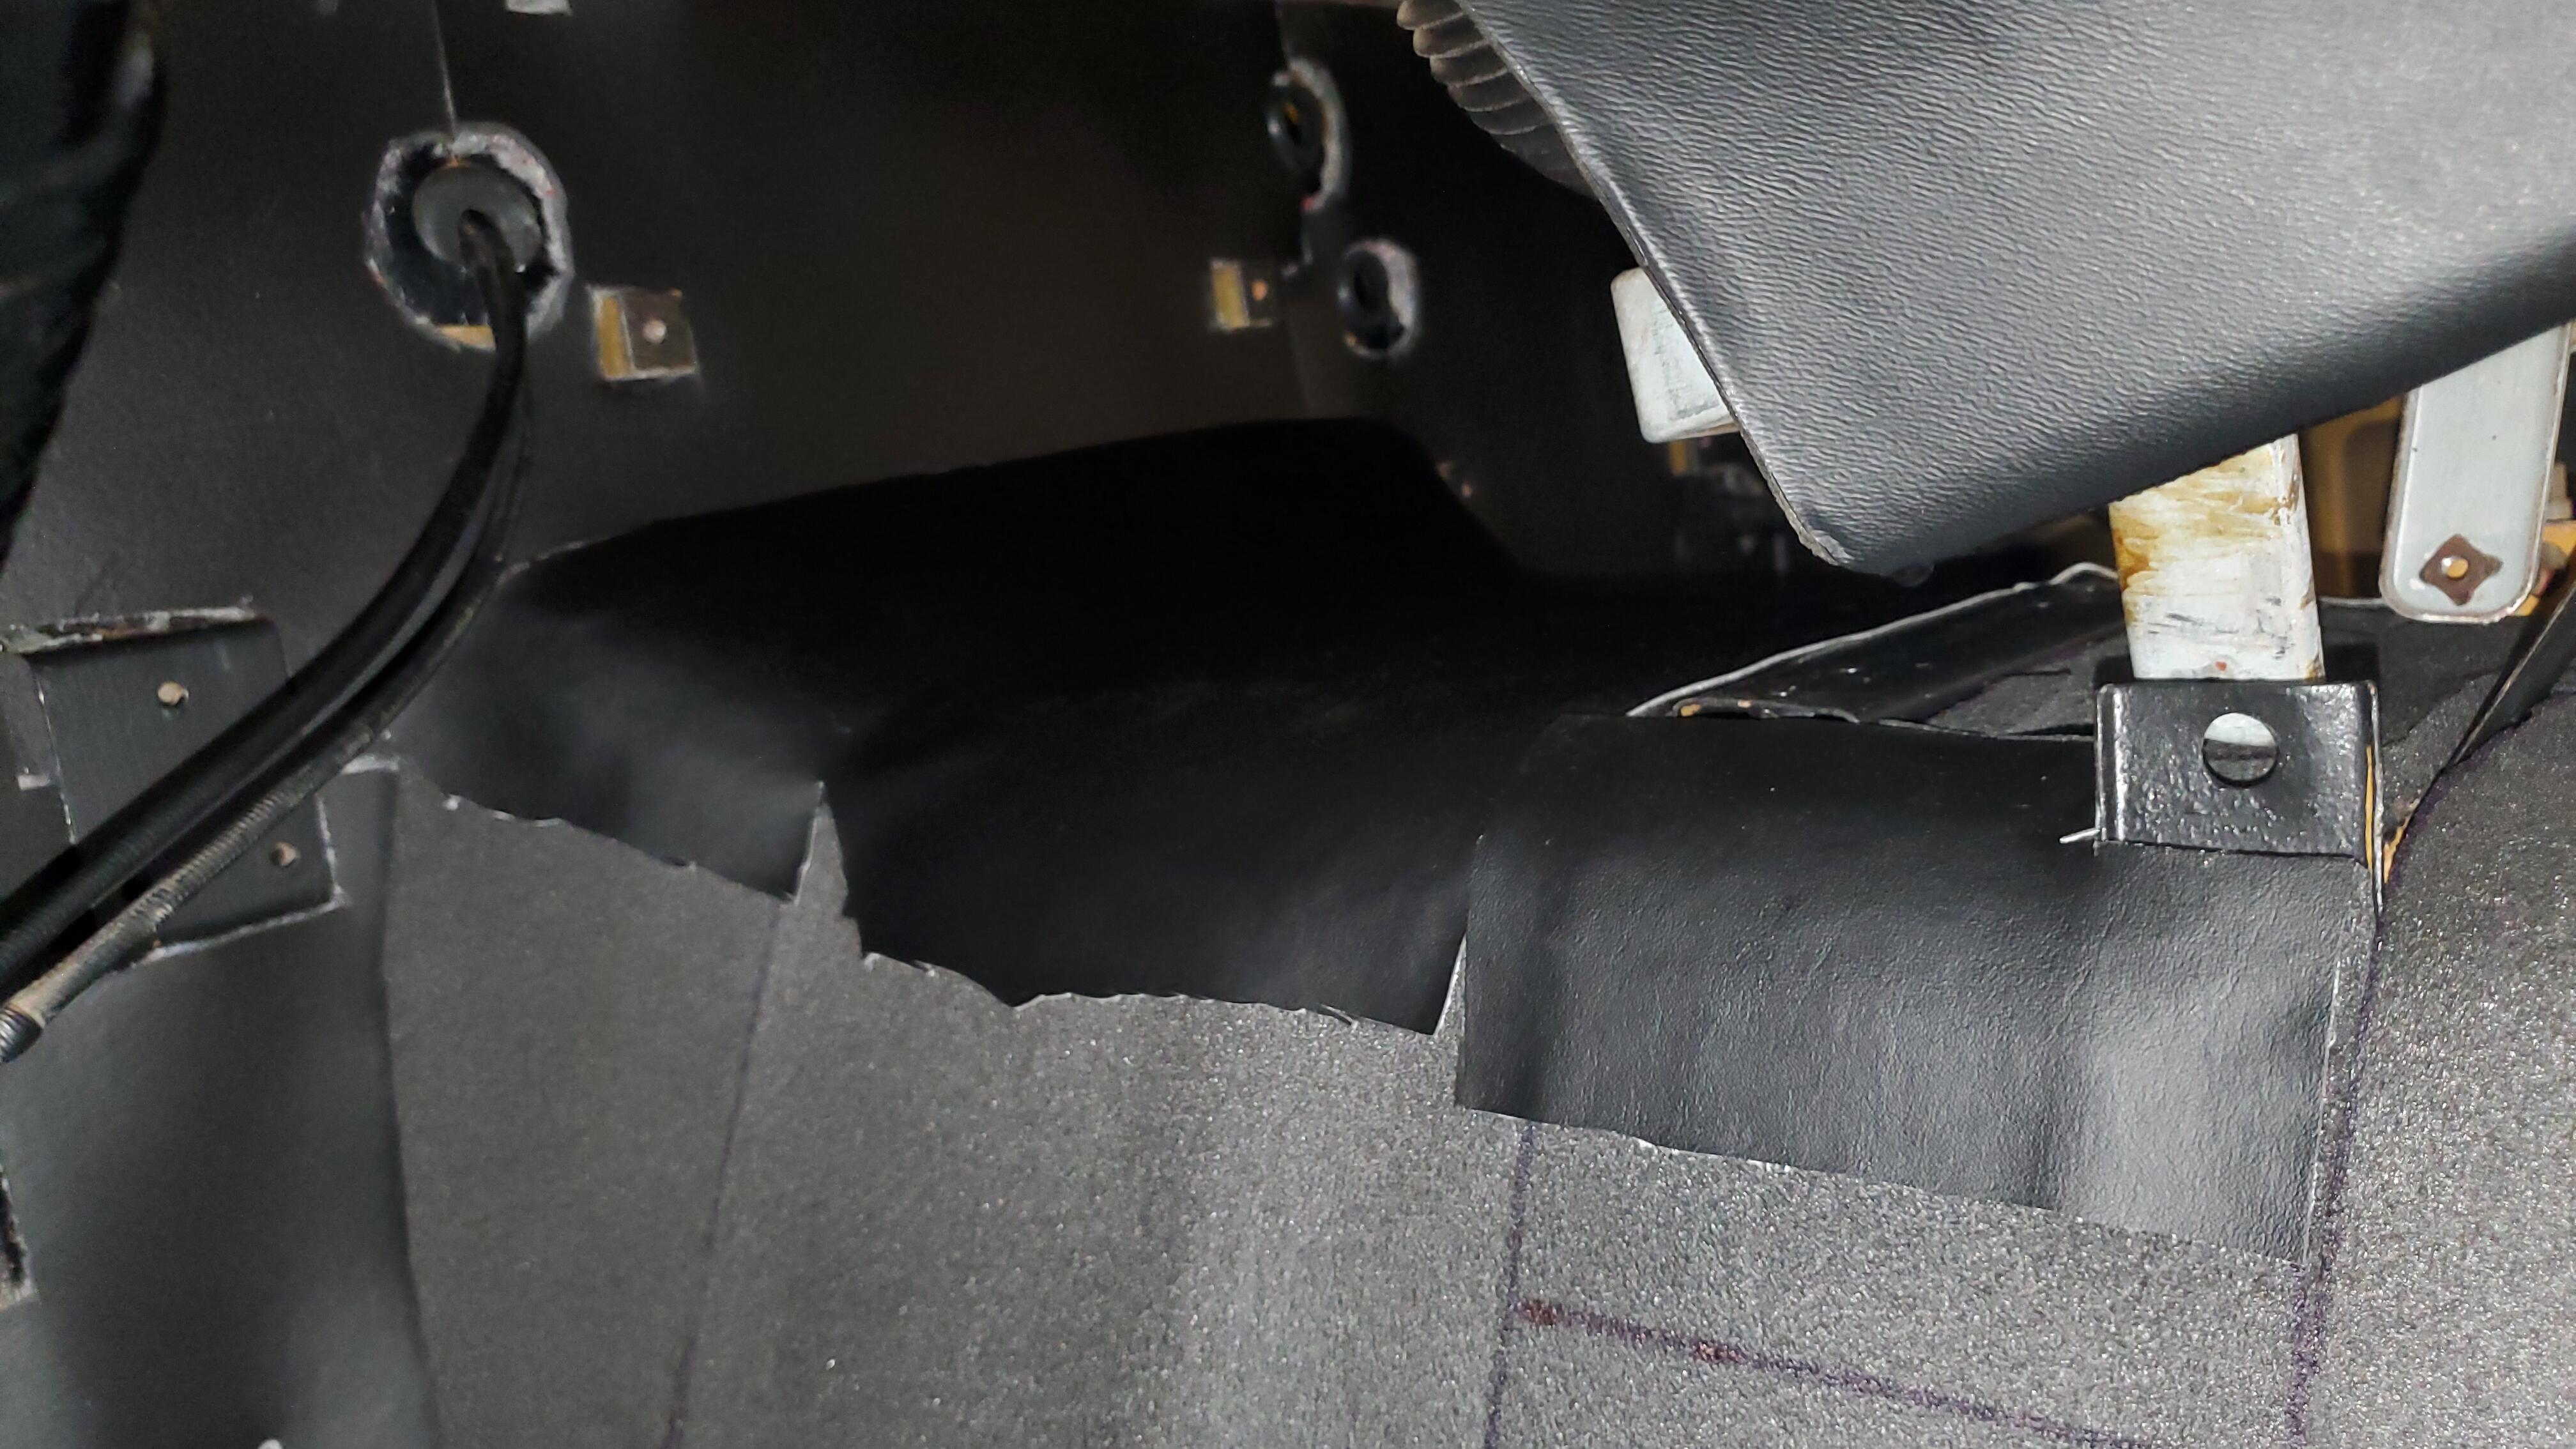
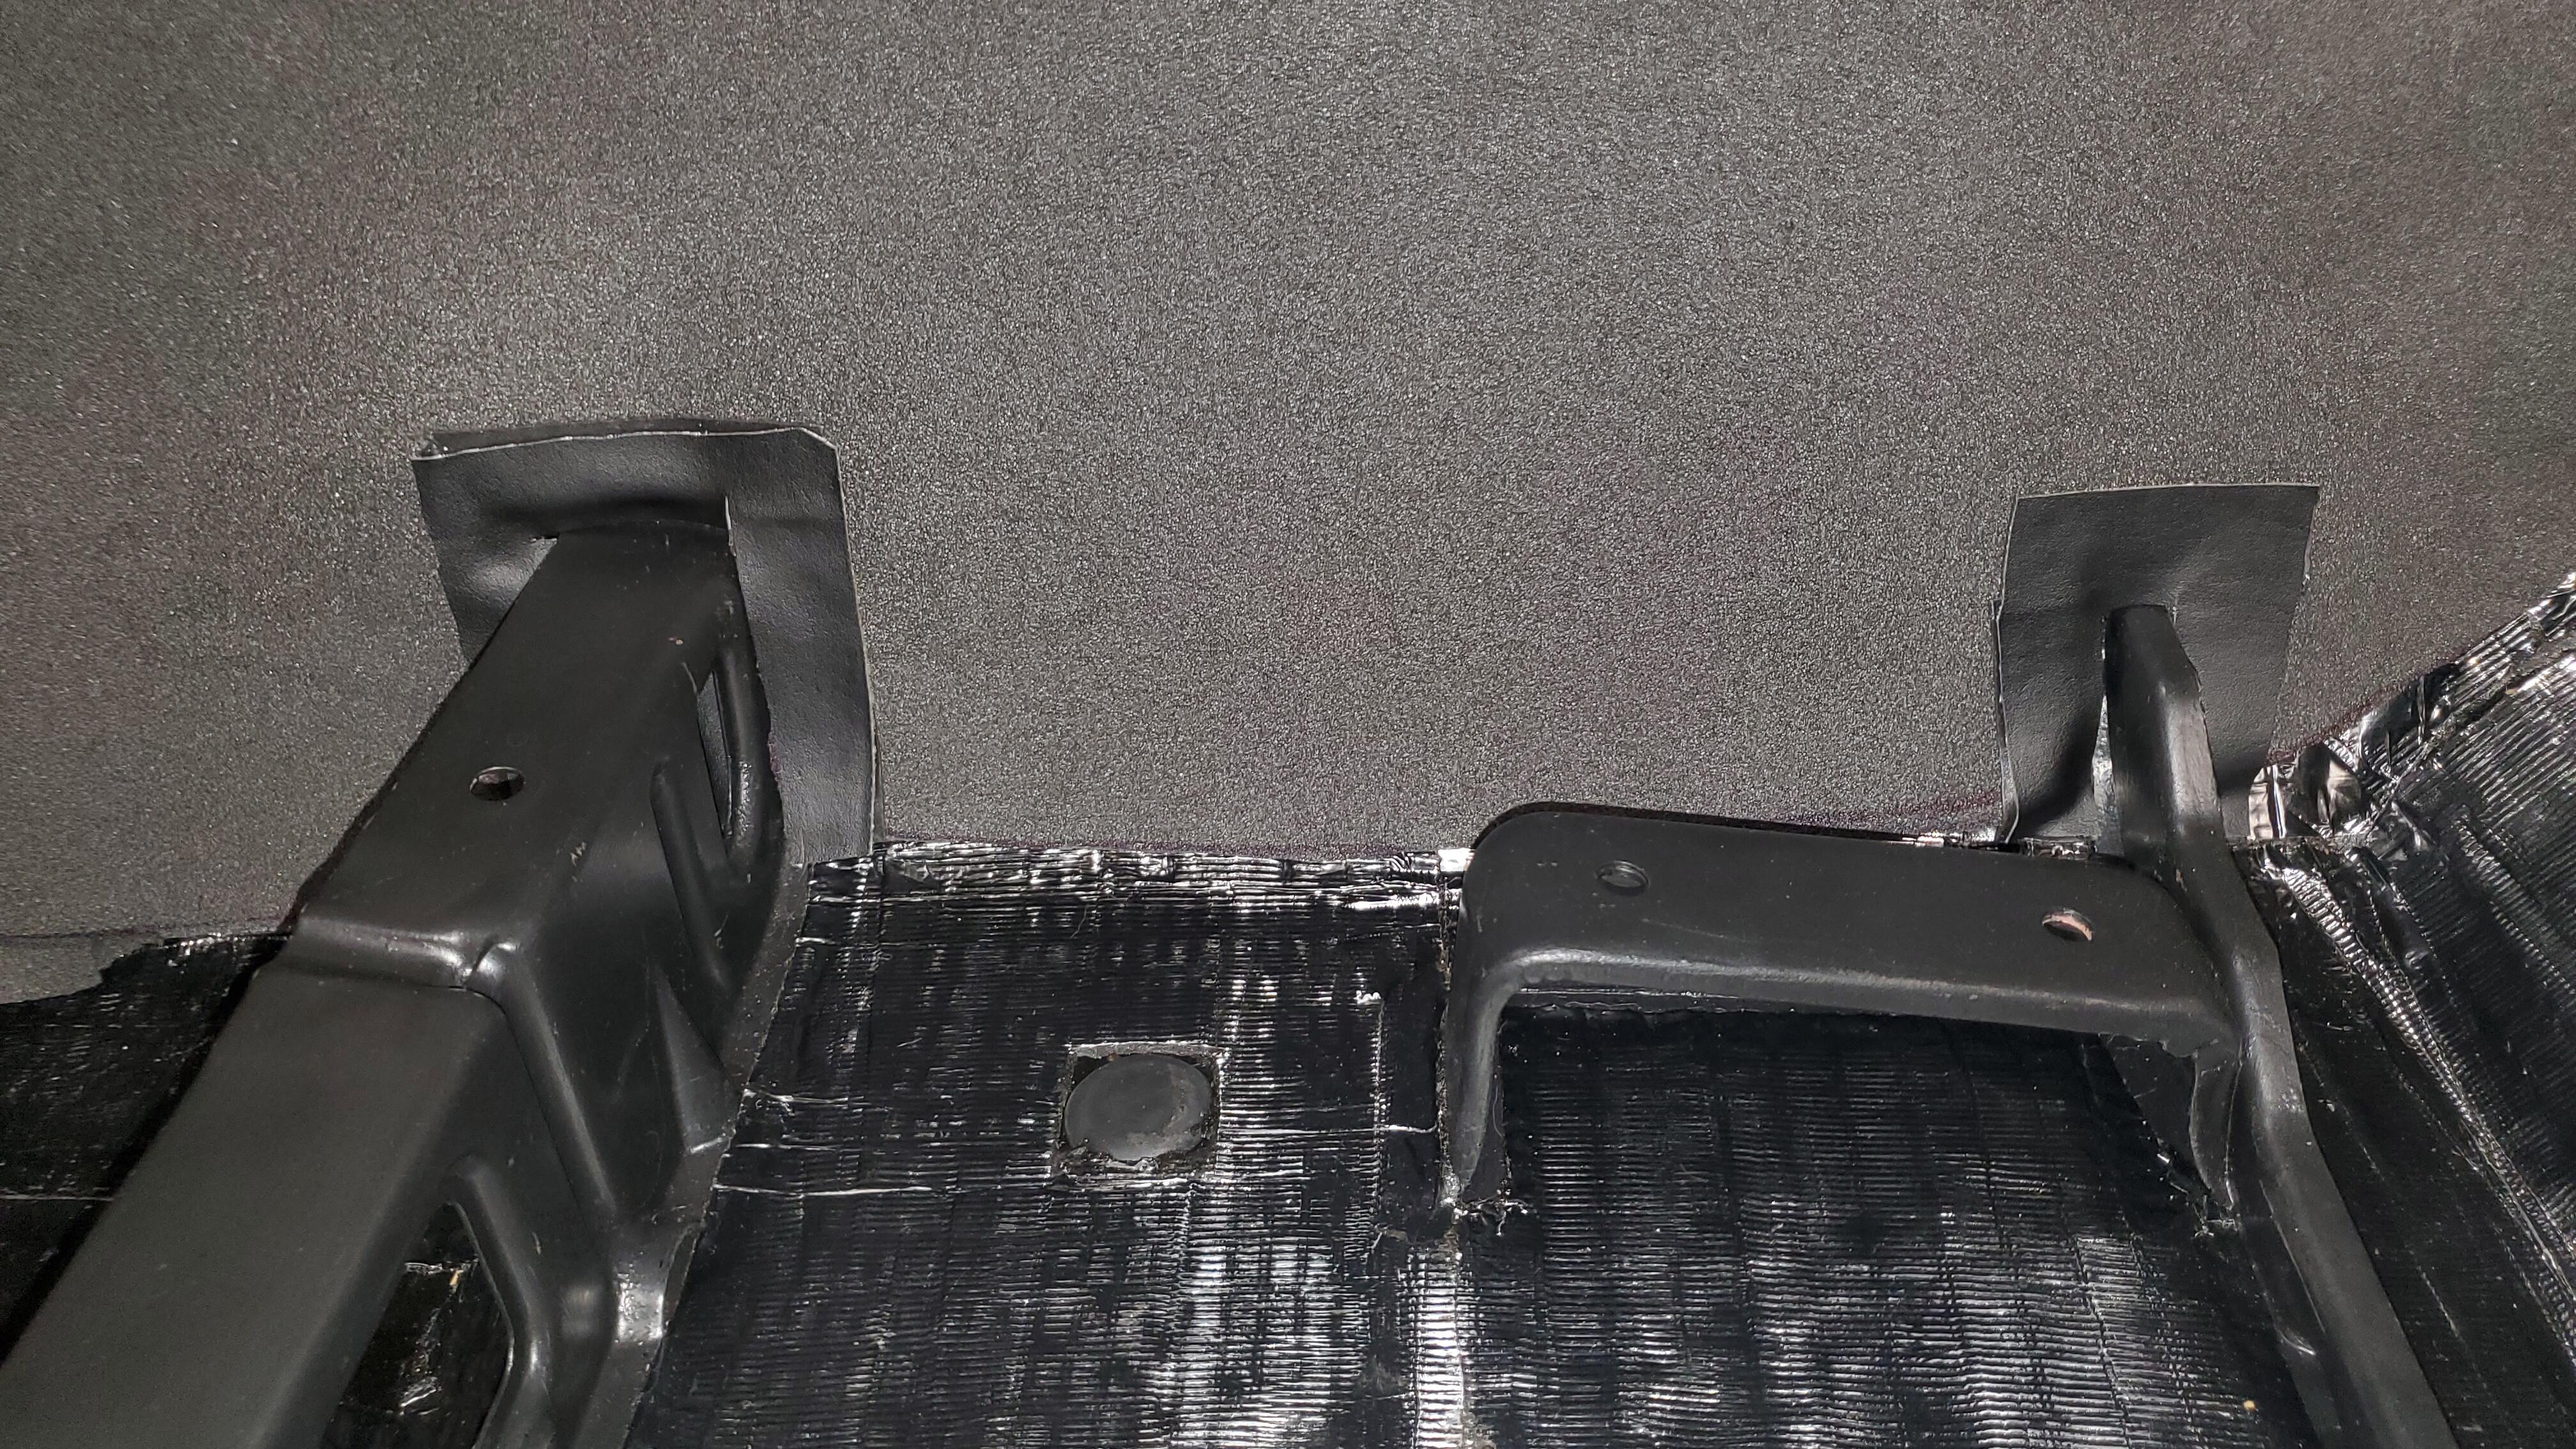
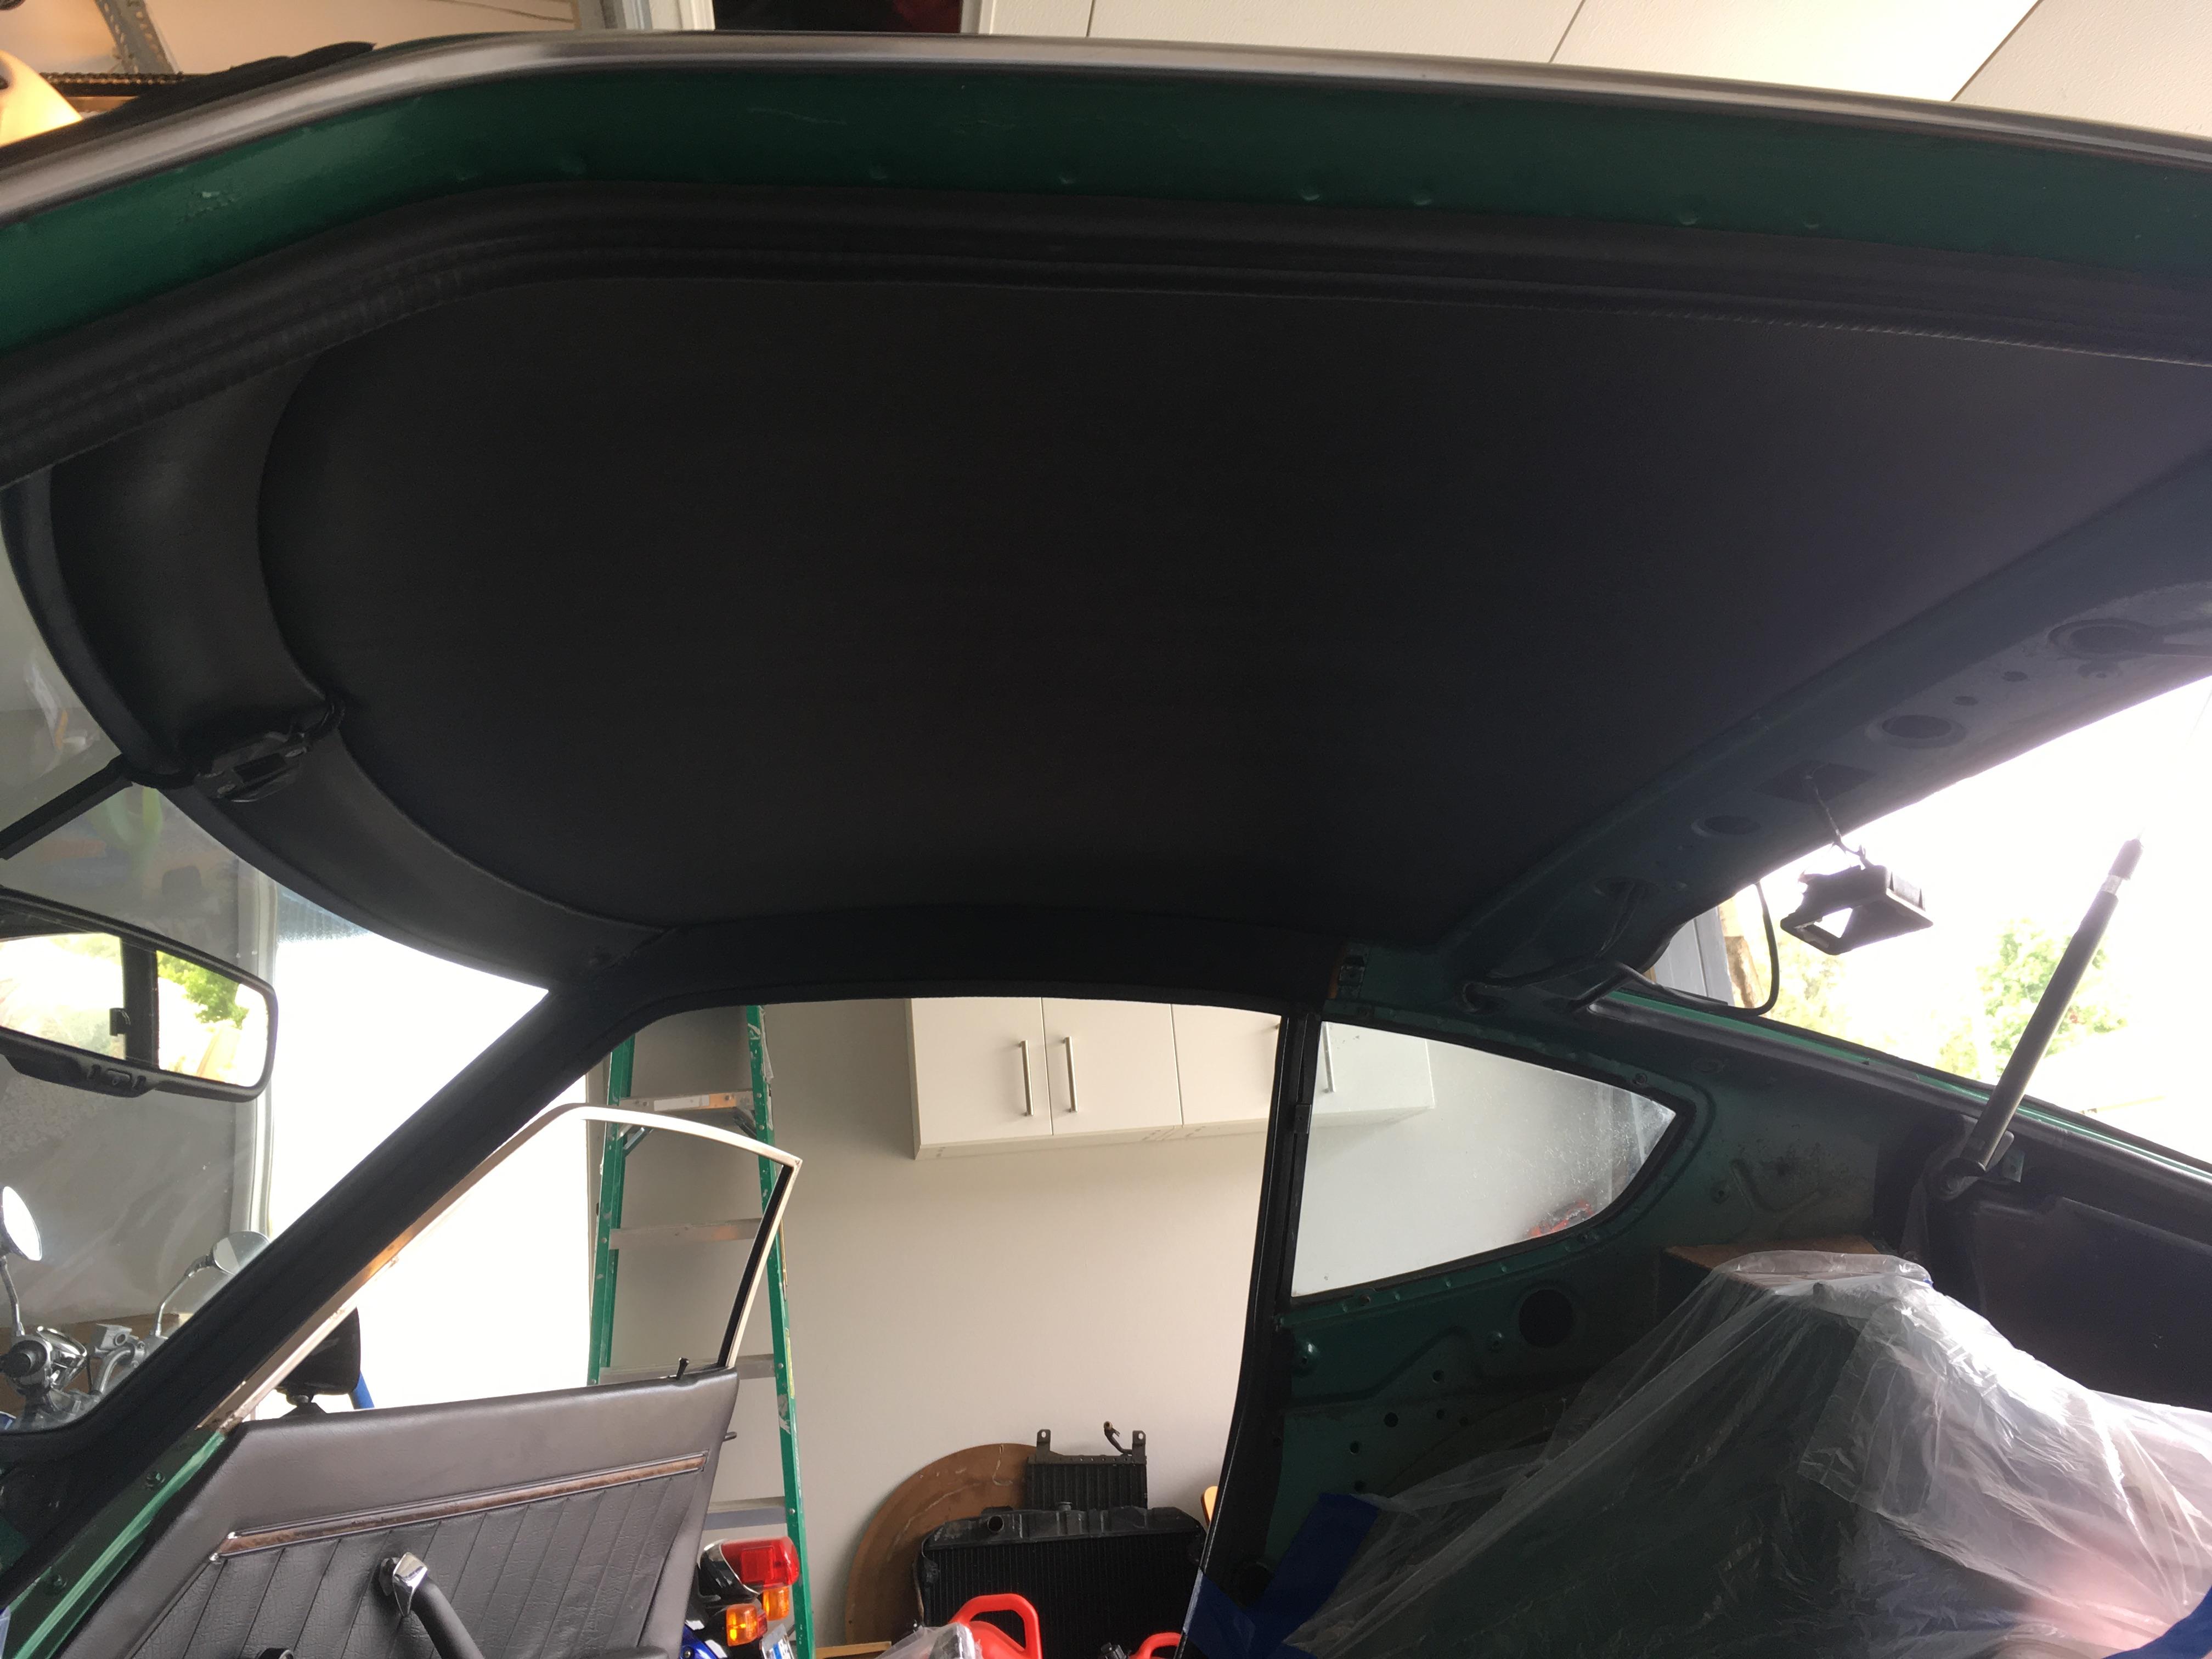
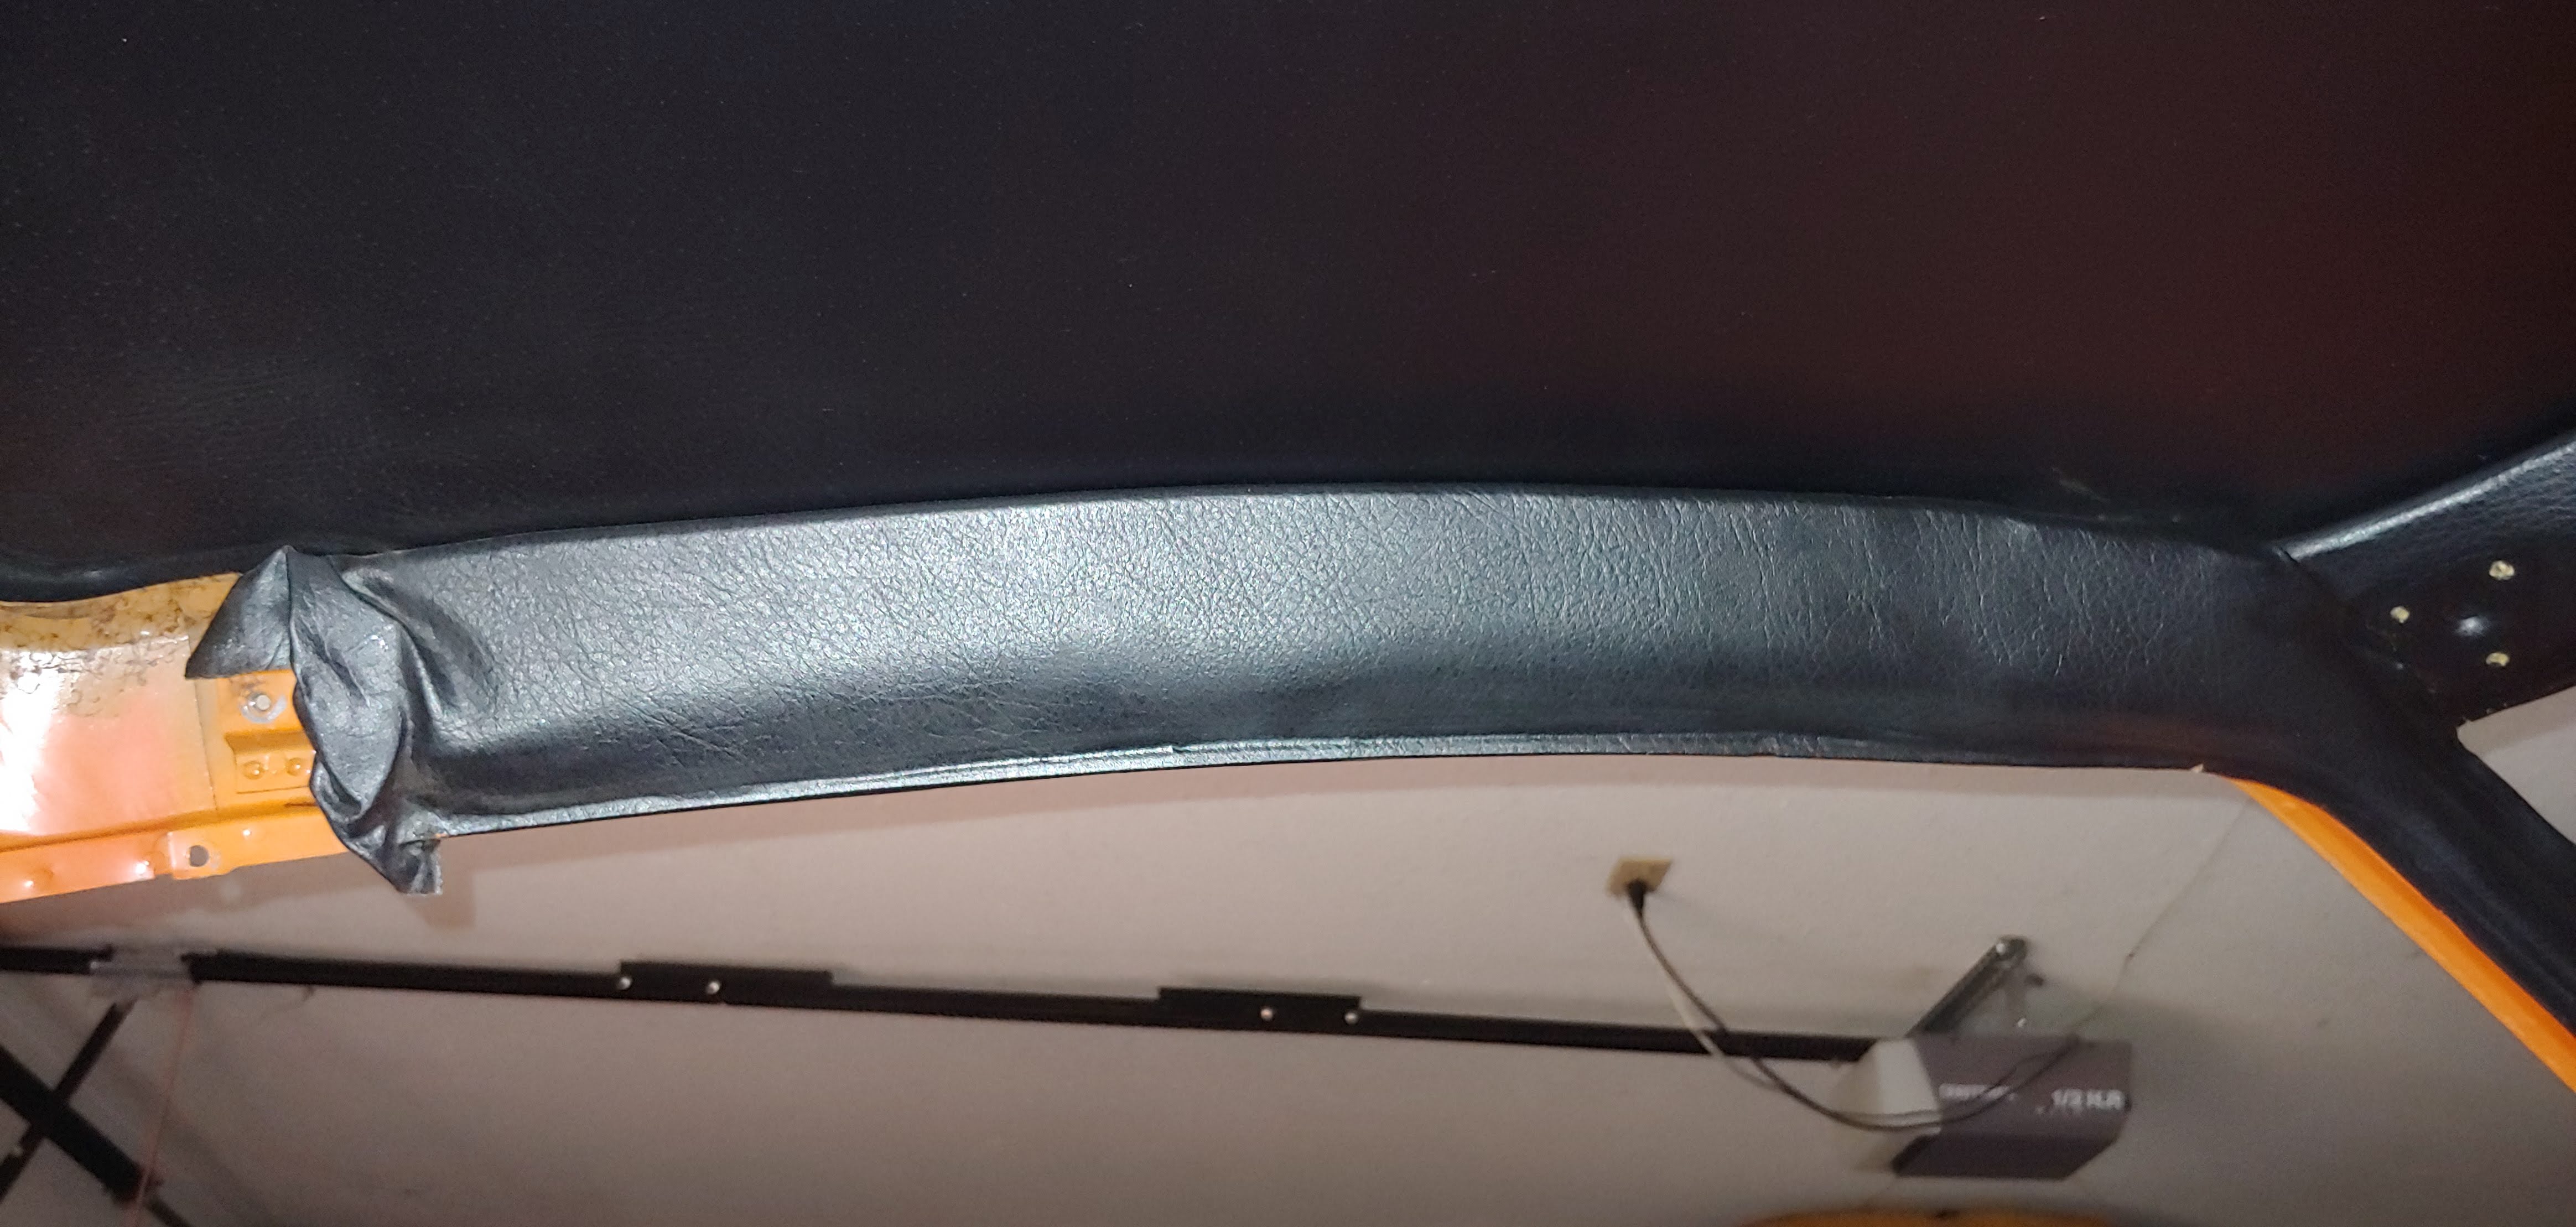
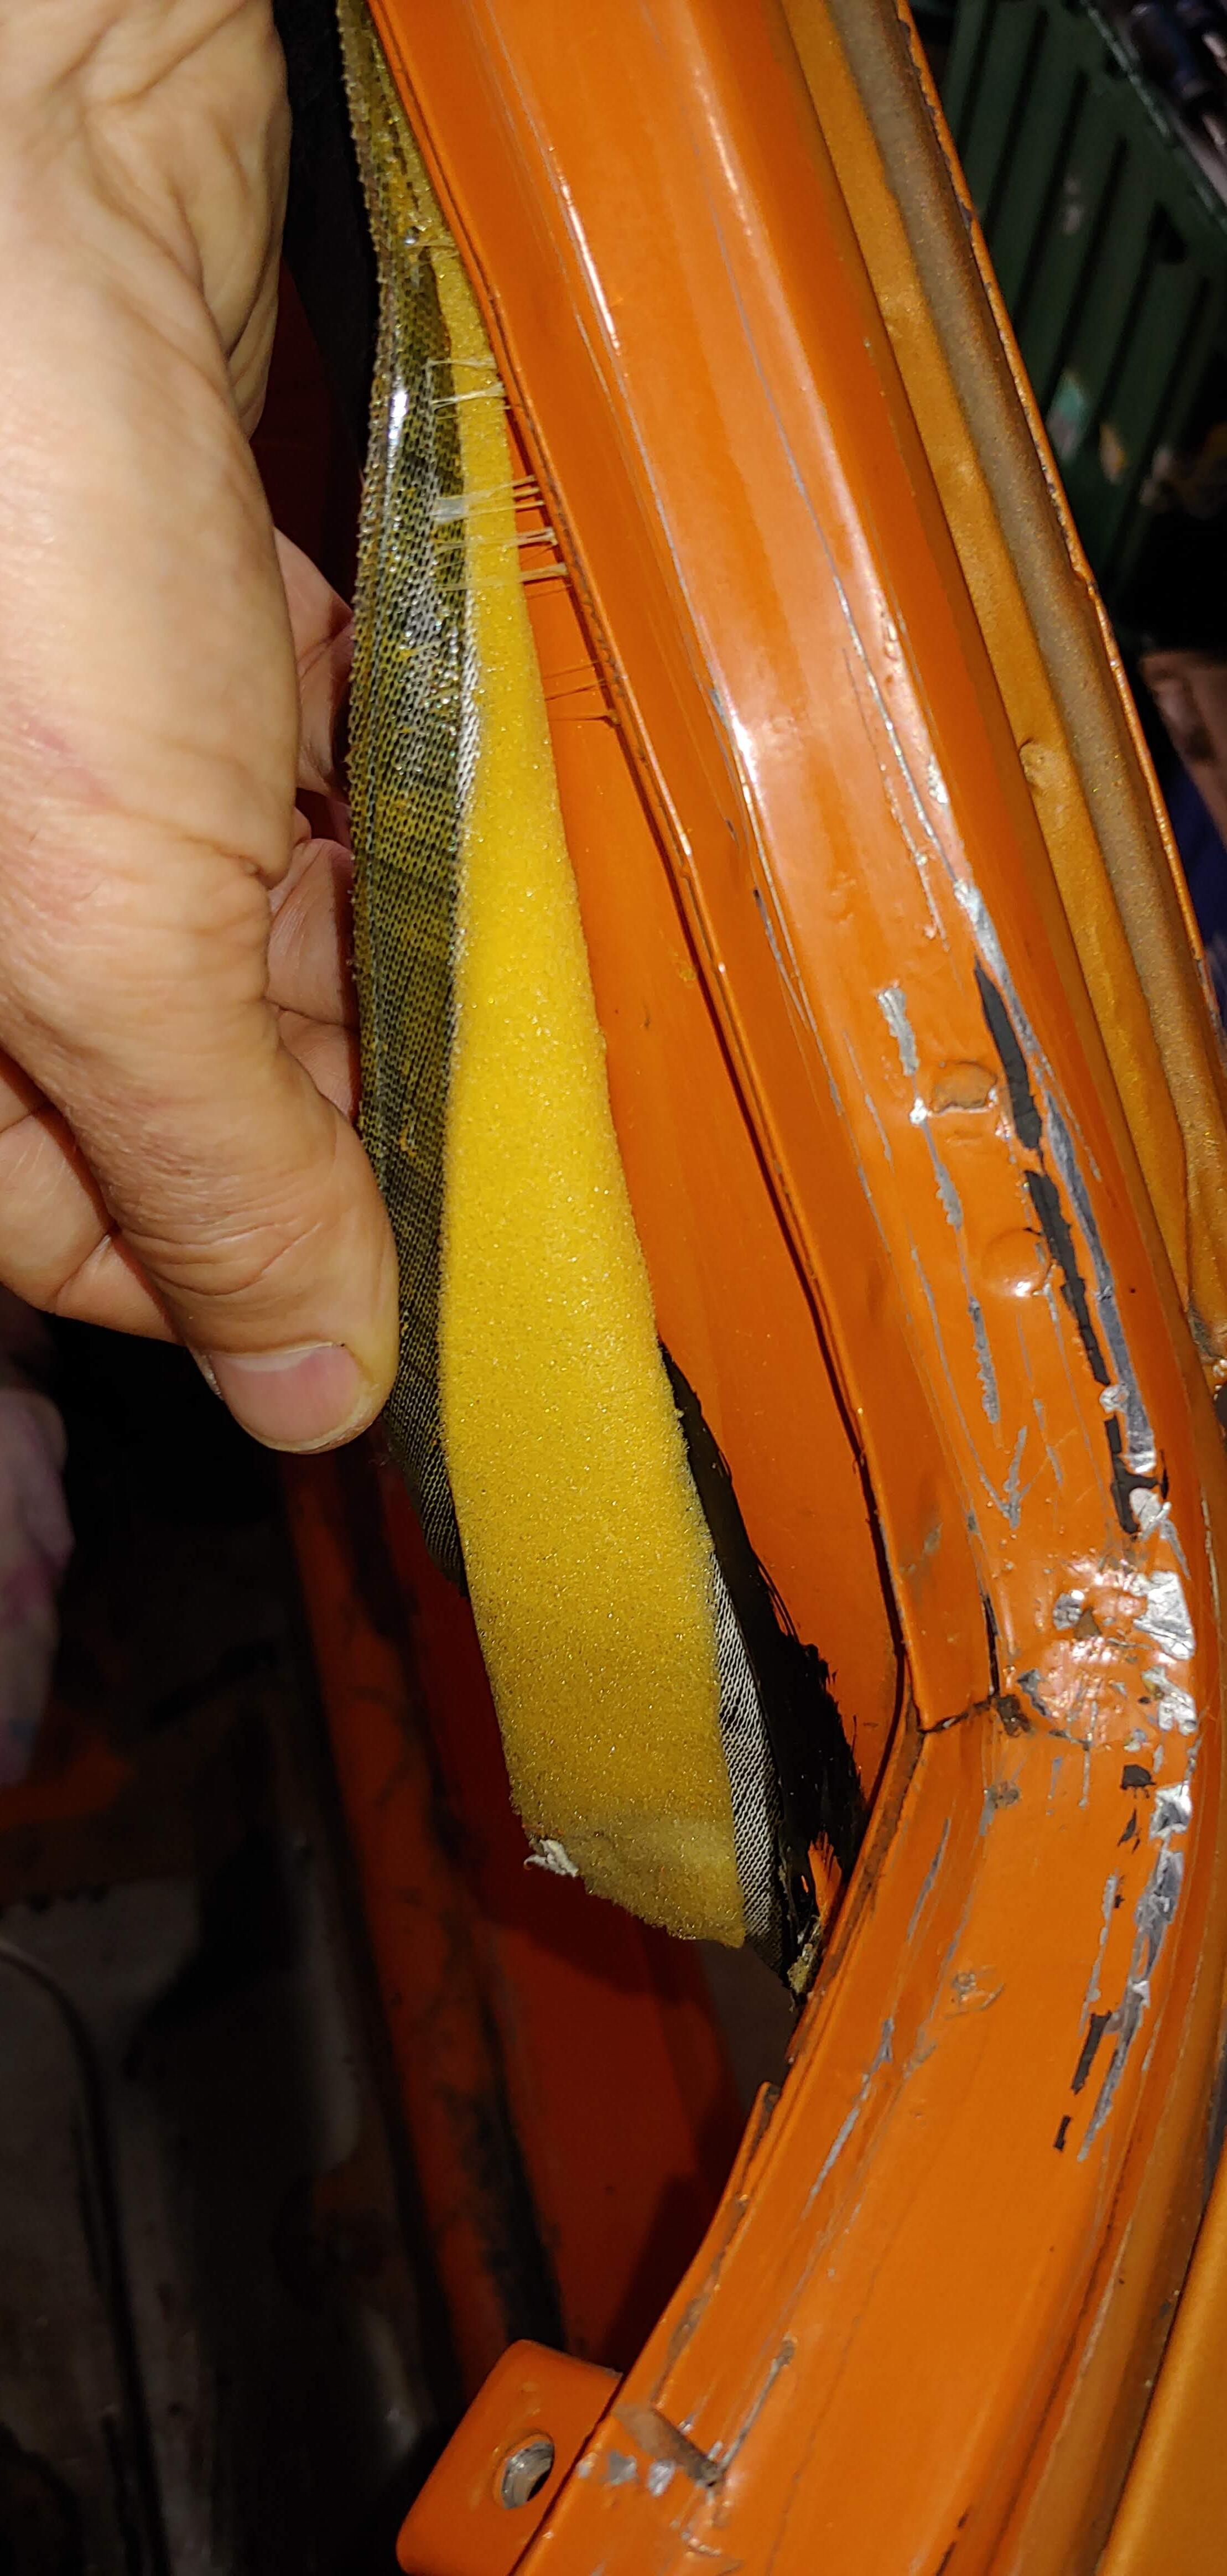
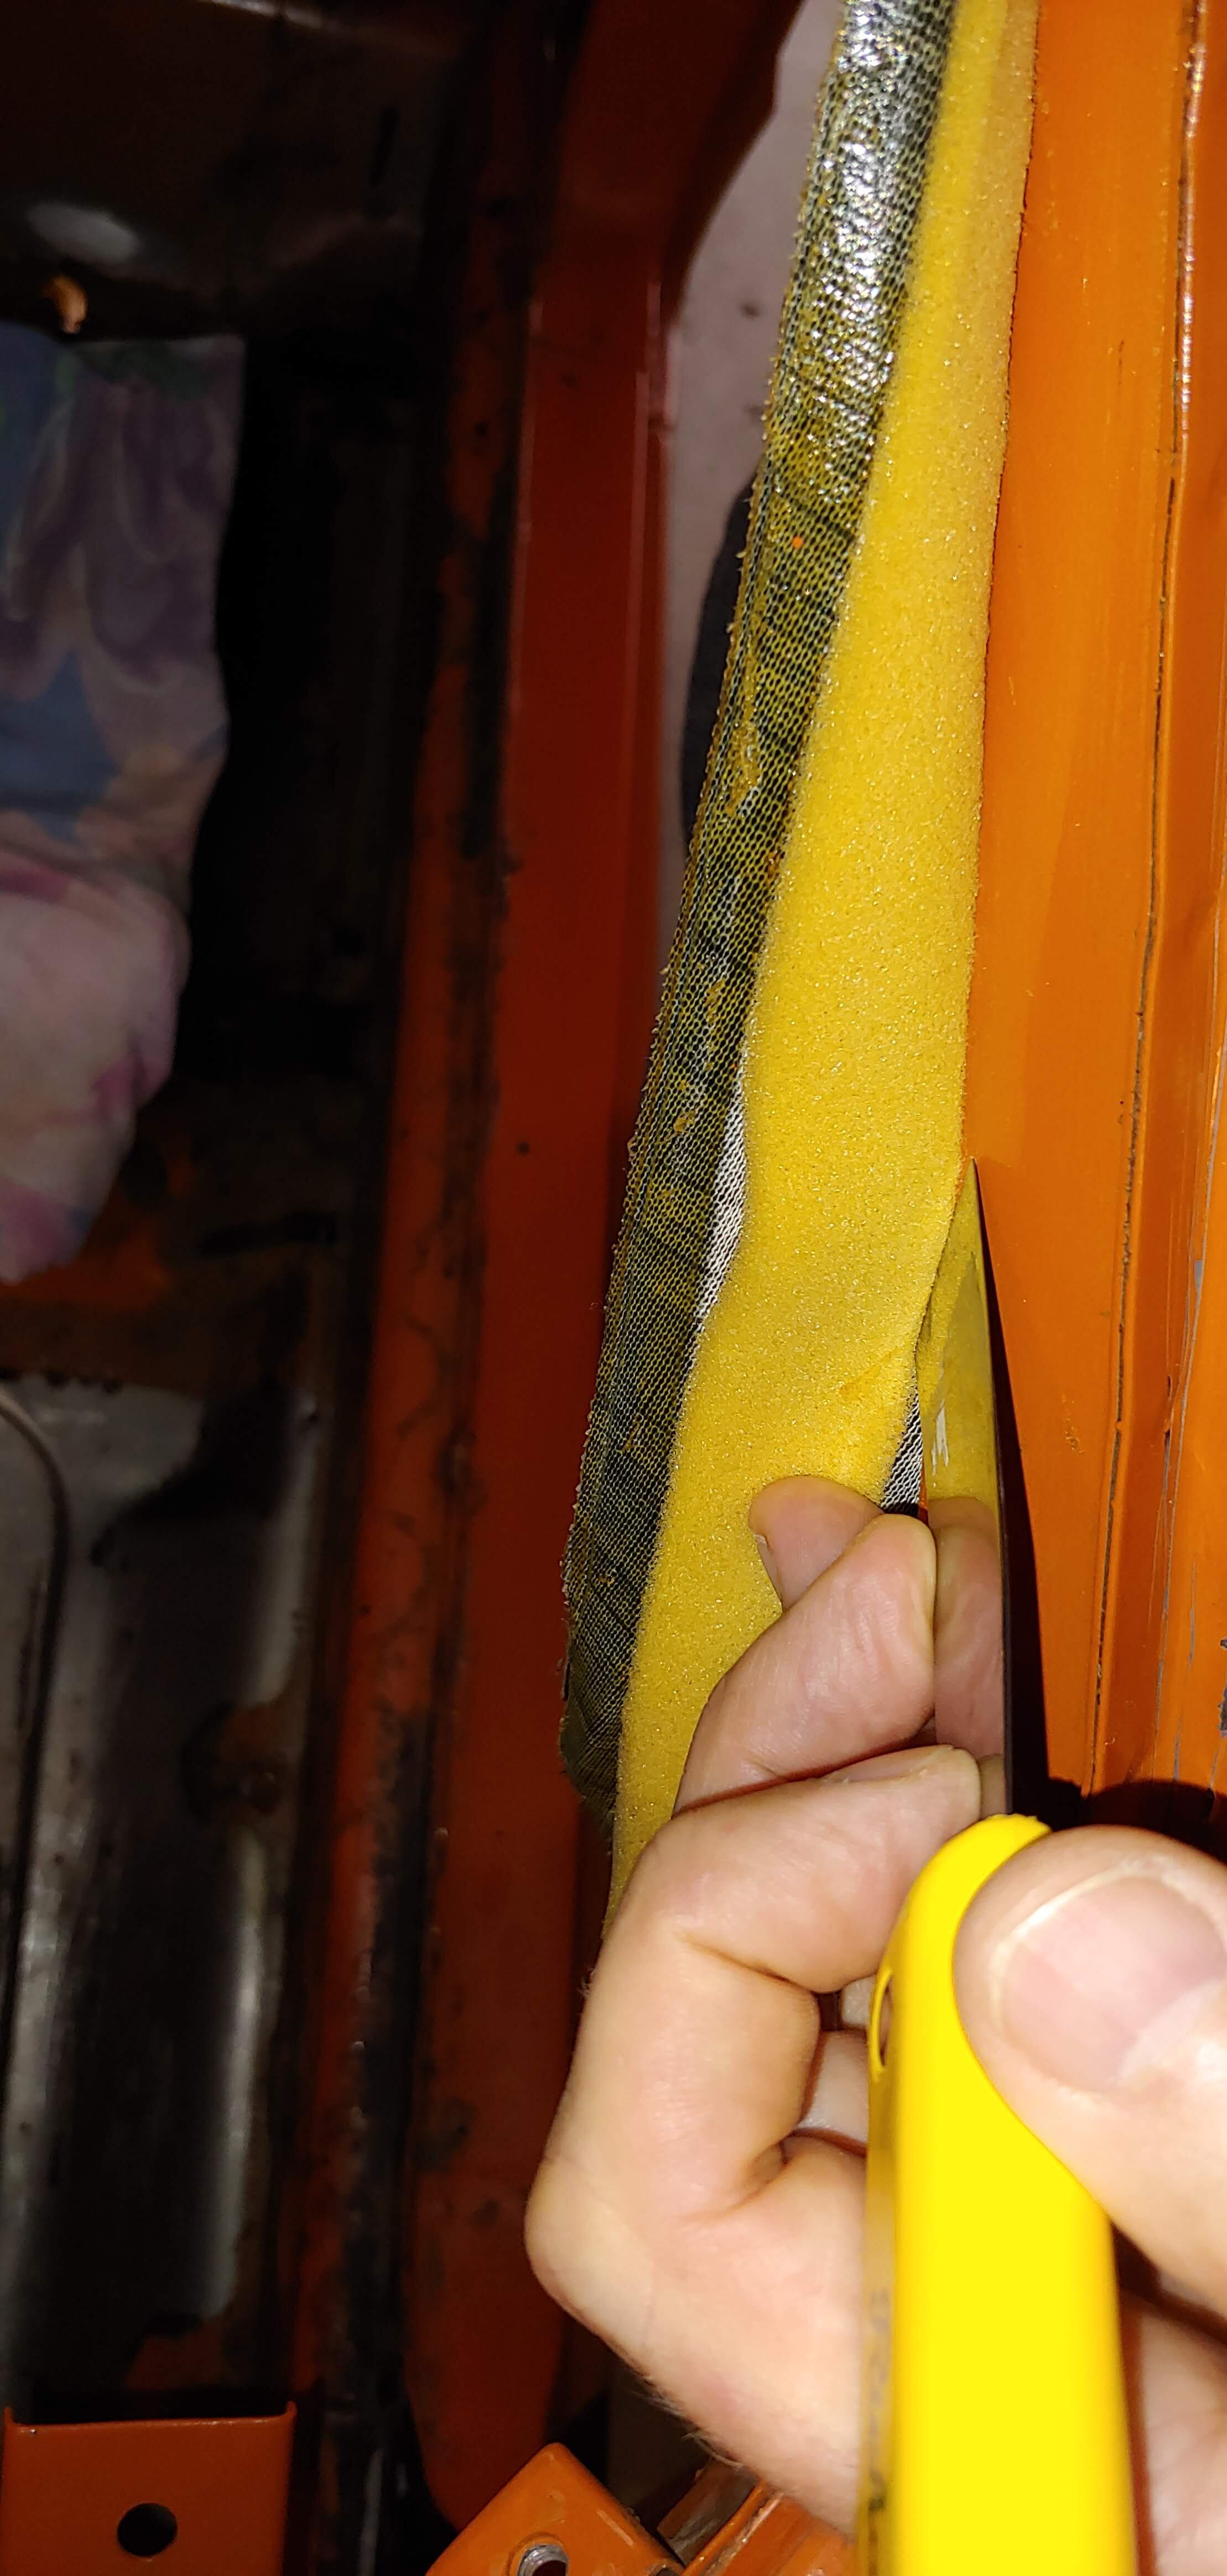
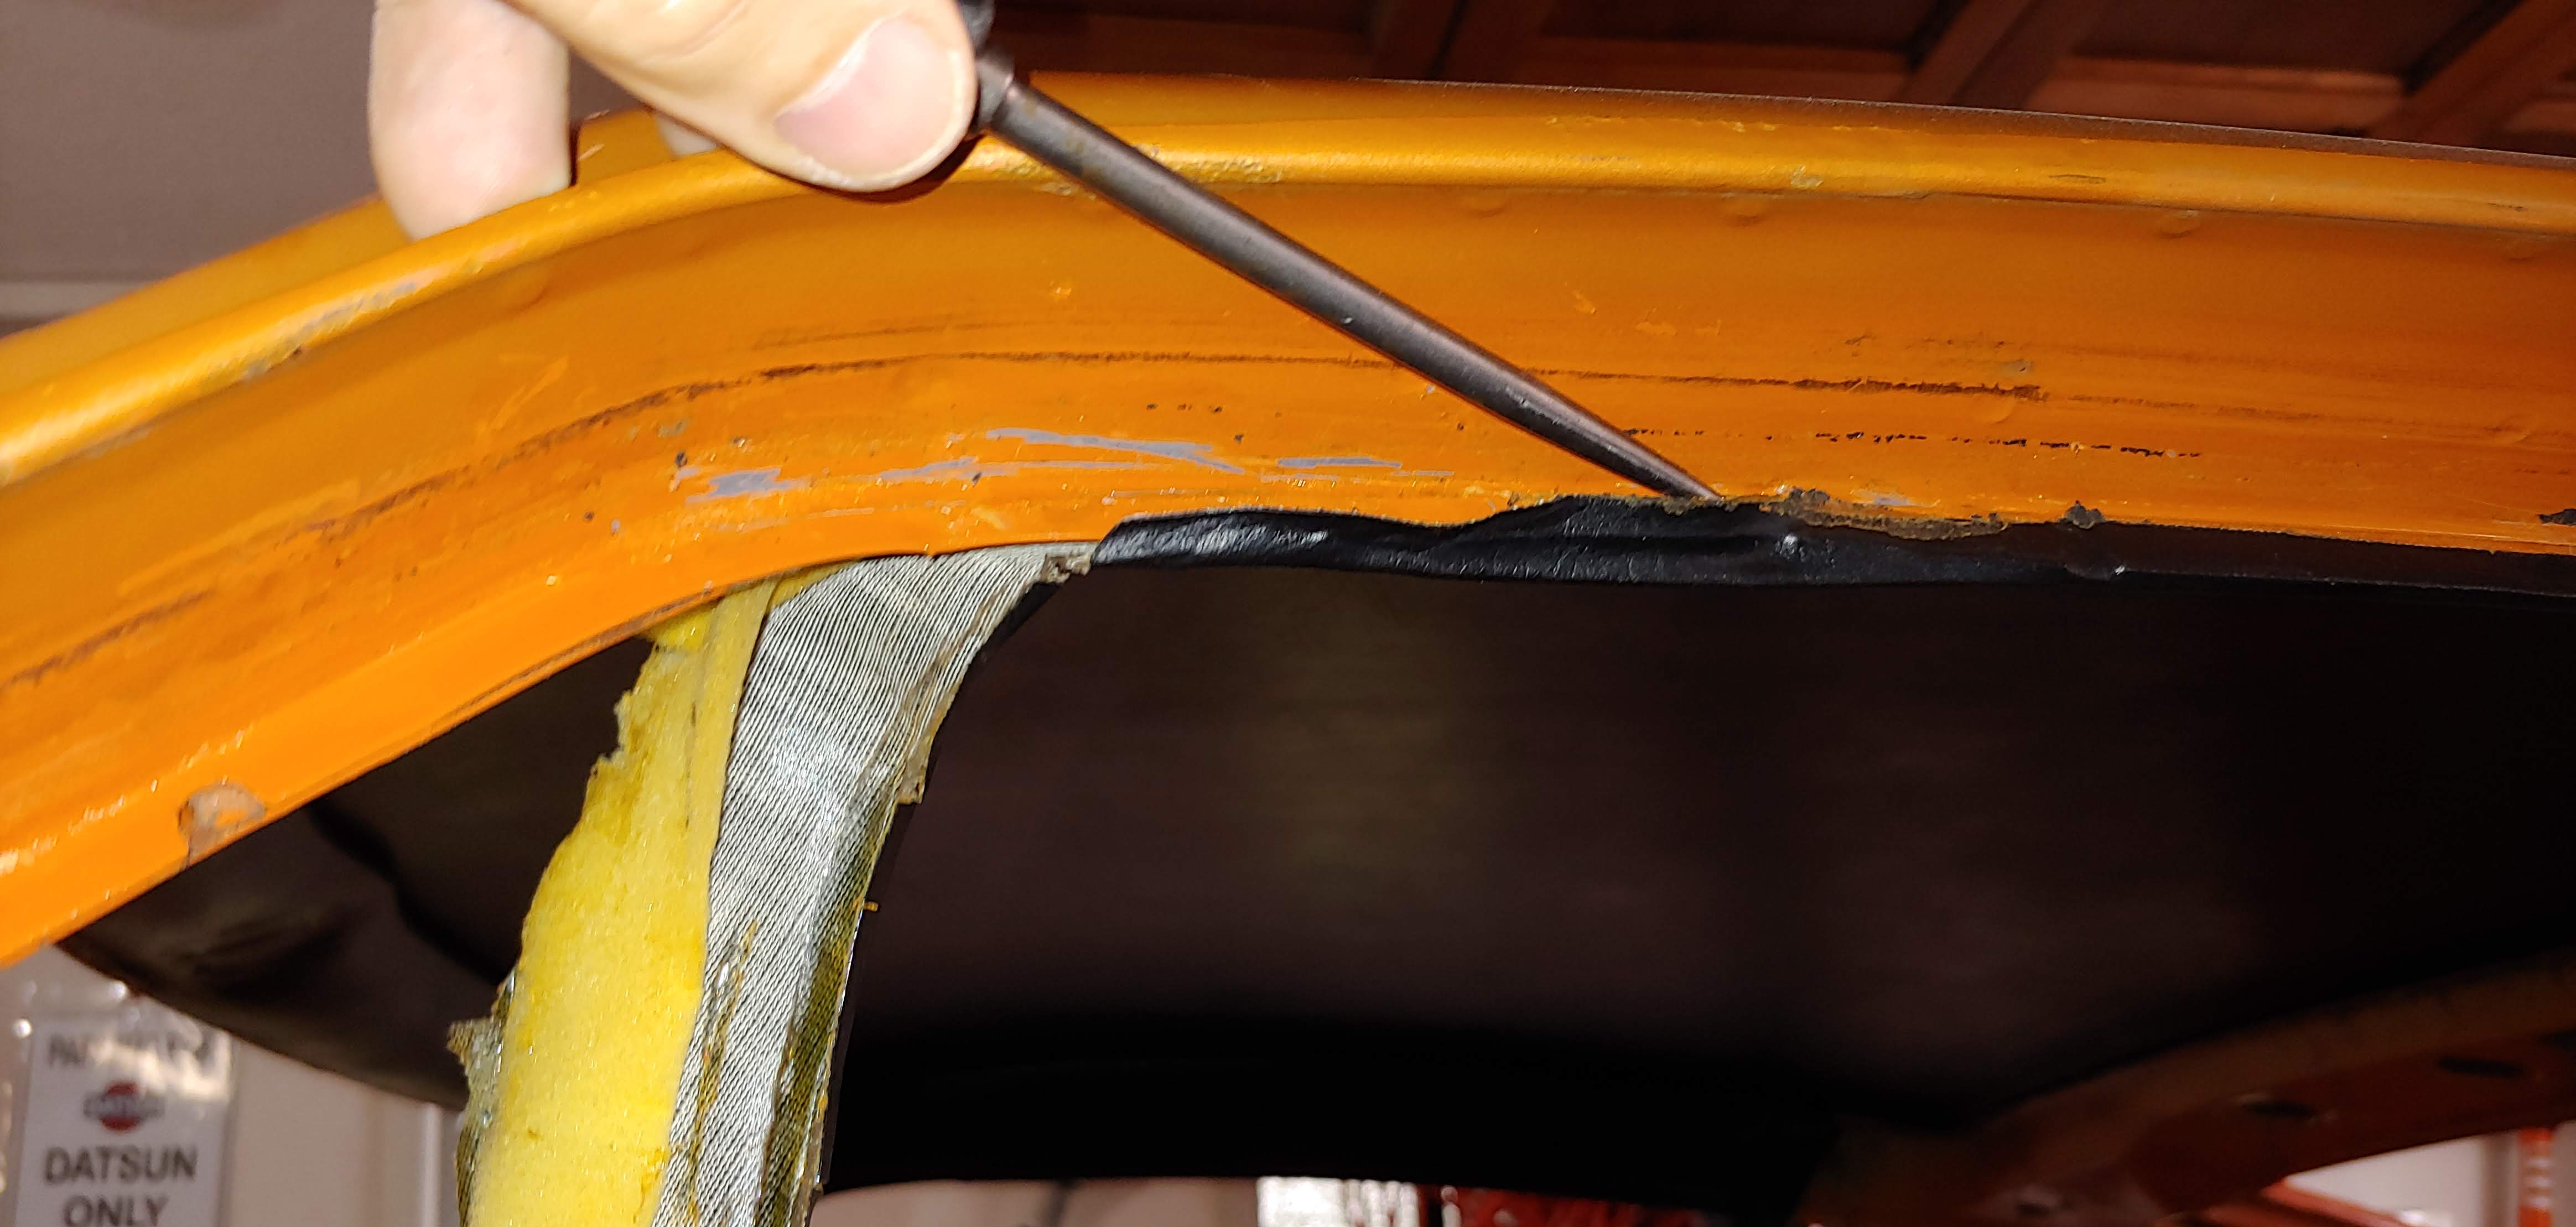
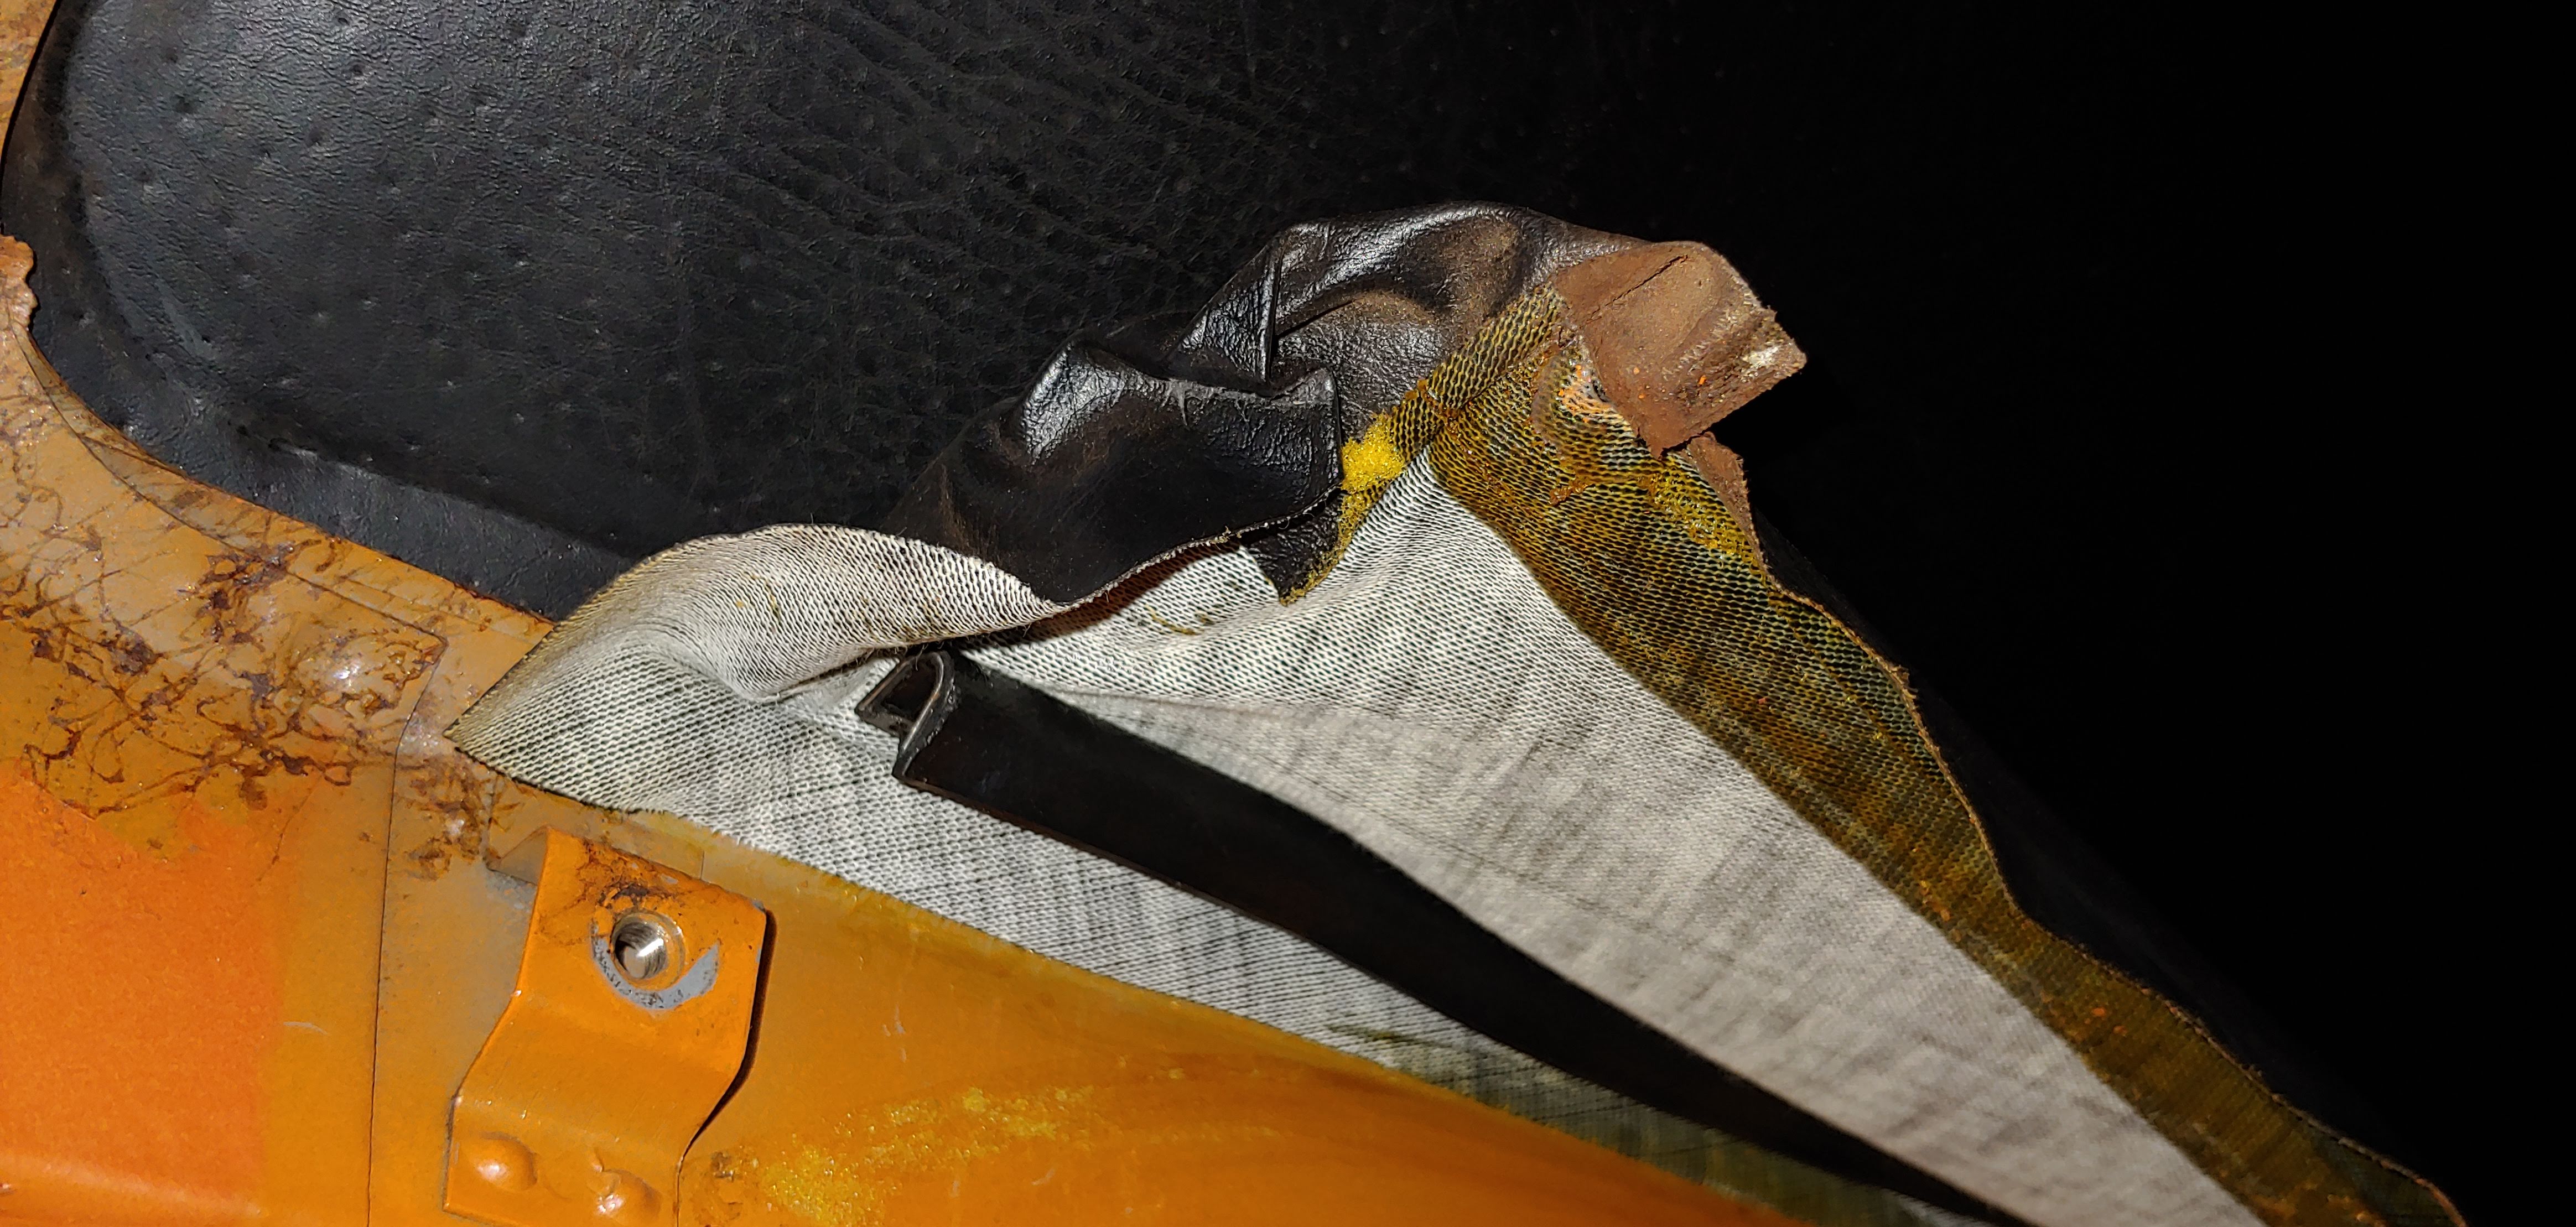
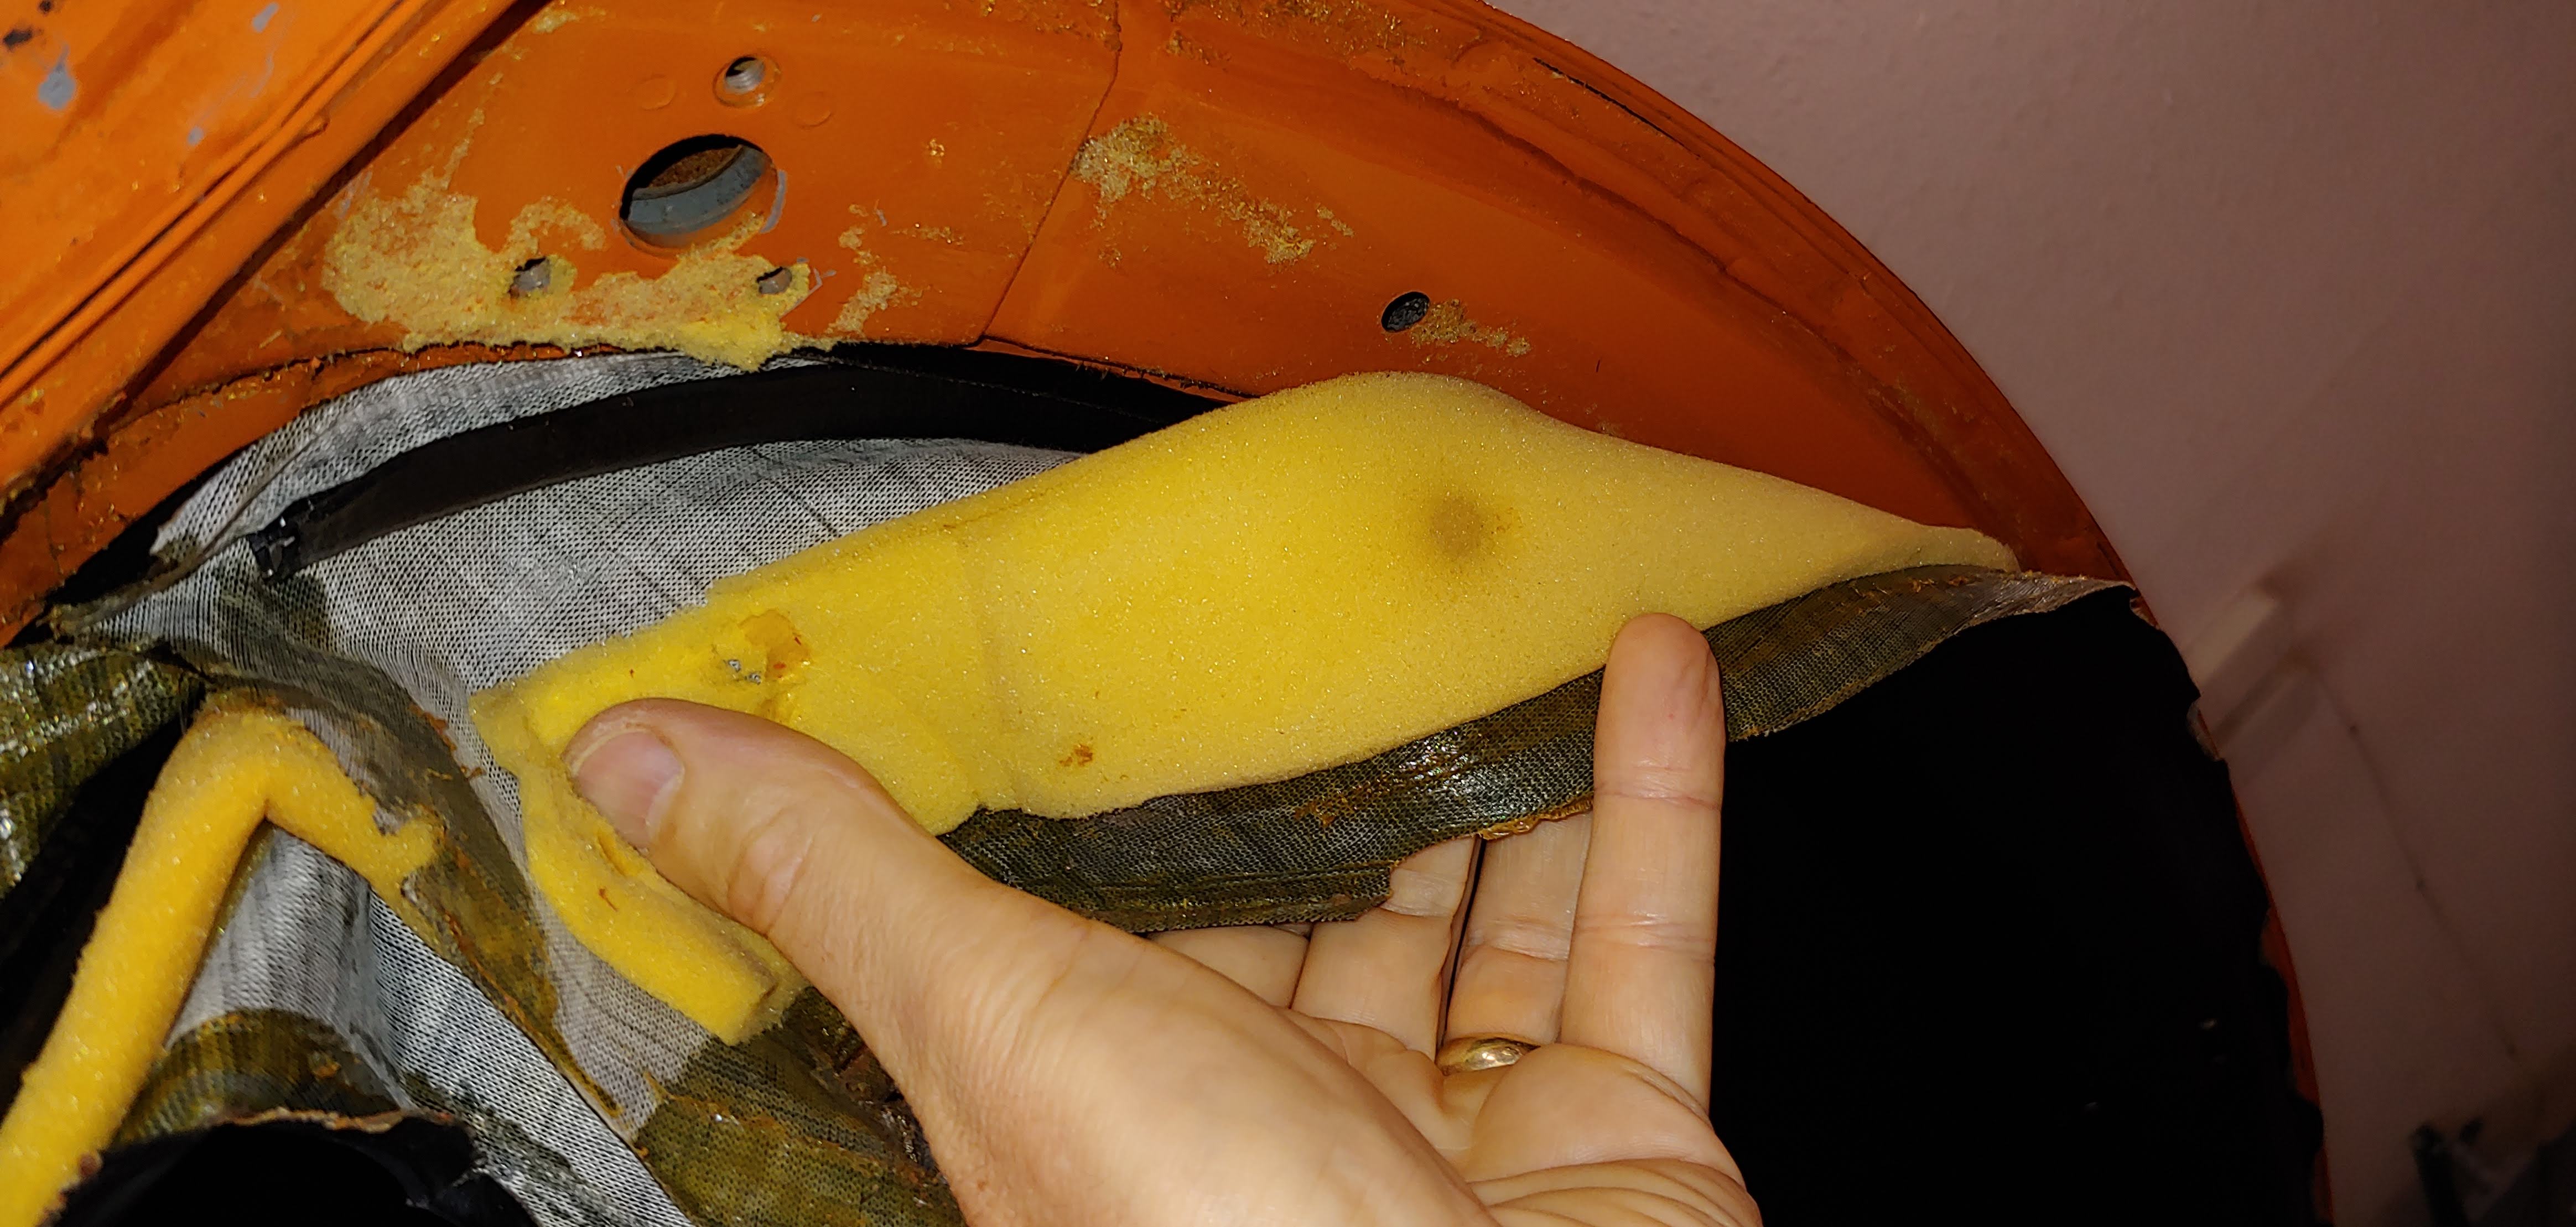
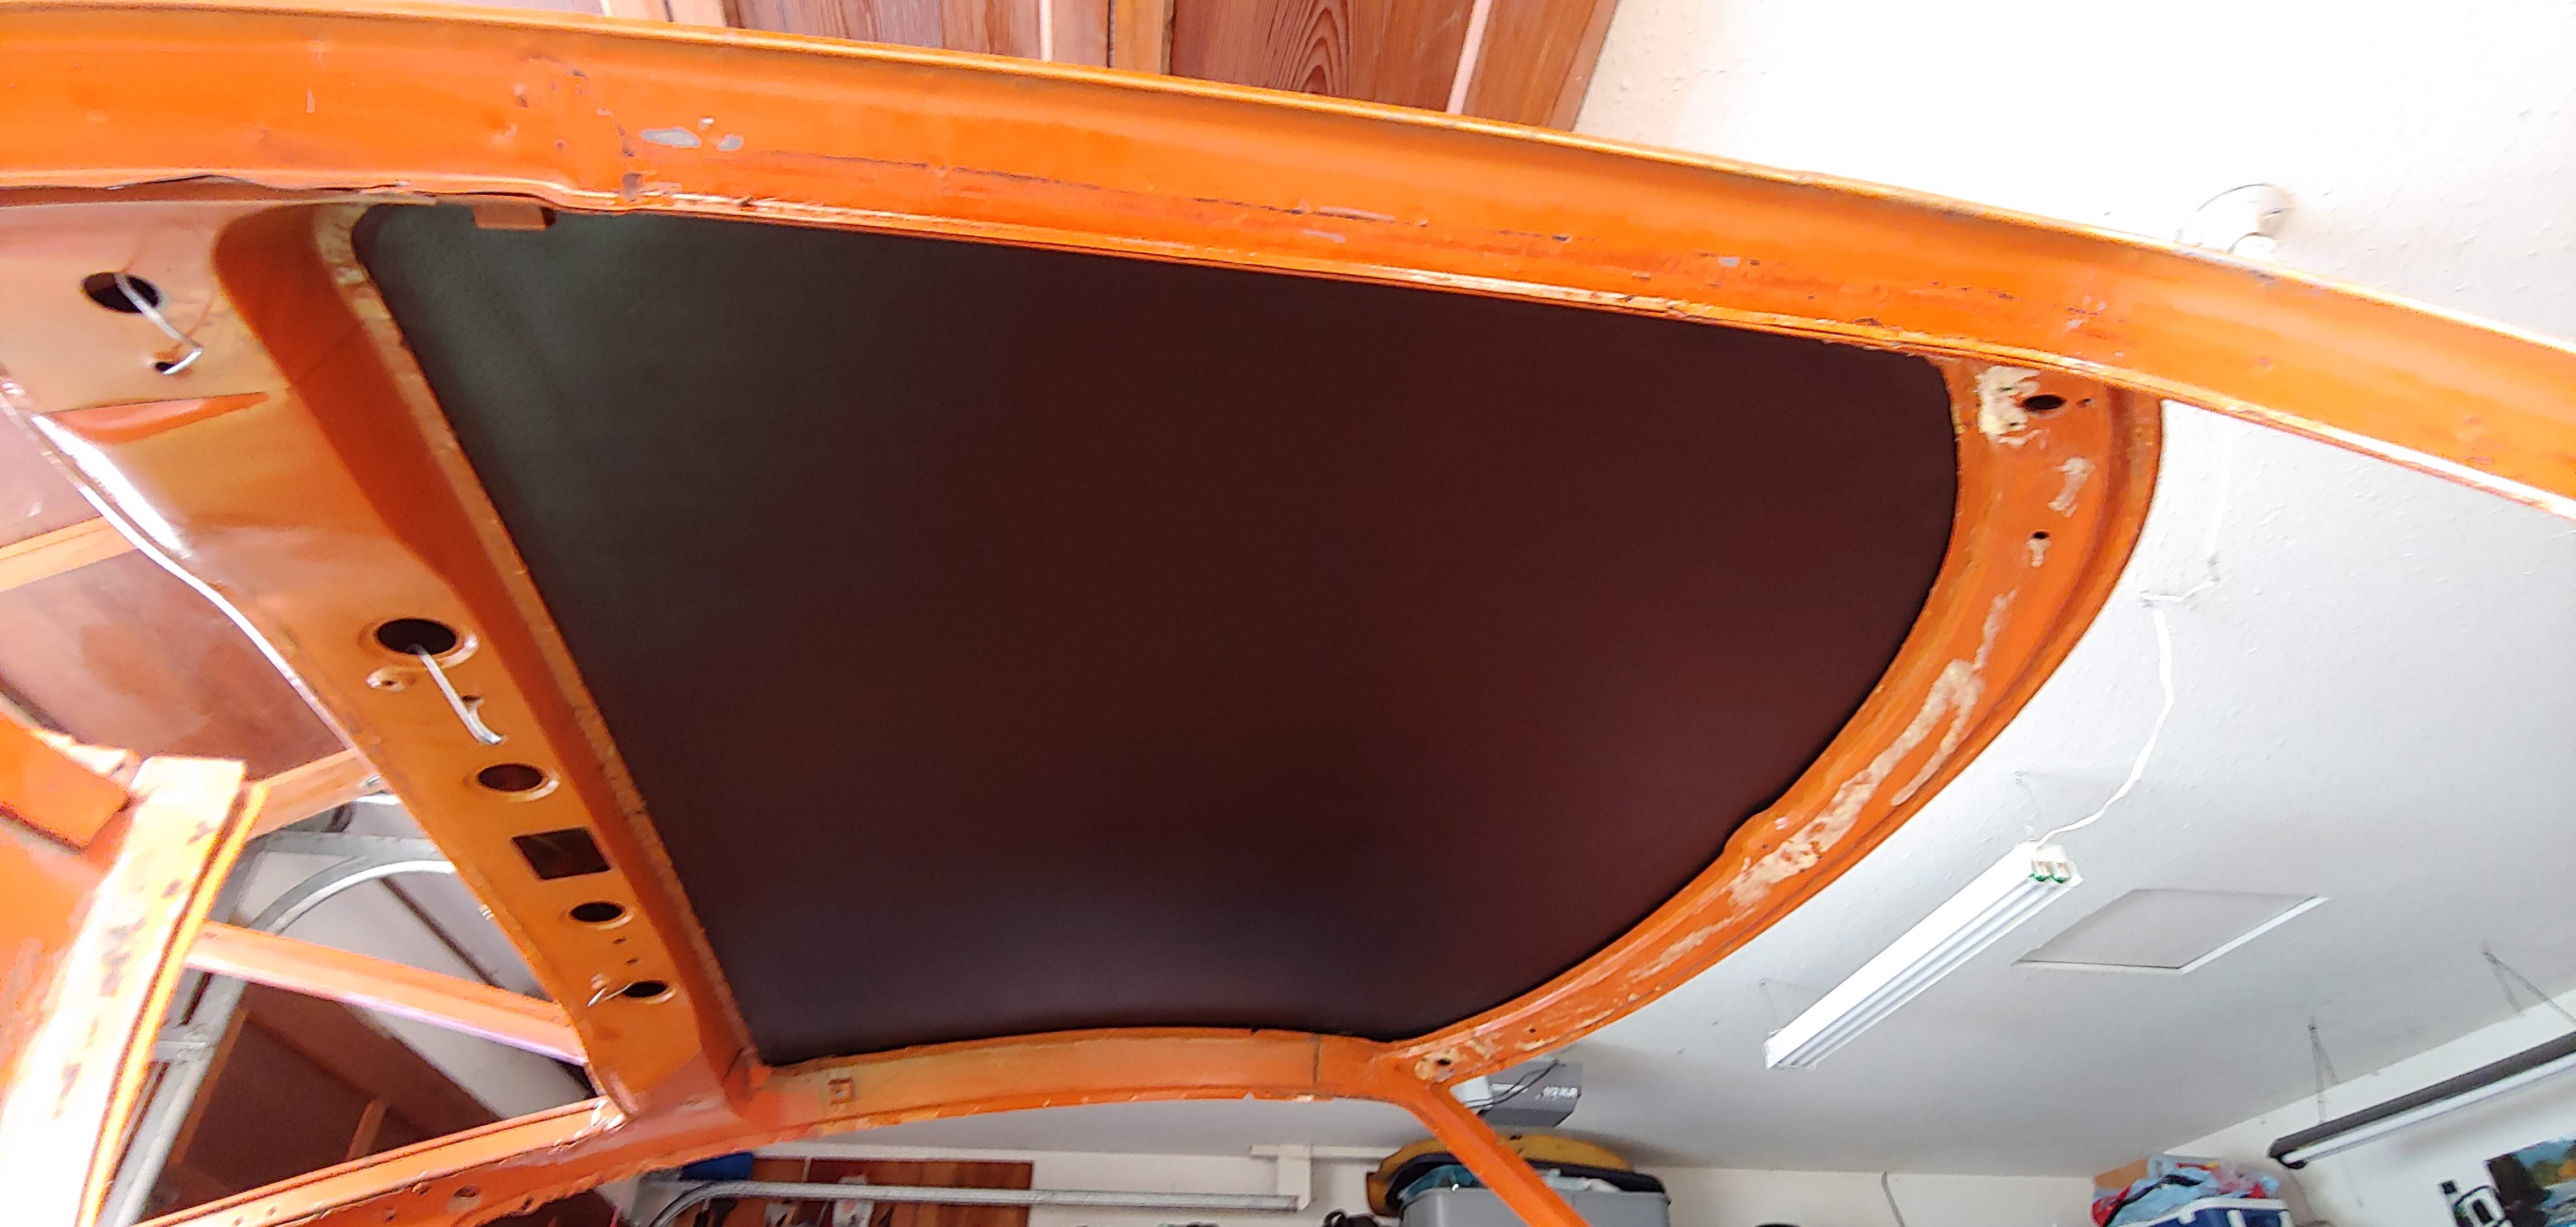
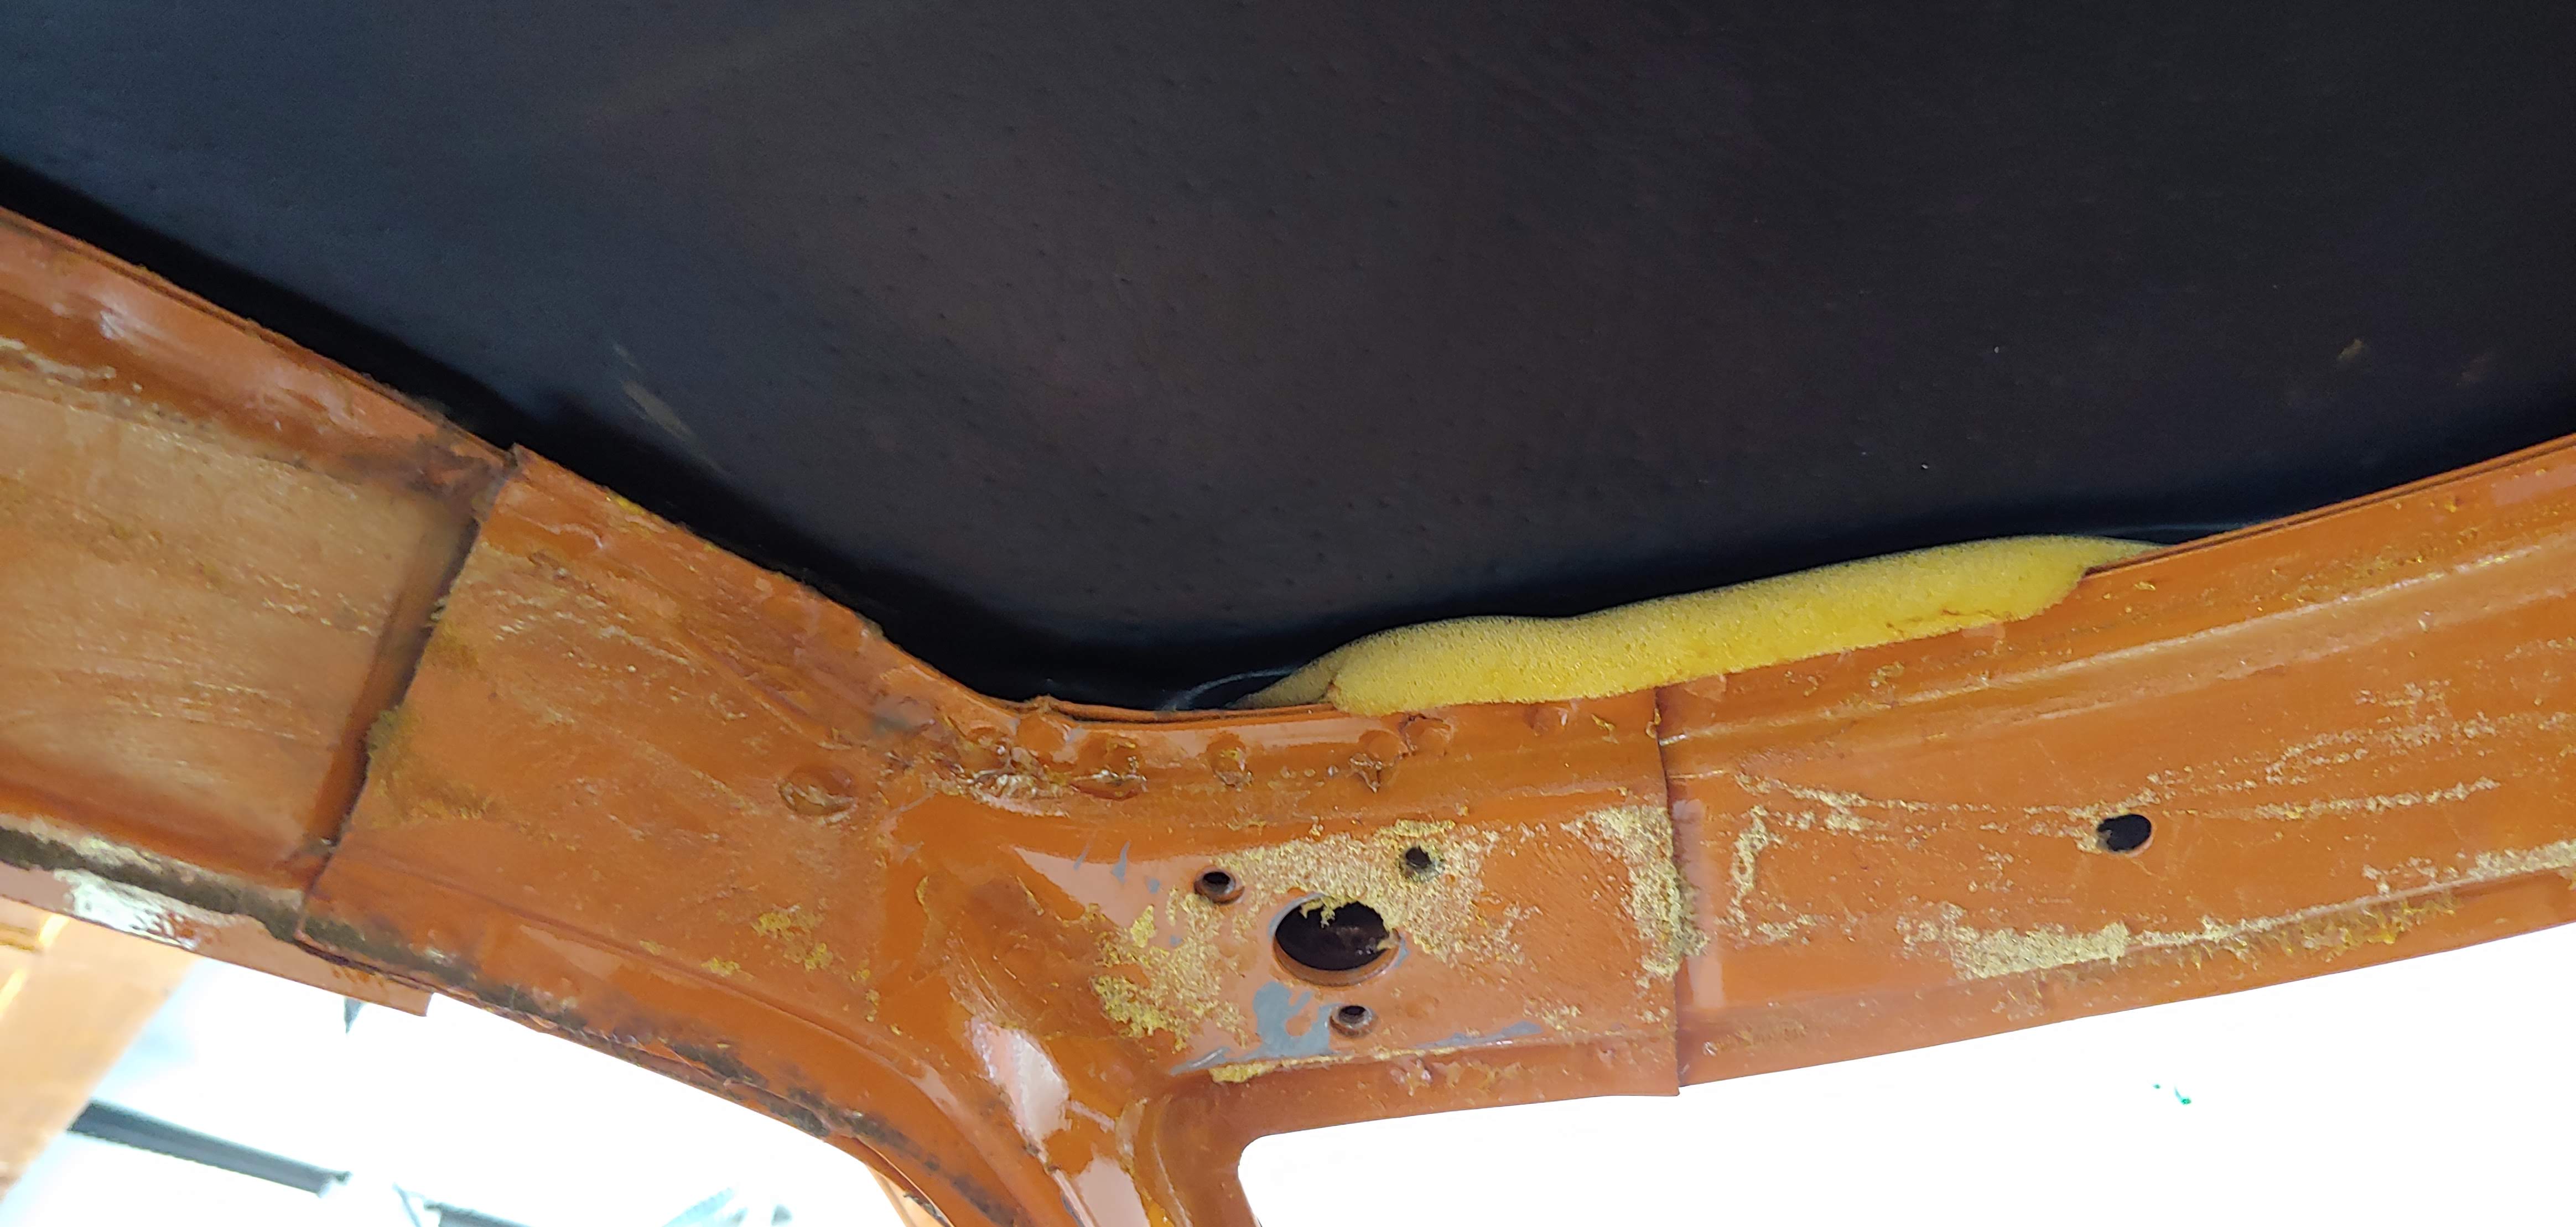
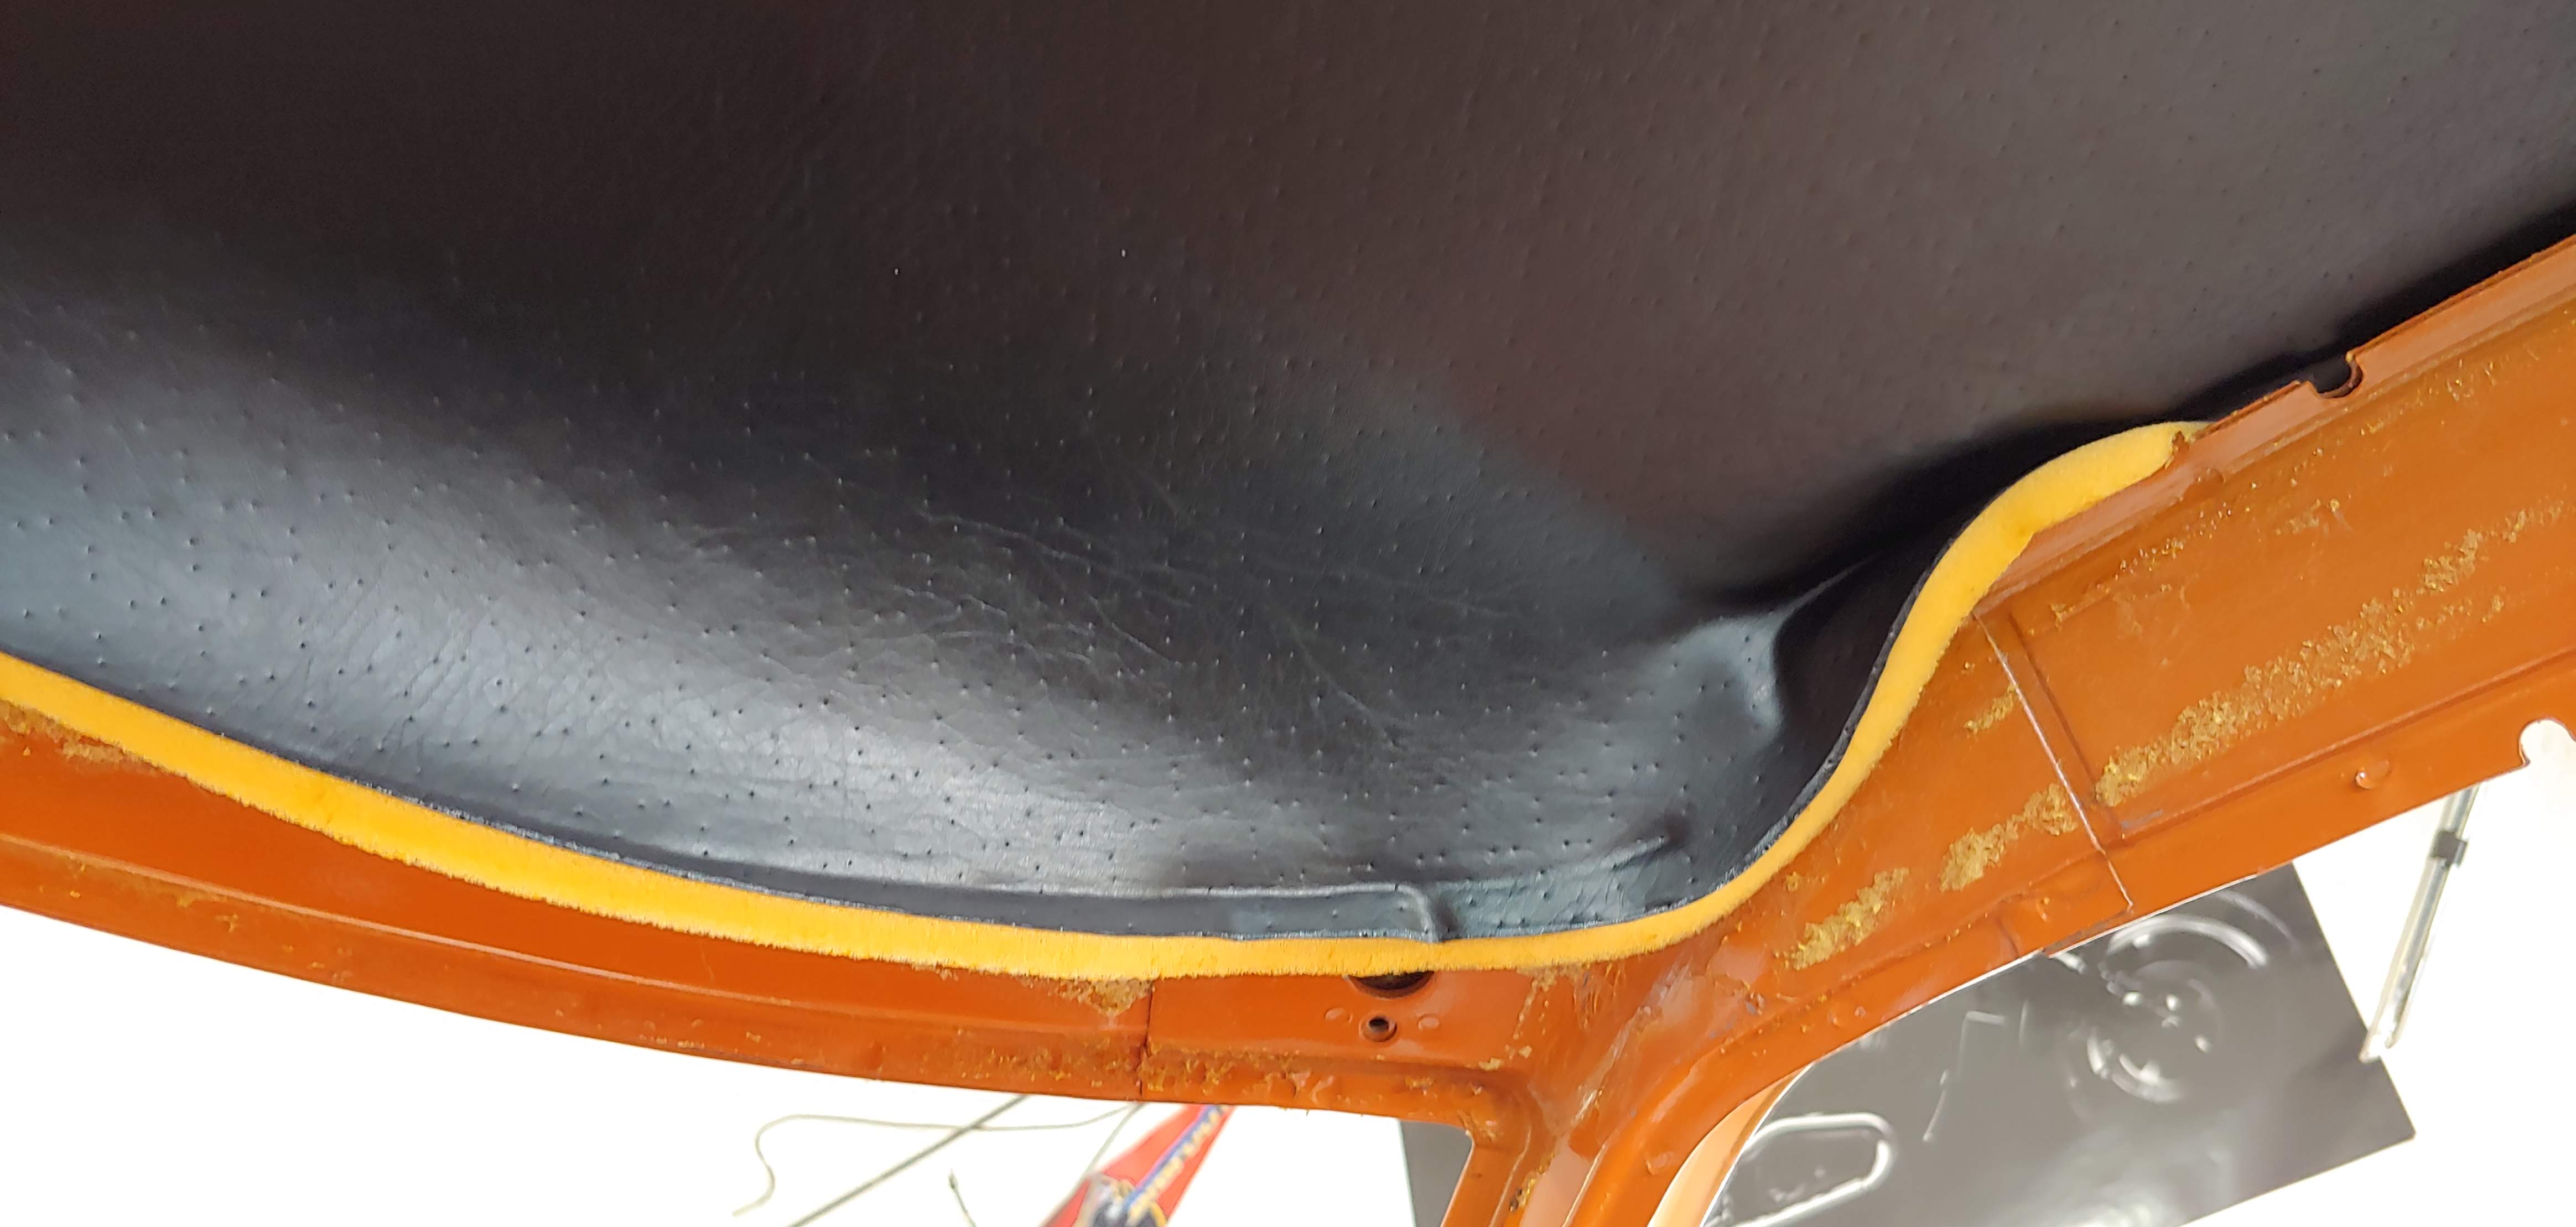
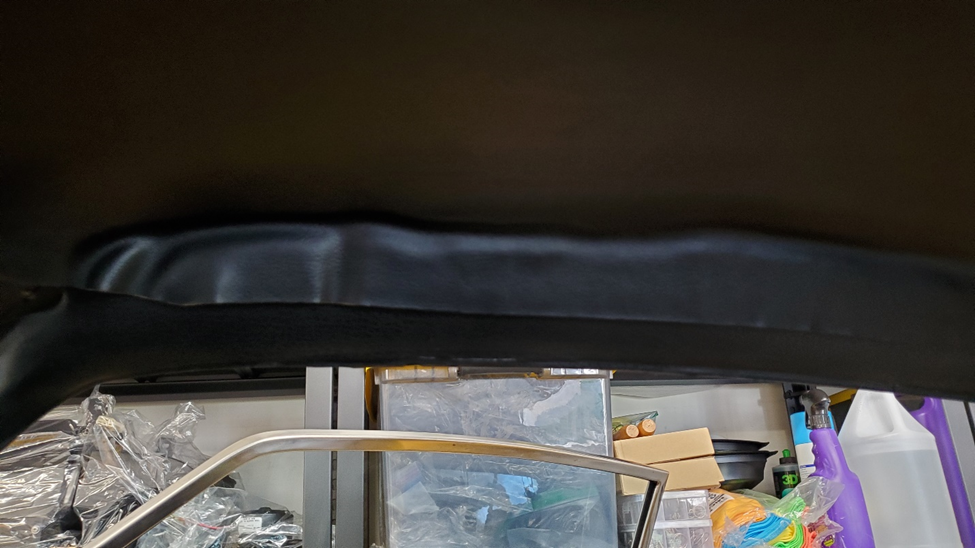
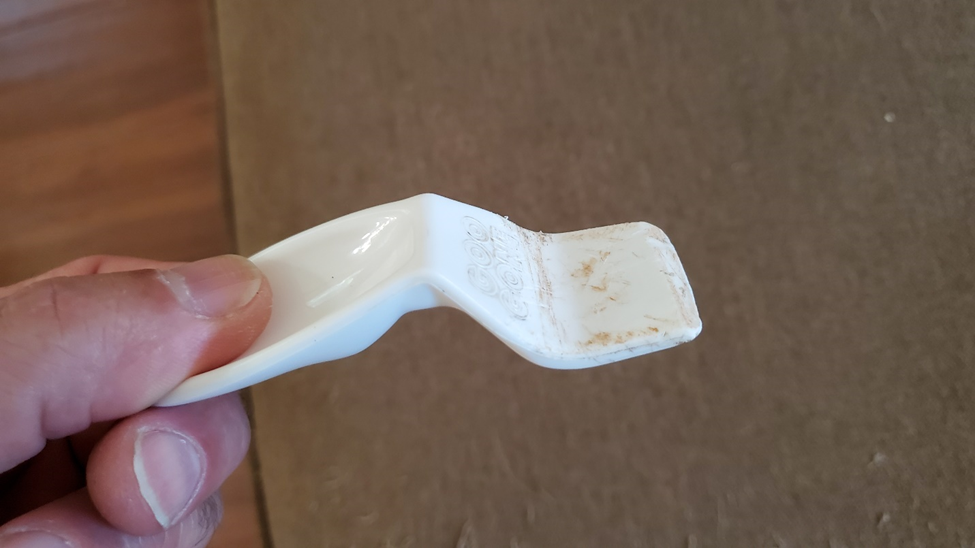
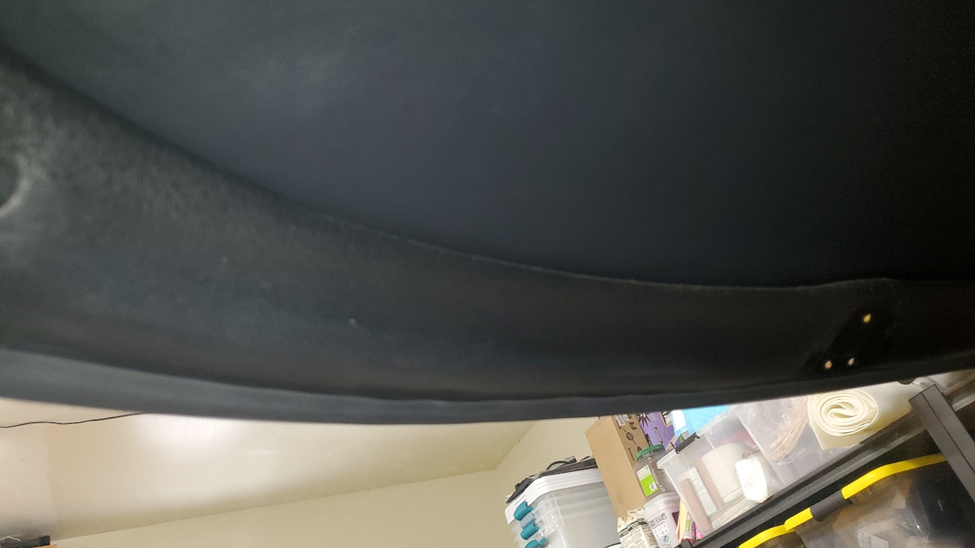
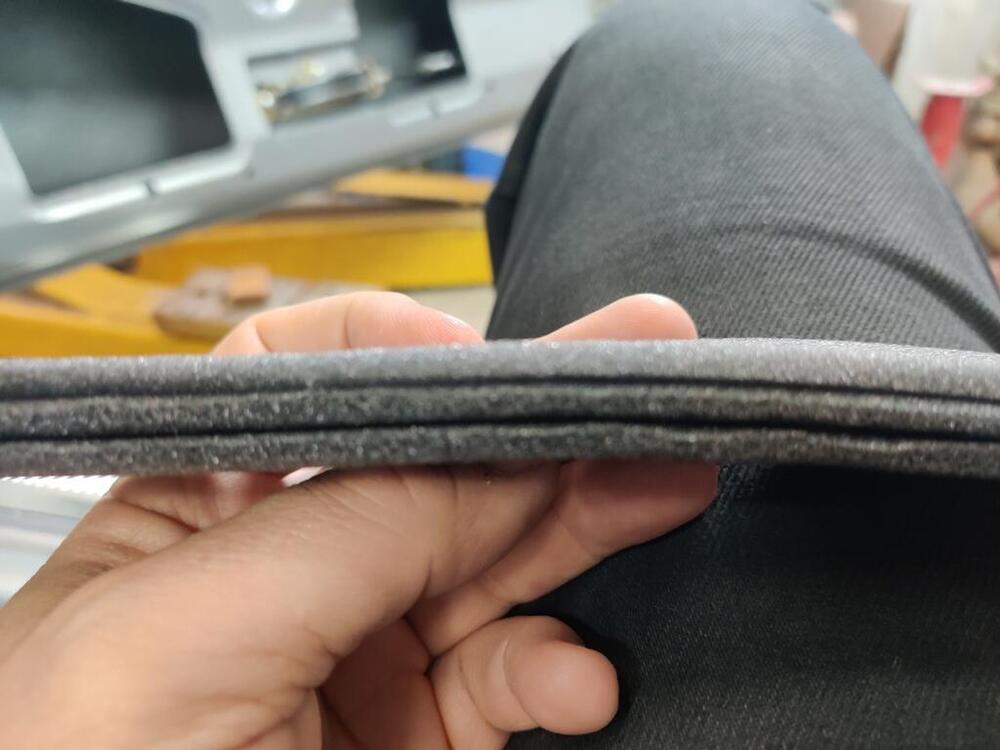
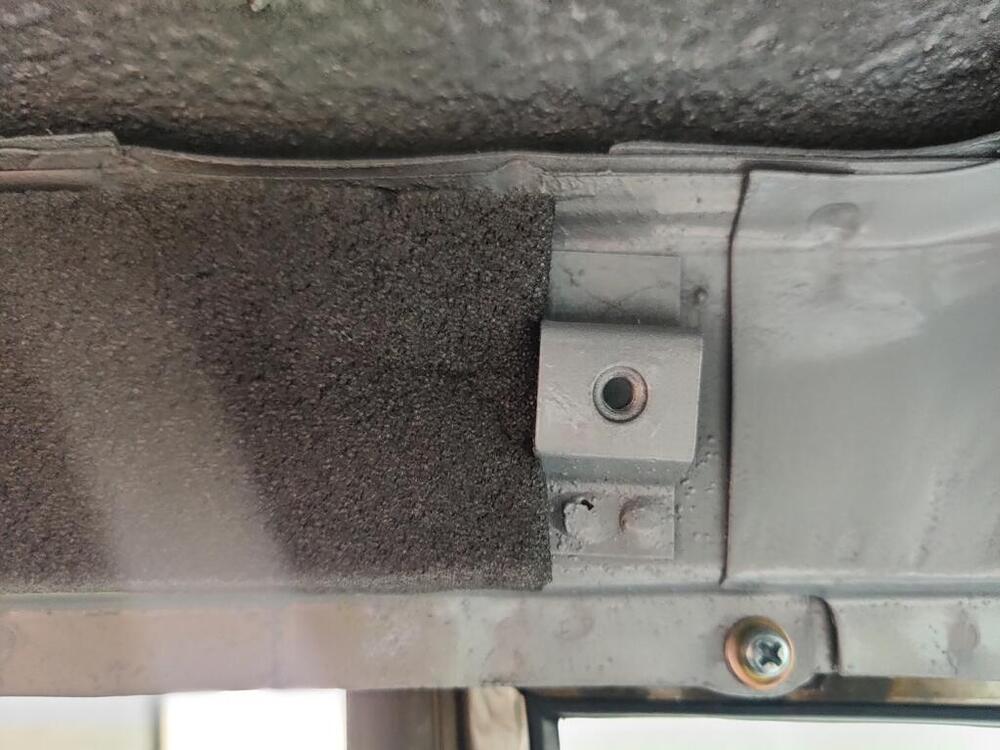
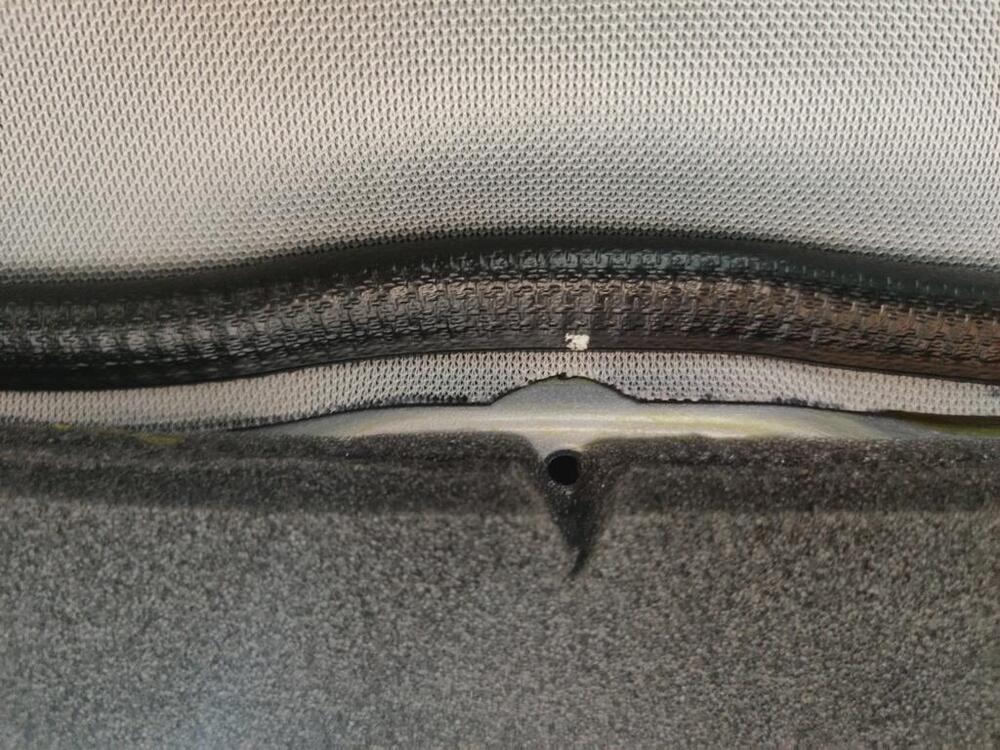
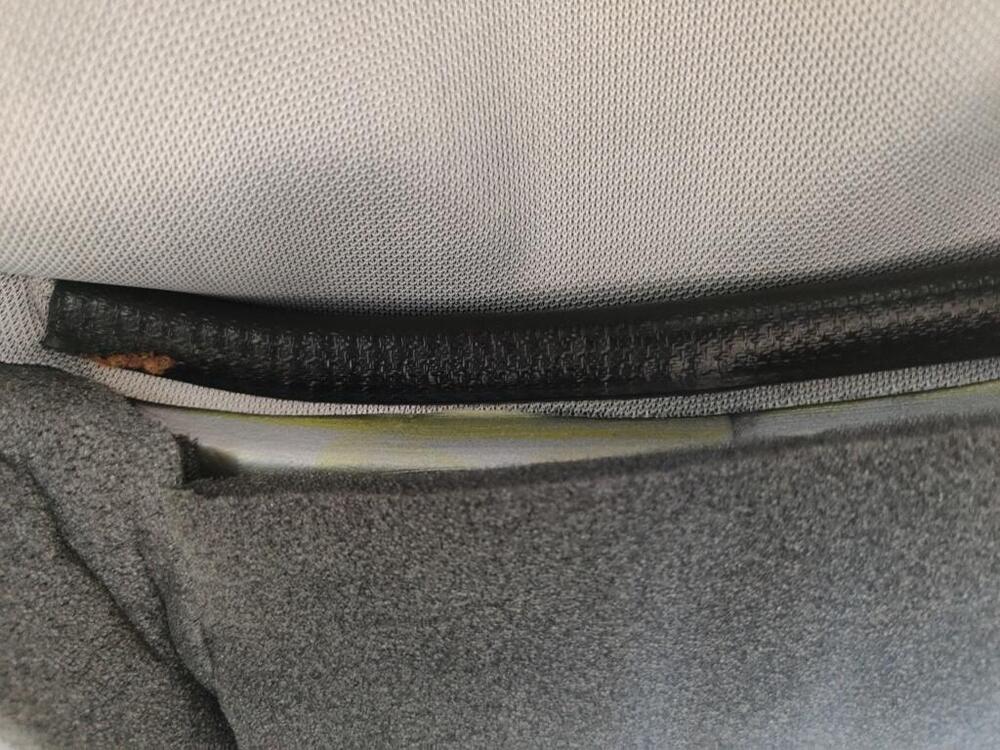
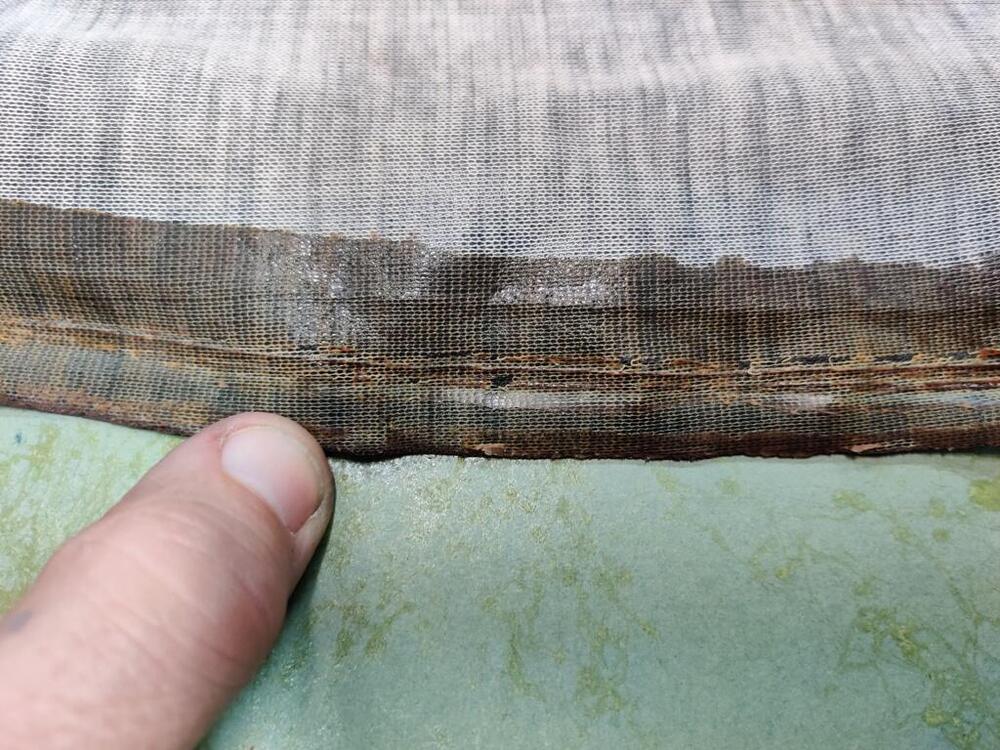
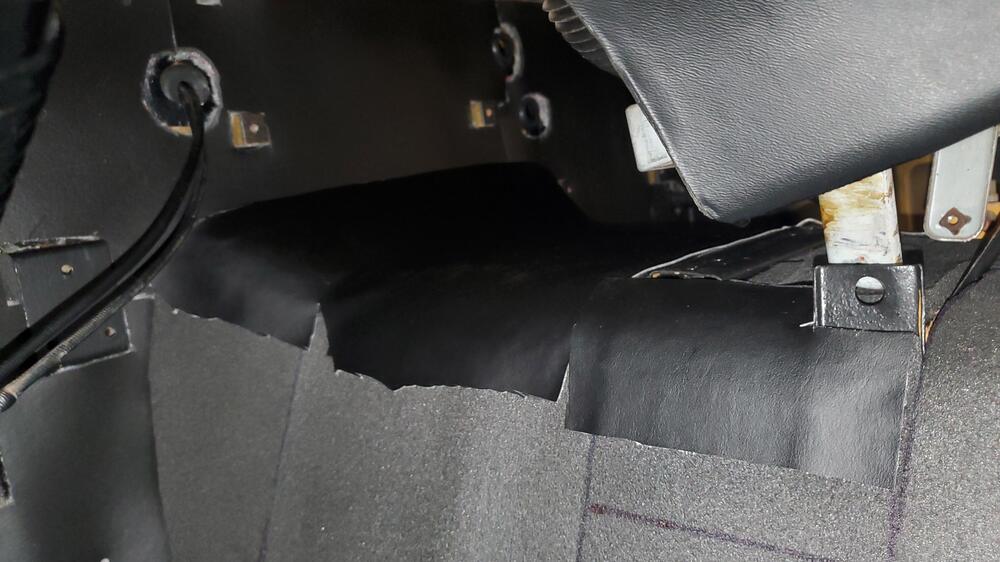
This weekend I removed the headliner and surrounding padded vinyl trim and A-pillar trim. I had a little anxiety about doing this as they are are in very good shape. Luckily all came out with no issues and will be reusable, including the foam padding. I took lots of pictures of the joint details to help when I reinstall. Here are some pictures of my process, the only tools I used were a 1.25" paint scraper with corners rounded off and an awl. I started at the lower end of the A-pillars and carefully peeled back the vinyl exposing the foam padding. In some areas I could do this with just my fingers and other areas I had to use the scrapper to break away the adhesive as I pulled. When I got to the vinyl over the door opening I used the awl to break the adhesive as space was limited. For most of the length the foam was glued at the edges to I had to go very slow using the scraper gently while keeping light tension on the foam. There is also U shaped welting that holds the vinyl to the roof frame that had to be pulled away. After removing the A-pillar and over the door opening trim I used the same process for over the windshield opening. For the headliner I found that there was no adhesive where it tucked into the roof frame but there was a very uniform coating of the adhesive on the rest. To get started I poked my little finger in to the hole for the LH visor mounting bracket pushing the unglued edge of the headliner and at the same time gently pushing inward with the fingers of my other hand until I had exposed the edge of the headliner foam. From there I could work the unglued edge out of the frame for the full perimeter. I freed the headliner using the scraper with a short jabbing motion, keeping light pressure on the roof and holding the headliner with light tension with my other hand. I had the scrapper at about a 30 to 45 degree angle to the roof while doing the scrapping. Using this technique very little of the foam was damaged. All in all it when quite smoothly and there was very little foam reside left on the steel. It was definitely worth taking my time to be able to salvage everything.